Hello there friends! Hoping you had a wonderful weekend and a fabulous Mother’s Day as well! I had a wonderful day with flowers delivered to me and wonderful phone messages.
Today I wanted to share a couple of cards that I had made participating in the “Spring Card Camp” classes from Online Card Classes. (It started April 11 and ran through the end of April.) Although we are now on a separate Part 2 Spring Card Camp, I have enjoyed the classes each day and I thought I’d just take my time and enjoy everything. So there may be posts spread across time as I go. I just like to take my time and actually enjoy the process rather than hurry up and run right through it. I feel this helps me to fully understand what I’m doing and what products I’ve used, take notes, etc.
The first class was taught from Jennifer McGuire as she showed us how to use a stamp and create our own embossing folder to make an impression with it!! Something that I had not heard of before, so this was fun to try out:

So the idea of each class is to pretty much get a “two for one” type of design and stretch your supplies and design concept so that it makes it easier to create multiple cards at a time, which is really great right now as I seem to be making more cards and donating extra cards that I normally wouldn’t be doing at this time of the year. (I also actually thought this could be applied towards Christmas making time as well…which I will be keeping in mind!)
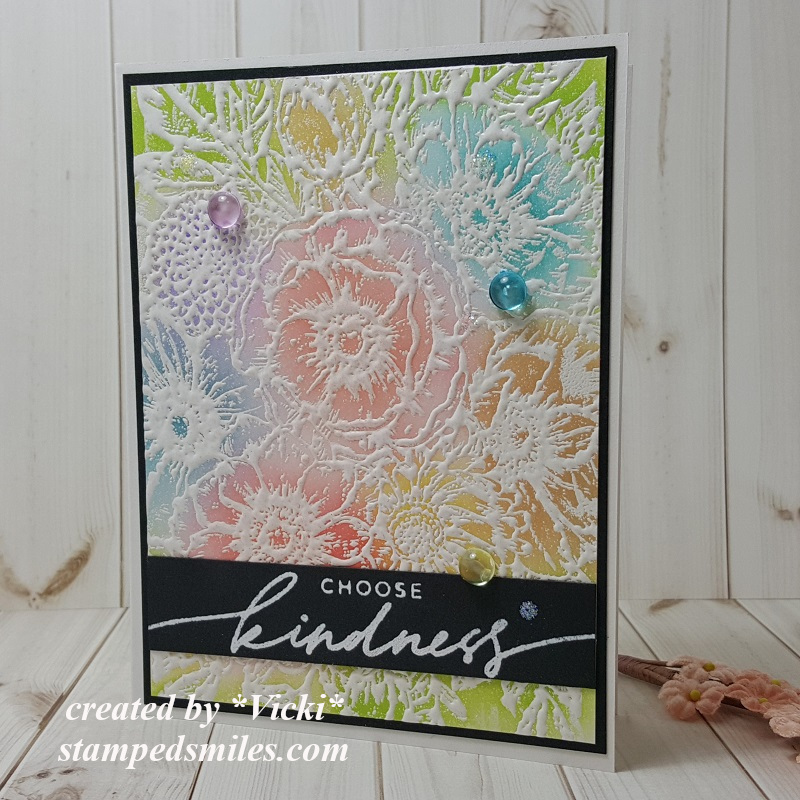
I started with this panel first as this was my piece that created the faux embossng folder:

I decided to use this gorgeous large image from the Kind Floral stamp set to create my “faux embossing” piece with. This image was heat set several times with white EP. All of the cards I made including the sentiments were used with this same stamp set.
After using it for my “faux embossing” on my other cards shown below, I went back to it and finished it on a card by using some blending brushes and ink to color in the panel. I took a strip of black cardstock and white heat embossed the sentiment over it and then layered it onto a white A2 side folding card base. I finished it off with some colored bubble drops and Stickles glitter drops.

Here’s a closer view of the white heat embossing I did on this panel with the image. It’s very thick as I had to build up layers to create a faux embossing folder to get a good impression with it. (See below)

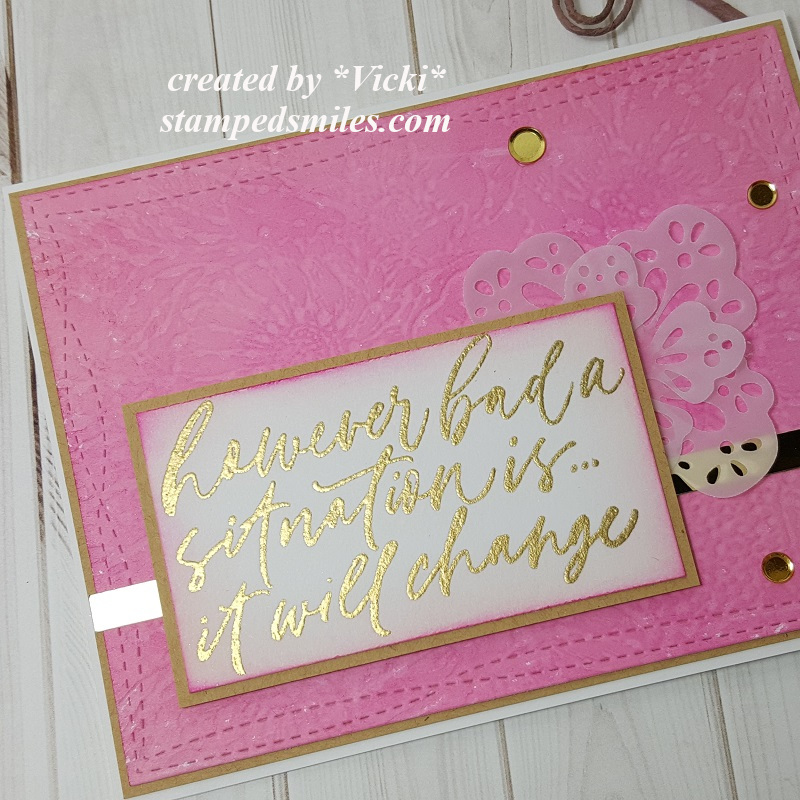
For my first card using the “Faux Embossing” piece, I took a sheet of pink cardstock and made the impression into it. You can see it in the background. For this panel I used the negative side of it and then sponged some darker pink ink over top of it so that you can really see the impression from the image. I used a Wonky Stitched Rectangle die to cut it out with and layered it over a piece of kraft Cardstock. This was attached to a top folded A2 sized white card base.
I took another sentiment from the same stamp set as above and heat embossed it with Gilded EP. I sponged some more pink ink around the edges of this panel and layered it over another piece of kraft CS. I popped it up with foam tape over some die cut flowers from vellum along with a strip of gold mirror cardstock and finished it off with some gold sequins.

Here’s a closer view at the texture in the background from the faux embossed piece.
I thought this gave a subtle but soft and pretty look to the design. Also, that sentiment could not be at a more perfect time right now, don’t you think?

And for my last card, I made the faux embossed background using some more kraft CS. This image I used the positive side and ran some distress ink over the raised areas to bring it out more. I took a darker brown ink to go around the edges.
I stamped a sentiment from the same stamp set with brown ink, layered with some Copper Glitter paper and then cut a piece of Macchiato CS from a scalloped stitched square die that was also used for the A2 Sized top folding card base, and popped up the sentiment panel with foam tape.
I layered the embossed background piece over a vanilla cardstock layer that was cut with a scalloped stitched rectangle die and then I wrapped some silk ribbon with a bow around it before placing the sentiment panel over it. I attached the flower and the sequins to the design and finished it off with some Nuvo Honey Gold Glitter Drops.

Here’s a closer look at not only the texture from the embossed background piece, but I also took some Shimmer Spray and covered the background with it. You can sort of see the beautiful shimmer over it…and it really looks incredible in person.
Hope you’ve enjoyed what I’ve learned and created for class! Thanks for dropping in with me today! There will be more things I have to share with you coming up, so I’ll see you soon!!
Challenges:
- Pearly Sparkles – Add a Ribbon or Bow (last card only)
- Moving Along With the Times – #118 Flowers
- Crafts Galore Encore – #75 Anything Goes
- Simply Create Too – #160 Use Flowers
- The Corrosive – #15 Anything Goes
- Use Your Stuff– #397 Flowers and/or Butterflies
- Arty Divas – #21 Anything Goes
- Cute Card Thursday – #633 Anything Goes
These ate so gorgeous Vicki! Each one is so different and beautiful. Thanks for the tips!
LikeLike
Such wonderful designs I have quite a few embossing folders and rarely use them might just dig them out and try siomething like this love and hugs Carole x
LikeLike
Very pretty cards and I love that technique! That’s great that you’re taking the class – fun! I took the first Spring one but didn’t sign up for this next one Guess I should have.
LikeLike
These are stunning cards, and you learned a wonderful technique in those classes! I just LOVE the first card with those pastel colored flowers, black sentiment panel and bubble drops! I don’t know how you did it, but those flowers look amazing! The pink and gold card is a beauty with a fabulous color combination, especially with the embossed sentiment! Loving that third card too with the earthy tones and subtle shimmer Each is beautifully designed and I’m so glad you had a good Mother’s day! Have a great week ahead too as warmer temperatures start to move in!
LikeLike
Stunning designs and love the technique. I will have to read up on faux embossing, thanks for the idea.
Hugs Diane
LikeLike
Vicki, these are all gorgeous! I’m certainly going to have to learn how to do this technique – I’m loving it!!!! You rocked the class – A+!!! Thanks for sharing 🙂
LikeLike
Hello, The first card just stunning, Vicki! I love them all, but the first card is a thief of hearts 🙂 hugs my friend,
BożenA
śr., 13 maj 2020 o 13:02 Stamped Smiles napisał(a):
> *Vicki* posted: “Hello there friends! Hoping you had a wonderful weekend > and a fabulous Mother’s Day as well! I had a wonderful day with flowers > delivered to me and wonderful phone messages as well as some safe social > distancing with my own mom. It was great to actuall” >
LikeLike
Beautiful set of cards and a great technique my favourite is the multi coloured card I love lots of colour and the other cards are also lovely. Hope you are staying safe and well xx
LikeLike
A beautiful collection of cards Vicki, the flowers with the pastel colours are just gorgeous, right up my alley,and then to emboss with it is amazing, the other embossed cards are lovely, what a great tecnique and money saving, thanks for sharing..
Luv CHRISSYxx
LikeLike
Brilliant technique and love the different results you got BUT WOW that first card is absolutely amazing !!!
Carol x
LikeLike
Three gorgeous cards Vicki!! I love that technique and all of the embossing you did! The white embossing with the pastel colors is stunning!
Tammy x
LikeLike
These are all fab. Love them. Thanks for joining us at Cute Card Thursday. Hugz Andrea.x
LikeLike
Gorgeous technique and the cards are stunning!
xxx Margreet
LikeLike
Fabulous, gorgeous designed cards and lovely embossing and image..so sweet.x
LikeLike
Hi your cards are gorgeous. I love them all. Thank you for joining us at Crafts Galore Encore Challenge Blog for challenge #75 which is Anything Goes. The sponsor is Star Stampz. Hugs Jackie DT xxx
LikeLike
What an impressive array of stunning cards, Vicki! It is remarkable that the wet embossed design was used to create the dry embossed cards! Who knew! Not me!
LikeLike
Absolutely stunning cards. Each one leaps out at, and thoroughly appeals to me, so picking a fave amongst this trio is off the table for me. 😀
What a beautiful blessing that you were able to see your mom in person on Mother’s Day. By a wide mile, visiting with loved ones is what I miss most about being in strict isolation. I hope that you both had a joy-filled day, and that it will soon be possible for us all to visit our friends and relatives completely safely again.
Autumn Zenith 🧡 Witchcrafted Life
LikeLike
Love your faux embossed cards – I’m going to have to go look up the original instructions. All of your cards are really pretty but I’m favoring the first one. Hope your Mothers Day was great.
LikeLike
That is an interesting and different idea for stretching your stamps! All of your cards are so pretty!
LikeLike
these cards are so beautuful!
LikeLike
I’ve never heard of this technique but all your cards are just lovely. The first one really caught my eye with the soft colors – I’d like to try this. Your sentiments are sweet and uplifting and the backgrounds are so subtle but add just the right touch. I like the sparkle in the final card and the glitter glue on the sequins. I’m thinking that’s such a nice way to cover up the sequin holes. Sounds like a wonderful mother’s day. I enjoyed mine as well.
LikeLike
Beautiful cards – thanks for sharing with us at the Arty Divas Challenge.
Helen x
LikeLike
Vicki, I’ve never seen this technique of faux embossing folder but I do love it and I’ll definitely have to try it myself. Thanks so much for the detailed descriptions. Fabulous cards, especially the one with the pink background! As you can see, I’ve finally found some time to just browse my favorite blogs and leave some comment love. 😀
LikeLike
Oh what a beautiful collection of cards – sounds that that class was a fun class. Glad you are taking time to relax and just do some things for Vicki.
LikeLike