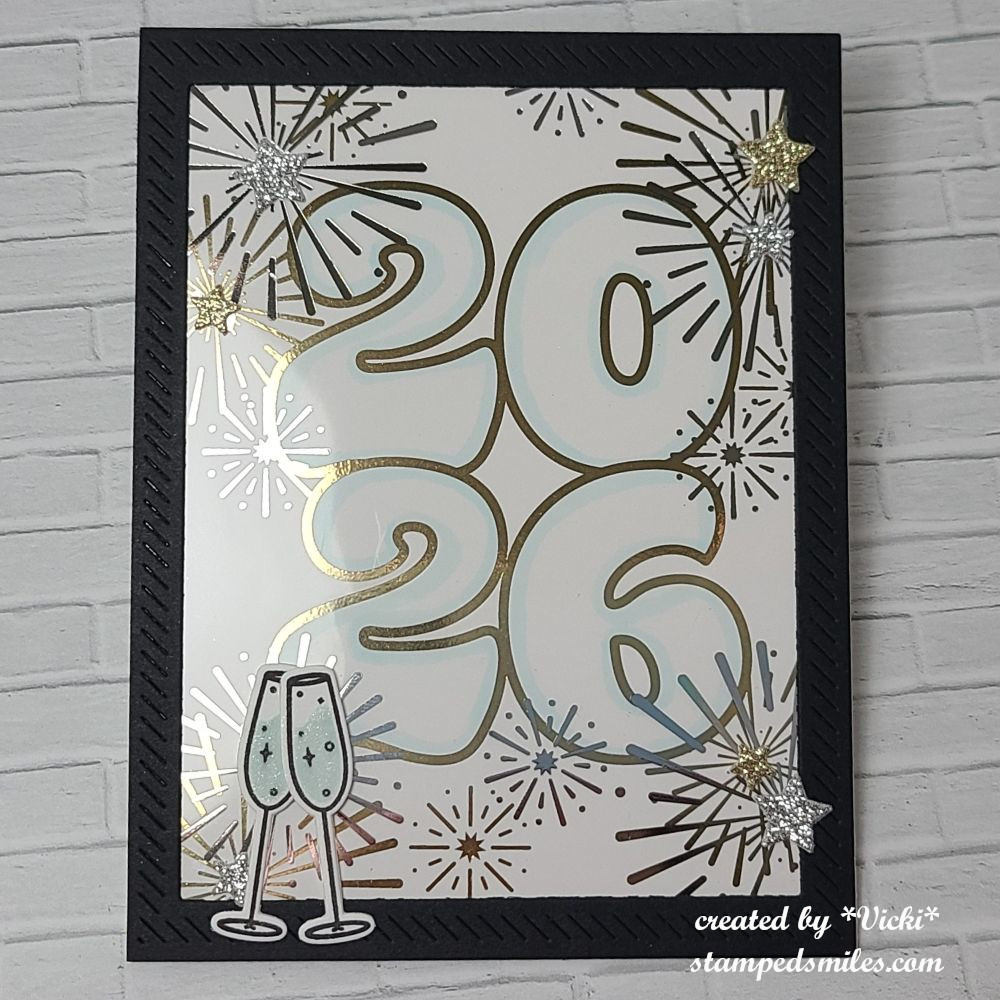
May AJ Page-Start a New Beginning

Hello friends!  I feel like the time keeps moving whether or not I do!  At the last minute before getting something done, I finally started this page! Once I got going, it was fun to just play around to see what happens!

It’s time for the monthly Art Journal Page collaboration with my crafty friend, Carol (from Crafty-Stamper)! We get creative trying to use up our never-ending stash piles along with a prompt for each month.  I know she will have some wonderful inspiration to share, so please check out her blog too! Here’s my AJ page with the “SMASH OUR STASH” May prompt of “FLOWERS”.

I noticed looking back on my AJ pages that I rarely use flowers on them unless it’s already apart of some papers that I’m using.  So this was a good challenge for me and it was fun to pull out these Tim Holtz “Flower Garden” stamps and dies from my collection to use for this one.

For the background:  I started with my 9″x6″ pre-punched holes of Canson 140# cold press watercolor and used a brick stencil and model paste.  I covered the entire page with some linen and umber paints mixed together.  I dabbed a bit of orange and spritzed it with water for a rust look.  I then went over that with a dry brush effect with some light ivory paint to bring out the texture of the brick pattern.

The flowers and stems were stamped over a watercolor Bristol that I previously made and splattered with chocolate paint.  I also covered the die cut flowers with shimmer spray. (Not sure if you can catch that in the photo.)  All of the stems were glued, and the flowers were glued with some being popped with foam tape.  I covered the bottom area over the stems with grit paste and then went over it with brown paint to give the appearance of dirt.

I took a Dylusions stamp and white heat embossed it over chocolate cardstock for the sentiment, hand cut it and popped up with foam tape at the top of the page.  I added a butterfly from a Tim Holtz ephemera pack.


Hope you’ve enjoyed my AJ page today!  Thanks for dropping in and checking it out!

Challenges:

  1. Art Journal Journey – Flowers
  2. Creative Artiste – Anything Goes Mixed Media
  3. Simon Says Stamp Monday – Watercolor (I watercolored the flowers/stems)
  4. Arty Divas – Anything Goes

Sparkles Monthly Challenge-Things with Wings

Hello friends!  I hope you’ve had a lovely Mother’s Day weekend and are enjoying the month of May so far!  I look forward to seeing those beautiful blooms and digging in the garden! 

Today starts a brand new challenge over at the Sparkles Monthly Challenge and the theme is “Things with Wings“!  This is a good one as there’s several ways to interpret it!  Be sure to check out the blog to see what the design team has come up with for inspiration!  Speaking of design team, Caz is looking to add to the team, so be sure to check out the details if you would be interested in joining.  Here’s what I’ve made for the challenge this month:

I thought the butterfly from this Taylored Expressions stamp set called Endless Joy would be so fun to color and use for this challenge.  They were stamped with Copic markers and cut out with the coordinating dies.

For the background, I’ve taken the rectangle masking stencil and blended some blue ink over the center and then I’ve added an additional stencil over top of it and blended more blue to get the pattern.  I then added some raw umber paint and opaque white Copic to splatter over top of it.  I cut out a stitched frame and added it over the blended area.

I added the flowers and butterfly to the card by gluing and popping out the smaller flower as well as the wings on the butterfly.  The sentiment was gold foiled and cut out with a coordinating die that was glued at the top.  I added some highlights on the butterfly with a white gel pen and added some Stickles glitter to the center of the flowers.  The white panel was attached to a top folding A2 white card base.

I hope that you have enjoyed my card today!  I hope that you will stop in to the challenge and play along with us this month!  Looking forward to seeing the gallery of wings!!

Have an amazing day and see you again soon!

Challenges I’d like to enter this card for:

  1. Four Seasons – Spring Season
  2. Triple B (Birds, Blooms &/or Butterflies) – Spring 
  3. Love to Scrap – Anything Goes
  4. Unicorn – Flowers
  5. Crafty Animals – Anything Goes + animal
  6. Critter Crazy – Anything Goes + featured critter
  7. Fab ‘n’ Funky – Things with Wings
  8. The Crafty Addicts – Anything Goes

Creative Artiste Guest Designer with Altered Mixed Media Frame

Hello friends and welcome to May!  I’m happy to see this month come with all of the beautiful Spring things that pop out like the flowers and sun with the warmer temps!  I look forward to going out and working in the yard soon!  Hope that you’ve had a wonderful week and look forward to a great weekend!  I’m getting ready for a fun crafty retreat and I’m really looking forward to crafting with friends!

5 May 2023

I’m super excited to be a guest for this month’s challenge over at the Creative Artiste Mixed Media Challenge!  If you’ve been around, then you know how I enjoy creating a few mixed media projects once in a while besides my Art Journaling that I do each month.  The theme is always “Anything Goes” with Mixed Media, so this time, I decided to make some altered art with an old frame:

I thought this would be a perfect item to alter with a Spring theme in mind.  I know the frame “looks old”, but it was actually a really old wooden frame that was stained/varnished about 30 years ago!  I’ve sanded, painted, added some crackling paste, and painted over it some more to give it a Vintage “falling apart” look.  I like the texture and the crackling from the paste that came out in it. The total frame size is about 9″x13″ and it’s shown hanging on my wall.

The center of the frame was done using a piece of cardboard sized to fit inside the frame.  (I threw out the glass front as I didn’t have a need for it.)  I had some papers that I thought was so pretty along with the sentiment.  The sentiment was way too large for a card and I thought it would work great for this project.  Of course, the size of the paper wasn’t quite large enough, so I worked on collaging some musical papers around the edges for a border.  I also went over it with a floral stencil and paste, paint splatters and waterproof ink before inserting behind the frame.

Here’s a closer look at the top of the frame where you can see that I’ve added a butterfly ephemera that was painted with some clear glitter paint and attached next to the sentiment with glue and foam dots on the wings.

I have tons of flowers in my stash, so I’ve created an arrangement along the frame with a vine and different sized flowers that I’ve added with twirled vines.  I’ve used more paint and even some art stones around the flowers as well as various places over the background for texture and interest.  More paints and metallic wax was used over all of these places to keep the Vintage feel to the design.  I tried to keep them coordinated with the papers in the background.  (It’s weird how the colors vary so much when you take a photo compared to what it looks in person.  The top frame photo looks more blue, but it’s actually more this muted green color.)

And as you scroll down to the bottom of the frame, you see I have this 3D arrangement with the painted chicken wire against the back panel with the papers.  (the flowers were added on top of that.)  On the bottom left you see I’ve made a “nest” for my bird with Spanish moss and even added a couple of twigs from my backyard underneath it.  I’ve also added a pinch of green moss in there which is also what I’ve used over top of the white picket fence section to the bottom right.  It actually sticks out in front of the flowers.

You can also see where I’ve added some more art stones and paints.  I’ve finished the whole design with some Finnabair white gold metallic wax.  This is hard to capture unless you get really close, but it adds a wonderful detail that brings out lots of the texture in your finished piece.

I really enjoyed creating this altered frame while I was thinking about Spring coming to life outside!  It was also fun to be able to find something I’ve had for so many years and give it some new life!  I hope you’ve enjoyed it as well and I look forward to seeing what mixed media art you make this month for the challenge

Thanks for dropping in today!

Challenges:

  1. Crafting From the Heart – Anything Goes (NO CARDS) challenges are back after 4 years!
  2. Crafting Happiness – Flowers
  3. Pearly Sparkles – Anything BUT a card
  4. Simon Says Stamp Monday – Paint It!
  5. Love to Craft – Anything Goes

April AJ Page Sparkle and Shine

Hello friends!  I can’t believe that it’s already at the end of the month!  I feel like this month went by very quickly, but as the weather gets warmer, it seems the more I want to be out.  Spring is always a great time to start seeing those pretty flowers which also means more weeds to pull too!

It’s time for the monthly Art Journal Page collaboration with my crafty friend, Carol (from Crafty-Stamper)! We get creative trying to use up our never-ending stash piles along with a prompt for each month.  I know she will have some wonderful inspiration to share, so please check out her blog too! Here’s my AJ page with the “SMASH OUR STASH” April prompt of “SHINNY/SPARKLY” :

I am a sucker for anything that shines or sparkles!  So of course I had so many things to choose from in my stash to play with!  I really had loads of fun making this one and the photos do not look quite as “wow” as it does in person of course, but you can probably guess what it may seem like once you know all what I’ve done.

For the background:  I used my normal pre-punched holes on a 6″x9″ watercolor paper and covered it with water spritzing and Brushos Crystal Color media in lemon, orange and brilliant red.  Once dried, I went around the edges with a scrapper and white gesso.  (I didn’t use a ton of it, just enough to make a scant frame.  Once that was dried, I took a leafy stencil with coordinating colored Distress Oxide inks and sponged over the page randomly.  I then spritzed with large water drops, once dry, I sprayed the whole page with shimmer spray.

On the dragonfly, you can see directly on the page a bit of a shinny gold shadow under the wings.  I have this dragonfly stencil that I used Deco Stencil Paste over that when dry, you can foil over it.  I did that directly on the page where I wanted the dragonfly and then again on a black piece of cardstock that was cut out.  I added some black string (This was a stray piece of string from a project that I did not use, so I decided to re-use it for this project) around the dragonfly, glued the center down over top the one on the page and then used black foam tape over the wings to give them a bit of a lift.  Before gluing down the cut out dragonfly, I used a gray Big Brush marker to create more shadows around it.  I also used a white Big Brush marker to create the dash lines around the page.

The sentiment was a piece that was cut out from a magazine that I recycled to use for this page and attached it with media paste.  I used the grey Big Brush marker to add some shadows around it as well.

On the left side of the page, you can see some gold sparkles which were created with another Tim Holtz Christmas stencil that I had which looked like fun sparkle images.  I used some gold glitter paste to go over that and then I took some gold Stickles glue to add some details with dots in various places.

And this is just one more photo of trying to capture that shine and sparkle:

Perhaps you can see more of the shine and sparkles in there.  I just had to move the page around in the light to get it in just the “right spot” to capture it better, so pardon my fingers in there.

Really hope you’ve enjoyed my AJ page today and gotten some inspiration!  Thanks so much for stopping in!  I’ll be seeing you again soon!

Challenges:

  1. Country View – Things with Wings
  2. Art Journal Journey – Recycle, Reuse, Repurpose (black string & sentiment)
  3. Creative Moments – Wings and Things
  4. Arty Divas – Anything Goes
  5. Crafting From the Heart – Anything Goes-no cards *First challenge*

Emboss It at Sparkles Monthly + Giveaway WINNER!

Hello friends!  I hope you’re having a great month so far and being able to enjoy the nice Spring weather!  It’s been really nice over my way, but I’m seeing we have a bit of cooler temps coming too.  Hopefully not too chilly!  **Be sure to scroll down below this post to see if you’re a winner from my giveaway!!**

Today starts a new challenge over at the Sparkles Monthly Challenge Blog and this time we would like for you to “Emboss it”!  I hope you will hop on over to see the inspiration from the team and consider joining in the fun with us this month!

Here’s the DT creation that I’ve made:

I love to do embossing on my cards and I know it’s a favorite for many!  I’ve decided to do a “Letterpress Embossing” technique and inked up an embossing folder to achieve the effect on my orange layer panel.  The raised areas stay white on the white cardstock.

For the two corners, I’ve taken a Simon Says Stamp Garden Greetings stamp set and gold heat embossed the floral spray image.  I’ve also used the same gold embossing for the “sending hugs” sentiment strip as well as the “Get Well Soon” sentiment over the shimmer vellum which was cut from a stitched circle die.  I added some gold sequins over it.

I wanted to keep it somewhat flat for mailing purposes, but I think some of it popped up would be pretty too. I was also very happy to pull out a past card kit and make another card with it.

I would love to see your embossed creations in the gallery this month, so I’ll hope you’ll play along!  Check out the challenge here – Sparkles Monthly


***ARE YOU A WINNER?!!***

vicki-tegiveaway

20230414_141351

I have taken all of the comments from my last post, added all of the names that mentioned they would be interested in the Beautiful Butterflies dies and foil package and wrote those names on pieces of scrap paper. I folded and crumpled them up and had my husband pick out a name. He threw them all into the hat he was wearing and pulled one out!

HERE IS THE NAME THAT HE PICKED OUT…………….

20230414_141630

Yay!  Congratulations Chrissy! 

Please contact me and send me your full name and snail mail address so that I can pop your package in the mail to you!  I hope you enjoy it!  (I haven’t even used mine yet!)  Sorry if your name didn’t get pulled as I only had one, but I know I have several “double” items that I’ve placed in a bin and will be pulling them out at some point to give away! So stay tuned!

Thanks so much for dropping in and taking the time to say hello!  I appreciate you!


Challenges I’d like to enter my above card into:

  1. Creative Inspirations – Anything Goes
  2. Can You Handle the Pressure? – Anything Goes optional clouds
  3. Pammie’s Inky Pinkies – Anything Goes
  4. Ally’s Angels – Anything Goes
  5. Little Red Wagon – At least 2 layers 
  6. Penny’s Paper-Crafty – Anything Goes
  7. Tic Tac Toe – TTTC204 (middle down: die cut, free, embossing)tttc-challenge-board-204

Class Fun & Square Samplers + Give Away

Happy April friends!  We have finished March already and onto Easter very quickly approaching!  I hope you’re enjoying all things Spring coming up your way!  We’ve had several storms and we’re in the tornado season as well, so I hope everyone is staying safe out there whatever the weather.  I do have some things that I had previously finished and wanted to share:

First, I wanted to share about the Virtual Stamp Joy Event by Taylored Expressions that I participated in a few weeks ago.  I always have so much fun and enjoy the motivation that it seems to generate!  I’m sharing them in the gallery below, so if you’re on my website post, then just click on each photo to enlarge it.

  • The first four photos were from a class using the same floral stamp set and the others are from the next day of make-n-take projects.  Please let me know if you have any questions about any of them!

The last set of four cards were a “mass production” using a background stamp in different colored cardstock panels and clear heat embossing over them.  The class sample had “hello” sentiment on each one, but I changed up the sentiments and have placed them in a card box to give them out with envelopes as a gift for someone.

Hope you’ve enjoyed the inspiration as much as I enjoyed putting them all together!


From the end of last year up until this last month, I didn’t have much time with the Holidays and everything going on, but as you may have seen in previous posts, I participate in a “square sampler swap” and when everyone sends out their squares, we then complete a home décor piece with all of the squares, so I thought I’d share mine finally completed:

  • CLICK PHOTOS BELOW TO ENLARGE

This was for the Christmas Sampler SWAP and you can see that I’ve used a black shadow box frame for my sampler and placed some red with red metallic dotted paper behind it.  The square on the right is the one that I made. (I’ve used My Favorite Things products for my square.)

This was for the Winter Sampler SWAP and I went with a white shadow box for this one.  I’ve placed some soft blue snowflake papers for behind my sampler as I thought it was soft enough to not look too busy.  The square on the right is the one that I made. (I’ve used Inky Stamper products for my square.)

And recently we finished up our Spring Animals Sampler SWAP that I used another white shadow box for the sampler.  I’ve added a piece of pink colored “Watercolor Wishes” paper from Lawn Fawn behind it.  It looks a little off in the photo, but it looks better IRL.  The square on the right is the one that I made.  (I used Taylored Expressions products for my square.)

Not sure if we’re doing any more or not, but I had so much fun making the squares to swap with friends!


Lastly, I have a fun little thing to give to whoever is interested in these Taylored Expressions dies + foil-it panels package. (It’s not sold in stores anywhere as it was a free gift with purchase)  I have an extra and so I thought I’d give it away to someone!  Just leave me a comment below if you’re interested and I’ll pick someone from the comments.
Leave a comment below if you’re interested!

That’s all I have for today!  Thanks so much for stopping in!  I’ll be seeing you soon!

March AJ Page-FLY

Hello friends!  Officially Spring has sprung, but I’m seeing some possible snow still in the forecast!  BLAH!  I sure how as we finish up this month, that April will be a little kinder to us over here.  With all of this weird weather in all different directions, I do hope that you’re staying safe and enjoying some craft time!

Speaking of craft time- If you’re not familiar, I post an AJ page each month along with my crafty friend, Carol (from Crafty-Stamper), as we get creative trying to use up our never-ending stash piles!  We use a prompt each month and post them.  I know she will have wonderful inspiration to share, so please check out her blog for an AJ page too! Here’s my AJ page for this month with the “SMASH OUR STASH” March prompt of “Find something/anything GREEN to use on your page” :

Thinking that I was REALLY in the mood to start seeing some green, I started digging through my stash and found SO MANY green things!  I didn’t realize that all you really need is a color to have so many different items to pull from!  I’m happy with all of the green items I found as I used several of them for my layout here.  I’ve got green paint, texture paste, metallic spray, flowers, lace, button, butterfly ephemera and green glitter Stickles!  I’m thinking I don’t use green enough, so I went with a monochromatic page.

For the background:  I started with some printed vellum attached with collage medium and went over top with a soft green layer.  I used an old stencil and went over the two corners with green paste. I then sprayed some green metallic over those two colors and moved it around with water until dry.  I splattered some white ink over top and set to dry.

Vicki-AJpageMar-Flybottom

I added green lace on the right bottom along with my scallop chipboard square that I painted white and added some papers behind it.  I used those same papers to die cut a tag at the top and glued the fairy along with butterfly wings behind her over it.  I added the sentiment sticker that was lined out with a black marker and button over it and attached a string to the hole.  This was popped up with foam tape as well as the “FLY” die cut letters inside the white frame.  The ripped sentiment was computer generated and sponged with grey ink and tucked behind the white frame.  I added some green Stickles glitter to each scallop and tucked some green flowers with gold enamel dots in the center.  I also tucked more of those behind the fairy too.

Vicki-AJpageMar-Flytop

I covered the butterfly wings with a glitter brush pen and then splattered some grey ink over top of the wings before attaching them to the page with glue and foam tape… and before attaching the butterflies to the page, I covered up the fairy with a piece of scrap paper and used some gold paint to splatter over the page…and I called it done!

I enjoyed making this page with all of those GREEN things from my stash!  I hope you’ve enjoyed it too!  Thanks so much for dropping in and have a great weekend!

Challenges:

  1. Art Journal Journey – Anything Goes Art Journal
  2. Creative Artiste – Anything Goes Mixed Media
  3. Challenge Up Your Life – Monochrome
  4. Beyond the Blue – Green
  5. Ally’s Angels – Anything Goes
  6. A Place to Start – Anything Goes
  7. Through the Purple Haze – Anything Goes

Party Pandas

Hello friends!  I had another birthday card to make and this person likes panda bears, so I thought I’d go through my stash and see what I had for that.  Here’s what I came up with:

So I found this cute little guy that I believe was a “freebie” a few years back for your birthday month from Lawn Fawn called “Party Panda” and the extra was that “Happy birthday” sentiment as well.  There was also a set of coordinating dies with it that cut out the panda as well as the tiny cupcake.

So to make it a good party, you need more than one panda, so I stamped him out three times and stamped out some “party elements” as well from the Lawn Fawn Party Animals stamp set, colored and cut everything out with the coordinating dies.  These little guys turned out so cute with their party hats on and holding their birthday items to celebrate with another panda friend, of course!

I thought it would be fun to create  a green colored frame with the Watercolor Wishes paper cut out with the Outside In Stitched Rectangle and the Reversed Stitched Scallop Rectangle dies to create a frame.  I had some additional metallic gold polka dotted papers for the background behind it that were also a freebie with one of my orders.  Before attaching it to the back of the green frame, I also added a piece of Noble Fir cardstock cut from the Grassy Border die.  Attaching this border to the frame only gave me some room to tuck the pandas behind the grass.

I stamped the sentiment in black, cut it out with my scissors to make a banner and sponged some green ink around it before attaching to the card.  Lastly, I added some gold sequins and placed it over an A2 sized top-folding white card base.  I decided to create my own envelope with more of that green Watercolor Wishes paper to mail it in.

  • Well the green and grass have me thinking of Spring coming and I think I might party like a panda myself when it finally arrives!! 😆🎈  I’m sure ready to be outdoors! 

Hope that you’ve enjoyed my card today and have been inspired!  I’ll be back Saturday for this month’s Art Journal Page and hope to see you then!  Thanks for dropping in!

Challenges:

  1. Creative Knockouts – Add a Sentiment
  2. Lil’ Patch of Crafty Friends – Anything Goes
  3. Pammie’s Inky Pinkies – PIP2311 Anything Goes
  4. Lawn Fawnatics – Inspired by Book/Movie/Song (My book inspiration came from Xander’s Panda Party by Linda Sue Park)BandN
  5. The Corrosive – Anything Goes
  6. Creative Fingers – Anything Goes

Going CAS at Sparkles Monthly

Hello friends and happy Wednesday!  Today starts a new challenge over at the Sparkles Monthly Challenge Blog and this time we would like to see your CAS (or “clean and simple”) creations!  I hope you will hop on over to see the inspiration from the team and consider joining in the fun with us!

Here’s the DT creation that I’ve made for it:

Sometimes I feel that CAS can actually be even more difficult than regular cards and I struggle with thinking I’ve added too much or it doesn’t look right.  I think it’s more of me over-thinking something, though!

It was my son’s birthday yesterday and I thought this would be a great opportunity to make a card for him.  He’s a postal carrier, so I thought this cute owl from the Lawn Fawn Special Delivery would work great for this.  I started with the LF Stitched Cloud Backdrop and the LF Stitched Rectangle Frames dies to create the main focal panel.  I lightly blended some blue ink in a circle before adding the Copic colored postal owl popped up with foam.

Over some red cardstock, I white heat embossed the sentiment.  (I don’t remember which LF stamp set it came from)  I  die cut it with a banner die and popped it up over the cloud panel.  I also had an extra die cut heart lying on my table, so I thought it would be great to add with the owl.

Thanks so much for stopping in today!  Hope you’ve enjoyed my CAS card and have been inspired to join us this month with your take on the challenge too!

Challenges:

  1. Country View – Birthday card for a man
  2. Love to Scrap – Anything Goes
  3. 613 Avenue Create – Anything Goes optional: CAS
  4. Lawn Fawnatics – All things birthday
  5. Sunday Stamps – SSC304 sketchSSC304

Rainbow Bridge

Hello friends!  Welcome to March!  Although it’s still cold and even some snow coming in our forecast, I know that warmer weather is coming soon along with those pretty flowers!  I have a full weekend of crafting coming, so I’m prepared to get through this cold snap!

So I have unfortunately had to make and send a couple of pet sympathy cards as I didn’t have any on hand.  I decided that I needed to pull out a card kit from My Favorite Things called “Rainbow Bridge“, I think.  It’s no longer available, but I know they have a few things in pet sympathy.  I wanted to make sure that I still had some of these on hand when needed because I feel like these can be hard to make.

This card was made and sent out in January for someone who lost their precious fur friend.  I thought the silhouette looked a similar shape to the photos I saw.  I’ve used the stencil and dies that came with the kit along with some of the papers included in the kit with the paw prints.  I’ve also used the same papers as a liner for the inside of the envelope that you can see in the photo.

I’ve ink blended some rainbow colors and then used the die set in the kit to make the rainbow bridge and added some hearts around the silhouette pup which was popped up over the rainbow bridge.

I also needed to make a kitty one and then just decided that I was going to use this card kit to make several of these different pet sympathy cards so that I had some on hand when needed.  I thought that was a clever card kit and knew it would be very useful to create lots of pet sympathy cards with.

  • These are all in the gallery below, so if you’re on my website, just click on each photo to enlarge the size so you can see the details:

Sometimes it’s just good to sit down and craft to have some cards on hand that you know you’ll probably need at some point, but don’t want to hurry to try and put something together because you need it.

Hope you’ve gotten some inspiration in my post today or found some inspiration with it.  Thanks so much for stopping in today!  

Challenges:

  1. Allsorts – Anything Goes optional 4-legged Friends
  2. Crafty Animals – Anything Goes + animal
  3. Critter Crazy – Anything Goes + Featured Creature
  4. Pearly Sparkles – Include Sentiment/Verse
  5. The Diva’s That Cut Paper – Anything Goes
  6. Penny’s Paper-Crafty – Anything Goes Using Paper
  7. Love to Craft – Anything Goes
  8. Pammie’s Inky Pinkies – Anything Goes