Hello friends! This will be a pre-scheduled post as I’m away for a bit, so this is going to be a very short and sweet post from me.
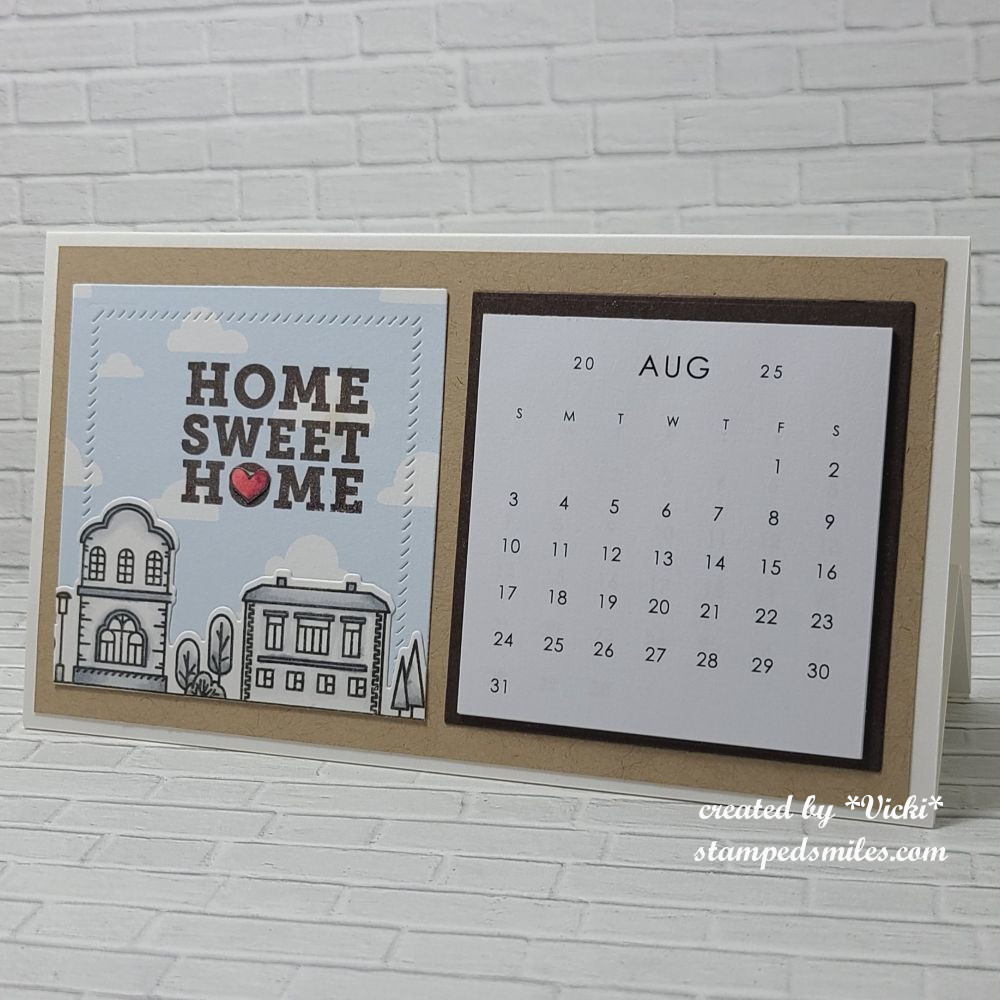
There is a new challenge today over at the Alphabet Challenge Blog! Our next letter is ‘H‘ and the hostess has chosen “H” is for HOME *Remember that this is a bi-weekly challenge, so you have two weeks to enter* I hope you will find some time to play along! Here’s what I’ve created:
I have pulled out an older card kit from Simon Says Stamp called “Home Sweet Home” and used some of the cloud papers that came in the kit along with the stamp set to make my little square on the left.
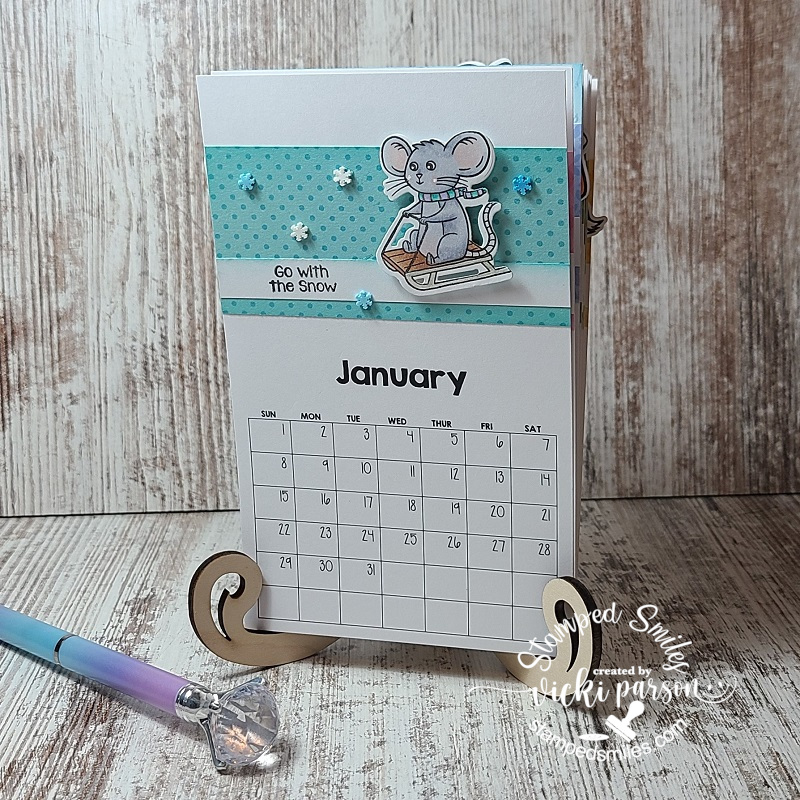
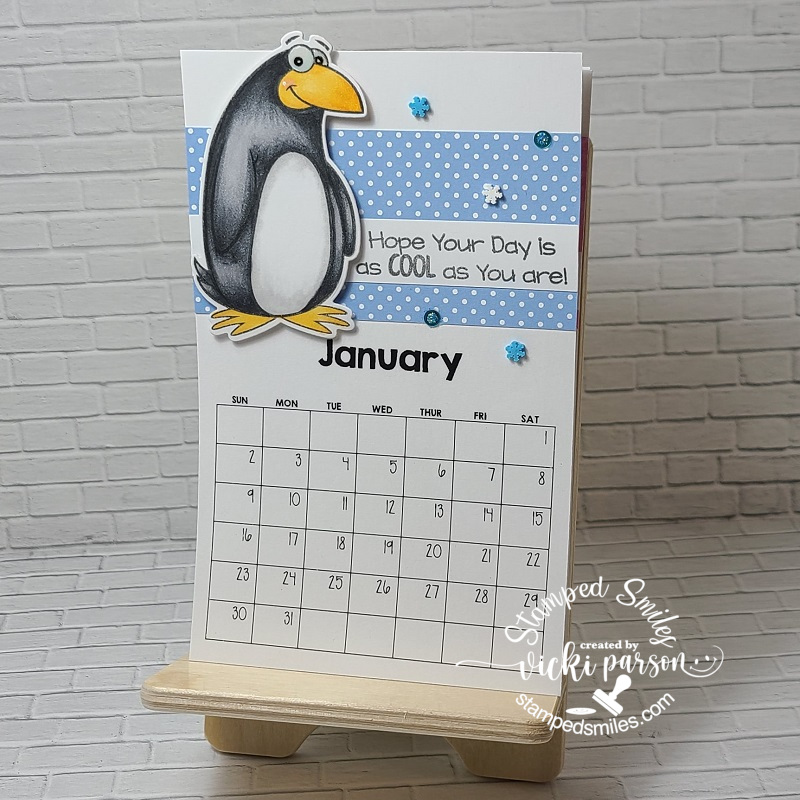
This is a mini slimline sized easel calendar. It folds flat for mailing and then sets up with a base at the bottom. (I figured a message could go on the back.) I got the Square Calendar Tear-Offs as well as the Landscape Calendar Table Tent Base from Taylored Expressions. The “slash marks” on the home sweet home square also came from the TE Square Tear Off Calendar Stacklets Die Set which is how I was able to cut out the square to fit onto the design too.
Obviously, I have August 2025, but I also have 2026 calendars that I will have to replace for the new year. I really love making these calendars every year to give as gifts and I thought it would be nice for someone moving into a new home as well.
Thanks so much for dropping in today! I hope you will take a look at what the design team has for inspiration and join in the challenge with us!
I’ll have another scheduled post for tomorrow to share my monthly Art Journal Page.
Hello friends! It’s that time of year when we turn over a new year and then realize that we need a calendar to keep track of our days…at least I do anyway! I don’t feel ready for the year ahead until I’ve got my calendars up and ready to roll! Usually, I’m ready to go by the end of the year, but I ran out of time with the Holidays, and I had planned on giving calendar gifts which I sent late, but I did get them done! I still feel in Holiday mode because of this…Ugh!
So this month I’ve been working on several calendars and spending most of my time coloring them up. It’s been very cold over my way, so I actually enjoyed doing them. Here are a few sets that I sent out for gifts:
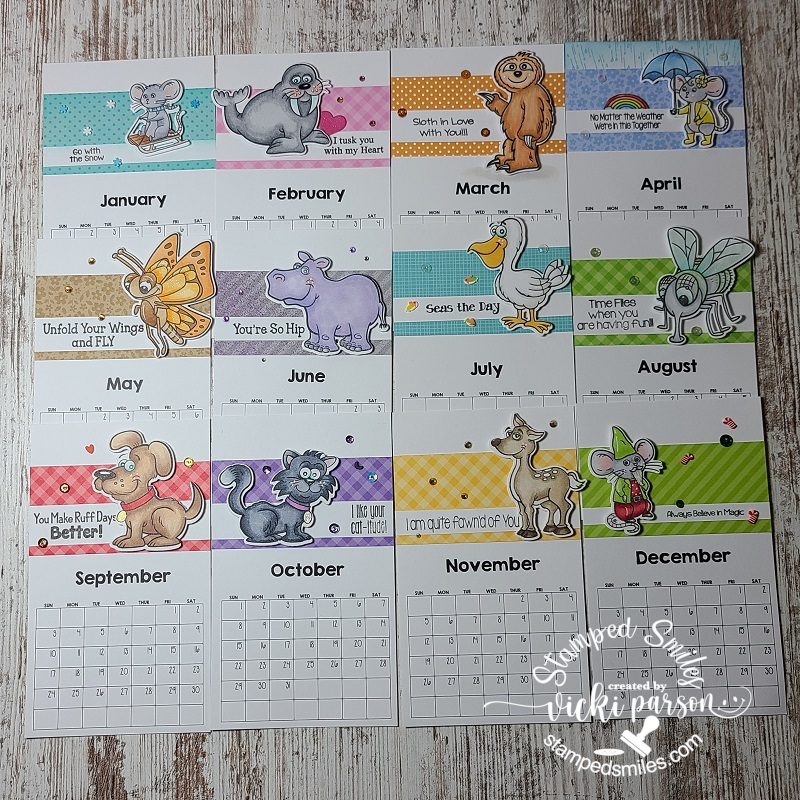
I think these Taylored Expressions Feisty Square Calendar Cards are my favorite!😆 I was laughing at each one as I was coloring them up! The cards are already printed and makes it easy to get them colored up and attach them to the Desk Calendars. All of the image cards are blank so that you can use them however. I decided to just create my own background with each one using my markers in different ways while I was coloring them up.
I gave this set as a gift and wasn’t sure how they would choose to be displayed, so I added a magnet on the back of each one and also included a Walnut Wood Display, so they had a couple of options to use.
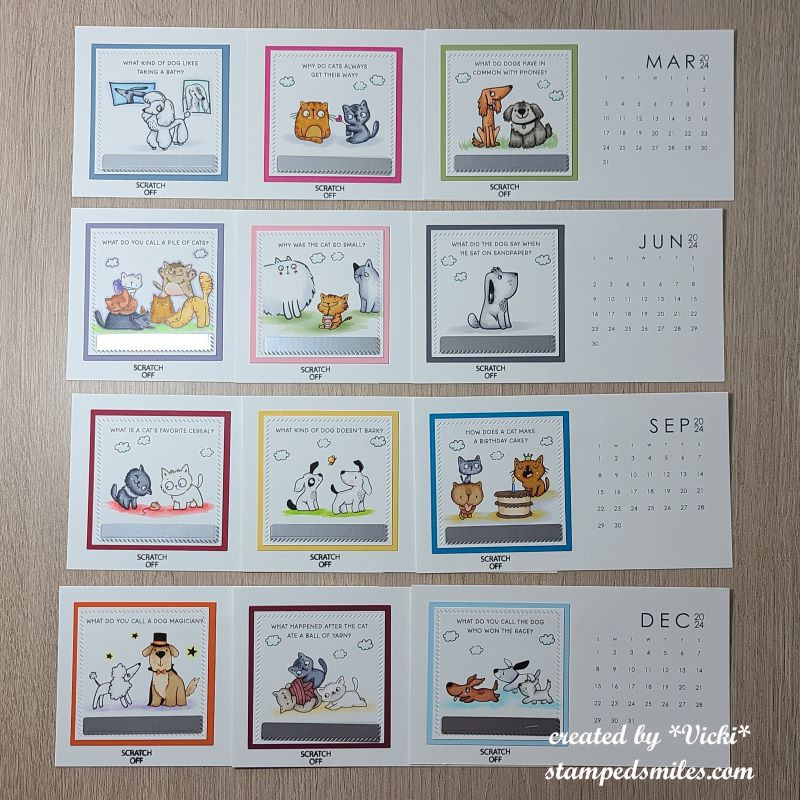
This next set was put together the same way I did the calendar above, expect these are the Taylored Expressions Scratch-Off cards. (This one is not available in the store because I received the entire set with my Advent Calendar purchase.) I thought these pups and cats were too cute and a perfect gift for someone that has both a dog and cat in their family.
After I colored them in, I added the Taylored Expressions Scratch Off Stickers to cover up the joke punch line. I then used the TE Square Tear Off Calendar dies to create the design around the edges and a layer of cardstock to coordinate behind each one before placing on the calendar cards. I also stamped “scratch off” under each card so that the person can scratch off the joke punch line for every month and see a new joke.
I also added a magnet on the back of each one as well as include a Walnut Wood Display so the recipient can choose how to display the calendar.
Click on the photos to enlarge on website!
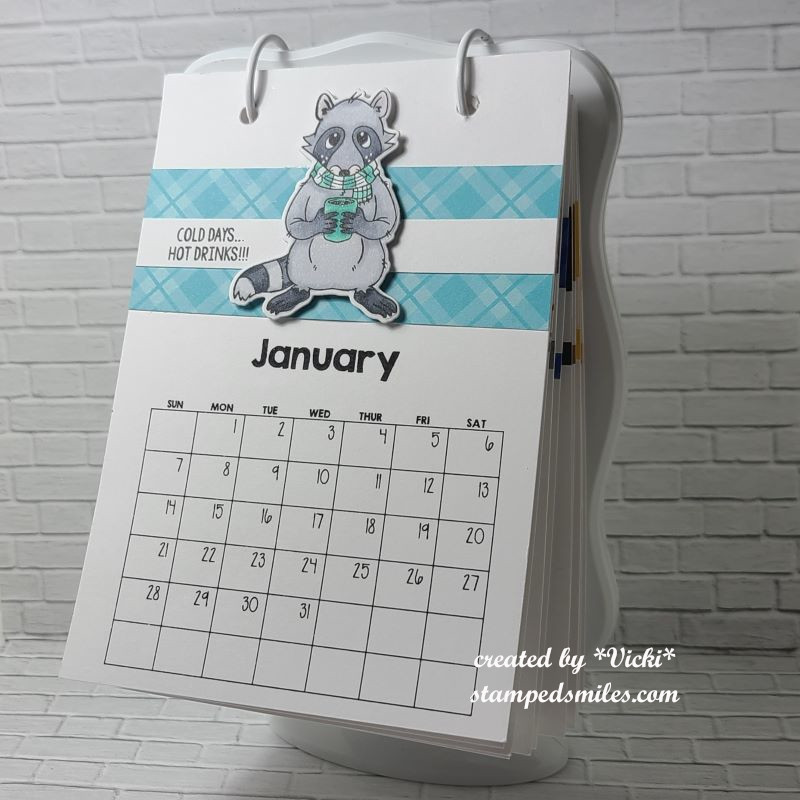
Every year I always get the Inky Stamper Calendar kit that gets put together at the end of each year. There is usually a number limit on how many are available each year, so if you are interested, you might want to click on the link to get one because I’m not sure how many more there are left.
These were also fun to put together and color. I chose to stamp my own images and cut them out. You still get the pattern papers and white sentiment strip with each month.
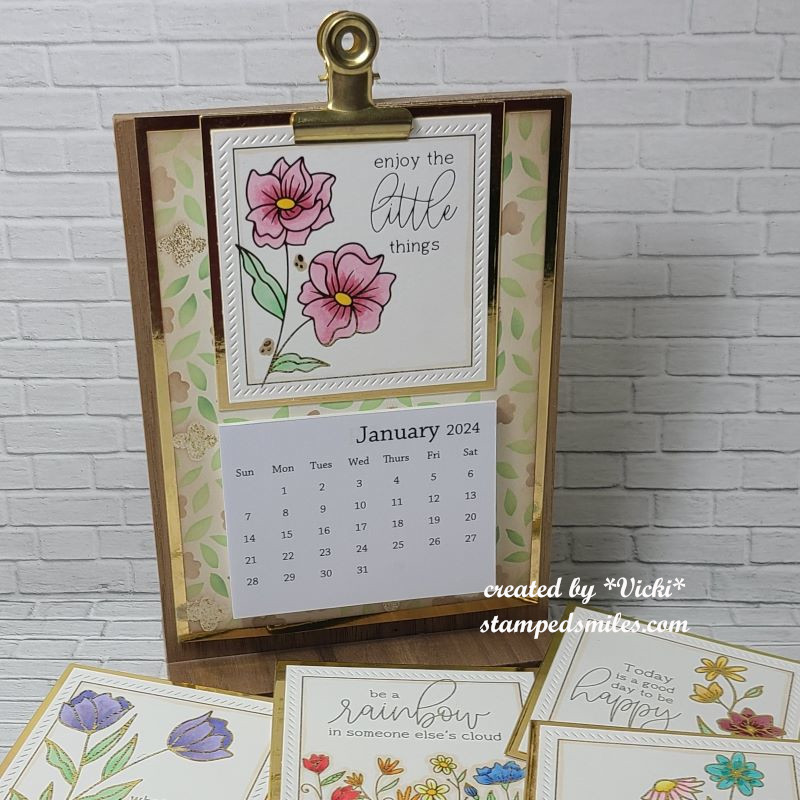
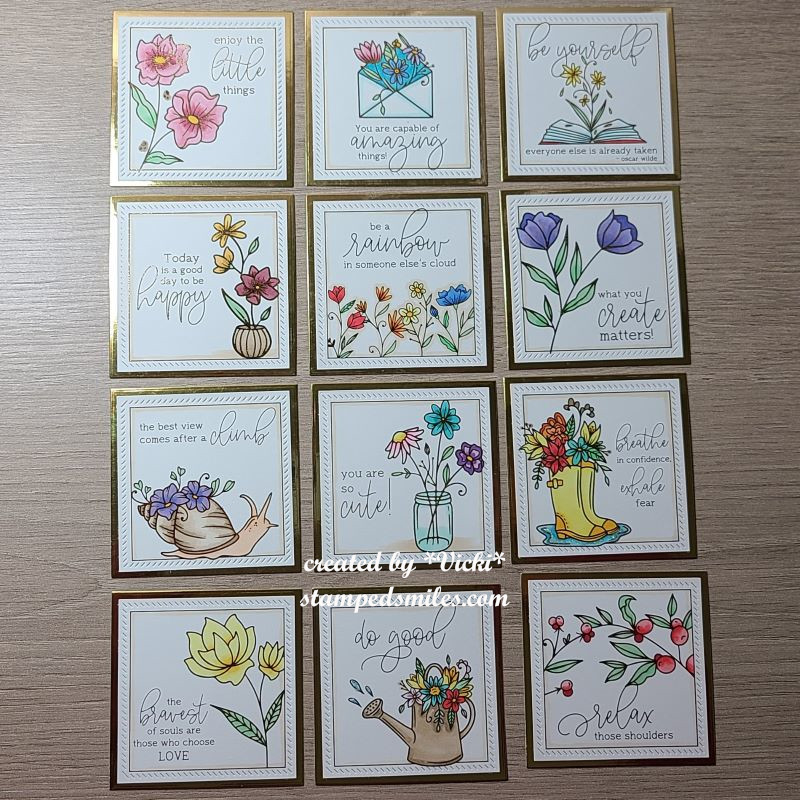
I absolutely love how this calendar turned out! I’ve used the Taylored Expressions Friendly Square Calendar Cards and I thought they were so uplifting. This time of the year positivity is something that is very important to me and can be hard to come by. The days seem to be gloomy and short with little sunshine, so coloring all of these was great to fill my time with.
For this display, you may remember a calendar I had done a few years ago on THIS POST using the TE Snarky Calendar Cards. I’ve decided to update that one and used the same display stand to create this one, which is why I prefer using this stand. It’s nice and durable.
I have gold foiled each card and colored it. I’ve made a new background display card with a layered stencil and I’ve layered everything with gold foil cardstock. I’ve got a bag on the back to store my extra cards so that I can switch them out whenever I’d like. All of the gold shine really catches my eye and is pleasant to view.
I hope you’ve enjoyed my post this afternoon and I REALLY appreciate you taking the time out of your day to leave me a comment. It means very much to me as does your support!
Have a beautiful day and I’ll see you on Saturday for my first Art Journal Page of the year!
We’ve made it to 2023!🎉 Congratulations and a huge welcome! I’m so thrilled to have you with me for another crafty year and honored to be apart of your creative journey in some way.
Towards the end of last year…which was a few months ago…I was asked to create a set of those calendar cards that I had made last January which you can view in my previous post HERE. If you look at the calendars at the bottom of the post, it explains the details. In sharing those, someone asked me to create a set with a particular theme in mind for giving as Christmas gifts.
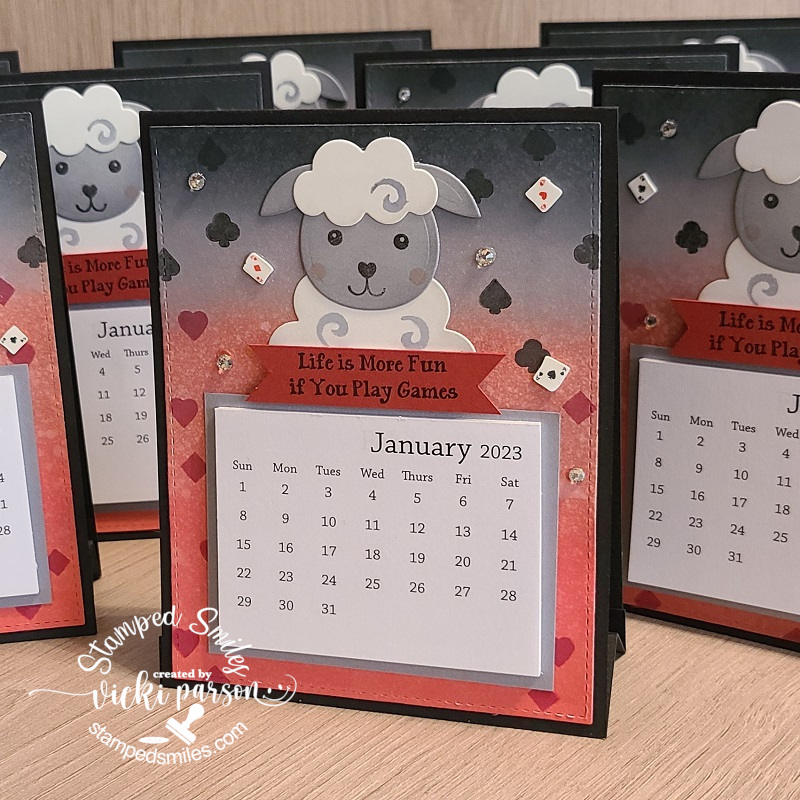
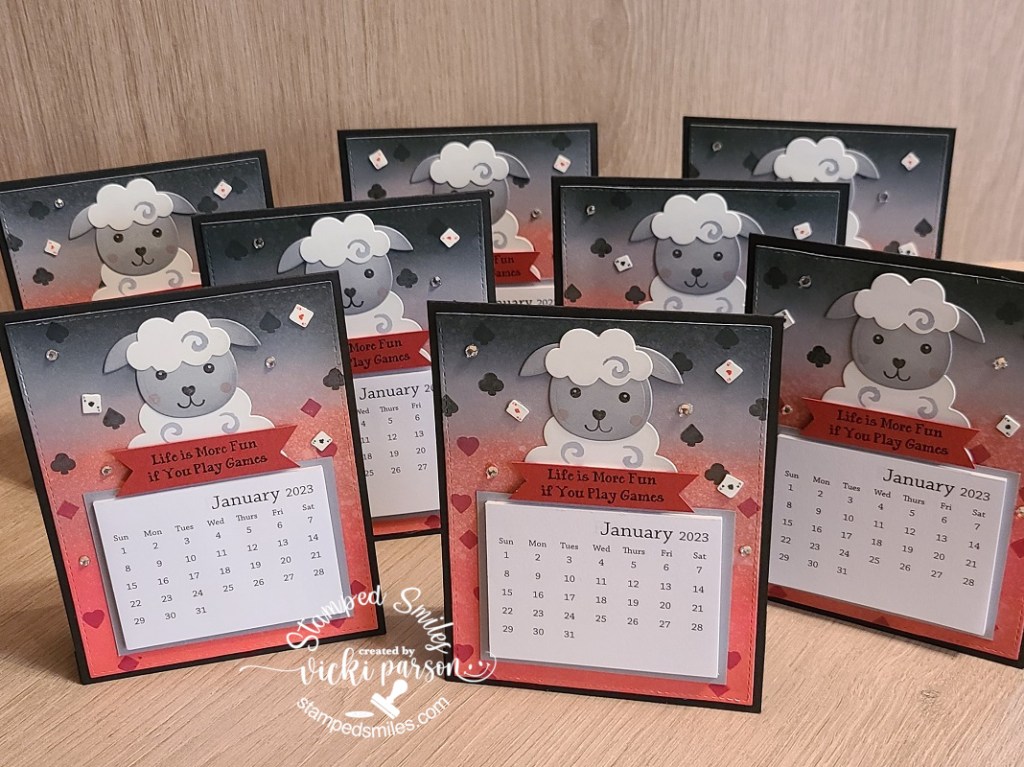
I was given instructions to use a sheep image for their card/game group that call themselves “Sheeples”. 😄 The first one that came to my mind was this adorable little die cut set from Taylored Expressions called Spring Squad Die & Clear Stamp Combo. I love the added stamp set to create the details of the characters! And of course, I’ve also used the TE Mini Tear-Off Calendars.
For the background, I wanted to incorporate some game theme items with this cutie, so I pulled out the fun stamp set from Inky Stamper called Game Night, of course! I ink blended the background panel with some reds and black/gray Oxide Ink colors and spritzed it with water for some texture. Once dried, I added the different “suit” images in the corresponding colors of the suits. I also stamped a sentiment from this same stamp set and die cut a banner with it to pop up under the sheep. Lastly, I’ve added a few Playing Card Shaker Elements and rhinestones.
In total, I needed to create 8 of these calendars and I think they turned out really cute and fun! I didn’t know if there were any masculine members of the group, so I wanted to keep it for use either way and I’m glad I did as it was needed. So, these are each A2 size that can fold flat and fit inside A2 envelopes for mailing if you needed. Then the recipient can stand them up to remind them of their next game night fun throughout the year! She seemed pretty pleased with them, so that was great too! And of course, she received them in plenty of time for Christmas giving, but I’m just now getting them posted.
I enjoy creating a new calendar for my craft room every year and there is a fun 2023 Calendar Kit from Inky Stamper that I completed.
Every year Inky Stamper comes out with these calendars that comes with all of the calendar month cards plus pre-stamped and cut images along with a sentiment strip and papers for each month. It also includes some sort of stand to display them on. (I like to use the previous year calendar to make cards with too!)
I was able to get them all colored and assembled for this year and have it displayed on a shelf next to my computer so that I can flip through each month and enjoy. I enjoy taking the time to sit and color especially with it being cold and snowy again over my way.
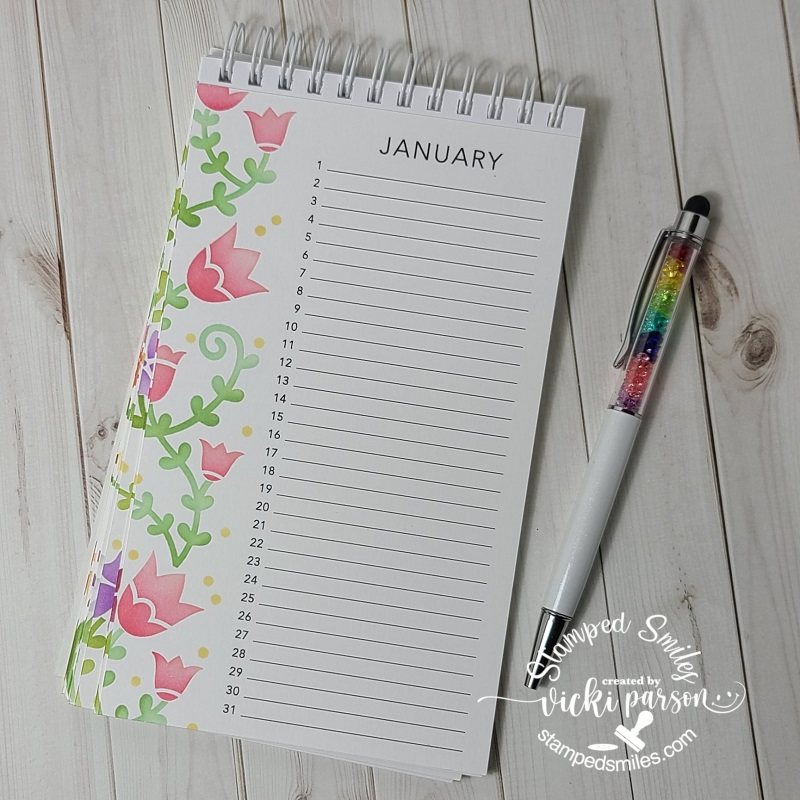
And since this post is all about calendars, I thought I’d take the time to complete TWOPerpetual Occasions Calendars from Taylored Expressions that I had gotten sometime last year for gifts and never got around to finishing them up.
I’ve just turned it to January to show, but you can see the other pages of the calendar on the bottom corner that were all stenciled up similarly. The link above takes you to the class kit which includes the TE Perpetual Occasions Calendar, the TE Calendar Coil plus the video class instructions from Taylor on how to put everything together. You can also get the TE Floral Vines Layering Stencils that work with this calendar which I’ve used with these that I made.
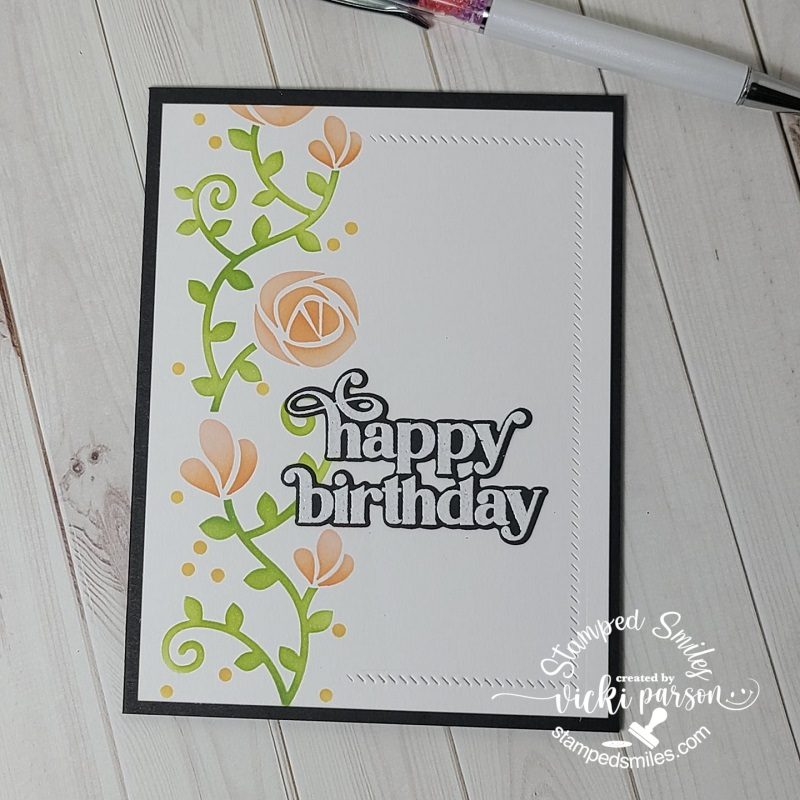
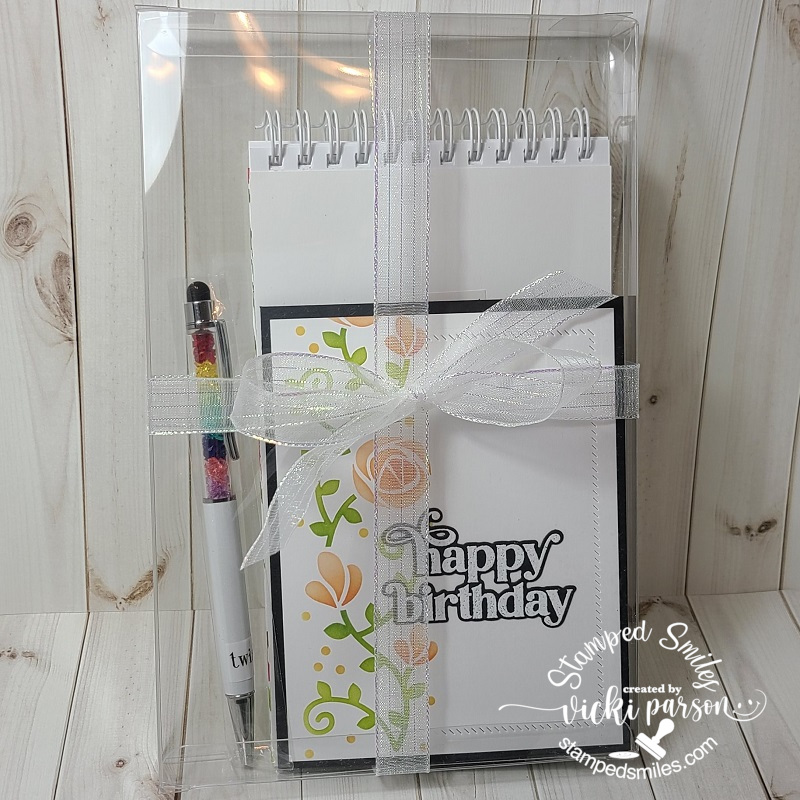
And of course, you can also use these same stencils to make a pretty card too! I’ve taken the same stencils that I’ve used on my calendar and made a birthday card. I took the instruction from Taylor’s class and applied it similar to my own card using the TE Diagonal Stitch Rectangle die to partially cut one side of the stenciled panel. I also pulled out the TE On Occasion stamps & dies to white heat emboss over black and cut out over the front of the card.
And then after creating two sets of the perpetual calendars and birthday cards to match, I’ve added a rainbow pen that I had previously purchased from Taylored Expressions (no longer in the store) and placed them all inside these TE 5×8 Clear Calendar Boxes. I pulled out some ribbon in my stash and wrapped it around the boxes. I now have two completed birthday gifts with cards this year! Yay! I feel like I’ve accomplished something ahead of time for a change!
I hope you’ve enjoyed my New Year calendar post today and have been inspired to start getting crafty! Thanks so much for stopping in and I’ll see you soon!
Challenges:
Creatalicious – Anything Goes optional something new (new calendar kit for 2023)
Hello friends! How are you dealing with the 2022 year so far? I hope that you have a fantastic start and look forward to a brilliant and crafty future ahead of you! Speaking of starting a New Year, I realized that I needed to start my crafty calendars…which really should’ve been started sooner!🙄 I actually enjoy putting them together, especially the coloring as it’s very relaxing for me.
I’ve had this set of calendar cards along with this stand since this last Spring from Taylored Expressions and of course I’ve waited until recently to get them finished up! I’m glad I did though as I think these will be so fun to look at and chuckle to change out each month:
Tee hee! What got me interested in Taylored Expressions from the start were these adorable and funny Grumpy characters that she has in one of her product lines! (You may have seen a “Grumpy” calendar I’ve made in the past on THIS POST.) She has LOTS of different types of calendars and accessories to choose from, but this is a set that had come out this past year. I thought this would be a fun way to help motivate me this year for creative inspiration!😁
I’ve taken a white piece of cardstock cut to size my calendar stand that would accommodate the tear-off calendar pad and hold the “snarky cards” in place with the gold clip. I’ve used some TE inks and blender brushes to blend over top of the white piece. I then used the TE Striped Squares stencil to go over it using the same colors and then mounted this piece over a black cardstock layer. (This piece and the changeable cards are held to the stand with the gold clip.)
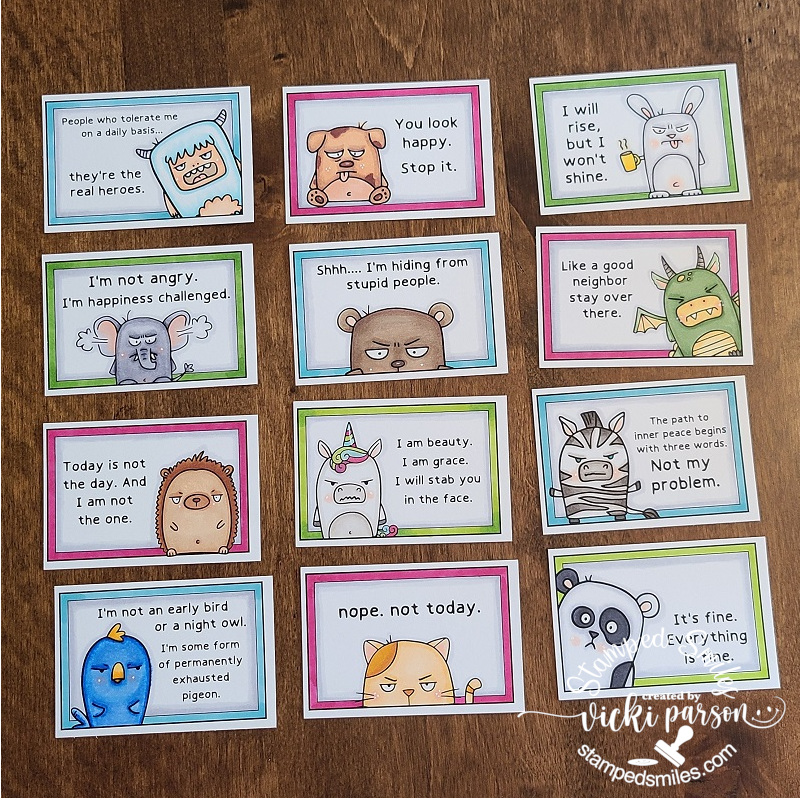
Here are all of the completed cards in the set that I can change out each month or whenever I want. I’ve used the TE Clipboard Calendar Cards-Snarky for my own personal calendar that I’ve colored up with Copic markers. The frames were colored with coordinating colors that matched up with the rainbow stenciled background for my calendar front. Really enjoyed coloring and giggling while making this set!
I also wanted to show you the back side of this TE Walnut Wood Clipboard Stand so that you can see how I store all of the extra cards on my calendar when I need to change one out. You can choose to add a package of the TE Calendar Storage Sleeves with the stand if you get one, but I thought this whole system was a nice and sturdy option of creating a calendar that you can personalize for yourself or for a gift. I ended up creating a calendar last year for Mother’s Day and gave it as a gift. I used the TE Clipboard Calendar Cards-Sweet for that one and did some foiling on them. (Just don’t forget to purchase the next year’s tear-off calendars to replenish the recipient for next year!)
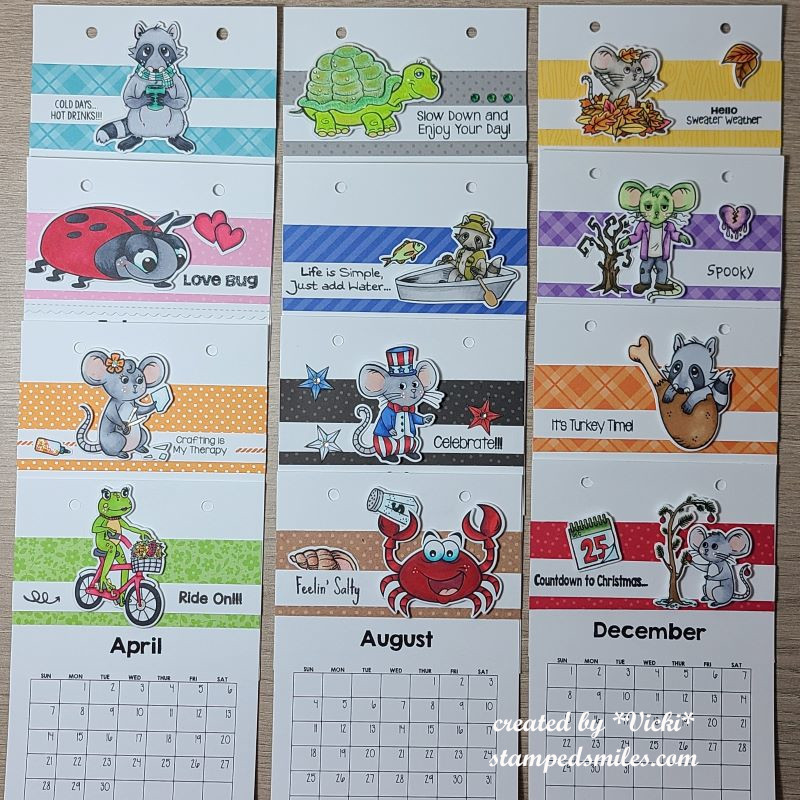
And I also wanted another calendar for my computer area which also brings a smile to me each month! I bought a calendar set last year from Inky Stamper and really enjoyed flipping the cute characters each month as the year went on. Happily, she came out with another new calendar set for this year and I happily purchased it BEFORE it ran out! (So sadly, it sold out quickly!)
With these calendar kits, the stand, the monthly calendar cards as well as all of the pattern paper strips, stamped and die cut characters and sentiment strips ALL come with this kit! I think it’s a pretty good bargain for all that was included with it. Of course, you have to color and put together each card…but THAT’S what the fun is about!
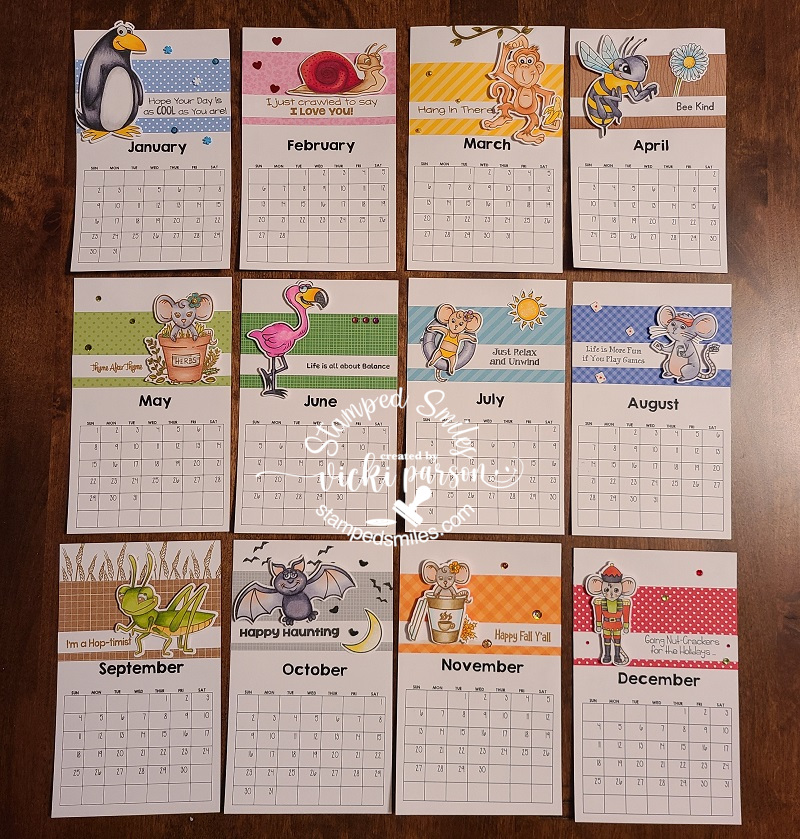
And here’s a look at the entire set of calendar cards that I colored and put together. There were instructions for each card along with the Copic markers used in the examples. For some of the cards, I already owned the stamp set, so I added a few extra details to some of them and I also added a few of my Inky Stamper Gems and Sequins mixes to some of them. Square dots and a strip of gold enamel dots were also included to decorate with.
So, I had an awesome time putting this one together as well! I look forward to seeing every single month throughout the entire year!
Since I had a couple of left over Taylored Expressions 2022 Tear-Off calendars, I thought it would be fun to just create a “calendar card stand” for crafters and give them out to whoever wants one!
EDITED UPDATE: All of the calendars have been claimed! Sorry if you’re looking to get one as I have no more left. Hope everyone enjoys their calendar all crafty year!
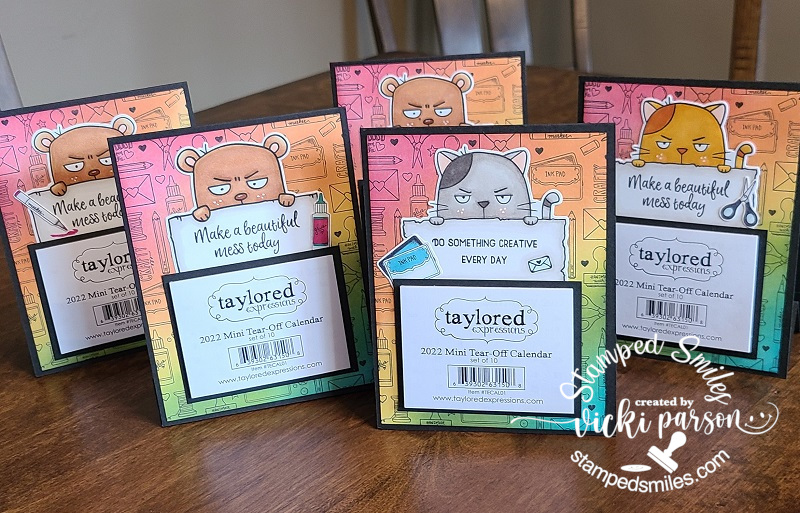
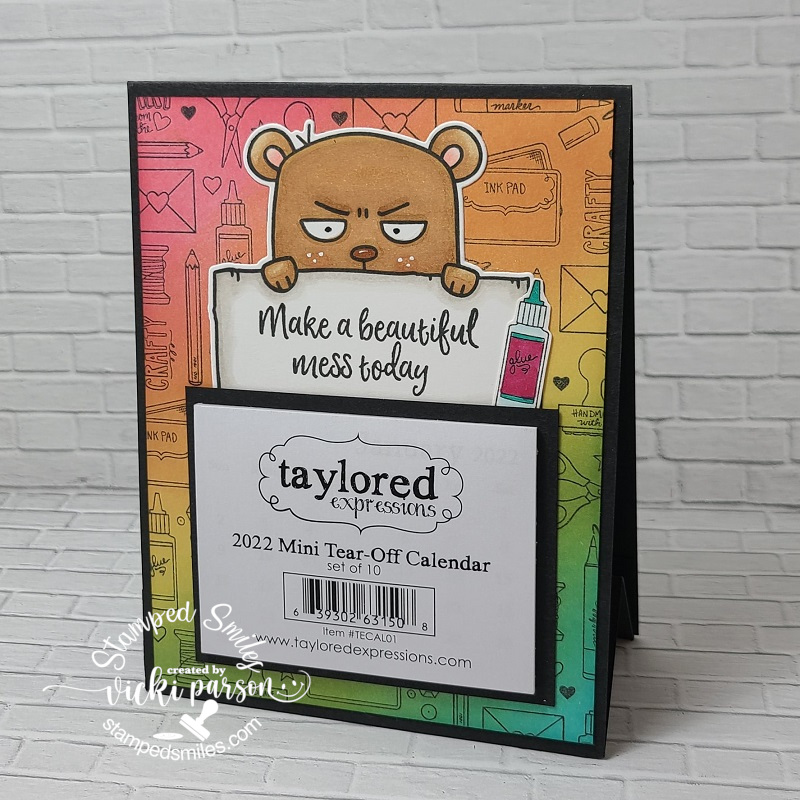
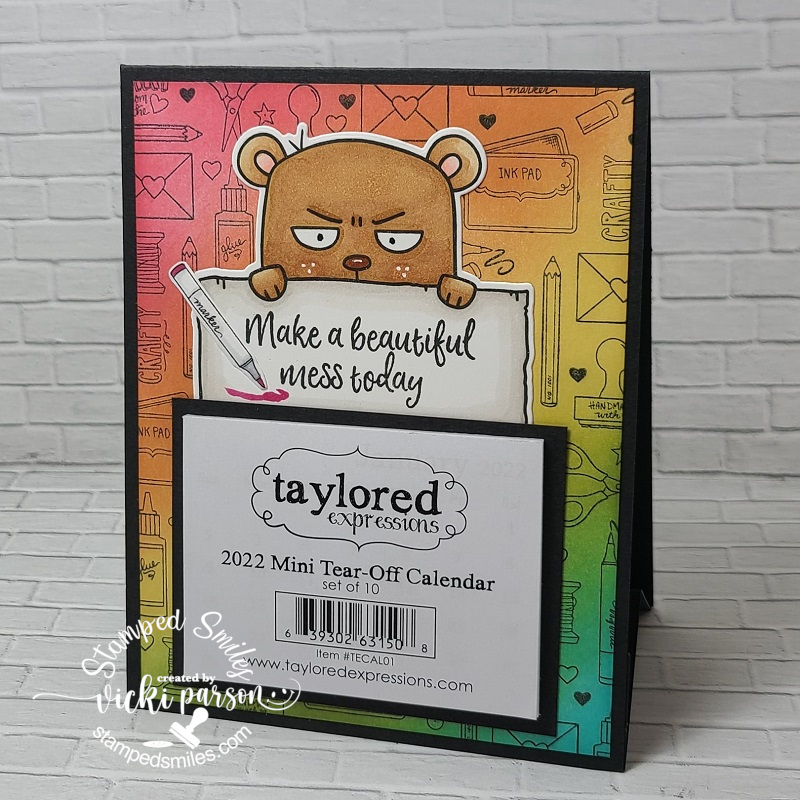
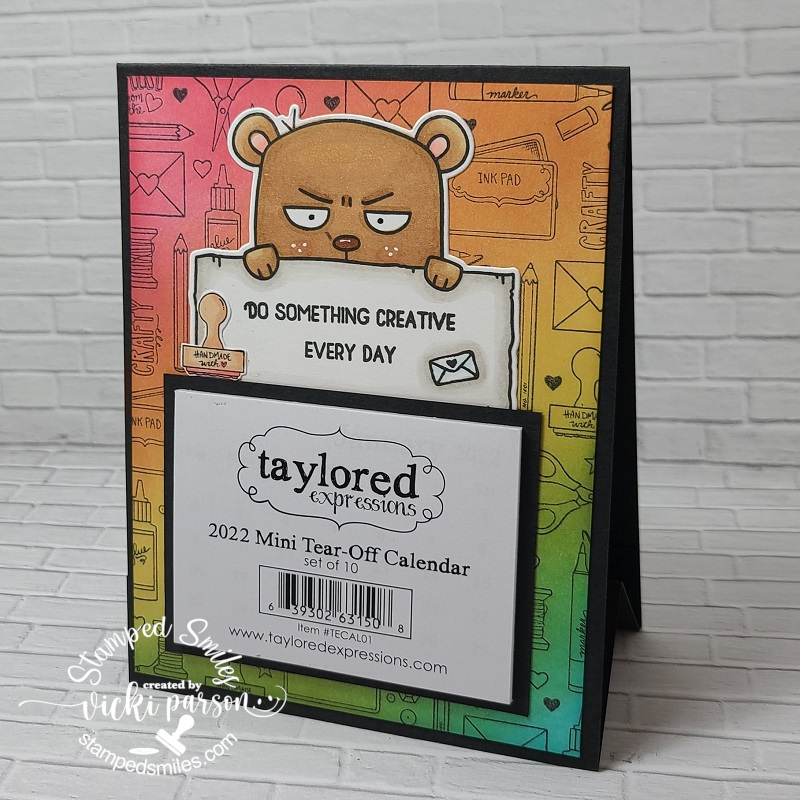
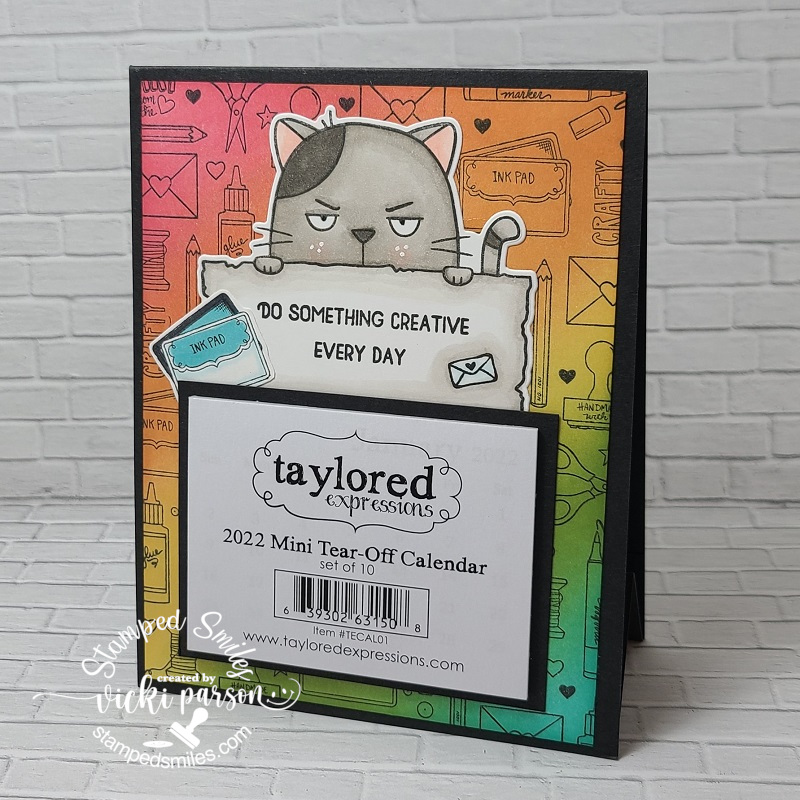
So, I had 5 of these calendars left over and I knew I wasn’t going to use them, but of course I didn’t want to just throw them out either! So, I took the TE Big Grumpy Bear and the TE Big Grumpy Cat sets to help motivate a fellow craft friend throughout the year! TEE HEE! I’ve made a rainbow-colored background for these by taking the TE Art From the Heart background stamp and stamping it with black over a white piece of cardstock. I used some TE ink and blender brushes to blend in the rainbow colors. I stamped an extra background image to color in some of the images and fussy cut them out for accents.
I attached the “Grumpies” over the background and layered the calendar with a black layered piece behind it to go over top of the “Grumpies” with their “feet” underneath so you can see them. I then added the fussy cut out images that I colored in a corner of each one.
I made a “stand” for this by creating a valley fold piece to attach in between the top folding A2 black card base. This will make for a permanent stand to display your calendar through the year! (And hopefully motivate someone’s crafty process throughout the year) I receive so much inspiration from many of you crafty friends, so it would be nice if I could possibly reciprocate that in some way!
Check out each one of these calendars I’ve made below in detail! Just click on the photos to enlarge them if you’re on my website:
Grumpy Bear with glue bottleGrumpy Bear with markerGrumpy Bear with stampGray Cat with ink padOrange Cat with scissors
So now that we’ve got the year started and in place, let’s hope for a really creative and productive one ahead!
I have some more craft projects that I’ve been working on as well as a really BIG craft project that I’m taking on for the love and excitement of it all! I look forward to sharing with you soon!
Thanks for stopping in and I wish you a happy, healthy and productive rest of your week!
Challenges:
Sweet Stampin’ – NEW (stamped New Year calendars with new products!)