It’s Christmas Eve and it’s almost here! Wishing everyone a very Merry Christmas! Hope that you enjoy the warmth and excitement of the season with the ones you love.
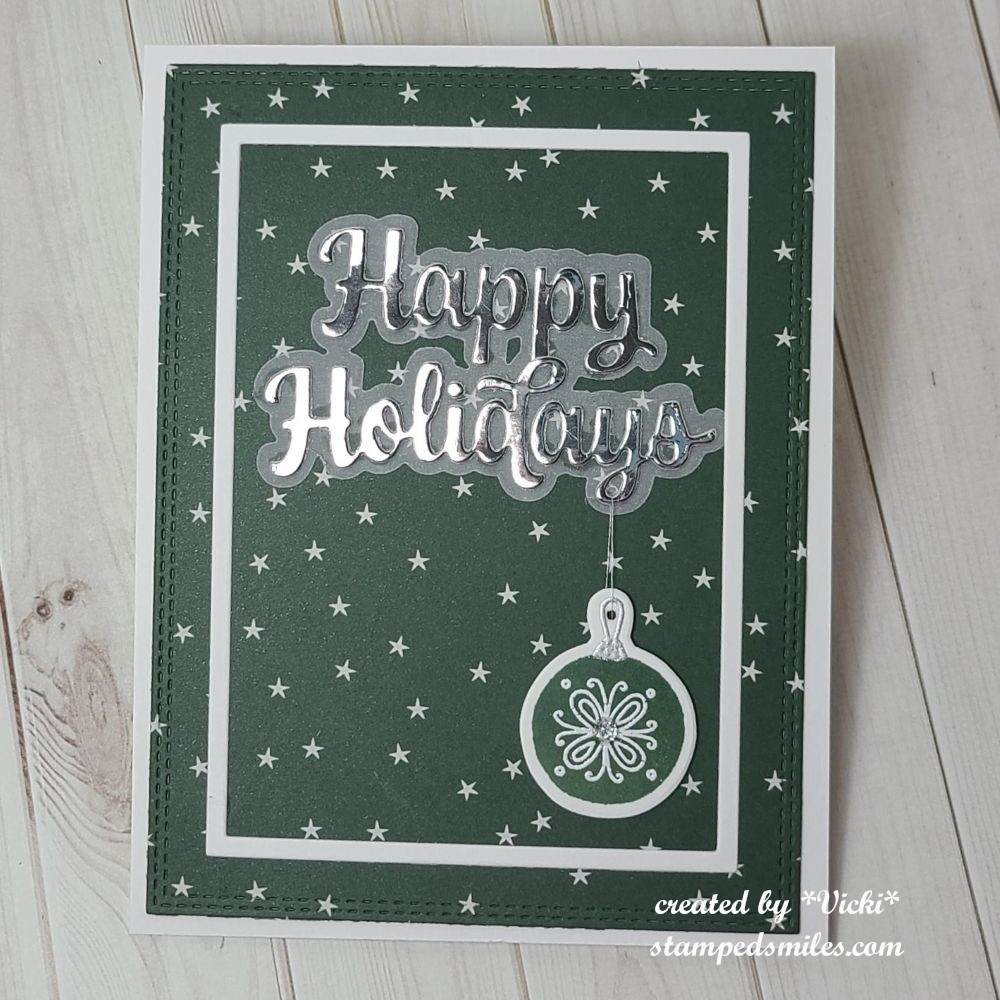
This is a Christmas card I had made last month using some Scrapbook.com products that I wanted to try out! If you take a look at THIS POST, there is another card version using this same ornament stamp set. I had gotten the Holiday stamps and dies plus papers and other die cut sentiments in a bundle.
- On another note, I had made a set of 18 other Christmas cards that I totally forgot to take photos of and they’ve already been sent out! I like how they turned out and was happy to use some more papers from my stash anyway! LOL
I had also been making some Christmas here and there throughout the year that I did remember to take photos of and that I didn’t share here on my blog, so here are some more:

This was a fun mitten shaped snowman gift card holder/tag I made back in January. I think I may have already given this out too. That was a while ago, so don’t remember much about it!
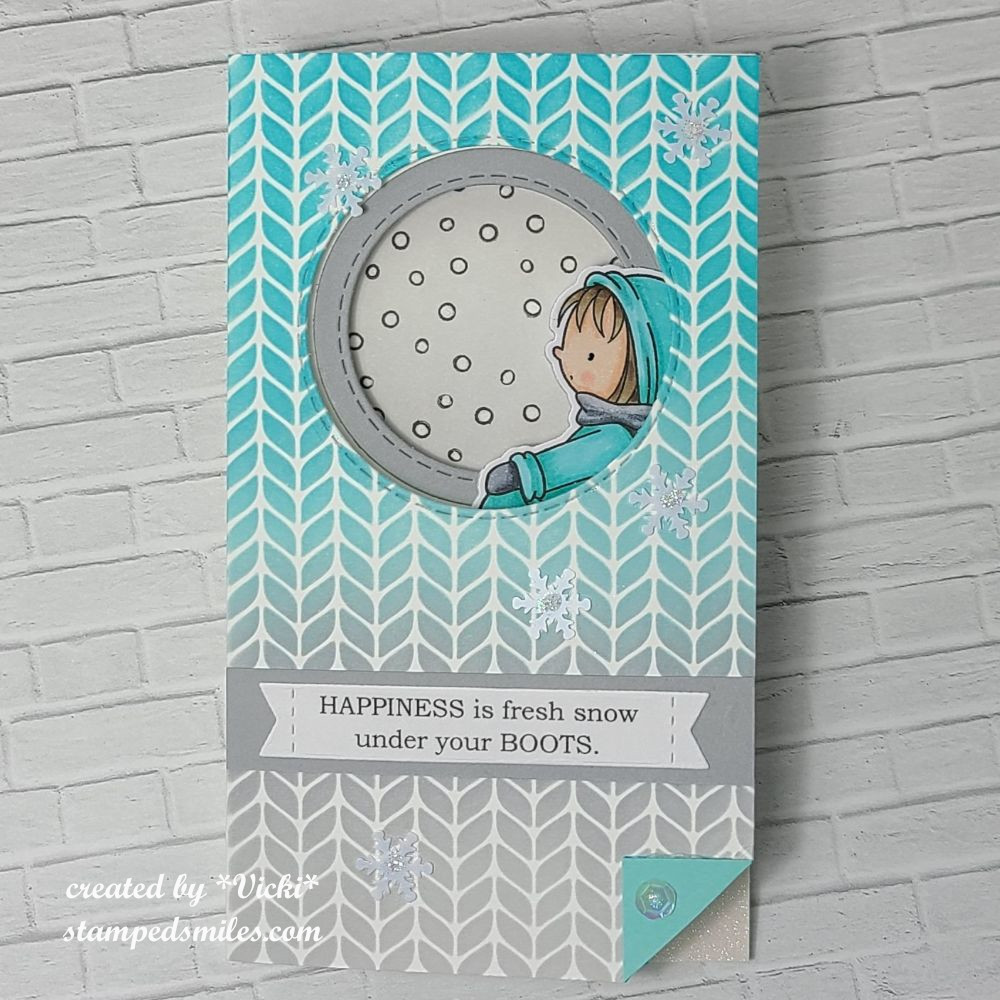
I made a slimline style tri-fold card in February using a My Favorite Things image (the little girl). I ink blended a stencil on the front and the sentiment was printed out on the computer. The photos below are what it looks like when you open the card up:
- Click on photos to enlarge if you’re on my website
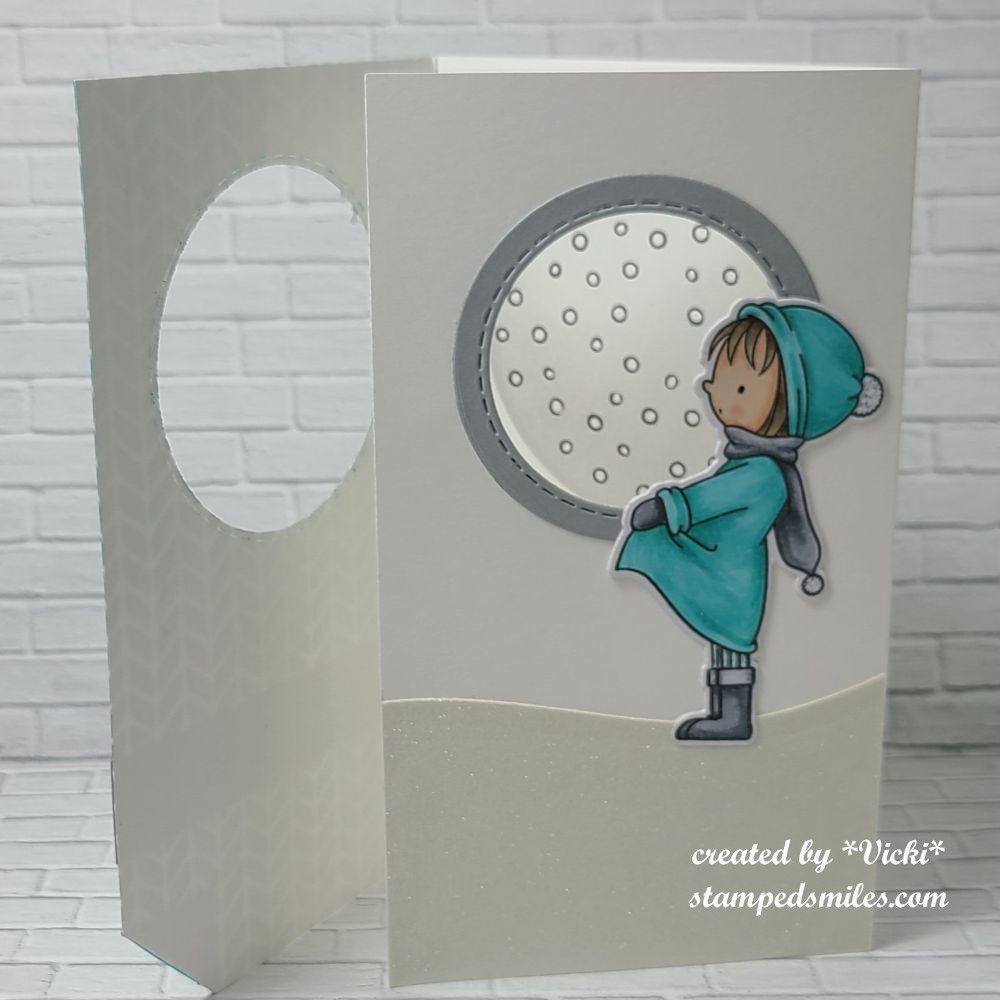
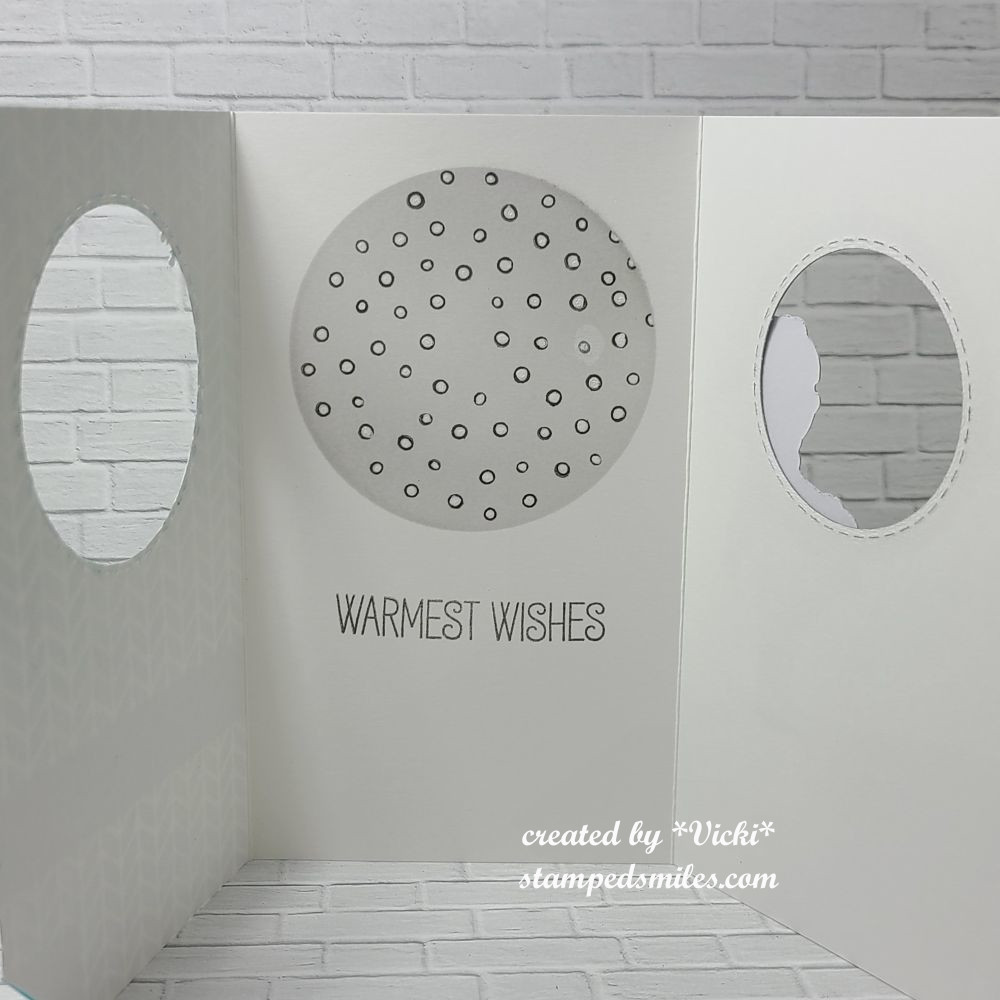
I used a circle die to cut the openings and added a snow drift from glitter cardstock for the girl to stand on, on the inside panel. The last inside circle panel was stamped with a snowflake stamp and I colored the snowflakes with a white gel pen and then added a stamped greeting underneath it.
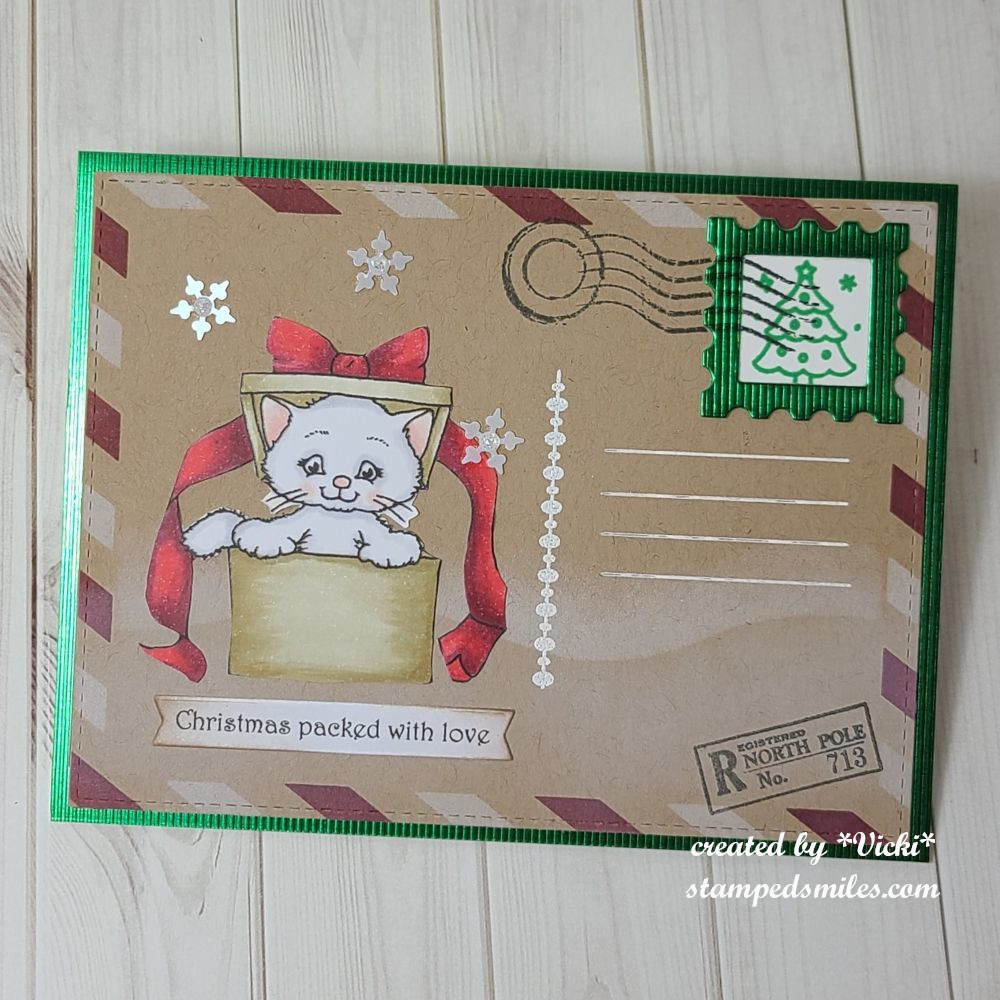
This is an actual greeting card that opens up, but I made the front of the card look like a post card with the stenciled edges and post markings on it. I made this one last month.
I colored up this digital image from Whimsy Stamps and hand cut it out over the card. The sentiment was printed from the computer and cut out as well.
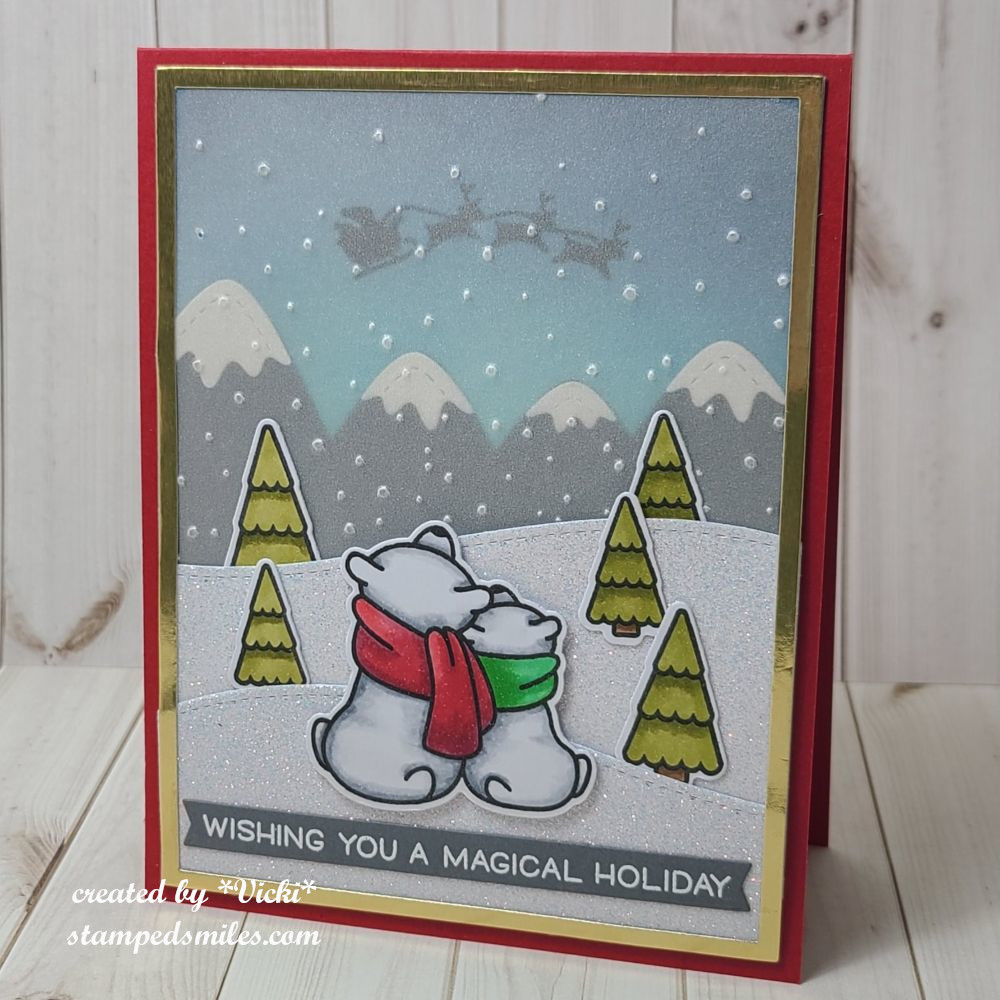
Another card I made last month using one of my favorite Lawn Fawn stamp sets called Winter Skies. I also used the Stitched Mountain Borders dies for the background.
I ink blended a couple of blue colors for the main panel in the background, stamped the Santa and sleigh image in black and then arranged the mountain border. I added a piece of vellum and used a falling snow embossing folder over it before adding the snow hills with glitter cardstock over it. I covered the edges with a gold mirror cardstock frame and added to the red A2 top folding card base. I colored, cut out the critters and trees and placed them on the scene. Lastly, I white heat embossed the sentiment from the set and cut out with a banner die to place under the critters.

I almost forgot to take a photo of this one too, but it’s now hanging on the tree before it gets gifted.
I had to make a handmade ornament for my grandson’s first Christmas! It’s actually a wooden shaped ornament that I painted the back red and the top/sides in gold acrylic paints. I then used some snowflake paper and covered the front. Then I turned this into a shaker by adding an additional circle with acetate on the front. The Santa comes from a Doodlebug stamp set and the lettering was printed from the computer that I hand cut and added to the front.

And this is the little guy at Thanksgiving with me! Love that toothless smile! Looking forward to spending some time with him at Christmas for sure!