Friendly SWAPs

Hello friends!  The weather has been really nice over my way so I’ve been taking advantage of it by enjoying the outdoors before it starts changing into more chilly temperatures.  All of the prize winners have contacted me and the packages have all been sent out.  I have received notice that the U.S. winners have gotten their packages and hopefully the overseas will be arriving soon.  My thoughts are also with those that were affected from Storm Ian and hope for healing and recovery as soon as possible.

Although it’s been a while since I last posted, I have been working on some things for SWAPs and a few other cards that I had created as well to share with you.

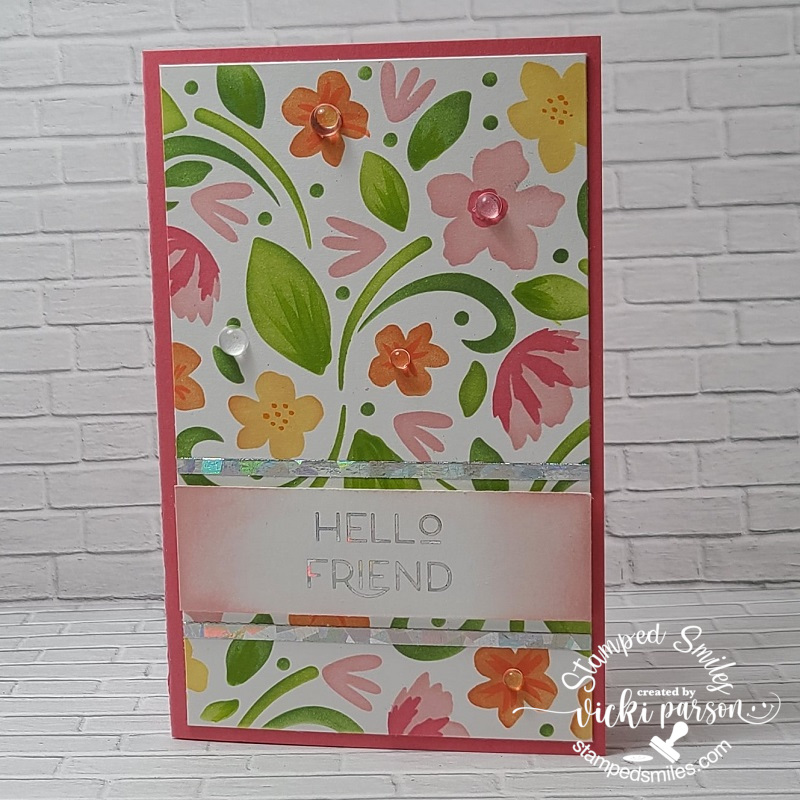
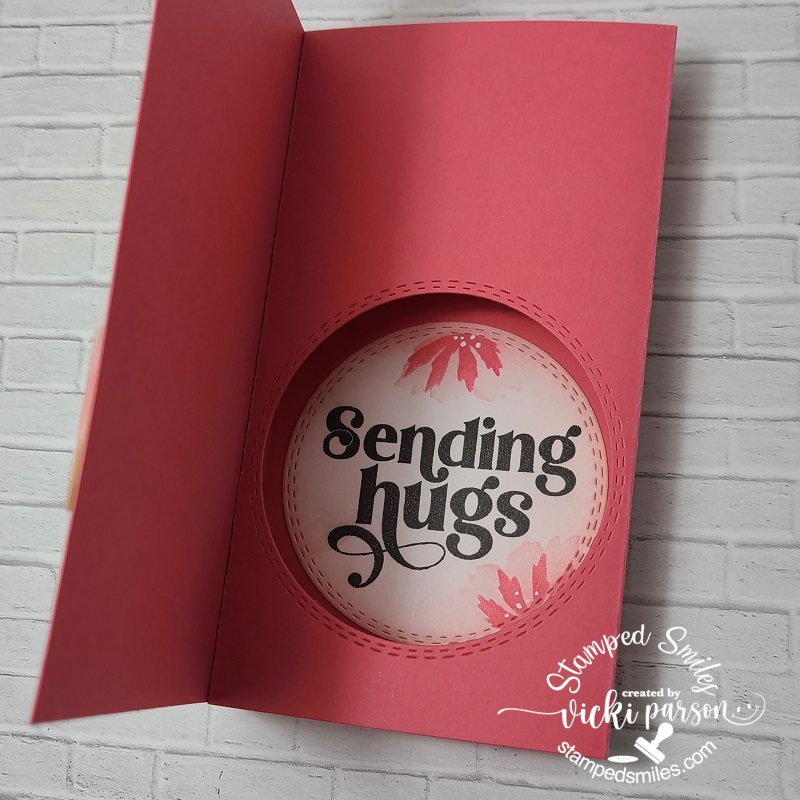
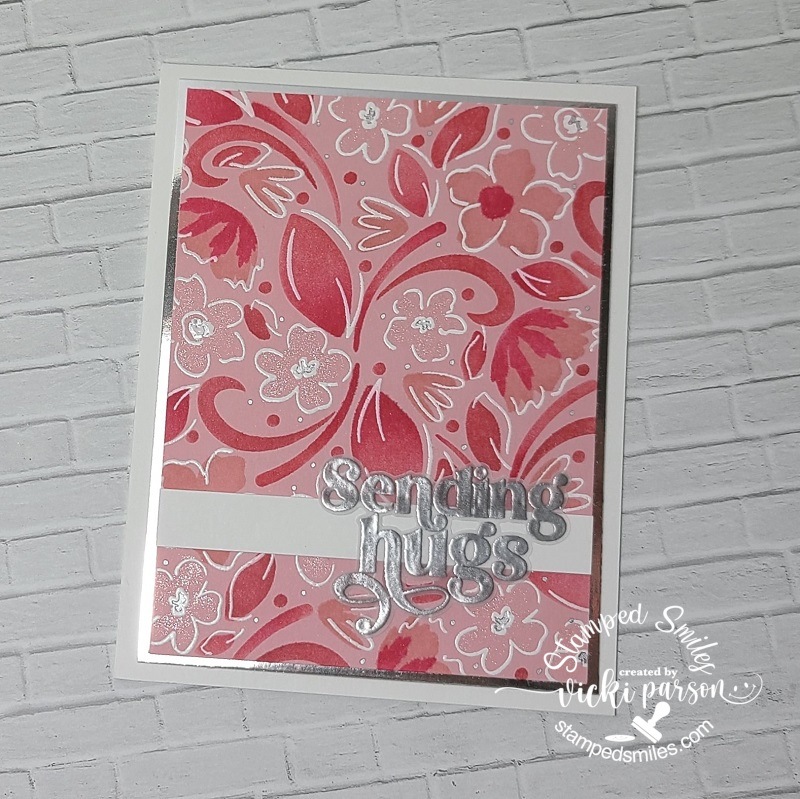
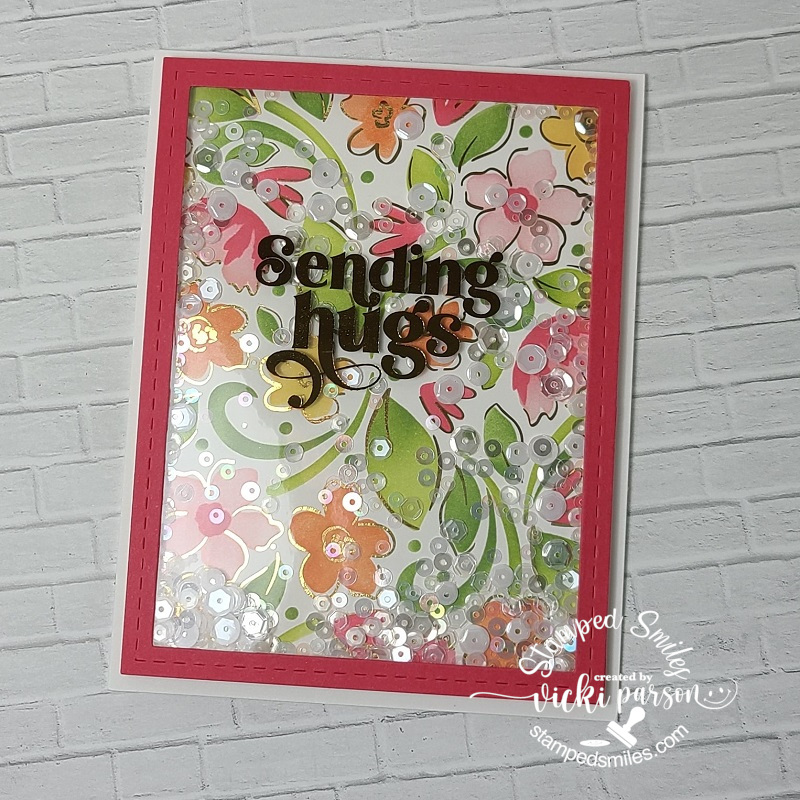
  • please click on the photos below to see them close-up

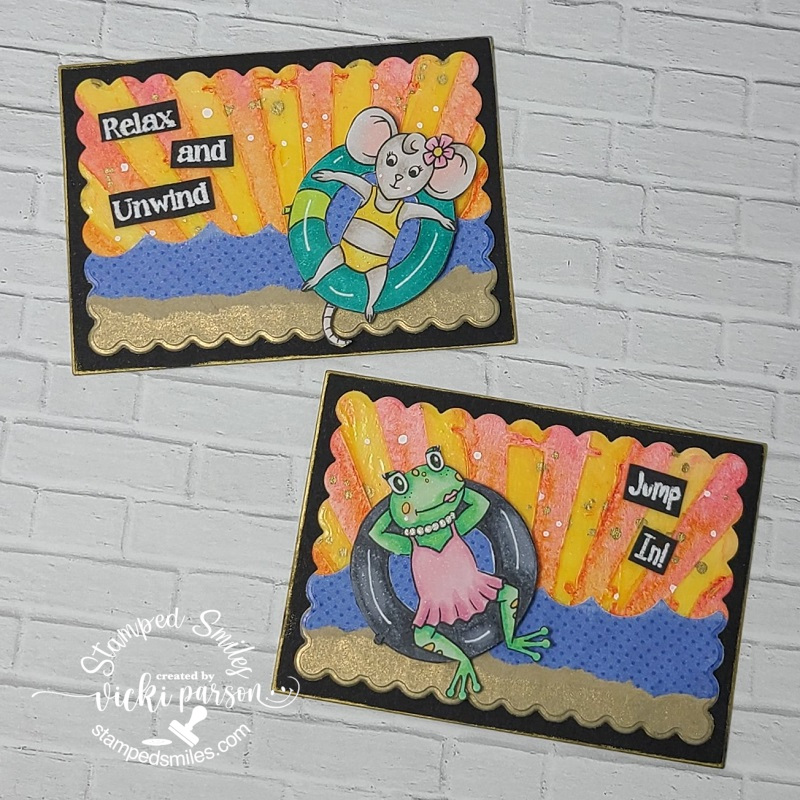
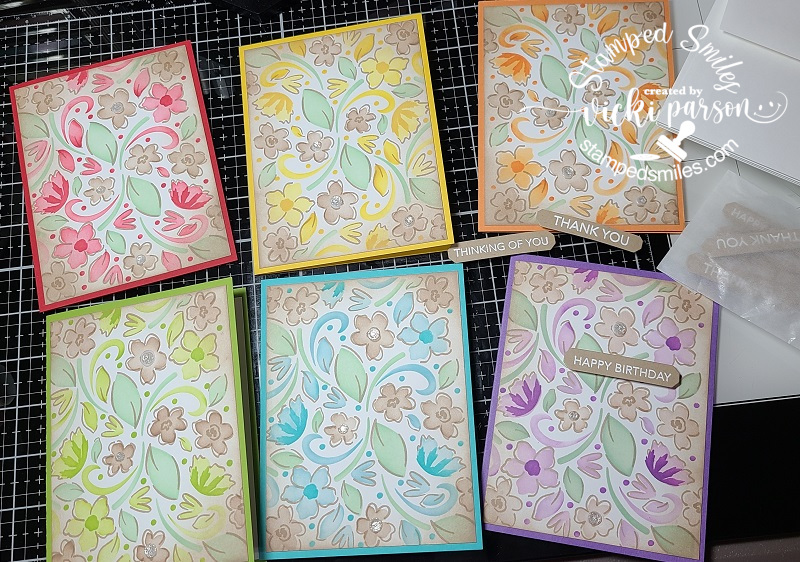
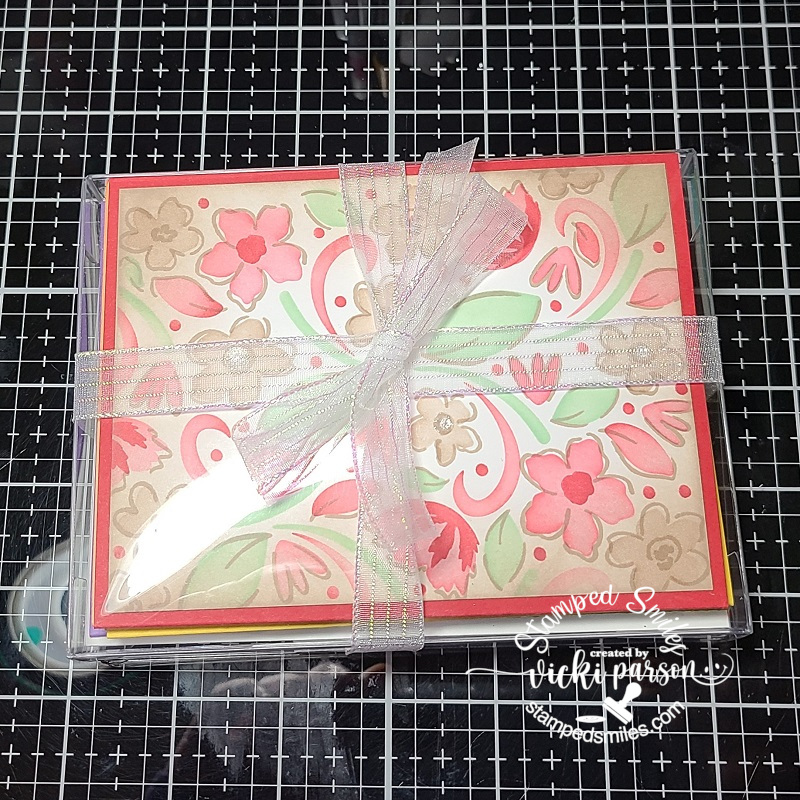
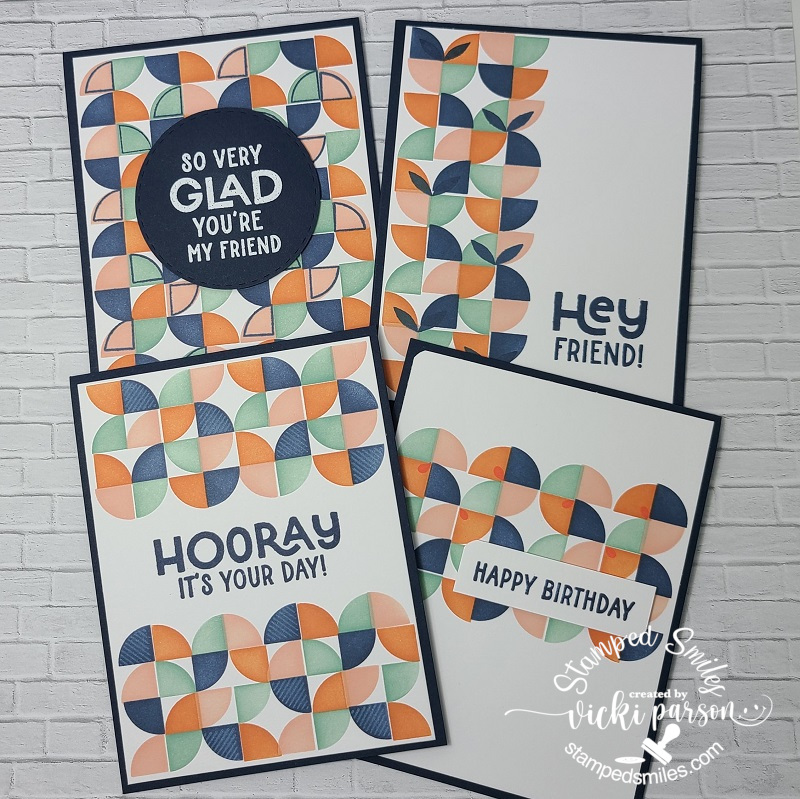
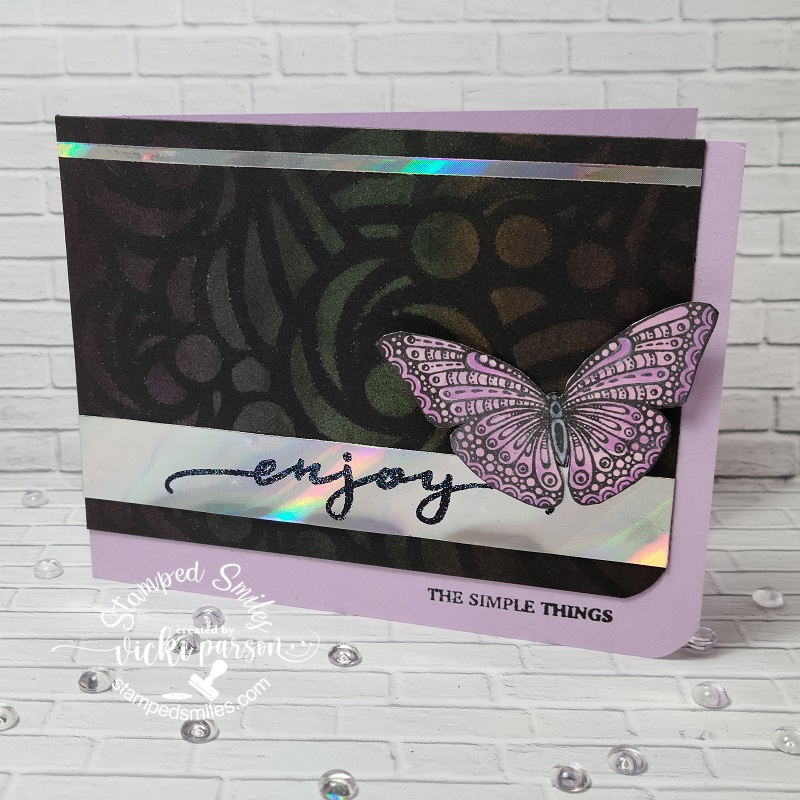
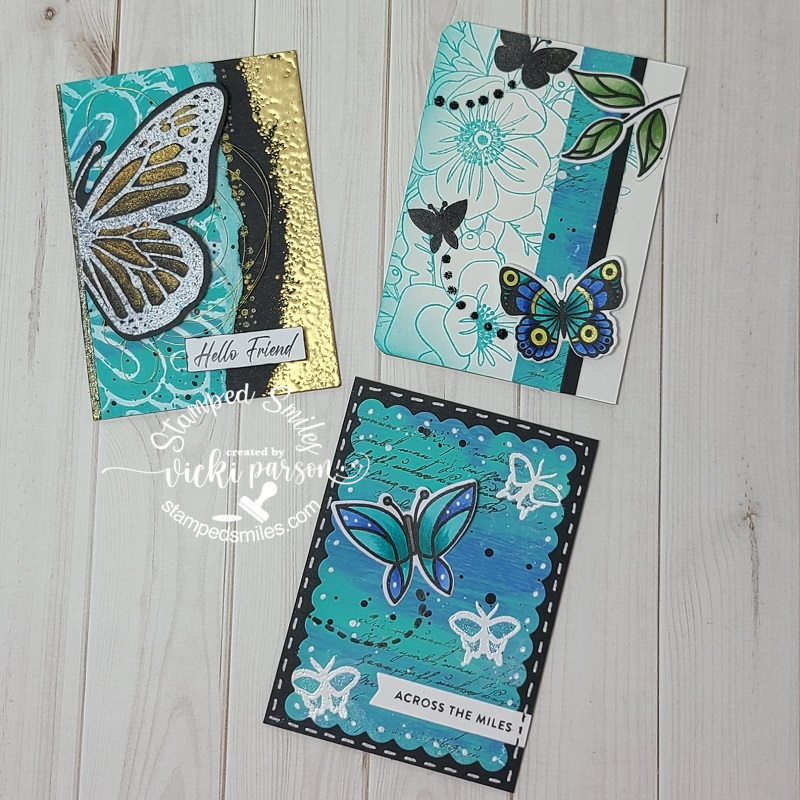
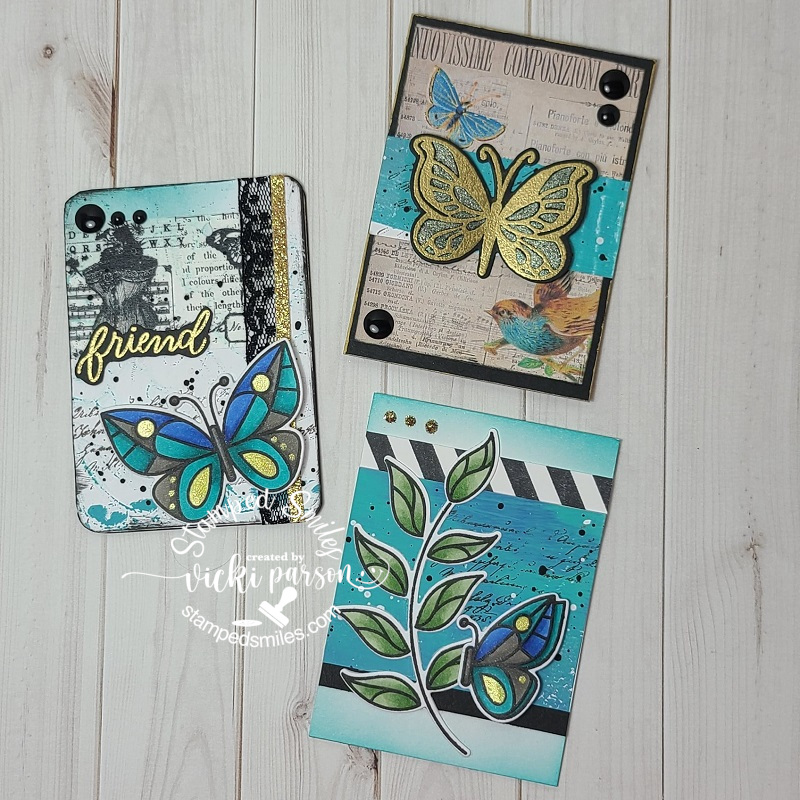
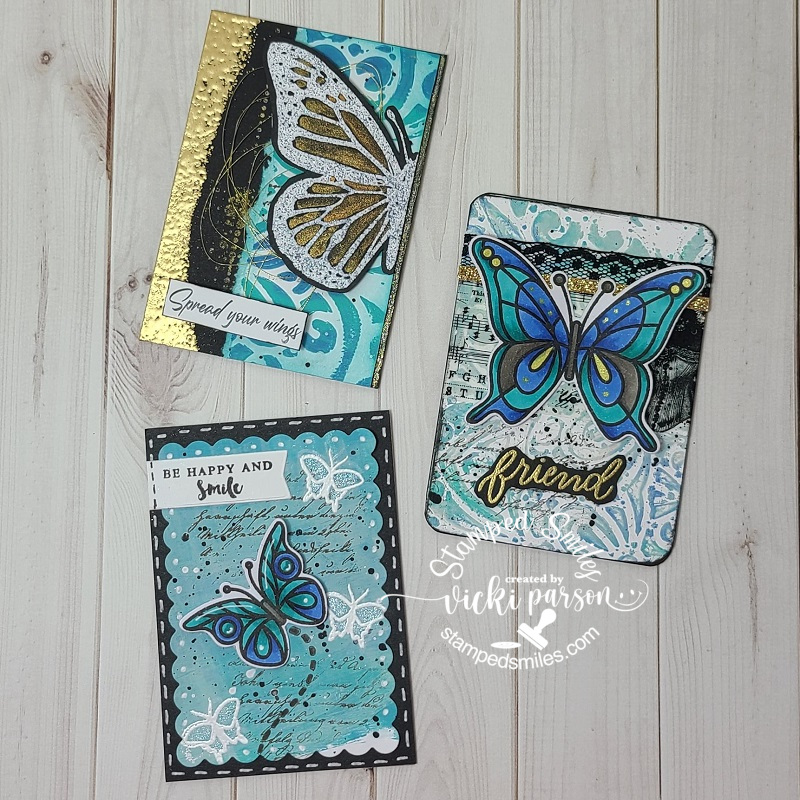
Within a FB Group that I’m in, we could choose to join an ATC SWAP with the theme of “Friendship” and these are the cards that I had created.  I swapped with two others and then kept one set of three for myself.  I was excited because this is the first ATCs I’ve sent overseas and really enjoyed making the collection.  I thought the butterfly theme with similar colors would work keeping the “Friendship” in mind… 

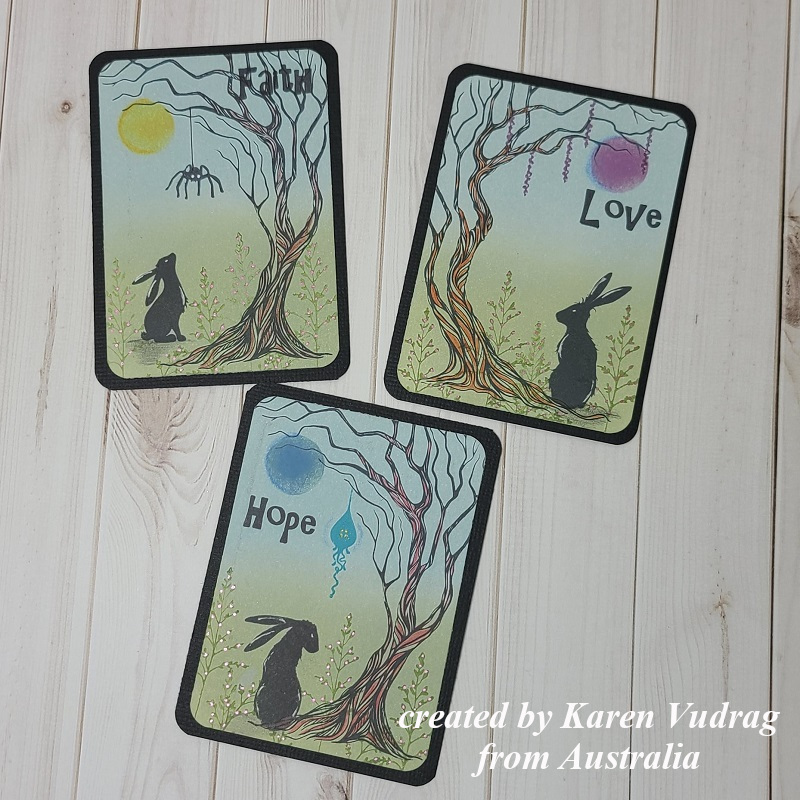
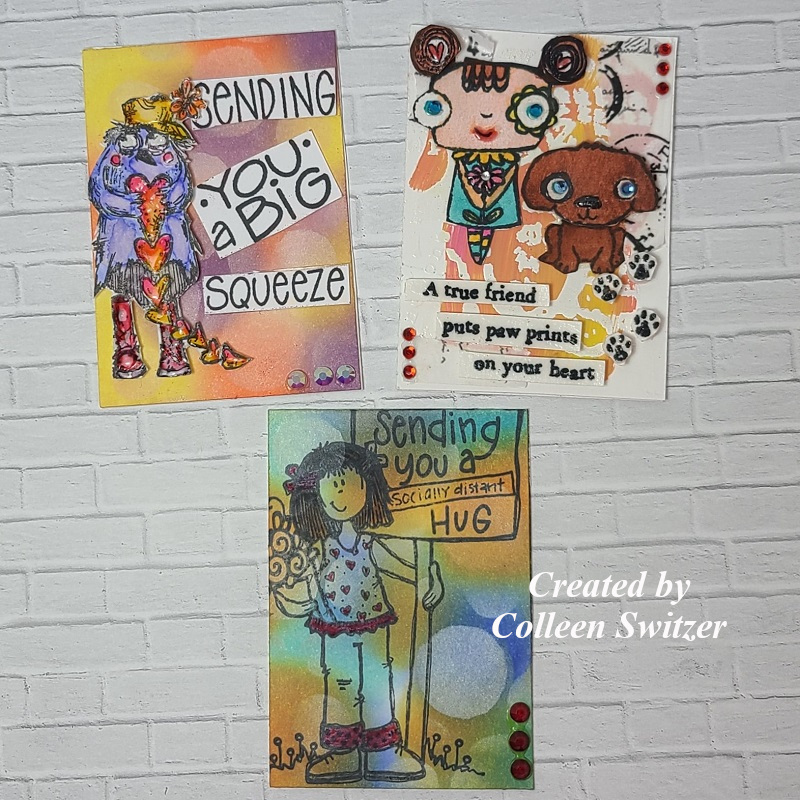
And then below are the set of ATCs I’ve received from my SWAP partners in return.  The first lady sent her ATCs from Australia and the other lady was from the UK I believe.  Love them and was excited to receive them to add to my book.

I was also involved in another “Stamped Sampler SWAP” making those squares like I had done with my Summer one if you remember that with my friends Patti, Shirley and Donna.  This time our squares were the theme of Autumn/Fall using the Stampin’ Up! colors Pumpkin Pie and Mossy Meadow.  It’s so fun to see them come in and then put it all together in the frame!  Here’s how mine finished out:

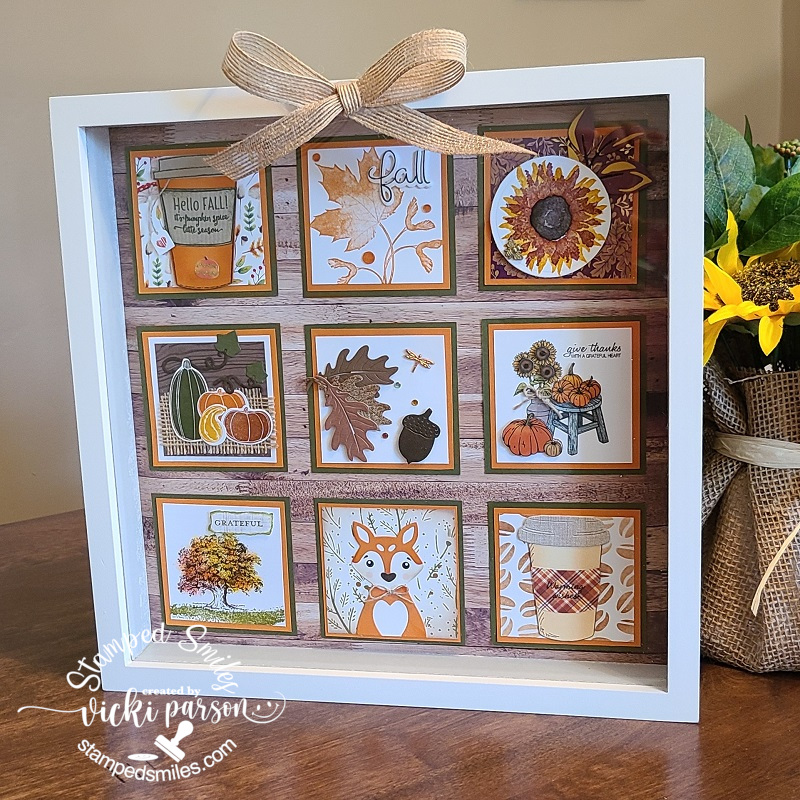
For my Sampler frame, I used some different colored woodgrain pattern paper to attach the squares to and this frame is a bit different than my Summer Sampler (Check it out in THIS POST if you want to see that one.)  It can stand on a table surface or you can hang it up.  I also decided to add a burlap bow at the top of the frame using a hot glue gun.

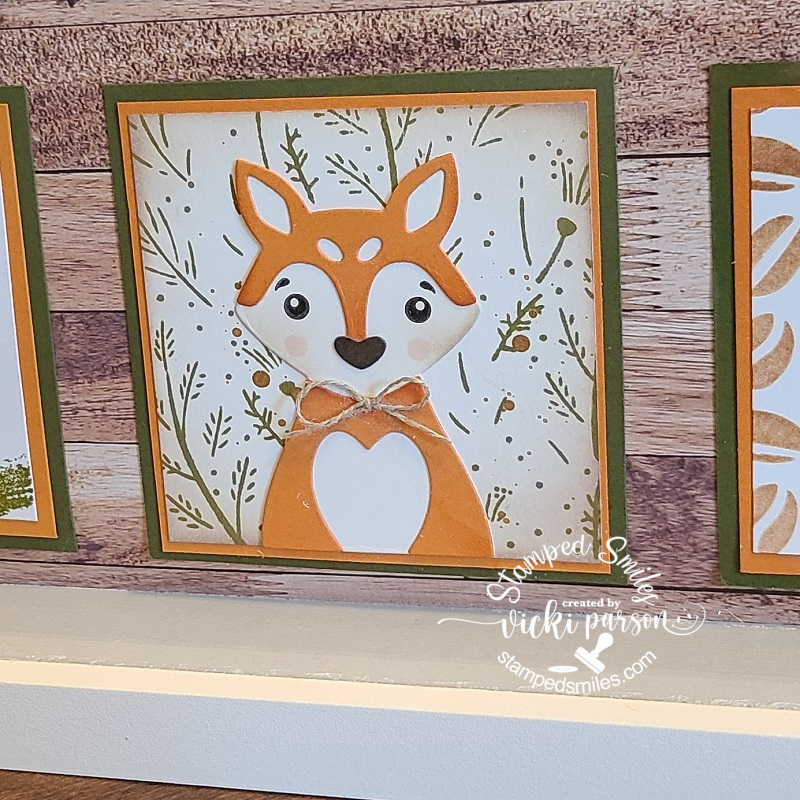
This is the Sampler Square that I had made using the adorable fox from the Taylored Expressions Woodland Squad Die & Clear Stamp Combo set.  The background was stamped with the TE Four Seasons Stamp & Stencil Combo set using ONLY the background stamp in one color.  I then using some gold acrylic paint to splatter over it.  I also added a twine bow to the fox.  I believe we’re going to be doing another one for Winter too…stay tuned!

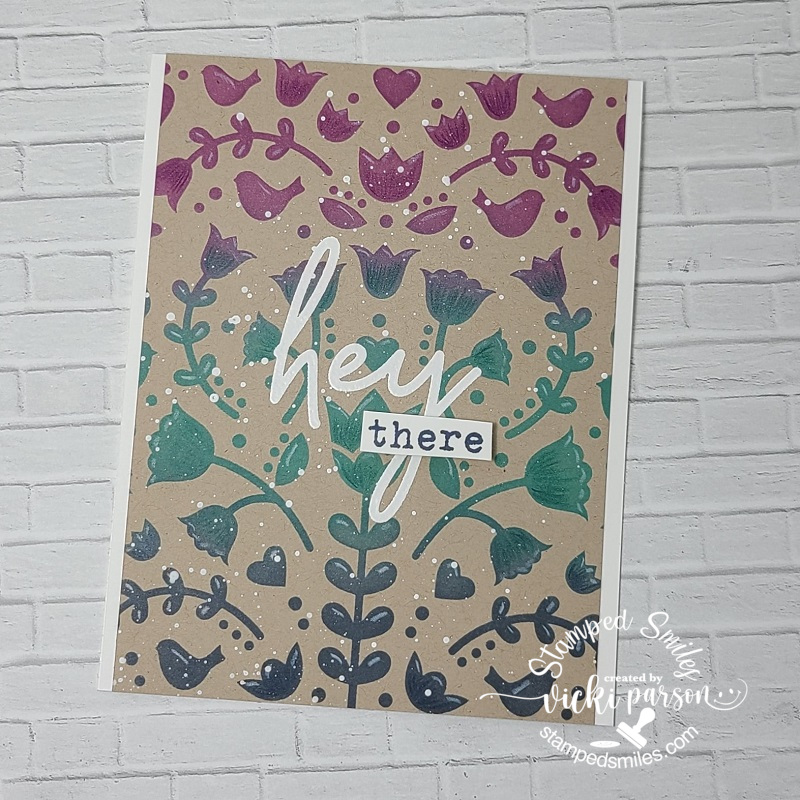
My friend Patti had also sent me an extra card kit from one of her classes along with her SWAP square, which I thought was so nice…so I had some fun putting it together as I don’t have this set which I believe is a Stampin’ Up! one.

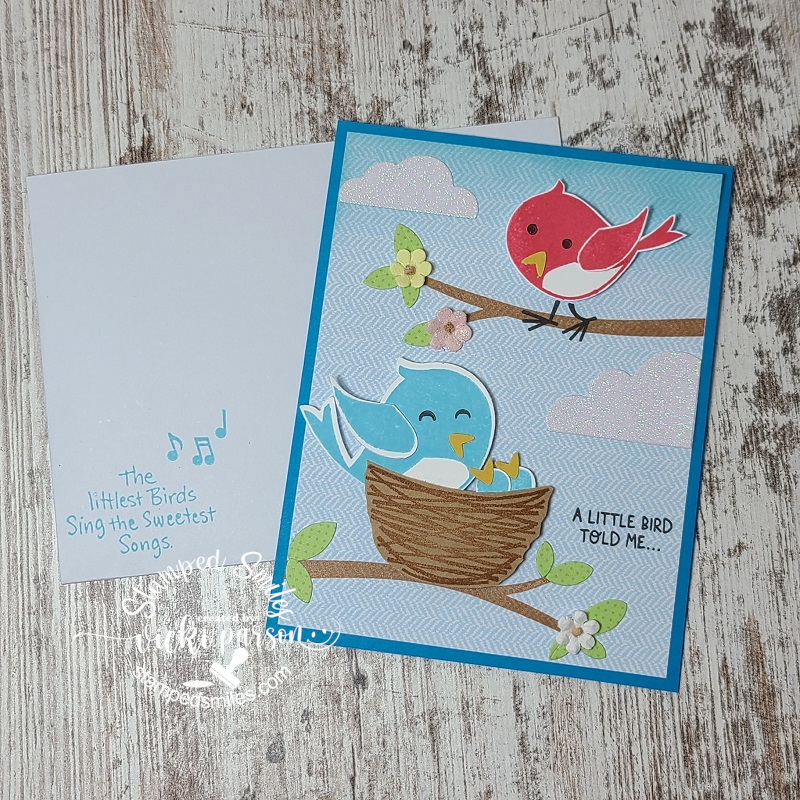
The card kit had all of the pieces in it along with the stamped birds cut out, the stamped branches and sentiments (even on the included envelope) along with cut glitter clouds and flowers!  There was a sheet with photo and instructions so I just followed along except I die cut some leaves for the branches from a piece of scrap green paper I had.  Now I have a cute little birthday card ready to send out, so thank you for the fun Patti!😉

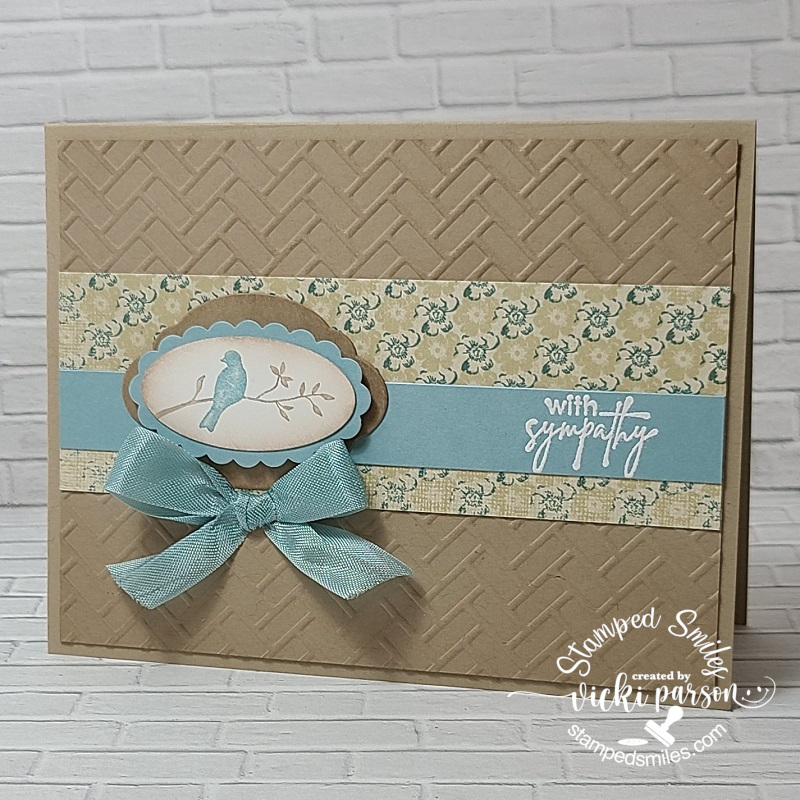
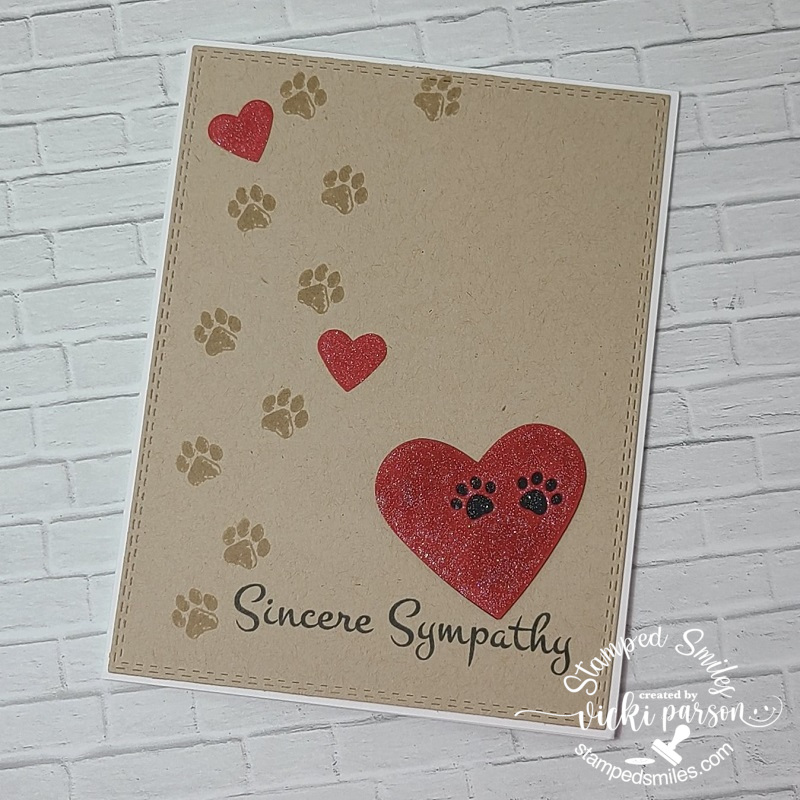
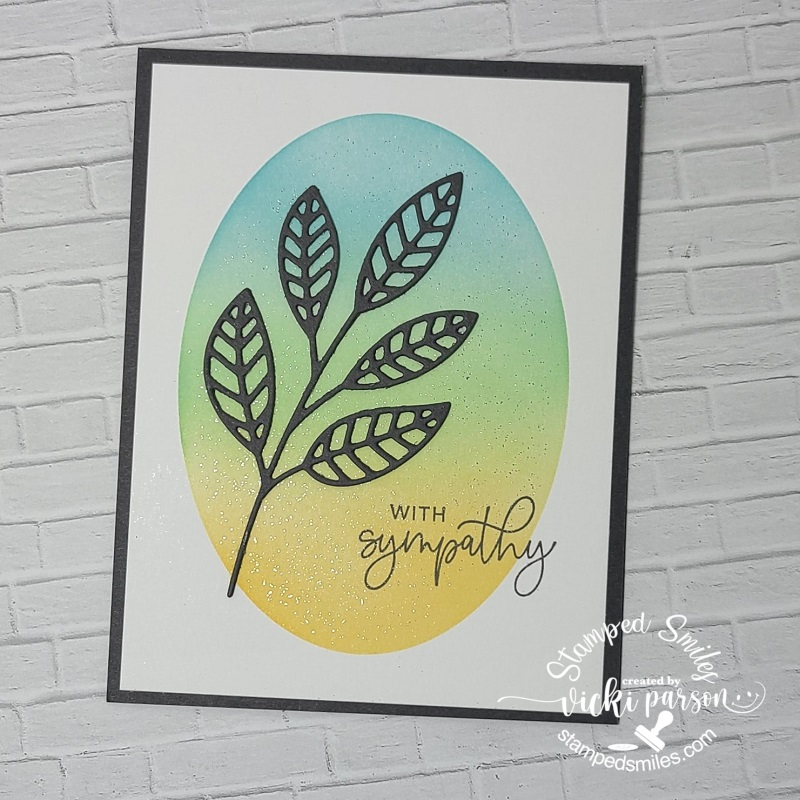
And speaking of birds and Stampin’ Up!, I had to make a sympathy card for someone that lost their pet bird.  I was looking through my stash and found an older Stampin’ Up! set with a bird silhouette which I thought would be good for a sympathy card like this.  I was inspired to pull out more of my older Stampin’ Up! stash to use so I used some old punches, ribbon and paper for my card as well.

I hope you’ve enjoyed the inspiration today and I thank you so much for stopping in!  If you have any questions about my post, please let me know.  Have a great day and see you soon!

Challenges:

  1. Lil’ Patch of Crafty Friends – Anything Goes (Bird sympathy card)
  2. The Corrosive – Anything Goes (Butterfly ATCs)
  3. Crafty Animals – Anything Goes + animal (Fox Square and/or Bird sympathy card)
  4. Fab ‘N’ Funky – Embossing wet/dry (Bird sympathy card)
  5. Creative Knockouts – Anything Goes (Butterfly ATCs)
  6. Sweet Stampin’ – Anything Goes EXCEPT birthday (Bird sympathy card)
  7. Ally’s Angels – Anything Goes (Butterfly ATCs)

ATCs, Greeting Card Gift Set, Pet Sympathy and Class Results too!

Hello friends!  It seems that I have went MIA on you, but I promise I’m still here!  I’ve been really busy “Behind the Scenes” as they say and have many things going on at once that I’m trying to juggle, but I do have TONS of things to share that I’ve been doing and hope you enjoy seeing them!  (LOTS of photos!)

First up I have a couple of fun Summer themed ATC sized cards using some Inky Stamper sets called “Splash” and “Chaise Lounge“.  (Still not wanting to warm up much for Spring…so I’m wishing for HOT summer now!😁) I made them for this month’s theme of “ATC sized or mini cards” challenge in their FB group.  I started out with a sunray stencil and used some yellow glaze paste and once dried I added some watercolor over it which was resisted by the glaze which gave me this look for the background.  I splattered it and then added some strips of blue dotted paper cut from a wave border and then I ripped a piece of gold at the bottom.  I cut cut with a scallop die and layered over a black 2.5″x3.5″ piece of black cardstock folded in half and went around the edges with a gold ink pad.

I white heat embossed the sentiments from each stamp set and then cut portions of them out with my scissors to attach over the backgrounds.  The images were colored with Copics, fussy cut out and popped up with foam tape over top.

Next, I wanted to share a “Greeting Card Gift Set” that I have made and gave as a gift for someone.  I used this wonderful product idea from Taylored Expressions called “Stamp & Give Card Kit 1” and it’s something that I had wanted to put together for a very long time on my own, but this product came along recently which pushed me into gear with no excuse of gathering things together on my own as this was already together for me.  All I had to do was do the stamping and stenciling.  I coordinated the colors with what was in the set.  I like the fact that the recipient of this give set can choose which greeting they want to use for each card and the package of greetings are ready with a foam strip on the back of each one.  For my designs, I’ve used the TE “Floral Flurry” Background stamp and stencils which I received from the “Stamp Joy Virtual Event” that I had attended. (not in store as it was exclusive for the event…photos at the bottom of post for that!)  I’ve added 3 gems randomly to the fronts of each card.

With the kit, it comes with all of the envelopes, card bases, glassine bag to hold all of the sentiment strips, the card fronts and even the acetate box to put them all in.  I just added some ribbon once I put all the cards inside.  I certainly plan on doing some more of these greeting card gift sets soon!  I think it’s always nice to have a set of themed cards all together and ready to go when you need to grab one quickly!

Unfortunately, next up I needed a pet sympathy card and I thought you could never go wrong with paw prints and hearts.  I’ve kept this simple and pulled out some favorite Whimsy Stamps “Fill My Heart” and “Furever In Our Hearts” stamp sets for the paw prints and the sentiment. I’ve also used the My Favorite Things “Paw Prints Die-Namics” to die cut a couple of paw prints over the heart that I’ve punched out from red cardstock along with some smaller hearts above it.

I’ve used a glitter brush pen to make the hearts sparkly looking.  This was all done over a kraft colored card front that was cut with a double-stitched rectangle die and placed over an A2 sized white card base.

I really need to get a set of pet sympathy going so that I already have them on hand as needed because it seems like I’ve sent many out and don’t have anymore…and I need another one already.  I actually need to make sure I have several sympathy cards in general on hand, so I know I’ll be replenishing that soon too.

____________________________________________________________________________________

And lastly, I thought you might want to see all of the projects that I made during my classes and make-n-takes that I’ve done during the Taylored Expressions “Stamp Joy Spring Virtual Event” from last month…gosh, It’s been that long already and I’m just now posting them!🙄

The first four cards were from the classes on the first day (using the same product/style line), and the others are from the second day with all of the Make-n-Takes.  If you’re visiting directly on my website, just click on each photo below and it will enlarge so you can see it better along with the typed details about it!  

I’m really far behind in catching up with whatever the challenges currently are as well as seeing what’s going on with my fellow blogging friends, so I will get going as soon as I can!

Thanks so much for stopping in and I’ll see you soon!😘

Galaxy Powders with LOTS of projects + video!🚀⭐

Hello there friends!  I’m a tad late with my post today, but I ended up hurting my shoulder and it was a bit hard to get on the computer to type things up! LOL!  I tihnk I’ll be able to recover a bit over the weekend…I hope anyway!

So today, I’ve pulled out some media that I hadn’t gotten a chance to REALLY play with until now.  I had so much fun and decided to turn on my camera and do a video with it as well!  (I’m a bit rusty with video making as I haven’t done one for a while and hope to do some more in the near future!)

Here’s my play with the Galaxy Powders:

Vicki-BRMSpaceATCs

My first of projects here are ATCs!  Do you remember back in the day for the “older crafters” that we use to trade those ATCs at conventions and such?!  I loved getting them from people from other countries!  ATCs (aka: Artist Trading Cards) are 2.5″ x 3.5″ with info on the back to trade with other artists.  You could even transform these to place on regular cards, etc. which I’ve done before too!

I’ve taken a piece of Midnight cardstock and started playing around with these Galaxy Powders and also used an ATC kit for the chipboard backs and the rocket details.

To show how the Galaxy powders work up close, check out my video below!  I started by making the backgrounds and then I worked each background into finished projects…CLICK HERE if you want to see it on You Tube or just watch it below:

Sometimes it’s fun to sit and just have fun playing around getting crafty!

Vicki-BRMEnjoy

And for this card, I’ve taken the High Tide stencil and went over it on black cardstock and brushed over it with the Galaxy Powders.

I’ve used this butterfly from the Take Flight stamp set and attached it over the panel along with the sentiments.  That Mirrorstock paper is really stunning and a little bit goes a long way with that!  (You can check out my video for full instruction on how I put this card together too!)

Vicki-BRMSmileOn

My last project here shows how I’ve used the Galaxy Powders over a stamp!  I’ve used the Smile On stamp set for that.  It’s hard to see in the photo the pretty shine on it, so be sure to catch the video to see it in action!  I used a white pencil to highlight some details on the image too.

I used a stitched rectangle die to cut it out and then used a stitched scallop rectangle die to cut out a piece of white cardstock to layer behind it.  I used Kraft cardstock for the A2 sized card base panel and then used the Embossing Ink to randomly stamp the “smile face” image for the background from the So Emotional stamp set.

I also layered on a piece of the Sequin Sheets between the layers of the sentiment panel and white scallop layered panel to attach to my card and then I used some metallic clear ribbon over that along with a bow before popping up my main image panel with foam tape.

Hope you’ve enjoyed my projects today along with my video on Galaxy Powders and learned a few things about them!

Have a wonderful day and I’ll see you again soon!

Challenges:

  1. Crafting Happiness – #58 Anything Goes
  2. Pammies Inky Pinkies – PIP2029 Anything Goes
  3. Fab ‘N’ Funky – Use Real Stamp (no digis)
  4. Simon Says Stamp Wednesday Challenge – Reach for the Stars (ATCs)
  5. ATC ARound the World – Sun, Moon and Stars (ATCs only)

ATCs With Flowers, Rainbows and Stencils…Oh My!

Hey there friends!  Hoping you had a wonderful weekend and ready to start a fun week ahead!  Although we’ve been having some cool and rainy days this week, I know that some nice warm weather is on it’s way and I’m really looking forward to it and getting outdoors to my flowers!

For today, I have something a bit different that is not a card, but I think a really cool and fun way to experiment with different media and ideas…especially on a smaller “non-intimidatingly” way.  I’m talking about those ATCs (Artist Trading Cards for the newbies)!  It’s like a “fun size” candy bar in small bite form…these are like the “fun size” of the traditional A2 sized cards!  LOL!  They’re normally 3 1/2″ x 2 1/2″ which is similar to the size of a business card.  They’ve been around for years since I started stamping and newer to me are the round coin ones.  (I will attempt those at another time, I’m sure!)

I had a few challenges in mind and found some time yesterday to have a play:

Vicki-BRM-StenciledRainbowATCs-close

Rainbows seem to be a huge deal right now and I think there is even a special day dedicated to them!  I also was wanting to play with my crafty stash.

For the ATC on the left, I used the stencil and some embossing paste over a piece of watercolor paper and set aside to dry.  While that was dry, I cleaned off the stencil and used it on another piece of white cardstock and used my distress inks and ink blending tool to create a rainbow background for another ATC (right).  I ended up stamping the bicycle over it with black ink and then sprayed the panel with some shimmer spray.

Going back to the dry embossed paste panel, I took some Creamy Aqua Pigments and added rainbow colors at the top and then sprayed them with water and let it drip down.  I let the colors run and even left some white on there as you can see above.  I let it dry and then splattered some black watered down paint to splatter over it with a paint brush.  I then stamped the clouds from the same stamp set, fussy cut them out and popped them over the background.

On both ATCs, I white heat embossed the sentiments over black cardstock and cut them out with my scissors to place over top.  For the bicycle ATC, I added some metallic Fibers along with some flowers.  Part of the sentiment was popped up on foam tape for both of them.  One of the clouds was popped up with foam tape on the left one.

Super fun to play and create with!


I had made one early last month too, but never posted it, so I thought this would help fit it in for today:

Vicki-NeonshoesATC

Not really a “rainbow” theme, but this was sure fun to create and doodle around with!

For this one, I finally got a chance to play with my Neon Aqua Pigments! I used the “smoosh technique” with them for this background and let it dry.  Then I used some black embossing paste over the Wallpaper stencil.

I also stamped the shoes and colored those in with the Neon AP and popped it up with foam tape over a another piece of the metallic Fibers like I used on the “bicycle ATC” above.  I also took  glitter pen to go over the shoes and added a yellow rhinestone to it.  From the stamp stamp set, I took the sentiment and stamped it in black ink, fussy cut it out and layered it over some black CS and fussy cut it out leaving a border.  Each one glued over the background.  I took a black pen and doodled along the edges.

Vicki-NeonshoesATC-neonglow

And of course, when you shut the lights off and turn on your black light, you can REALLY see the fun and funky neon colors glow on it!!  Even this photo doesn’t do it justice because it looks so fun in person!

For my ATCs, I’ve been attaching them to Chipboard for sturdiness.  I also added the Artist Trading Card Labels for the backs of them.

Hope you’ve enjoyed my ATCs today and gave you a little inspiration to try one out for yourself!  But I have to warn you….just like those “fun-sized” candy bars, you can just have one!!  LOL!

Thanks for dropping in today friends!!  Enjoy your week!

Challenges: (For top ATCs only)

  1.  ATC Around the World – Flowers (Bicycle ATC only)
  2. Creative Crafting Uncles – Anything BUT a Card
  3. Creativ Fusion Arts & Crafts – Anything Goes
  4. Happy Little Stampers ATC – Rainbow
  5. Crafty Friends – Flowers (Bicycle ATC only)
  6. {Cupcake Inspirations} – CIC493 “Let’s Roll!” (Bicycle ATC only)
  7. A Bit More Time to Craft – #116 Anything Goes