**THIS IS POST TWO OF TWO FOR TODAY! SCROLL BELOW TO SEE MY POST FOR THE GDT CREATIVE ARTISTE. THANK YOU!**
Hello friends and a happy November! I think that the last two months completely flew by and here we are getting closer to the end of the year…what?! I hope that you look forward to happy times ahead and lots of crafting fun too! I’m thankful you’re here with me, so let’s get this month started.
Today begins a new challenge over at the Mix It Up Challenge Blog and it’s always “Anything Goes with an optional theme“. The optional theme this time is “Paper Piecing“! (This challenge is open for 6 weeks, so you have plenty of time to enter!) Here’s what I came up with using this theme:
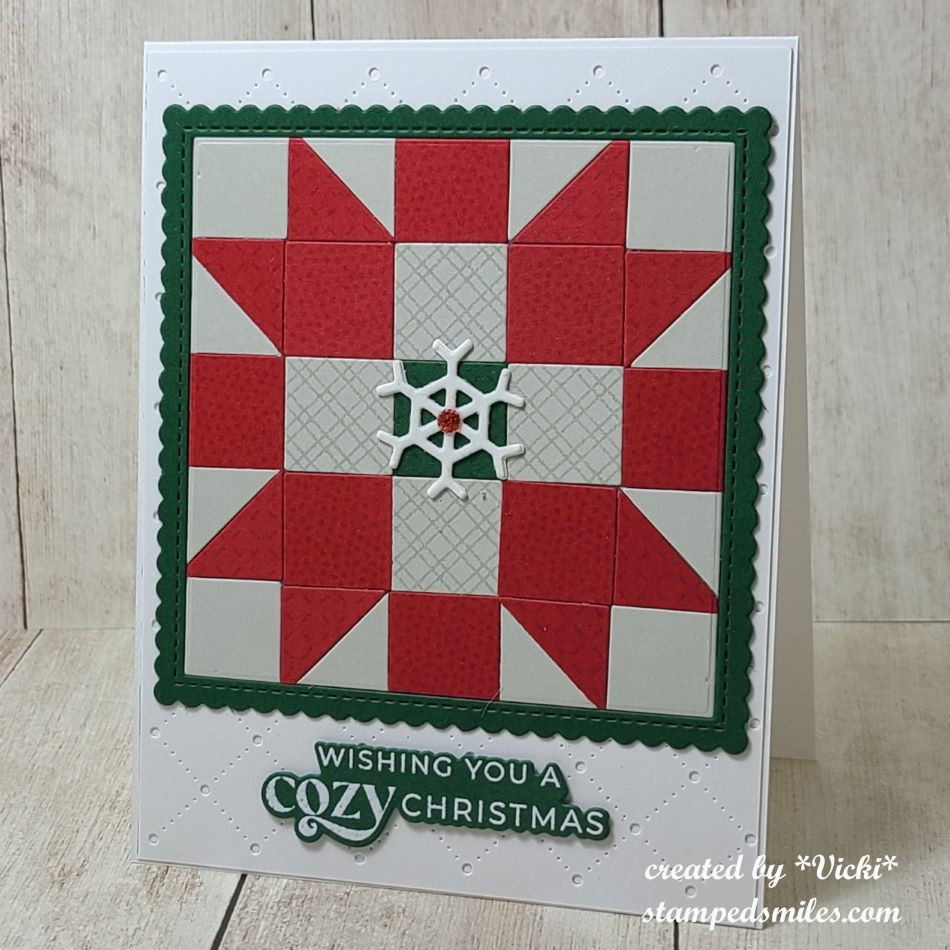
I absolutely love the look of quilts, but I like to keep my making of quilts done with paper! So I thought this theme would be great for making a quilt pattern design for Christmas. I normally paper piece stamped images, but I wanted to do something different this time and pull out more stash items and use them!
Several months ago, I purchased a card kit from Taylored Expressions called “Pieced Patterns” and I loved the concept of cut out squares attached over a “map” to follow along on how/where to place the squares. It’s really easy to piece different colors/patterns together to make a design. Some squares were also cut diagonal and I stamped a tone on tone pattern over some of the squares before they were cut out. Then they were placed over the “map” design and cut out with a square die. I also cut the stitched scallop frame to go around the square pattern. I die cut a white snowflake twice to layer in the center of the pattern and added a red gem in the middle of it.
I attached the paper pieced pattern over a white card front that was cut with the Taylored Expressions Pierced Lattice Cutting Plate that was then attached to a top folding A2 white card base. For the sentiment, I white heat embossed it from the Taylored Expressions Jingle All the Way stamp set and cut it out with the coordinating die. It was popped up at the bottom with thin foam tape.
I can see this might be fun with several different squares cut out ahead of time to place over the different “map” designs to create multiple design patterns ready for cards! It’s just a matter of taking the time to cut out all of the squares.
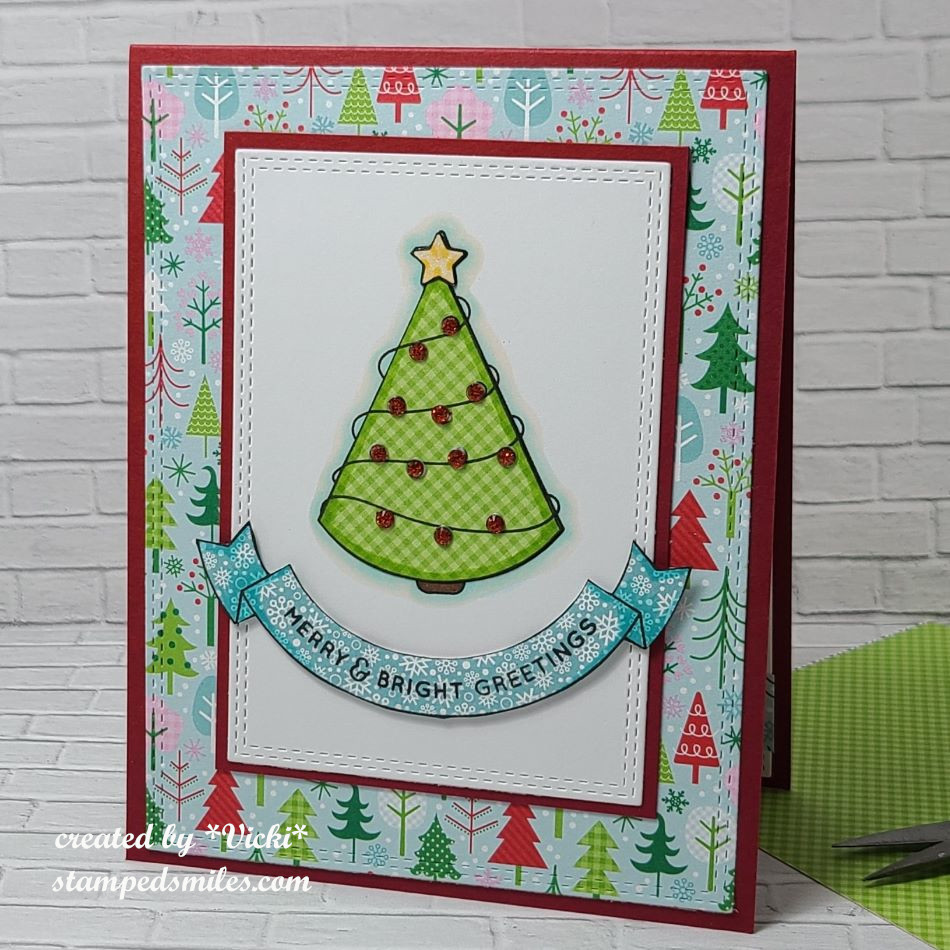
I have decided to create a “bonus” card using the same “paper piecing” technique, but with a stamped image this time…as we all need more Christmas cards, right?!
For this card, I pulled out an older card kit from my stash (2016) and used the Doodlebug pattern papers that was included with the kit. The papers are too cute not to use and hoarding them is not a good idea!
I stamped the tree onto a stitched white rectangle, then stamped the tree, star and banner over some of the pattern paper, carefully cut it out and attached it to the stamped tree and white panel. Before I attached the stamped pattern pieces, I used my Copics to color in the tree stump and outline around the tree. I also added some details to the pattern pieces for shading as well.
The banner was popped up with foam tape and I attached all the layers together over a top folding red A2 card base. All the cardstock/papers were included in the kit. I’ve added some red rhinestones on the tree where the ornaments were to finish it off.
Anyway, hope you’ve enjoyed all of my projects today and I hope you will take some time to check out the challenge blog to see what the other talented designers have made. I look forward to seeing what you make! Have a great day!
Challenges:
- Inkspirational – #327 Seasonal (Winter/Christmas)
- Pammie’s Inky Pinkies – PIP2443 Anything Goes
- Cardz 4 Galz – #237 Showcase Your Patterned Paper (second card)
- Crafty Catz – #681 Anything Goes with optional twist: use dies/punches (top card, but dies used on both of them!)
- Lil Patch of Crafty Friends – #240 Anything Goes
- Penny’s Paper Crafty – #583 Anything Goes Using Paper