Hello and happy Friday! It’s not only “Good Friday”, but it’s Easter weekend here for us, so plans to enjoy the time we have together with food and laughter. At least that’s the plan anyway! I hope that whatever plans you have that you enjoy yourself.
Today starts up a new challenge over at the Alphabet Challenge Blog! We have finished up the entire alphabet round and starting back up again for the 14th round which began in 2011! WOW! So beginning with the alphabet, the hostess has chosen “A” is for Alphabet(choose your own letter of the alphabet and a theme that begins with that chosen letter.) *Remember that this is a bi-weekly challenge, so you have two weeks to enter* I hope you will find some time to join us in the gallery! Here’s what I’ve created:
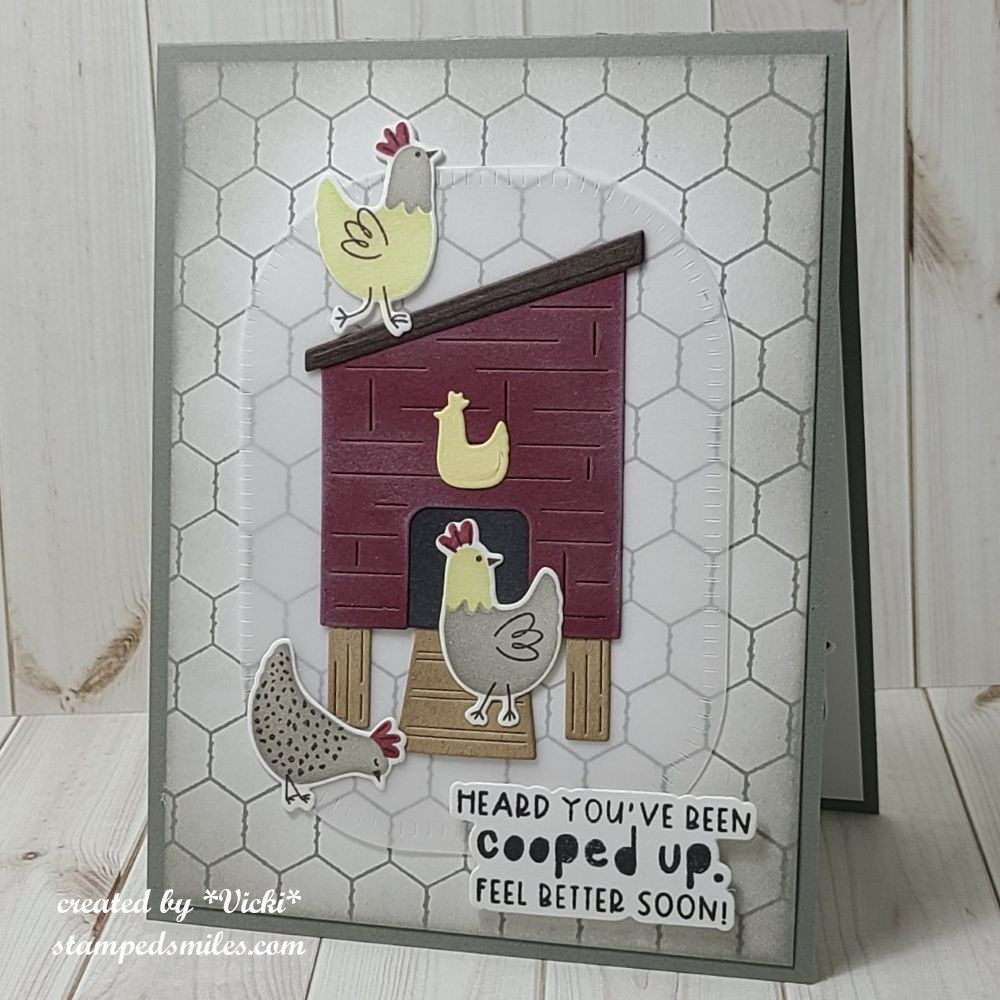
The quirky chickens and for an inside joke were sent to help cheer someone up not feeling well.
I started with a separate panel to stamp and stencil the chickens on. I cut them out from the stenciled panel. On another piece of cardstock, I stamped the Wire BG and ink blended around the edges. I placed this onto a top folding A2 sized gray panel. I wanted the area with the chickens to be the focus, so I took the TE Rounded Rectangle Stacklets and cut a piece of vellum that I used to create my scene on with the Yard House die set. I centered the “hen house” and then used the placement of that to adhere the vellum panel to the center of the card front.
Lastly, I added the other chickens to the scene and the stamped/die cut sentiment which was popped up with foam tape at the bottom right of card.
Thanks so much for stopping by today! I hope you’ve enjoyed my card and it gave you a smile! 😊 Have a wonderful Easter weekend my friends!
Hello friends! For those of us that experience the cold weather season for January, I hope you’re finding ways to keep warm. I have been wrapping myself in blankets with fluffy slippers around the house…and yes, I have the heat up too! LOL I think I seem to feel the cold more as I get older in age! This week will be really cold for us here. So I suppose that’s why they say “January Blues”?🥶
Anyway, that brings me to the January challenge over at Sparkles Monthlyand for this month, our hostess is asking for “January Blues” (monochromatic blue) on your project. Be sure to stop by the blog to see what the rest of the design team has created for you. Here’s my project for this challenge:
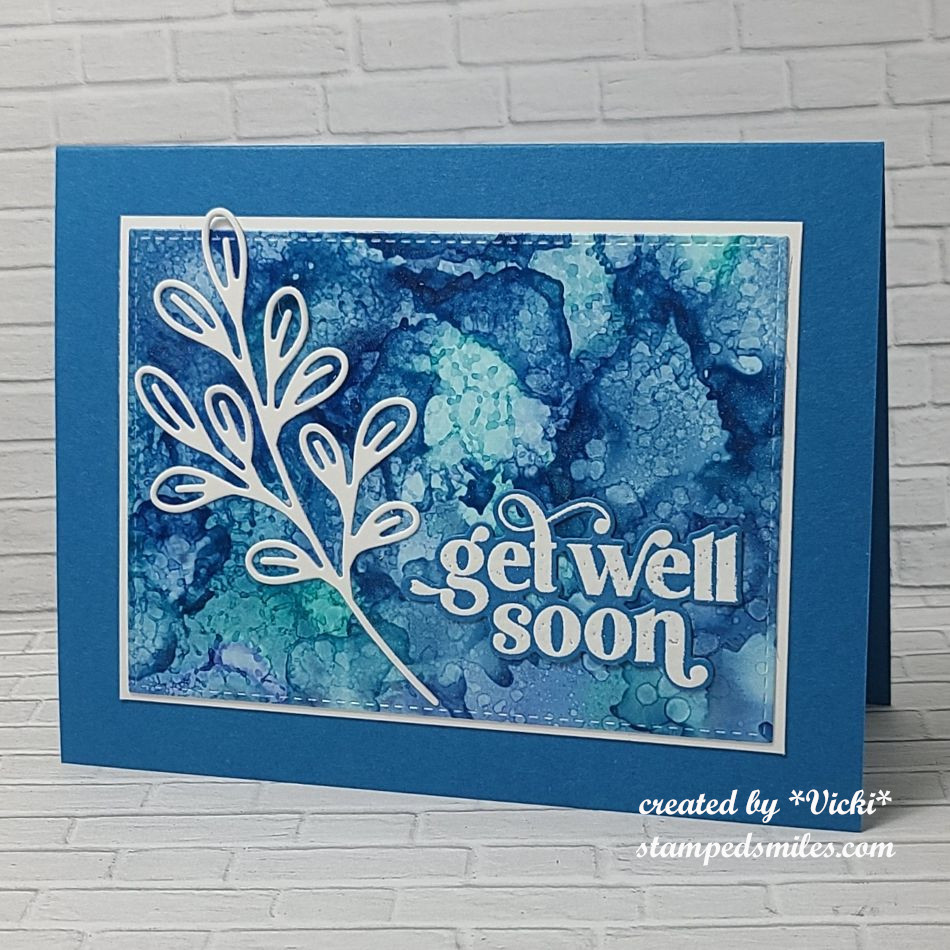
Usually, when I think of blues, especially in January, I tend to think of snowflakes. I wanted to do something a bit different and decided to pull out my blue tone alcohol inks and make a background. It was really fun to play around with, and of course, you make a panel and make more than one to save for other cards! Blue makes for such a great masculine card too.
I found some cardstock to match up with the background and die cut the alcohol panel with a stitched rectangle die, layered it over a piece of white to attach to an A2 sized top folding blue card base. (I’m glad that I’m using some older items from my stash as I think this is old Stampin’ Up! paper that needs to be used! I THINK it’s Pacific Point?)
I pulled out a leaf die from Taylored Expressions called Subtle Sprigs and cut one in white to place over top the alcohol background. I also used the TE On Occasion stamp set by white heat embossing over blue cardstock, cutting it out with the die and placing it over the background with the sprig.
It’s a very simple card, but I wanted the alcohol background to take the stage on this one.
I hope you’ve been inspired today to play along with us this month for the challenge at Sparkles Monthly! (P.S. This will also work with the Monochrome challenge at Mix It Up this month too!) Thanks so much for stopping in today with your kind support! I really appreciate it! See you soon!
Hello friends! November has come with the pretty leaves on the trees and the coolness in the winds. I always turn to comforting “things” this time of the year and it always gives me a sense of peace before the year comes to an end. A warm fuzzy blanket, socks/slippers, sweaters, etc. is what I usually turn to. What is your comfort “thing”?
I promised to share with you the fun things we did over at the “Inky Escape” event that I recently attended and it was wonderful to see all of my crafty friends again for laughs and fun together. I think I miss them already!
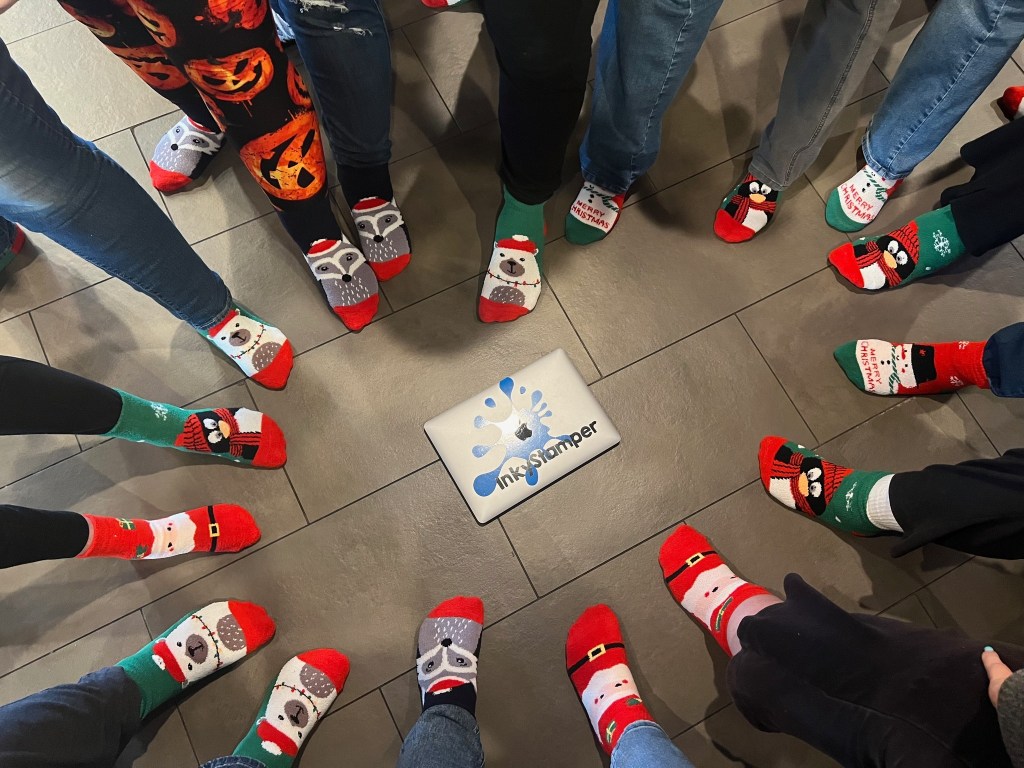
I lifted this fun photo from the Inky Stamper FB page as I don’t have any photos other than seeing what others took. There were a total of 18 of us this time:
Everyone received a “swag bag”…but the case this time was a Christmas stocking full of fun goodies and one of them was that everyone received cute fluffy socks. I’m not exactly sure which one is me in that photo, but I did have a polar bear sock! LOL We each placed one foot in the circle and Chelsea took the photo.
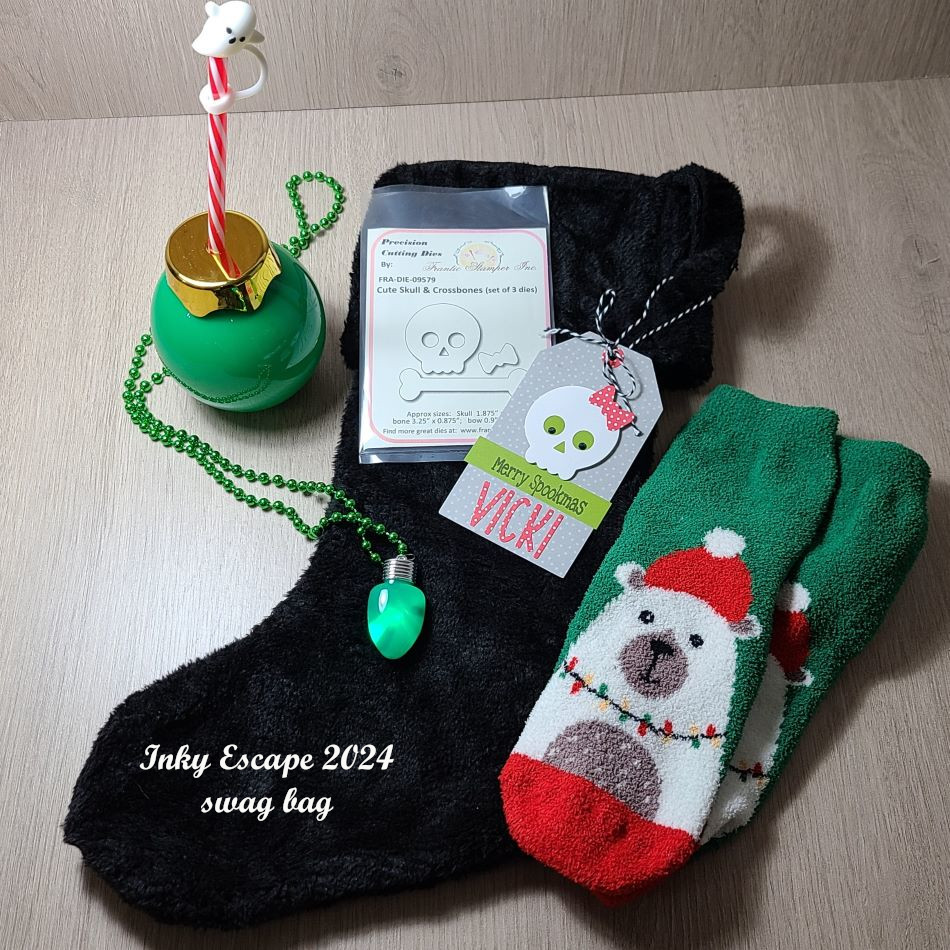
And speaking of the “swag bag”/Christmas stocking…here’s what we each received:
When I got to the event, there was this black stocking on my table with the cute tag attached to it with my name. Each person received a personalized tag on the swag bag, plus the “skull” dies that were used to create the tag which was inside the stocking! There are my polar bear fuzzy socks (I’ve already washed them up by hand so the colors wouldn’t bleed in the wash…and they’re so warm and fuzzy!) I also received the cute “Christmas bulb” drink holder with a candy cane straw and a little ghost stopper for the top! We used these containers to hold the “Jingle Juice” that we drank at some point! And then I received a light up Christmas bulb necklace that has different settings when you push the button the back. The theme for this event was called “Merry Spookmas” which you can see the greeting for that on my personalized tag. So fun!
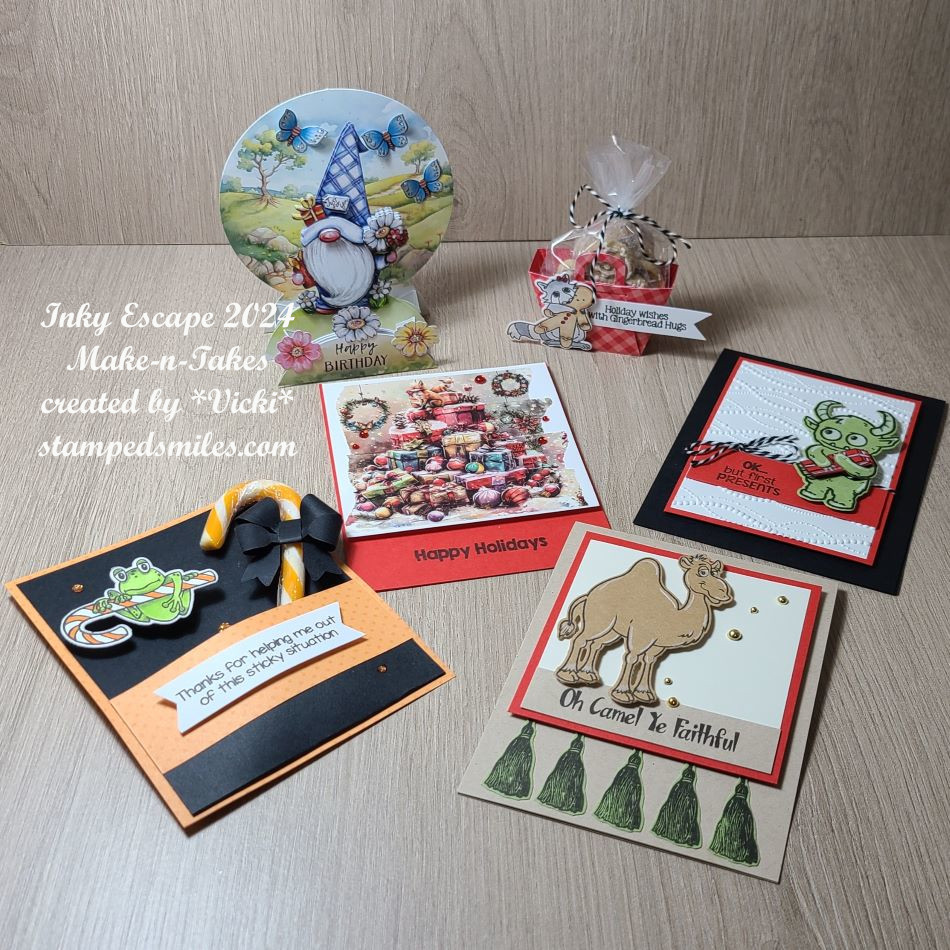
And speaking of fun…here are all of the Make-n-Takes that we created during the event. We sat and made 4 projects and then two of those projects were “bonus” makes using some other special items. (There is a “story” about one of them, but you can check out each project up close in the gallery below.)
*If you are on my website, just click on each photo to enlarge and scroll downward to see more information about each photo while it’s enlarged.*
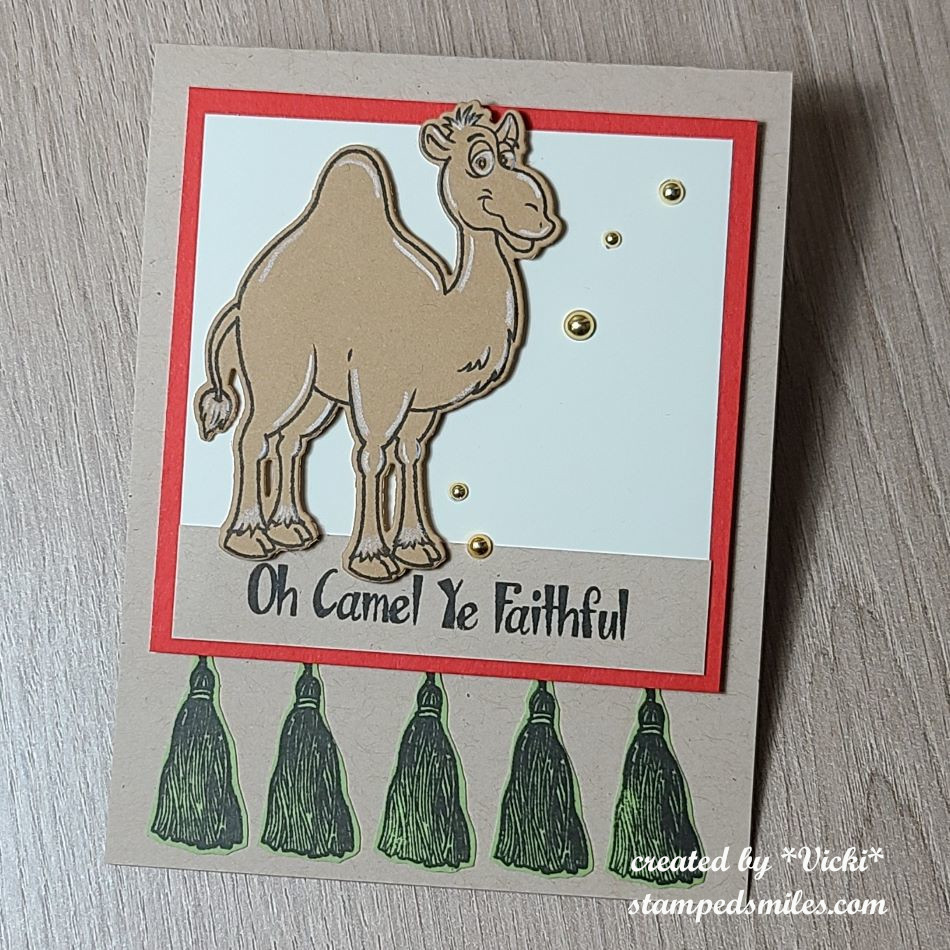
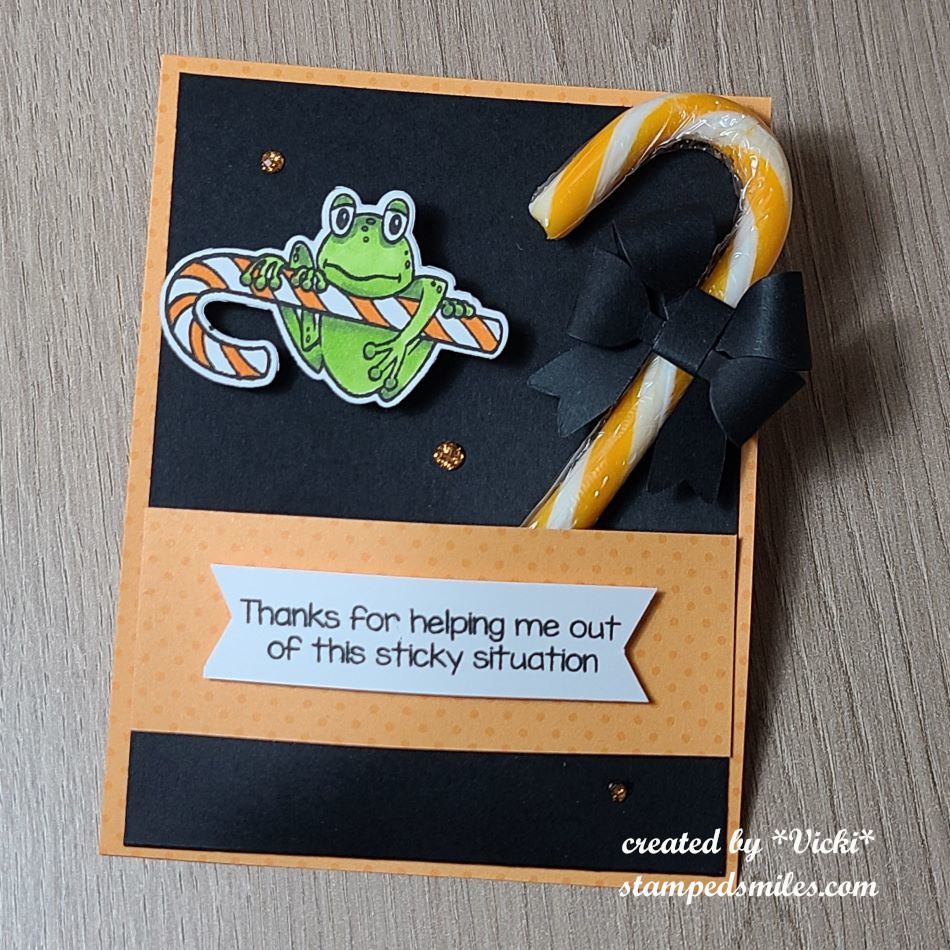
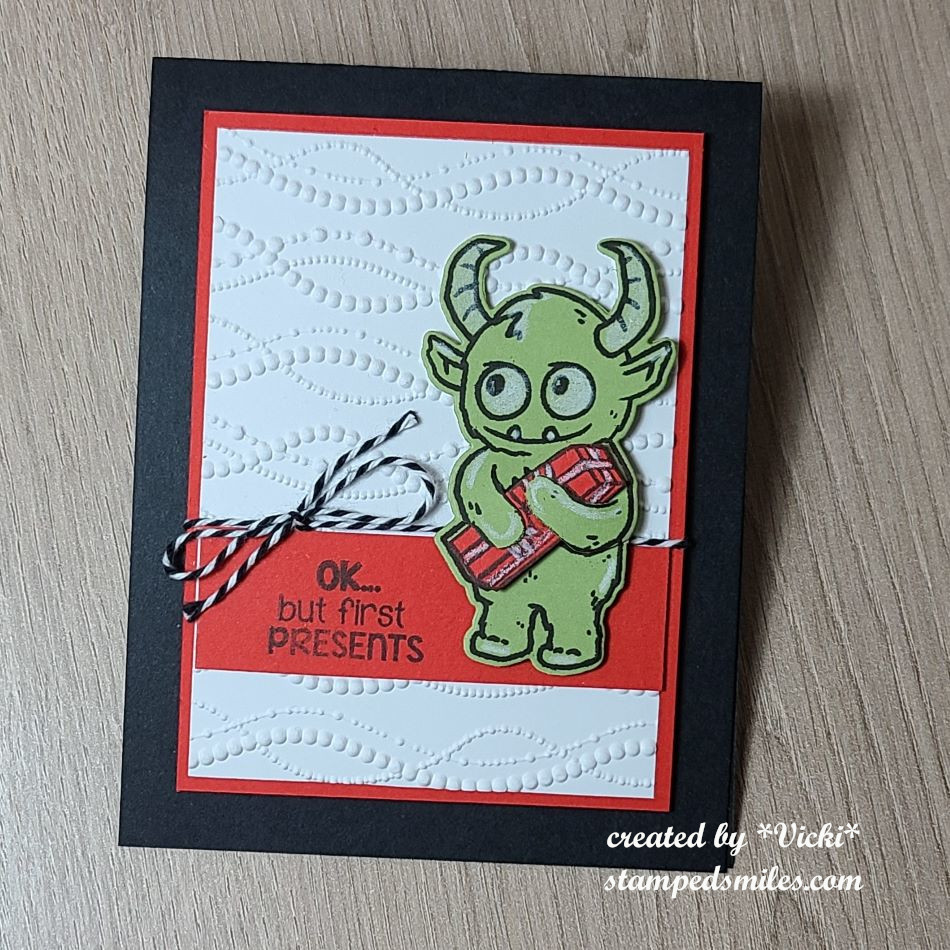
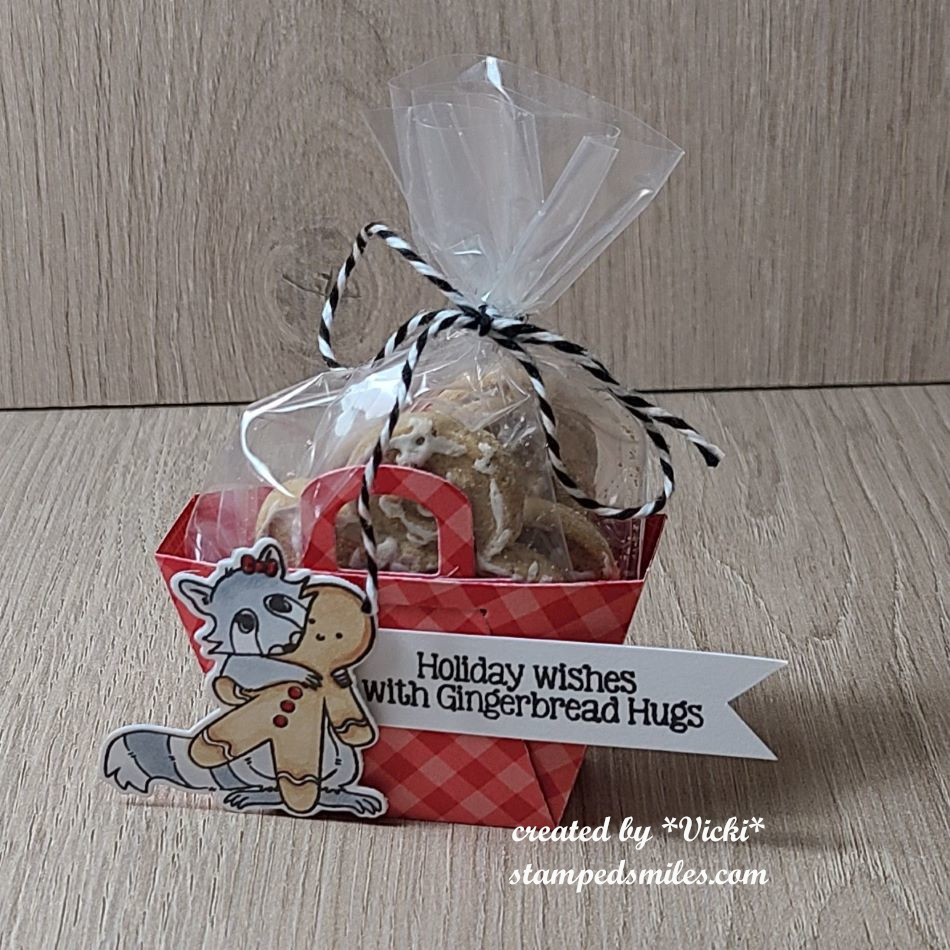
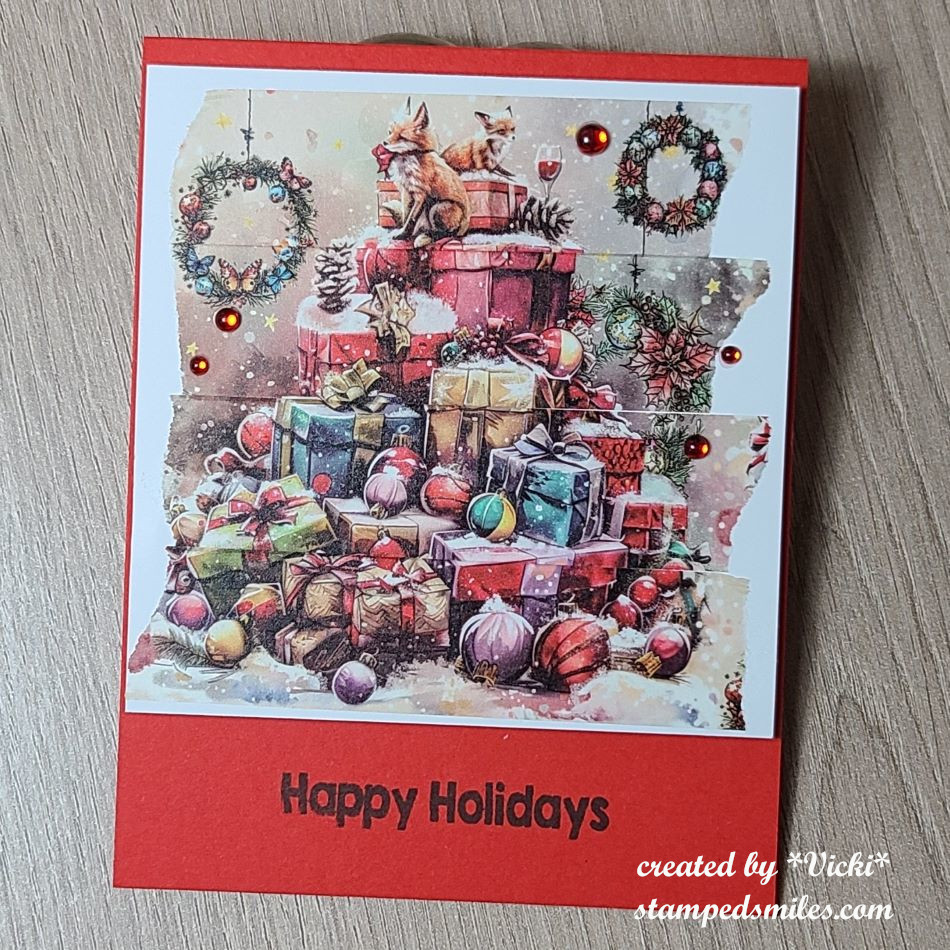
Camel stamp set used. Images were stamped on colored cardstock and cut out.I TOADally FROGgot to run the black cardstock through an embossing folder! Doh! Orange Cream candy cane inside pocket with paper bow and frog on wobbler.My favorite stamp set of this release is the Gifter set. He was stamped on cardstock and cut out. Present was paper pieced inside his arms.Cute gingerbread treat container came complete with gingerbread cookies wrapped with twine!Bonus make-n-take was easy peasy with some very cool Aall & Create washi tape that made this image!We chose the “winter” gnome that we wanted, but mine was so messed up I had to ditch it! I came home and made a birthday one that similar from my own card kit stash! LOL
The first four make-n-takes were made using the brand new Inky Stamper release that came out during this event! You should go check them out now on the website! (They’re all shown on the home page under “Featured Products”.) My favorite is that darling “Gifter” stamp set! I’m sure you’ll be seeing something from that set soon from me! *wink*
And since I was there to “crop” (as they say), I brought some things to work on that I really wanted to get done. So I decided to pull out some more Inky Stamper images to color and make a “Sheetload of Cards” using the September Sheetload of Cards Template by Crafty Al. If you’re not familiar with her, check out her You Tube Channel and look for all of her “Sheetload of Cards” videos to see how you can find instructions for each month. #SUYSSep2024 #ShowUsYourSheetLoad
I utilized her template to create the full 12 cards as demonstrated. The dimensions of the finished card design is 3.5″ x 6.25″ which I really liked as it helped to use up the full 6″x6″ size of those paper pads! Also, you don’t have to create envelopes for these as they fit perfectly inside those #6 envelopes (3-5/8″ x 6.5″) that you can find at any office supply area of a store.
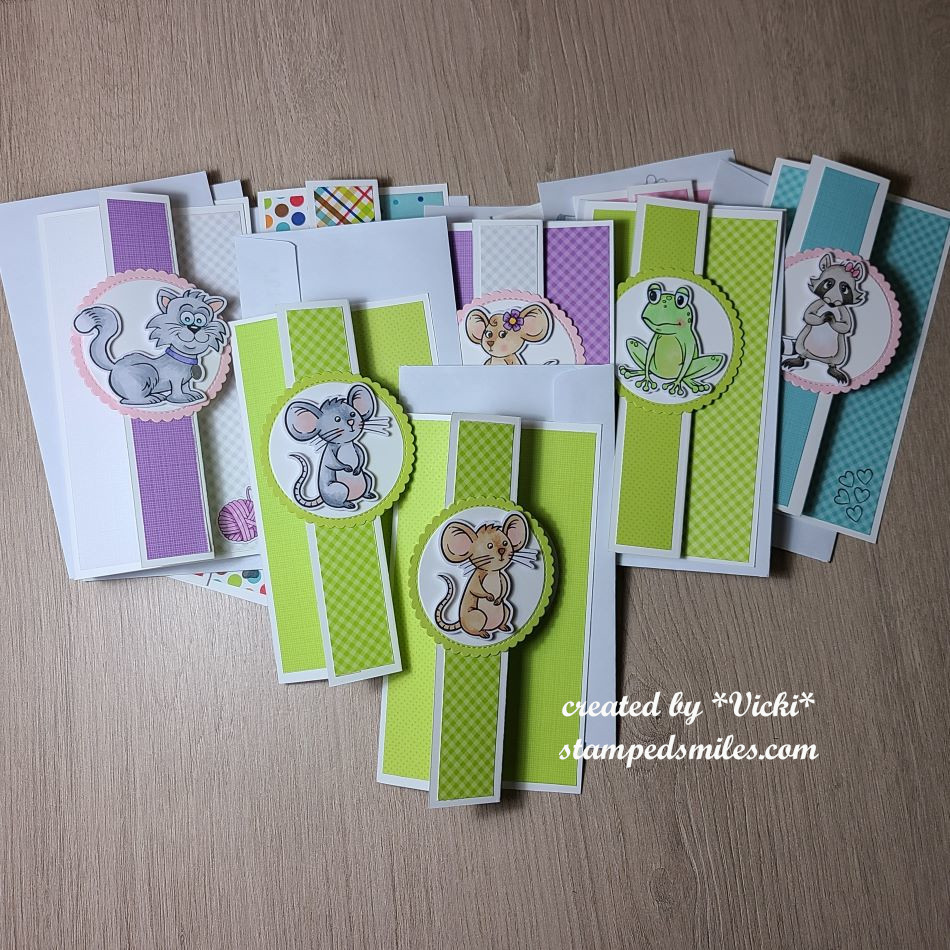
As you can see, I used a variety of images that I stamped, colored and cut out for each design. I matched up my design papers to coordinate with the images. All of the images I used are from Inky Stamper. All papers come from a variety of Doodlebug Design papers.
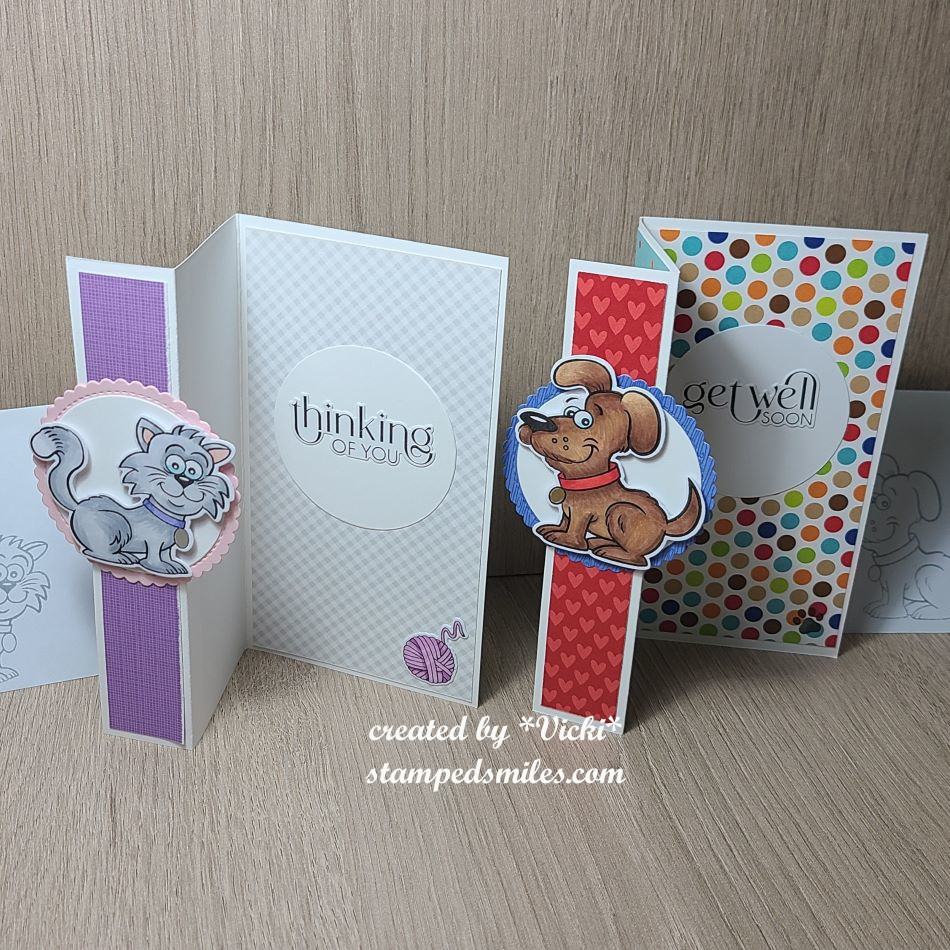
Here’s a closer look at two of the cards I made from the set so that you can see how the card opens up and the greetings on the inside of each card. (Sentiments come from Taylored Expressions.) You can also see the coordinating envelopes next to them with the matching critter stamped in grey ink.
These cards are on the way for a special charity for ill children patients to help lift spirts and I hope each one will!
I know there were so many things going on during the event that I was even surprised that I got all of these finished. They were mostly finished with the exception of the greeting which I added when I got home. I had plenty to do while I was there and also enjoyed all the activities too!
I hope you’ve enjoyed my post today as well! I thank you so much for stopping in!
Hello friends! I’m so very happy to see April come as well as the warmer weather it has brought our way! I’ve actually been taking sometime outside to see some blooms with daffodils, tulips and other buds popping out everywhere! We are expected to get some rain tomorrow, but that is exactly what April is all about…and then the May flowers to follow!
This is exactly what it’s all about for this month’s challenge over at Sparkles Monthly too! We hope you can share your “April Showers-May Flowers” projects with us this month! Here’s what I’ve chosen to make:
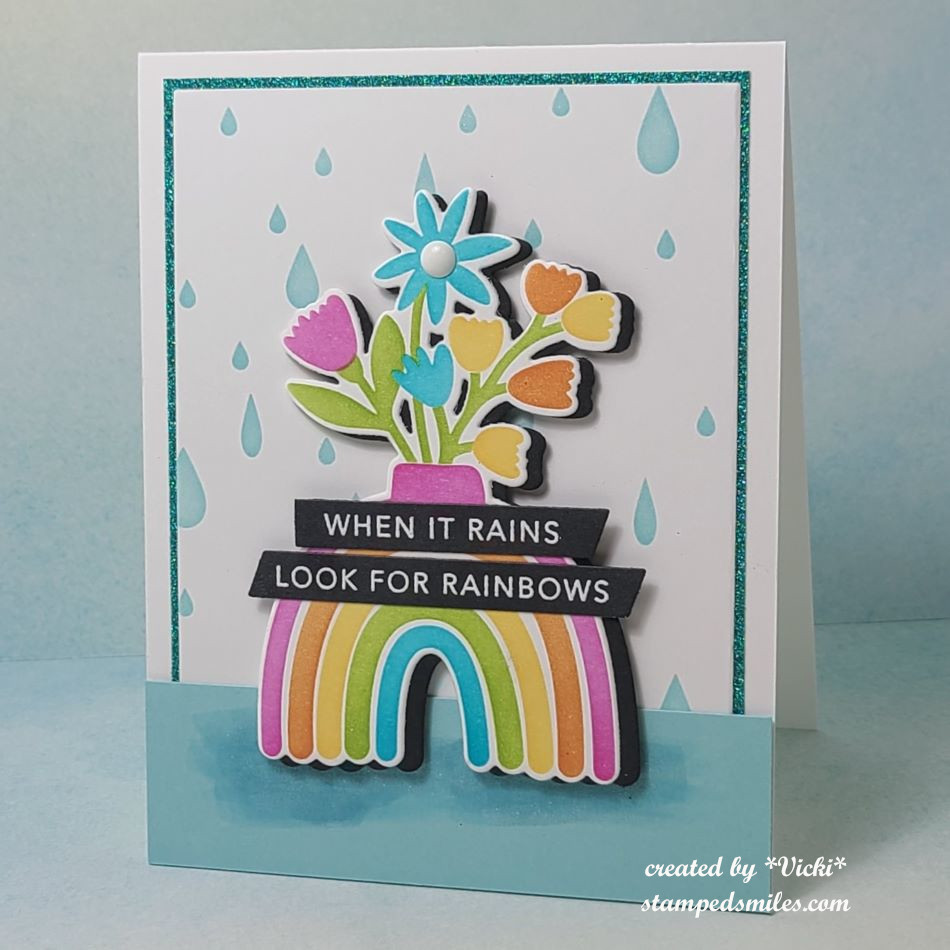
I always love a good Spring rain with a little bit of sunshine peeking through that causes rainbows! I never get a good photo of one, so I just enjoy it while it lasts!
I’ve used a fairly new product from Taylored Expressions with my card today called “Create-in-quads ROYGBV” which creates 4 different card panels at one layered stencil session. (I now have 3 other panels to make cards with too.) I used the “Create-in-quads ROYGBV vase die” to cut it out and then another one in black cardstock for a slightly off shadow effect behind it.
For the background card panel, I had a DCWV rain drops stencil (that I’ve had for a long time) and blended some blue ink over it. I’ve also cut a piece of blue/teal colored glitter paper for a thin border behind it to attach over an A2 white top folding card base. I then took another piece of blue cardstock strip to make a “landing/grounding” for the vase to sit on. Before popping up the ROYGBV vase, I took a marker to create a blue shadow underneath where the vase would be positioned. I was going for a “rain puddle” look. Popped it up with foam tape and added a white enamel dot in the center of one of the flowers. I also took a glitter pen to cover over the raindrops and “rain puddle” under the ROYGBV vase.
The sentiment came from the Taylored Expressions Mini Strips-Rainbow stamp that I’ve white heat embossed over black cardstock and cut it out with the Mini Strips-Asymmetrical die and chose the ones that I wanted to use for this card to attach over top of the vase. (I also have extra sentiments to use on other projects.)
Hope you’ve enjoyed my card today! I also hope that you will take some time to stop in and join in the challenge with us this month! I have several projects finished that I’d like to share, but I find it so hard to come and sit at a computer when the sunshine and happy weather is calling my name! Maybe when it rains tomorrow, I will post more things!
Hello friends! Hope you had a great weekend and maybe did some crafting? Did you participate in the World Card Making Day events? There were so many things going on, so I basically opened up the You Tube video marathons and watched while I did a bit of crafting.
I was inspired by the Craft Roulette WCMD event with several crafters showcasing their version of the parameters they were to use for that event. It was several hours long!
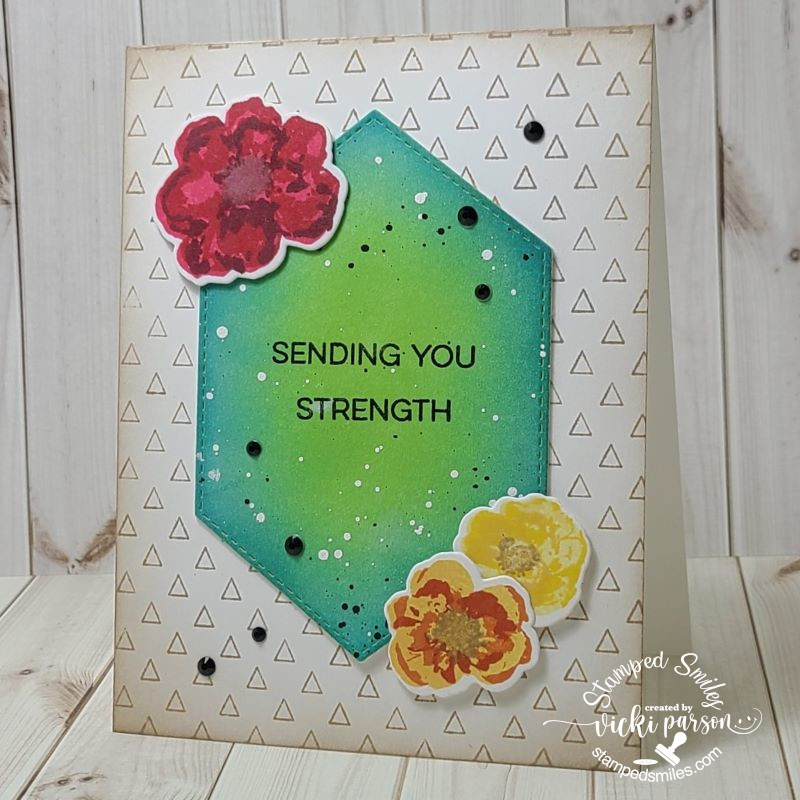
Here’s the card that I made with the Craft Roulette World Card Making Day parameters of – PROJECT: A2 card, COLORS: rainbow, ELEMENT: nature, and RANDOM: black dots
I also combined my card using one of the sponsor’s products which I’m entering for this week’s sketch challenge from My Favorite Things.
I’ve had these stamps in my collection for quite a while and it was nice to pull them out for this card. I actually needed a card for an elderly woman who recently fell and broke her hip, so she’ll be recovering with therapy for a while.
For my card, I used the MFT Watercolor flowers and stamped them in red-, orange- and yellow-colored layers and cut them out (This was my nature element parameter). The middle was cut with the MFT Stitched Hexagon diesthat I ink blended with green and blue inks (These colors make up the rainbow parameter). I splattered the shape with white and black. *Before I splattered, I stamped the sentiment from the MFT Essential Sentiments set with black pigment ink and heat embossed it with clear EP. (The sentiment was cut in portion to fit my design.)
For the A2 sized card base (makes up project parameter), I used a MFT Triangle background stamp (retired) in the same kraft color that I inked the centers of the flowers with. I also used this color to ink around the edges of the card. I than layered two more cut out shapes for the ink blended sentiment panel for dimension and attached to the stamped card base. I used foam tape to pop up the flowers and lastly added some black gemstones (for the black dots parameter).
Thanks so much for stopping by today! Hope you’ve enjoyed my inspiration! See you soon!
Hello friends! I hope you’re having a good week so far and staying safe wherever you are in the world. Sending hugs to all experiencing a troubled time. I hope that my post can bring a smile to you today.
I needed to create some get well type of cards and so I thought I’d try to incorporate some challenges while working on them which helps me to concentrate more in what I’m doing and maybe think outside the box a bit.
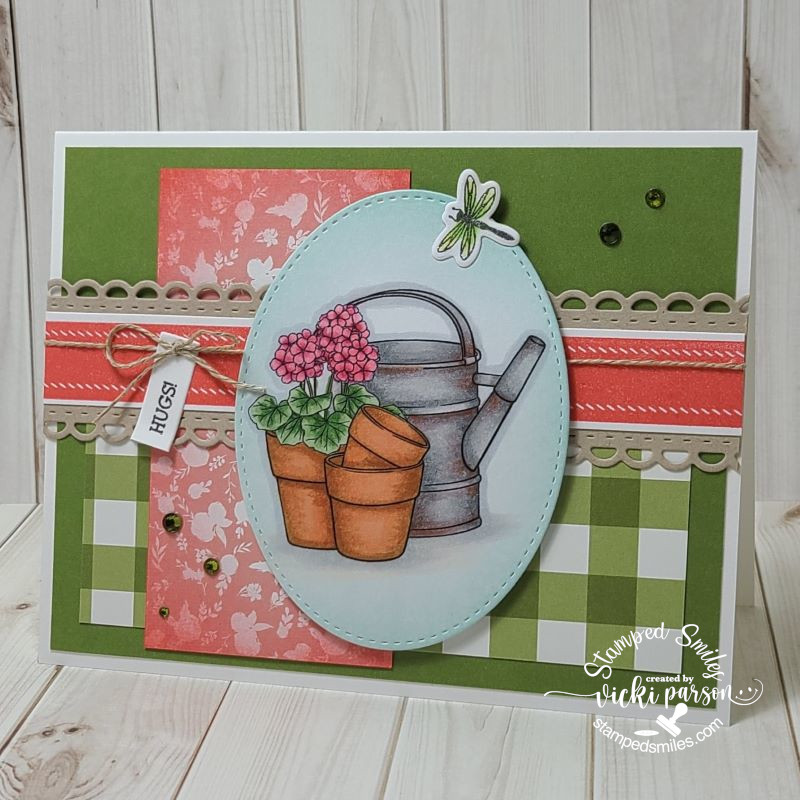
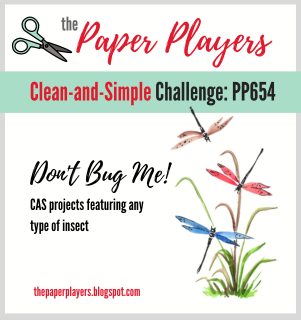
My first card is made with the Beccy’s Place Challenge freebie this month and she also challenged us with a sketch which I’ve decided to use for my card. (see sketch below) I was really happy to use up some more pattern papers with it and I also decided to add a tiny dragonfly at the top to enter another challenge and to adhere to my “bug” theme today!
I printed the image in black and white and colored with Copics. The dragonfly and the center pink strip were stamps that I cut out and added to the design. The rest is pattern paper from my stash except the scalloped kraft border in the center that I cut out with a die. I stamped the sentiment and cut it out to go with my twine around it. *You will notice in ALL of these cards that I’ve used some sparkly gems. I wasn’t aware until posting them! I must be on a kick of wanting to use them!*
And for this next card, I’ve played with a large bug:
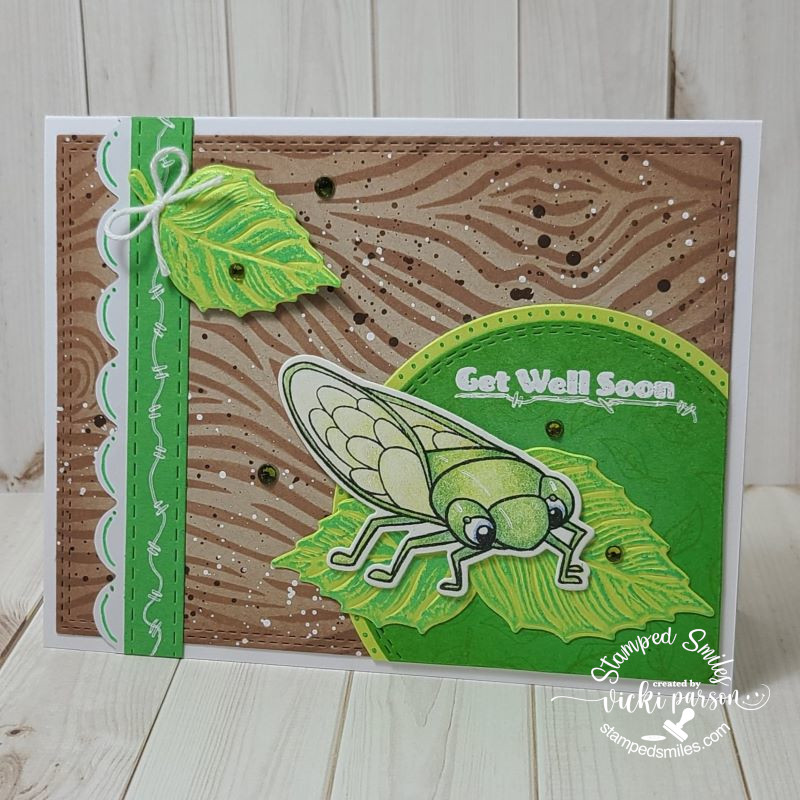
Around my area this time of year, you can hear the sound of these cicada bugs with their distinct noise throughout the trees. My husband likes the sound when a bird catches one! EEW! This bug is a cute one from Inky Stamper called Cicada and I’ve colored it up with pencils this time. Hard to see, but I’ve also added some shimmer with a glitter pen on his wings.
I’ve used the Picket Fence Tree Bark stencil over kraft on the background and then splattered it with brown and white paint. The leaves under the bug and the accent came from the Lisa Horton Variegated Leaf EF+die that I cut over light green cardstock. I used some metallic green wax to go over the details in them. I also used some gel pens to make some doodles around the strip, the circle and under the sentiment along with following a sketch. (details below) You will also notice more sparkly gems! I’m also entering this in the Inky Stamper FB challenge this month which is using an IS bug image.
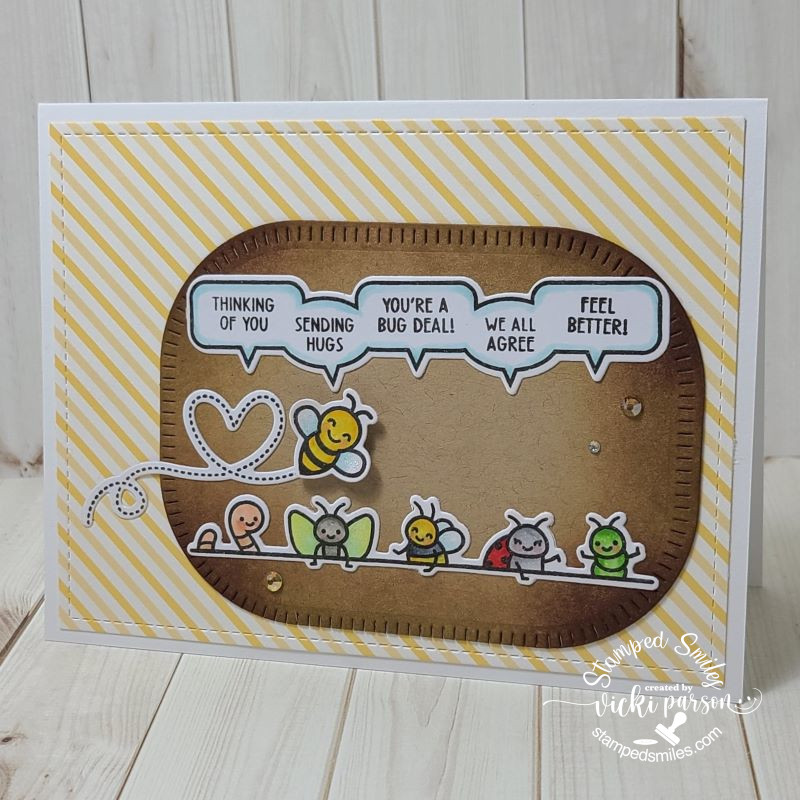
For my last card I decided to keep this one simple’ish’:
So, I know these aren’t real bugs because I’m not squealing, but these guys are too cute! They’re popping up out of the dirt for a special greeting! I mixed in both a new and older stamp set from Lawn Fawn on this one. I’ve used another sketch for this one and decided to keep it very simple. The hardest part of this was the coloring which honestly wasn’t all that difficult either because they’re small images. I’ve also added some shimmer with a glitter pen on the wings and of course, there’s those sparkly gems again!
Hello friends! I hope you’re having a great month so far and being able to enjoy the nice Spring weather! It’s been really nice over my way, but I’m seeing we have a bit of cooler temps coming too. Hopefully not too chilly!
Today starts a new challenge over at the Sparkles Monthly Challenge Blog and this time we would like for you to “Emboss it”! I hope you will hop on over to see the inspiration from the team and consider joining in the fun with us this month!
Here’s the DT creation that I’ve made:
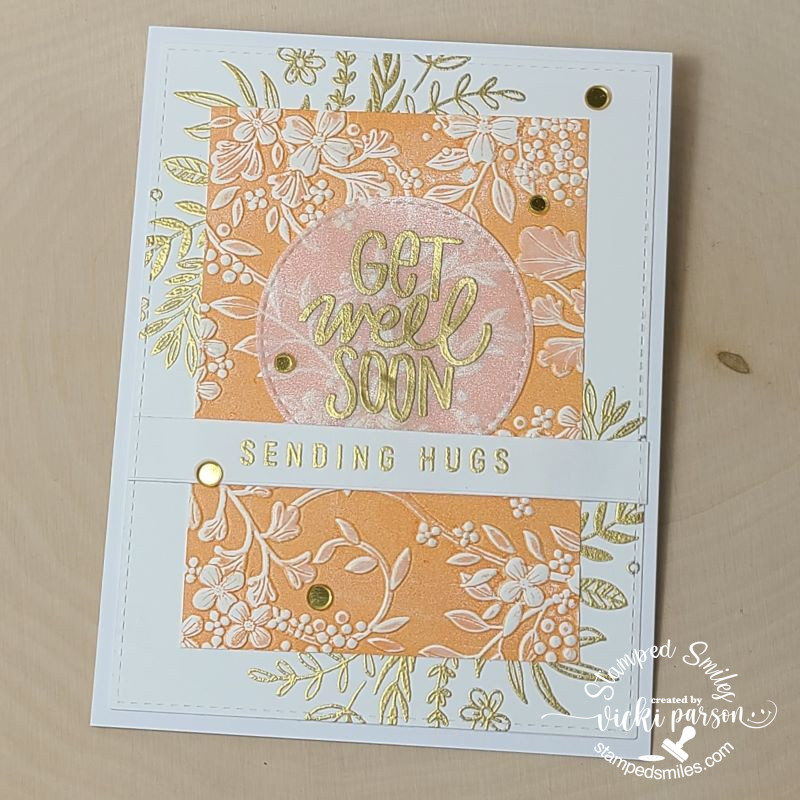
I love to do embossing on my cards, and I know it’s a favorite for many! I’ve decided to do a “Letterpress Embossing” technique and inked up an embossing folder to achieve the effect on my orange layer panel. The raised areas stay white on the white cardstock.
For the two corners, I’ve taken a Simon Says Stamp Garden Greetings stamp set and gold heat embossed the floral spray image. I’ve also used the same gold embossing for the “sending hugs” sentiment strip as well as the “Get Well Soon” sentiment over the shimmer vellum which was cut from a stitched circle die. I added some gold sequins over it.
I wanted to keep it somewhat flat for mailing purposes, but I think some of it popped up would be pretty too. I was also very happy to pull out a past card kit and make another card with it.
I would love to see your embossed creations in the gallery this month, so I’ll hope you’ll play along! Check out the challenge here – Sparkles Monthly
***ARE YOU A WINNER?!!***
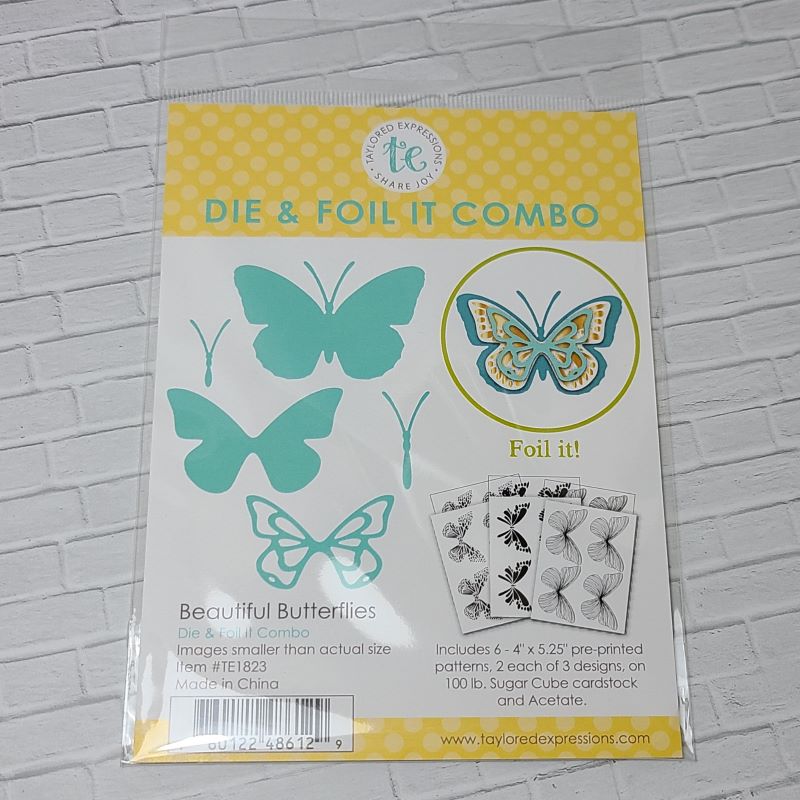
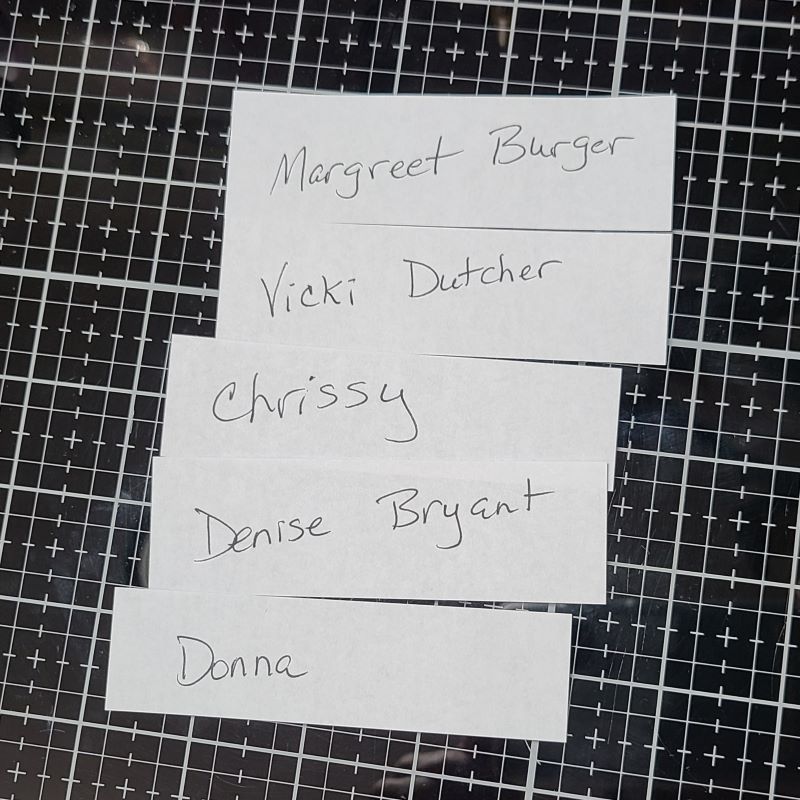
I have taken all of the comments from my last post, added all of the names that mentioned they would be interested in the Beautiful Butterflies dies and foil package and wrote those names on pieces of scrap paper. I folded and crumpled them up and had my husband pick out a name. He threw them all into the hat he was wearing and pulled one out!
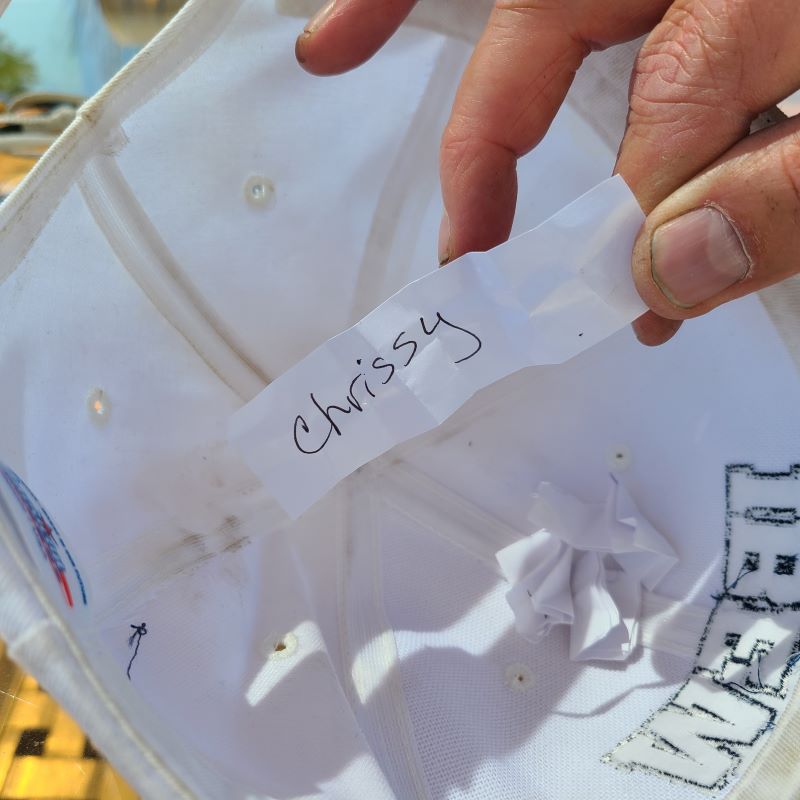
HERE IS THE NAME THAT HE PICKED OUT…………….
Yay! Congratulations Chrissy!
Please contact me and send me your full name and snail mail address so that I can pop your package in the mail to you! I hope you enjoy it! (I haven’t even used mine yet!) Sorry if your name didn’t get pulled as I only had one, but I know I have several “double” items that I’ve placed in a bin and will be pulling them out at some point to give away! So, stay tuned!
Thanks so much for dropping in and taking the time to say hello! I appreciate you!
Hello friends! I hope that you are having a great week so far! After the little “heat wave” hit us, I’ve been enjoying some ‘nicer’ outdoor temperatures, finally. As you may have read in a previous post, I had been working on my son’s wedding invites as well as some thank you cards for them to send out afterwards. I will be sharing that later on, but today I have some other “mass production” that I’ve been working on in addition to those:
First up, I’d like to share a set of cards I’ve made for the Taylored Expressions Fans FB Group challenge for May which calls for “4-8 mass-produced cards. (similar or identical)” & the colors “Poblano Pepper with Confetti Cake“. I do not own the Poblano Pepper, but I do have a small cube of Confetti Cake ink.
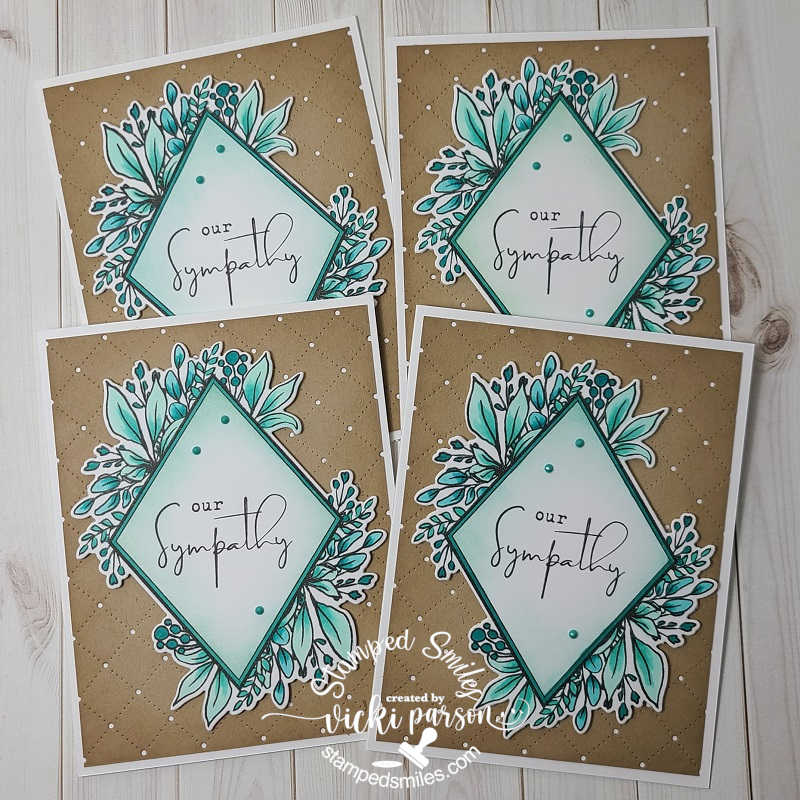
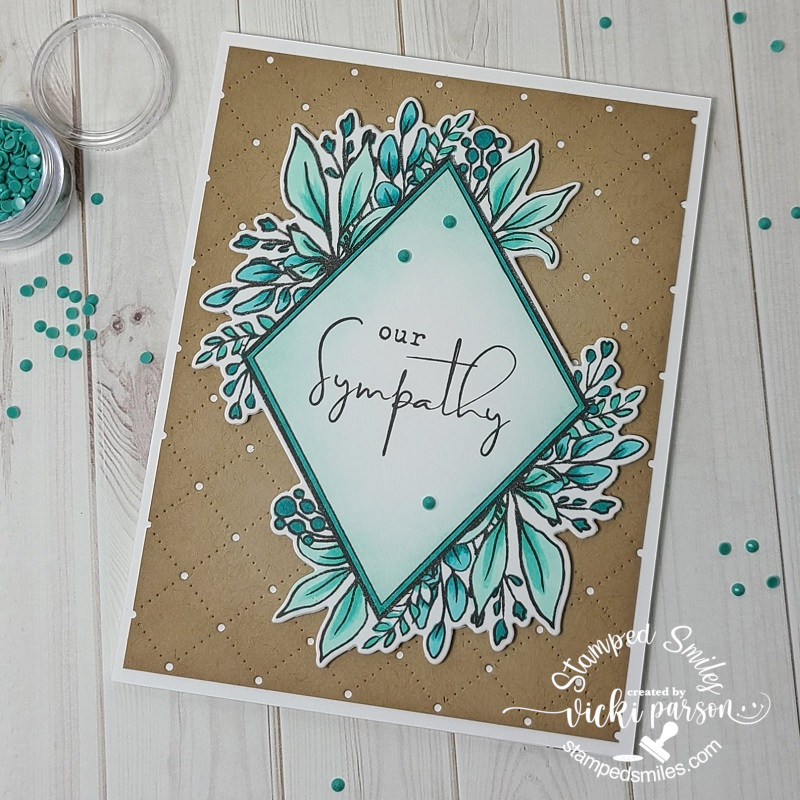
I’ve been wanting to create several sympathy cards so that I had them on hand instead of making at the last minute for one, so I was happy to get these made. I decided it was just easier to make them identical so that I didn’t have to decide how to arrange or cut my papers, etc. I’ve used the Taylored Expressions Diamond Botanicals with dies as well as the TE Diamonds Masking Stencils for the main image. The background uses the TE Pierced Lattice Cutting Plate over a piece of Toffee cardstock.
Here’s a close-up look at one of the cards. I stamped the floral image in black ink as well as the sentiment from the stamp set and then took one of the Diamonds masking stencils with some Confetti Cake Ink to softly blend around the edges of the sentiment area with it. I also used a blender brush to blend around the edges of the cut Toffee layer too.
Since I only had the Confetti Cake ink color, I matched up the coordinating colors with my Copic markers and colored in the image using only those color tones. I think it worked out great for sympathy cards. After I colored up the images, I used the coordinating die cut and popped it up over the Toffee cut panels with foam tape squares and then layered it over a side folding white A2 card base. I finished each one with some of those coordinating TE Pastel Tiny Diamonds. (Although the suggested listed coordinating colors on the website don’t have the Poblano Pepper or Confetti Cake, I thought it matched up rather nicely to this anyway.) I think these cards work out great for mailing too.
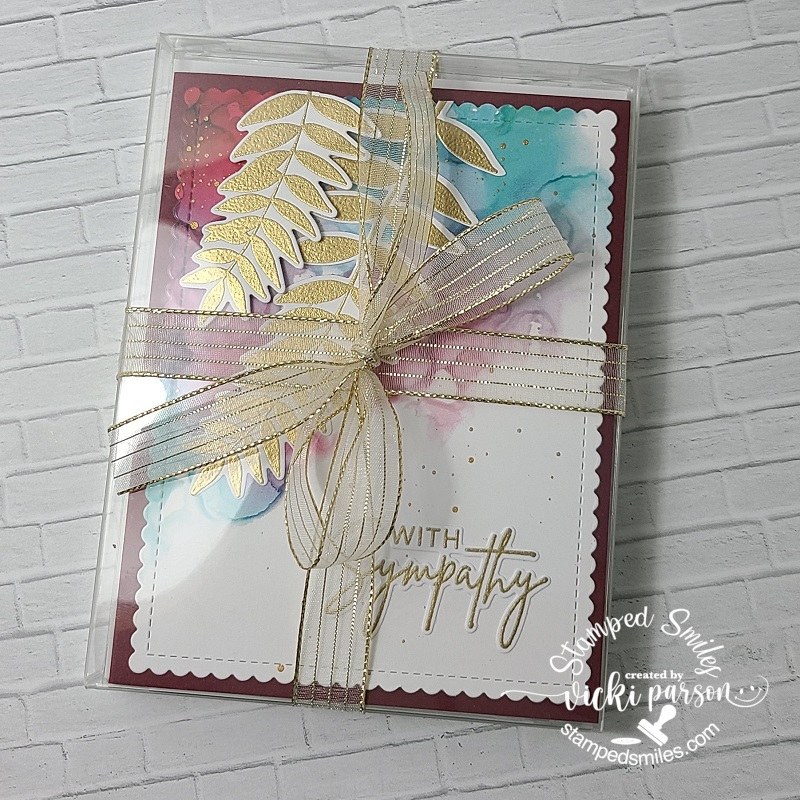
And speaking of sympathy cards and Taylored Expressions, I thought it would be great to create a nice gift set too:
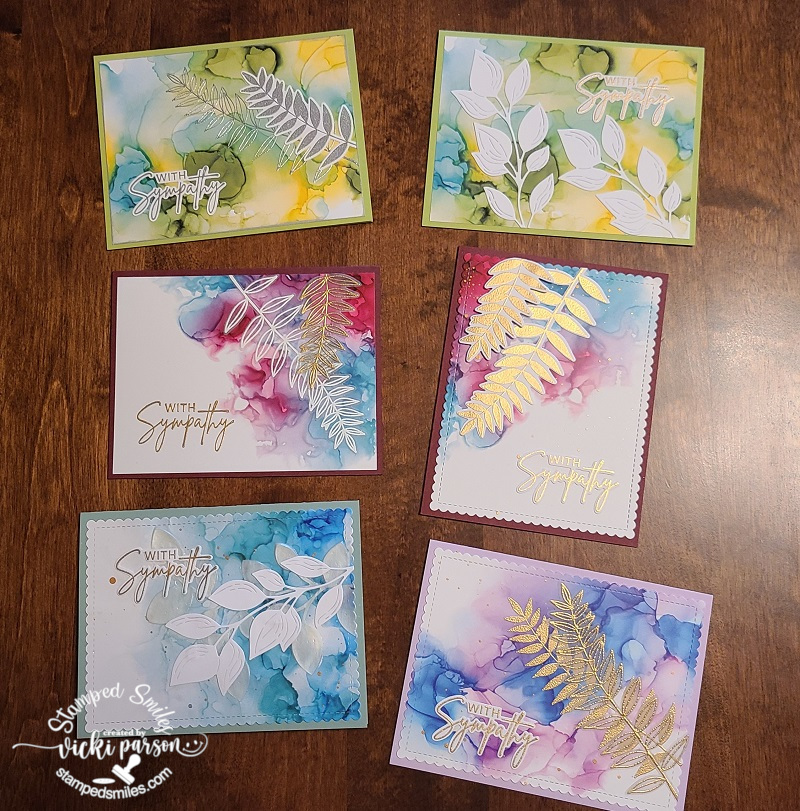
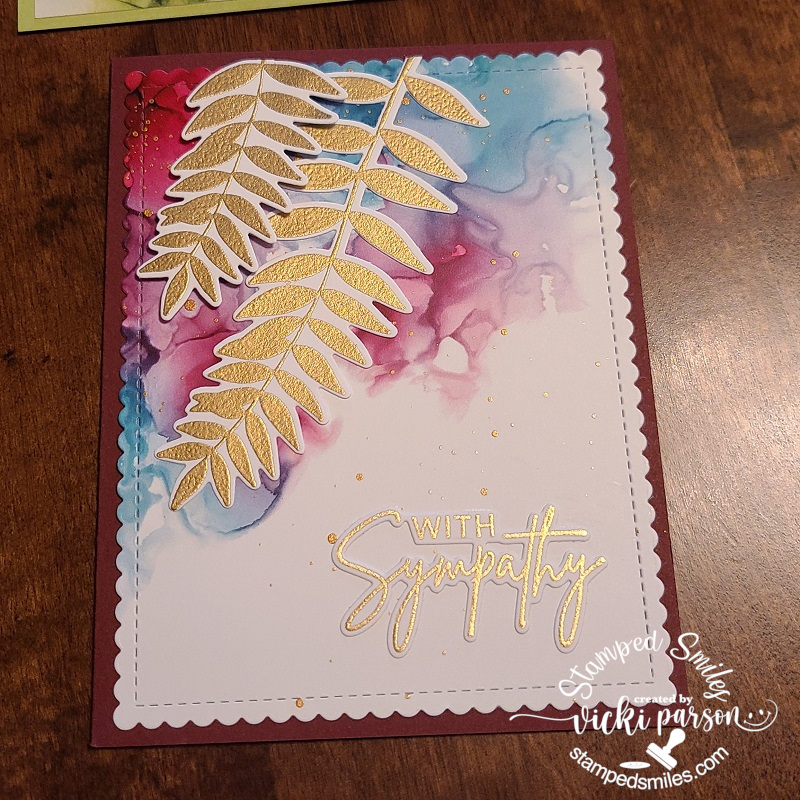
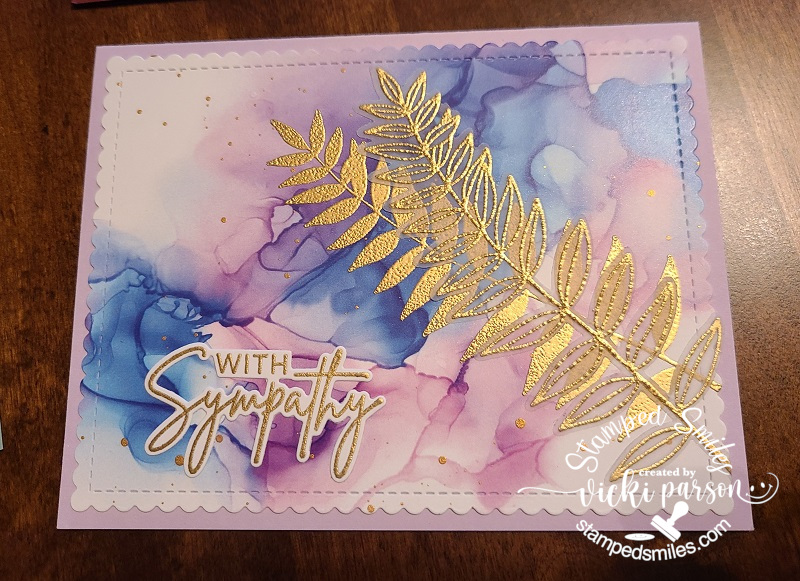
If you remember one of my previous posts, you may remember where I created a greeting card gift set (CLICK HERE). I’ve went along with the same idea here and made them all sympathy related cards using my own acetate box and some Taylored Expressions products. These were all quick and easy to pull together using the Taylored Expressions Done for You Alcohol Ink Background Panels along with a previously released card kit stamp set/die.
I decided to heat emboss several of the fern images with white, gold and silver over a few of the panels, some over white and vellum and then cut out. I placed them along with the heat embossed sentiments cut out and arranged them over the panels. I matched up the cardstock that I had from my stash with the panels to create the completed cards.
Here’s a gallery of a few of the cards up close along with the finished gift box tied with a ribbon: (Just click on each photo from my website to see them enlarged.)
I think this will make a nice gift for someone as I always hear people saying they never have a sympathy card on hand when they need one or for those people that don’t make their own cards too.
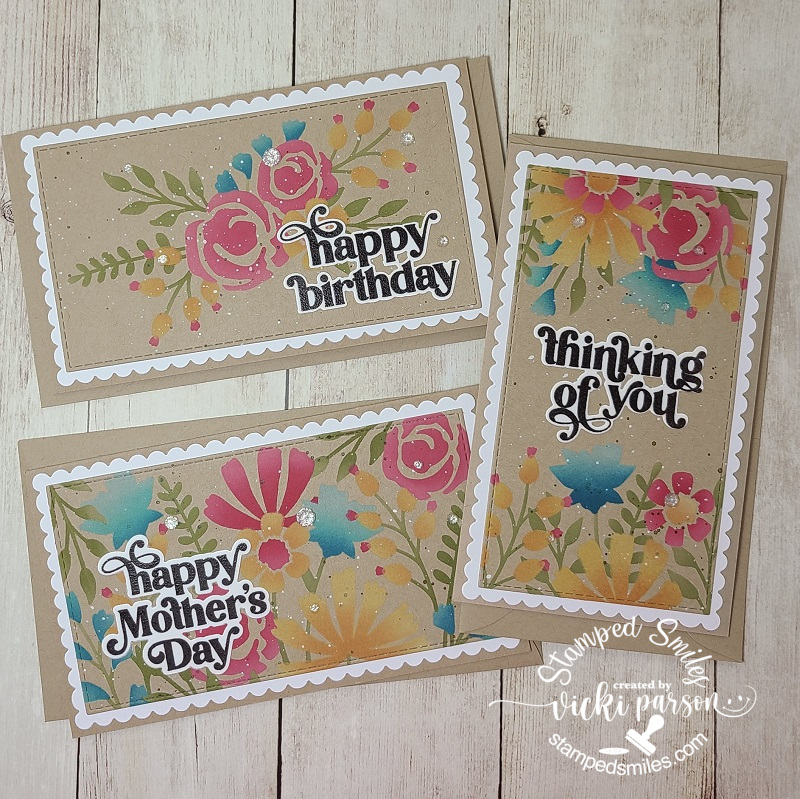
And lastly, I’ve made a couple sets of mini slimline style cards using the Taylored Expressions In the Garden-Triple Slim Layering Stencil:
I quickly fell in love with this quad type of stencils especially with these gorgeous florals! I love the way these floral panels are different from one another, and you can stencil them all up with the same color in one pass! I needed a couple of Mother’s Day cards, so making all of these at once sure came in handy for bonuses too!
Using the “craft-along” video from Taylor and Heather, I used the same, or similar colors that was used, added my black splatters and then used the TE On Occasion with dies as well as the TE Get the Word Out-Mother’s Day with dies for the sentiments where I white heat embossed over black cardstock and cut out. I just glued to the panels and attached each panel to a white mini slimline card base.
And then here’s another set of mini slimline cards using the same products as above except I used Toffee instead of the white cardstock for these. I also stamped the sentiment with dark brown ink over white cardstock and then cut them out to place over the stenciled panels.
I also used both dark brown and white paint to make the splatters over these. I also used the TE mini slimline stitched and scallop die cuts for these cards and then layered them over top of a Toffee mini slimline card base. I’ve also added a few TE white rhinestones for a bit of sparkle too.
I also think that these would make great greeting card gift sets as well! So, then it’s just a matter of which ones to keep and which ones to give away as a gift!?🤔
Hope you’ve enjoyed my mass production post today or have been inspired in some way. Thank you so much for taking the time to drop in and say hi as I enjoy hearing from you!
Challenges:
Creative Friday – No patterned paper (top set of cards only)
Colour Crazy Craft – Anything Goes with coloring (top set of cards only)
Hello friends! I hope that you’re having a great start to your week and are staying safe and warm in your world.
Today I’m sharing a collection of creations that I never seem to have in my stash because it’s never really something that I think about when creating…and I always seem to be making them as needed rather than having a few on hand. Even though, a couple of these were needed, I decided to make duplicates to have on hand this time around.
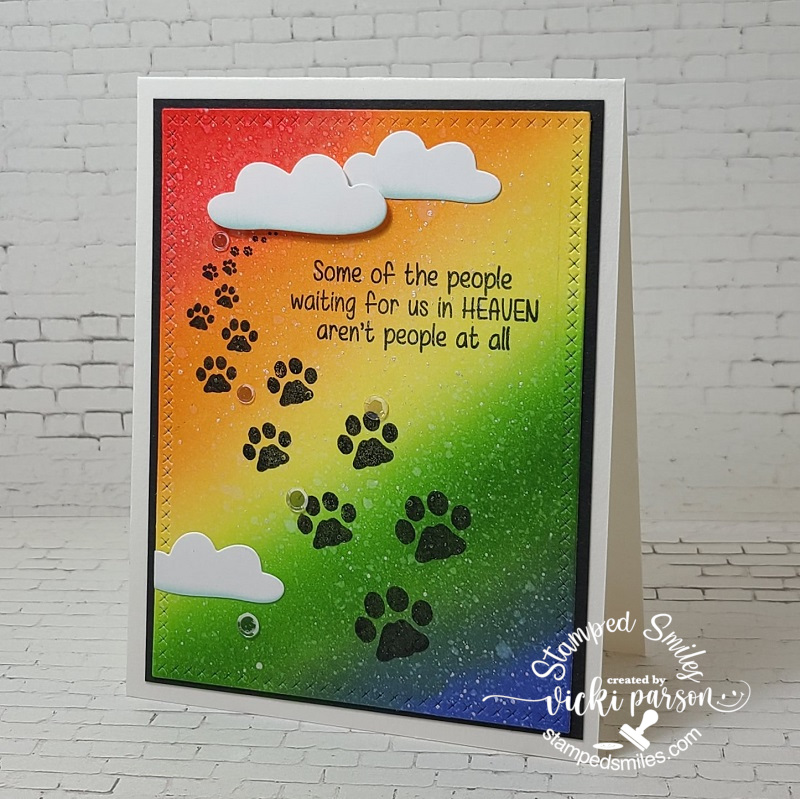
As you can see, this is a pet sympathy card I created, and one was needed to send to a friend that had recently lost her special companion. For anyone that has lost a pet knows how this feels and I wanted to be sure to send something special her way. It’s always great to have one on hand when needed.
I’ve used this wonderful stamp set from Whimsy Stamps called Furever in Our Hearts. I started by ink blending the background with distress inks in Candied Apple, Carved Pumpkin, Squeezed Lemonade, Mowed Lawn and Blueprint Sketch on a piece of Neenah Solar White. I sprayed the panel with water and used a towel to blot up the water droplets. I then took some white shimmer paint mixed with water and splattered it over top with a paint brush.
I cut out the panel with a Lawn Fawn Cross-stitched die. I used my Brilliance Black pigment ink to stamp the paw prints and sentiment over top of it so that it would show up over the background. I die cut a couple of clouds out (MFT I think) and lightly sponged the bottom of them and placed them over the areas I wanted with popping up the one cloud using foam tape at the top of the paw prints. I layered this panel onto a piece of black cardstock and then layered them both over a white A2 sized top folding card base. I finished it off with a few sparkling clear sequins.
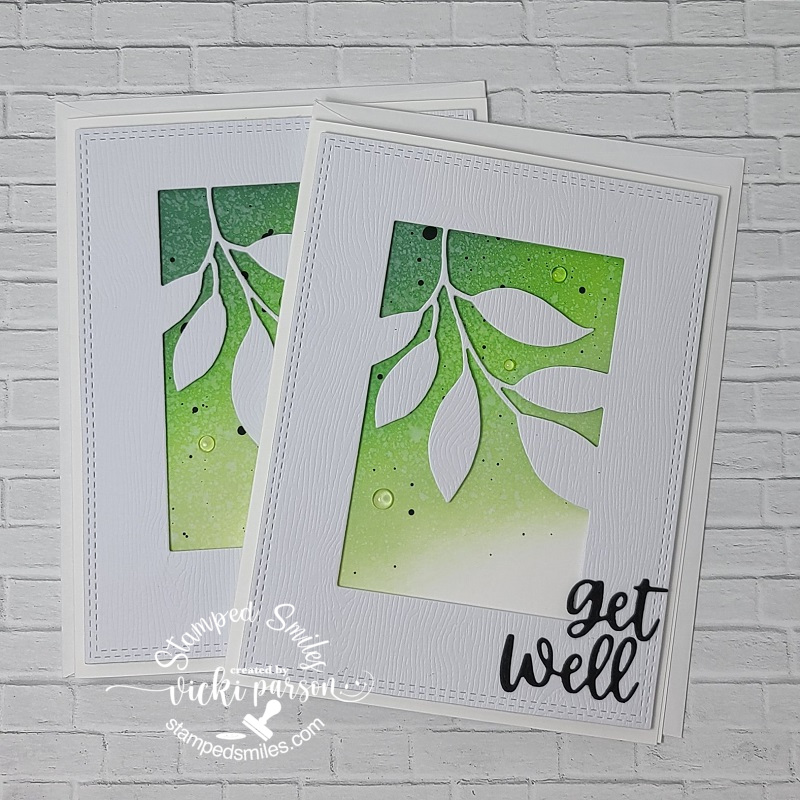
Another card that I needed was for someone that had recently been through a surgery, and I actually didn’t have any more “get well” in my stash… again, so I decided to create a duplicate of this one too. This set of cards along with the set of cards below actually were the results from the previous OOAK event I had attended, and these were part of a class I had taken. So, this class actually came in handy!
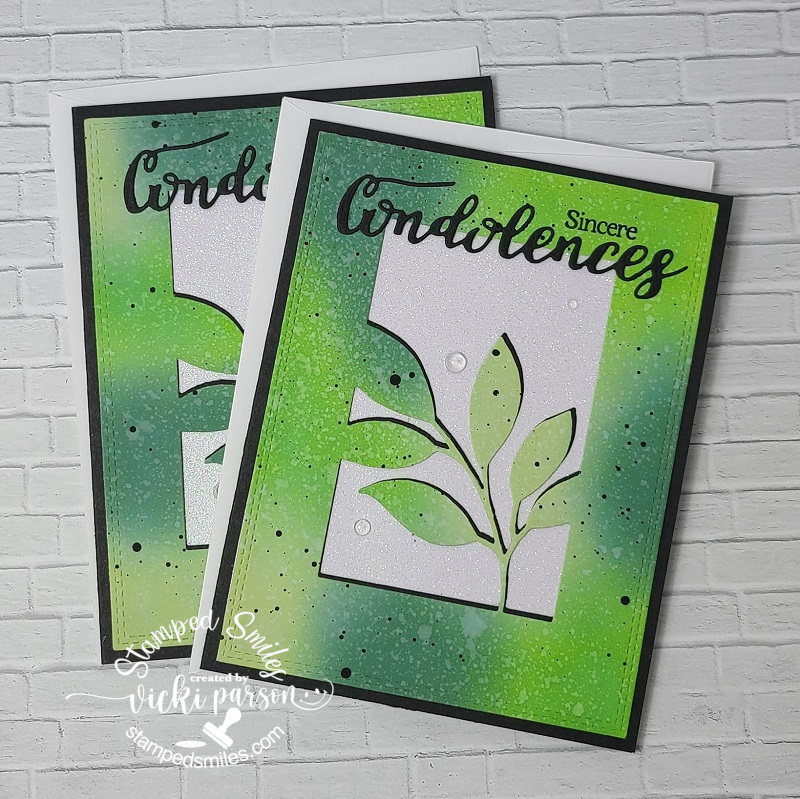
All of the papers including that beautiful die (from Memory Box-Verdant Leaf Collage), Get Well Soon die, and dewdrop water droplets came with the kit. I subtly changed up the design given for the class by adding black paint splatters and changing up the die cut lettering and the layering of the papers. I really liked doing more of that ink blending and then having it fade to the white for a soft look. The outside woodgrain frame was popped up with foam tape.
And here’s the second set of cards created within the same class using the same Memory Box die and ink blended colors. I changed up the layout with these as well by making the card base black (instead of white like shown in class) and instead of the sentiments used in class, I created my own version with the Whimsy Stamps Deepest Sympathy clear stamps and the WS Sympathy Heartfelt and Condolences die set. I also added the black paint splatters to the ink blended panels like on the set above.
I thought these sets made for some really nice cards to have on hand when needed. I’m not sure that I would’ve actually sat down to make up these types of cards in production if I hadn’t have taken the class, so I’m glad I did.
Thanks so much for stopping in today! Hope I have inspired your crafty inspiration in some way! I’ll be seeing you soon!
Hello friends! Hope you’re having a great week so far and have been enjoying the September month! I look forward to the Autumn Season and all of the beautiful changes it brings! Today, I have a fun post to share with you!
Super excited to have won a guest design spot over at the Addicted to Stamps and More Challenge blog! Have loved playing along with the challenges over there for years! A few years back I had been on the DT for a bit which was really fun too!
They have fun challenges every other week with a select set of 5 categories/themes that alternate for each challenge which makes it nice so that you can plan your creations according to each one! So, the category/theme for this challenge happens to be “Any Occasion.“
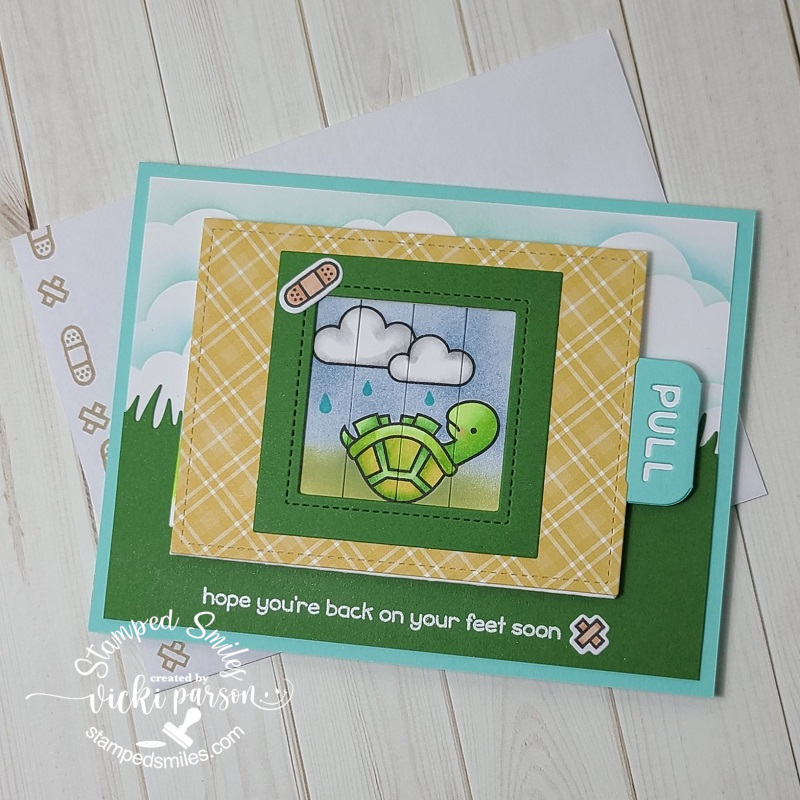
This turned out to be a really great category to work with because my husband came to me and said one of his friends that he used to work with broke his leg. So he’d asked me to make an “interactive” get well card for him:
The first thing that came to mind for this was the cute Lawn Fawn stamp set “Get Well Before n Afters” along with the “Magic Picture Changer” die set. Once you’ve made one of these picture changers, it’s not hard at all and it’s really fun to see it change. I had made a card a couple of years ago for someone else with this set and it was a really fun card to make! So I grabbed the items and started with the scene for the background.
As you can see, there’s not much showing once you place the pull tab picture changer layer over it. So I just sponged some clouds over the white background and die cut a grass border for the bottom section of the card. I also white heat embossed the sentiment at the bottom of the grass section, but waited until the picture changer area was done so that I could use that for placement of the sentiment. I also added one of the band-aids for decoration to the right of it.
I wanted a tiny scene inside of the picture changers with the cute turtle. If you’re familiar with the stamp set, then you know there is a turtle on his back not feeling well and then there’s also a “healthy turtle” image too. So for the “sick turtle” I sponged the sky and grass behind him and the stamped clouds by using masks I cut out from the images. I then colored him up with Copics.
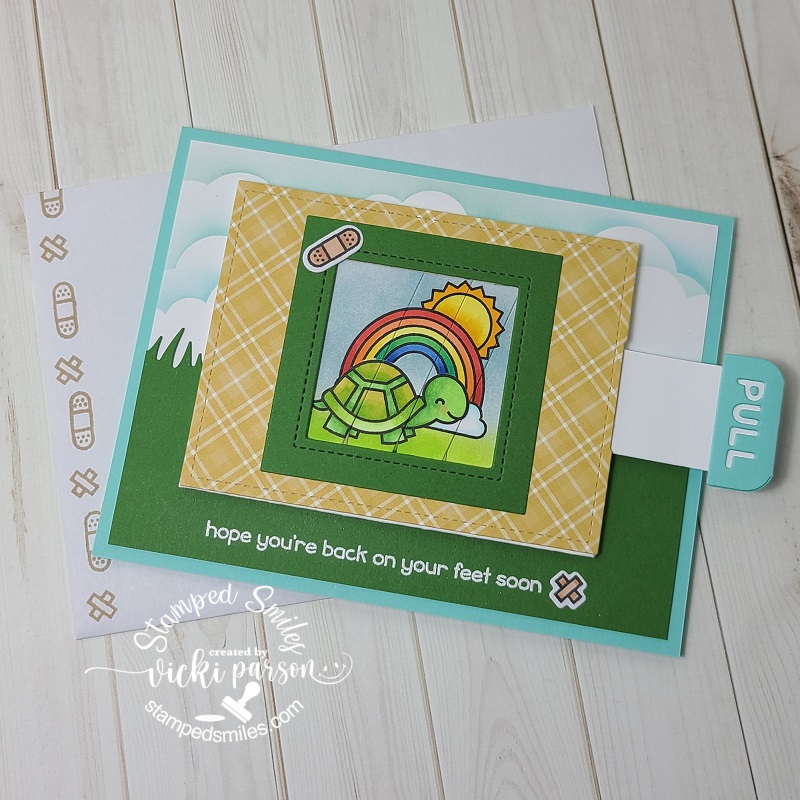
And then of course when you pull on the slider tab, the picture changes and you see the “healthy turtle” with the sun and rainbow instead of the clouds and rain. LOL, I colored the images with Copics again and made masks for the images so that I could sponge over them for the sky and ground.
I popped up the picture changer section with foam tape over my background panel and then layered it over a top folding A2 sized card base so that there’s message inside too. Lastly, I’ve added another band-aid image on the green frame and stamped some band-aids on the envelope for mailing too.
It’s certainly no fun to be laid up with a broken leg, so maybe this will help cheer him up!