Hello and happy Friday to you friends! Welcome to the month of October! We’re still having some unseasonably warm weather right now, but next week it’s supposed to cool down a bit along with maybe some rain which we really need right now. Hope that wherever you are that things are going well for you!
Today is a new challenge over at the Alphabet Challenge Blog! Our next letter is “M”, and our hostess, Tee, has chosen “M is for MYTHICAL CREATURE(s)” (fairies, gnomes, unicorns, dragons, vampires, zombies, etc.) I think this will be a fun one for Halloween! *Please remember that this is a bi-weekly challenge, so you have two weeks to enter.* I hope you’ll join in the fun with us. Here’s the project I’ve made for this challenge:
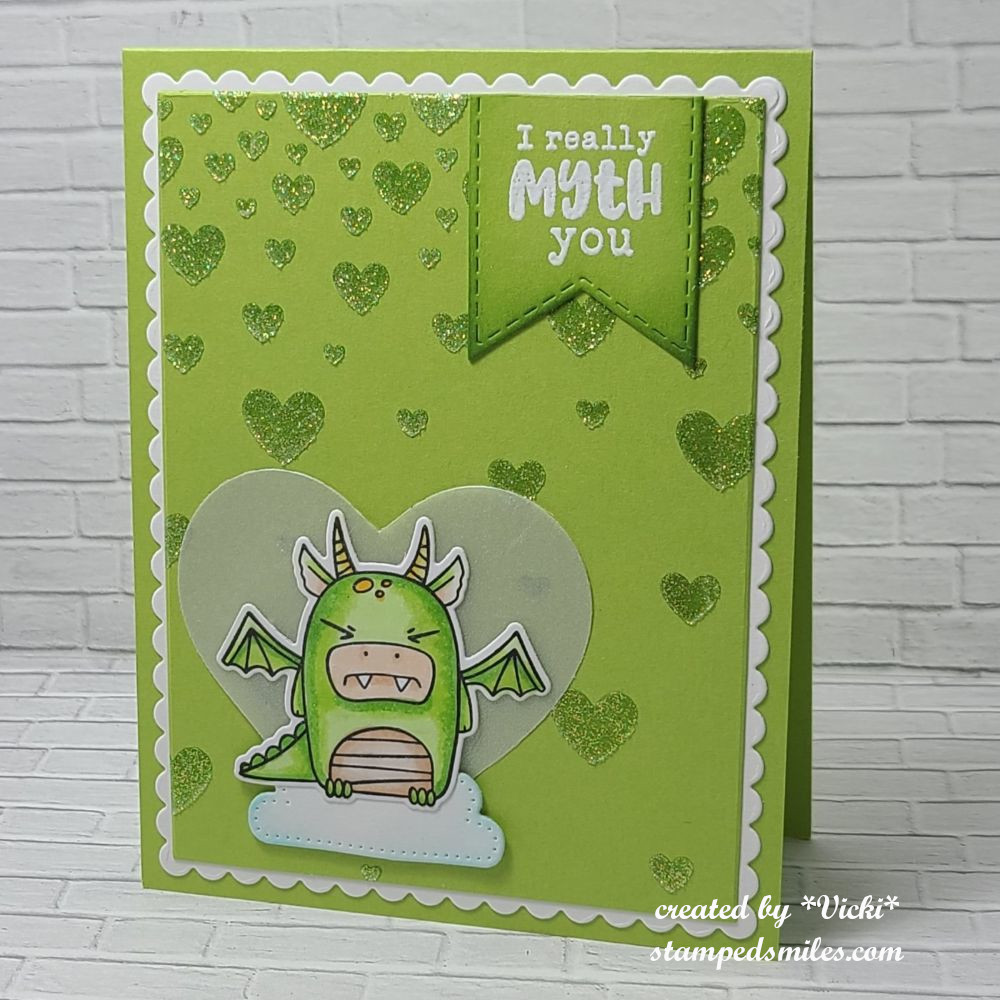
These little grumpy guys from Taylored Expressions always make me giggle and I fell in love with this set a few years back and had to snatch it up! I pull it out sometimes to make a funny card to send someone. There are other characters from this set called “Mythical Grumplings” (looks to be a retired set) that are super cute!
Because he’s a grumpy dragon, I mainly used green colors to color him up and for the base/background design. I used a heart stencil with green ink and overlayed some translucent sparkle paste over it. I die cut a cloud for the dragon to stand on as well as die cut a heart from shimmer vellum for the dragon to stand out a bit over all of that green color. I popped both the cloud and dragon up over the vellum heart and added to the background.
I layered it over a scallop white layer and a green A2 top folding card base. I also white heat embossed the punny sentiment and die cut it out with a stitched banner die. Sponged the edges with green ink and attached to the top right of the heart panel.
- I hope you’ve enjoyed my mythical creature card today and that you’ll consider hopping on over the to the challenge blog to see the inspiration from the rest of the team and join in the fun to play along too!
Thanks so much for stopping by today! Wishing you a happy weekend ahead!
Challenges:
- Try it On Tuesday – Animals (real or imaginary)
- The Divas That Cut…Paper! – Anything Goes
- Crafts Galore Encore – #140 Anything Goes
- CRAFT – #765 Grandparents/Anything Goes
- As You Like It – Square card or Not & why? (I most usually make A2 sized cards because it’s what fits best with my envelopes and I can get 2 card bases from one sheet of 8.5″11″ cardstock. It makes crafting cards more simple with this size.)