Hello friends! I do not even know where this month went! Wow! I guess life has a way of keeping us busy and sometimes we just need to make time to take time. I do hope that you’re having a great September month and looking to the Autumn season. It’s my favorite season to be out in…I still need the cooler weather though! I’m hoping for it soon!
Can’t believe it, but it’s time for another monthly AJ page with my crafty friend Carol (from Crafty-Stamper) who is collaborating with me to “SMASH OUR STASH”! We get creative trying to use up our never-ending stash piles along with a prompt for each month. I know she always has great inspiration to share, so please check out her blog too! Here’s my AJ page with the “SMASH OUR STASH” SEPTEMBER prompt of “WOOD”:
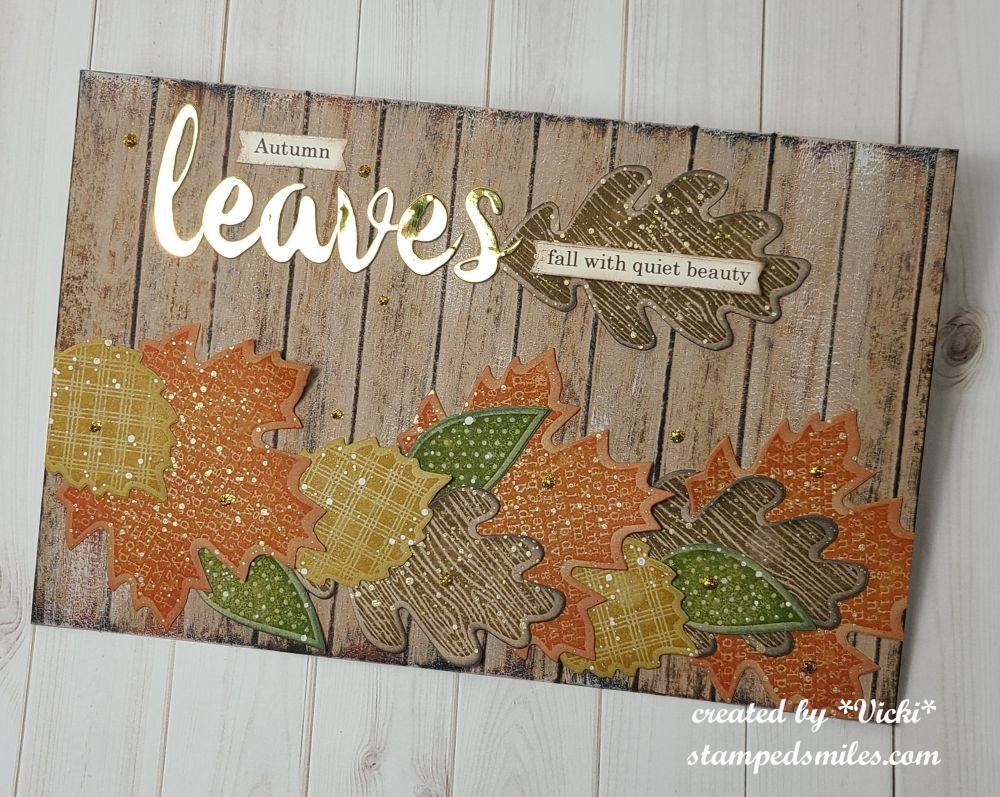
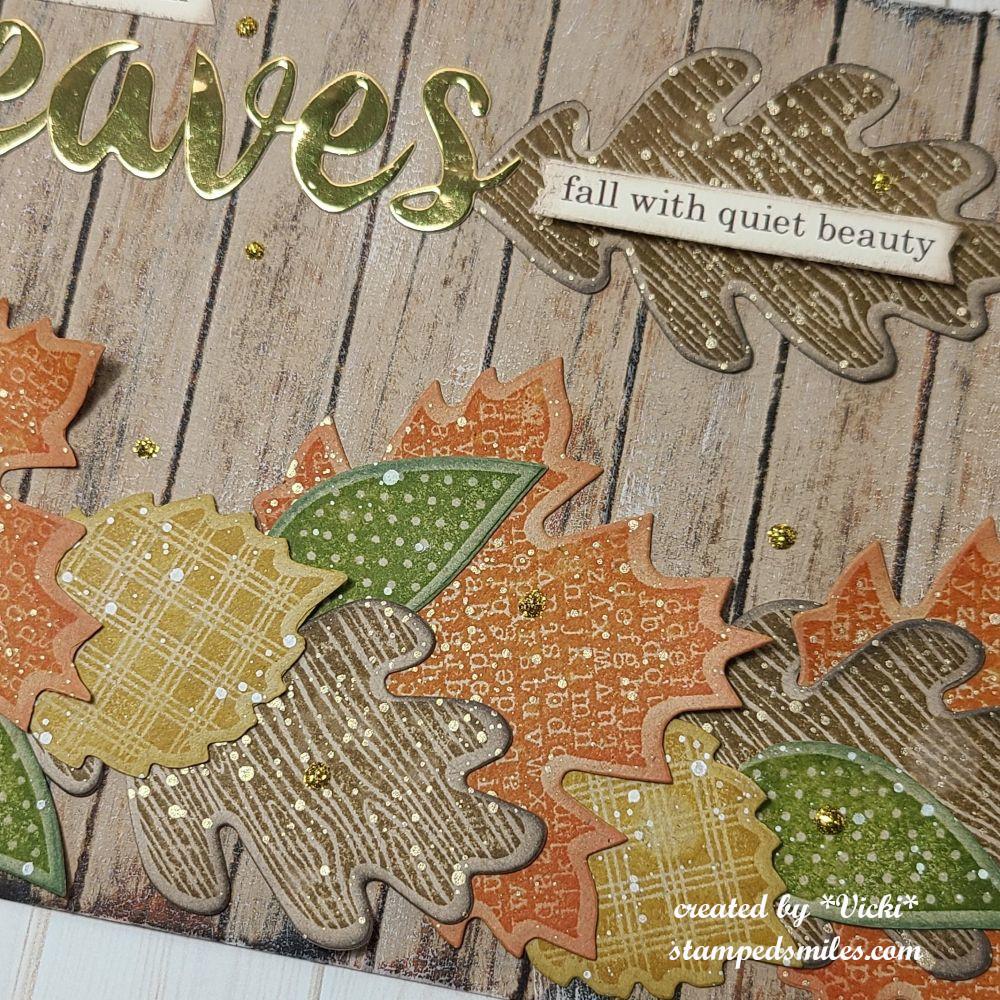
Although the temps are still unseasonably warm right now, I’m dreaming of those pretty Autumn colors and cooler temps! I decided to get lots of inks out and make a background for this one to display my leaves across it.
For the background: I started with a kraft piece of cardstock measuring my usual 8.5″x 5.5″ size and then at every 3/4″ I scored a line across the longer side edge. So, using the score marks with the texture line facing up at me, I swiped a few colors of distress inks in Vintage Photo, Walnut Stain, Rusty Hinge and Black Soot. I then took a flat DRY paint brush and brushed down over the ink marks I swiped to brighten the colors. It’s such a simple technique to make a background!
I definitely “shopped my stash” this time and pulled out a VERY old Stampin’ Up! stamp set called “Wonderfall” and the Bigz die to cut them out. Those were the days where we didn’t have a MISTI tool to help us line stamps up! LOL It’s much easier now with the MISTI! So I splattered all of the leaves after the die cutting and stamping with metallic gold watercolor, brown and white Copic Opaque white. I arranged them all over the background and attached them.
Here’s a closer view of the background so you can see how I’ve done it along with the details on the leaves.
For the sentiment, I die cut some letters from gold metallic foil cardstock and attached to background. I used my computer to print out the other words and die cut them out with a banner die and sponged the edges. I used foam tape to pop up the one over the leaf.
Lastly, I used some gold glitter drops to add a bit of sparkle to it.
Thanks so much for dropping in today! I hope you’ve enjoyed my art journal page today! I hope you’re able to get outside and enjoy your weekend!
Challenges:
Art Journal Journey – Make Your Own Background (wood panel/plank background with inks)
Hello friends! Here we are again at the end of another month! Although I’ve been really busy this past week, I think I’m ready for March to be over with! Mainly because of this crazy weather and another because I’ve been busy doing things other than crafting! LOL (Must be time for that organizing…er as I like to say “agonizing”!)
Today is our monthly AJ page with my crafty friend Carol (from Crafty-Stamper) who is collaborating with me to “SMASH OUR STASH”! We get creative trying to use up our never-ending stash piles along with a prompt for each month. I know she always has great inspiration to share, so please check out her blog too! Here’s my AJ page with the “SMASH OUR STASH” March prompt of “Favorite Things”:
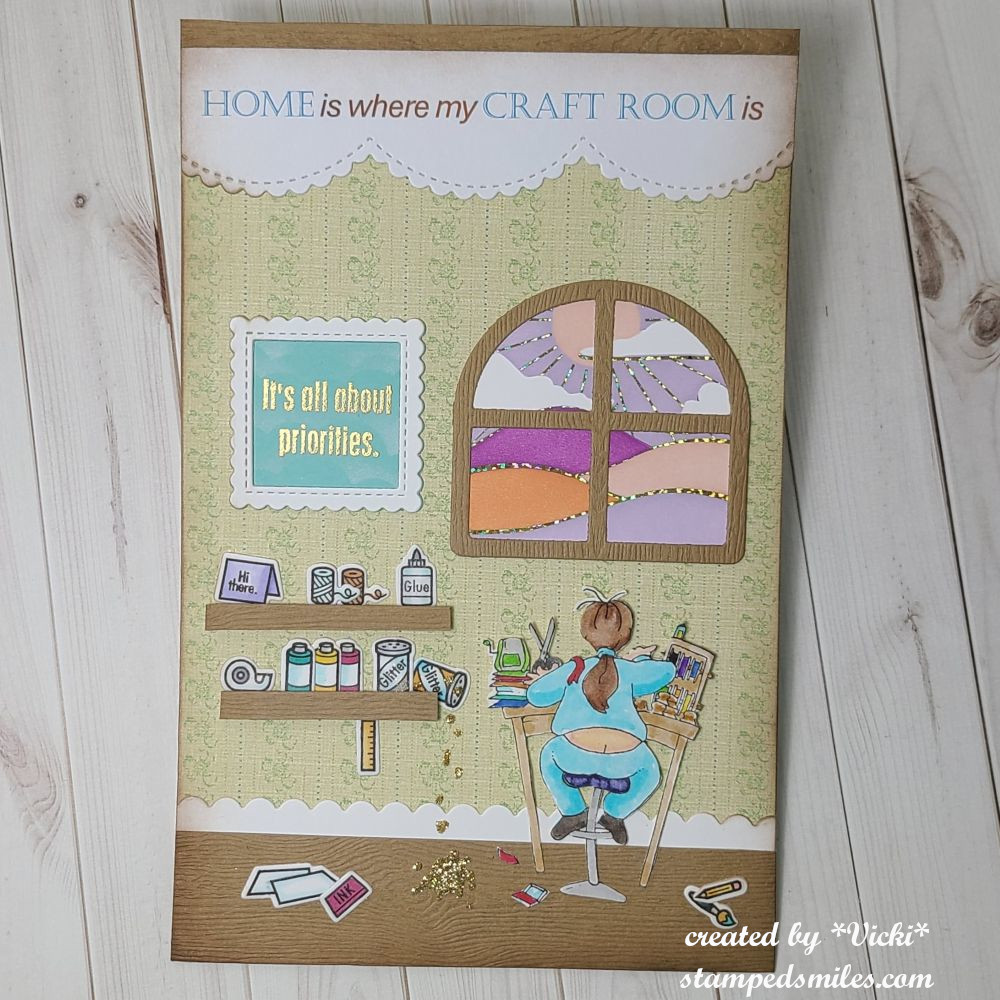
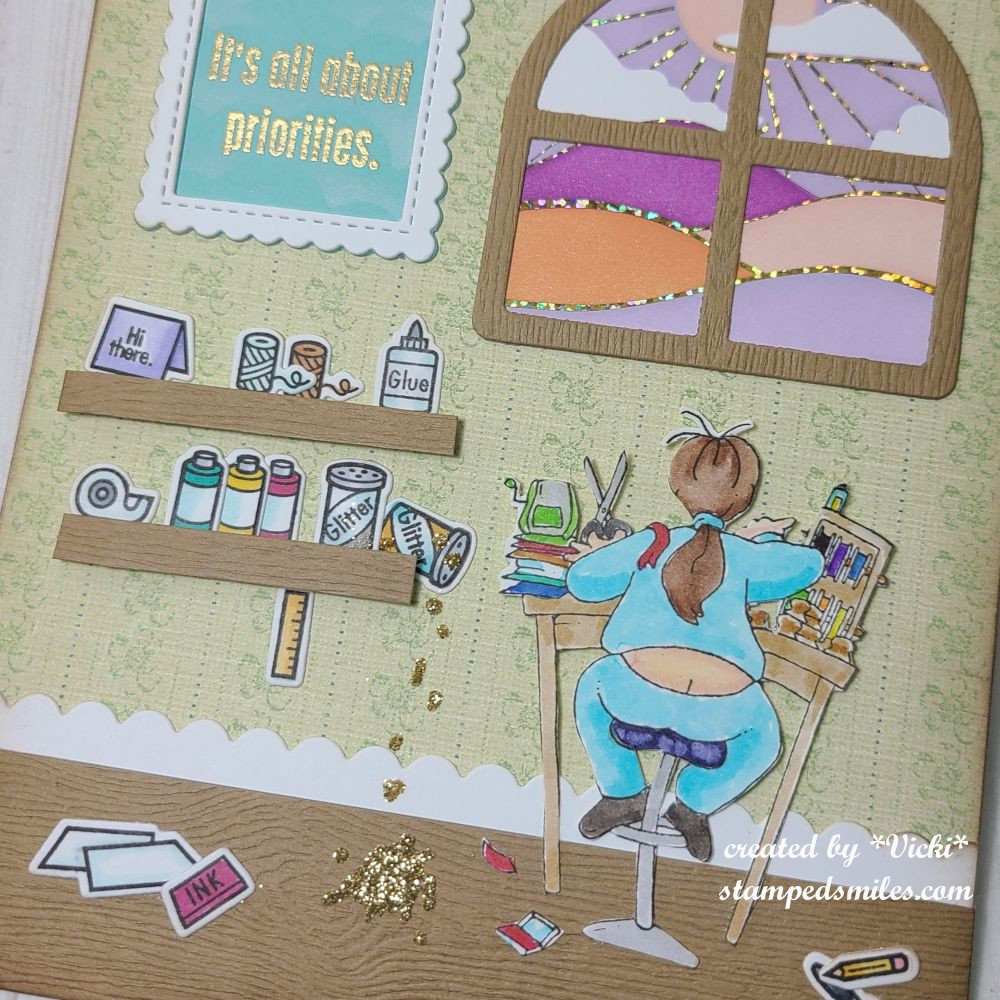
I’m sure you might’ve guessed that one of my favorite things to do is obvious on this page! (This craft room actually looks a bit more organized than mine is currently!) I did have so much fun with this one! I’ve usedSO many of my favorite things on here: old stamps, mixed company favorite stamps, foiling, heat embossing, coloring (Copics and watercolor), ink blending, die cutting, fussy cutting, using old paper stash, mix of papers, favorite colors, the subject of stamping, my favorite room, wearing sweats, crafting while sun going down, etc, etc, etc. Honestly, this was easy, but it could be because I enjoyed putting it together.
For the background: I used a standard white cardstock base measuring 5.5″x8.5″ and then took some very old Stampin’ Up! paper (Porcelain Prints) to cover the entire size so that I could get the look of wallpaper. I then used some textured woodgrain cardstock from my stash for the floor, the window and the shelves. (The shelves were popped up with a foam strip) I die cut a scallop border in white for the trim above the floor and also die cut a frame for the wall hanging. The sentiment for the wall hanging was gold heat embossed and placed behind the frame. (I sponged some white clouds in there too.) The border at the top was printed off my computer and I used another scallop border die to cut it out. I sponged some brown ink around the edges of the page and added all of the elements.
The stamper girl image was from an old company called “Hambo Stamps” (went out of business several years ago), but I think it’s so cute and funny! This is where the gold embossed sentiment came from as well. Had fun coloring her up with my watercolor pens.
For the window, I used the Taylored Expressions Foil It-Dreamscapes along with the coordinating stencils that I received from Virtual Stamp Joy earlier this month. (I will share my projects in another post later on.) I also used the TE Arch Windowpanes die set to cut out a frame in the woodgrain cardstock over one of the ink blended panels.
And lastly, the little crafty items on the shelves and floor came from the Lawn Fawn Just Add Glitter stamps & dies. I stamped and colored those up with Copics to place on the shelves. I also thought it would be fun to add some glitter spilling from the gold glitter bottle and dumping onto the floor…always a fun thing to happen in the craft room while you ignore it because you’re so intently working on something!
All this page did for me was to remind me that I really need to do more organizing! I hope you’ve enjoyed my page today and take a hop on over to see Carol’s inspiration too! Thanks so much for stopping in today!
(P.S. I’m currently away and it will be a few days before I can reciprocate your comments, but I truly appreciate your kind words of support.)
Hello friends! I hope that your week has been going great! I had planned on posting earlier in the week, but I got so focused on completing my classes that I ran out of time! (Check out the gallery below…LOTS of cards!) I thought while I’m working on laundry today, I’d make a post sharing some things I’ve been doing…so grab yourself a beverage and take some time to enjoy! First up is my art journal page:
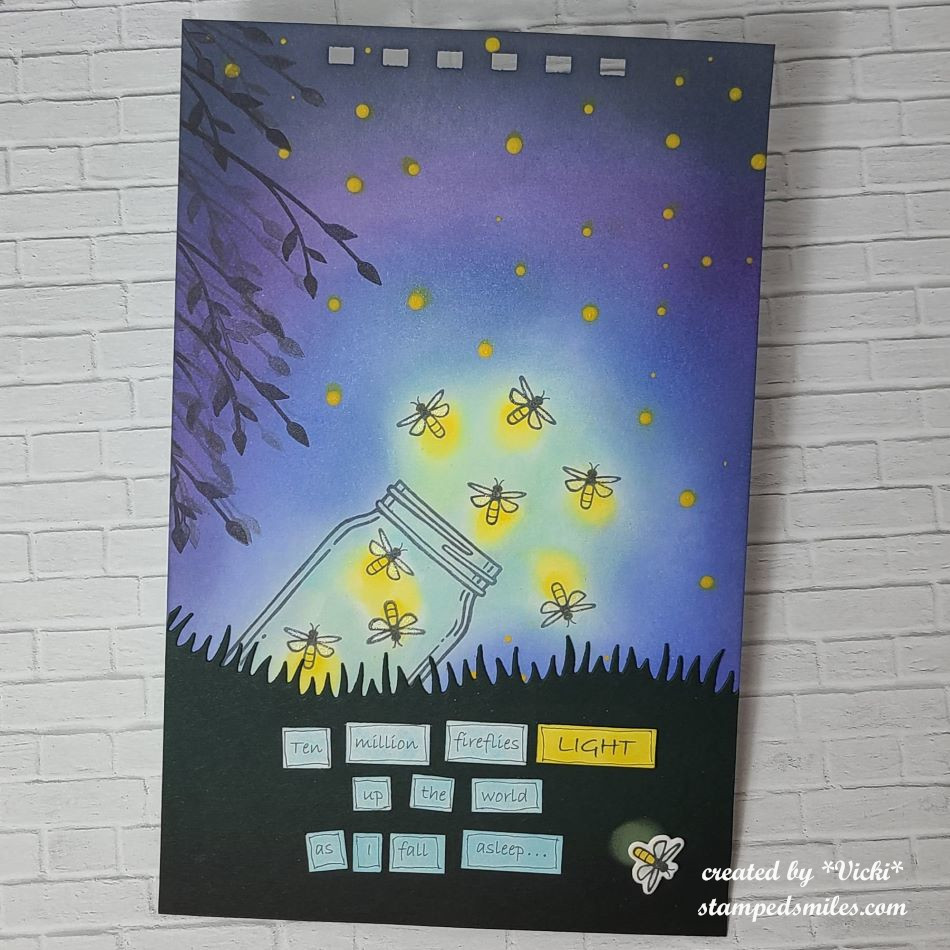
Remember that I’m a guest host over at Art Journal Journey this month and the theme that I’ve chosen is “LIGHT“. I hope you’ll stop over to see all of the wonderful inspiration that everyone has been creating with this theme and join in the fun!
This so reminds me of Summer! Remember as a child going outside in the dark and seeing tons of those flashing lights going off?! I was always amazed that when I ran over to chase that flashing light, it disappeared on me and I was forever trying to capture those lights!
For the background: I’ve chosen some Bristol Smooth cardstock in 5.5″x8.5″ pre-punched holes at the top cut with my Zutter machine. I have started with stamping the jar and placing it where I thought it needed to be and then stamped those fireflies around it. Starting with the fireflies, I dabbed on some yellow where they emit light and then used some soft blue around them working out with darker shades of blues as I reached the edges. Bristol cardstock works great for ink blending with Distress Oxides. To make sure that the yellow light was showing over the dark ink (without smudging it), I took some yellow paint and the end of my paint brush to make various sized yellow dots for the look of those fireflies in the distance.
I decided to take a leaf branch to generation stamp it along the edge for the illusion of a tree being there. Although it looks black, I die cut a grass border in very dark green cardstock for the bottom portion of the page. I also added another firefly at the bottom that was die cut and popped up with foam tape. I used yellow ink for underneath his light glow. The firefly wings have been covered with a glitter brush pen.
For the bottom lettering: I printed it off my computer and then cut out each word, added some color with inks over them and then doodled around each word with a pen. These words and this AJ page was totally inspired from a song called “Fireflies” by Owl City. If you’re interested in listening to the song, check out the video below:
I learned that this song artist has insomnia and came up with this song during one of those times he had trouble sleeping. I can relate and so it inspired my light page.
Next, I would like to share with you a card class event that I took part in called “Celebrations Delivered” provided by Scrapbook & Cards Today magazine. It was a one day event with virtual live learning class videos and each instructor provided at least 3 different projects. I have listed below each photo who the class instructor was.
If you are on my website, just click on each photo to enlarge it and see the details about each one underneath the photo. I have made 15 total cards from this:
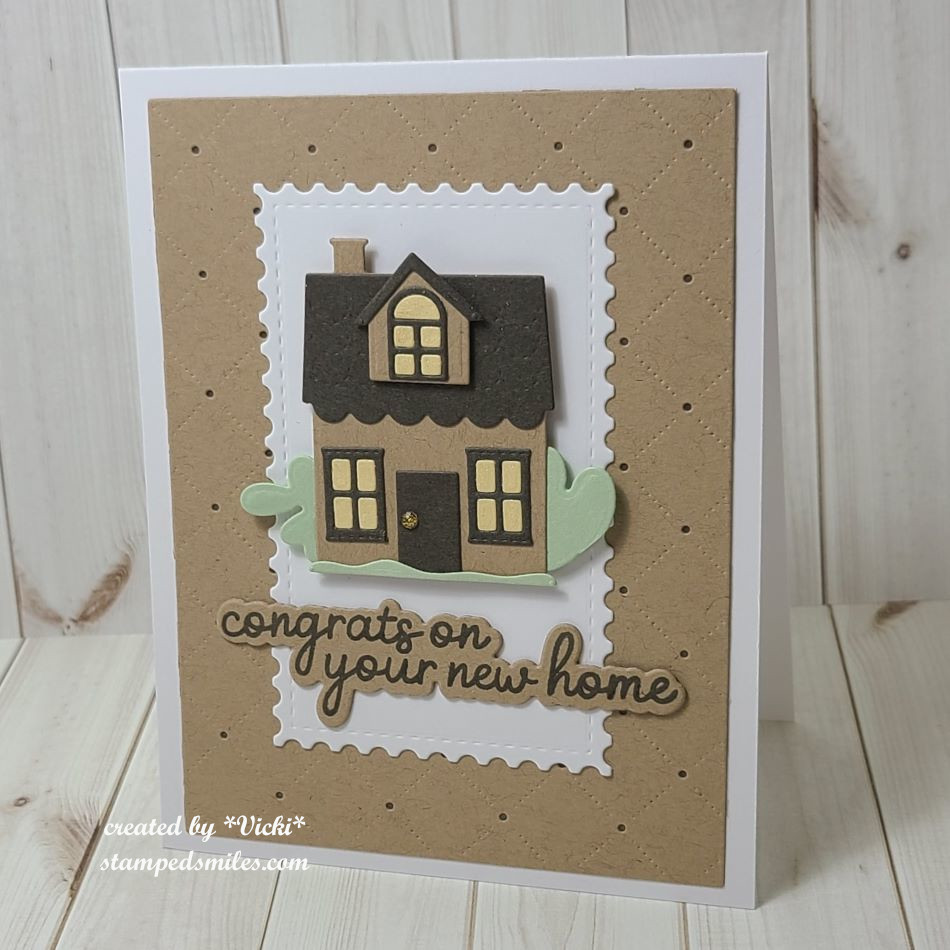
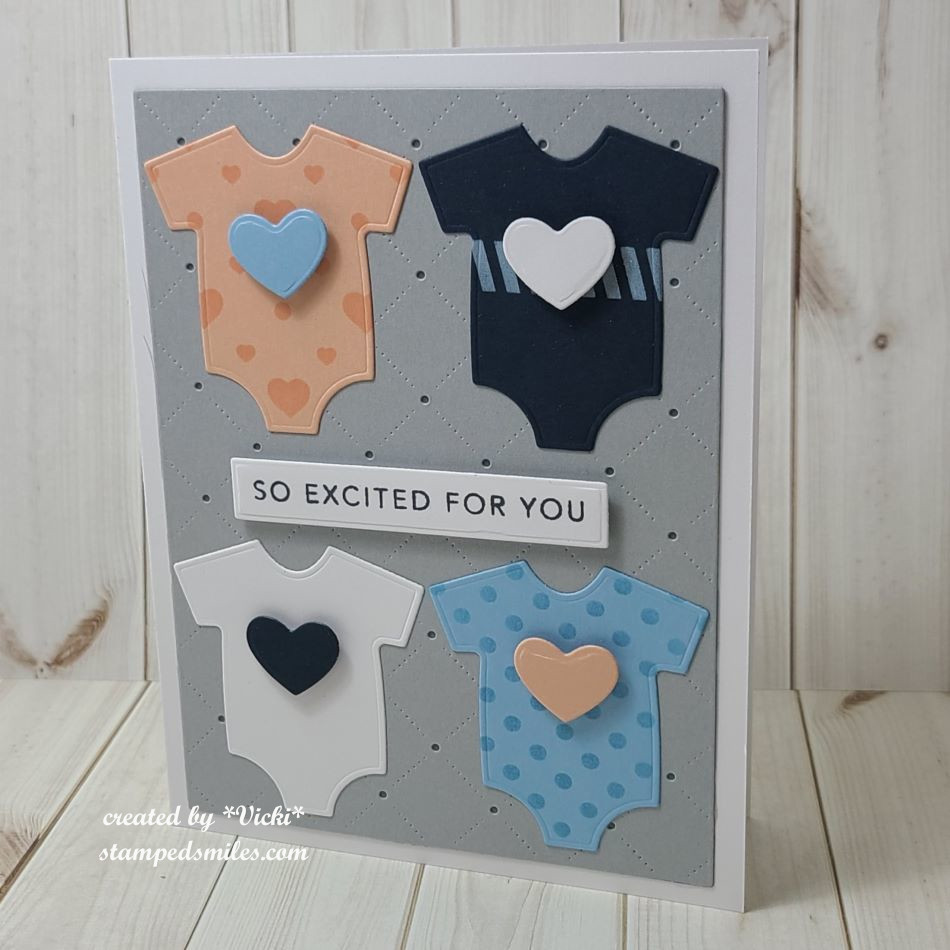
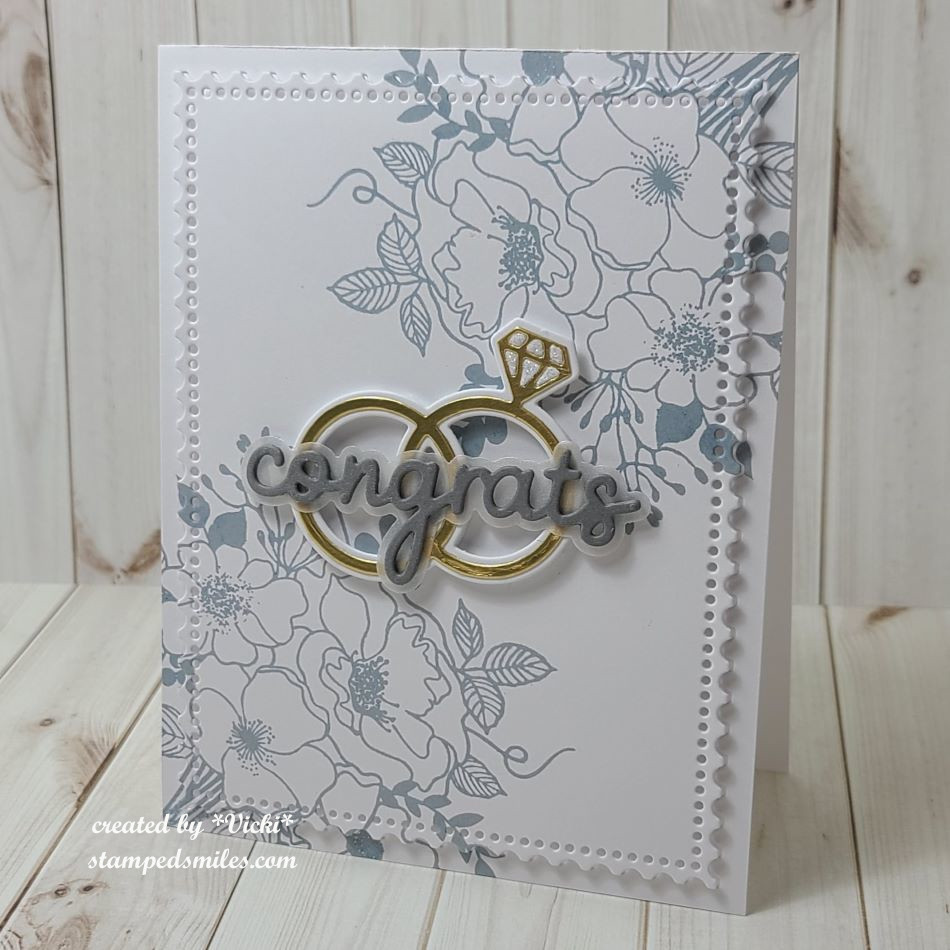
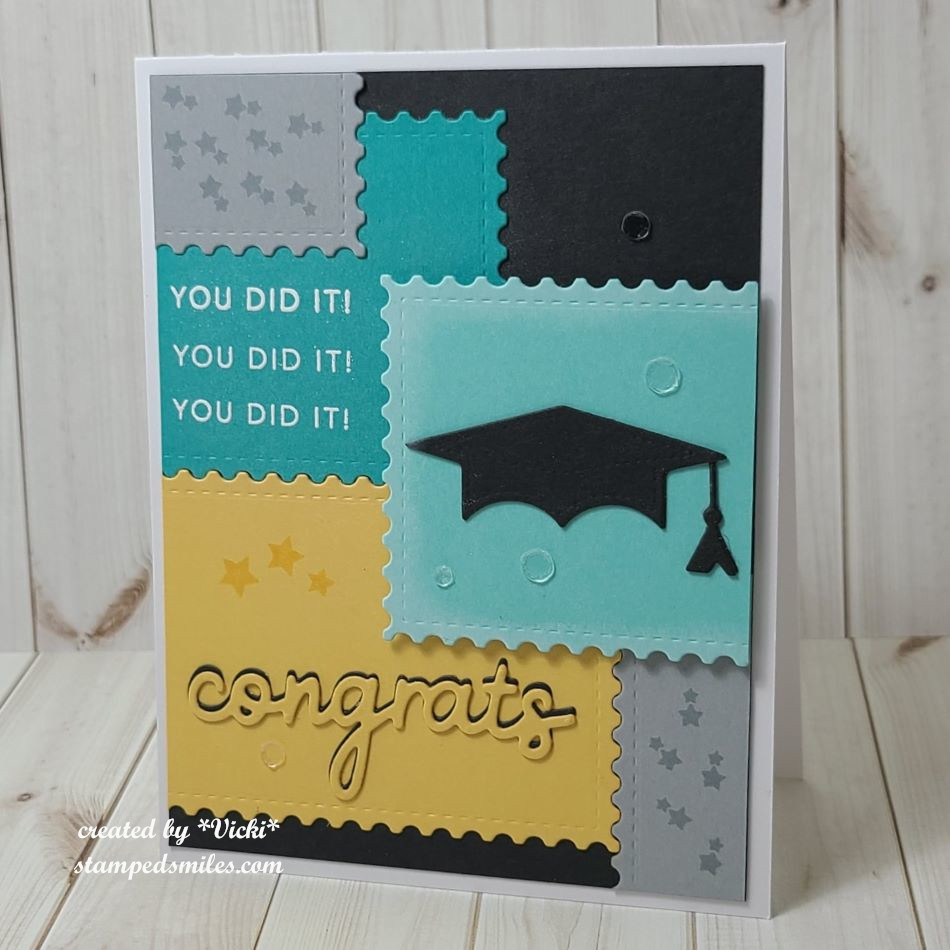
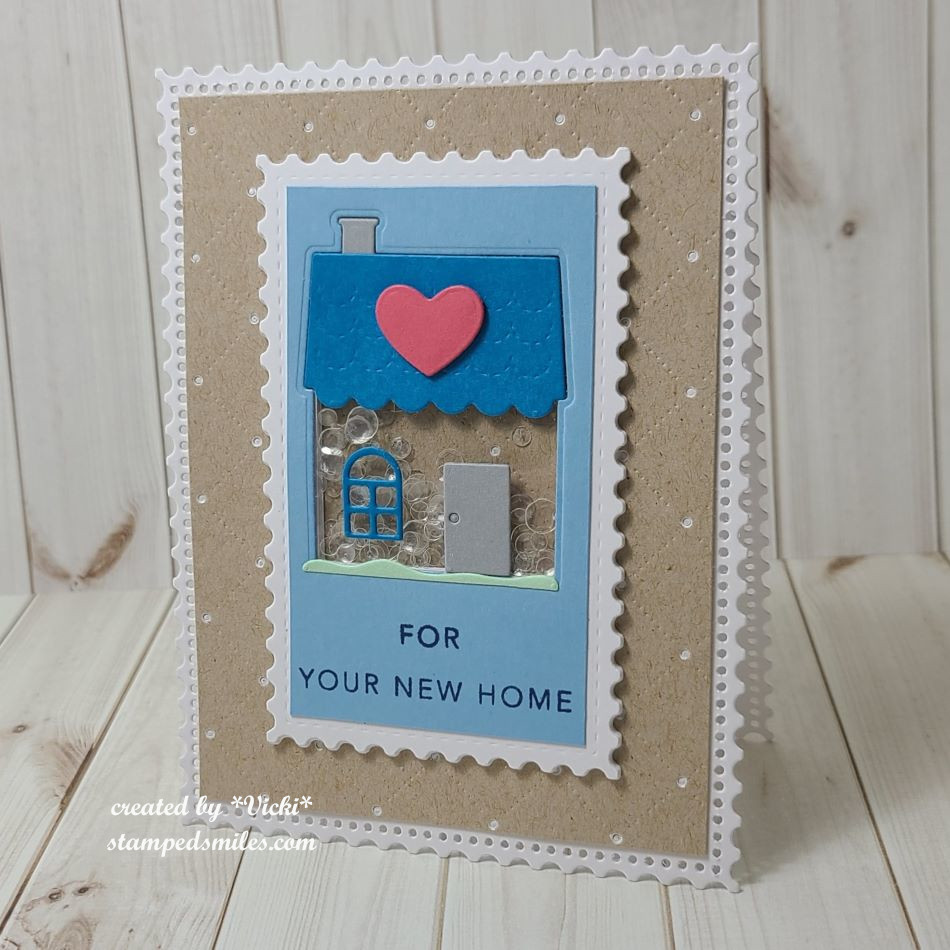
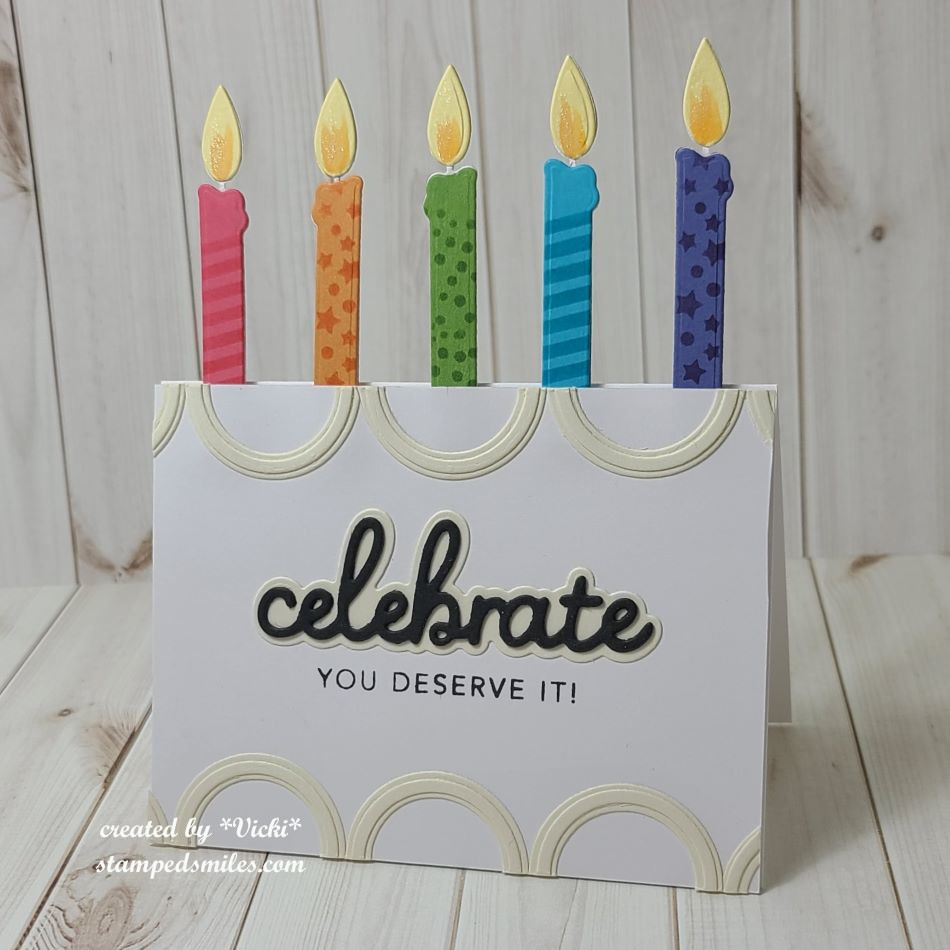
Cathy Zeilske card 1Cathy Zeilske card 2 – embossed background with a stencilCathy Zeilske card 3 – windows have glitter brush over themMindy Eggen card 1 – my glitter paste made ink color look off and it dried opaque…didn’t like that. (I chose the product – not class or Mindy’s fault!)Mindy Eggen card 2 – masked flowers and ink blendedMindy Eggen card 3Meghann Andrews card 1 – embossed with die cut (I changed mine around from hers)Meghann Andrews card 2Meghann Andrews card 3Meghann Andrews bonus card 1 (changed slightly from hers)Meghann Andrews bonus card 2 – shaker card & ink blend backgroundMeghann Andrews bonus card 3 – (changed colors and style from hers)Jennifer McGuire card 1 – flaps on all sides to tuck in with belly band & fits 5×5 envelopeJennifer McGuire card 2 – shaker house and die cut shape cardJennifer McGuire card 3 – unique card making creative use of dies
Really had fun making these and using the products provided to us. This also reminds me that I have more classes coming soon that I’ll be doing and that I’ve also forgotten to share some things that I had done last year, but hadn’t posted! If anything else, you can hopefully enjoy or be inspired in some way as I post! But more will come soon if my arms don’t fall off!😉
Thank you so much for stopping in today and I’m happy you’re here! I will be dropping around to see what everyone is up to and I will be back on Saturday for our “Smash Your Stash” AJ inspiration! Have a wonderful day!
Hello friends! Wishing you a happy weekend! We’ve had a heat advisory in our area all week, so I’ve been staying indoors organizing, cleaning and crafting! Hope that you’re taking some time to enjoy your weekend even if it’s just for a moment of time.
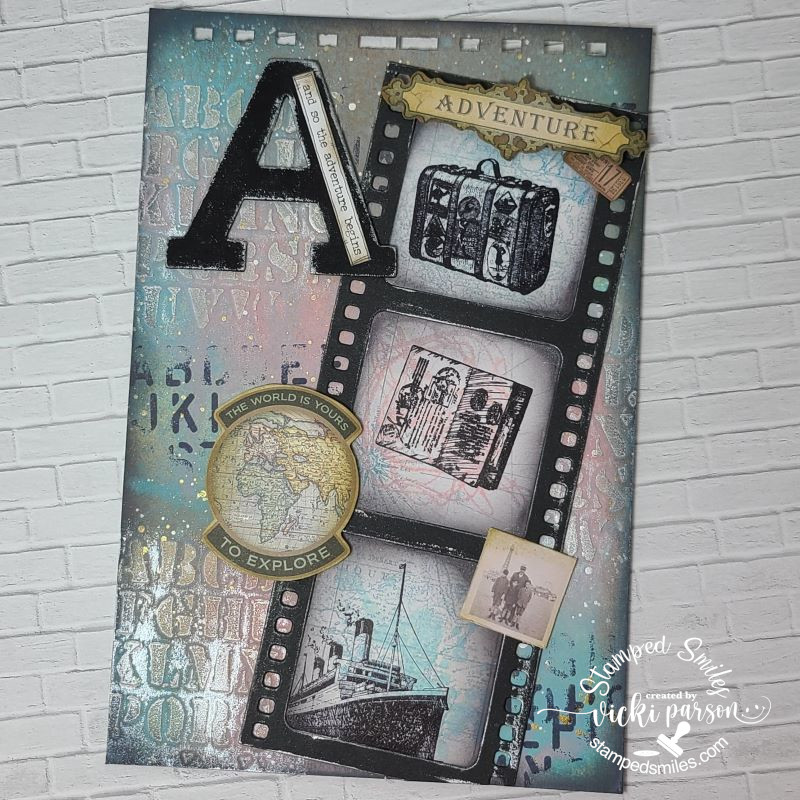
I can’t believe we’re at the last weekend of August, because it’s time for the monthly Art Journal Page collaboration with my crafty friend, Carol (from Crafty-Stamper)! We get creative trying to use up our never-ending stash piles along with a prompt for each month. I know she always has great inspiration to share, so please check out her blog too! Here’s my AJ page with the “SMASH OUR STASH” August prompt of “LETTERS”:
Thinking of YOUR stash, what do you come up with from the prompt? I think as crafters, we probably all have some type of lettering in our stash! I have stamps, stickers, chipboard, wood, stencils, ephemera, etc so I knew this would be a good opportunity to pull out something. And if that doesn’t work for you, I suppose you could take the prompt literally, and attach an actual written letter or make one up yourself to add to your AJ page. Lots of ways to interpret a prompt which makes it easy to come up with a plan to inspire you. So this is what I came up with.
For the background: I started with a 6″ x 9″ Strathmore Acrylic paper with pre-punched holes at the top and stenciled some crackle paste over my Tim Holtz alpha stencil and let dry. I then took some Distress Oxide sprays in the colors kitsch flamingo, salvaged patina and speckled egg and mixed with sprayed water to let the the colors run over the stenciled areas. After it dried, I used the Tim Holtz Grunged stamp set and stamped more letters over the background with black archival ink. The edges were blended with dark gray ink and then I splattered the page with gold and white paints with a fan brush. Lastly, I took some white gold metallic wax and went over the stenciled letters.
The film strip came from the Whimsy Stamps Slmiline Film Strip die cut out from black cardstock. For the three image sections, I found some packaging with maps images on them and cut it out with the same die. Since the packaging had a slick surface, I painted it with clear gesso so I could stamp over it. After it dried, I stamped the three panels with the TH Grunged stamp set in the same colors of Oxide inks as the background and then stamped the travel images with black archival ink from an old Stampin’ Up! set called “Traveler”. To finish is off, I used an old chip board letter “A” from my stash, painted it black and added some more of that white gold wax along the edges, found a TH “small talk” sticker to go over it and then I drew some lines around it and sponged it to make it look grungy. I finished it with more ephemera I found in my stash from Tim Holtz and Stamperia… and decided to call it done.
Thanks so much for stopping by today! I hope you’ve found some inspiration with my project! Enjoy your day!
It is here! The end of 2022 has arrived weather you are ready for it or not! I know as I’ve gotten older the time seems to pass more and more quickly. Each year I usually go through all of the things that I didn’t have time to do. This year I’m going to look at all of things that I DID do instead! I look forward to a wonderful year ahead and I hope you are as well!
For this entire year, I’ve had such a wonderful time creating my AJ pages at the end of each month with my crafty friend, Carol (from Crafty-Stamper)! Thanks SO MUCH to her for the wonderful inspiration and joining in the venture with me! I know she’ll have something wonderful, so please check out her blog for an AJ page too! We’ve gotten creative by using up our never-ending stash piles! (I look forward to doing this for another year each month in 2023 and I’ll hope you’ll be here too!) Here’s my final Art Journal inspiration for 2022 with the “SMASH OUR STASH” December prompt of “Oldest Stash” :
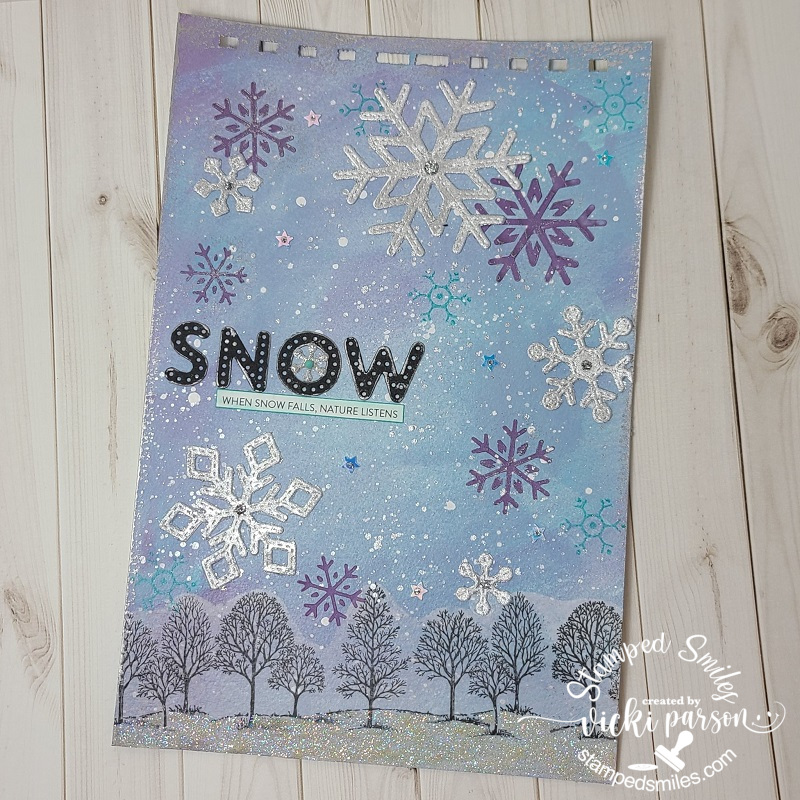
It’s a bit challenging for me to FIND my “oldest stash” as I’ve been a bit of a collector over the years. So I’ve pulled out a very old, but favorite stamp set of mine from Stampin’ Up! called “Lovely as a Tree” from 2001. The container broke when I opened it up to take a stamp out! LOL I’ve also pulled out my Pearl Ex powders and some gilding flakes from my older media stash. It’s a good thing that powders don’t go bad otherwise I wouldn’t have been able to use them!🙄
For the Background – I’ve used some mix of paints and splattered some white paint over it for the snow. The trees at the bottom were stamped over vellum and then I cut it out and attached that to the bottom of the page so that they were a nice vibrant black as I didn’t think they would stamp over the paint very well. I did take a snowflake stamp (not too old) and stamped a few randomly over the background in teal ink. (water-proof)
For the Pearl Ex Powders – I mixed some Misty Lavender Pearl Ex with embossing paste and used a snowflake stencil to randomly add this to the background.
For the Gilding Flakes – I die cut some snowflakes with double sided adhesive sheets will make the front sticky. This made it so I could rub in the gilding flakes over them. They did turn out very pretty!
The “SNOW” letters were die cut and I found a neat winter clipping from my sentiment stash to add below it after I sponged some teal ink around it. I also die cut another tiny snowflake in the center of the ‘O’ with glitter cardstock and attached a tiny teal rhinestone in the center of it. I rubbed some silver wax around the letters and around the edges of the page. Lastly, I’ve added some star sequins and filled the centers of those and the gilded snowflakes with some silver Stickles. I covered the bottom of the page under the trees with glue and covered it with sparkly glitter.
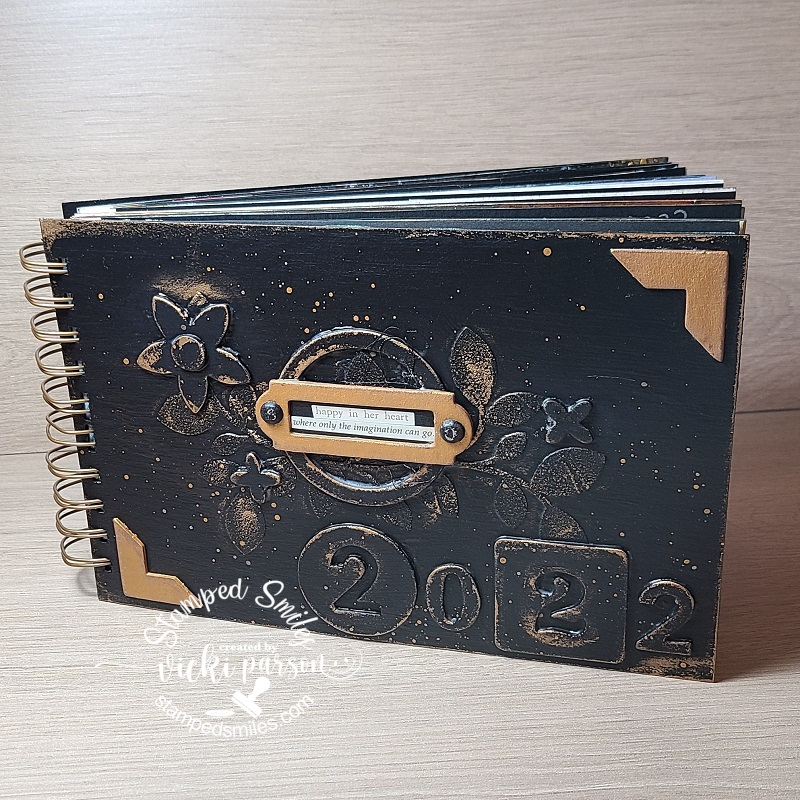
So I thought that since I’ve done an AJ page every month this year that not only did I need to close up the year, but I also needed to close the book to all the AJ pages I made from 2022 by finally finishing up a book to put them all in!
I made the covers with some chipboard along with some “old” chipboard pieces from my stash and did some painting with a bit of mixed media gold wax and stenciling. I wanted to be sure to add the year to the front and a little quote from my sticker book that says: “happy in her heart where only the imagination can go”
I fit all of the AJ pages completed this year along with a few extras that were created from before with unknown dates, added the front and back covers and used my Zutter Bind-it-All machine to add the spiral wire for a book. (This was the reason all of my pages had the pre-punched holes in them when I posted each month.)
That finishes up the 2022 year on my blog. I hope you’ve enjoyed my posts weather it’s for inspiration or just a smile. Either way, I’m so thankful that you have joined me this past year and your friendships. I look forward to a productive and crafty year ahead in 2023!
Hello friends! The weather has been really nice over my way so I’ve been taking advantage of it by enjoying the outdoors before it starts changing into more chilly temperatures. All of the prize winners have contacted me and the packages have all been sent out. I have received notice that the U.S. winners have gotten their packages and hopefully the overseas will be arriving soon. My thoughts are also with those that were affected from Storm Ian and hope for healing and recovery as soon as possible.
Although it’s been a while since I last posted, I have been working on some things for SWAPs and a few other cards that I had created as well to share with you.
please click on the photos below to see them close-up
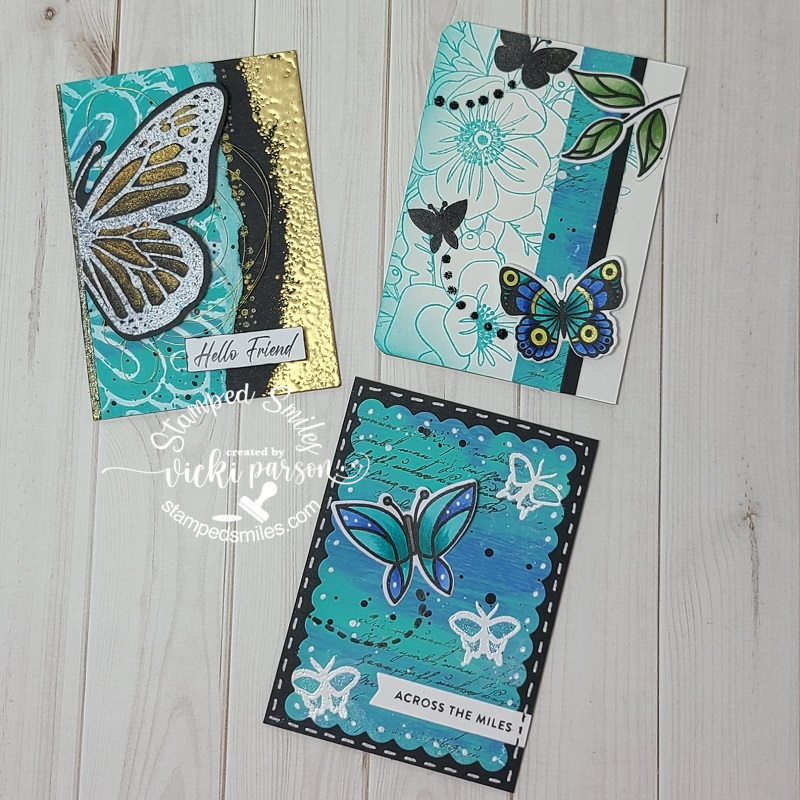
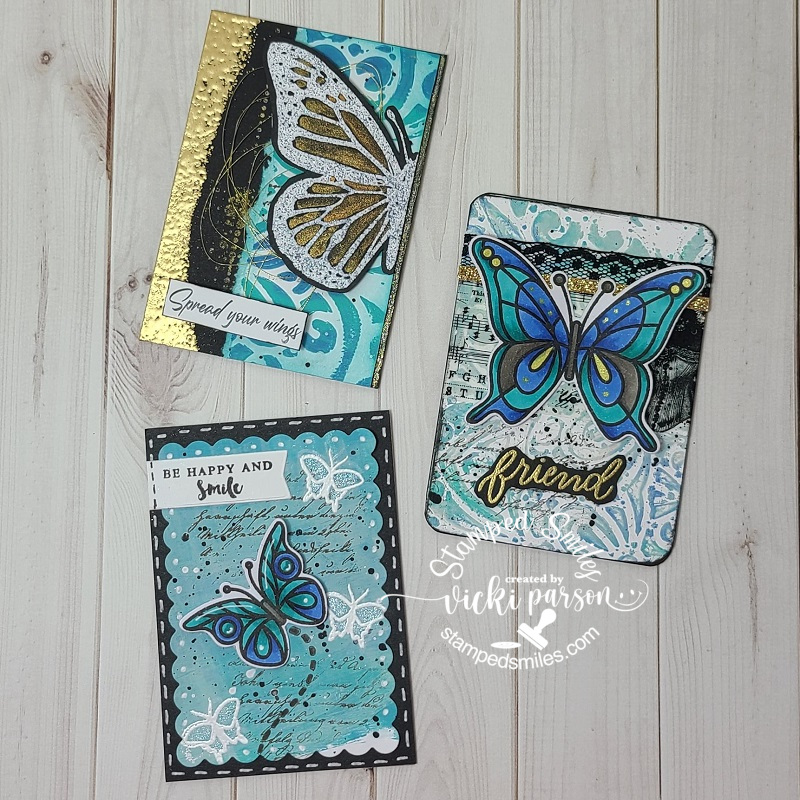
Within a FB Group that I’m in, we could choose to join an ATC SWAP with the theme of “Friendship” and these are the cards that I had created. I swapped with two others and then kept one set of three for myself. I was excited because this is the first ATCs I’ve sent overseas and really enjoyed making the collection. I thought the butterfly theme with similar colors would work keeping the “Friendship” in mind…
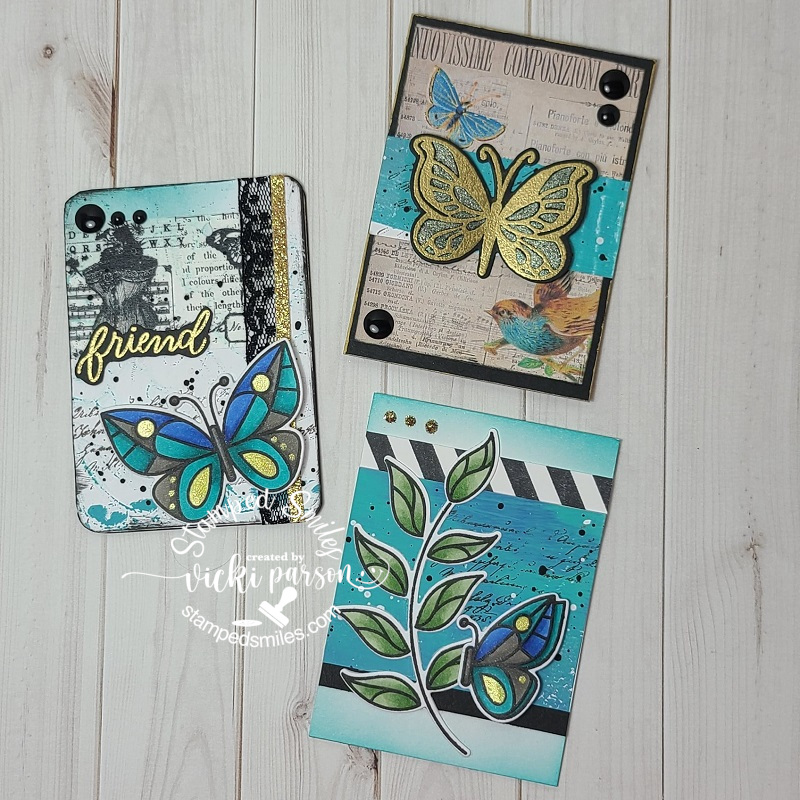
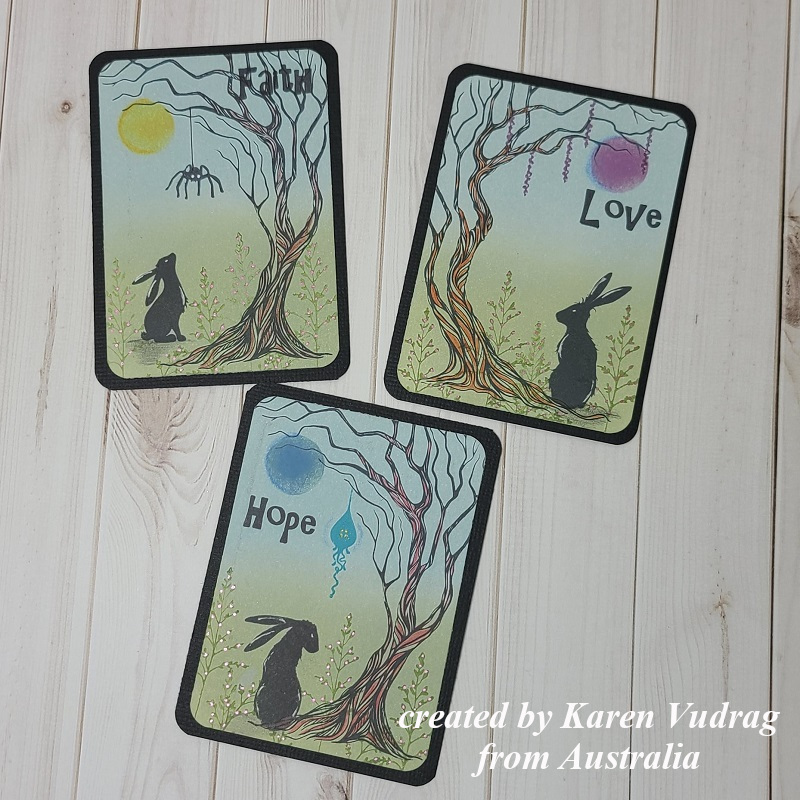
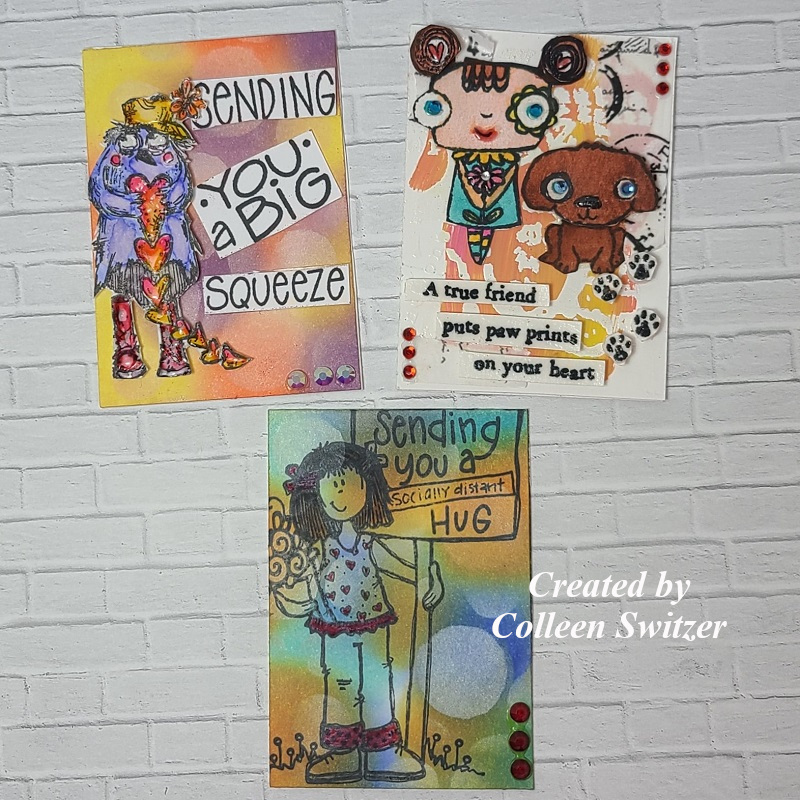
And then below are the set of ATCs I’ve received from my SWAP partners in return. The first lady sent her ATCs from Australia and the other lady was from the UK I believe. Love them and was excited to receive them to add to my book.
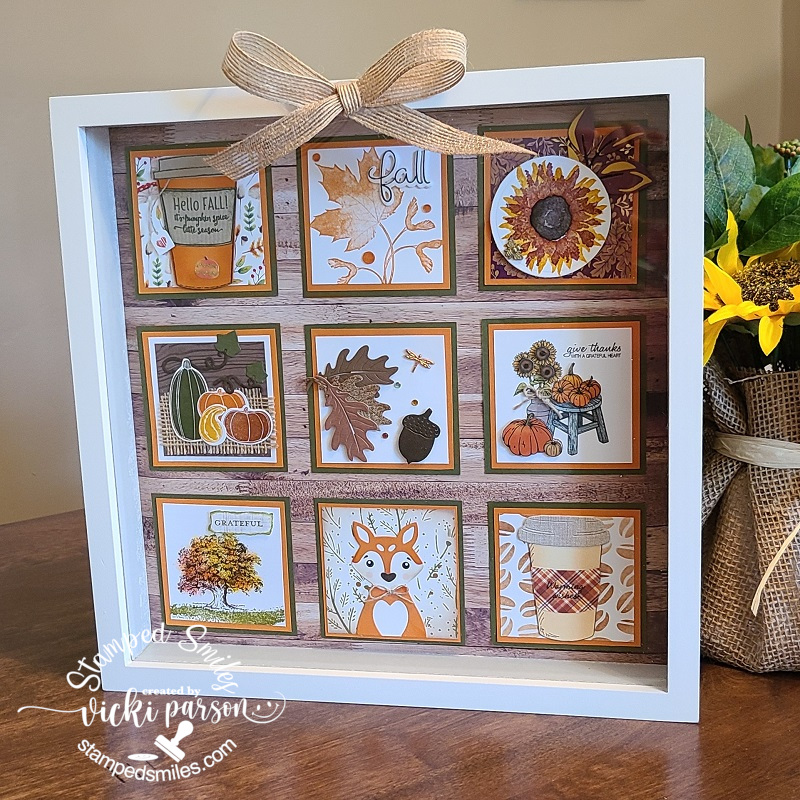
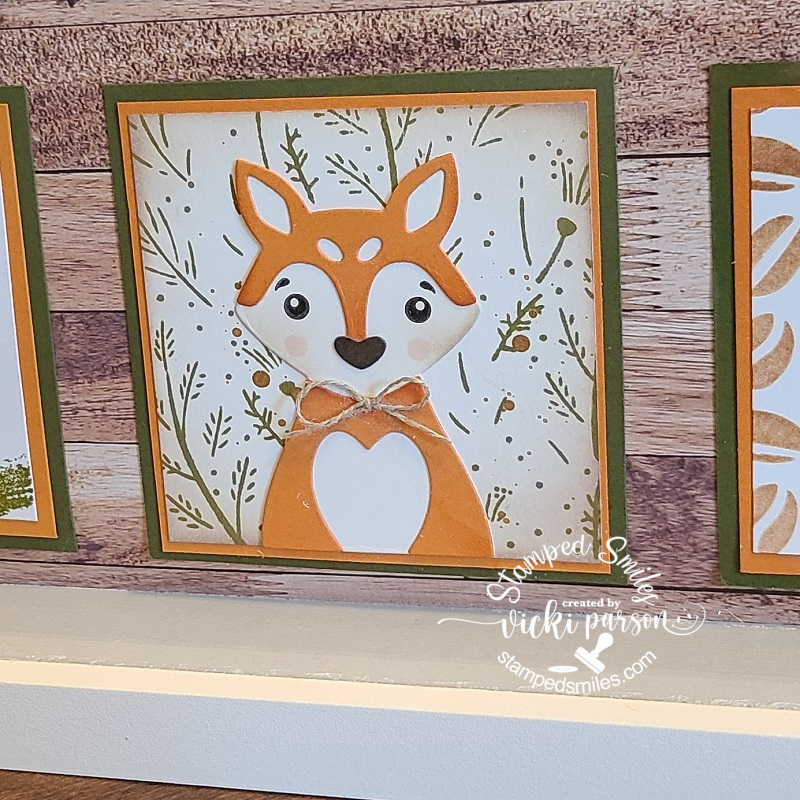
I was also involved in another “StampedSampler SWAP” making those squares like I had done with my Summer one if you remember that with my friends Patti, Shirley and Donna. This time our squares were the theme of Autumn/Fall using the Stampin’ Up! colors Pumpkin Pie and Mossy Meadow. It’s so fun to see them come in and then put it all together in the frame! Here’s how mine finished out:
For my Sampler frame, I used some different colored woodgrain pattern paper to attach the squares to and this frame is a bit different than my Summer Sampler (Check it out in THIS POST if you want to see that one.) It can stand on a table surface or you can hang it up. I also decided to add a burlap bow at the top of the frame using a hot glue gun.
This is the Sampler Square that I had made using the adorable fox from the Taylored Expressions Woodland Squad Die & Clear Stamp Combo set. The background was stamped with the TE Four Seasons Stamp & Stencil Combo set using ONLY the background stamp in one color. I then using some gold acrylic paint to splatter over it. I also added a twine bow to the fox. I believe we’re going to be doing another one for Winter too…stay tuned!
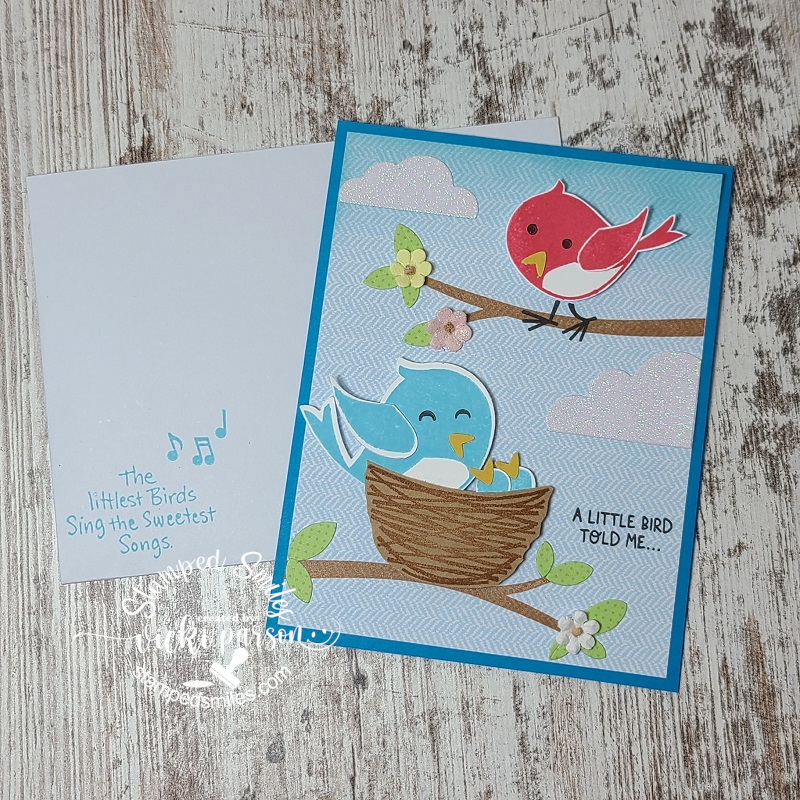
My friend Patti had also sent me an extra card kit from one of her classes along with her SWAP square, which I thought was so nice…so I had some fun putting it together as I don’t have this set which I believe is a Stampin’ Up! one.
The card kit had all of the pieces in it along with the stamped birds cut out, the stamped branches and sentiments (even on the included envelope) along with cut glitter clouds and flowers! There was a sheet with photo and instructions so I just followed along except I die cut some leaves for the branches from a piece of scrap green paper I had. Now I have a cute little birthday card ready to send out, so thank you for the fun Patti!😉
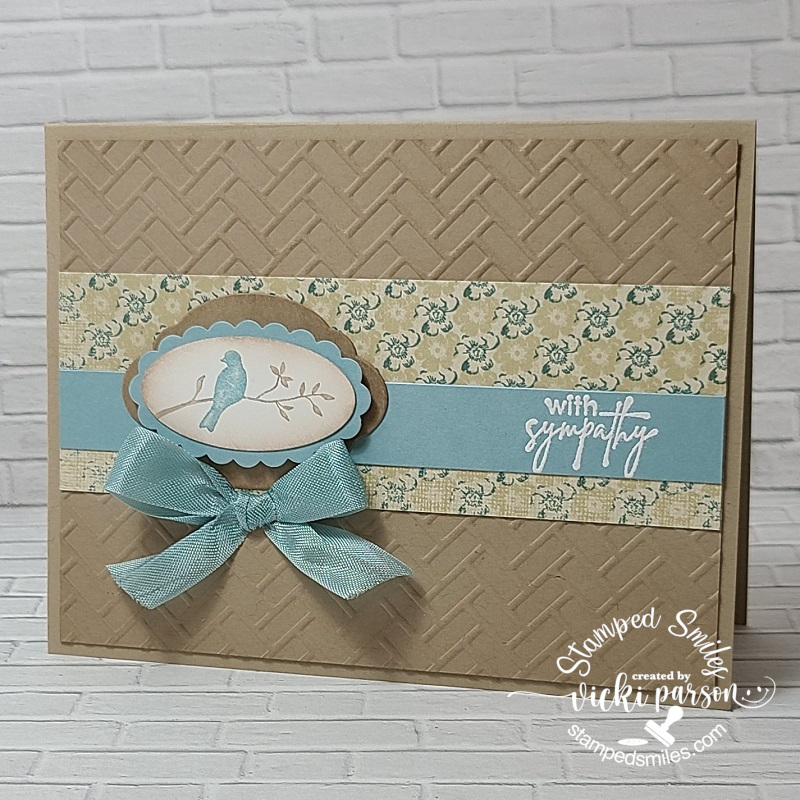
And speaking of birds and Stampin’ Up!, I had to make a sympathy card for someone that lost their pet bird. I was looking through my stash and found an older Stampin’ Up! set with a bird silhouette which I thought would be good for a sympathy card like this. I was inspired to pull out more of my older Stampin’ Up! stash to use so I used some old punches, ribbon and paper for my card as well.
I hope you’ve enjoyed the inspiration today and I thank you so much for stopping in! If you have any questions about my post, please let me know. Have a great day and see you soon!
Hello friends! I hope you’re having a great week! We got a tiny break from the hot weather, so I had to spend the last few days enjoying it and was happy to get away from being indoors! Now as the temps climb back up, it’s time to get busy and craft some more!😃
As promised, I’m catching up with my postings to share the wedding invites, thank you cards and special wedding card I made from my son’s June wedding. I made them a few months back, obviously, but I thought it would be nice to condense it altogether here in one posting.
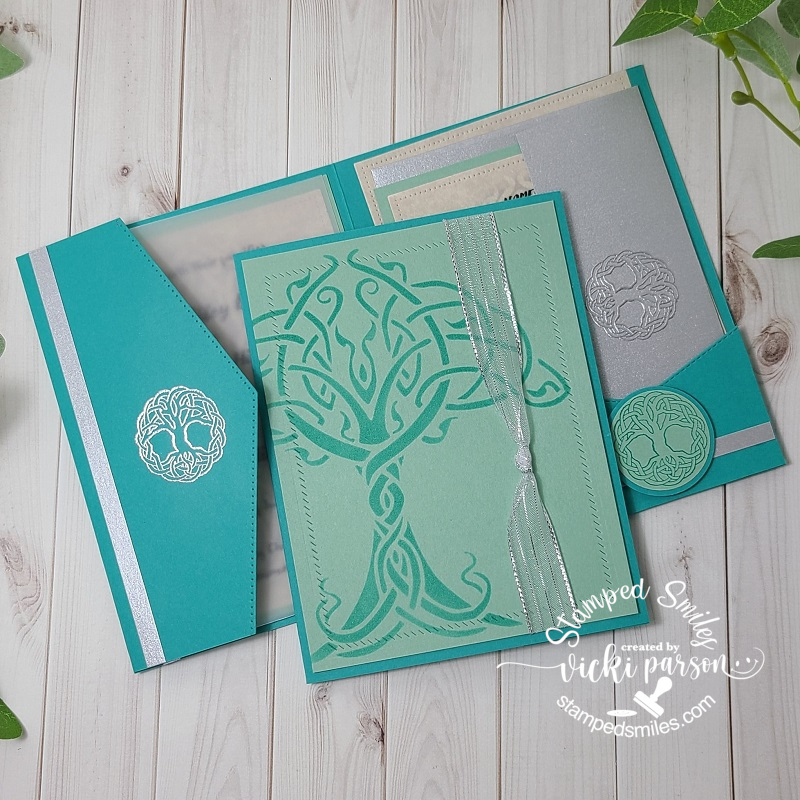
The couple had asked for me to make their invites for them and of course it was a great honor to be able to do that for them. I was given a photo of an image and was educated about the “Tree of Life” to incorporate that into a design as well as a sample of some color shades. Making a total of 50, here’s what I came up with:
I was able to find some similar Stampin’ Up! colors that closely resembled the samples given and come up with Bermuda Bay and Mint Macaron for the design. I wanted both the ink and cardstock colors and worked it out from there.
For the base of the design, I’ve used the darker Bermuda Bay and on the front panel, I used a piece of Mint Macaron with a stenciled “tree of life” over top of it with Bermuda Bay ink. I actually found a fairly inexpensive stencil on Amazon and thought it looked very similar to the image I was given and thought it would be perfect for the front with a partial side off the edge. I never inked up 50 panels before, but this stencil certainly got a workout! I was thinking it needed a bit more to it than just the stenciling, but I didn’t want to do too much with having 50 to make! I took the Taylored Expressions Diagonal Stitched Rectangle die to impress a design around the edge, wrapped silver ribbon around the front with the knot and layered it over the front of the invite.
So being happy with that, the hardest task was to figure out the inside details….
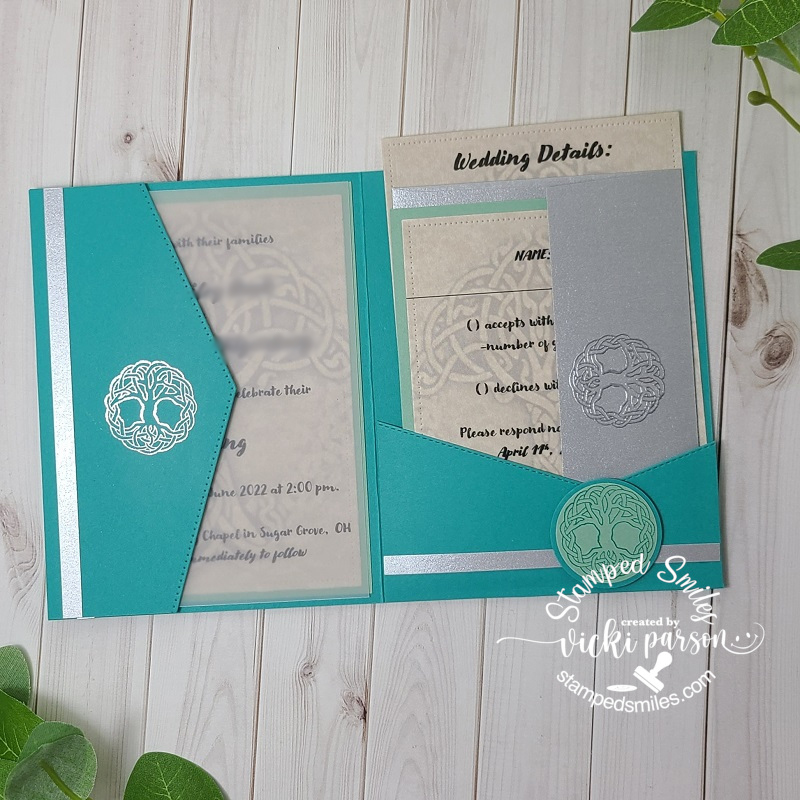
I wanted to make the inside a portfolio style with a pocket containing the wedding details as well as the RSVP/envelope inside and then the actual “announcement” on the other side. As I was piecing it together, I thought a decorative flap with some vellum would be pretty over the announcement too.
I’ve used the Stampin’ Up! Basic Borders die set to die cut the pocket front as well as the vellum flap on the left side. I had to adhere two Bermuda Bay card panels together and cut out the areas I didn’t need. (I ended up using the left over pieces to punch out a circle layer. To add a bit more of a decorative detail, I cut strips of silver cardstock as well as silver heat emboss the “tree of life” circle stamp. (I was happy to also find this really inexpensive rubber stamp image for a couple of dollars to use for this too!) For the image on the pocket area, it was stamped with Bermuda Bay over the Mint Macaron cardstock, layered with that left over Bermuda Bay circle punched pieces and popped up with foam squares over the silver strip. I was happy with how the portfolio design was working.
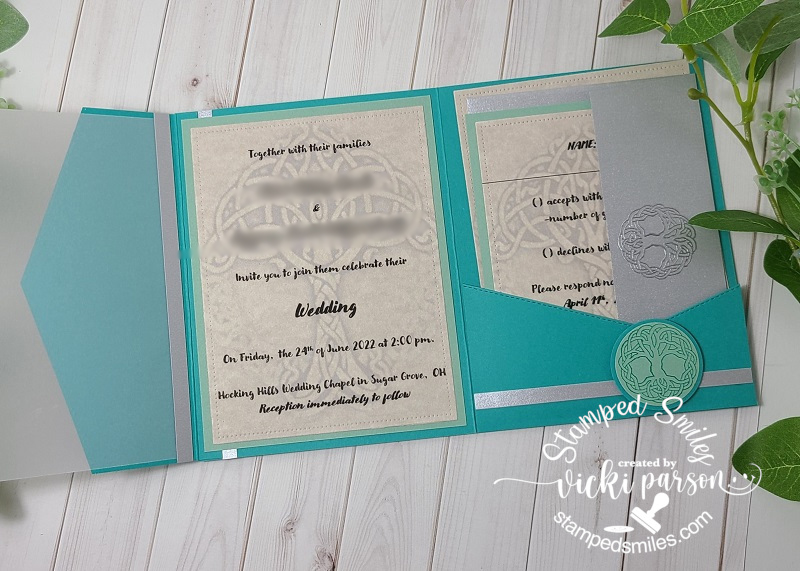
And now once you open up the vellum flap on the left side, you will see the announcement portion. The silver strips were strategically placed to cover up where all of the layers are glued/attached together, but still looks like it “belongs” there. The image that was given to me via digital photo was used at the “back drop” behind the wording. It was a very bright image that I altered on my computer and muted it down so that it was faded in the background, but yet still clearly visible on the design. I thought it worked out nicely and still coordinated with the stenciled area on the front.
Because this invite was so thick in nature, I didn’t want to add more layers of cardstock, so I used a thinner parchment style copy paper as everything was printed out from the computer anyway. The parchment made it feel a bit more professional I thought. I die cut ALL of the printed parchment pieces with a Lawn Fawn RETIRED Small Dotted Rectangle dies. (I thought the “small dots” went with the SU! edges I used on the flaps.) I placed the announcement over a piece of Mint Macaron and then layered it inside the card. I layered the RSVP card over a piece of Mint Macaron and the “wedding details” card was left on its own.
Finally, you can see that on the silver envelope flaps, I silver heat embossed the image. This was also done for the larger silver envelopes for the whole invite to fit in as well. I even used the “Tree of Life” computer generated image to create some address sticker labels for them and give them extras ones to use.
Of course, after the wedding, you need to send out the thank you cards, so I also made 50 of those….
I really didn’t want to event a new wheel with it, so I had plenty of cardstock colors and just repeated the same design on the front as I did with the invites except for this one, I used the Taylored Expressions On Occasion stamps. I stamped them out with the Bermuda Bay over the Mint Macaron cardstock, cut it out with the coordinating dies and popped it up with foam tape over the silver ribbon. Stenciling another 50 panels with this same stencil gave it another work out yet!
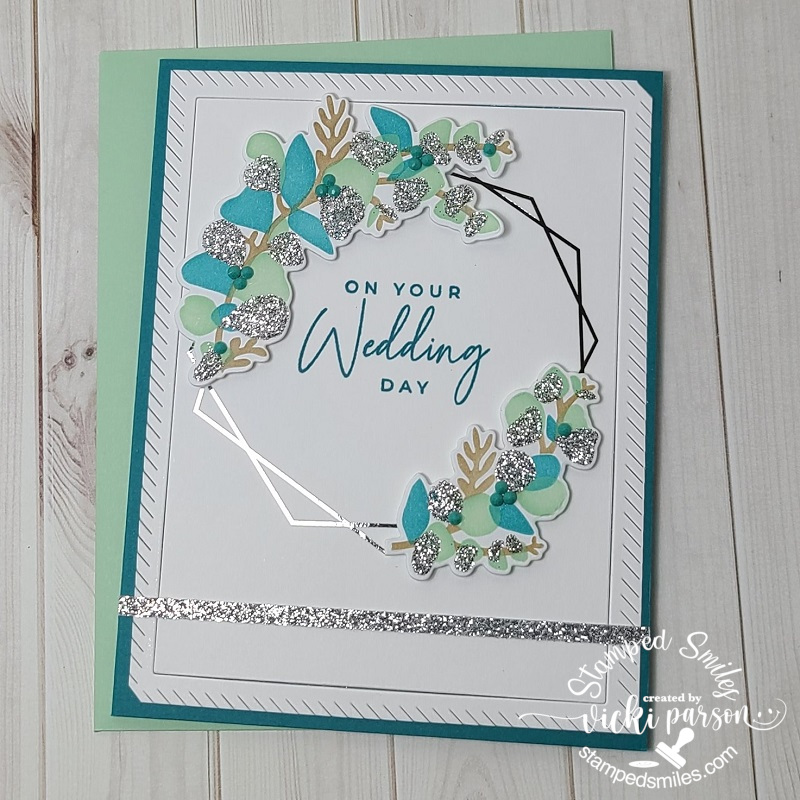
So, for the actual day of their wedding, this is the card I made FOR the couple. I was able to get a little more “intense” with this one as it was only ONE card!
I was so excited when I saw this stunning card kit come out from Taylored Expressions called “Modern Eucalyptus” (no longer available) and I thought it was the perfect colors to create something with for their wedding. The white panel was silver foiled and then I stenciled the colors of the wreath pieces, stenciled some silver paste, die cut them out and popped them up over the foiled wreath. I stamped the sentiment in the center, added some TE Tiny Diamonds to some areas and cut a strip of silver glitter cardstock to go across the bottom.
Around the edge of the panel, I used a free gift that I got with purchasing items and tried it out and on my panel without realizing that it cut the center. I went ahead and attached it down anyway as I liked the decorative look to it. I had a matching envelope and off we went to the wedding!!!!!
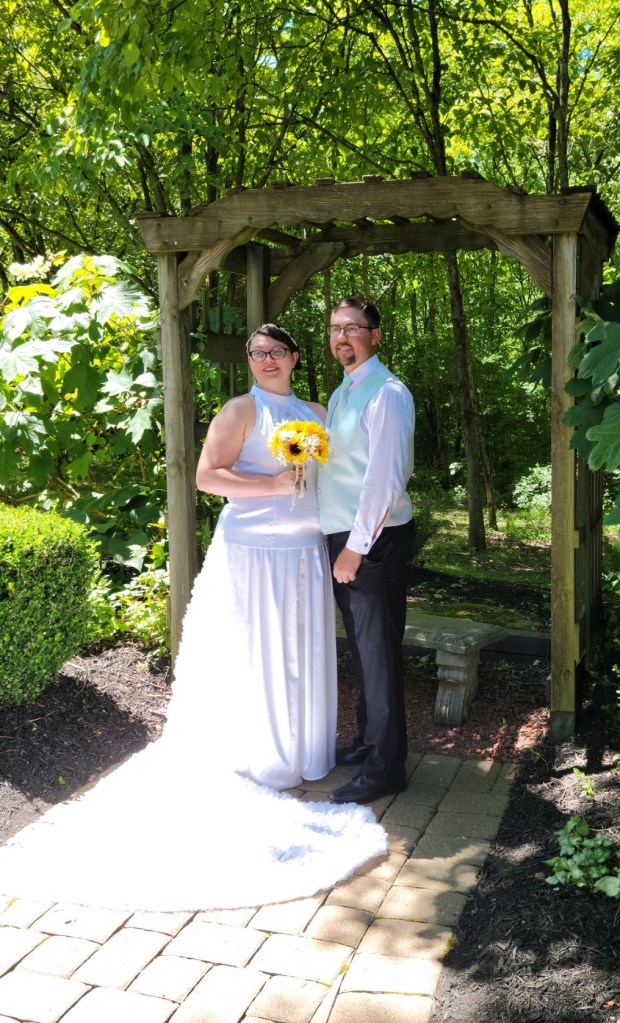
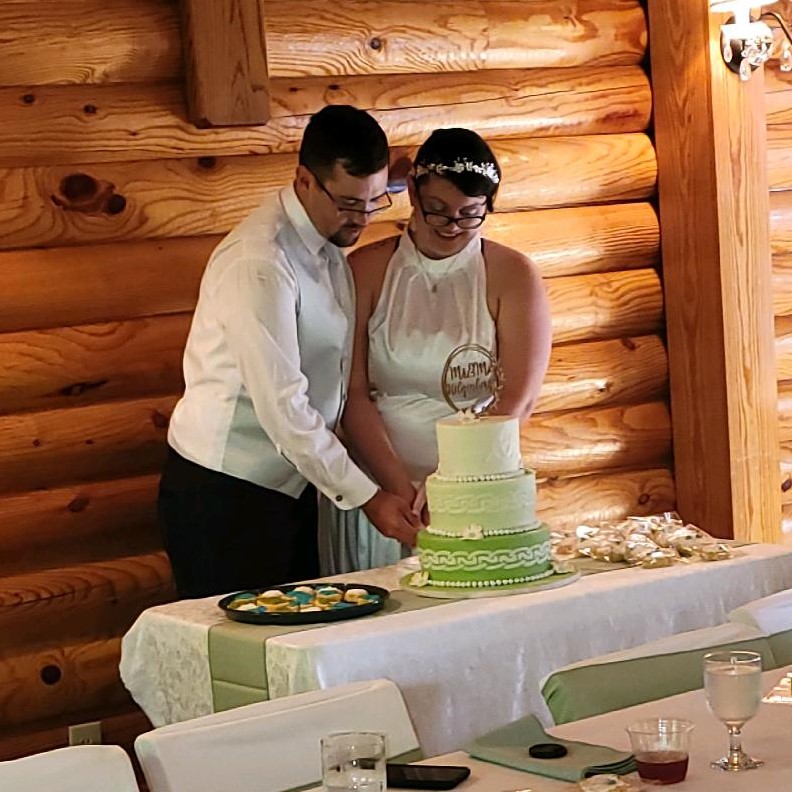
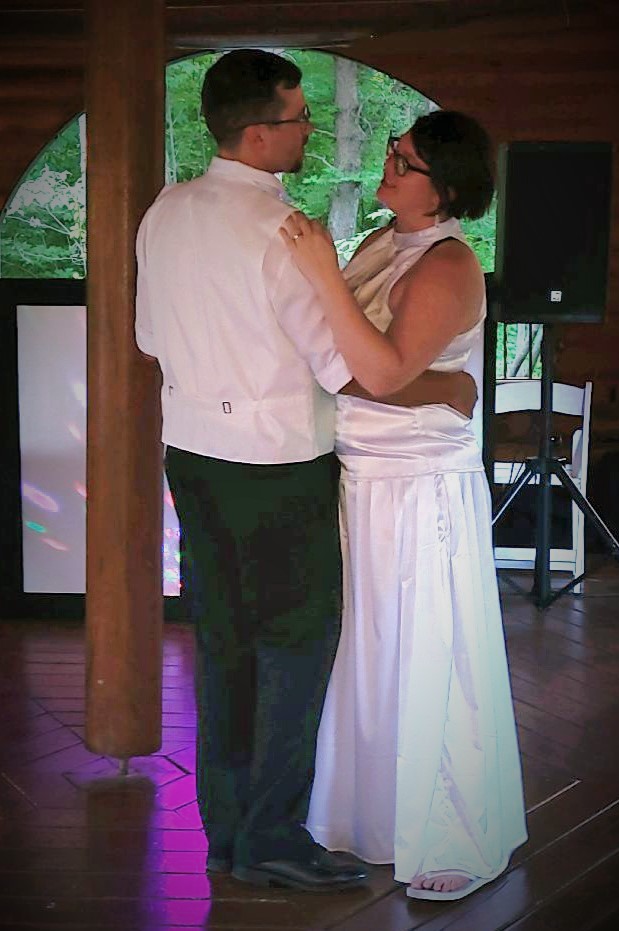
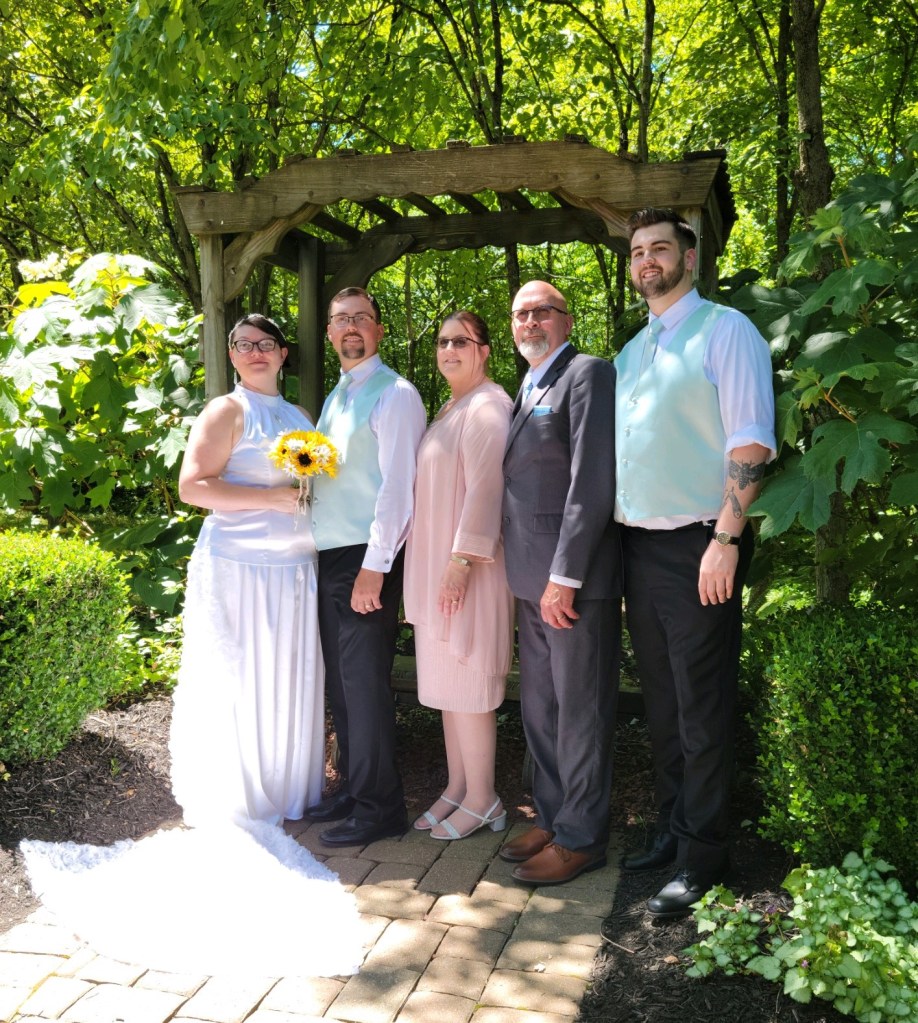
The couple was married in Hocking Hills (Ohio State Park area) and it was absolutely beautiful over there! The venue they used only had a certain capacity limit and so this is why there were only 50 invitations that went out. It was a very nice private wedding with everything done and organized for them. I do not have any professional photos of the wedding as of yet, but I had to rely on my husband for taking a few photos on his phone and then handing the phone to someone for photos as well…my dress didn’t allow me for handy phone carrying. LOL But here a just a few photos (not professional) of the wedding.
As being a first time “mom of the groom”, it is quite an experience and very emotional especially when my son picks out a song for our dance with a song I used to sing to him as a baby in my belly! We both had tears!! LOL It was such a joyous occasion and I’m thrilled to welcome our new family into our lives for years to come! May they always feel the joy and love together for ever after!
Hope you’ve enjoyed my wedding post today and have been inspired in some way to brighten your day. I thank you so much for taking the time to stop in and say hello! It means so much to me! See you soon!
Challenges:
Crafty Friends – Embossing Wet/Dry (heat embossed on invites)
Hello friends! Really excited to share my post today as a guest designer for the new challenge over at the Retro Rubber Challenge Blog! One of the cards I had previously entered had been chosen as a top pick and I was also invited as a guest to participate for this challenge.
**Please remember that when you enter your creation for this challenge blog that you MUST include a stamp that is at least one year or older on your creation**
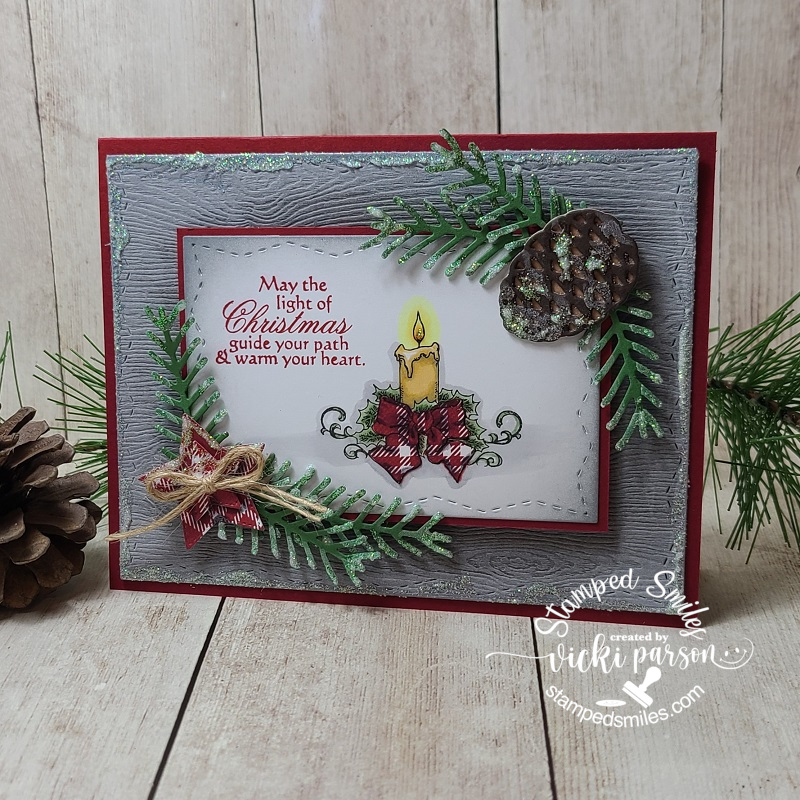
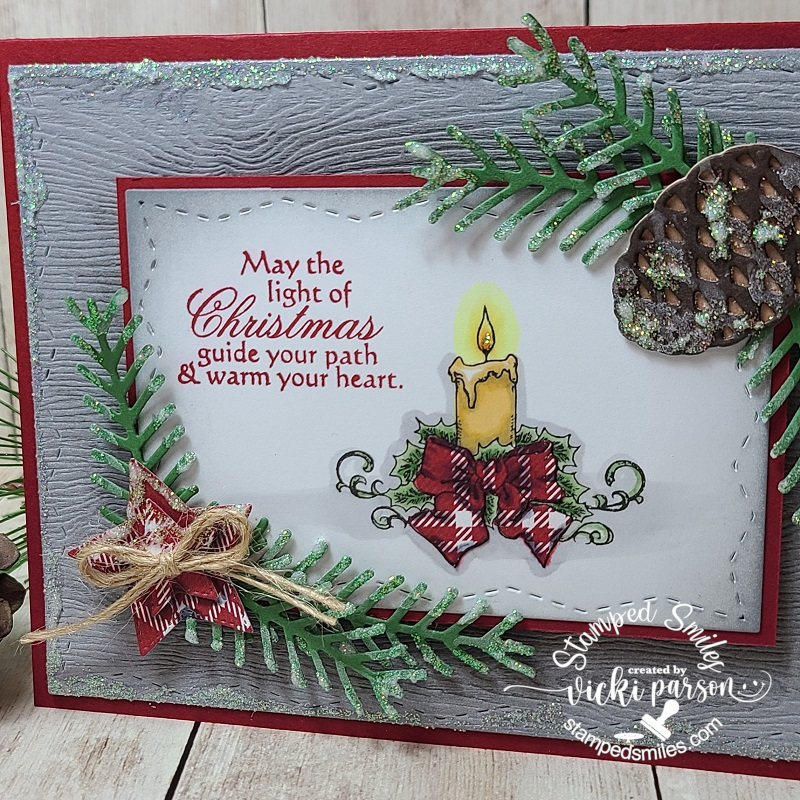
I was so inspired by the warm and cozy feeling of the image with the candle, so my thoughts turned to an older stamp set that I’ve had in my collection for several years:
Both the candle and sentiment came from a rubber stamp set by Whimsy Stamps called “Peace on Earth“. It is no longer available and I’m thinking it was circa 2010. There is ONE digital image available that derived from this set called “Peace Angel“. (If you were familiar with Whimsy Stamps as far back as I was, you may remember the whole set and that this candle image was included with it.) I obviously still love the set and won’t part with it! 😉
I’ve got it stamped and colored with Copics over the white panel along with the sentiment from the same stamp set in red ink. The ribbon on the candle was paper pieced with some old pattern paper in my stash. I also used the same paper to die cut a couple of stars for the corner.
The image panel was cut out with the Whimsy Stamps Zig Zag Stitched Rectangle die, layered with red cardstock and then popped up with foam tape over a grey woodgrain embossed panel that was also cut out with the same die set. I ran some white ink over the grey woodgrain piece to bring out the texture in it a bit more. I layered these panels over a red top folding A2 sized top folding card base.
I’ve also used the “Stampin’ Up! Pretty Pines Thinlit dies” for the accents along the edges of the image panel. I die cut the pinecone pieces as well as the pine branches and arranged them over my design. I took some Gina K Glitter Glitz Gel and added it over those die pieces as well as around the edges of the grey woodgrain panel and the top of the stars. Lastly, I’ve added a double twine bow in the center of the stacked stars.
Here’s a closer look at that candle image and how I’ve got it colored up and paper pieced on my design. I’ve also taken some Ranger Stickles icicle and added some in the center of the flame in the candle.
You can also see the “snowy glitter” effect from the Gina K Glitter Glitz Gel. It dries hard and doesn’t come off! I like how it has sort of an icy look about it.
I hope you’ve enjoyed my creation today and have been inspired in some way! Please be sure to stop on over at the Retro Rubber Challenge Blog to take a peek at the inspiration from the design team and how they were inspired by the beautiful photo as well! Hope you will be able to join along in the fun too!
Thanks for stopping in friends and I’ll see you soon!
Hello there friends! I hope that you enjoyed Thanksgiving Day for those of you that celebrate. It’s difficult not being able to celebrate the holiday in the usual way with sitting at the table with family and I really miss them all so much and look forward to being able to hug them tightly in the future. I did have a nice dinner with hubby and we stuffed ourselves, also enjoyed spending time with each other.
After Thanksgiving comes the “Black Friday” shopping which I don’t go out and do in the department stores anyway let alone during this time, but I do enjoy taking advantage of deals online! Did you shop any sales or plan to this weekend?
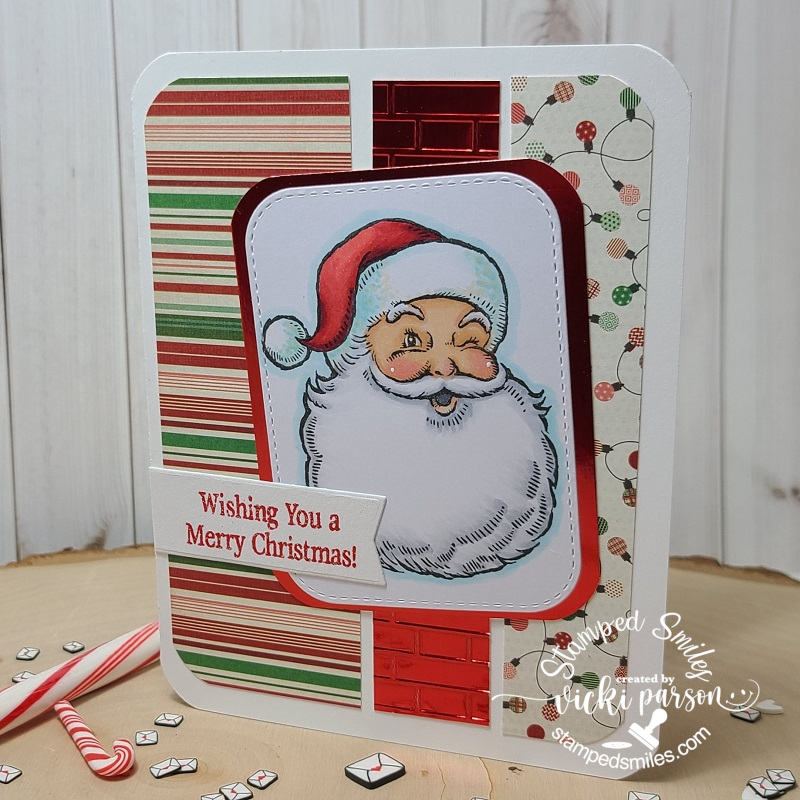
Today I have a Christmas card that I’ve made for a very special individual with Down Syndrome. He has a very weakened immune system and is unable to go out and visit Santa like he usually does (6 times at least each year)! Santa is his friend, and he doesn’t understand why he can’t see him and thinks he’s been “bad” this year. 😥 Although he is an adult in age, he doesn’t understand with his mental handicap and his mother has asked if people would help in sending a Christmas card to him. Of course, THIS is the reason I love making cards! Here’s the card I made for Danny:
I was trying to go through all of my stamps that had a Santa and the first one that came to my mind was this older Stampin’ Up! stamp set called “Jolly Old Saint Nick” and it’s one of my favorite images for a Santa! I love how he’s got that “wink” going!
I colored him up with Copic markers and cut it out with a stitched round rectangle die and then layered it over a piece of red mirror cardstock that was cut with a rounder punch. For the design of this card, I’ve used a current sketch challenge (see below this post). I found some festive papers in my stash and cut the strips that I rounded the corners on with the punch as well. For the middle strip, I used some more of the red mirror cardstock and ran it through a brick embossing folder before attaching it to the other pieces. I layered them over a white A2 sized side folding card base that I also rounded the corners on as well.
For the sentiment, which also came from the same stamp set, I heat embossed it with Brutus Monroe Christmas Eve EP over a piece of white cardstock and cut it out with a banner die and cut off the edge of the card.
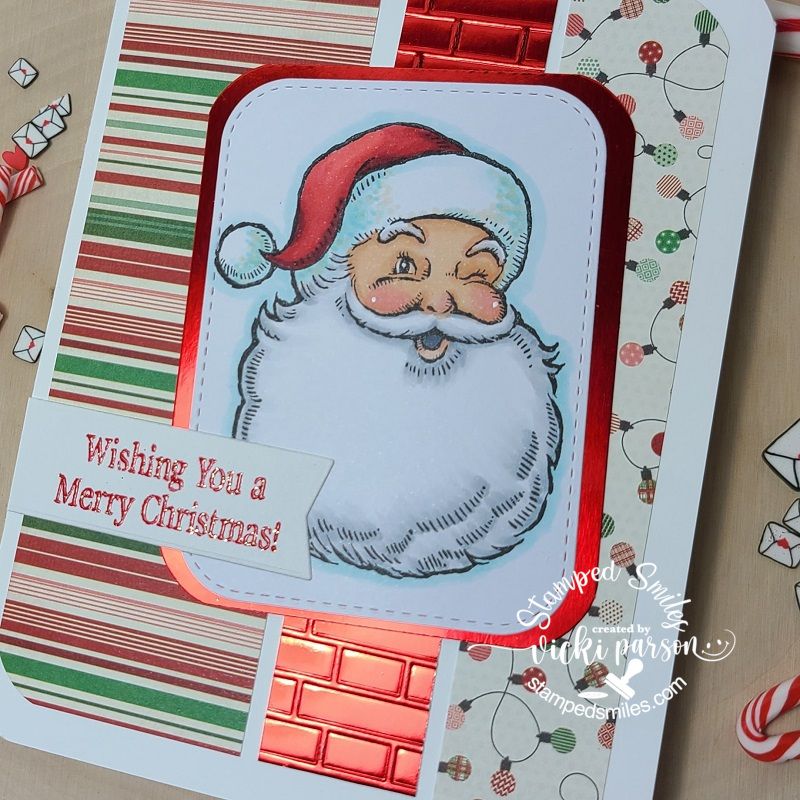
Here’s a closer look at Santa and how I’ve colored him in. I couldn’t resist giving him white highlights on his cheeks with a gel pen. You can see the beautiful mirror effect with that embossed middle strip as well as the pretty sparkle in the sentiment from that EP I mentioned above.
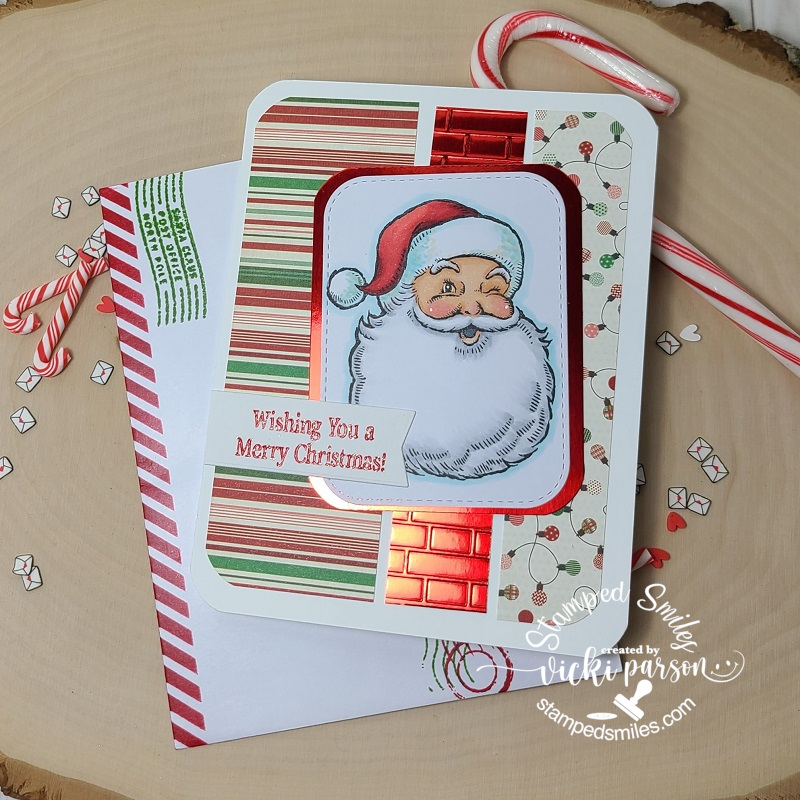
And of course, I wanted to make the outside envelope that it’s getting mailed in just as fun! I took a diagonal striped stencil and inked it up with red ink along the bottom on both sides. I also had a fun “Postal Christmas” stamp set (unknown) and stamped a few of those all over the envelope in red and green inks. I sure hope that he enjoys this card and helps to bring a smile to let him know that Santa KNOWS he’s been good! 😉
I had also told you in a previous post that I was still working on projects from the Whimsy Stamps Virtual Workshop that I participated in during October…well I’ve just been slowly enjoying completing them as I go, and I saved the Christmas projects for last for this reason! LOL! I’m getting closer to finishing up all of those projects! (Only 3-4 left to do I think!) For now…here’s some Christmas projects from the retreat:
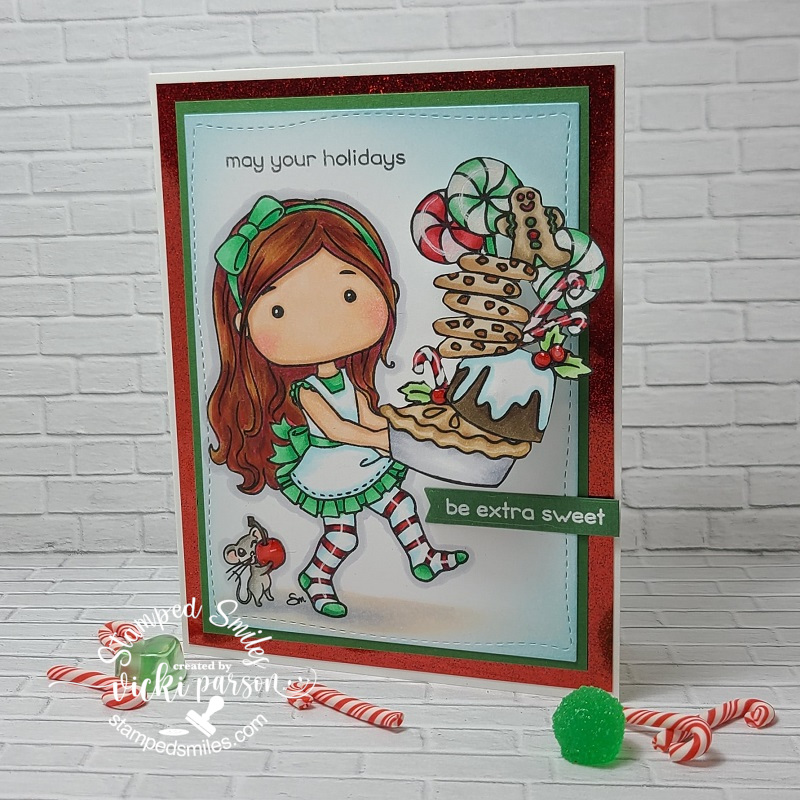
This was for kit 8. What’s fun about this card is that there is an action wobbler behind the pile of treats she’s holding! I had fun coloring her up and I couldn’t stop playing with the wobbler! LOL! PS: This is a good reminder for the {Cupcake Inspirations} challenge too!😋😉
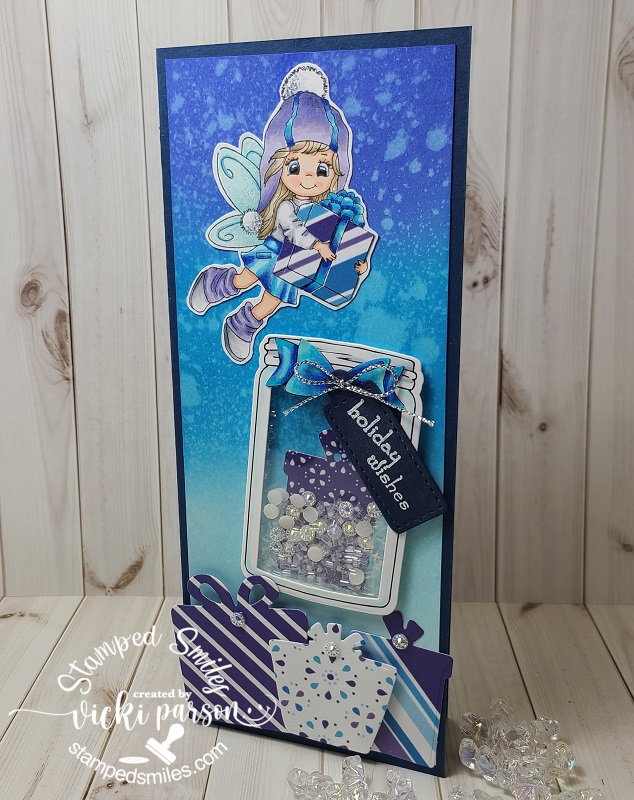
This was for kit 13. I slightly changed up the card, but not much. I actually made a shaker with the jar and put some acetate behind it and then I also added a tag and silver ribbon at the top of the jar. I paper pieced the fairy’s gift box instead of coloring the strips too. I love the colors in this one!
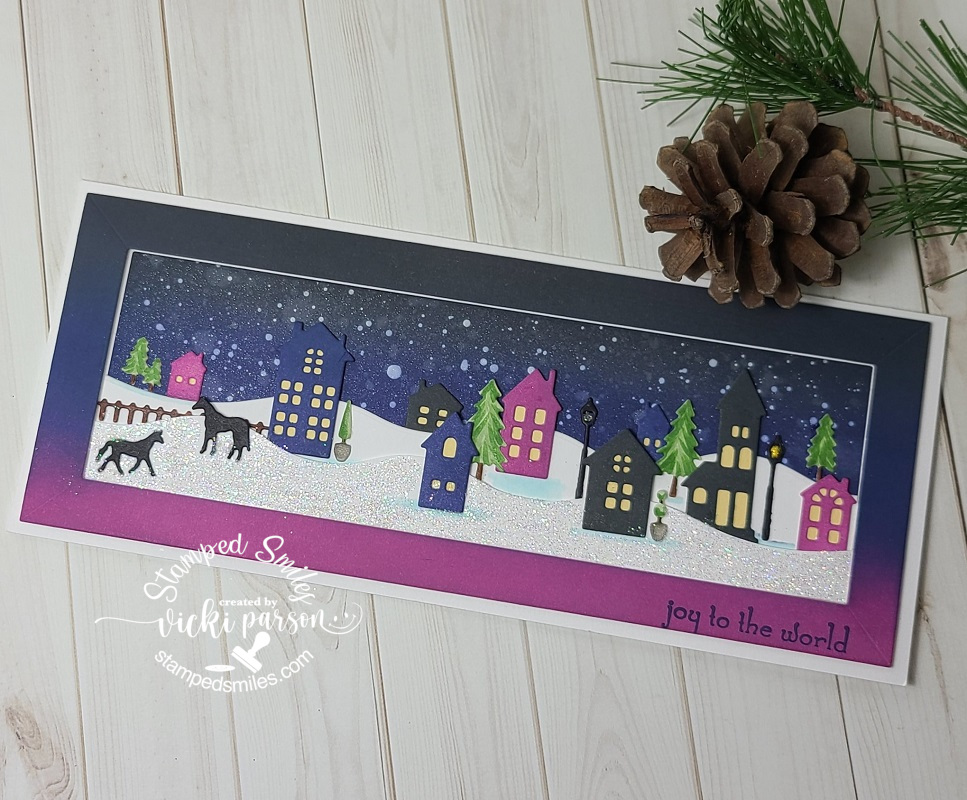
This slimline card was for kit 17. All of the dies were actually really fun to color and arrange to create a scene with. I didn’t change things up too much with this one other than covering the bottom snow with glitter and then adding a sentiment onto the bottom of the frame. I splattered the sky with white paint instead of using a white gel pen.
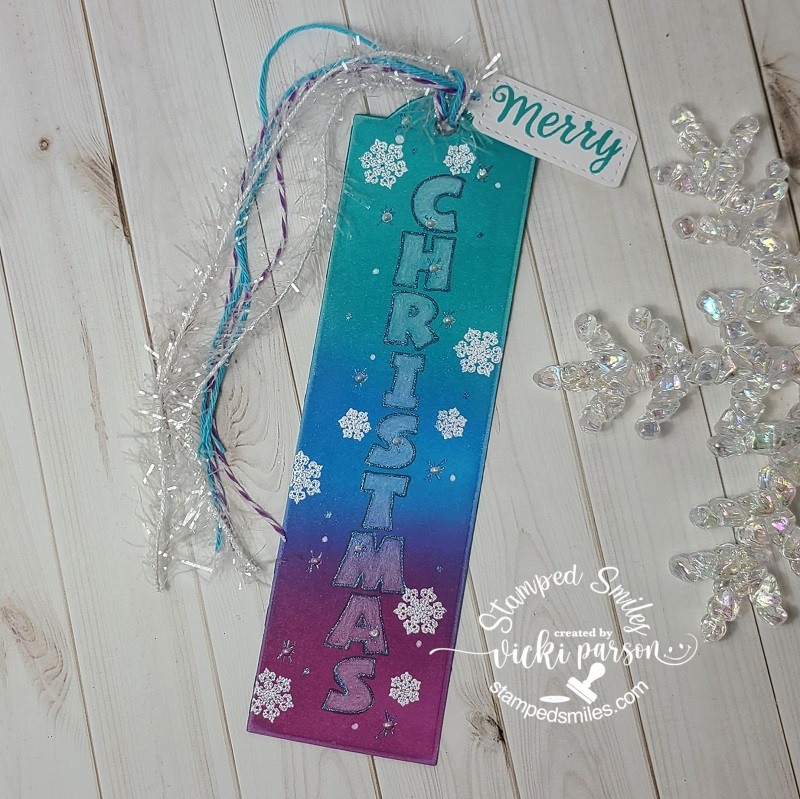
And this fun bookmark was for kit 18. The ink blended colors were similar to the above card, but I colored in the letters with a white pencil and then used a gel pen to trace around the letters. I white heat embossed some snowflakes and added doodles with gel pens as well as pearl drops. I also added some tinsel ribbon to go along with the twine given. I might use this as a tag…not sure yet.
That was a rather long post! I’m a bit behind and trying to catch up with my projects, posting right now. I hope that you’ve enjoyed my projects today and have been inspired to get some festive projects going! I’ll be back very soon with another project and challenge reminder soon!
Hello friends! Hope that you’re having a great week so far! Hubby and I are trying to figure out how this “retirement thing” goes together! LOL! I think we’ll be having so much fun and we’re just really excited about the future and what we’ll be doing.
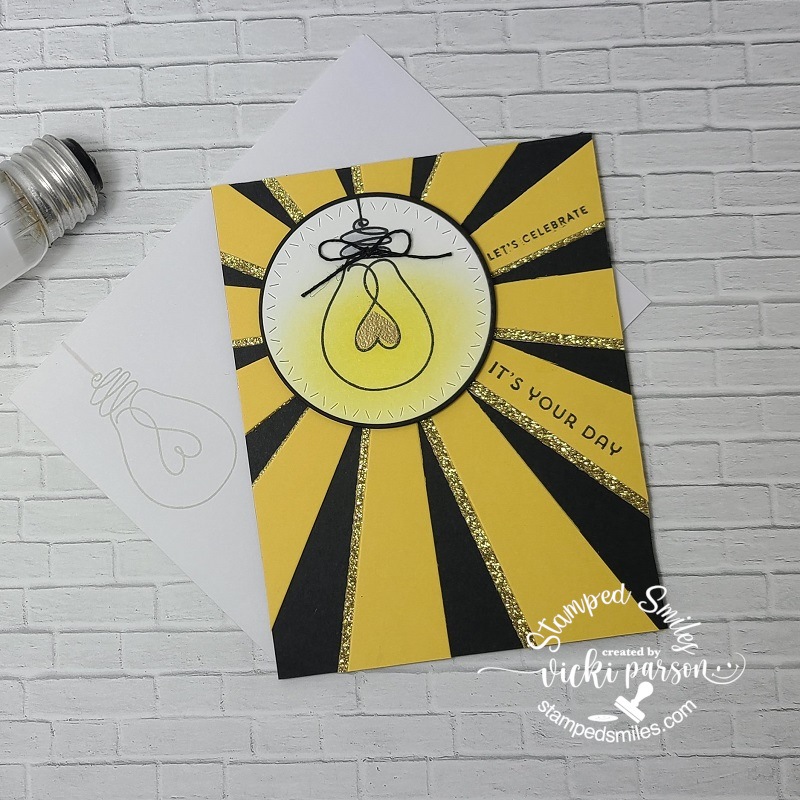
Speaking of which, this past Sunday he also celebrated a birthday and of course I had to make him a card that was suited for an electrician. I had to add a bit of humor about his age on the inside, but this is what I came up with:
I’ve had this Stampin’ Up! Sunburst die and stamp set and haven’t used it that much since I bought it. (Quite a while ago! Not quite sure how old. LOL) I thought it would make a great light beam for my VERY old Simon Says Stamp ‘Watts Up’ stamp set that was from a past card kit. (circa 2014/2015) …yep, all old!
I die cut the sunburst from some yellow and gold glitter stock that I glued together slightly off-set and then attached it over a side folding A2 sized black card base. I stamped the sentiments over a couple of the yellow strips with black ink taking care to make room for the circle panel.
I then stamped the lightbulb over a white piece of cardstock and colored the base with Copics and used a marker draw a line above it for the string. I took a solid heart from the stamp set and heat embossed it with some Gold Metallic Gilded EP and then sponged some yellow ink over the bulb for some glow. I die cut it out with a circle die and then layered over another die cut circle black piece and popped it up over the sunburst layers with foam tape.
I tied a bow with some black twine and glued it to the light bulb base. I also stamped the bulb in a lighter gray ink over the envelope and added a string to that as well with a gray marker. (The inside of the card said: “Old is the new black.” 😆)
———————————————————————————————————–
And I also wanted to share that I’m still plugging away on the several kits that I received from the Whimsy Stamps Virtual Retreat last month! These are really amazing projects and I’m having lots of fun putting them together still! (Christmas will be coming next. So, stay tuned for those!):
This is a fun interactive card with a pull tab at the top where this cut little dragon slides upwards towards the sky! This kit 9 came with an A2 sized envelope, but I had to make my own envelope slightly larger to accommodate for the pull tab sticking above the card. I’ve added doodle lines around the edges and shadow stamped a sentiment at the bottom for my own added details.
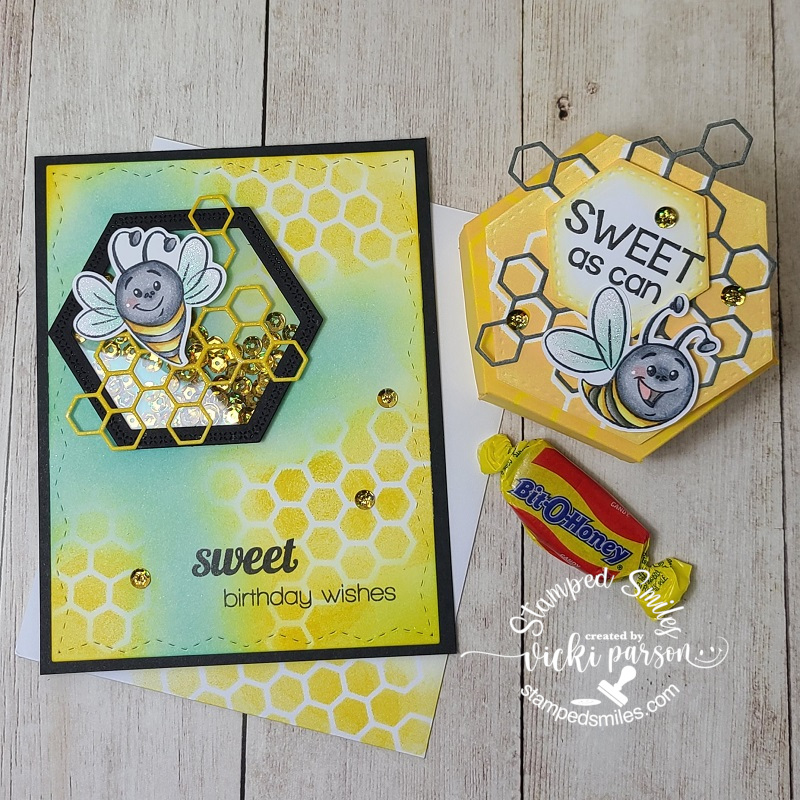
This set was from kit 14. The hexagon shaped box was super fun and even came with the candy! There was also an extra stamped and cut out bee, so I used it to make another card… shaker style! I used the left over honeycomb die cut piece as a stencil on the card as well. I used the envelope that was provided in the kit above and decorated it for this A2 sized card instead. (I know someone that loves these candies…so they might get a surprise at some point! 😉)
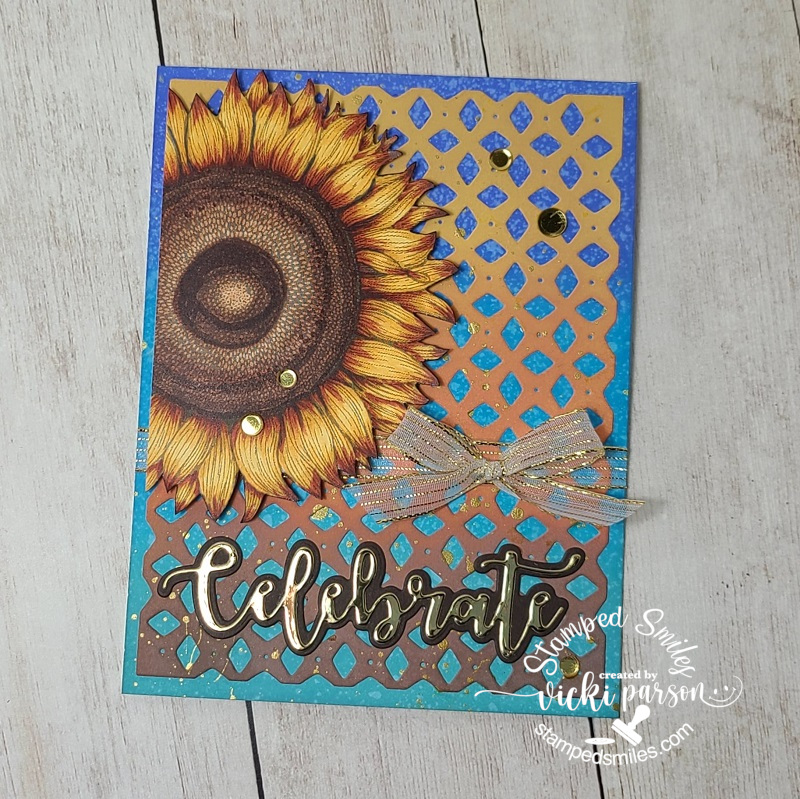
And lastly, this was from kit 15 and TOTALLY different than what was photographed in the booklet! First of all, I received a plant image with a die cut speech bubble sentiments and thought it might be cool for a Halloween card on another project, so I saved those to use later. I received an EXTRA stamped sunflower image from kit 22 that I had posted earlier and decided to use it for this card here. I colored it similar to that one and cut it out, but cut off a portion of it on this design. I also changed up the background ink blended colors and splattered some gold paint on this one. Love how it turned out. This will be for an Autumn anniversary card for someone coming soon.
Hope you’ve enjoyed all of my projects today! Thanks so much for stopping by and I’ll be seeing you soon!
Challenges (For the Birthday Lightbulb card ONLY):
Retro Rubber – Anything Goes + stamps older than one year


 We’ve gotten creative by using up our never-ending stash piles! (I look forward to doing this for another year each month in 2023 and I’ll hope you’ll be here too!) Here’s my final Art Journal inspiration for 2022 with the “SMASH OUR STASH” December prompt of “Oldest Stash” :