Hello friends! Here we are at the end of August already! I’ve already been feeling the Autumn vibes, so I thought I’d create with Summer one more time. There is still a few more weeks left of Summer, so let’s enjoy it!
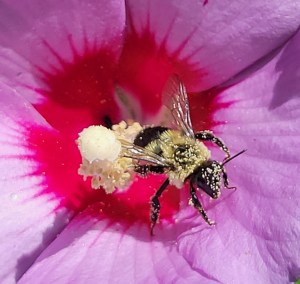
Wanted to share a photo that hubby took a really good close-up shot of a bumble bee enjoying the last bit of summer blooms on one of our flowers in the back yard the other day. He is covered in pollen! I love the bright colors in the flower.
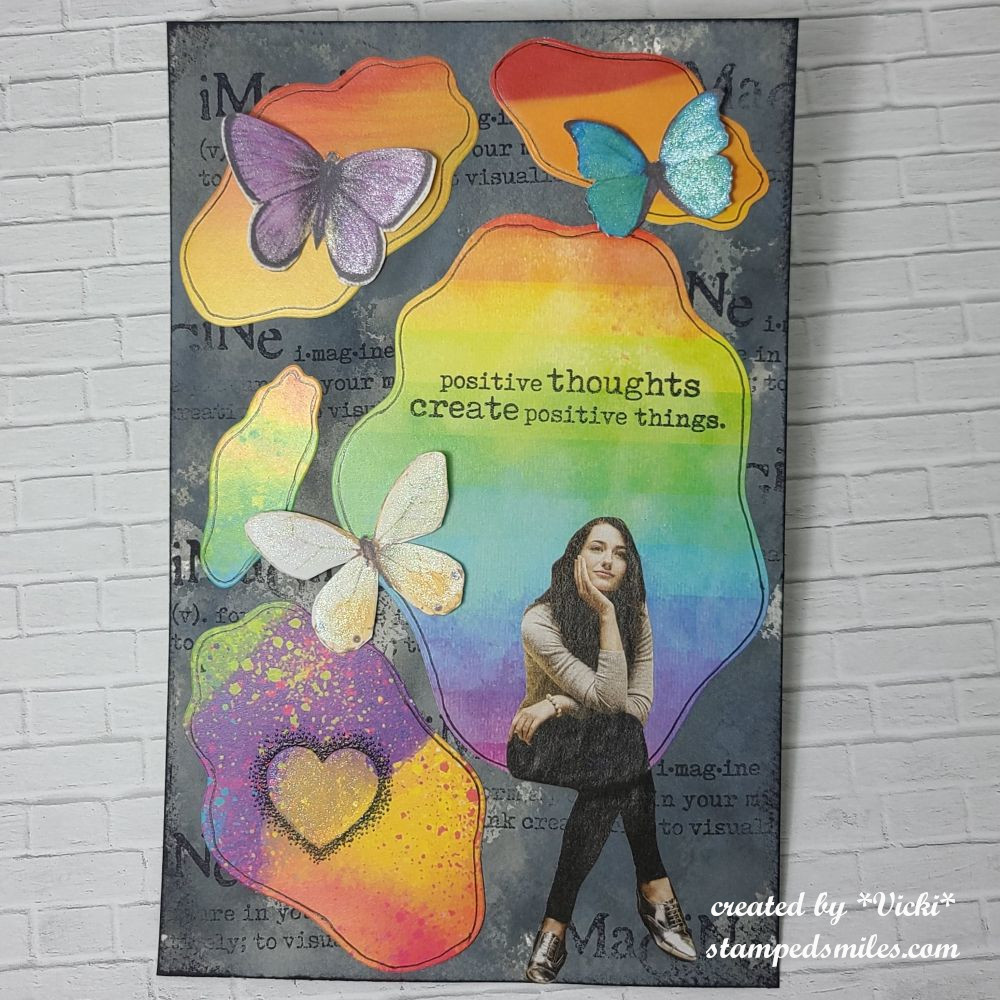
Speaking of bright colors, today starts another monthly AJ page with my crafty friend Carol (from Crafty-Stamper) who is collaborating with me to “SMASH OUR STASH”! We get creative trying to use up our never-ending stash piles along with a prompt for each month. I know she always has great inspiration to share, so please check out her blog too! Here’s my AJ page with the “SMASH OUR STASH” AUGUST prompt of “BRIGHT/HAPPY COLORS”:
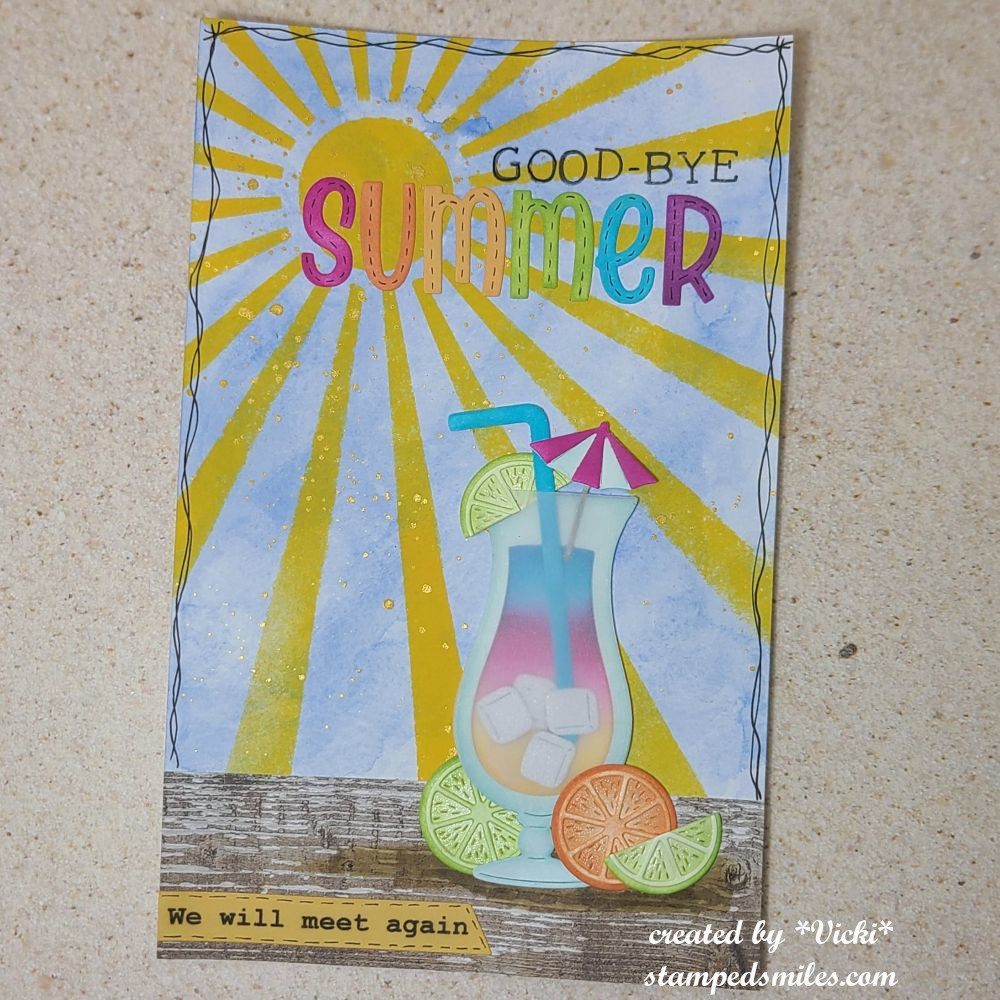
Bright and happy colors to me are those sunny yellows, citrus and basically a rainbow of bright colors. I tried to reflect this with my page using mainly blended ink colors, but I also used some watercolor and paint too.
FOR THE BACKGROUND: I used a 5.5″ x 8.5″ piece of Bristol Smooth Watercolor cardstock. I covered the background with a light wash of blue watercolor and let it dry. I took a stencil from My Favorite Things (closed) called “Sun Ray” and went over the background with yellow paint applying with a watered-down sponge. Once that was dry, I splattered the entire background with some metallic gold watercolor. I covered the bottom portion of the page with some wood plank background paper. (I like to make my own book to add my finished pages in.)
The “Summer” lettering was die cut with white cardstock and then ink blended with several different bright colors. I stamped out the lettering above it. Both the stamp and dies came from Lawn Fawn.
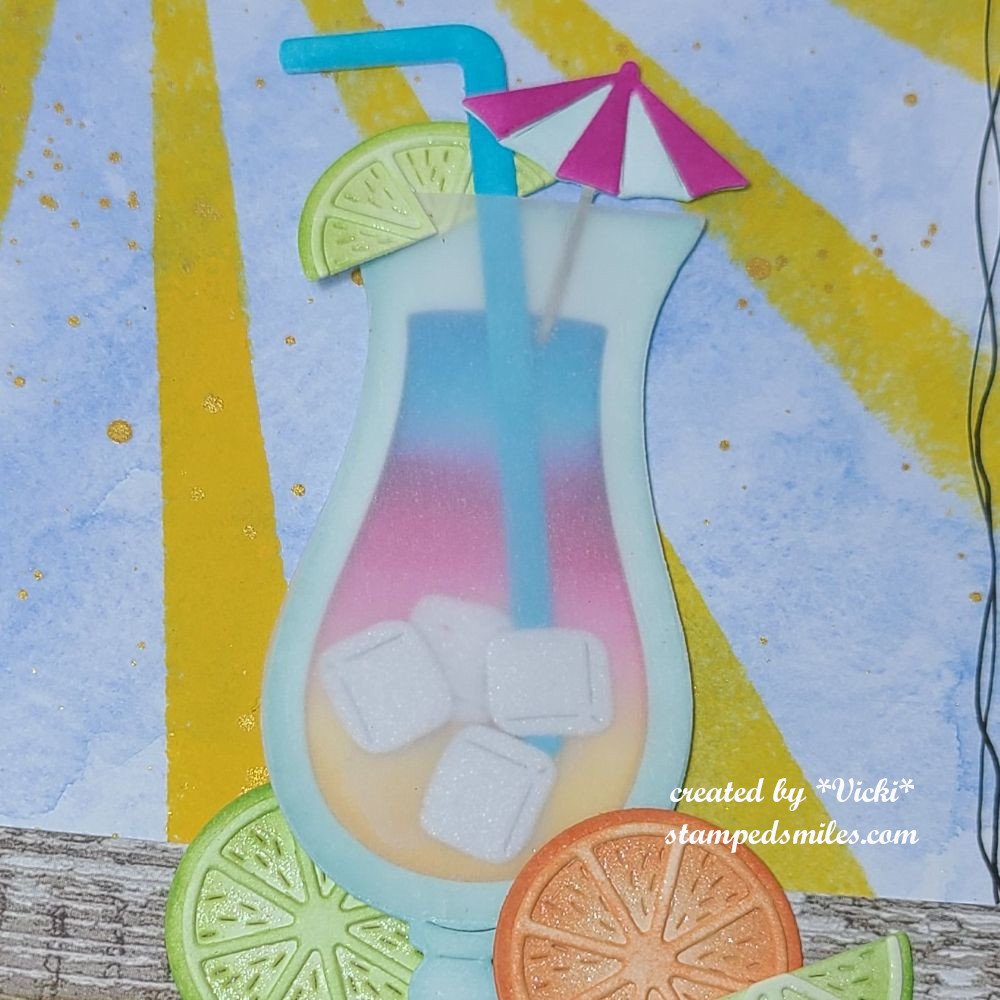
Here’s a closer view of the drink glass I created using some die sets from Taylored Expressions called Summertime Sips. There was the glass that I lightly ink blended around the edges and then for the separate die for inside the glass, I ink blended a few different colors for that tropical drink look. There are also ice cube dies that I cut from glitter cardstock to put in there. I cut another glass from vellum and then cut the stem of it so that I could attach it to the front of the glass which is where I added all of the items inside to make it look see-though.
The straw and the umbrella were cut in white and then ink blended and put together for the glass. I also took the TE Fresh Squeezed die set to cut more pieces from white cardstock and then I ink blended some green and orange colors over them to arrange around my cup. The green slice on the top of the cup was cut with scissors so that I could add it to the inside of the glass rim. I covered the inside of these citruses with a glitter brush pen.
Lastly, I took a black detail pen to make lines around the edges of the page and also the stitch marks within the lettering and around the sentiment strip at the bottom. This was printed from computer and ink blended with yellow ink.
- Thanks so much for stopping in today! Hope you’ve enjoyed my page! Have a wonderful weekend!
Challenges:
- Art Journal Journey – Hot Summer (Nights and Days)
- Creative Artiste – #118 Anything Goes Mixed Media
- Anything Goes in a Card Free Zone – August -No Cards
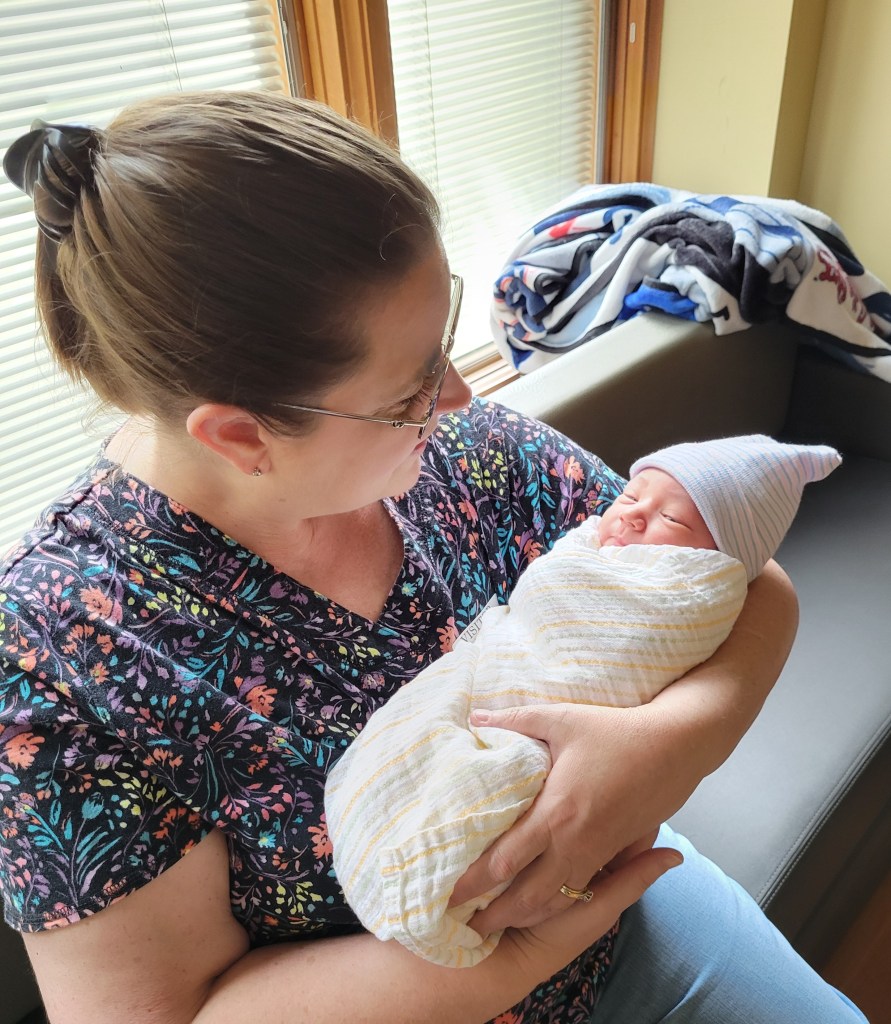
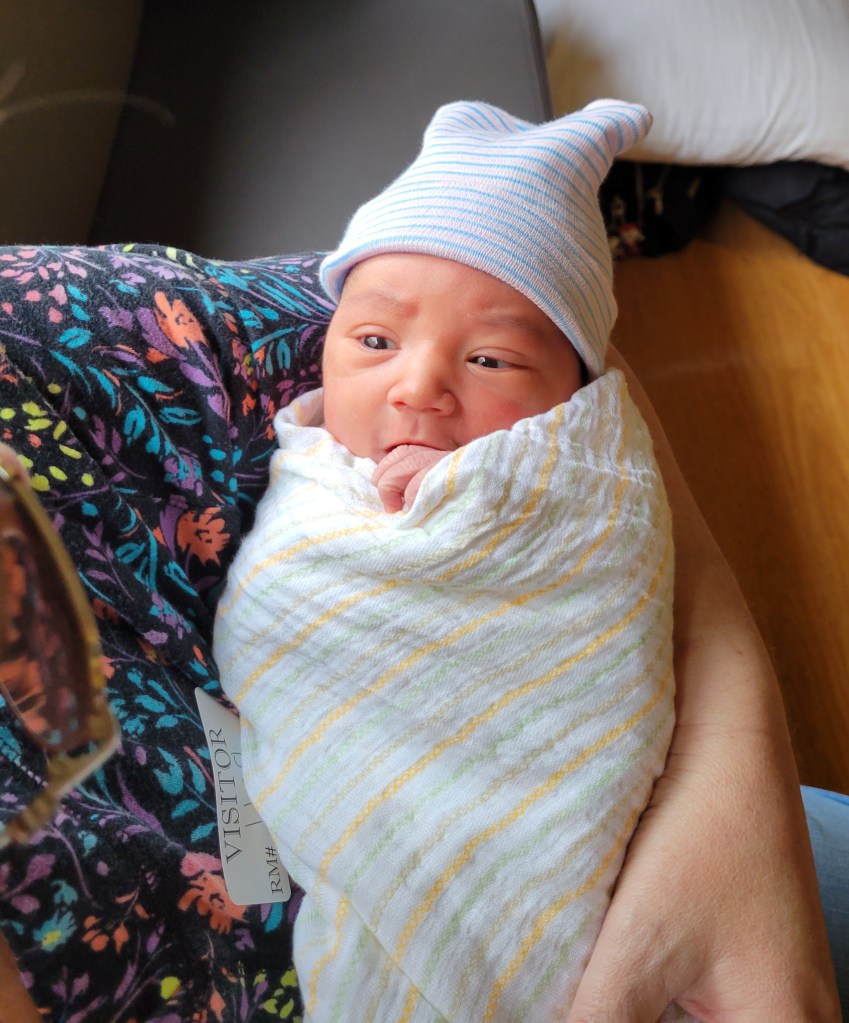
And speaking of bright and happy, I know a few people have mentioned my new grandson and wondering if I get to see him. My answer to that is every single chance I can get! LOL He’s growing so very fast! He came for a visit for lunch…well grandma fed him his bottle.
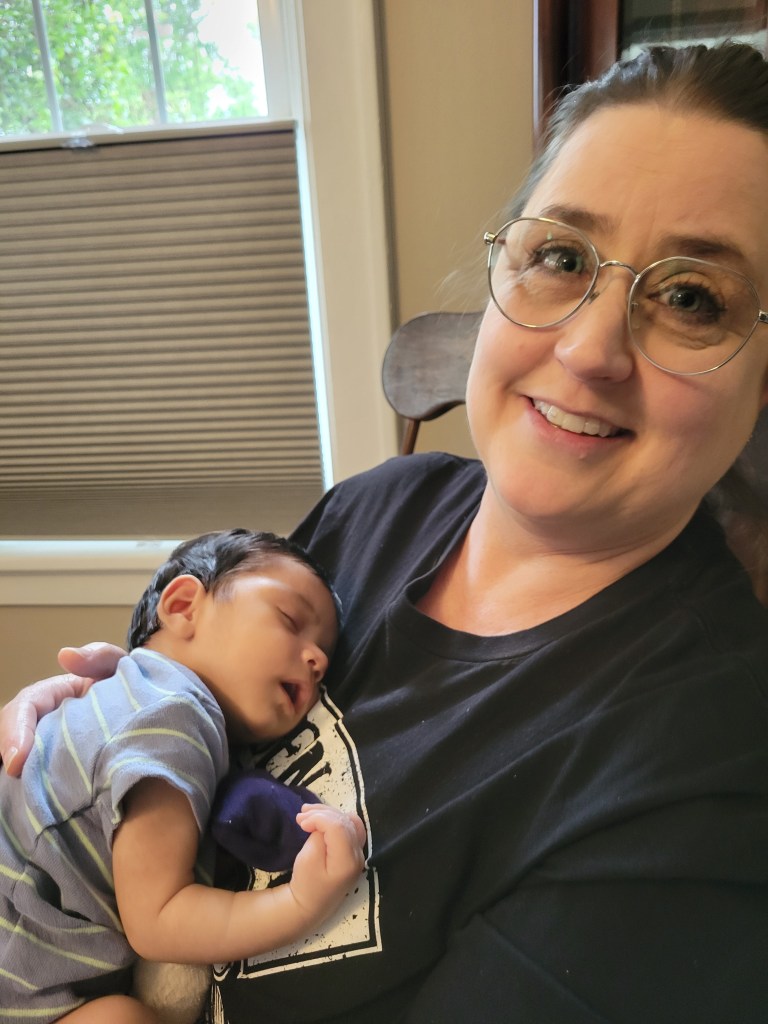

I will be getting to see him again VERY soon and I’m so excited! How can you resist that face!?
Thought I’d share a little update to make you smile! 😉