Hello friends and happy Friday to you! It’s been so crazy warm over my way and I’m hoping this day finds us with a bit of a break in temperatures.
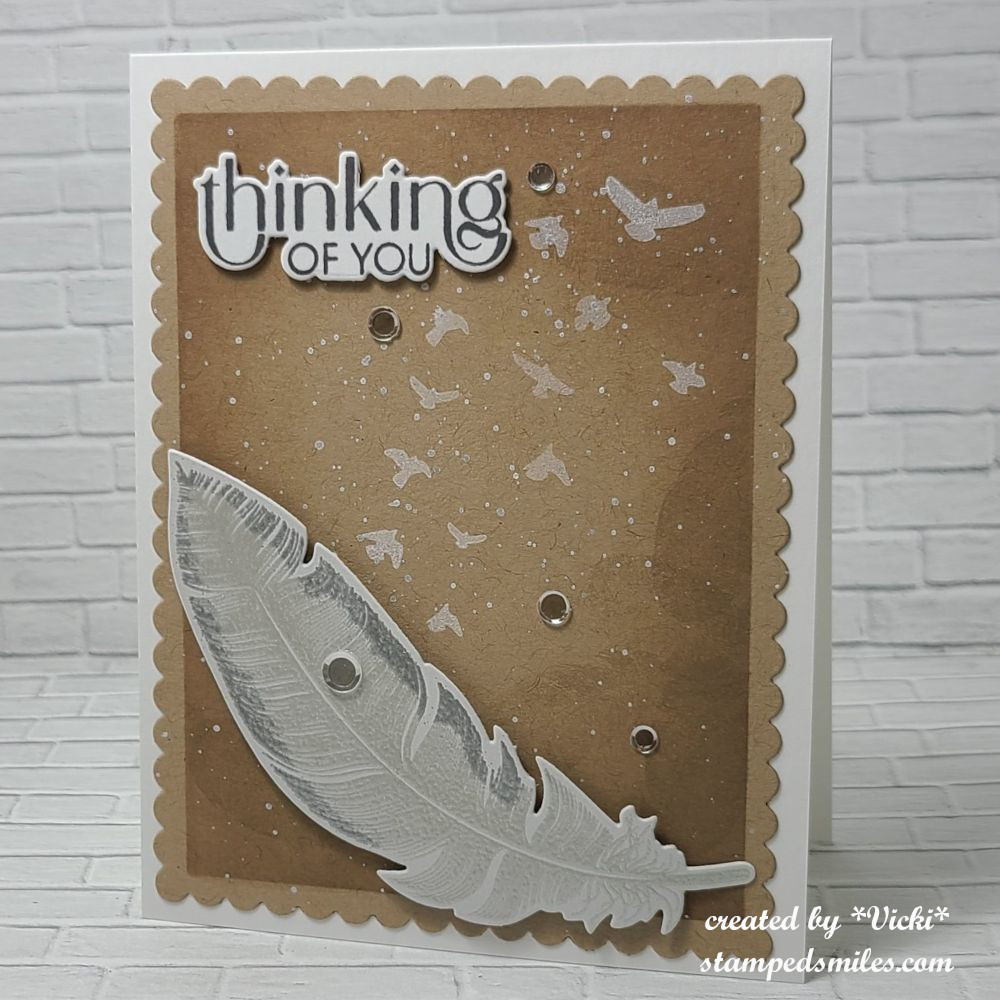
Today starts a new challenge over at the Alphabet Challenge Blog! Our next letter is F and it was my turn to choose a theme for this letter, so I have chosen “F” is for Feather(s) *Remember that this is a bi-weekly challenge, so you have two weeks to enter* I hope you will find some time to play along! Here’s what I’ve created:
I thought this would be a fun theme to play around with as you could just add a bird or anything with feathers. I look forward to seeing the projects for this one! I was happy to have this chance to pull out some things in my stash that I hadn’t used yet.
I started with a kraft colored cardstock cut with a scallop rectangle die and masked off the edges to ink blend and stamp a smaller feather around the edges with brown ink. I then took the flying birds image from the “Wings of Love” stamp set and stamped it in white ink. I also decided to add some white splatter over that. This panel was then attached to an A2 top folding white card base.
For the large feather at the bottom: I used my VersaMark ink pad to just ink up the edges of the feather, then I silver heat embossed just the edges of the feather. Without removing the feather stamp from my MISTI, I inked up the entire feather with VersaMark ink and then used a white opal embossing powder over the entire image. Since this embossing powder is translucent, the silver edges that I embossed still showed through. I die cut it out with the coordinating die and popped it up with foam tape at the bottom of the card.
The sentiment was stamped with grey ink and cut out with a coordinating die that I attached with thin foam tape at the top of the kraft panel. I added some clear sequins to finish it off.
Thanks so much for stopping in today! I hope you will grab your feather(s) and play along with us! I’ll see you tomorrow for a new Art Journal Page!
Hello friends! I hope you’ve had a wonderful week and looking forward to a great weekend coming up! We are having a heat advisory for the next several days over my way, so I thought it would be a great idea to stay indoors and craft! I also thought this would be a great time to catch up with some posts sharing some things that I’ve worked on the first part of this year that I hadn’t gotten a chance to share with you.
LONG POST – pull up your chair with your favorite beverage and enjoy!
I thought I’d share the Taylored Expressions Virtual Stamp Joy that I did back in March. I actually spent the weekend attending the classes and creating as I followed along. I managed to get all of the projects done the day after the event was over, but failed to post all of what I had made due to the fact that I was busy helping two different people move…and then life just got really busy after that as well! LOL
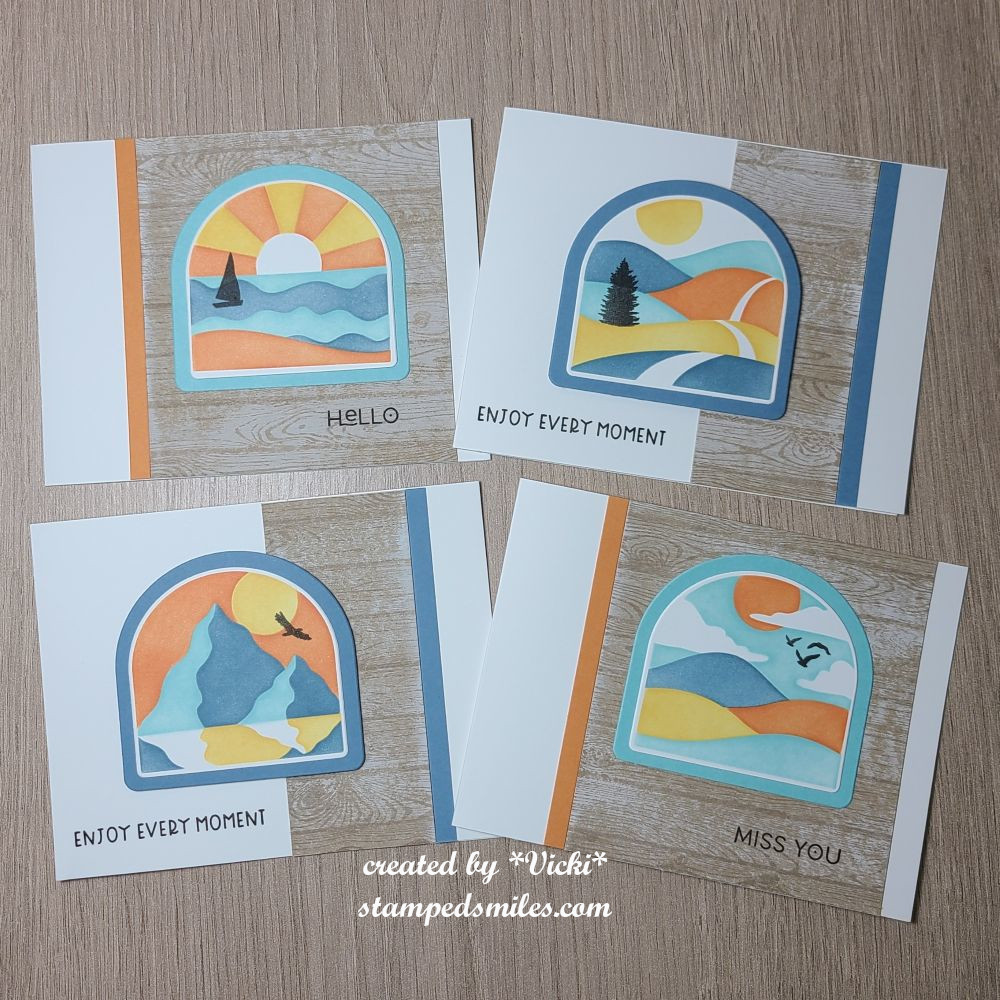
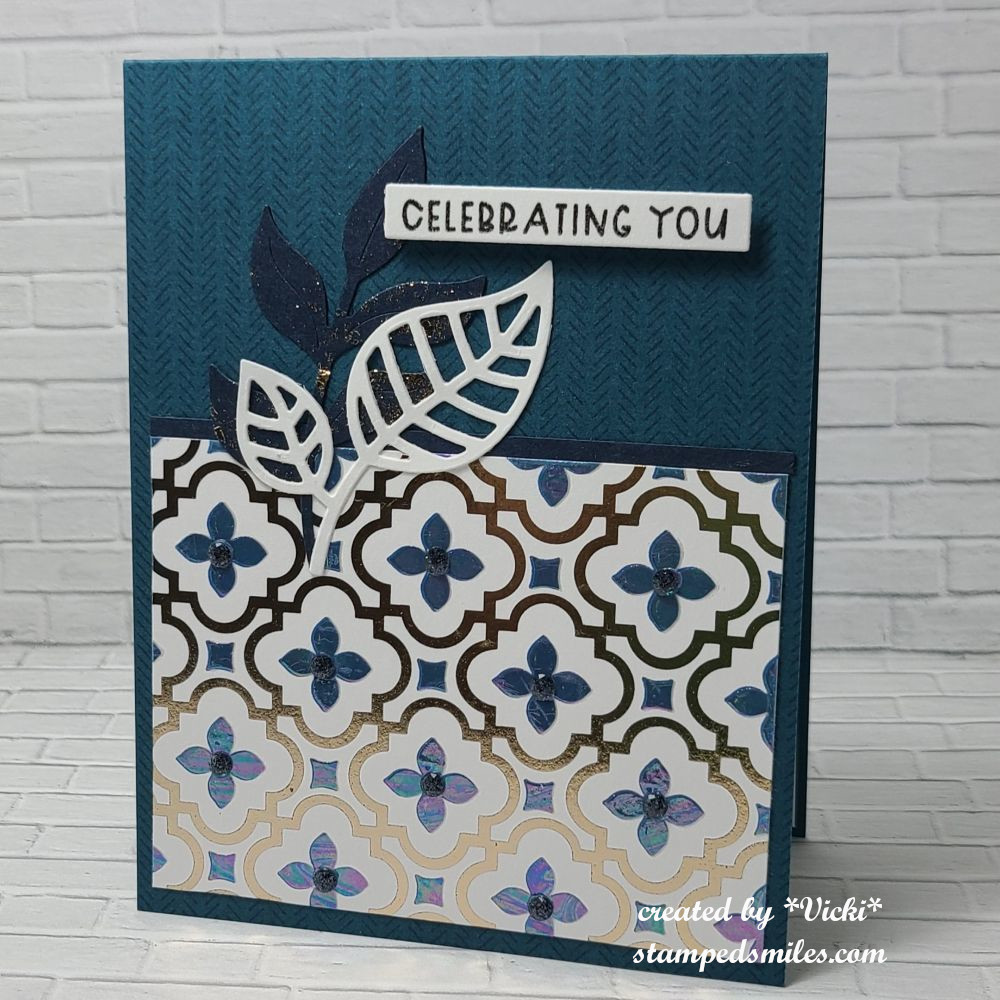
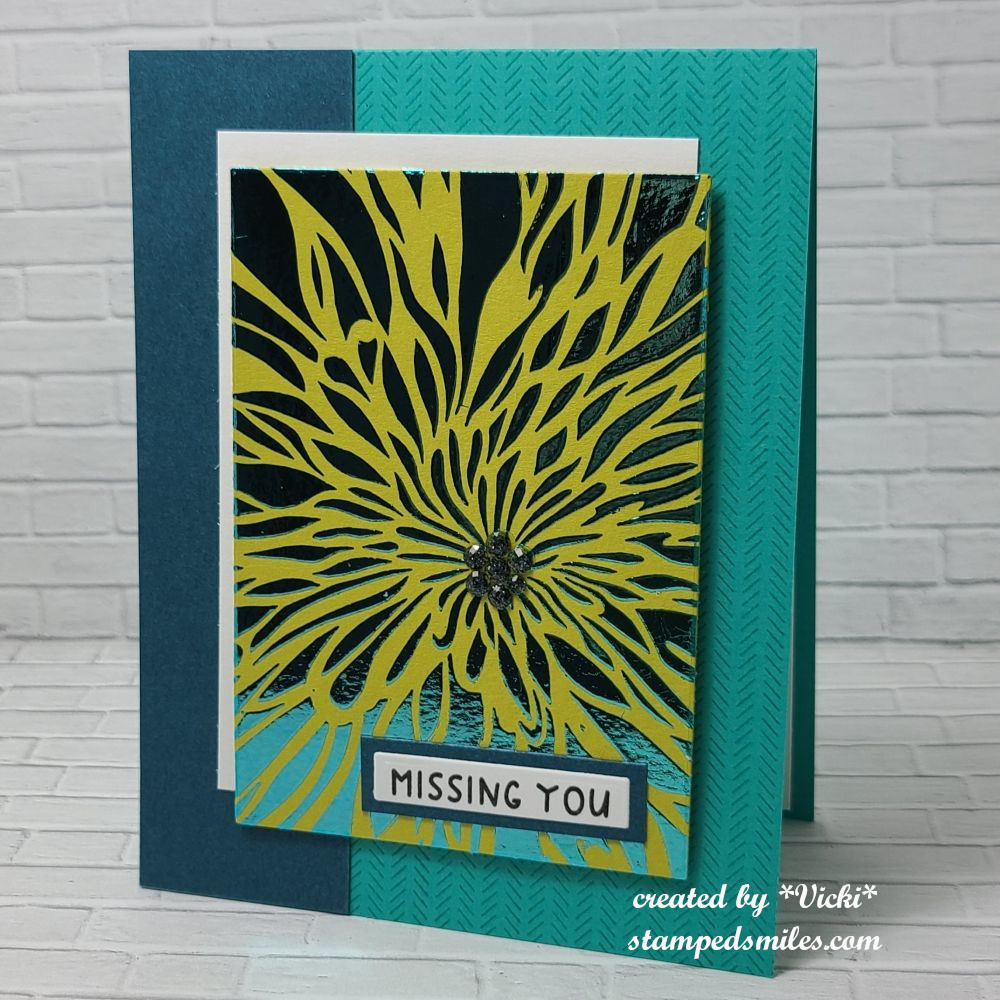
*I also have added an additional event from Taylored Expressions this last weekend called “Summer School” which concentrated on foiling techniques. Although I’ve done foiling before, I sure enjoyed seeing new products and learning a few new techniques too! (These four cards are at the end of the gallery photos below)*
If you’re on my website, just click on the images below to enlarge the photos and view any details underneath each one. ENJOY!
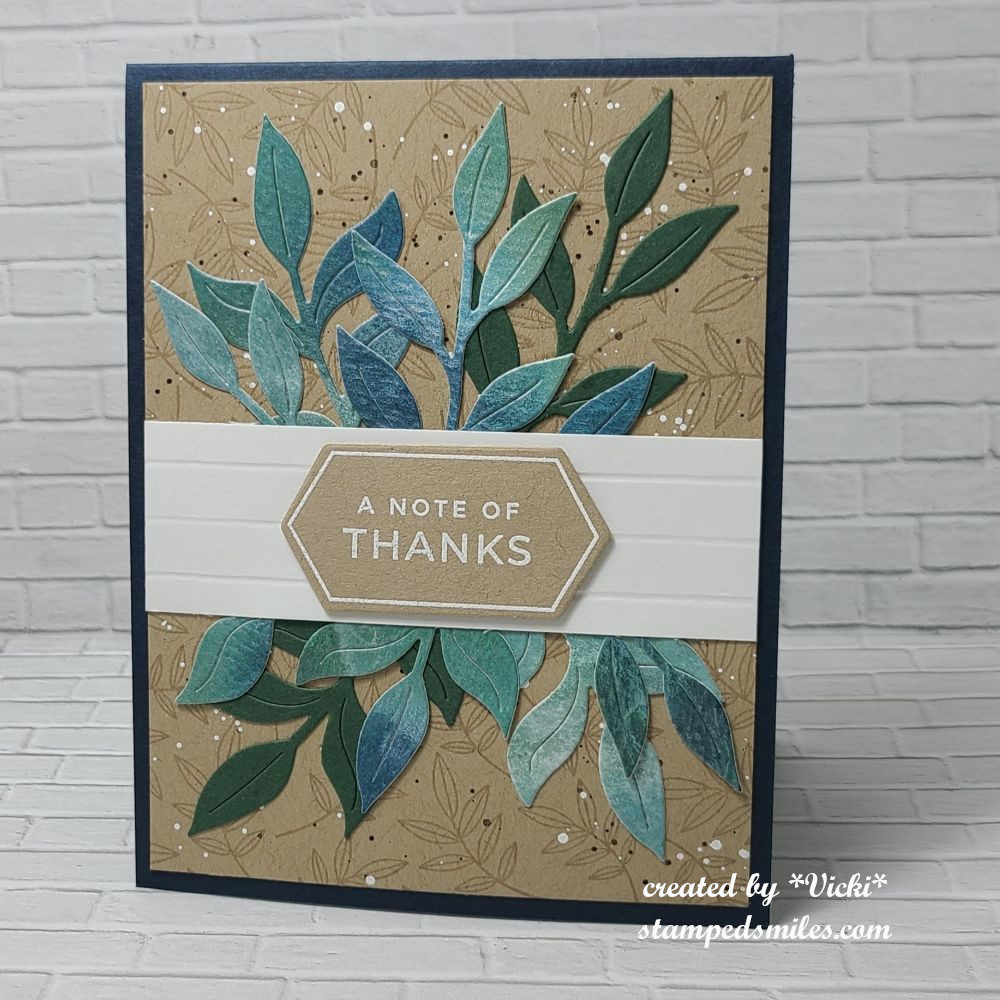
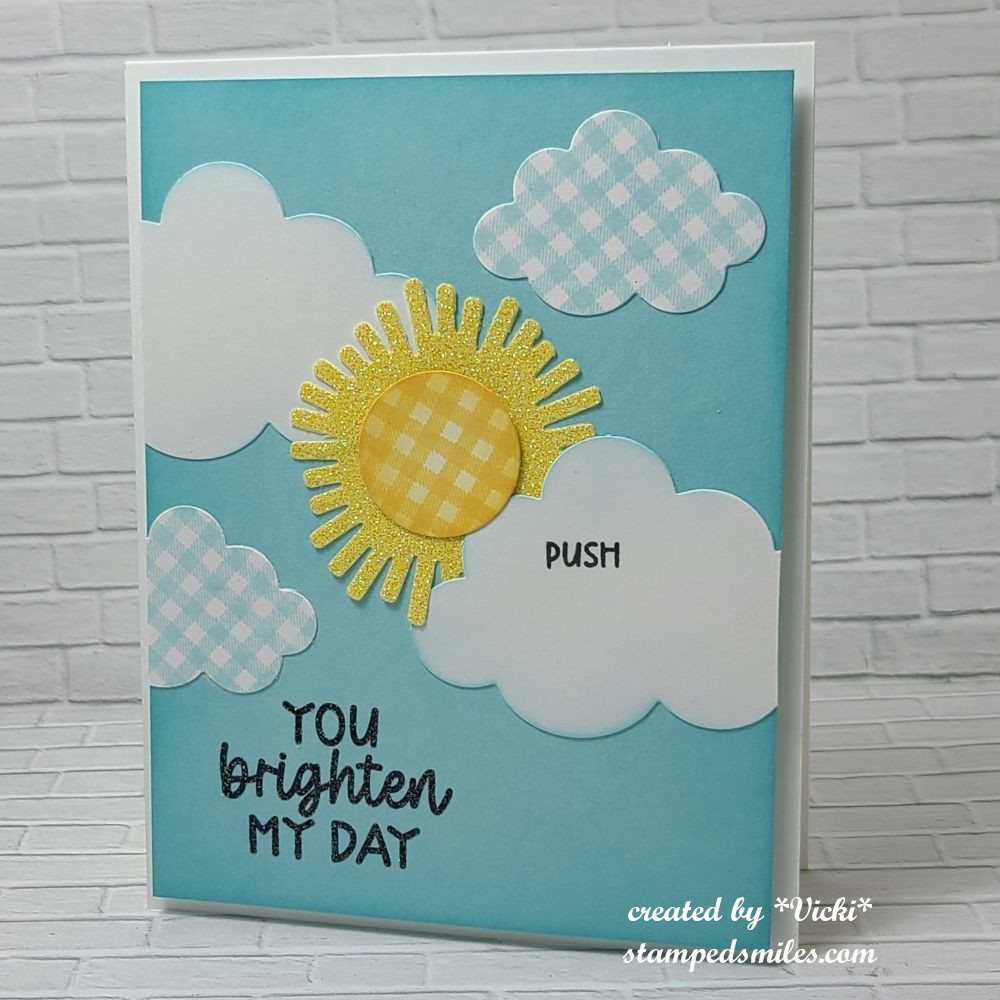
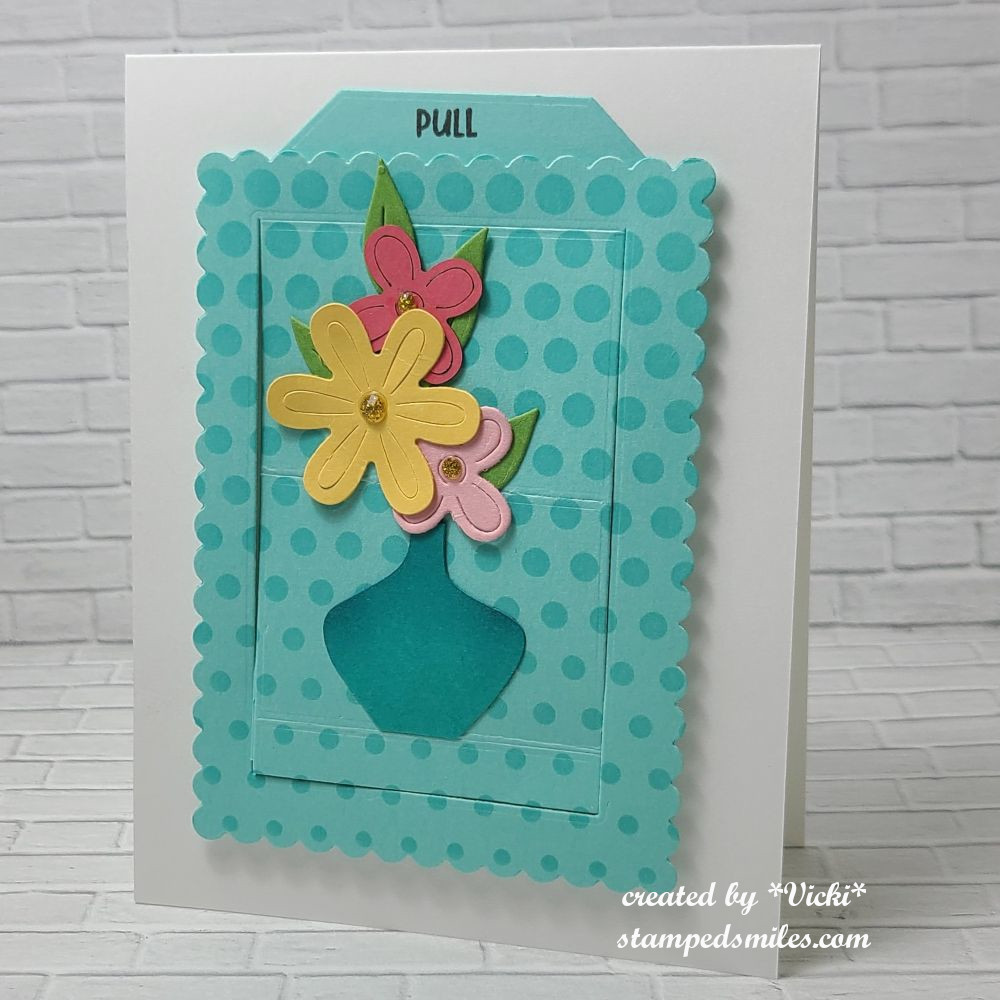
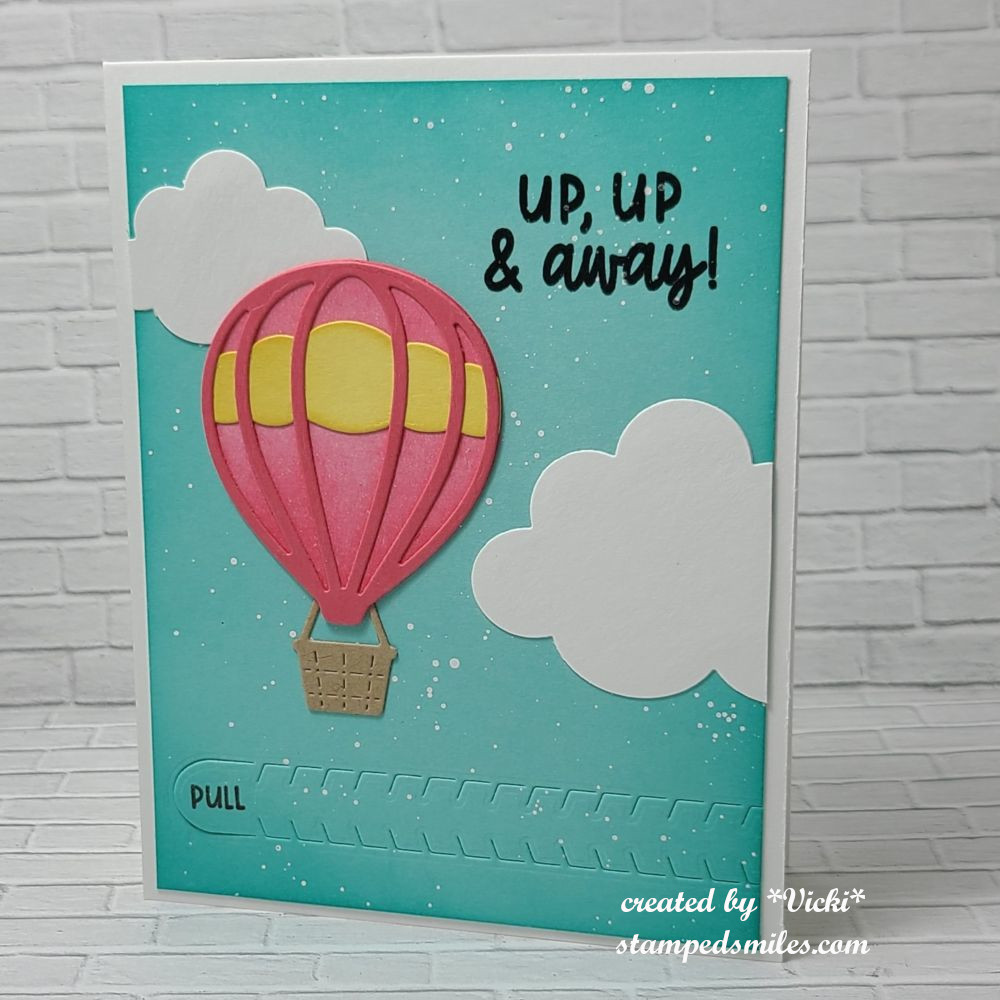
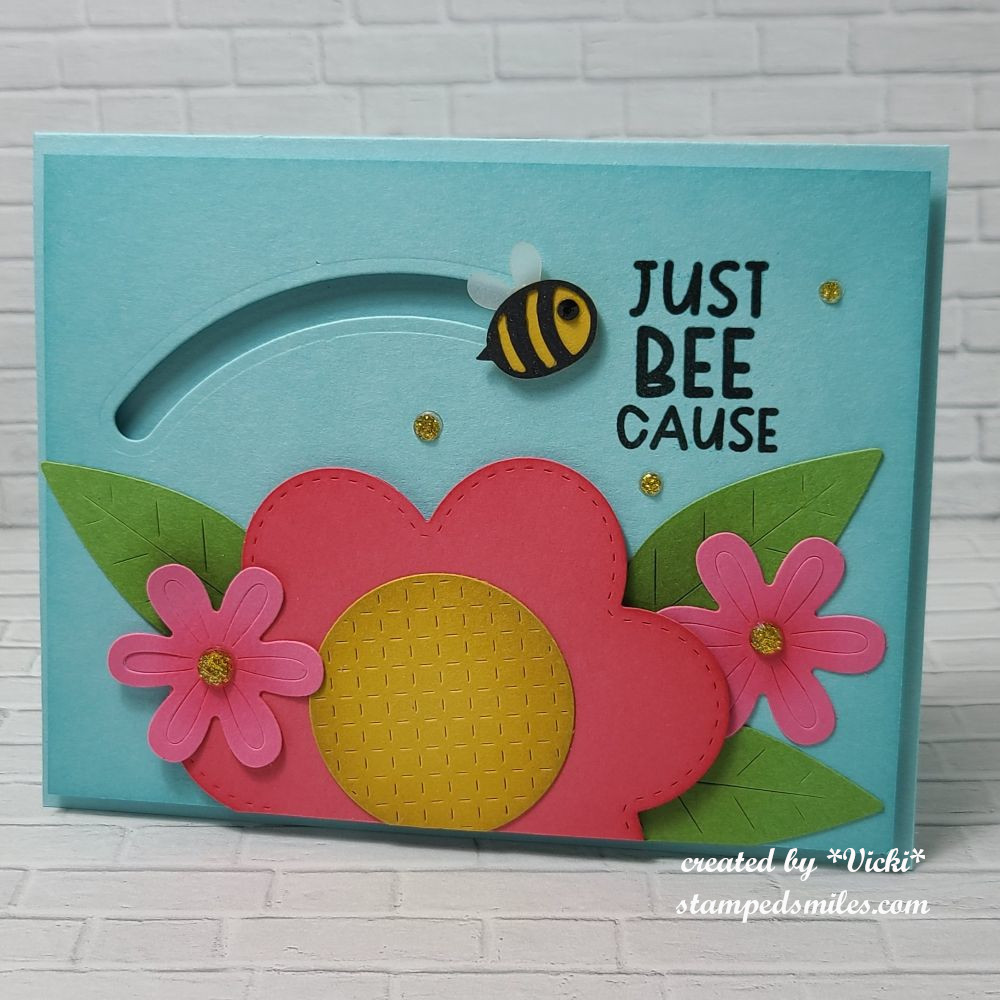
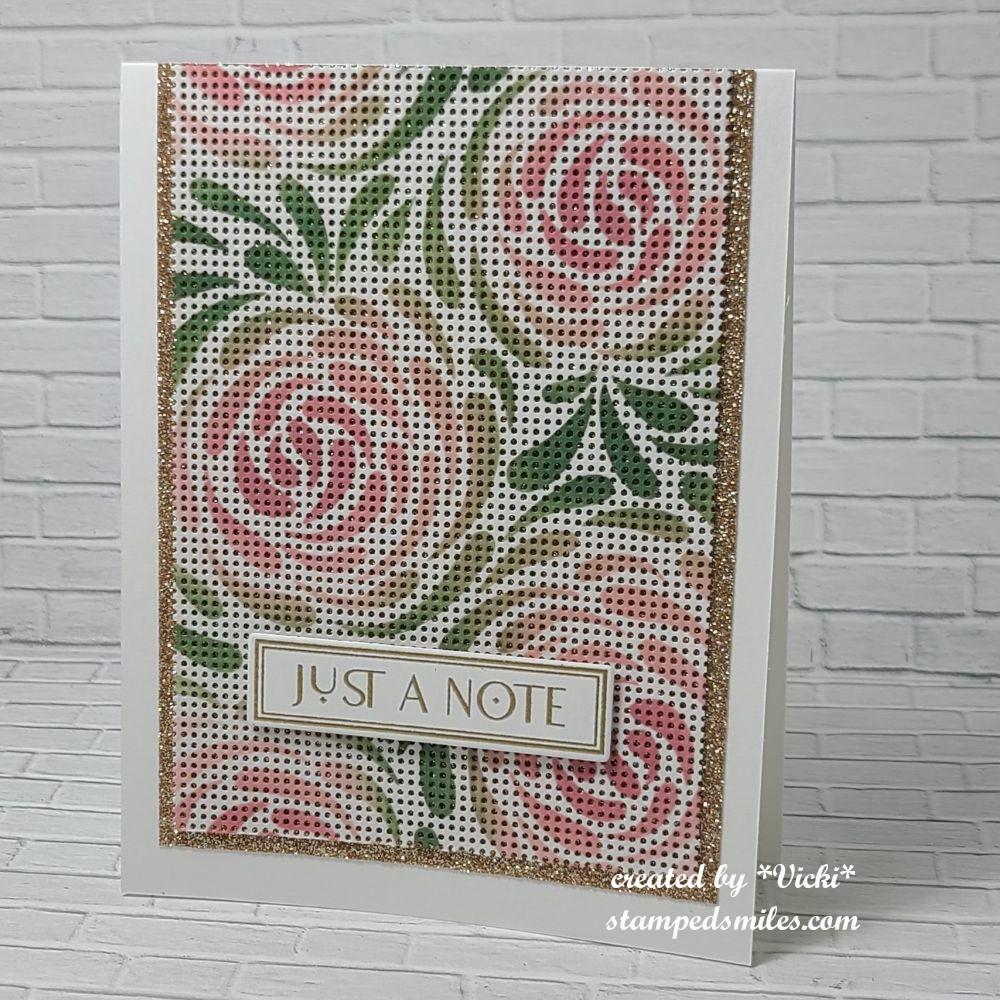
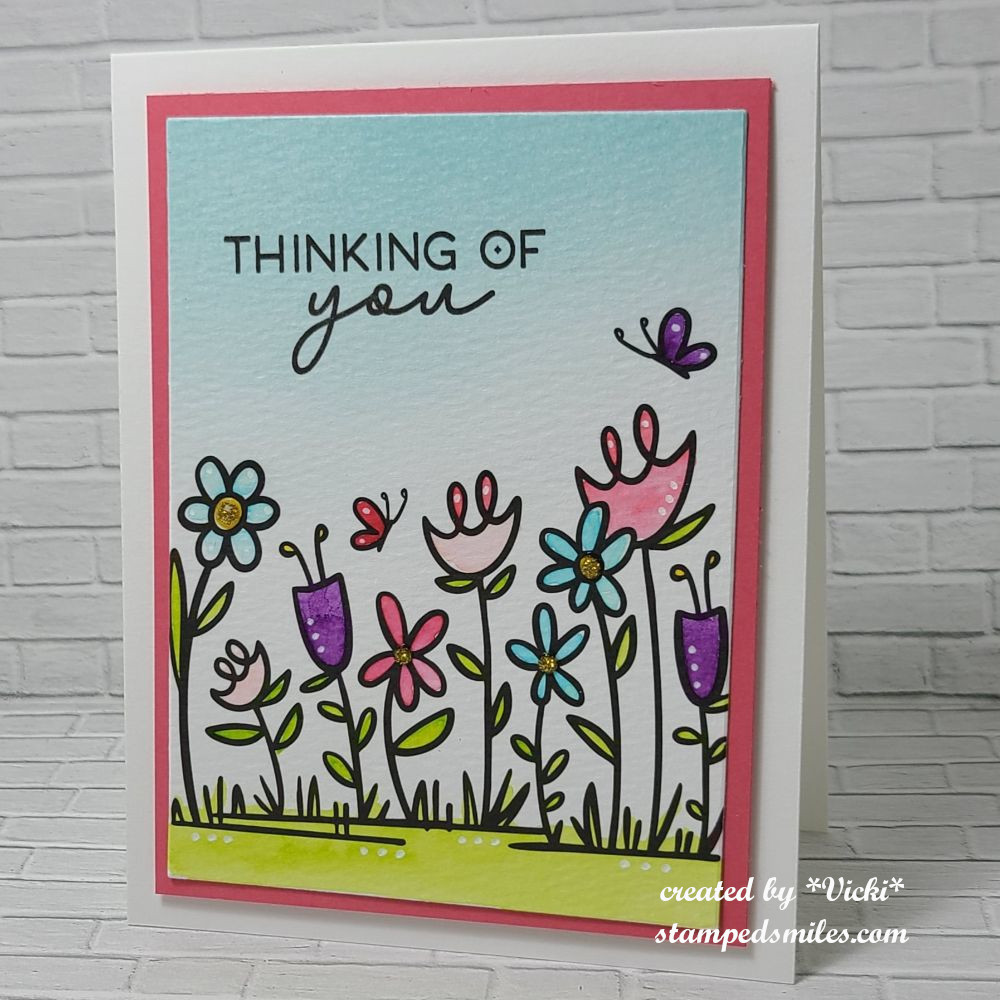
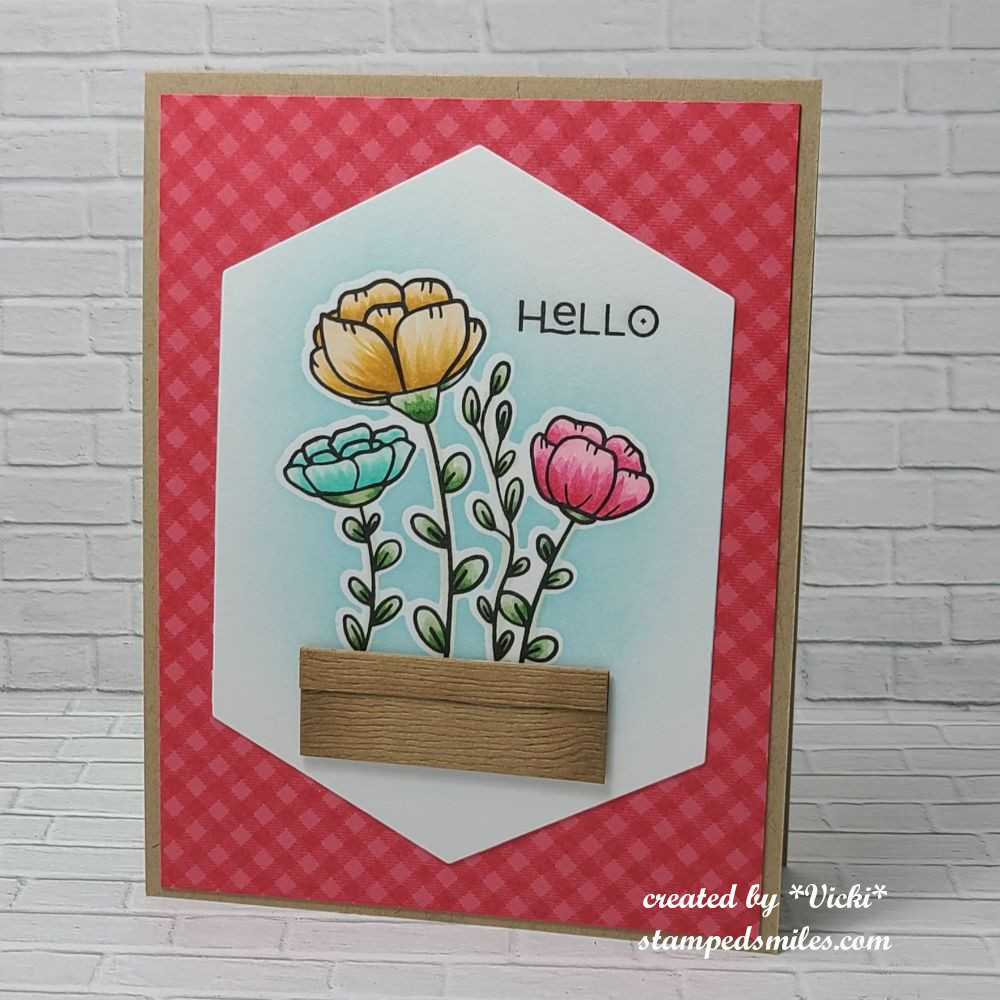
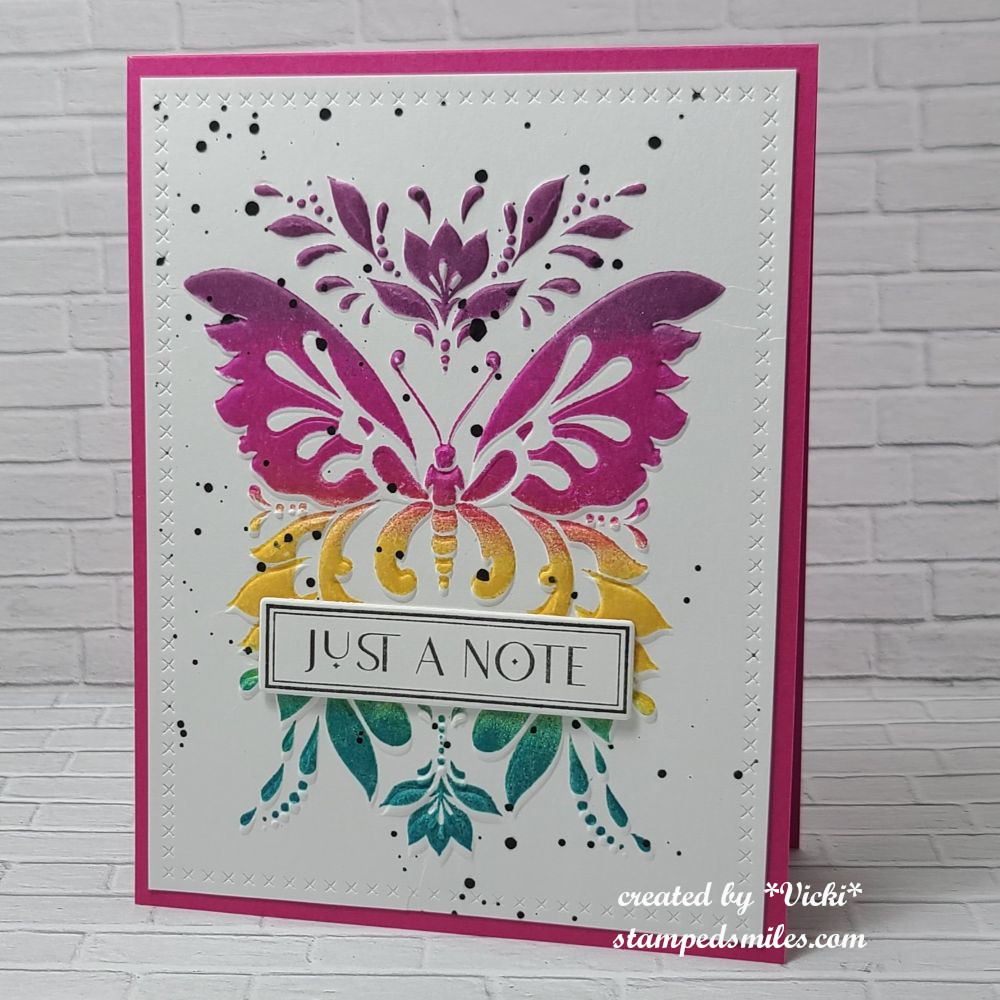
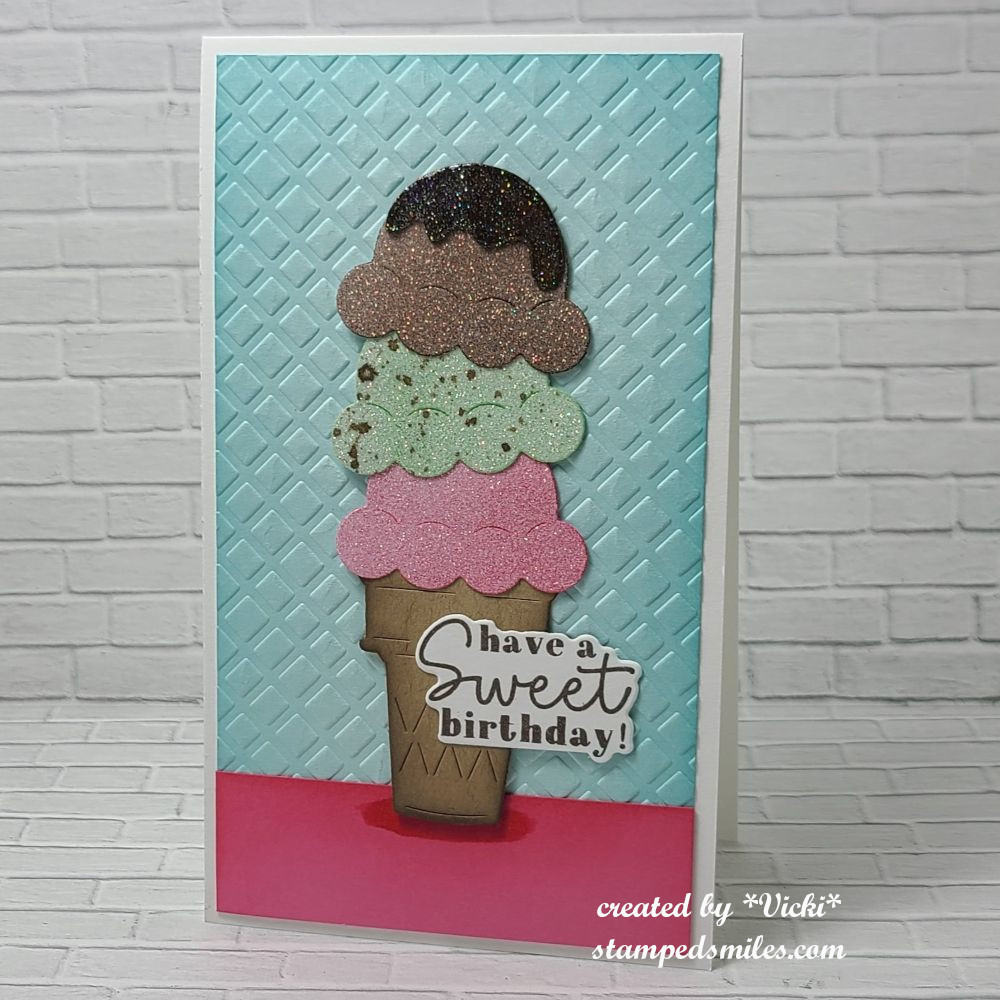
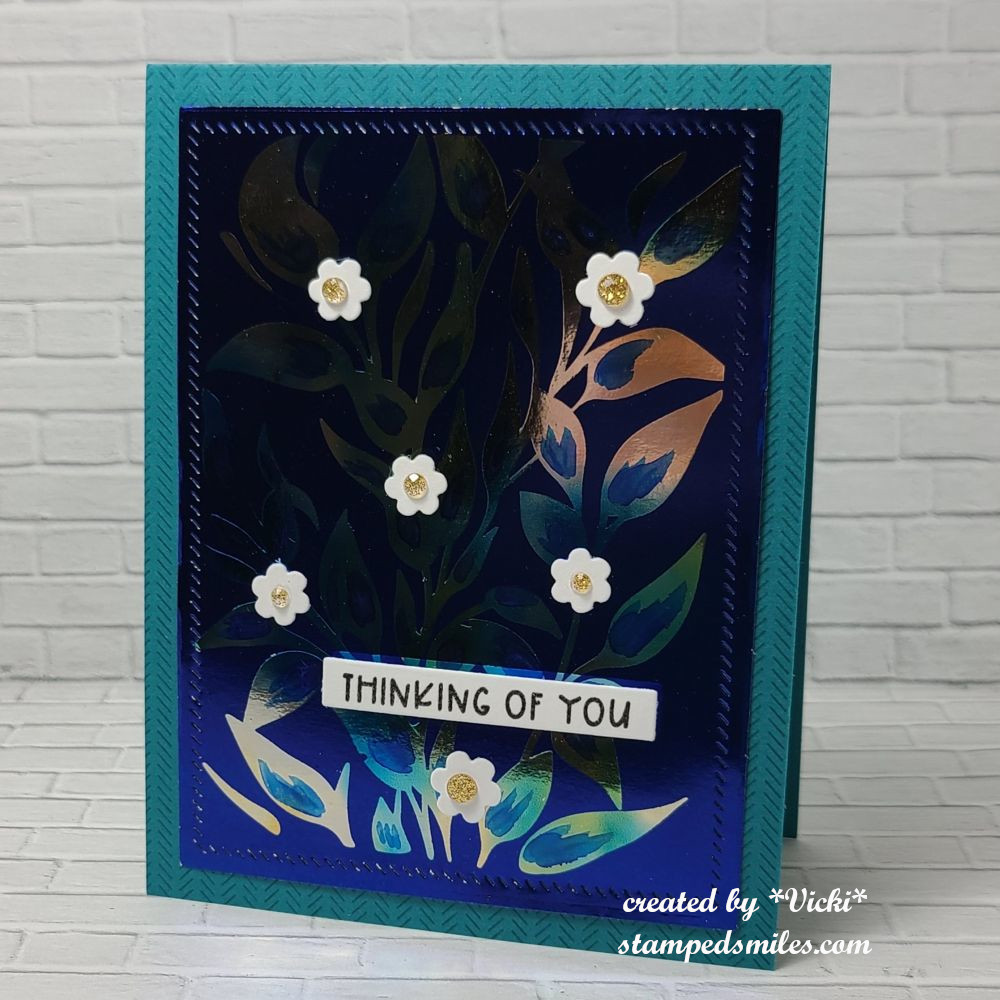
Dimension Class-ink blending and splattering die cutsDimension Class-markers over die cutsDimension Class-stacked die cuts for layersDimension Class-liquid watercolor smooshing with die cutsInteractive Class-Light Up CardInteractive Class-Light Up Card pushing button to activate itInteractive Class-Pop Up CardInteractive Class-Pop Up Card when you pull up on the tab to reveal message and flowers pop upInteractive Class-Rip Strip Card – when the recipient pulls on strip, it reveals messageInteractive Class- Spinner Card – bee spins and moves along curved trackSession 1 -stenciling on perforated papersession 2 – watercolor panels using Karin Brush markerssession 3 – stamp a stack using quad stencils to make four cardssession 4 – marker coloringsession 5-ink blending on stamp and embossing over imagesession 6-calendar easel card with message padsession 7 – ink blending over glitter cardstockSummer School-double foil technique and using markerSummer School – clear foilSummer School – foil paste and sprayed foil techniquesSummer School – Foil paste over color cardstock
I always love to learn new things with stamping/crafting along with all of the fun new products that come out too! I know I REALLY don’t need to purchase more things, but when cool stuff comes out, it’s really hard to pass it by! I think doing these classes and joining in on different challenges help me to use these fun things up!
So I hope you’ve enjoyed my post sharing all of the things that I’ve been doing! I will have another post sharing more things that I haven’t shared yet too! In the meantime, I’ve also been working on a scrapbook which has been fun and something that I haven’t done in a really long time! A baby can do that to you! LOL
Thanks so much for stopping in today my friends! I’ll be seeing you soon! Have a great weekend!😊
Hello friends and Happy Father’s Day to all of those in the U.S. that celebrate this day! Our usual is to cook out on the grill and spend time together. So I hope whatever your plans are, you have a great day! (I made a card for hubby, but forgot to take a photo…so I’ll share later.)
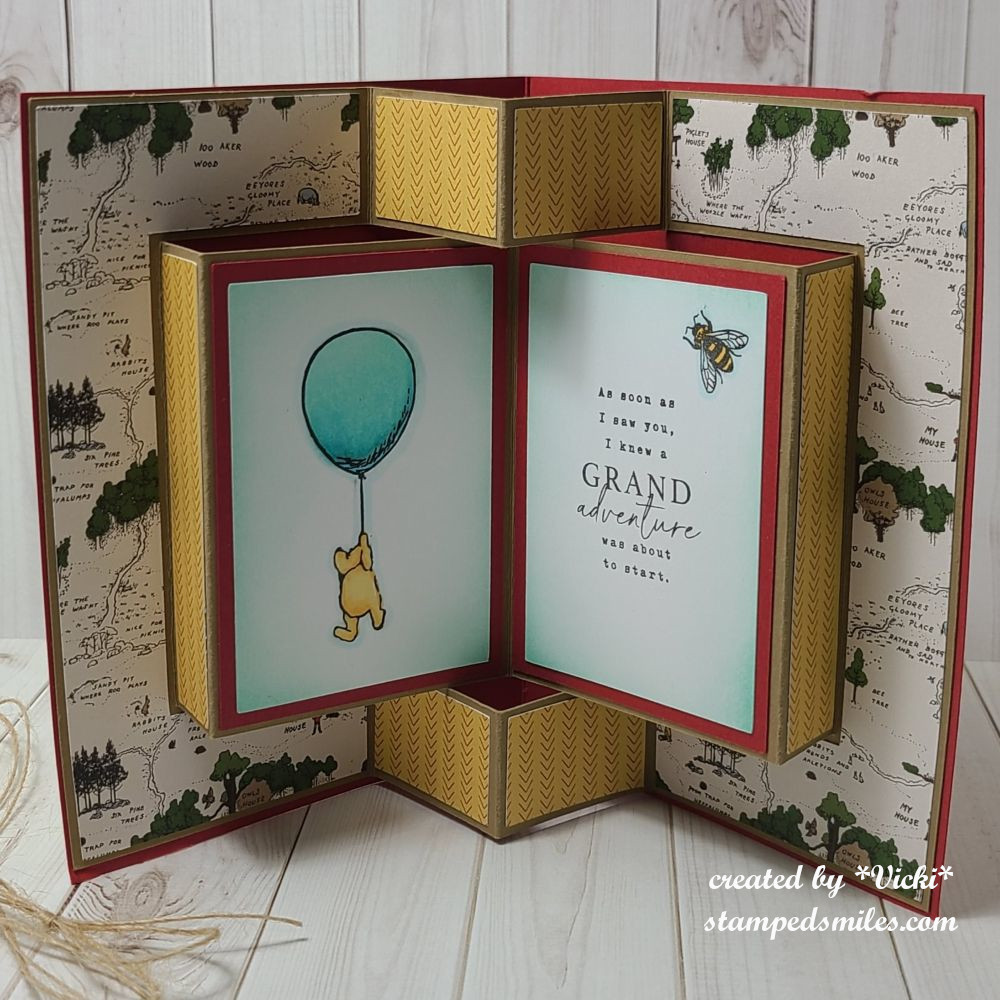
I’m stopping by today to share that we have a new challenge over at Sparkles Monthly and we have the theme of “Fairytale/Storybook” this month. Would love to see your take with this theme on your projects, so I hope you’ll join us. Here’s what I came up with:
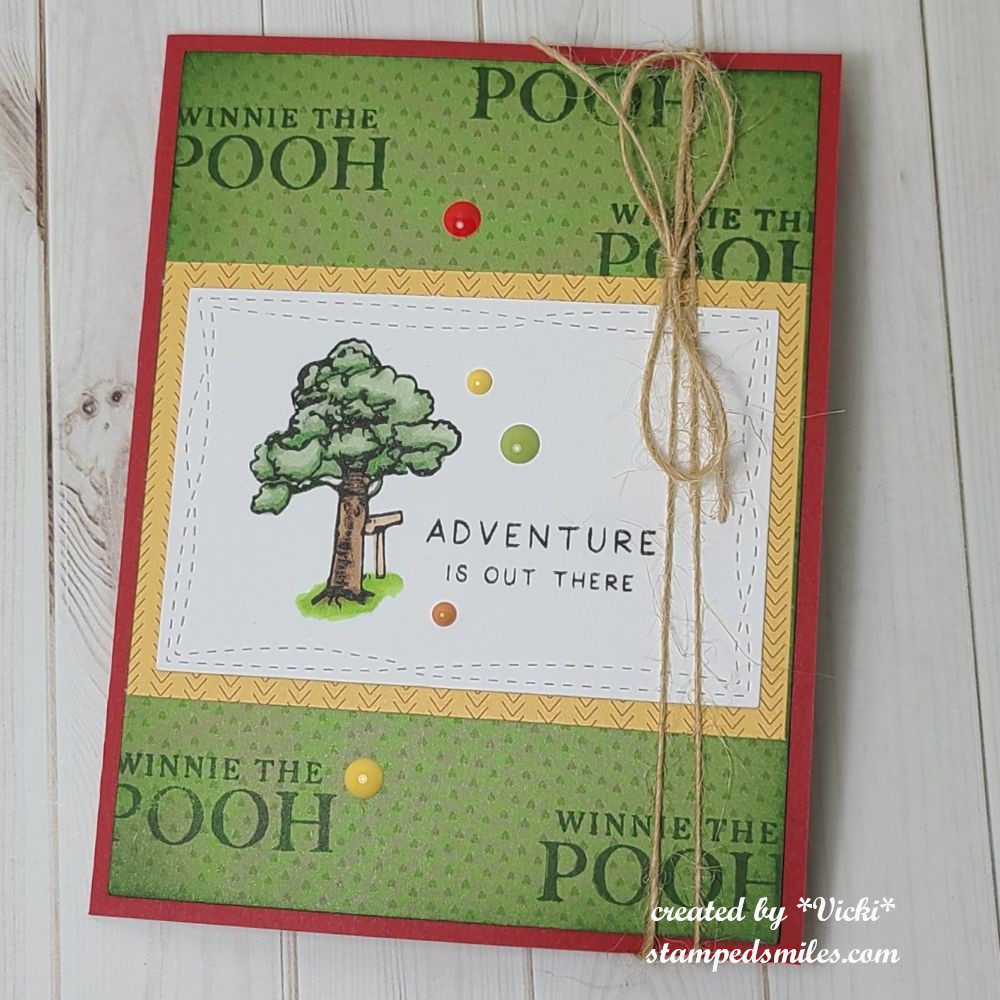
Since, I had lots of “Winnie the Pooh” on my mind with the baby shower, I thought it would be appropriate to create something using the stash that I already had out and was thinking of when this challenge theme came time to do! I think most of us grew up with this storybook and know who this is! And I had purchased some of these items from Echo Park several months ago, so it was great to be using more of it up!
FRONT of CARD: It doesn’t really look to appealing on the front, but I thought I’d share what I did anyway. I used a stamp set from Echo Park and stamped the tree (and colored it) with the sentiment on the white panel and die cut it out. I also used some of the Winnie the Pooh papers and layered behind it. The green paper was stamped with the sentiment from the stamp set. I added some matching enamel dots all over it.
Since this is a special Fun Fold design, I needed to help it stay closed, so I tied some twine around the right side of the card.
When you open the card, this is what the inside looks like! You see the center fold pops out like a book! So this is called a “Fun Fold Book Card” and the design was cut out with my Cricut machine using the papers and stamps from Echo Park Designs. This way I knew it would all match up on the design. I did stamp the Pooh with balloon and the other side with the sentiment and bee were also stamped. I blended some blue ink around the edges.
I thought this would be such a cute card for a kid!
Thank you so much for stopping in today and I hope you like my fun fold card! Please stop by the challenge blog to see more inspiration and join in to play! See you soon!
Hello and happy Friday! Thank you so much for the congrats from my last post about the baby! I look forward to meeting our new family member soon! It’s starting to get really warm over my way, so it’s a great time to be indoors with the cool air and craft.
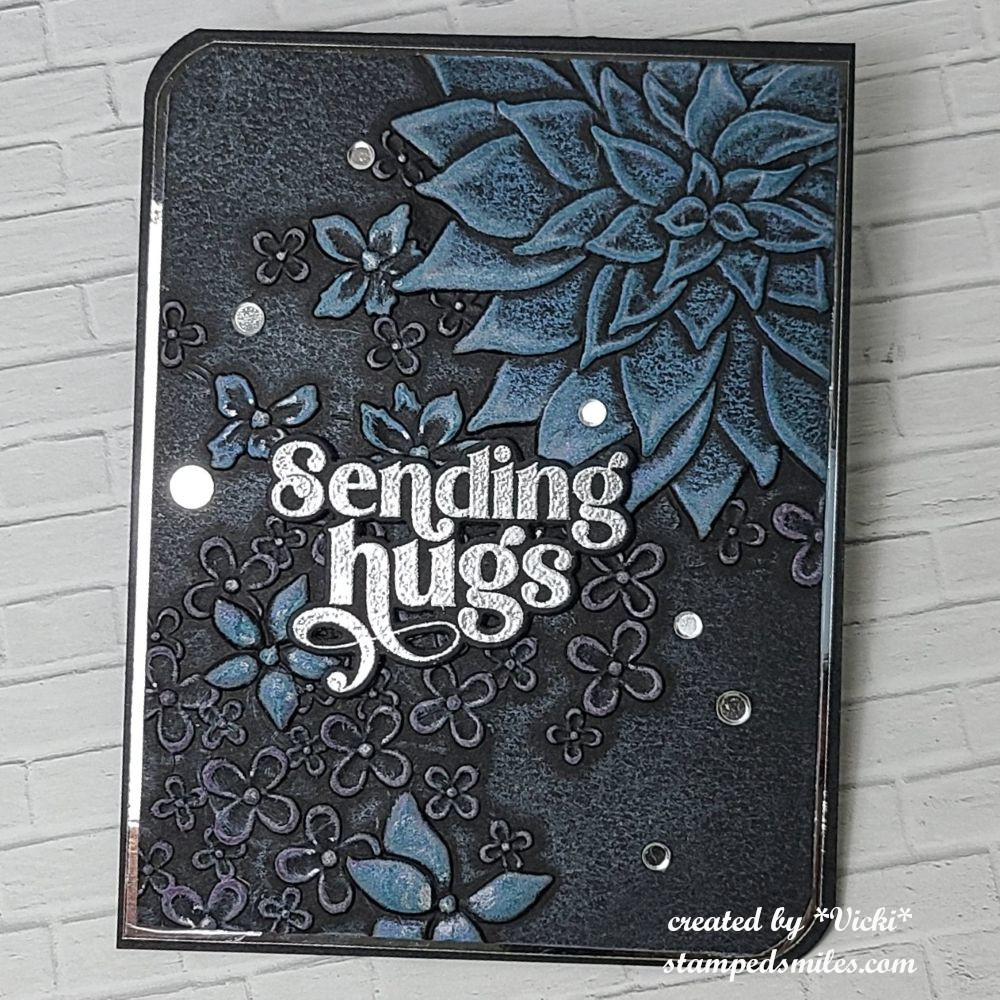
Today starts a new challenge over at the Alphabet Challenge Blog! Our next letter is E and the hostess has chosen “E” is for Embossing (heat or dry) *Remember that this is a bi-weekly challenge, so you have two weeks to enter* I hope you will find some time to play along! Here’s what I’ve created:
I absolutely love to emboss! I first fell in love with stamping because of the magic of heat embossing and then fell in love again when those embossing folders came out! So I’ve decided to do both versions for my card.
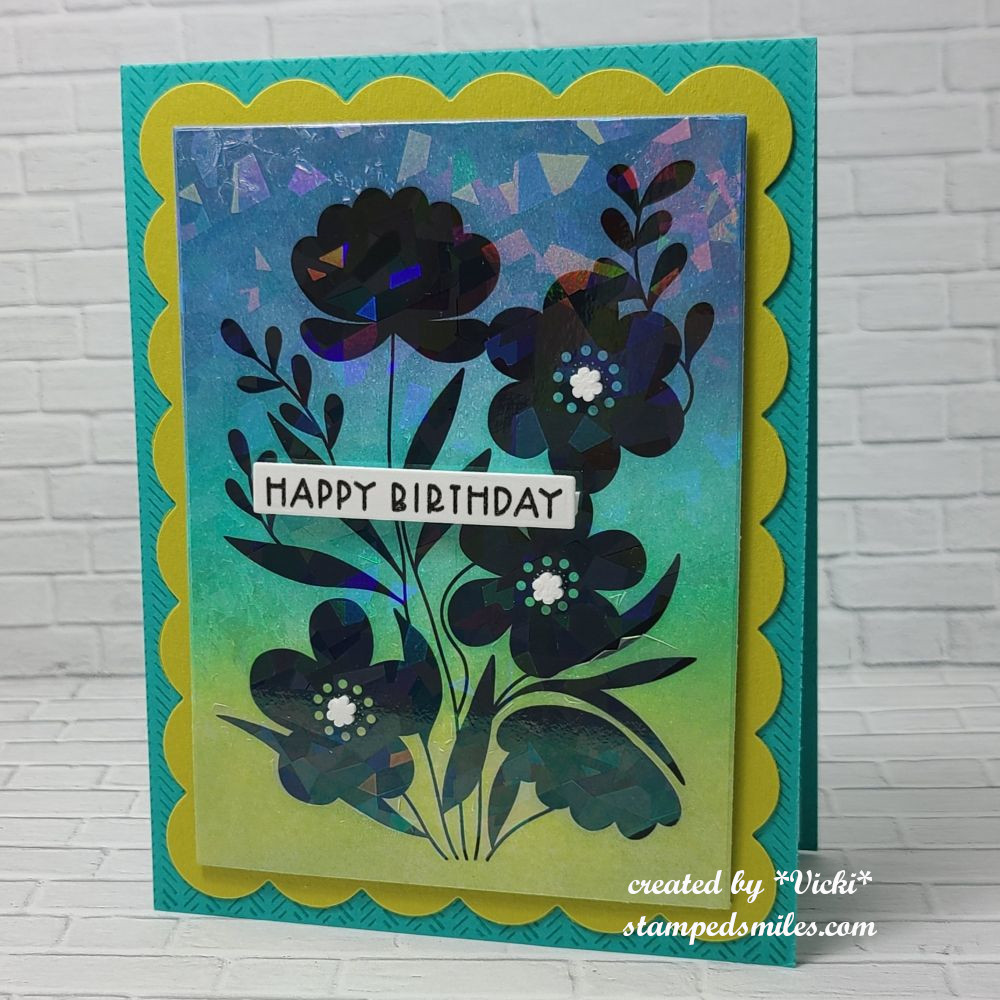
I haven’t had a chance to use this Drifting Flowers embossing folder from Simon Says Stamp. I thought it was so pretty! I wanted to emboss in black and try out my Lisa Horton Interference Inks with it, so after I embossed it, I used my finger to rub white ink over the raised areas. I then used the LH Interference Inks over that once it dried. (I can’t remember exactly what colors I used, but it basically started as an experiment and I had several pads open!) I also used a silver ink pad to rub the centers of each flower minus the large one.
I should also mention that some of the white ink was very slightly rubbed over the open areas as well because I got a white streak on it…so I just continued to rub all over those areas until blended in. I didn’t mind the look.
While the inks were drying, I silver heat embossed the sentiment and cut out it with the coordinating die. I additionally cut out two more for added thickness and attached to the panel. I layered this embossed panel onto a mirror silver layer with both of these layers getting rounded on two ends with my corner chomper. I added these onto a chomped top folding A2 black card base. Lastly, I added some silver sequins.
Please be sure to stop by the challenge blog to see the inspiration from team as well! I look forward to seeing your embossed projects in the gallery. Thanks so much for stopping by today and I hope you like my card. See you soon!
As You Like It – Favorite: to add a sentiment or not and why? (I most always have sentiments on my cards because I feel it’s important when sending a greeting card to someone and it’s hard for me to leave it blank.)
Hello friends! Last month was a very busy month for me and I know that I had mentioned a couple of times that I had some things that I was working on “behind the scenes”, so I thought I’d share what I’ve been doing.
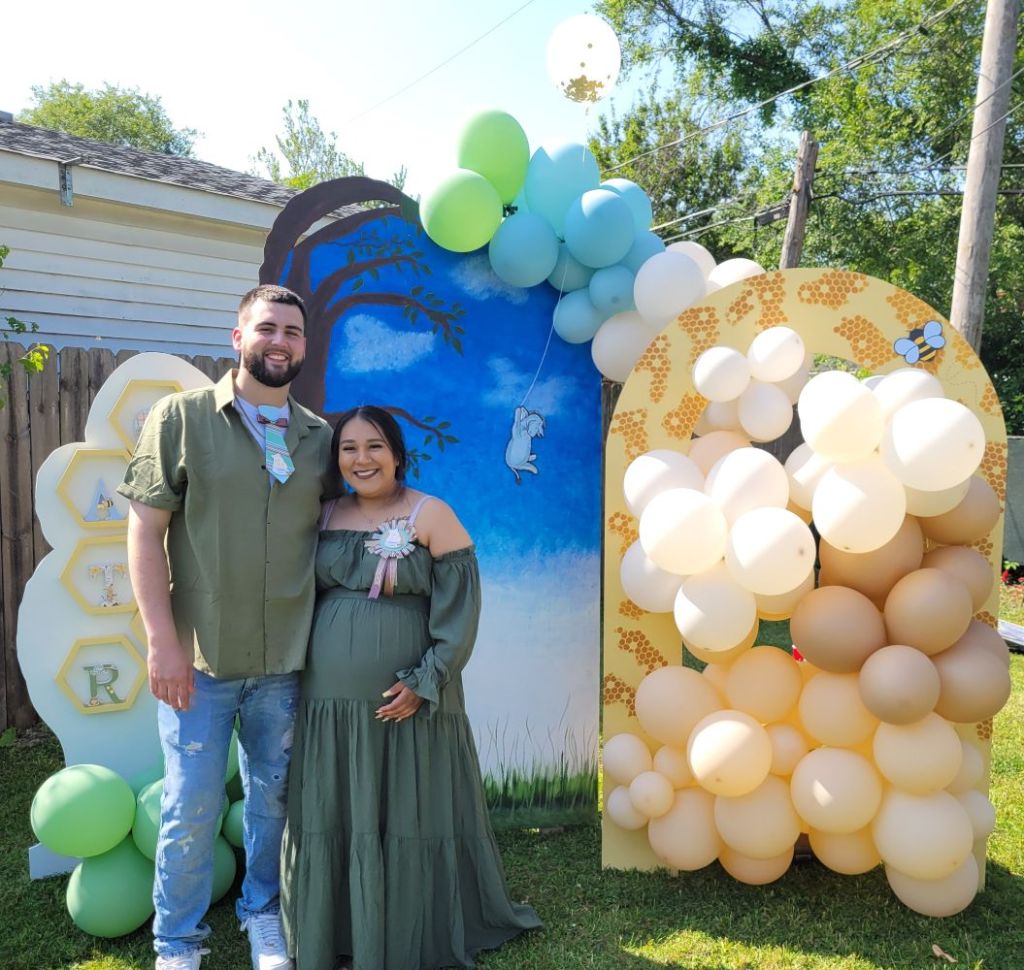
At the end of last year, my son surprised us with the news of a new grandchild coming! A few months ago, I was asked to help with some decorations for their baby shower and of course I wanted to help! Here’s a photo of the soon-to-be parents in front of a back drop that my husband cut out and I hand painted. My husband and I also put together the balloons around it:
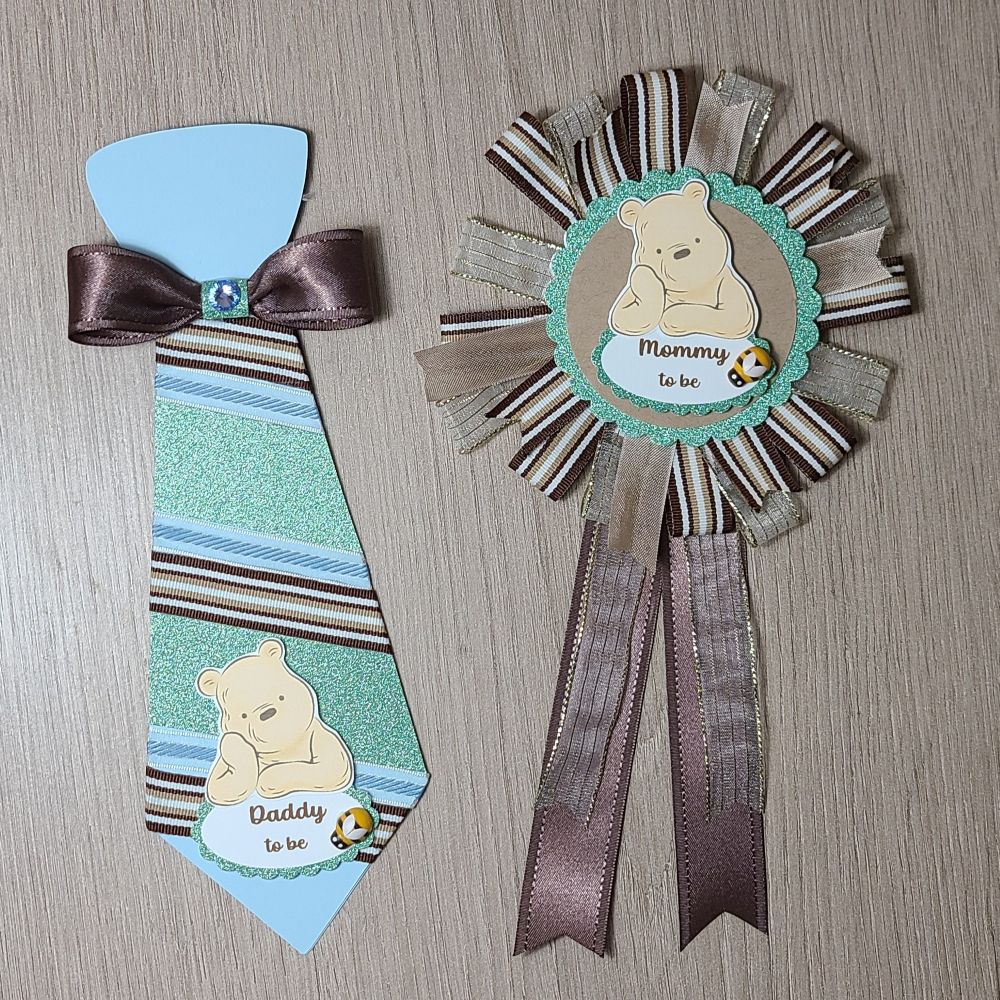
You may also notice, on the couple, they’re wearing a corsage that I made for each of them to wear. My son wasn’t too thrilled about wearing it, but he humored his mom. LOL
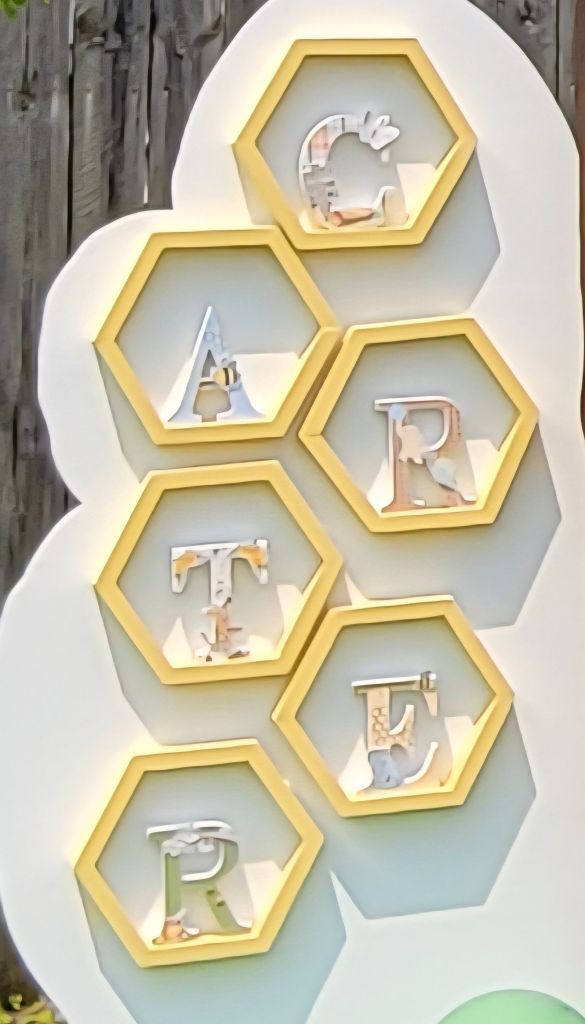
On the left white panel, There are hexagon shelves that my husband put together and there are wooden letters of the baby’s name. I decorated each of the letters with Winnie the Pooh papers and characters. I wish I had taken a better photo of them, but I tried to zoom in a photo with the gallery below.
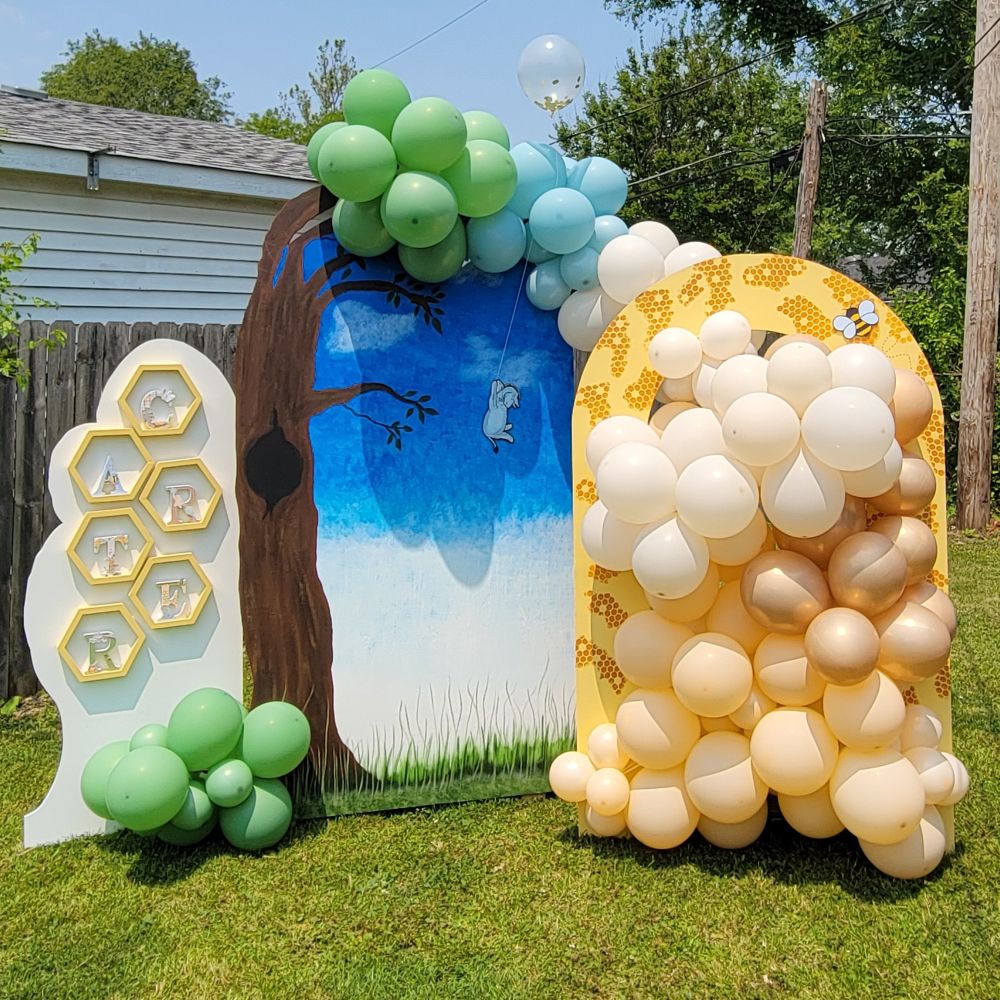
You can see how tall each of the panels are. My son is over 6 foot tall. I don’t paint much, so painting something this large was a big undertaking, but I enjoyed the labor of love doing all of these things for them.
Below you can see all of things that I’ve made for the baby shower and there is a brief description with each photo explaining what it is. If you are on my website, please click on each photo to enlarge it and scroll just beneath it to read the description:
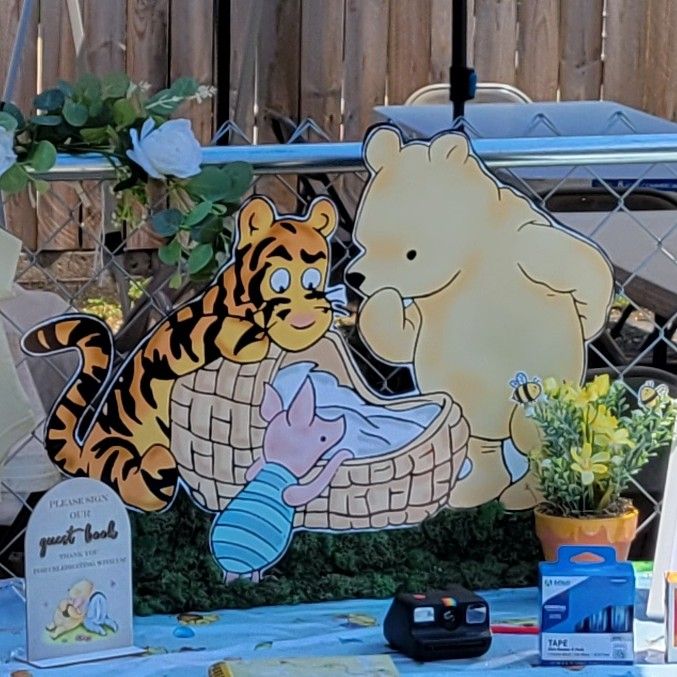
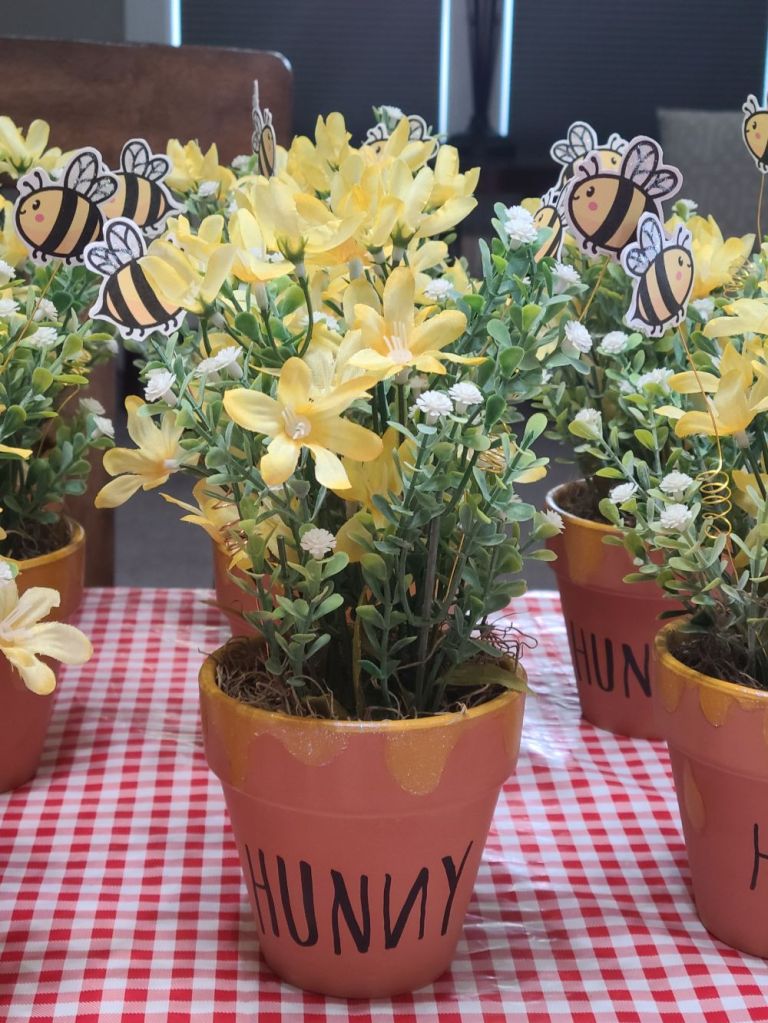
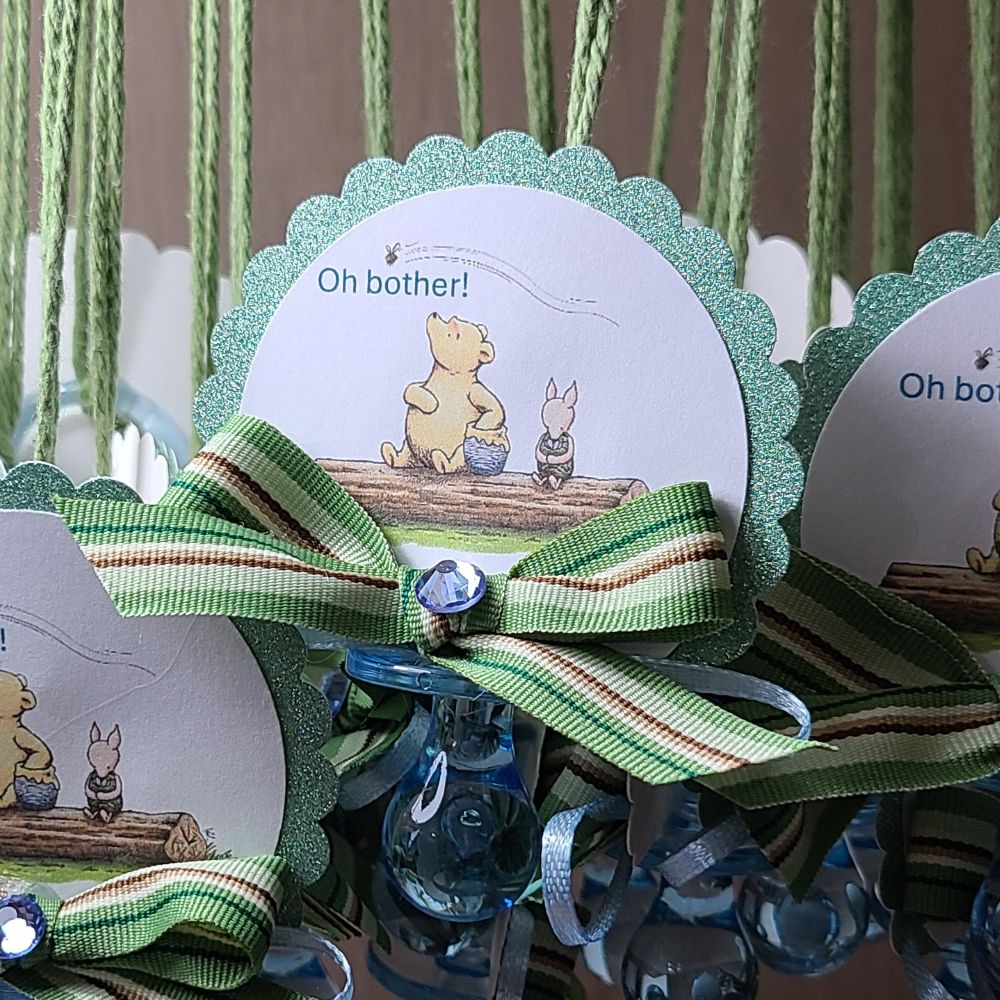
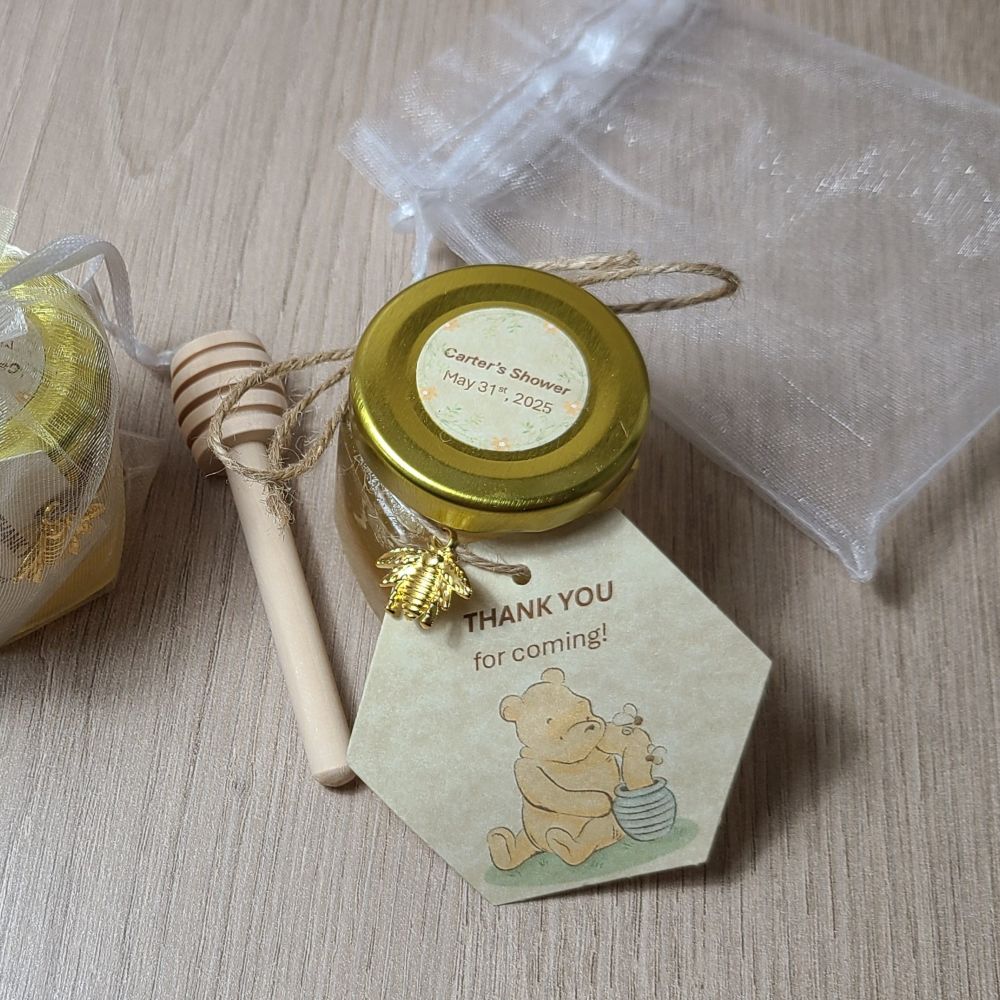
The full backdrop when finished with 3 large wooden panels cut out by my husband and hand painted by me. I added a hexagon stencil pattern with paint on the yellow arch panel. Eeyore and the bee were cut out from computer print and attached to a foam cut out by hand.Left back drop panel with hexagon shelves. Each hexagon has the wooden letters of baby’s name that I decorated with Winnie the Pooh characters and papers. This photo is really blown up because I didn’t capture a good photo of the letters.We made a large “hundred acre wood” sign that my husband cut out and placed in a clay pot. I used paper covered chipboard for the “welcome” and stenciled with black paint on the rest. The Winnie the Pooh character with all of the balloons was cut out from a computer print and flipped with each side on a cut out black foam piece. We staked it in the ground and attached the balloons around it. We made 5 different characters to line the drive.This is one of three different prints that we had done on poster size that was hand cut out and placed on a foam board. To make the characters stand up, my husband made a wooden stand with slots wide enough to fit the cut outs with the foam board. Since the front of the wood showed when the characters were upright, I covered the wood with moss by gluing it to the wood that showed. This character is on a table about 16″ x 20″ large. (I didn’t get good photos of these either!)I made 15 center pieces by painting the yellow honey drip over a clay pot. I also added some glitter paint over it and added the “hunny” letters. I printed and cut out the bees and attached them with wire to stick inside the pots with the fake flowers. I added some moss at the bottom to cover up the foam used inside to stick the flowers in. I covered the bee’s wings with glitter too.For each of the center pieces, we added a charger plate underneath each one so the couple could add candies for each of the tables.These are the corsages that I made for the mommy and daddy to be. I used the Cricut to cut the tie pattern from cardstock and then added some glitter papers, ribbon and cut out a cute Winnie the Pooh to go above the lettering. I had some wooden bee embellishments and added a pin on the back to attach the clothing with.I made 50 of these pacifier necklaces for the party. I cut out the image with a circle punch, added the glitter scallop punch layer behind it. I used some green yarn to tie around the blue acrylic pacifier decoration and attached the image over it with hot glue. I also attached a ribbon bow as well as a blue gem in the center. The rule of the game was if anyone was crossing their legs, arms, hands, etc. they collected a necklace from someone else. Whoever collected the most necklaces won the game. (It was funny to watch everyone playing the game! I lost mine really fast!)I made 50 of these hexagon tags and personalized sticker on top with the name and date for a party gift. Inside the jar was real honey combs from a local area.
They put in so much work having this baby shower with lots of food, yummy desserts and drinks. I know with all of the set up and cleaning up they were wore out! We were also wore out when it was finished up. LOL Now it’s just the waiting to meet the newest member of the family by the end of this month. We are certainly looking forward to it!
Hope you’ve enjoyed my post today…and now you can see why I’ve had “BEEs” on my mind lately! LOL Thanks so much for stopping by!
Hello friends! Welcome to June! The “lazy days” of Summer are here! I’m hoping I can be lazy this Summer, but not sure about that! LOL
I’m very happy to share my project with you today as a guest design spot I won from challenge #594 at Penny’s Paper-Crafty Challenge Blog! This is a fortnight (bi-weekly) challenge starting today and the theme is always Anything Goes Using Paper! Hope you will stop by the blog to see the team’s inspiration and play along! Here’s the project I made for the challenge:
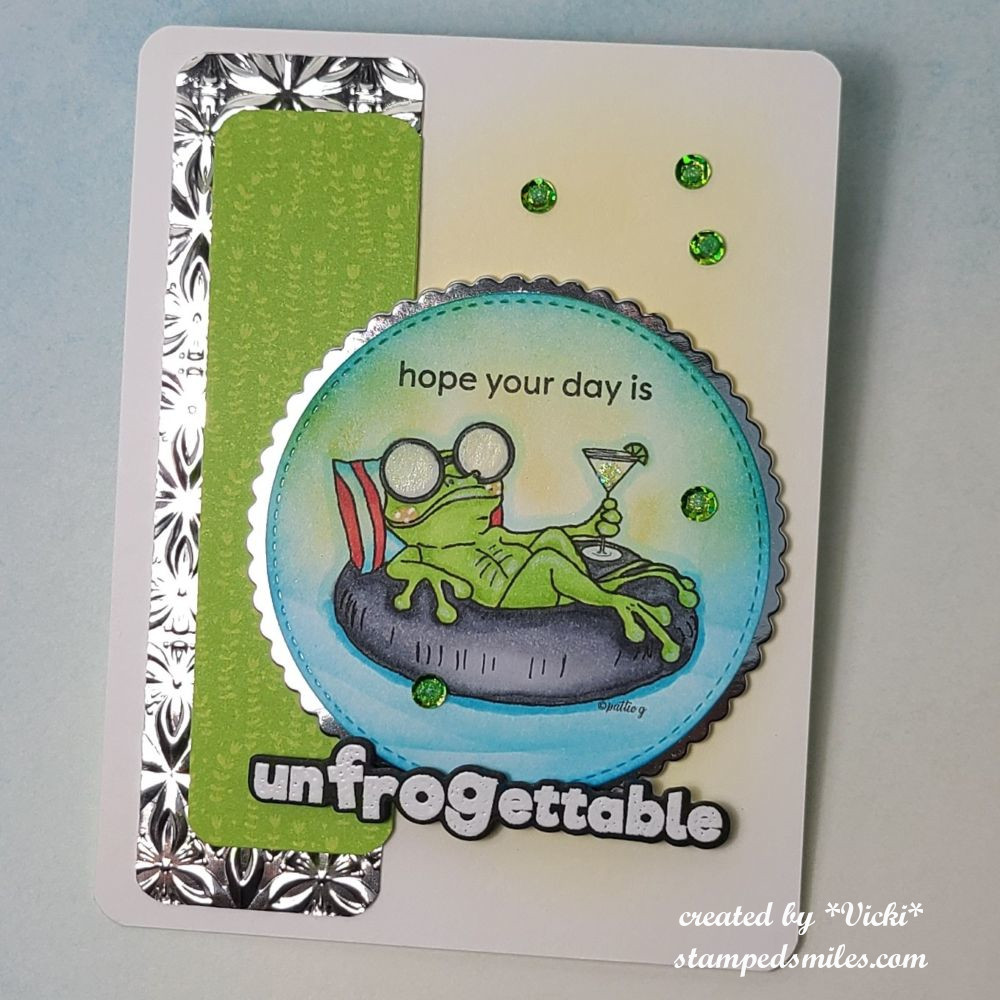
They gave me this super cute image called “Frogtini” by Pattie’s Creations to use, so I colored him up with Copics and added some stenciled waves at the bottom along with some blending of yellows and blues above him to create this relaxing scene. I cut him out with a stitched circle die and layered him onto a silver mirror scalloped die cut circle.
I used a fun card sketch I found along with pulling some papers and a sentiment out from an older card kit I had in my stash to complete the card. For the A2 sized top folding card base, I used a corner chomper to round the edges and then I used some more of the yellow ink over the background where the circle image was going to be for a bit of softness and color.
I embossed a strip of the silver mirror cardstock with a 3D embossing folder and rounded the edges of that strip along with the green paper strip to create my layout. I popped up the circle image with foam tape over top.
Lastly, I white heat embossed the “unfrogettable” sentiment and cut it out with a coordinating die and placed it at the bottom of the circle with foam strips behind it. I used the other part of the sentiment and stamped it directly above the frog’s head.
For some more finishing touches, I attached some green sequins, used a glitter brush pen for the frog’s sunglasses and covered the martini glass with Stardust Stickles along with some green Stickles for the centers of the green sequins.
Hope you’ve enjoyed my card today! I had fun coloring him up! Thanks so much for stopping in and I wish you a very hoppy and relaxing day!🐸
Hello friends! Here we are at the end of another month for the year! It seems like we’ve only just barely started the year and now it’s almost at the halfway point? Time seems to fly away! Which reminds me that today is our monthly art journal page!
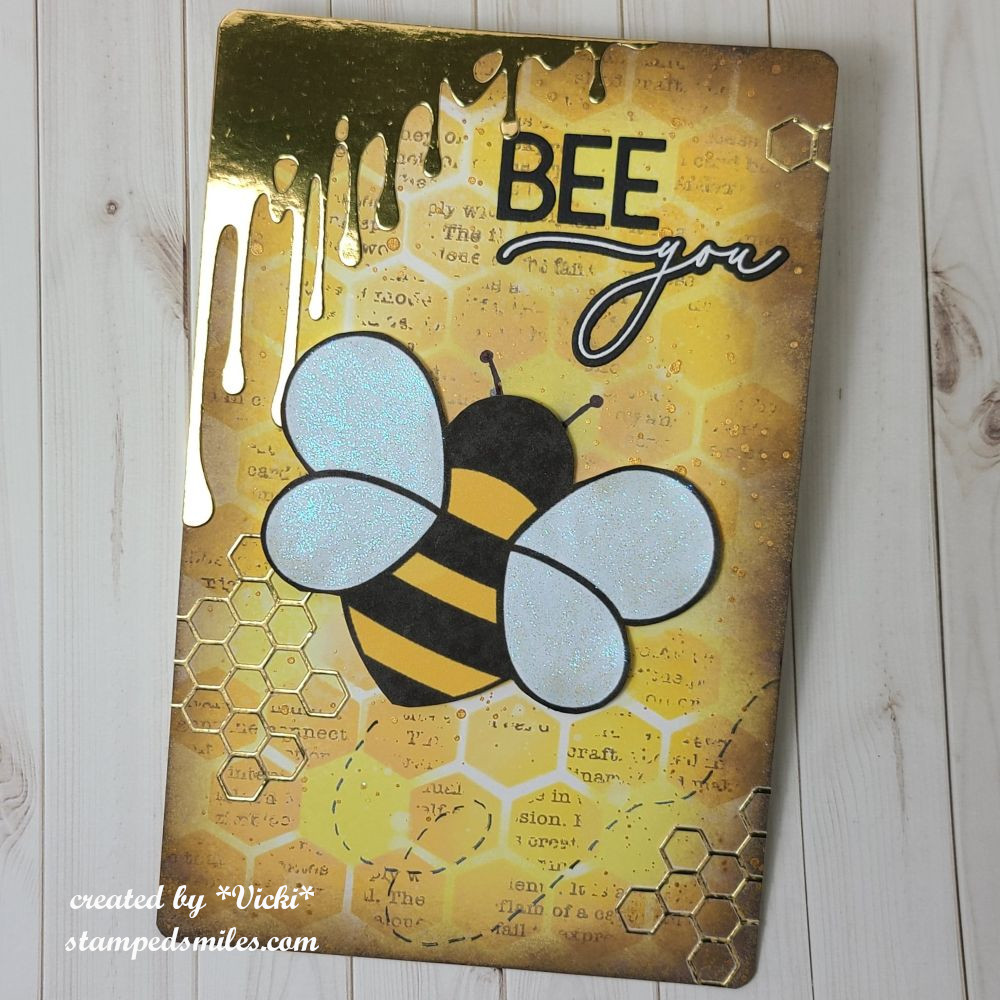
Yes, it’s our monthly AJ page with my crafty friend Carol (from Crafty-Stamper) who is collaborating with me to “SMASH OUR STASH”! We get creative trying to use up our never-ending stash piles along with a prompt for each month. I know she always has great inspiration to share, so please check out her blog too! Here’s my AJ page with the “SMASH OUR STASH” MAY prompt of “WINGS”:
There happens to be wings on many things, but my attention has been focused on bees lately. I have been working on several projects and this was one of the things that I had used on something, so I thought I’d print me out an additional one to use on this month’s page! (This image is a digital file that I printed out and hand cut with scissors.)
For the background: I started with 8.5″x 5.5″Bristol Smooth Watercolor paper that I chomped the corners to get a rounded edge. I used a Dina Wakley Media Stencil along with yellow tones Oxide Distress inks to blend over it. While the stencil was still in place, I used a text stamp to go over it with brown ink. (water proof). Lifted off the stencil and added some more bright yellow ink in various places and then spritzed it with water to blend a bit. Since the text ink was water proof…it didn’t run. I then went around the edges with brown ink and then splattered the entire page with gold watercolor.
I die cut the hexagon and drip corner with gold mirror cardstock and attached to page. I used a black marker to make the “bee lines” and “bee antennas”. I took the fussy cut bee and popped him up with foam tape over the marker lines. I then used some glitter paint to paint over his wings. (I’m glad it shows up nicely in the photo.)
Lastly, I cut out the letters for the sentiment in “BEE”. for the “you”, I white heat embossed a sentiment that originally says “you are” and then die cut it out with a coordinating die. I cut off the “are” portion so that I could use just the “you” to place under my “BEE” lettering.
Thanks so much for checking in today! I hope you’ve enjoyed my page! I will be back next week to share some items that I’ve been working on! Have a great weekend!
Hello friends! Hope that you’re doing well and enjoying the month of May so far! As I’ve mentioned in my previous post, I’ve been very busy working on projects “behind the scenes” that I will be sharing at a later date. The next couple of posts are scheduled as I will be away until next week. But I need to catch you up on the new challenge for now…
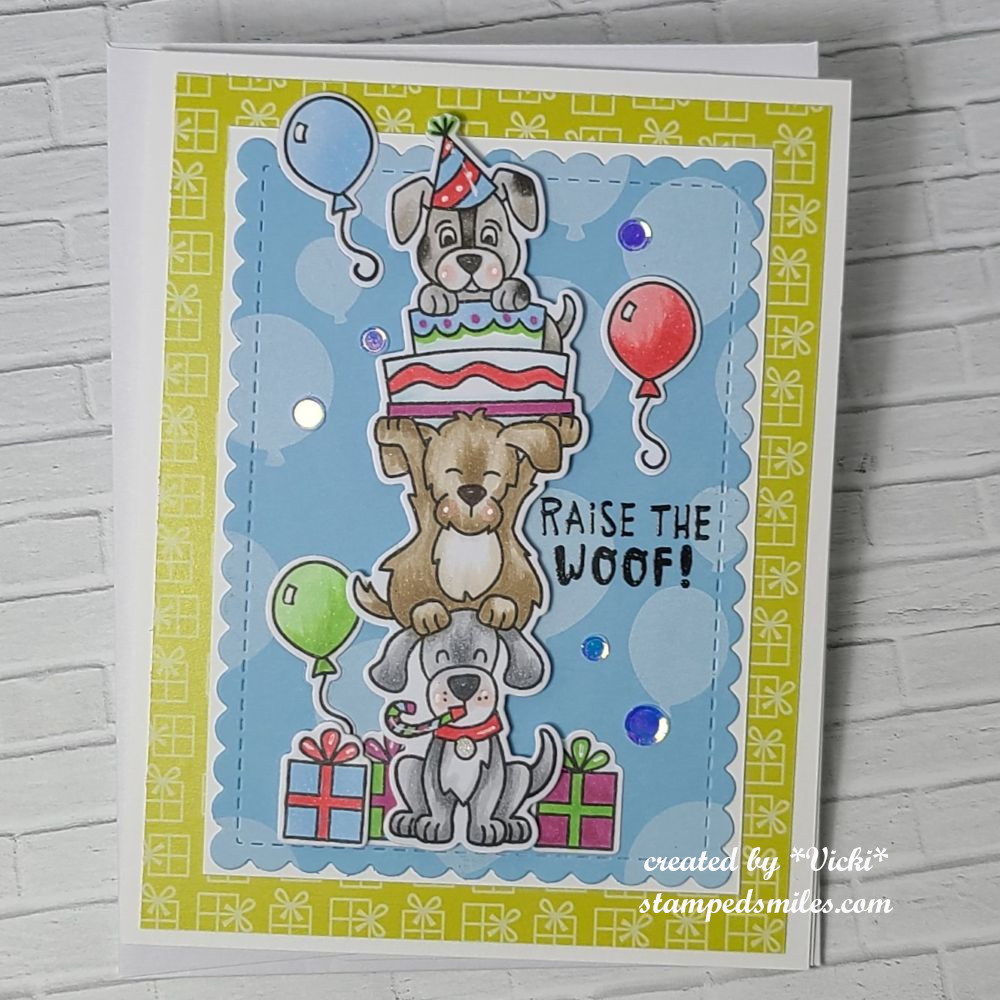
Today starts a new challenge over at the Alphabet Challenge Blog! We are now onto the letter “D” and the hostess has chosen “D” is for Dogs *Remember that this is a bi-weekly challenge, so you have two weeks to enter* I hope you will find some time to play along! Here’s what I’ve created:
I’ve pulled out this adorable stamp from my stash by Newton’s Nook called Birthday Barks and I’ve colored the stack of dogs along with a few extra balloon and gift images with Copic markers and cut them all out with the coordinating dies. (I’ve used a white gel pen for highlights and a silver gel pen for the bottom dog’s collar.) Some of the balloons and gift images were glued on the blue background, but the stack of dogs and a few of the other images were popped up with foam tape.
I’ve used some papers from the Newton’s Nook Birthday Woofs Paper Pad and the blue background was made using a solid balloon image from my stash and stamping it with white ink. I’ve black heat embossed the sentiment from the Birthday Barks stamp set and added a few clear sequins to the background.
This will make a great birthday card for a guy or girl! (I’m sure I’ve probably missed someone’s birthday somewhere! LOL) Hope you’ve enjoyed my card today and will stop by the challenge blog to see what the rest of the team has come up with. Pull out those dog stamps and come join in the fun!
Thanks so much for stopping in today and I’ll be back with another post tomorrow!
Hello and happy Friday my friends! After things got heated up the last couple of days, I think I’m ready for a couple of days of cooler weather! I don’t want to skip Spring by going straight into a hot Summer! Hope you have some great things planned this weekend!
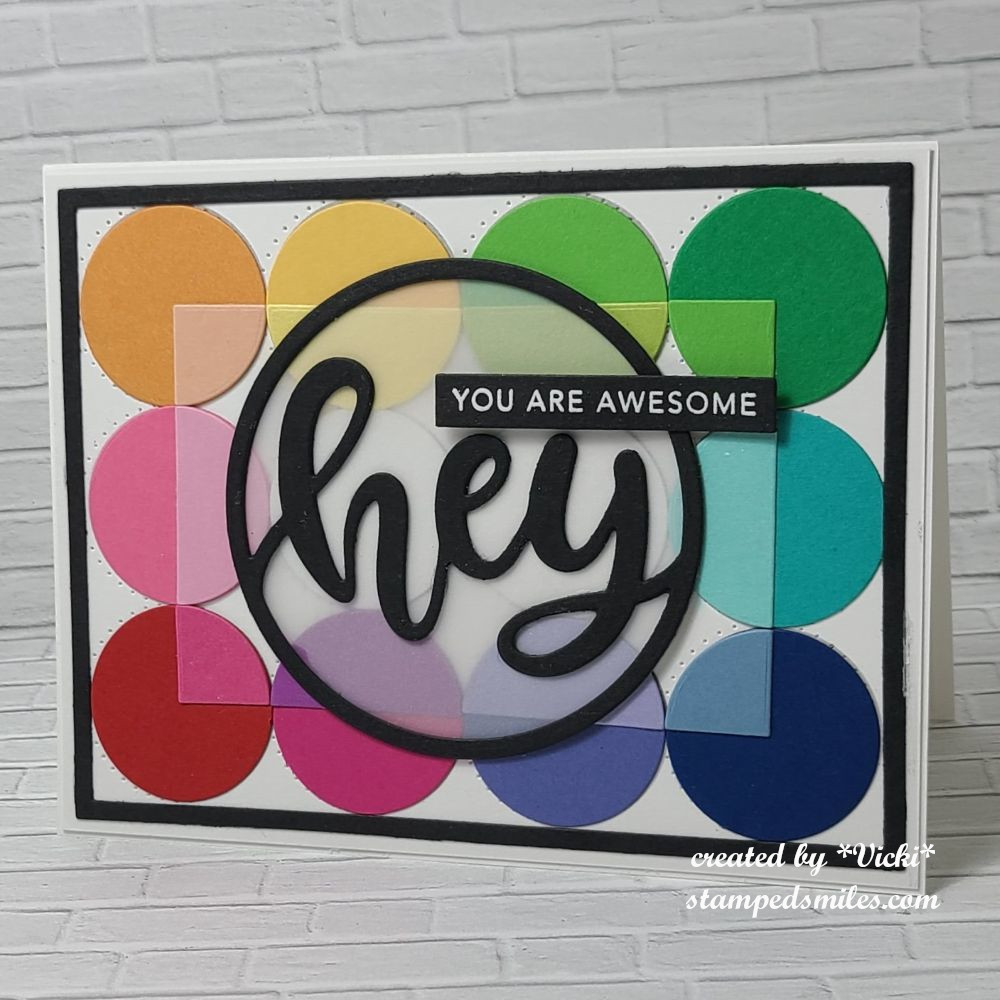
Today starts a new challenge over at the Alphabet Challenge Blog! We are now onto the letter “C” and the hostess has chosen “C” is for Circles *Remember that this is a bi-weekly challenge, so you have two weeks to enter* I hope you will find some time to play along! Here’s what I’ve created:
I do love me some circles and I thought I would just use them all over the place for this challenge! I pulled out my Taylored Expressions “Talking in Circles card kit” that came out earlier in the year and no longer available. However, the panel that I’ve used to create this design are still available in the store called “Talking in Circles A2 Sugar Cube Maps“. They make it easy to follow where placements need to be and lined up.
I used the TE A2 Thin Frame Cutting Plate for the black frame around the circles. I thought I would try and use another cutting plate, but the design pretty much covered it up. I layered this whole panel over a top folding A2 white card base.
For the sentiment in the center, I used another circle die from the TE, but I don’t think it’s in the store any longer. I cut the “HEY” circle out from black cardstock and layered some vellum behind it. I white heat embossed the “You are awesome” sentiment over black and cut that out with a Simply Strip die. This was popped up with a foam strip over the design.
Thanks so much for stopping over today! I hope you’ve enjoyed my card and you will take a hop on over to the challenge blog to see what the rest of the team has come up with.
See you soon! In case you need to know…you are awesome!
Hello friends! I hope that you’re enjoying this month so far! The weather has really started to warm up now and it’s been nice and sunny to be outside. I have so many projects that I’m working on, so my blog has been a bit neglected lately. I will be able to share with you all of the things that I’ve been working on later…but for now, let’s talk about flowers!
Today starts a new challenge over at Sparkles Monthly and this time it’s my turn to pick a theme and I have chosen “FLOWER(S)” for this month. Flowers seem to work for so many occasions which is why I chose it. Here’s the project that I came up with:
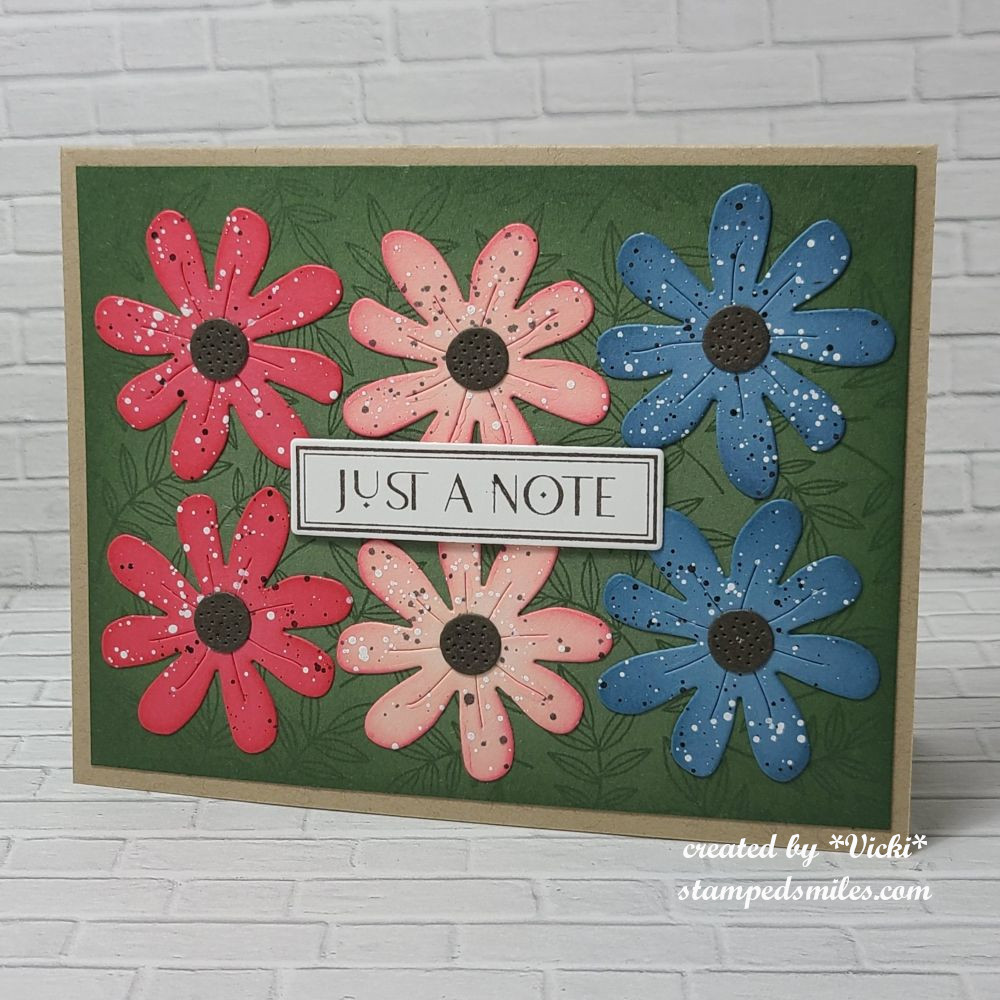
I needed a card for Mother’s Day this last weekend, so I thought I’d pull out my stash of die cut flowers from Taylored Expressions and create several pieces in different colors to place inside my wheel barrow.
I’ve die cut several pieces from the Fresh Cut Flowers die set in pineapple, guava, dried fig, chocolate truffle (centers) and green tea (stems and leaves). I used the same color of ink to sponge a bit of dimension over the centers and then splattered some white Copic ink over just the flowers and the toffee background that was stamped in toffee ink with the Weathered Words Background stamp.
I arranged all of the die cut flowers and leaves behind the Farmhouse Wheelbarrow die cut from chocolate truffle, toffee and woodgrain textured cardstock. I also used the Building Blocks Happy Additions to white heat emboss over a piece of chocolate truffle and cut out with the coordinating die. The toffee background was placed over an A2 sized top folding white card base and then I added a white frame die cut from the A2 Thin Frame Cutting Plate for an “anchor/ground” for the wheelbarrow to sit on. The sentiment greeting was popped up with a foam strip and then I’ve added a few enamel dots including in the center of the wheel.
Thank you so much for stopping in today! Hope you’ve enjoyed my card and that you will stop by the challenge blog to see the rest of the inspiration from the team. I look forward to seeing what floral creations you share in the gallery with us!