Living in the Wild Wild West

Hello friends!  I hope that you are having a great weekend so far!

I’m stopping by to share my Whimsy Stamps creation that I made for my posting on the WS Inspiration Blog.  It’s my first post as a Whimsy Stamps digital DT over there, but I’m also posting on my own blog, here, for my readers and in case someone would like more details about my card design. 🙂

I have to say that I have been enjoying my coloring with these digital images since I’ve joined the DT.  It seems like it’s been forever since I’ve made cards like this for some reason and the feeling, I once had doing this is starting to come back, so I’m glad to be a part of the team!

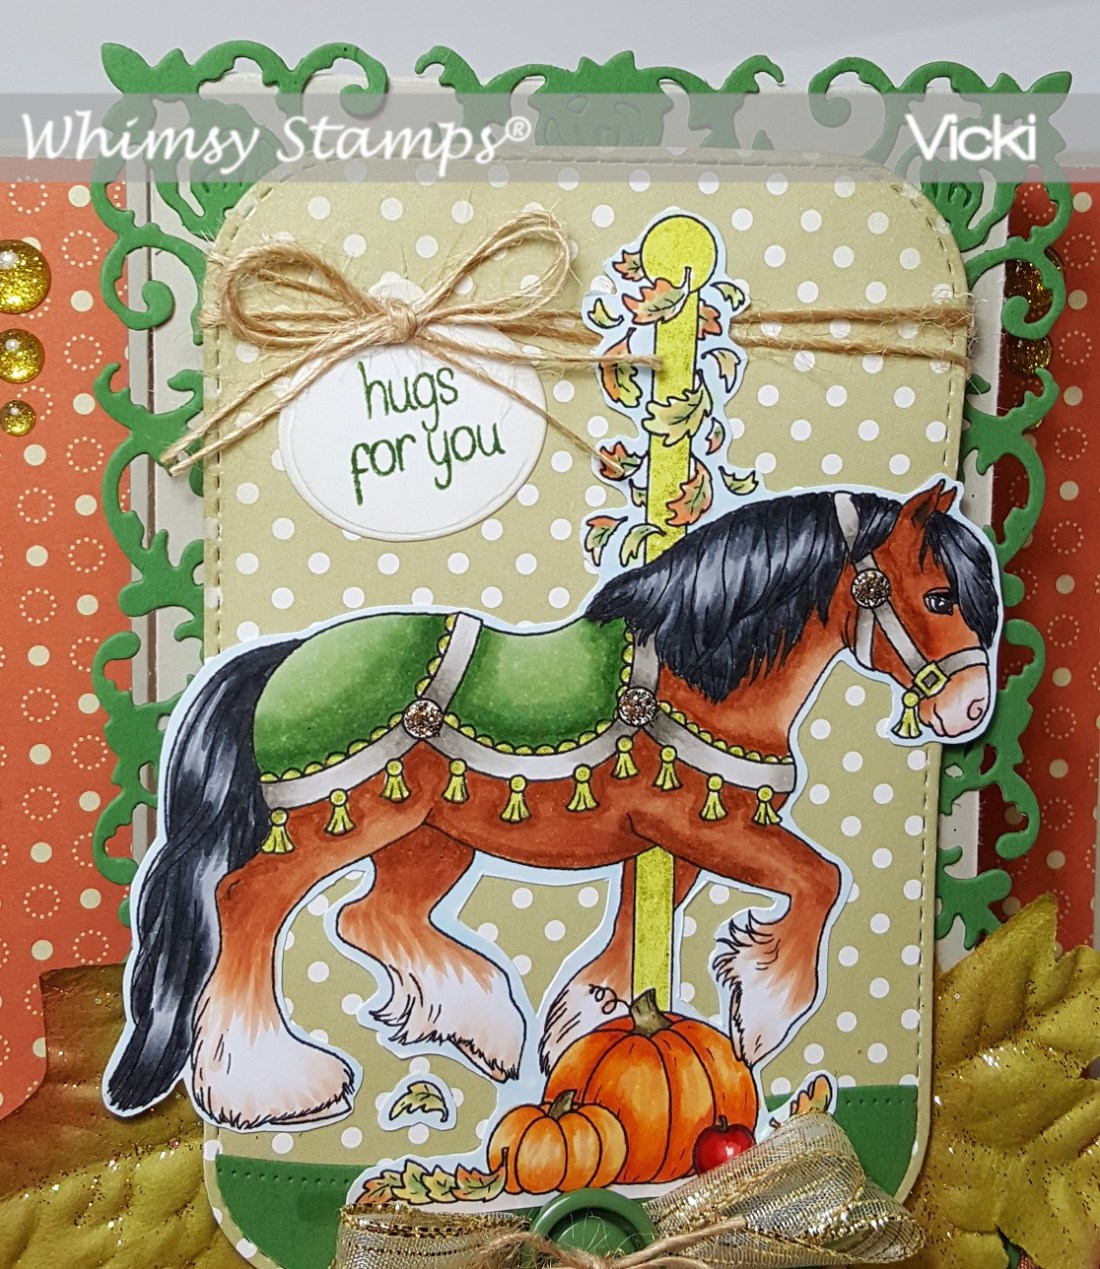
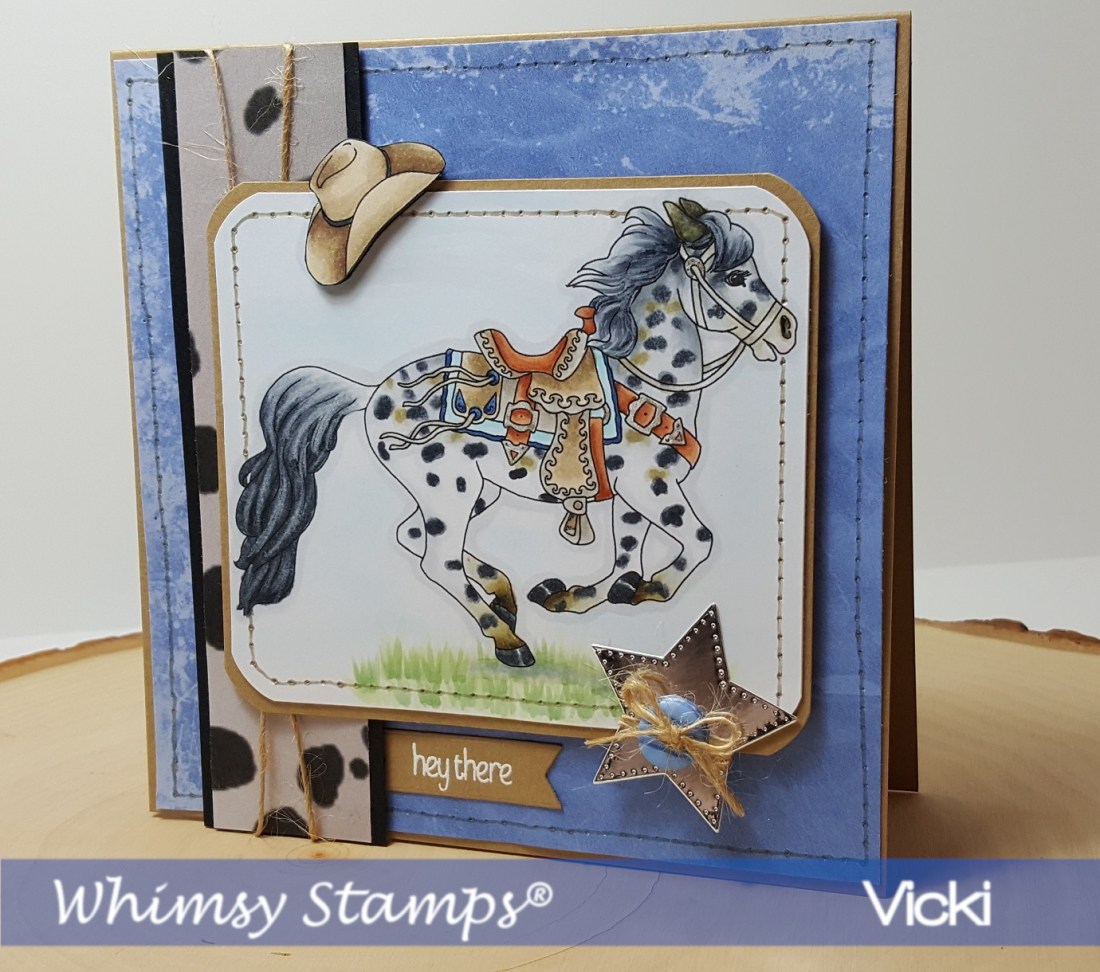
A horse is a horse of course of course, but this one took on a different “spot” when coloring it.  I have used this month’s release Western Pony digital stamp for my card:

Vicki-WS-blogpostAug25-WesternPony

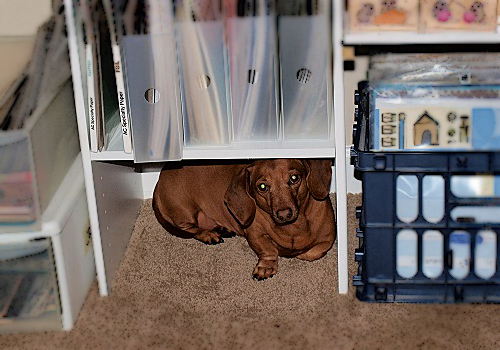
The inspiration for coloring in this horse came from this month’s release of digital papers called Animal Prints.  The spotted papers reminded me of the appaloosa breed of horse and so I took my coloring inspiration from there.  I found a photo online to help with some of the coloring details:

1280px-Appaloosa_stallion

It’s hard to see in the photo, but there are just a couple of spots of the brown/tan color in this horse.  I decided to add just a bit more brown/tan spots on mine.

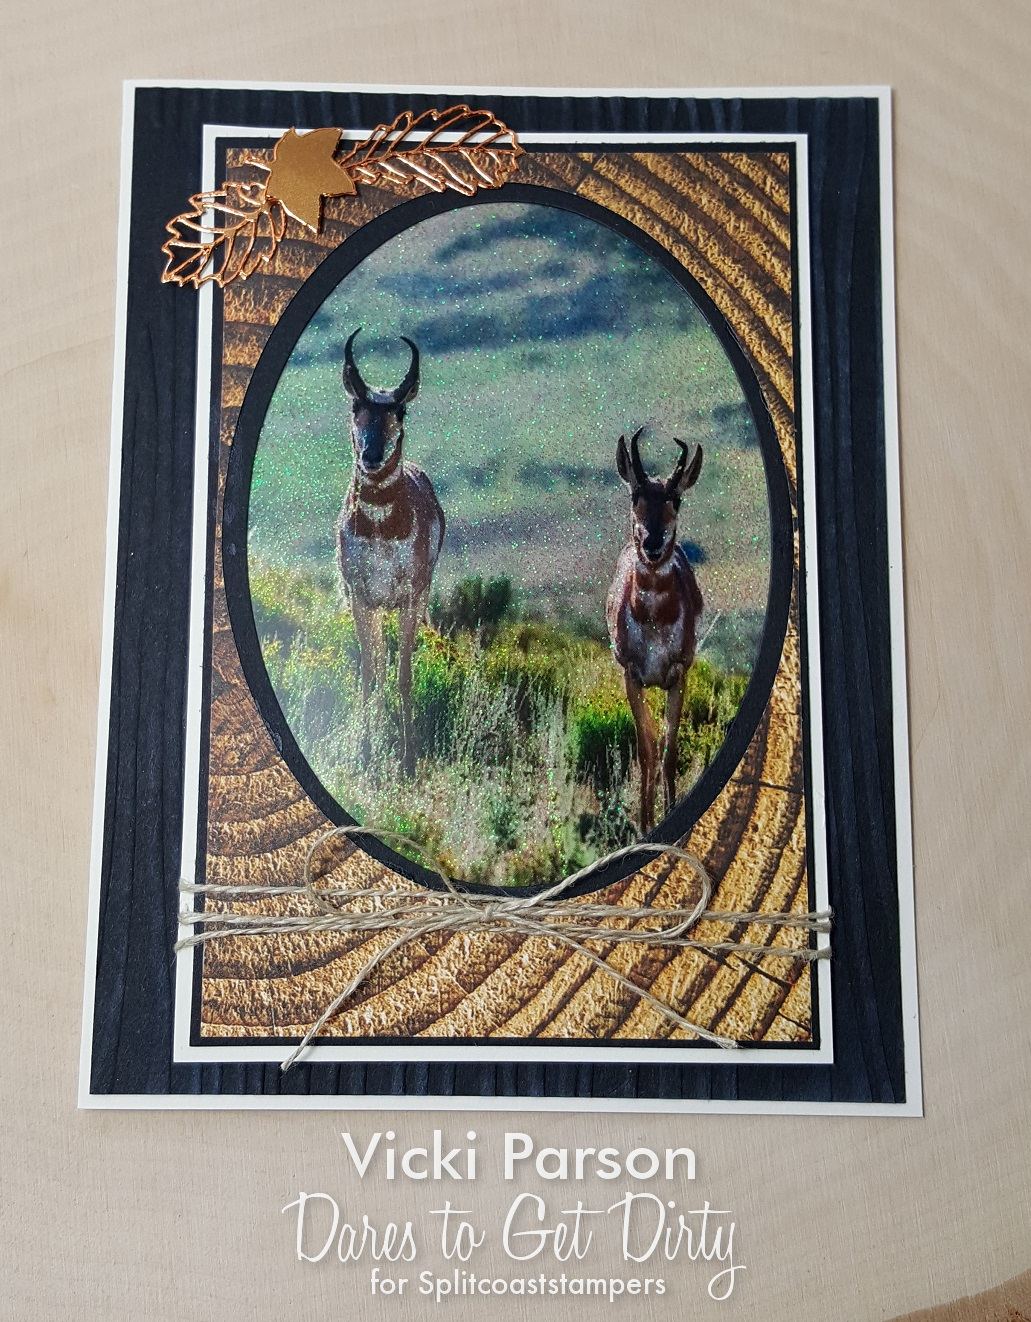
I’ve added some coordinating card stock for the accents which helped bring out the colors in the horse too!  As you can see in my layout, I took a strip of those Animal Prints papers and layered it with a piece of black cardstock and wrapped some twine around it.  I attached it over some other Whimsy Stamps digital papers called Ahoy, There from a past release.  (Although the theme doesn’t suggest to use it for this type of card, I thought it complimented the overall design and brought out the blue colors from the blanket under the saddle.)

I took a paper pierce tool and added some stitching details around the image as well as the blue card front papers before attached it all down.  The image panel and card stock layer were rounded with a corner chomper.

Because it’s a digital image that comes with 2 separate images, you can use them together or not and resize them how you’d like.  So I printed the hat separately and then popped it up over the image panel to make it look as if it’s flying off in the wind.

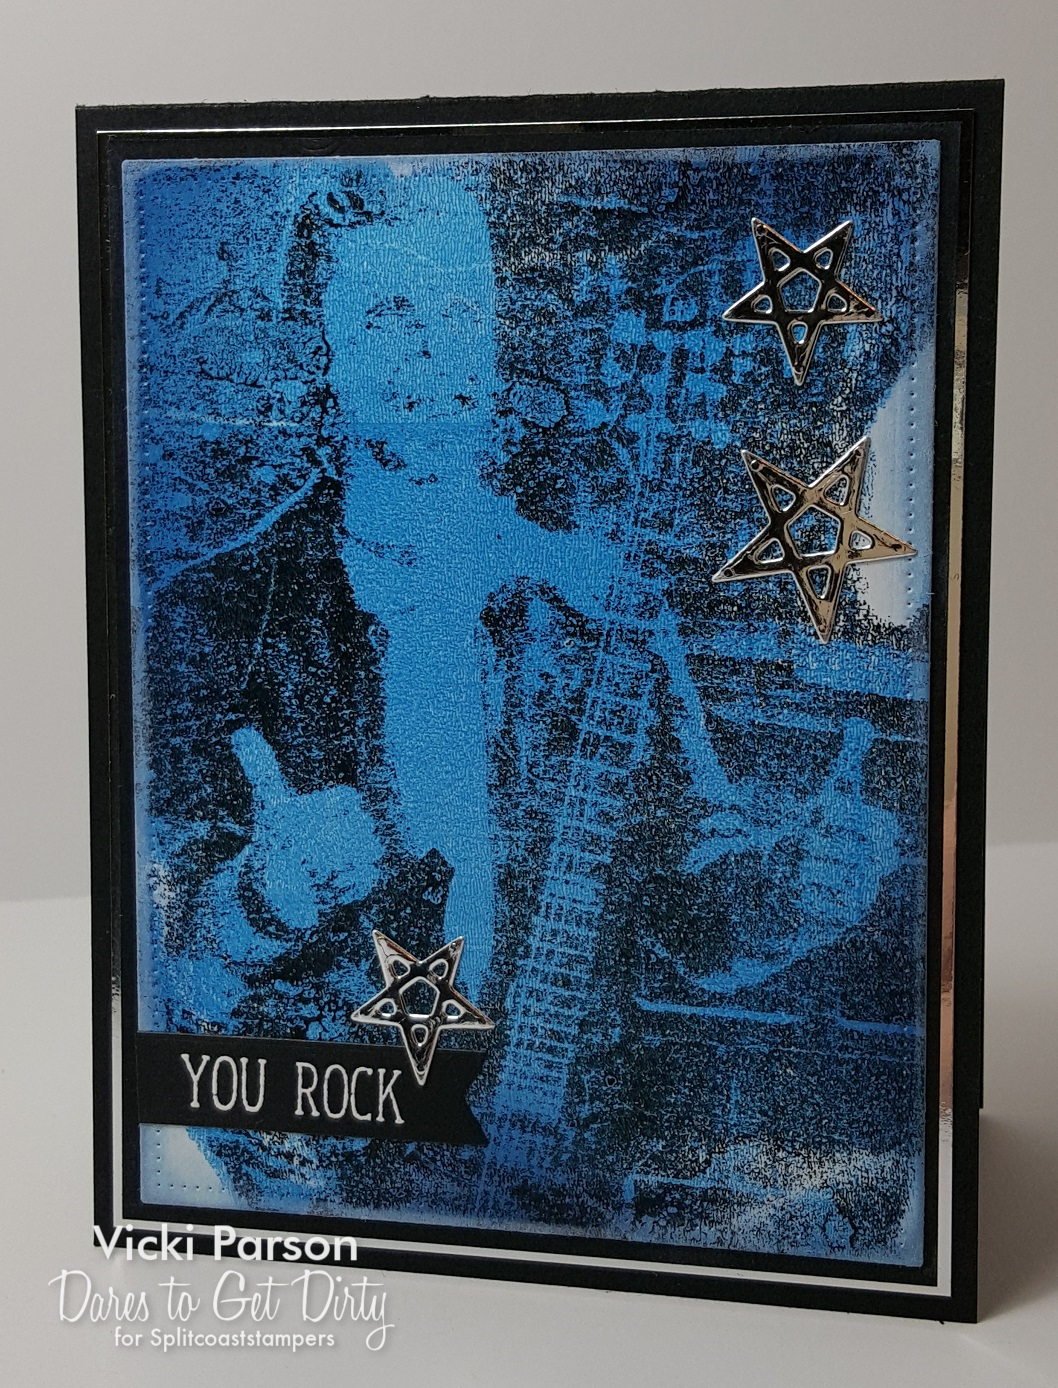
I’ve added a silver foil star that I die cut from the Whimsy Stamps Pierced Stars die set, wrapped some twine around it and placed a bow with a button over top.  Lastly, I white heat embossed a sentiment under the image panel on a banner with the Whimsy Stamps Everyday Mini Sentiment Clear stamp set.

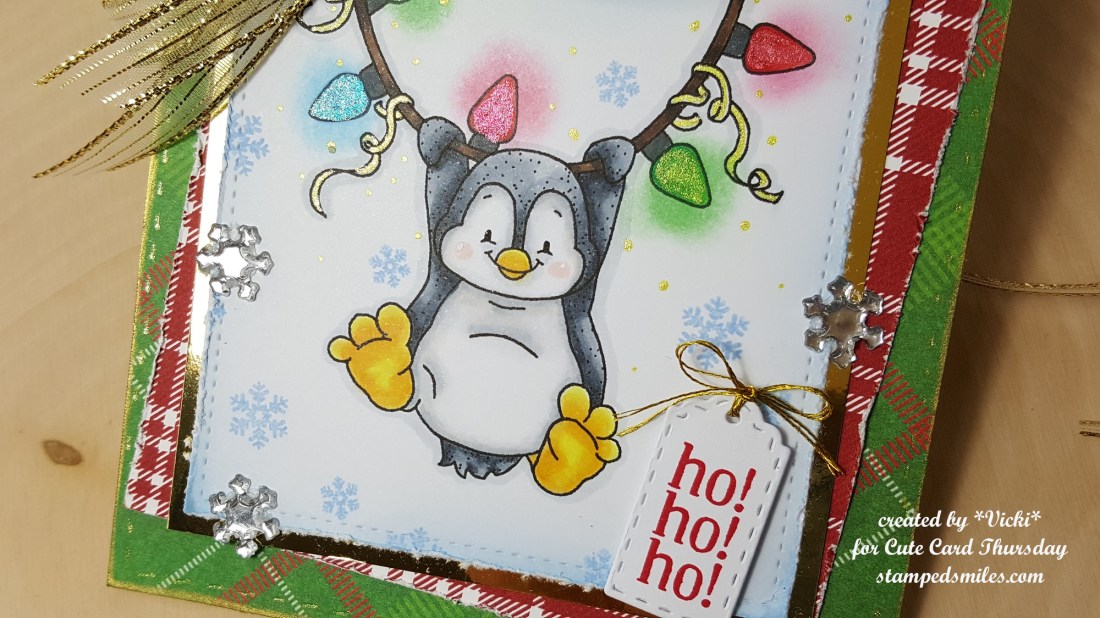
Here’s a closer view of the image and how I’ve colored it:

Vicki-WS-blogposAug25-WesternPony-close

I’ve colored this image mainly with Copic markers and then took a white pencil to add a couple of highlights in the mane and tail.  I took my Copics to create the blades of grass and shadow for the ground.  There are also places on the harness and saddle that I’ve used a glitter gel pen for a metal look.

I think this sort of reminds me of a Western Sheriff with the star! LOL!  Thinking of that made me think this would be a fun card for a kid.

Hope you’ve enjoyed my creation today!  If you haven’t stopped by the Whimsy Stamps Inspiration Blog to follow along, you might want to hop on over there to subscribe so you can get lots of inspiration using the Whimsy Stamps products along with information on new releases too!

Thanks for dropping in!

Challenges:

  1.  Send a Smile 4 Kids – Slimy, humorous or Anything Goes 4 kids
  2. Try it On Tuesday – Take a Ride
  3. Crafty Creations – Anything Goes
  4. 2 Crafty Critter Crazies – Anything Goes + animal (2nd entry)

I’ve Been Schooled!

Hello friends!  Hope you are doing well and are having a great week!

I took some time over the last few days to try and follow along with all of the videos and classes going on over the My Favorite Things blog as they are doing “Session 2 of their MFT Summer School“.  I don’t know about you, but I find that there is always something new to learn and different things to try with crafting and I enjoy learning about it so that I can continue to improve in what I already enjoy doing.  Sometimes that self-doubt creeps into the skull to tell you that “you’re not good enough” and “give up”, etc.    The way for me to try and stomp out those feelings is to take classes and try something new.  I just want to enjoy the process and learning can help bring on more positive feelings.

Since there are SO MANY creations in this post, I won’t go into too many details other than share the links to the MFT Summer School links that I made each card for.  I hope you enjoy having a look at them:

Day 1 – Monochromatic (CAS)

Vicki-MFTcamp-monochromatic CAS

I used several colors of MFT purple (of course!) cardstock and stamped a background stamp with VersaMark over it.  I think the die I’ve used is from something retired.

Day 2 – Focal Point

Vicki-MFTcamp-FocalPoint

Really had fun with this sweet little bear! 🙂  I loved the layout so much from class and decided to follow that for my card here.  The balloon and die cut sentiment actually have shimmer over them which doesn’t show in the photo very well.

Day 3 – Visual Triangle

Vicki-MFTcamp-VisualTriangle

This one took me quite a bit to put together.  I think maybe part of it was all of the coloring, but I was struggling a bit with the concept…I’m hoping this was how she was going with it.  3 long strips at the bottom, 3 images at the bottom and 3 images at the top.  The purple in the background was a watercolor wash like she showed in the video, but I didn’t heat emboss any image like she did.

Day 4 – Rainbow

Vicki-MFTcamp-rainbows

I have done this before, and I really like how you can use up your paper scraps in a colorful way.  I used the same frame die here in a similar manner as I did the card above this one.  I cut the sentiment several times before laying down the top one and then I slightly off centered it to show the white slightly behind it.

Day 5 – Ombre

Vicki-MFTcamp-Ombre

And here I go with another purple card! LOL!  I actually remembered a fantastic video that I created this card based on a tutorial from Jennifer McGuire.

If you have any questions about these, please feel free to contact me or simply leave a comment below and I will be happy to reply.

Thanks so much for stopping by and I will see you again on Thursday for a new challenge! 🙂

Spots and Dots for Cute Card Thursday

Hello friends!  It’s Thursday once again and time for another new challenge over at the Cute Card Thursday blog!  I really enjoy creating with challenges as it gives me inspiration and a push to finish a design in a way I might not have thought about doing otherwise.  If you haven’t done this yet with your card making, I encourage you to give it a try…you never know what you might come up with!

I know we are in the heat of August, but I think this month is going by fairly quickly and the Autumn Season will be here before you know it!  I was inspired by this along with another GORGEOUS image released this month from Whimsy Stamps, so check out my card for this week’s Cute Card Thursday challenge:

Vicki-CCT543spotanddots-WSAutumnHarvestRide

I have used this stunning Fall image From Whimsy Stamps called Autumn Harvest Ride by Crissy Armstrong.  I had some older Fall papers from my stash that had this fun dotted print on them and used these for the theme of the challenge to combine it with this wonderful Fall image as well.

The special card design I’ve used is called a Center Step Card.  (Click on the link to see the tutorial on how to make one for yourself on Splitcoaststampers.)

Vicki-CCT543spotsdots-WSAutumnHarvestRide

Upon a closer look at the design, I have also used a brand new (to me) elegant die cut by Spellbinders that I received as a prize winning from a fellow blog friend.  I’ve cut that with some garden green color and used that as a “back-drop” for my main image panel.  I’ve taken the Whimsy Stamps Pierced Border Trio Dies and cut another garden green piece for the image to sit.  I’ve also stamped out the sentiment with the Whimsy Stamps Everyday Mini Sentiments set and cut it out with an older Whimsy Stamps tag die to attach on the image panel with some twine.  I popped up the image panel with craft foam and layered this on the center panel of my card design.  I’ve also added a couple of Prima leaves between that.  I’ve attached some other dotted papers to the other panels including the bottom long panel and wrapped some gold ribbon around the bottom one before attaching it.  Lastly the gold ribbon and twine bows were added along with the button in the center gold bow and then I’ve added gold enamel dots on the side panels.

Vicki-CCT543spotsdots-WSAutumnHarvestRide-close

Here’s a closer look at the image and the coloring I’ve done with it.  I’ve mainly used my Copic markers to color it in and then added some gold gel pen coloring to the carousel pole, the saddle and bridle with the gold parts on them.  I took some Tinsel Stickles glitter to add to the “dots” on the saddle and bridle.  I then fussy cut it and attached it over the white dotted background and garden green border panel at the bottom.

Hope you’ve enjoyed my creation today and inspired you in some way to play.

I’ll be back again soon to share more creations!  Have a great day!

Here are the challenges I’d like to enter:

  1.  Creative Fingers – Anything Goes
  2. Crafty Friends – Anything Goes
  3. My Time to Craft – More Than One-Fold
  4. Shopping Our Stash – Leaves
  5. Crafty Gals Corner – Add Ribbon and/or Bow.

Basket of Best Friends

Hello friends!  Hope that you had a wonderful weekend!  I enjoyed spending time with hubby as he always makes me laugh…we have fun together no matter what we do!

Today I’d like to share another new creation I made from the Whimsy Stamps new August Digital release.  I fell in love with these guys and thought it would be perfect on just a simple little design:

Vicki-WS-Aug14-Pupsinbasket

This cute image is called Pups in a Basket.  I like that you can almost create any type of color or breed with this image by coloring it however you want.  So I found this adorable image online that I wanted to try and resemble the breed/coloring of:

119

Are these guys just as cute and fluffy as can be?!   I want to pet them! LOL!   Of course, the real thing has got to be the best! 🙂  And how cute would it be to add a red handkerchief to one of these pups on the image?  So many fun things to possibly do with them!

I used some plaid papers I had in my stash, and I wanted them to be somewhat neutral in color due to the accents of blue.  I’ve white heat embossed the banner at the top with the Whimsy Stamps Everyday Mini Sentiments stamp set.  Cut out all the panels with some dies and attached them to a top folding white A2 sized card base.  Lastly, I found some blue sequins to match and added some glitter accents to the centers.

Here’s a closer look at the image:

Vicki-WS-Aug14-pups up close

I’ve used my Copic markers to color it in and couldn’t help but also add some rosy cheeks with a white dot for highlights on them too!  This was so fun to color and how fun would this be to make up for someone with a new best friend!

So what type of breed or color(s) do you see in this image?  I’d love to know what you think!

Thanks so much for stopping in today!  Hope you’ve enjoyed my card and I’ll be back again soon to share more!

Challenges:

  1.  CCEE Stampers (CCEE1831) – Coloring Book Day (colored image)
  2. Crafty Creations – Anything Goes
  3. Creative Moments – Anything Goes
  4. QKR Stampede – Anything Goes
  5. Sunny Day Crafting – Anything Goes + animal on project
  6. That’s Crafty – Animal Magic

Dare to Get Dirty Challenge Results Finale

Hello friends!  Are you glad it’s Friday?  Sometimes I think where did the week go and other times, it seems forever before we get to the weekend!  I know that although I am a homemaker, there is still something about the weekend getting here.  Hubby still works so perhaps that the reason, I’m not sure.  None-the-less TGIF!  🙂

I know you had gotten used to seeing (lots of you really enjoyed looking at them each week too!) the Friday results of ICAD, but now that it’s over, I still have a different kind of results to share with you.  As in this last Monday’s post, the following creations that I’m showing on my blog here are from the Splitcoaststampers “Dare to Get Dirty” challenges.

And as I mentioned in Monday’s post also, I am not able to reveal the full details of how I went about making these creations.  But, if you are a fan club member on Splitcoaststampers, then you will know exactly what I’m talking about here! 🙂

The first card here was made for Anita’s challenge:

Vicki-DTGD18snietje

It was hubby’s idea to add the Starbucks gift card on the inside! LOL!  Good one Hunny!  (He wanted me to give him credit for that!)  Let’s just say that I had a BLAST creating this one! 🙂

challenges for the above card:

  1.  4 Crafty Chicks – Out of This World/Space
  2. Creative Knockouts – Fancy Fold
  3. Simon Says Stamp Wednesday – Distress It (distressed edges)
  4. Sweet Stampin’ – Travel

Vicki-DTGD18ohmypaper!

This card was so fun!  It seems to be a creation that was commented on over in the gallery quite a bit.  This was made for Angie’s challenge, and I really like how this one turned out too.  The little piggy, sentiment and sentiment die all came from My Favorite Things.  I paper pieced the heart for the little piggy. 🙂

challenges for the above piggy card:

  1.  Stamping Sensations (August) – ‘current’ favorite stamp (OMG this pig!)
  2. Happy Little Stampers Anything Goes with Dies – August
  3. Try It On Tuesday – Inspired by Song (‘Total Eclipse of the Heart’ by Bonnie Tyler & ‘Smile’ by Uncle Kracker)

Vicki-DTGD18stampersandee

This was for Sandee’s challenge.  I’m getting ready to be in need of some masculine cards coming up in the next few months or so, so I’m trying to get ahead of the game by having them on hand!  Let’s see how that goes!   Do you remember the cool Stamp On It products that I purchased from my Stamp Convention trip in THIS POST?  I’ve used it again on this card.

Vicki-DTGD18KelliJoB-CrayonPopArt

This is a challenge that is released today at the “Dare to Get Dirty” event for Kelli Jo’s second challenge.  I think it turned out pretty cool and can I just say that I wish I had this hair?!  LOL!  The sentiment was white heat embossed from My Favorite Things More Essential Sentiments and then I added some heart sequins.  And that’s all I can say about it.

I hope you’ve enjoyed seeing my creations even if you don’t understand how I’ve arrived at the completed design. 🙂    Looking back at these now, I can see how they could each fit into a masculine style category which is pretty cool!

Thank you so much for stopping through my blog and having a look!  Hope you will consider becoming a subscriber or check on updates in your favorite reader with me…I have much more to share!

Enjoy your weekend!

Charmed at Cute Card Thursday

Hello friends!  I thank you all so much for your latest comments on my posts, I do read them all and appreciate what you have to say. 🙂

It is Thursday once again and there is a new challenge issued over at Cute Card Thursday which is “Charms“.  You can never have too many charms, right?  So pull one out and use it to enter a project with us this week!  We would love to see what you come up with!

We are sponsored again by the lovely All Dressed Up Stamps and here’s what I’ve made for my card this week:

Vicki-CCT542-charms-ADU

I saw this sweet little image and knew I needed to put it on a card! 🙂  I have used this adorable ADU Christmas Deer image for my design today.

My card size is a 5×5 square design.  I have used a stitched square die to cut some snowflake papers from my stash to mount onto a navy piece of card stock which I then placed over a white top folding card base.  Before placing it down, I added the white ribbon around it with the bow.

As you can see the ribbon is where I have the snowflake charm attached.  I’ve attached it with some silver thread which I’ve also used in a ‘nest’ form behind my circle image panel.  I thought it would be cute to take the silver ribbon not only for the center of my white bow, but another bow around the deer’s neck.  I die cut some snowflakes with glitter paper for accents and then added some glass enamel dots to the centers.  For the circle image panel, I colored the image and cut it out with a circle die and then cut a stitched scallop circle in navy to place behind it and then popped that up with some craft foam.

Vicki-CCT542-charms-ADU1

Here’s a closer view of the intricate coloring details on the deer.  I left his antlers plain and just colored in around them.  I used white and red gel pen for the dots.  I also took a silver glitter pen to add more dots around the snowflakes.

On the bottom of the circle, I’ve attached some faux snow glitter flakes for the deer to stand on.

I hope you’ve enjoyed my card today! Thanks so much for stopping by!  I will have another fun post to share with you tomorrow! 🙂

Challenges:

  1.  All Dressed Up (ADU83) – Anything Goes + ADU image.
  2. Daisy Chain – Anything Goes
  3. Tuesday Throwdown (TT404) – Anything Goes
  4. Back to Basics & Beyond – Use a Digital Image
  5. Christmas with the Cuties – Add Some Sparkle

Splish Splash New Design Team FUN!

Hello friends!  I am VERY excited to share my first post with you today as a new design team member for the Whimsy Stamps Digital Design Team!  Woot!! Woot!

For those of you that have followed along with me for a while on my other blog know that I have previously worked with them as a DT member for other positions on the team over a period of several years.  This is simply because I adore Whimsy Stamps along with the owner and several others involved with this company.  I just love the images and working with them.  What better way to enjoy creating and coloring with the products than being apart of the team!  I’d like to share my creation today with this new image that was released at the beginning of this month:

Vicki-WS-Aug-week2

I find these penguins from Crissy Armstrong in the store absolutely adorable!  They all make me smile, but how fun is this cute Penguin Bubble Bath image! 🙂  The image was colored with my Copic markers as well as certain areas with gel pens and then I brushed over the shower cap and bubbles with a clear glitter shimmer brush pen.  I also decided to do a little paper piecing with her shower cap using the August release digital papers called Wonky Circles.

Vicki-WS-Week2Aug-close

Of course, there is so much sparkly goodness on this card that it’s hard to capture in just one photo, so I tried to angle it a bit to give you another view from the sparkly gel pens on the bubbly drink, water and claw feet on the tub.  The shimmer brush pen details can be found on her shower cap as well as the bubbles.  And if that wasn’t enough sparkle, I’ve added a strip of glitter paper along the left side of the image and then finished it off with some Studio Katia Crystal Clear Confetti sequins.

The sentiment I’ve used in the upper right corner of the image panel comes from a Whimsy Stamps clear stamp set called Everyday Mini Sentiments.

I wanted to create a special birthday card with this image in mind, so that when you lift up the penguin image, the card opens up like this….

Vicki-WS-Aug-week2-inside

I’ve taken more of these Wonky Circles digital papers and used them for the inside of my card design and created a pocket for a gift card to fit inside.  I thought a Bath & Body Works gift certificate would be fun to use with this image! LOL!

For the inside sentiment, I’ve used the Whimsy Stamps Happy Everything Clear stamp set.  I stamped the sentiment in black ink and then added the circle elements with some ink to coordinate with the paper.

Here are some challenges I’d like to enter this card for:

  1.  2 Crafty Critter Crazies – Anything Goes with a critter.
  2. Aud Sentiments – For the Girls + sentiment
  3. Craft Rocket – Anything Goes
  4. Seize the Birthday – with toppings of “water!”
  5. Crafting with an Attitude – Anything Goes

Card Results For Dare to Get Dirty Event

Good evening friends!  I don’t normally post in the evening, but I had been working on some other things this weekend and today and hadn’t had a chance to create a post to share my creations with you for the “Dare to Get Dirty” challenge on Splitcoast Stampers!

And of course since the challenges are exclusively for the SCS fan club members only, I cannot share the details with you about what the challenges are about…so please keep that in mind when you see my creations for this without full details! 🙂

The first three cards that I’m sharing were created for my challenge during this event.  It went “live” yesterday and there are really so many wonderful and creative entries in the gallery for this!  I’m so glad everyone has been having fun playing along with it!

Vicki-DTGD18basementstamper-paperpeicing

I couldn’t stand how stinkin’ CUTE this My Favorite Things stamp set was, so of course I HAD to go grab it!  I had been holding off on it for quite a while and then finally broke down and just got it!  That cow in there just kills me! LOL!!  I am talking about the MFT BB The Whole Herd stamp set.  I’ve used a ton of different paper from my stash to create a scene for the pigs.  I’ve also used various MFT dies to put everything together.  I have handwritten the words that are on the trough the little piggy is standing in.

Vicki-DTGD18basementstamper-paperpeicing1

My next card is made using the tutorial on SCS called the Herringbone technique. (You do NOT have to be a fan club member to see this technique…it’s open for everyone.)   It’s been around for a while, but I really love the results it can bring to a background on a card!  I have used the flower image from a retired Lawn Fawn stamp set and a greeting set and die from Impression Obsession.

Vicki-DTGD18basmentstamper-paperpiecing2

This final card for my challenge is done using an ‘Iris Fold‘ technique.  I have used a circle die cut to create my design and then went around the circle with a tag die from Lawn Fawn that I also used an additional circle die that I’ve used to cut out the center of it for a framing effect and so that it looks more like an ornament.  I used an embossing folder from SU! as well as the snowflake image in the middle of the ornament along with a wonky stitched rectangle die to cut the panel out with and then added a sentiment cut with a die from CAS-ual Fridays with gold foil card stock.  The gold thread was added through the tag hole at the top and secured around the back of the main image panel and lastly, I added a crystal in the center of the snowflake.


Another card I wanted to share was for another challenge issued from a fellow Dare to Get Dirty Dozen design team member.  This one took me a while to grasp how to make it happen, but once figured out, it turned out pretty cool:

Vicki-DTGD18KelliJoA-pulledpopart

Again, I can’t share with you the details about the challenge, but it’s sort of a ‘mixed media’ based design! 🙂  I’ve die cut some stars using some silver foil card stock and added a sentiment to go with it embossed with white EP over a black banner strip.

Thought this would make for a fun masculine style card.

Be sure to stop by again tomorrow!  I have something fun to share with you!!!

Ho! Ho! Ho! Anything Goes at Cute Card Thursday!

Hello friends!  Hope that you are having a good week.

Today is Thursday which means that it’s time for another Cute Card Thursday challenge!  Yay!  This week we have our monthly “Anything Goes” challenge, so please be sure to enter whatever you’re making this week!  We’d love to see what you come up with!

We are also sponsored by the lovely Whimsy Stamps this week and they have provided an image for each of our design team to use.  I have been wanting to get going on making some Christmas…so here’s my card:

Vicki-CCT541-ATG-Whimsy

I just adore these sweet and fun penguins that Crissy Armstrong comes up with at Whimsy Stamps.  I’m using the Penguin Light Me Up digital stamp on my card here.

I have colored it with Copic markers and gel pens.  I thought it would be fun to stamp some snowflakes in the background, so I’ve used the Whimsy Stamps Penguins Winter Adventure stamp set for the background as well as the sentiment from the same set for my tag.  My tag was cut out using a tag die from my stash and then I added some gold thread to the top and attached it to the card with foam tape.

I’ve mounted this image panel onto a gold foil cardstock piece and then attached it to a couple of layers of festive plaid papers which was mounted onto a white top folding square card base.  I sponged some gold ink around the edges and added stitching detail with my gold gel pen.  Lastly, I’ve added some gold ribbon tied in a bow at the top corner and also some dimensional snowflake accents.

Here’s a closer view of all the shimmer and glitz on this card:

Vicki-CCT541-ATG-Whimsy-close

I had so much fun coloring this image and glad that I’m down another card for the Holiday Season too! 🙂

Thanks for stopping by today and I hope you’ve enjoyed my share!  See you soon!

Challenges:

  1.  Whimsy Stamps Challenge – Anything Goes (using Whimsy Stamps image)
  2. Holly and Ivy Christmas Challenge – Anything CHRISTMAS Goes
  3. Adicted to Stamps & More! – Holiday
  4. Creative Inspirations – Holidays
  5. That’s Crafty – Animal Magic

Turn! Turn! Turn! – A Remembrance of My Sweet Mocca (Bean)

I can’t tell you how very hard it is for me to type up this post, but I knew it was going to come and it is just something I must do to help with my grieving process.

If you have followed along with me on my other blog, then you may have seen a few posts or photos or mentions of my beloved miniature red-haired dachshund named Mocca.  (Pronounced like the word spelled mocha)  You may have also seen along the side of this blog a photo of her and dedication of her life.  I would like to say thank you for those of you that have asked about her and sent thoughts of sympathy my way.  It is appreciated so so much!  I thought of her as a very special family member and was with her until the very end.  She was a fantastic companion and ALWAYS there for me and by my side day in and day out.  Every single one of my family members just LOVED her so much.  It has been hard on me, but I know for a fact that she has impacted the lives of everyone around her…she was loved that much.  This post is for all of us.

Vicki-Mocca Canvas

It was very hard to go through her photos to pick out just the right ones that I wanted to do these various things with, but I’m very glad I did.  I will begin with this photo that I took while she was looking up at me in the very spot I am typing up this post.  I grabbed my phone and took it.  I took the photo to my local Walgreens and had them make an 8×10 canvas printing and it is hanging on the wall right above my computer, so I can always see her.  It’s a very awesome canvas printing and the photo wraps around the edges.

Newborn Mocca: (I received this photo after she was born)

Vicki-Mocca-newborn pup

Part of the reason for my last absence from blogging was the caretaking of her.  She had developed some problems as most older dogs do, but she had arthritis, pancreatitis and lastly, she was diagnosed with a rare disease called Mega-esophagus or “floppy esophagus”.  What that means is that her throat didn’t allow her to swallow, and she would choke or “regurgitate” anything that was caught in there.  I had to specially make her food in meatball form and make enough to feed her small meals 4 times a day.  They needed to be spread out so that there was less of a chance of anything being caught.  Dogs that develop this disease can regurgitate and then accidentally ingest some of it causing them to die from aspiration pneumonia.  Not only this, when she did eat, she had to be in an upright position so that the food went down her throat by force of gravity.  And to make sure her meatballs got down to her stomach, I had to keep her sitting upright for at least 15-20 minutes after each feeding or any time I gave her something.  After Christmas time, she had gotten worse and was slowly deteriorating to the point she couldn’t take water without choking.  I was in a special group on Facebook that had the support of others going through the same thing with their pets and some helpful advice was given many times with her.  I started giving her “Knox blocks” to help with hydration.  She was older and with her other problems, she was still dehydrated, and I think she gave up because she refused to eat at the end.  Of course, I wanted to keep going and hubby knew this…so he made me take her in where the vet had to spell out to me how sick she was.  She was 12 and half years old on Groundhog’s Day of February this year when we had to let her go.  I’m pretty sure I yelled NO! at the office.   You may remember photos from her 12th birthday in her special chair:

Mocca turns twelve

I was hoping to be able to celebrate her 13th birthday with her which would’ve been today.  Unfortunately, we did not make it, so I thought this would be a good day to remember her.  Rest in peace my little beenie weenie…. I will see you some day at the rainbow bridge.

Vicki-Mocca Shadow Box Memorial

Something else that was very important for me to get done was her Shadow Box Memorial.  Hubby and I picked out one of our favorite photos of her.  She really enjoyed being out in the sunshine and grass.  She was very healthy in that photo.  The footprints came from the vet and I had heard that sometimes they fall apart, so I wanted her footprints to stand out a bit, so I took some glitter paint to go over them and then covered the entire piece of clay with some sealer.  I put it back into the plastic case I was given and then glued them onto the shadow box background.

Vicki-Mocca shadow box1

On the other side of the paw print case that the vet gave me was this Rainbow Bridge Poem.  So I matted it with black card stock and attached it to the box.  (I apologize for the glare on the glass…hard to capture it.)  I still cannot read the entire thing without tears.

Vicki-Mocca shadow box2

For the lettering of her name, I took some wood veneer letters and painted them along with the pink heart in the center of the ‘O’ and glued them on the back of the shadow box.

The other items are sentimental from her like the collar.  I cut the end of her collar because it was so curled up and part of it was all cracked from use.  The heart is a piece of fabric from her favorite “bone blanket” she got for Christmas one year.  I cut out a heart shape and then stitched around the edge with some black thread.  The tiny jar above her footprints is her red Doxie hair.  I had some from her comb in her little “beauty box” as we called it.

This month was also our local County Fair, and I decided that I was going to enter a simple scrapbook layout that I would be able to put in her scrapbook that I’m working on.  I ended up getting third place prize with it:

Vicki-MoccaMothersDay2017-layout

The photos were taken on Mother’s Day of last year.  She was snuggling with me on our front porch and fell asleep, so my hubby took photos of the process.   This is a 2-page 12×12 layout.

Vicki-MoccaMothersDay2017-layout1

I remember now that this was about the time, I started growing my hair out…so it’s really gotten long since then! LOL!  I had some “cloud” pattern paper which I thought was perfect for this.  I added a sentiment sticker backed with black card stock along with stamping the birds and die cutting the swirl underneath the sentiment.

Vicki-MothersDay2017-layout2

I had taken the other piece of “cloud” pattern paper to place on the opposite page, but I die cut the paw prints (From My Favorite Things) so that the black would show through.  The journaling says:

Mother’s Day 2017

It was a beautiful day to be outside and Mocca was enjoying the weather with me as we relaxed on the porch.  She finally fell asleep in my arms.  really miss snuggling with you sweetie.

The paw prints underneath the journaling were stamped in white ink from the MFT Critter Condolences stamp set.

She had even shared time with me by scratching up a spot on the carpet in weird places on the floor in my craft room 🙂 What a precious crafty friend!

OLYMPUS DIGITAL CAMERA

Thank you for sharing this remembrance with me.  If any of you have ever lost a special friend like this, I know you understand.  I wish you all LOVE & PEACE

Vicki-Pooh-goodbye

Sharing this post with:

2 Crafty Critters Crazies – challenge 16 Anything Goes with a critter.