A Beautiful June Wedding!

Hello friends!  I hope you’re having a great week!  We got a tiny break from the hot weather, so I had to spend the last few days enjoying it and was happy to get away from being indoors!  Now as the temps climb back up, it’s time to get busy and craft some more!😃

As promised, I’m catching up with my postings to share the wedding invites, thank you cards and special wedding card I made from my son’s June wedding.  I made them a few months back, obviously, but I thought it would be nice to condense it altogether here in one posting.

The couple had asked for me to make their invites for them and of course it was a great honor to be able to do that for them.  I was given a photo of an image and was educated about the “Tree of Life” to incorporate that into a design as well as a sample of some color shades.  Making a total of 50, here’s what I came up with:

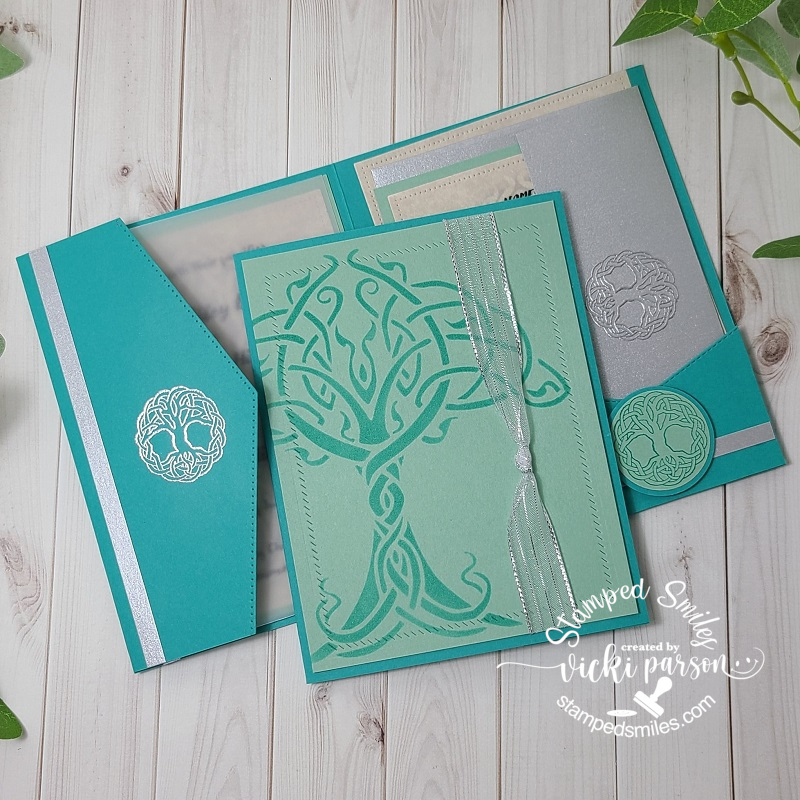
I was able to find some similar Stampin’ Up! colors that closely resembled the samples given and come up with Bermuda Bay and Mint Macaron for the design.  I wanted both the ink and cardstock colors and worked it out from there.

For the base of the design, I’ve used the darker Bermuda Bay and on the front panel, I used a piece of Mint Macaron with a stenciled “tree of life” over top of it with Bermuda Bay ink.  I actually found a fairly inexpensive stencil on Amazon and thought it looked very similar to the image I was given and thought it would be perfect for the front with a partial side off the edge.  I never inked up 50 panels before, but this stencil certainly got a workout!  I was thinking it needed a bit more to it than just the stenciling, but I didn’t want to do too much with having 50 to make!  I took the Taylored Expressions Diagonal Stitched Rectangle die to impress a design around the edge, wrapped silver ribbon around the front with the knot and layered it over the front of the invite.

So being happy with that, the hardest task was to figure out the inside details….

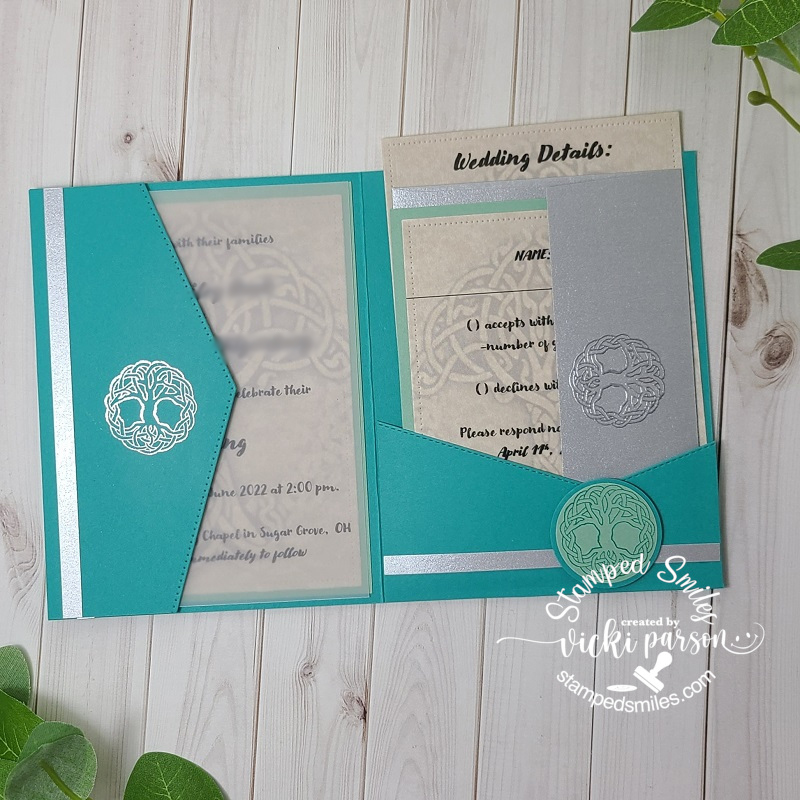
I wanted to make the inside a portfolio style with a pocket containing the wedding details as well as the RSVP/envelope inside and then the actual “announcement” on the other side.  As I was piecing it together, I thought a decorative flap with some vellum would be pretty over the announcement too.

I’ve used the Stampin’ Up! Basic Borders die set to die cut the pocket front as well as the vellum flap on the left side.  I had to adhere two Bermuda Bay card panels together and cut out the areas I didn’t need.  (I ended up using the left over pieces to punch out a circle layer.  To add a bit more of a decorative detail, I cut strips of silver cardstock as well as silver heat emboss the “tree of life” circle stamp.  (I was happy to also find this really inexpensive rubber stamp image for a couple of dollars to use for this too!)  For the image on the pocket area, it was stamped with Bermuda Bay over the Mint Macaron cardstock, layered with that left over Bermuda Bay circle punched pieces and popped up with foam squares over the silver strip.  I was happy with how the portfolio design was working.

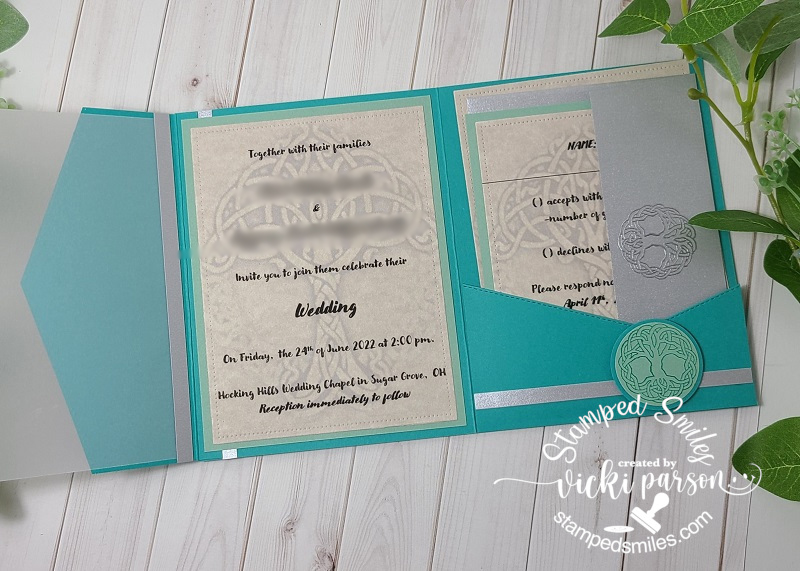
And now once you open up the vellum flap on the left side, you will see the announcement portion.  The silver strips were strategically placed to cover up where all of the layers are glued/attached together, but still looks like it “belongs” there.  The image that was given to me via digital photo was used at the “back drop” behind the wording.  It was a very bright image that I altered on my computer and muted it down so that it was faded in the background, but yet still clearly visible on the design.  I thought it worked out nicely and still coordinated with the stenciled area on the front.

Because this invite was so thick in nature, I didn’t want to add more layers of cardstock, so I used a thinner parchment style copy paper as everything was printed out from the computer anyway.  The parchment made it feel a bit more professional I thought.  I die cut ALL of the printed parchment pieces with a Lawn Fawn RETIRED Small Dotted Rectangle dies. (I thought the “small dots” went with the SU! edges I used on the flaps.) I placed the announcement over a piece of Mint Macaron and then layered it inside the card.  I layered the RSVP card over a piece of Mint Macaron and the “wedding details” card was left on its own.

Finally, you can see that on the silver envelope flaps, I silver heat embossed the image. This was also done for the larger silver envelopes for the whole invite to fit in as well.  I even used the “Tree of Life” computer generated image to create some address sticker labels for them and give them extras ones to use.

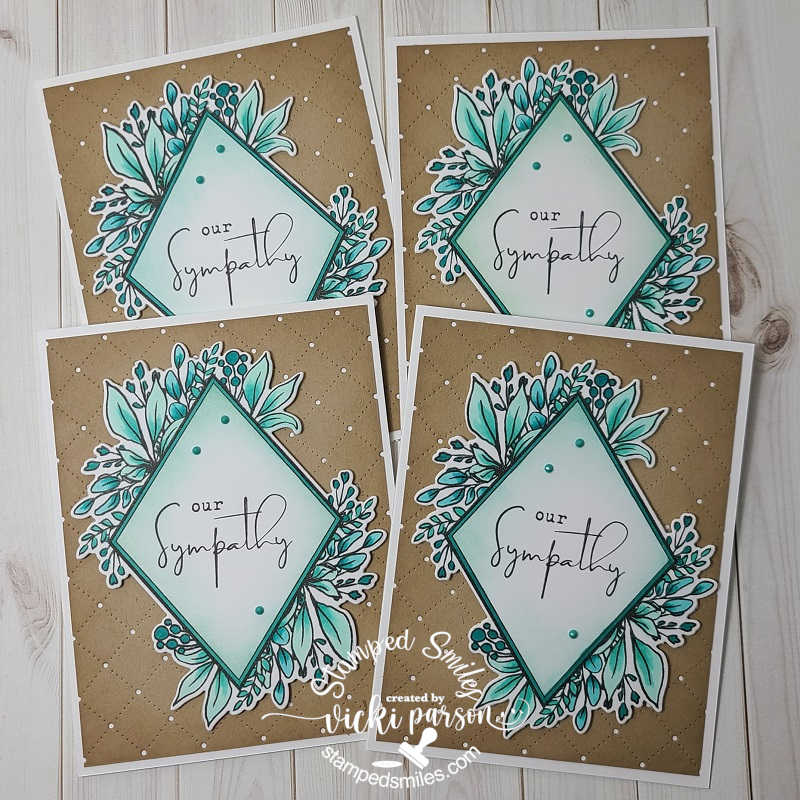
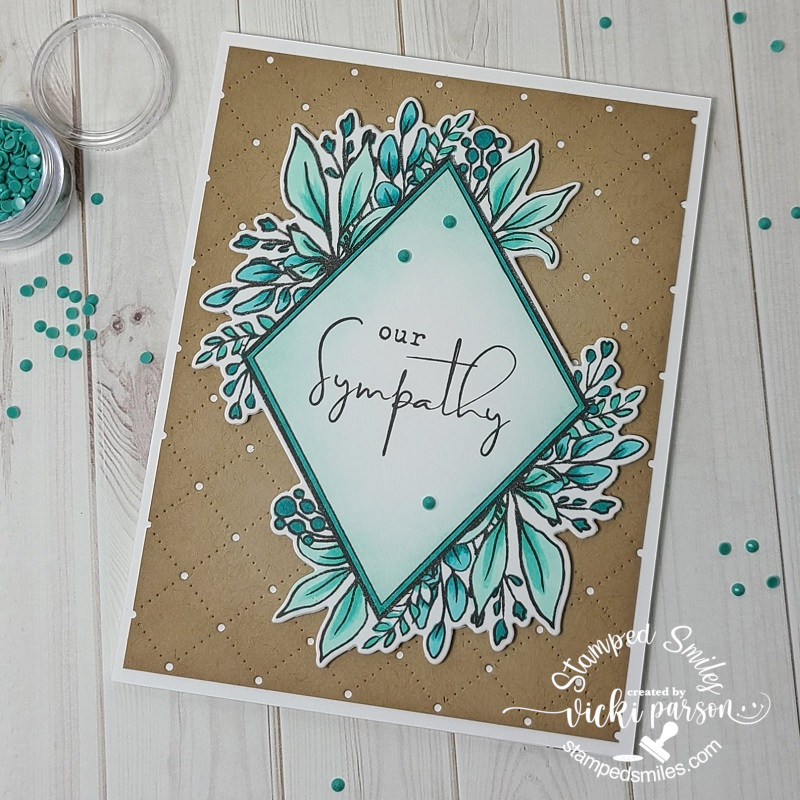
Of course, after the wedding, you need to send out the thank you cards, so I also made 50 of those….

I really didn’t want to event a new wheel with it, so I had plenty of cardstock colors and just repeated the same design on the front as I did with the invites except for this one, I used the Taylored Expressions On Occasion stamps.  I stamped them out with the Bermuda Bay over the Mint Macaron cardstock, cut it out with the coordinating dies and popped it up with foam tape over the silver ribbon.  Stenciling another 50 panels with this same stencil gave it another work out yet! 

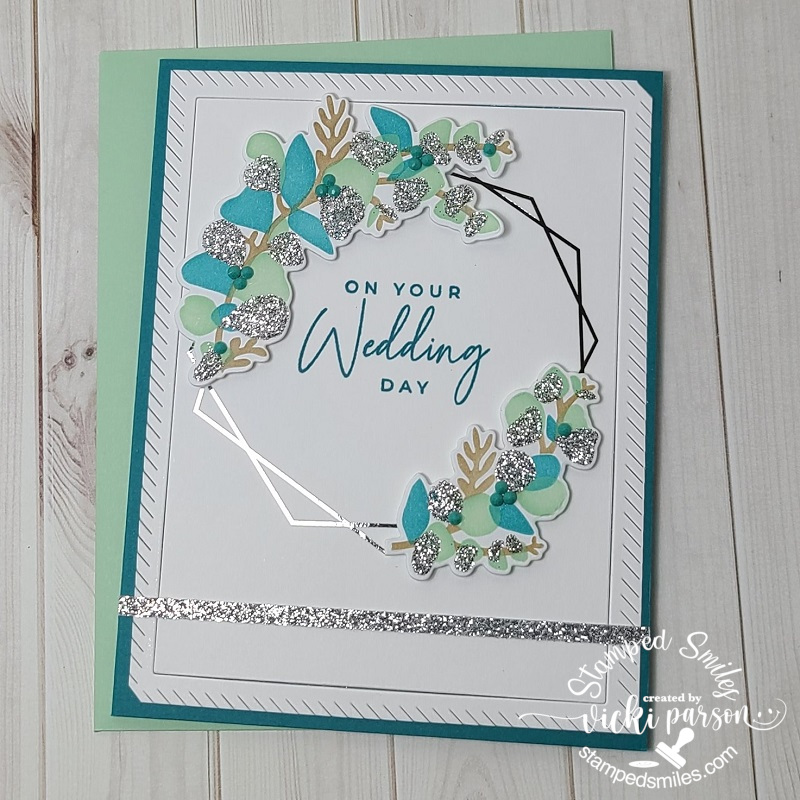
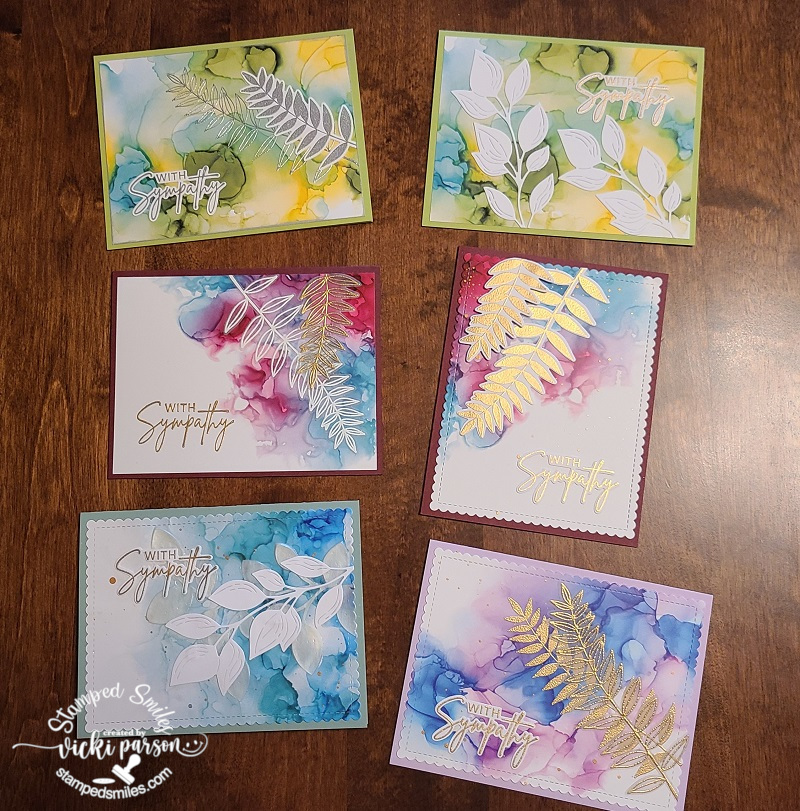
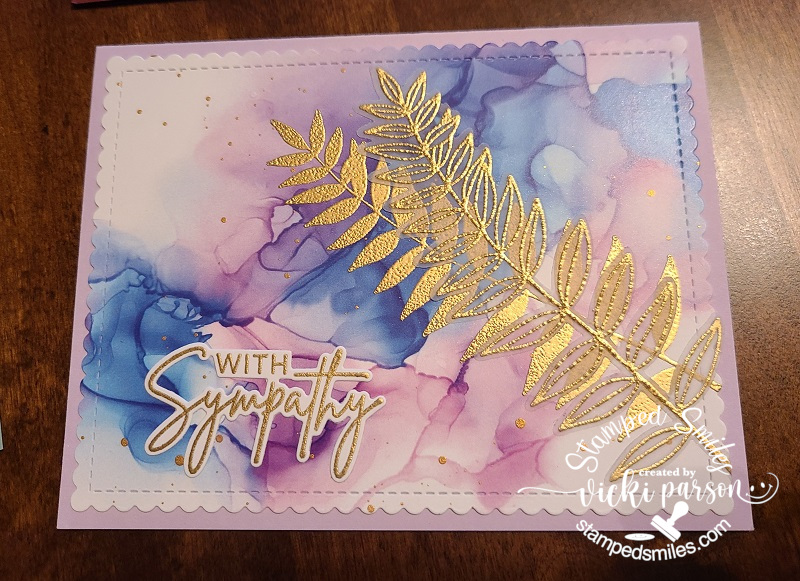
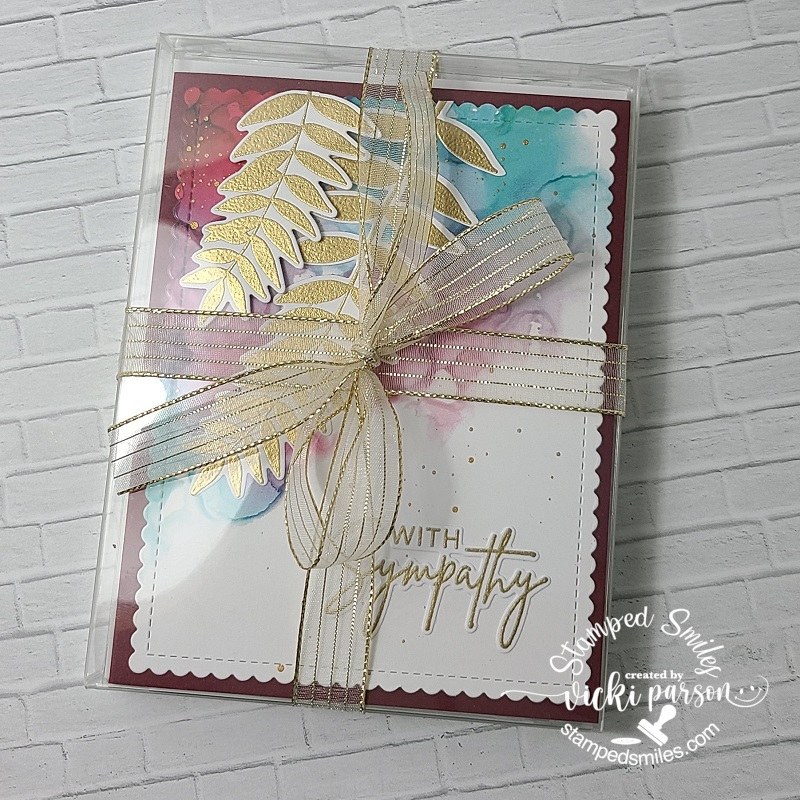
So, for the actual day of their wedding, this is the card I made FOR the couple.  I was able to get a little more “intense” with this one as it was only ONE card!

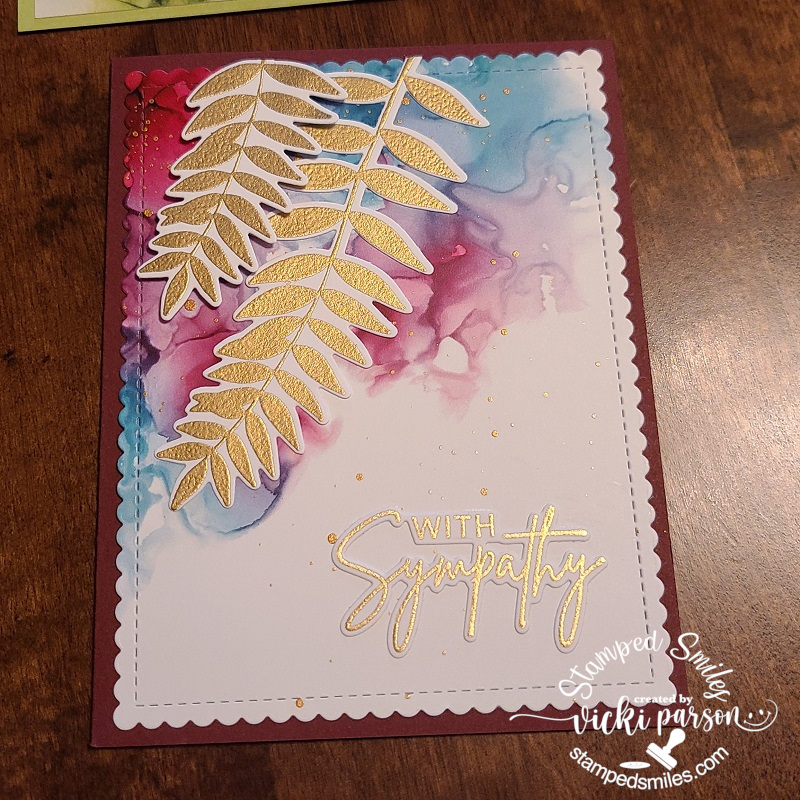
I was so excited when I saw this stunning card kit come out from Taylored Expressions called “Modern Eucalyptus” (no longer available) and I thought it was the perfect colors to create something with for their wedding.  The white panel was silver foiled and then I stenciled the colors of the wreath pieces, stenciled some silver paste, die cut them out and popped them up over the foiled wreath.  I stamped the sentiment in the center, added some TE Tiny Diamonds to some areas and cut a strip of silver glitter cardstock to go across the bottom.

Around the edge of the panel, I used a free gift that I got with purchasing items and tried it out and on my panel without realizing that it cut the center.  I went ahead and attached it down anyway as I liked the decorative look to it.  I had a matching envelope and off we went to the wedding!!!!!


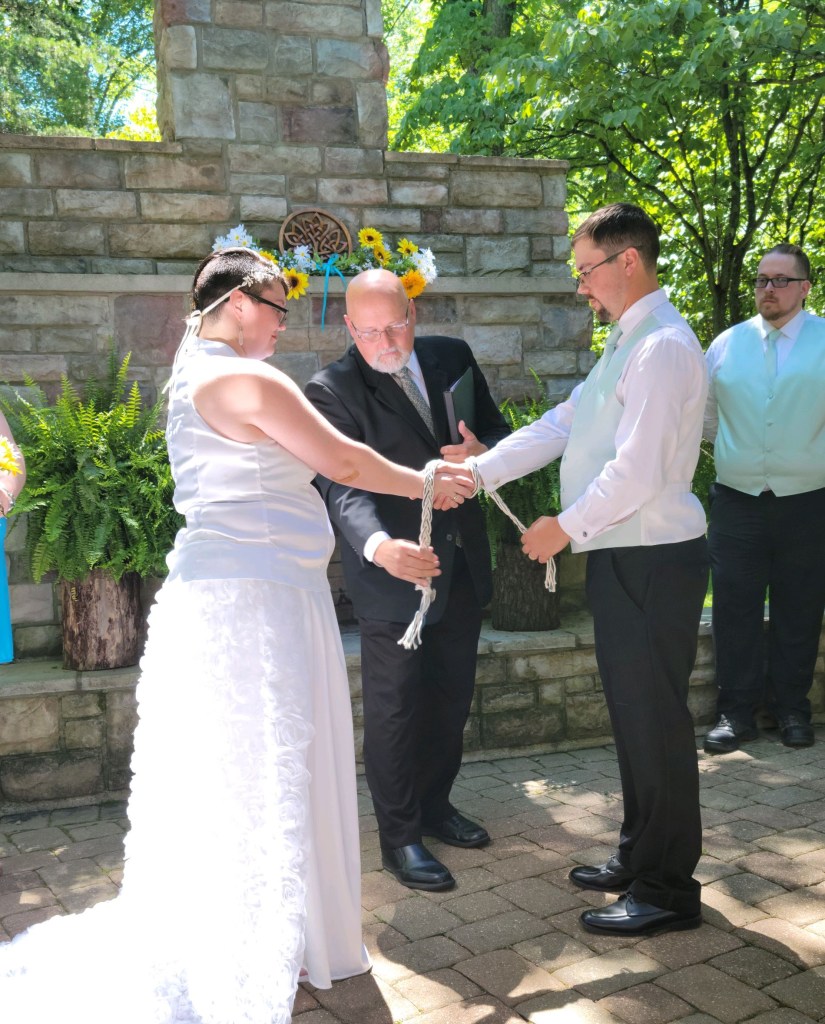
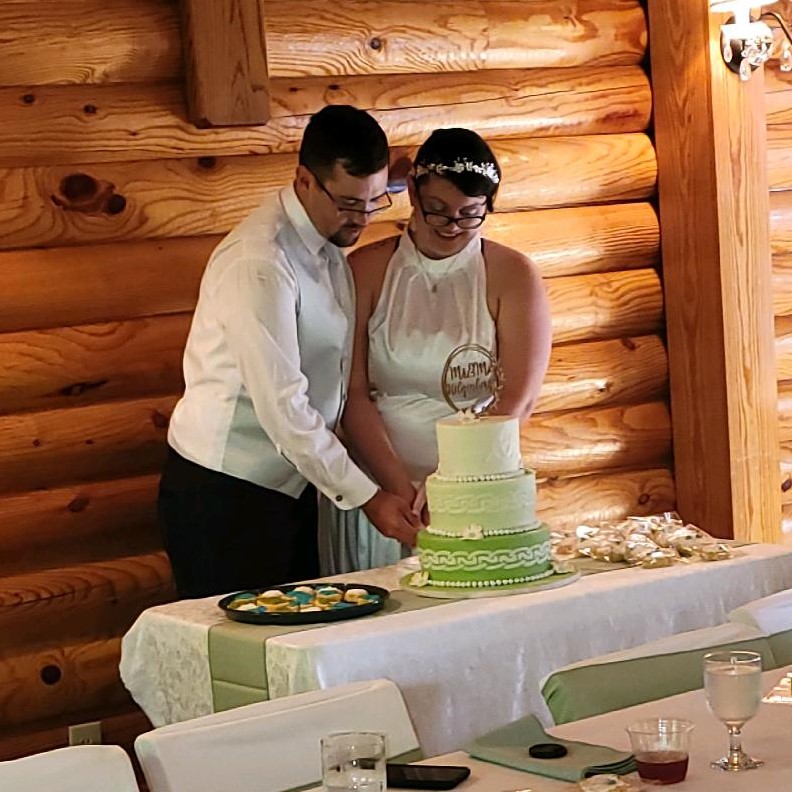
The couple was married in Hocking Hills (Ohio State Park area) and it was absolutely beautiful over there!  The venue they used only had a certain capacity limit and so this is why there were only 50 invitations that went out.  It was a very nice private wedding with everything done and organized for them.  I do not have any professional photos of the wedding as of yet, but I had to rely on my husband for taking a few photos on his phone and then handing the phone to someone for photos as well…my dress didn’t allow me for handy phone carrying.  LOL But here a just a few photos (not professional) of the wedding.

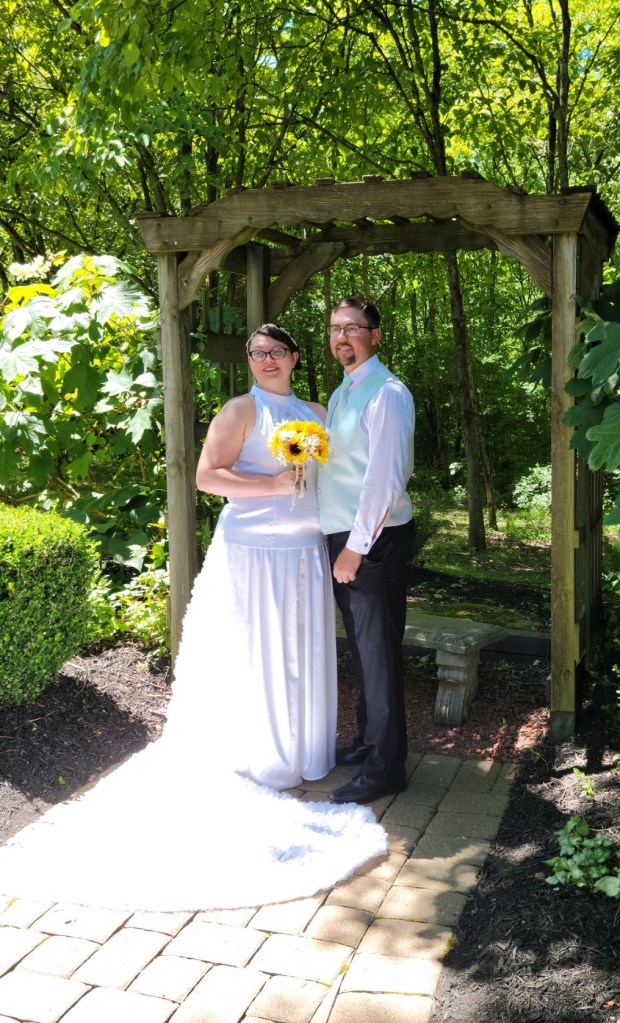
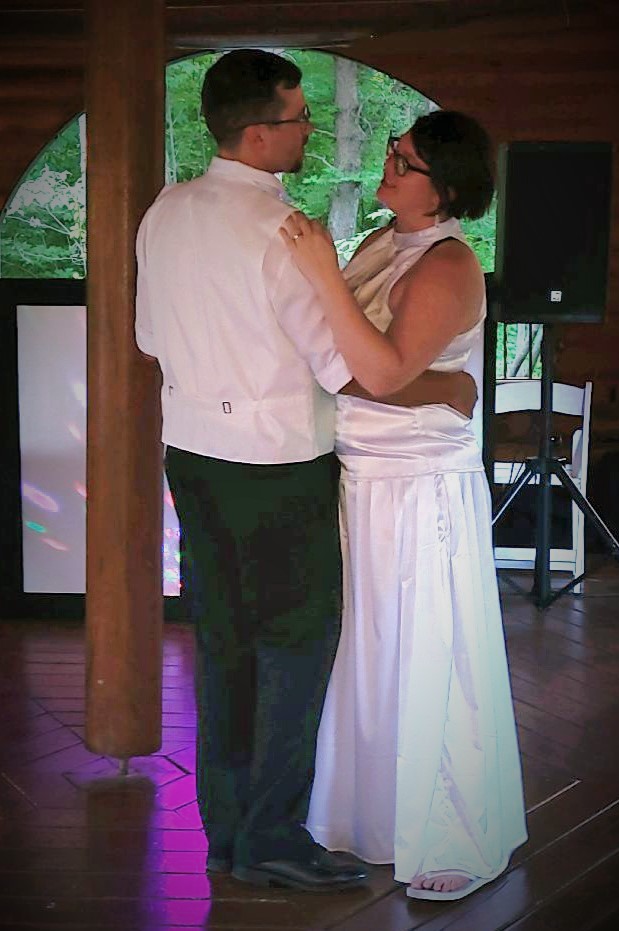
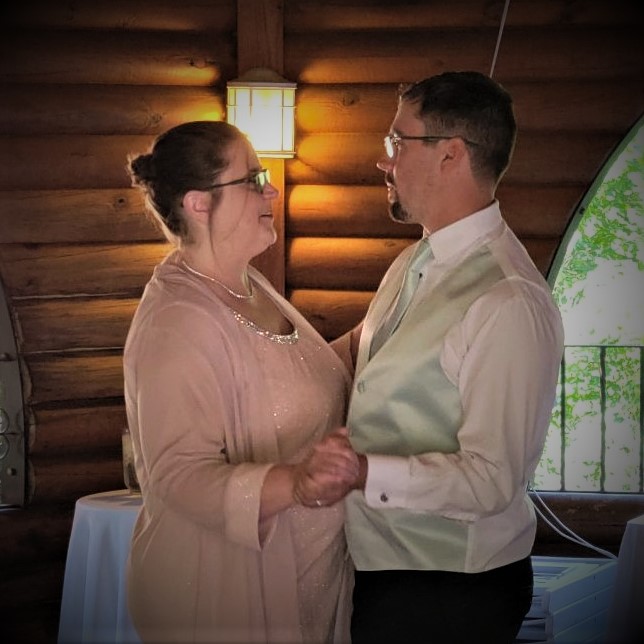
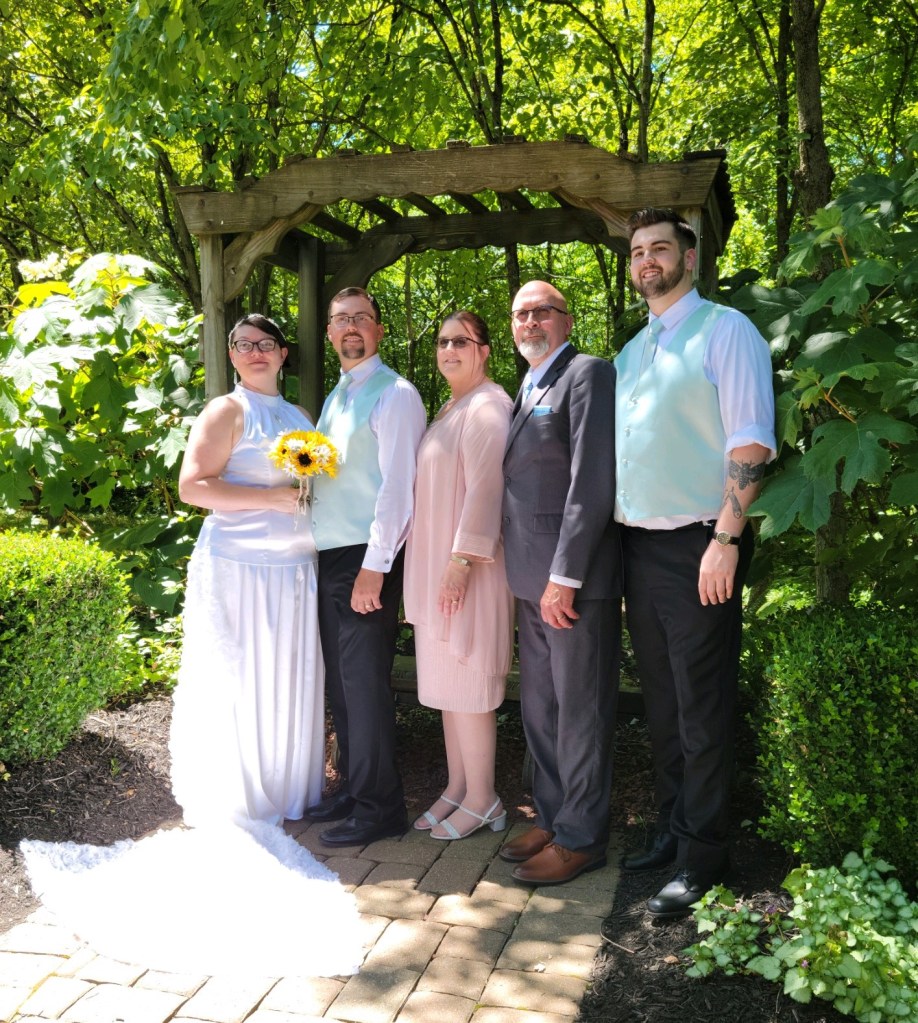
As being a first time “mom of the groom”, it is quite an experience and very emotional especially when my son picks out a song for our dance with a song I used to sing to him as a baby in my belly!  We both had tears!! LOL  It was such a joyous occasion and I’m thrilled to welcome our new family into our lives for years to come!  May they always feel the joy and love together for ever after!

Hope you’ve enjoyed my wedding post today and have been inspired in some way to brighten your day.  I thank you so much for taking the time to stop in and say hello!  It means so much to me!  See you soon!

Challenges:

  1. Crafty Friends – Embossing Wet/Dry (heat embossed on invites)
  2. Crafty Calendar – Add a ribbon (on invites and thank you)
  3. Pammie’s Inky Pinkies – Anything Goes
  4. Fab ‘N’ Funky – Anything Goes
  5. Penny’s Paper Crafty – Anything Goes using paper
  6. Creative Fingers – Anything Goes

Lawn Fawn Fever!

Hello friends!  I have LOTS to catch up on with all of the blogging of projects that I’ve been working on over the last few months, so I will probably share several projects within one post until I can get caught up!

I know that Christmas in July is going on everywhere right now, so I thought I’d share that along with a few other projects I had going on during my “Lawn Fawn Fever” episode!  I have loved their cute little critters for so long and hope you enjoy what I’ve made:

It’s been a while since I even played along with a Lawn Fawnatics challenge, so I decided to join this one which is asking to see your Lawn Fawn “Fun with Food” challenge projects.  What could be more fun than sharing Christmas cookies?!  I’m not sure I’d share any with mice…but these guys are too cute and add some more fun to the scene.  They’re a bit older and I know I’ve had the set for several years as it was one of the STAMPtember sets called “Merry Christmouse“.

I used some older Lawn Fawn papers from my stash to create the table and backdrop setting and then cut it out with the Lawn Fawn Outside In Rectangle dies.  I used the following sets which include the one mentioned above for my scene: How You Bean?, How You Bean? Christmas Cookie Add On, and Thanks a latte.  I Copic colored them and even added a few stamped images over the cookies including some Chunky Glitter

For the mouse hanging over the hot cocoa cup, I cut around his arms to fit over the cup.  I popped up the candy cane as well at the mouse next to the jar for depth on the scene.  I added some touches of glitter and then on the mouse Santa hat, I took some liquid applique and heated it up until it was puffy.  The sentiment was white heat embossed over the dark chocolate cardstock and then I just used my scissors to cut it out and attach at the top.  Really fun scene to create!

I also took part on Friday with the “Hive Five Kit” class they did using the adorable new Hive Five card kit they came out with recently. 

For the first card, I made my sentiment too high, so I had to “arrange it” how it worked for me, and I wanted it to be a birthday card instead.  The other project was just the hexagon tag.  I changed mine into a shaker and then added to a card.  I also added the speech bubble on this one.

The products included with the card kit were really fun and I’m glad I got it!

The majority of this card came from a fun little kit that my sweet blog friend Shirley gifted me included with a SWAP that I was in with her. (Details of that are below.)  Really love that she included the backdrop for the sky which worked out perfectly!  I actually already purchased this awesome Lawn Fawn Platform Pop-Up die along with the Platform Pop-Up Add-on and the Upon a Star stamp set and dies, but she was so very kind to have all of these pieces already stamped and cut out for me!  I just colored in the critters and the stars, added a few more here and there along with some glitter, white heat embossed the sentiment over the navy cardstock and put it together.

I hadn’t even broken out my Platform die at the time, so this was my first time putting one together!  It looks a little more intimidating than what it really is, so I had lots of fun with it!  Thanks so much for sharing the fun with me my friend!  I can’t wait to attempt another one soon! (Thanks for helping me with my addiction! 😁)

And as I had mentioned above, I was asked if I’d be interested in joining this “Summer Sampler SWAP” with my wonderful blog friends Patti, Shirley and Donna along with a few other ladies to take part with!  When it was described to me, I quickly realized that I had seen these 12″ x 12″ sized papercraft stamped samplers all over Pinterest.  Of course, I had thought to myself that would be fun to create and never did.

Each square is 3-1/4″ and we each were to use the same color for the back layer so it was all similar for the finished project to coordinate well.  So 9 of us created 9 squares, kept one for ourselves and then mailed out the others to each person in the swap.  Really fun to see everyone’s idea here with the theme of “SUMMER” too!  I love them all and thought how fun that each one is so different from the others!

This is my finished 12″ x 12″ shadow box framed piece with everyone’s squares that I’ve attached to a wood panel background paper.  I have it hanging on the wall.  I think this would be so fun for each season or even gifts!  Hope we can do another one!😉

And here’s the square that I did for the swap.  I zoomed in to take the photo and it’s behind the glass, so it’s not a real great look at it, but as you see, I’ve used Lawn Fawn again! LOL

I had some fun 4th of July papers and thought it would be neat to make somewhat of a shaker element with confetti stars.  I’ve used the Lawn Fawn Dandy Day Flip Flop set along with a mouse from the Bubbles of Joy set for the front of my square.  I was trying to give the impression that the mouse had a sparkler, and the sparks were flying while the other mouse was enjoying the show. I used glitter and die cut a star from silver glitter cardstock for the center of the dandelion.  I added a red bow at the top.  I thought with using a shadow box frame that the dimension wouldn’t be an issue and it wasn’t.  

There’s always something fun to keep me hopping, so I know you’ll see more soon including the wedding & painting class projects!  I promise I’ll get there!  Thanks for dropping by!!

Challenges:

  1. Lawn Fawnatics – Fun with Food (first card)
  2. Crafty Gals Corner – Christmas in July (first card)
  3. Krafty Chicks – Christmas (first card)
  4. CRAFT – Christmas (first card)
  5. Jingle Belles – BLING on the Holidays! (first card)
  6. Double Trouble – Christmas in July Thing 1, Thing 2 & Thing 3 (I’ve used old stamp sets, papers and added some fun bling on my cookies -plus added to the partner challenge in first card!)
  7. Alphabet – ‘H’ is for Holidays (first card)
  8. My Time to Craft – Christmas in July (first card)
  9. Papercraft – Christmas in July

Pray Until Something Happens With Inky Stamper

Hello friends!  How is your Summer going?  It seems like it is really flying by for me!  After getting back from the wedding, I have a PILE of things to get finished up, literally!  I signed up for classes knowing that I couldn’t participate during the class time, but figured I would finish them up on my own, so along with doing that I’ve decided to also throw in a current challenge project as well and share that today:

So, this cute little fella came from Inky Stamper called Praying Mantis, of course.  The challenge for the month of July in the Inky Stamper Inkspiration FB Group calls for “watercolor” of any kind and so I pulled out my Zig CC Real Brush markers to color him with, cut him out with the coordinating die and even added a bit of the Liquid Pixie Dust on his wing.

For the watercolor on the background, I’ve used an Inky Stamper Watercolor Panel and ran a few different colored Distress Oxide ink pads over it without touching the colors.  I then spritzed it with water to saturate and let the colors run together over it.  I picked up any extras on my glass mat to completely cover the panel and then I took the Picket Fence Geo Squares Stencil and laid it over top while it was wet, pressed it in and let it just sit until it was dry. I picked up the stencil that had dried ink on it, spritzed it with water and turned the stencil the other way with the ink on it and pressed it onto the panel again and let it dry.  This is how the darker ink color showed up on the lighter end.  I took some green and black watercolor to spritz over top.  Really fun background to play with!

I then white heat embossed a sentiment over a black strip and attached it to the bottom portion of the background and then die cut the panel with a double-stitched rectangle die.  I used foam squares to pop up the bug and wrapped some Doodlebug Limeade Twine under the sentiment.  This panel was layered over a black piece which was attached to a top folding A2 white card base.  I finished it with some Doodlebug rhinestones.

And continuing on with my “Inky Stamper projects”, There was an OOAK event a few days before I left.  I didn’t have time to do my projects during the time but finished them up when I returned.  We made this fun and unique fold design with a gorgeous butterfly and then of course the mini card to go along with it. 

For mine, I colored the butterfly with Copics, popped up the wings with foam tape and added some of that Liquid Pixie Dust which is hard to see in the photo.  Then for the mini card, I used some watercolor to color the hydrangea with.  The sentiment was white heat embossed.

Super fun projects as always! (I usually make my “mini card” into TWO ATCs, I just did the one so far here.)

And for my last set of “Inky Stamper projects”, this was for a special class Chelsea held during the time that I was gone.  Even though I wasn’t able to attend the fun and games with them live, I went ahead and purchased the kit anyway so I could watch the video at a later date to make all of these fun projects centered around this ADORABLE Sloth!

I pretty much followed along with the way the class projects were made.  I added some gold thread on the card in the back with the clocks so that it could hang from the sloth’s claw.  I added a glittery heart for the treat container for the sloth to hold as well.  The candy inside the container are slow pokes!! 😂   Super cute and fun projects to make!  I sort of treated myself to the candy while I was creating!

I also think that there were a few days where I could relate to the sloth too, but glad to get things done!

Really hope you’ve enjoyed my projects that I’ve shared today and are inspired in some way too!  Thanks so much for stopping in today…I’ll be sharing more soon! 😉

Challenges: (For top card only)

  1. Happy Little Stamper Watercolour – Anything Goes + watercolor
  2. Happy Little Stamper Stencil – Anything Goes + stencil
  3. Aud Sentiments – Anything Goes + sentiment
  4. As You Like It – Favorite warm/cool colors and why? (Always been attracted to the cool tones even as a child!)
  5. Krafty Chicks – Week 1: Stamp Act
  6. Crafty Catz Anything Goes
  7. Creative Fingers – #235 Anything Goes
  8. Colour Crazy Craft – Week 27: Anything Goes + coloring
  9. Pammie’s Inky Pinkies – PIP2228 Anything Goes

Massive Mass Producing!

Hello friends!  I hope that you are having a great week so far!  After the little “heat wave” hit us, I’ve been enjoying some ‘nicer’ outdoor temperatures, finally.  As you may have read in a previous post, I had been working on my son’s wedding invites as well as some thank you cards for them to send out afterwards.  I will be sharing that later on, but today I have some other “mass production” that I’ve been working on in addition to those:

First up, I’d like to share a set of cards I’ve made for the Taylored Expressions Fans FB Group challenge for May which calls for “4-8 mass-produced cards. (similar or identical)” & the colors “Poblano Pepper with Confetti Cake“.  I do not own the Poblano Pepper, but I do have a small cube of Confetti Cake ink.

I’ve been wanting to create several sympathy cards so that I had them on hand instead of making at the last minute for one, so I was happy to get these made.  I decided it was just easier to make them identical so that I didn’t have to decide how to arrange or cut my papers, etc.  I’ve used the Taylored Expressions Diamond Botanicals with dies as well as the TE Diamonds Masking Stencils for the main image.  The background uses the TE Pierced Lattice Cutting Plate over a piece of Toffee cardstock.

Here’s a close-up look at one of the cards.  I stamped the floral image in black ink as well as the sentiment from the stamp set and then took one of the Diamonds masking stencils with some Confetti Cake Ink to softly blend around the edges of the sentiment area with it.  I also used a blender brush to blend around the edges of the cut Toffee layer too.

Since I only had the Confetti Cake ink color, I matched up the coordinating colors with my Copic markers and colored in the image using only those color tones.  I think it worked out great for sympathy cards.  After I colored up the images, I used the coordinating die cut and popped it up over the Toffee cut panels with foam tape squares and then layered it over a side folding white A2 card base.  I finished each one with some of those coordinating TE Pastel Tiny Diamonds.  (Although the suggested listed coordinating colors on the website don’t have the Poblano Pepper or Confetti Cake, I thought it matched up rather nicely to this anyway.)  I think these cards work out great for mailing too.


And speaking of sympathy cards and Taylored Expressions, I thought it would be great to create a nice gift set too:

If you remember one of my previous posts, you may remember where I created a greeting card gift set (CLICK HERE).  I’ve went along with the same idea here and made them all sympathy related cards using my own acetate box and some Taylored Expressions products.  These were all quick and easy to pull together using the Taylored Expressions Done for You Alcohol Ink Background Panels along with a previously released card kit stamp set/die.

I decided to heat emboss several of the fern images with white, gold and silver over a few of the panels, some over white and vellum and then cut out.  I placed them along with the heat embossed sentiments cut out and arranged them over the panels.  I matched up the cardstock that I had from my stash with the panels to create the completed cards.

Here’s a gallery of a few of the cards up close along with the finished gift box tied with a ribbon: (Just click on each photo from my website to see them enlarged.)

I think this will make a nice gift for someone as I always hear people saying they never have a sympathy card on hand when they need one or for those people that don’t make their own cards too.


And lastly, I’ve made a couple sets of mini slimline style cards using the Taylored Expressions In the Garden-Triple Slim Layering Stencil:

I quickly fell in love with this quad type of stencils especially with these gorgeous florals!  I love the way these floral panels are different from one another, and you can stencil them all up with the same color in one pass!  I needed a couple of Mother’s Day cards, so making all of these at once sure came in handy for bonuses too!

Using the “craft-along” video from Taylor and Heather, I used the same, or similar colors that was used, added my black splatters and then used the TE On Occasion with dies as well as the TE Get the Word Out-Mother’s Day with dies for the sentiments where I white heat embossed over black cardstock and cut out.  I just glued to the panels and attached each panel to a white mini slimline card base.

And then here’s another set of mini slimline cards using the same products as above except I used Toffee instead of the white cardstock for these.  I also stamped the sentiment with dark brown ink over white cardstock and then cut them out to place over the stenciled panels. 

I also used both dark brown and white paint to make the splatters over these.  I also used the TE mini slimline stitched and scallop die cuts for these cards and then layered them over top of a Toffee mini slimline card base.  I’ve also added a few TE white rhinestones for a bit of sparkle too.

I also think that these would make great greeting card gift sets as well!  So, then it’s just a matter of which ones to keep and which ones to give away as a gift!?🤔

Hope you’ve enjoyed my mass production post today or have been inspired in some way.  Thank you so much for taking the time to drop in and say hi as I enjoy hearing from you!

Challenges:

  1. Creative Friday – No patterned paper (top set of cards only)
  2. Colour Crazy Craft – Anything Goes with coloring (top set of cards only)
  3. Creative Fingers – Anything Goes
  4. Sparkles Monthly – Floral Frenzy
  5. Lil Patch of Crafty Friends – Anything Goes
  6. Pammie’s Inky Pinkies – Anything Goes
  7. Stamping Sensations – Anything Goes optional: Flowers/Fauna

Challenge Up Your Life with a RAINBOW!🌈

Hello friends!  I don’t know about you, but I’m so happy to see the month of May starting!  That means the flowers will be coming out along with the warmer weather!  It’s also a great time of the year to see a rainbow perhaps?!

#147_regenbogen_CUYL

Today I’m super excited to be joining the “Challenge Up Your Life” challenge blog as a guest designer!  I had previously won a Top 3 and a future guest design spot from a past challenge I had entered, so I’ll be joining them as a guest for April, May and June challenges!  Today their new monthly challenge for May is “RAINBOW“.  Hope you can share your lovely creations with us this month!  (Check out the challenge blog for details and inspiration!)

Here’s my guest design creation for this month’s challenge:

Nothing better than to look up into the sky and see a rainbow!  What’s also fun is to be able to create your own and especially on a card to send to someone to brighten their day!  I’ve used a previous card kit from Taylored Expressions that contained these products:  Make a Rainbow Stencils, Over the Rainbow clear stamp set, Rainbow Cloud Duo dies, and Over the Rainbow Sentiments clear stamp set to create this card.  I ink blended the different colors through the rainbow stencil and stamped the orange dots over the rainbow as well as a few hearts in light blue ink. The sentiment was also stamped with black ink over top of the rainbow.  I then die cut the one cloud twice from white cardstock and ink blended some light blue around the edges of it and popped it up with foam tape at the ends of the rainbow.

Then the card front panel was run through the die machine using the Taylored Expressions Diagonal Stitch Rectangle dies (Which actually doesn’t cut anything out but creates the lines.)  I layered it onto a piece of black to make the rainbow pop a bit more and then attached it to an A2 sized top folding TE Pineapple card base.  I also topped it off with a couple of TE Bits & Pieces-Full of Heart sequins. 

I knew the minute I went to create for this challenge that my zippered pouch from Taylored Expressions that has the “A Rainbow of Possibilities” sticker over it was what I was going to grab!  All of my rainbow things are in it!  Makes it easy to grab when you know everything is in there!

I hope you’ll stop over at the challenge blog and join with us to share your rainbow too!

I hope you’ve enjoyed my card or been inspired!  Thanks for stopping by and I’ll see you soon!

Challenges:

  1. Sweet Stampin’ – Rainbows & Rainy Days
  2. Arty Divas – Anything Goes
  3. Penny’s Paper-Crafty – Anything Goes
  4. Krafty Chicks – All Occasions (encouragement)
  5. Creative Fingers – Anything Goes

ATCs, Greeting Card Gift Set, Pet Sympathy and Class Results too!

Hello friends!  It seems that I have went MIA on you, but I promise I’m still here!  I’ve been really busy “Behind the Scenes” as they say and have many things going on at once that I’m trying to juggle, but I do have TONS of things to share that I’ve been doing and hope you enjoy seeing them!  (LOTS of photos!)

First up I have a couple of fun Summer themed ATC sized cards using some Inky Stamper sets called “Splash” and “Chaise Lounge“.  (Still not wanting to warm up much for Spring…so I’m wishing for HOT summer now!😁) I made them for this month’s theme of “ATC sized or mini cards” challenge in their FB group.  I started out with a sunray stencil and used some yellow glaze paste and once dried I added some watercolor over it which was resisted by the glaze which gave me this look for the background.  I splattered it and then added some strips of blue dotted paper cut from a wave border and then I ripped a piece of gold at the bottom.  I cut cut with a scallop die and layered over a black 2.5″x3.5″ piece of black cardstock folded in half and went around the edges with a gold ink pad.

I white heat embossed the sentiments from each stamp set and then cut portions of them out with my scissors to attach over the backgrounds.  The images were colored with Copics, fussy cut out and popped up with foam tape over top.

Next, I wanted to share a “Greeting Card Gift Set” that I have made and gave as a gift for someone.  I used this wonderful product idea from Taylored Expressions called “Stamp & Give Card Kit 1” and it’s something that I had wanted to put together for a very long time on my own, but this product came along recently which pushed me into gear with no excuse of gathering things together on my own as this was already together for me.  All I had to do was do the stamping and stenciling.  I coordinated the colors with what was in the set.  I like the fact that the recipient of this give set can choose which greeting they want to use for each card and the package of greetings are ready with a foam strip on the back of each one.  For my designs, I’ve used the TE “Floral Flurry” Background stamp and stencils which I received from the “Stamp Joy Virtual Event” that I had attended. (not in store as it was exclusive for the event…photos at the bottom of post for that!)  I’ve added 3 gems randomly to the fronts of each card.

With the kit, it comes with all of the envelopes, card bases, glassine bag to hold all of the sentiment strips, the card fronts and even the acetate box to put them all in.  I just added some ribbon once I put all the cards inside.  I certainly plan on doing some more of these greeting card gift sets soon!  I think it’s always nice to have a set of themed cards all together and ready to go when you need to grab one quickly!

Unfortunately, next up I needed a pet sympathy card and I thought you could never go wrong with paw prints and hearts.  I’ve kept this simple and pulled out some favorite Whimsy Stamps “Fill My Heart” and “Furever In Our Hearts” stamp sets for the paw prints and the sentiment. I’ve also used the My Favorite Things “Paw Prints Die-Namics” to die cut a couple of paw prints over the heart that I’ve punched out from red cardstock along with some smaller hearts above it.

I’ve used a glitter brush pen to make the hearts sparkly looking.  This was all done over a kraft colored card front that was cut with a double-stitched rectangle die and placed over an A2 sized white card base.

I really need to get a set of pet sympathy going so that I already have them on hand as needed because it seems like I’ve sent many out and don’t have anymore…and I need another one already.  I actually need to make sure I have several sympathy cards in general on hand, so I know I’ll be replenishing that soon too.

____________________________________________________________________________________

And lastly, I thought you might want to see all of the projects that I made during my classes and make-n-takes that I’ve done during the Taylored Expressions “Stamp Joy Spring Virtual Event” from last month…gosh, It’s been that long already and I’m just now posting them!🙄

The first four cards were from the classes on the first day (using the same product/style line), and the others are from the second day with all of the Make-n-Takes.  If you’re visiting directly on my website, just click on each photo below and it will enlarge so you can see it better along with the typed details about it!  

I’m really far behind in catching up with whatever the challenges currently are as well as seeing what’s going on with my fellow blogging friends, so I will get going as soon as I can!

Thanks so much for stopping in and I’ll see you soon!😘

An Electric Connection and Happy Mail Love For Valentine’s Day!

Happy Valentine’s Day friends!  Today is the day all about hearts and love!  Although I’ve already sent out my Valentine cards, I have a couple of lovely individuals who take a peek at my blog from time to time…so I have to wait until they’ve received their cards before I share them here!😉  It’s somewhat hard to “hide” my crafting since hubby’s now retired! LOL  So here’s the cards I made:

I just KNEW the minute I saw this Taylored Expressions Love Lights Stamps & Stencil Combo set that it was something perfect for making cards for my retired electrician hubby!  This set also coordinates with other products and so I started by foiling the TE Foil It-Love Lights panel and then ink blending with the stencil set.  I had to use blue as this is hubby’s favorite color.  So, I’ve used the TE Sprinkles and Potato Chip inks.  The cardstock is TE Sprinkles. (I used softer tones for the Valentine feel.)  I also used the coordinating TE Mini Strips-Watt’s Up sentiment set that was silver heat embossed over the TE Sprinkles cardstock and cut out with the TE Mini Strips-Asymmetrical Die.  I just love the punny sentiments that go with this set!

The tiny light bulb for the accent I used actually came from a TE ‘freebie’ with one of my orders, so I die cut the light bulb with white glitter cardstock and lightly sponged some yellow ink in the center.  I die cut the center and bottom of the bulb with silver brushed cardstock and glued it onto the light bulb.  I die cut a circle from some vellum and also sponged this with yellow ink and glued the light bulb on top of it and attached it to the side of the card nestled with the sentiment strips that were popped up with foam tape.  He will have gotten this one this morning.

And here’s another card that I sent to someone very special!  It’s a simple card, but wow it was so much fun to create with using the Simon Says Stamp Limited Edition Happy Mail Love card kit! (Looks like it’s still available at the time I’m writing up this post, but not sure how long it will stay available.)  I so love those CUTE Doodlebug products and there are so many of them including the stamp set that goes together in this kit!  I wanted to play some more with it, but I have so many other things to focus on, so I’ll have to come back to it later! LOL

I’ve used the Doodlebug background papers from the kit and cut it out with a Lawn Fawn Cross-Stitch die and also cut a strip of ‘grass’ with green cardstock at the bottom using the Lawn Fawn Grassy Border die.  The heart papers were attached over a red piece of cardstock from the kit and layered onto a top folding A2 white card base.  The grass border was attached over the red cardstock and heart background papers.  This gave me the room to take the CUTE Doodlebug LOTS OF LOVE Odds and Ends Ephemera die cut shapes to create my scene with!  This pack came in the kit and there are SO many pieces!  I’m sure you could go on and on making cards!  The bird and bunny die cuts were popped up with foam tape.  It’s hard to see in the photo, but I’ve taken my glitter brush pen to all of the hearts on the images and the cheeks on the cloud.

I think these cards did what was intended which was to create smiles during this cold winter season!  I sure hope that it has done the same for you as well! 😉 Wishing you a happy Valentine’s Day with all of my heart! ❤ Thanks for stopping in and I’ll be seeing you soon!

Challenges:

  1. Moving Along With the Times – Love/Anniversary/Wedding
  2. Creative Inspirations – With Love
  3. The Paper Funday – Anything Goes optional ‘Hugs & Kisses’
  4. 613 Avenue Create – Anything Goes optional ‘Whimsical Valentine’
  5. Everybody Art – Love and/or Heart
  6. Try It On Tuesday – ‘All Loved Up’
  7. Cardz 4 Guys – ‘Love’ cards
  8. Little Red Wagon – Be My Love/Valentines

Huge thank you to those that keep the challenge blogs going!

Vintage Anniversary and Commissioned Ones Too!

Hello friends and happy February!  I feel like we just started a new year and it’s already into the second month!  I will need to get going on a couple of Valentine cards really soon!  Today, I wanted to share a card I had made for my parent’s 57th wedding anniversary along with a few other anniversary cards I was commissioned to make that I had forgotten to share until I made my parent’s card! LOL!

I really like how this one turned out!  If this looks familiar to you, then you may recognize it from a past Simon Says Stamp card kit. (This one came from a Valentine 2020 kit.)  I thought that the papers in the kit looked “Vintage” and I really liked that, so I thought I’d try to go for that style in my card.

I used the heart rose stamp image from the kit and colored it with Copics and fussy cut it out.  I also copper heat embossed the leaves from the stamp set included in the kit over some green cardstock and fussy cut those out as well.  The sentiment was also from the same set as the leaves, and I copper heat embossed that for the bottom right corner of the card.  It’s hard to see from the shine, but it says: “Happily ever together” and was fussy cut as well.

I started with the Vintage looking papers and cut a piece down to size and inked up along the edges with Vintage Photo distress ink and layered it over a side folding A2 white card base.  I pulled out a piece of shimmer vellum that I ran through a Sizzix 3D heart embossing folder and layered it over top of the background.  I also took some of the ephemera from the kit and added those to parts of the background after sponging the edges of that too.  (See the “ticket” in the top left.) 

Finally, I arranged the heat embossed leaves along with the heart shaped rose over top.  I glued the leaves and then popped up the rose with foam tape along with the heat embossed sentiment.  I added some shimmer to the leaves with a shimmer brush pen and then took some sequins from the kit to attach over the card and filled with Stickles glitter.

I think this would be a special Valentine card as well for someone! 😉

At the end of last year, I was also commissioned to make a 50th wedding anniversary card for someone.  I was just given the detail that the wedding photos were shown with the colors black and white…so I based my card using that idea.

I always think that wedding/anniversary style cards look especially elegant with die cuts and embossing, so I dig through my die cut and embossing folder stash.  I’m sure you can imagine me sitting on the floor with things everywhere! LOL!!  Do you do this too when you’re not sure what you want to do and/or what all you have?

So I found this really pretty Memory Box die cut with the heart in the center that I wanted to use and thought some glitter paper behind it would be so pretty.  This is why my card is a square shaped design.  Since it was celebrating 50 years, I thought it would be appropriate to add some gold in there too and die cut the numbers for the center of the heart as well at the border pieces on the top and bottom of the heart.  (Not sure where that die came from as it’s old. The number dies are really old too!)

I layered this onto the glitter paper and gold foil paper.  I stamped a sentiment (Taylored Expressions-The Inside Scoop Anniversary used both inside and out of card.) and die cut it out with a banner die and popped it up under the heart with foam tape.  I layered this onto a white 3D embossed background that was layered over a black top folding square card base.  I attached a gold ribbon bow over top.

I stamped a sentiment for the inside of the card and you can see that I’ve decorated the inside of the card using the same die cut border with gold foil cardstock.  The papers I’ve used for the borders on the inside were also used to create a custom envelope for this card.  Sometimes if I don’t have the envelope on hand, I make my own envelope.  Sometimes I prefer to do this for special cards anyway.

And this is another card that I had been commissioned to do for someone that wanted a card for an anniversary on Christmas Eve.  I was given the detail about them spending time at Disney World and seem to be a fan of Disney along with it being their 25th anniversary…so my card was based on those details.

I have no Disney character type stamps/products at all.  My thought was to create something with a “winter/Fairytale” theme which is why I turned to my Cricut machine for help.  I was lucky enough to find the carriage and horse image that I cut out using brushed metallic silver and silver glitter cardstock for the different pieces.  I also found a castle image that I cut from the brushed metallic silver as well.  I used black cardstock for the base and insides of the cut-out images.  After I cut out the castle, I ran it through a brick embossing folder to give it that brick castle look.  I also die cut the numbers from Taylored Expressions Cap It Off Numbers dies.  I attached the numbers in the center of the castle and attached a silver ribbon bow over top of the numbers.

Since I had my main cut out images for my card, I was able to create my scene and size based on those.  My finished card measures approx. 7″ x 5″ which is not a regular size for me, but I thought it was fitting given the type of card it was along with the cut-out images.  I started with a piece of blue cardstock and generously sprayed it with some Pearlescent Cosmic Shimmer previously received from a class I took.  It gives a really stunning look, and the shimmer doesn’t show very well from the photo either.  Once dried, I die cut both the snowflakes and snow border at the bottom from some white glitter cardstock.  Both dies used for them come from Lawn Fawn.  The trees behind the bottom snow border were cut from some pearl white paper with an older Stampin’ Up! die set in my stash.  

I attached the sprayed blue background over a piece of silver metallic cardstock after wrapping a silver ribbon around the center.  I then attached the trees and added the snow border at the bottom.  I added the castle and snowflakes next being careful that everything was showing the way I wanted and then I popped up the carriage with foam tape.

This whole scene was placed over a white 7 x 5 top folding card base. I also took some silver glitter to add to the little flag ends on the castle.  I thought with all of the glitter and shimmer it didn’t need any more embellishment!  I was happy with how it turned out because I wasn’t quite sure it would!

There was a custom envelope that was also made for this card using some pretty silver pattern paper from my stash.

Everyone seemed to be pretty pleased with how the cards turned out for them and I was very happy to have had the privilege of being a part of someone’s special day too!

Speaking of wedding anniversaries, I’ve been given the honor to create wedding invites for my son’s wedding coming up this Summer and I know I’ll be getting really busy putting those together as well!  So that will be coming up really fast and I hope I can keep up with things! LOL

Thanks so much for stopping in today!  I hope that you’ve enjoyed my creations or been inspired in some way!  See you soon!

Challenges (TOP CARD ONLY)

  1. Simon Says Stamp Wednesday – Anything Goes
  2. Krafty Chicks – All Occasions
  3. Crafty Catz – Anything Goes with optional add flowers
  4. Colour Crazy Craft – Anything Goes with coloring (Copics used for heart rose image)
  5. Creatalicious – Anything Goes with optional love
  6. Simon Says Stamp Monday – Use embossing folder (3D heart folder over vellum piece)

Making Condolence and Get Well Cards

Hello friends!  I hope that you’re having a great start to your week and are staying safe and warm in your world.

Today I’m sharing a collection of creations that I never seem to have in my stash because it’s never really something that I think about when creating…and I always seem to be making them as needed rather than having a few on hand.  Even though, a couple of these were needed, I decided to make duplicates to have on hand this time around.

As you can see, this is a pet sympathy card I created, and one was needed to send to a friend that had recently lost her special companion.  For anyone that has lost a pet knows how this feels and I wanted to be sure to send something special her way.  It’s always great to have one on hand when needed.

I’ve used this wonderful stamp set from Whimsy Stamps called Furever in Our Hearts.  I started by ink blending the background with distress inks in Candied Apple, Carved Pumpkin, Squeezed Lemonade, Mowed Lawn and Blueprint Sketch on a piece of Neenah Solar White.  I sprayed the panel with water and used a towel to blot up the water droplets.  I then took some white shimmer paint mixed with water and splattered it over top with a paint brush.

I cut out the panel with a Lawn Fawn Cross-stitched die.  I used my Brilliance Black pigment ink to stamp the paw prints and sentiment over top of it so that it would show up over the background.  I die cut a couple of clouds out (MFT I think) and lightly sponged the bottom of them and placed them over the areas I wanted with popping up the one cloud using foam tape at the top of the paw prints.  I layered this panel onto a piece of black cardstock and then layered them both over a white A2 sized top folding card base.  I finished it off with a few sparkling clear sequins.

Another card that I needed was for someone that had recently been through a surgery, and I actually didn’t have any more “get well” in my stash… again, so I decided to create a duplicate of this one too.  This set of cards along with the set of cards below actually were the results from the previous OOAK event I had attended, and these were part of a class I had taken.  So, this class actually came in handy!

All of the papers including that beautiful die (from Memory Box-Verdant Leaf Collage), Get Well Soon die, and dewdrop water droplets came with the kit.  I subtly changed up the design given for the class by adding black paint splatters and changing up the die cut lettering and the layering of the papers.   I really liked doing more of that ink blending and then having it fade to the white for a soft look.  The outside woodgrain frame was popped up with foam tape.

And here’s the second set of cards created within the same class using the same Memory Box die and ink blended colors.  I changed up the layout with these as well by making the card base black (instead of white like shown in class) and instead of the sentiments used in class, I created my own version with the Whimsy Stamps Deepest Sympathy clear stamps and the WS Sympathy Heartfelt and Condolences die set.  I also added the black paint splatters to the ink blended panels like on the set above.

I thought these sets made for some really nice cards to have on hand when needed.  I’m not sure that I would’ve actually sat down to make up these types of cards in production if I hadn’t have taken the class, so I’m glad I did.

Thanks so much for stopping in today!  Hope I have inspired your crafty inspiration in some way!  I’ll be seeing you soon!

Challenges:

  1. Crafty Calendar – Anything Goes
  2. Happy Little Stampers – Anything Goes with Dies
  3. Lil’ Patch of Crafty Friends – Anything Goes 
  4. Stamping Sensations – Anything Stamped with optional add a die
  5. Addicted to Stamps and More – Make Your Mark
  6. Watercooler Wednesday – All About Occasions
  7. Penny’s Paper-Crafty – Anything Goes using paper 

Winter is Shaping Up With Interaction!

So after getting my calendars ready to start the year off, which is easy to sit and craft during the cold snowy winter where I live, my mind turned to winter when creating!  Sometimes it’s nice to create with a “snowflake/winter” theme because I think they can be used interchangeable for Christmas or just a “warm winter greeting” for someone!  (Or… because you might be late sending one out or for those friends overseas that won’t arrive one time!)

Today I’m sharing a card that I’ve made for this month’s Inky Stamper challenge on FB with the theme: “Shaped Cards.”

Vicki-InkyStamper-Janchallenge-shapedcard

Isn’t she cute?!  I was trying to come up with a different shape besides a regular circle, etc.  So, I looked up “coloring pages for kids” free online and found this one that I resized to what I wanted and printed it out over some light purple cardstock.  I used another printed one as a template so that I could cut another one out over a folded cardstock piece to create a shaped folded card design. (You can partly see the back piece in the photo.)  The sparkly “ball” at the top was just die cut out from a scallop circle die with sparkly silver cardstock.

For the card front, I used the Inky Stamper Snow Angel stamp set to stamp the snowflakes in the background with some purple ink.  I white heat embossed the sentiment over and wanted it to stand out a bit more, so I sponged some more light purple ink over top of it.  I colored “Rosie” over Copic blending card and used the die to cut her out with.  I’ve die cut a couple of the large snowflakes from Lawn Fawn with white cardstock and layered them over the beanie hat.  You can see that “Rosie” is popped out a bit over that snowflake, which is where I’ve added a “wobbler” to her.

I finished the card with some sparkly Icicles sequins mix.  I filled the centers of them with some Silver Stickles.

Because of the “ball” on top and the length of the “beanie band”, it needs to be in a 5.5″ square envelope to mail.  You could also make your own envelope which I do all the time anyway.  But the 5.5″ size fits perfectly.

*Speaking of Inky Stamper things, this past prior weekend there was an OOAK event (on FB) that Inky Stamper was a part of, so of course I wanted to get the kit and play along too!  Here’s my results:

The top card is an interactive “Theater Fold” design.  (All of the pieces were included with the kit along with an instructional video/class.)  She usually always includes a mini bonus card which measures about an ATC size. (3.5″ x 2.5″) She used the “icicles” from the stamp set, but I decided to stamp and cut out another snowflake for the front of mine.  I added a pretty gem to the center of it.

And of course, that’s not the ONLY fun I had during the OOAK event!  I decided to play along with the always cute and funny Riley and Co. as well!  Here’s the set of cards created from that class:

I just thought these were so cute with the cow images and their little outfits along with the “Funny Bone” sentiments!  The instructions came with the kit which were really easy to follow along with.  I basically looked at the photos and put together the pieces from the kit.  For the clouds, I decided to pull out some sparkly white flock to cover them with.  They have a nice soft feel to them!  They just make me chuckle and I think it will be fun to send along to someone who needs a smile! 😉

*If you are visiting my website, then you can check out each one of these cards in the gallery below by clicking on the photos to enlarge them: (I’ve found some coordinating envelopes from my stash for each card.)

I sure hope that you’ve enjoyed my post today and have been inspired in some way!  Really appreciate you stopping in and I’ll be seeing you soon!🥰  Stay warm!

Challenges (For Winter Beanie Hat Shaped card ONLY):

  1. Challenge Up Your Life – Winter Fun
  2. Papercraft – Winter Wonderland
  3. Creatalicious – Anything Goes with optional winter
  4. Make My Monday – Winter-Wherever You Are (snowy and cold!)
  5. Make the Cards – Encouragement (You’re unique sentiment)
  6. Aud Sentiments – Anything Goes + sentiment