Hello! Welcome to 2022!

Hello friends!  I hope you are all doing well and looking forward to a promising year this go around!  I sure am!  I know it’s been a while since I’ve posted, but I was having a bit of a hard time with having lost my “MOJO” for a period, feeling really down and not myself at all.  Christmas came and then on top of it, I’ve gotten sick.  I am starting to feel a bit better now, so I decided that the only way to get through all of this is by doing what I’ve always felt to be therapeutic, which is to keep on creating!  I just need to get back into the mindset of it again is all, but I do enjoy it when I’m creating as I’m sure my fellow crafty friends can relate to!😉  Appreciate your kindness to me always.

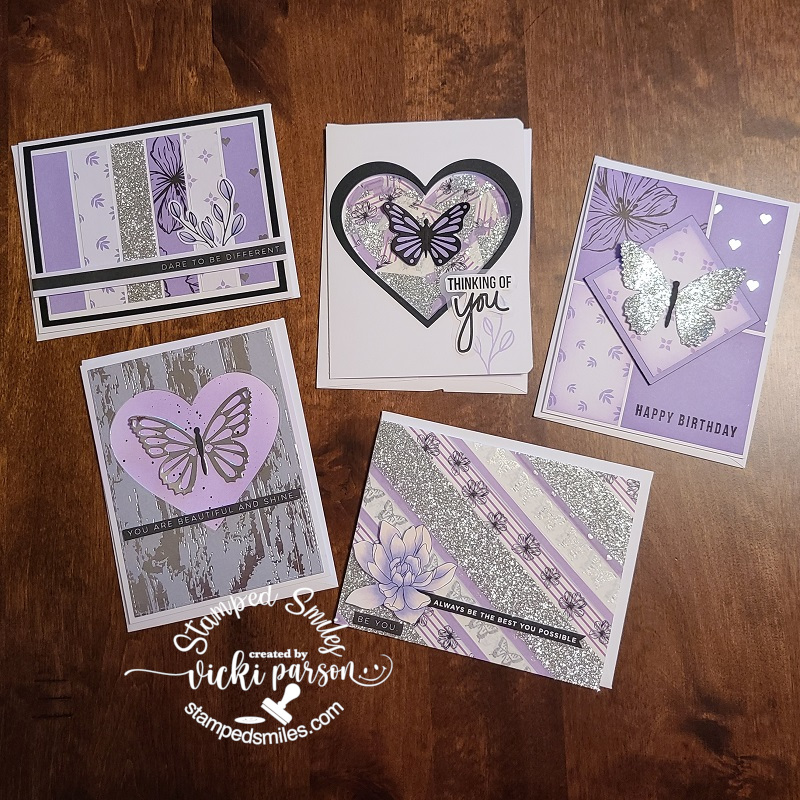
Since I really haven’t created much lately other than Christmas cards (as you can see from my previous post below), I’m going to share some projects that I had done at the end of last year including some commissioned cards I was asked to do:

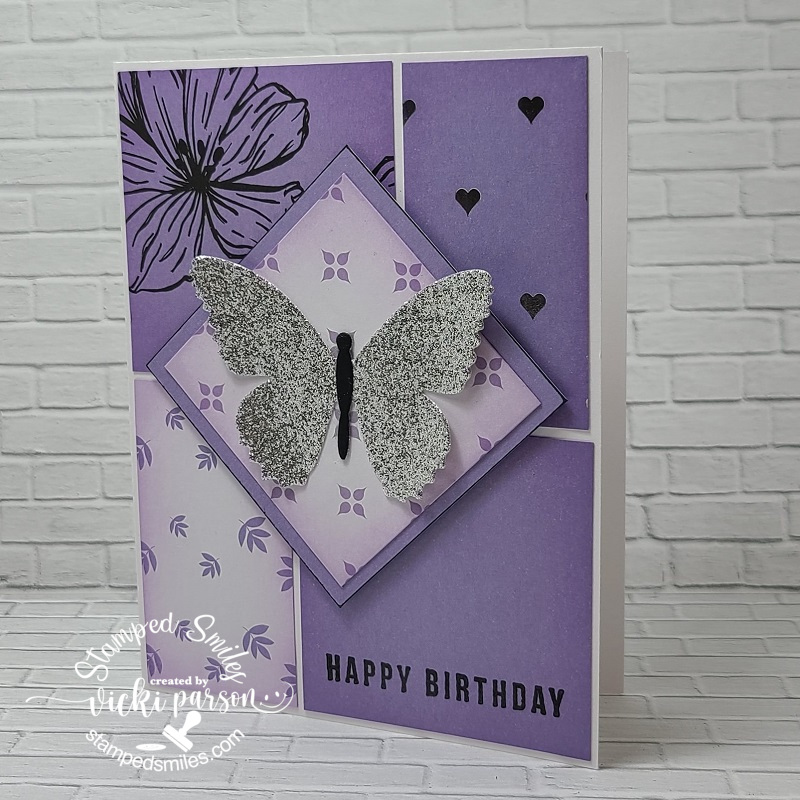
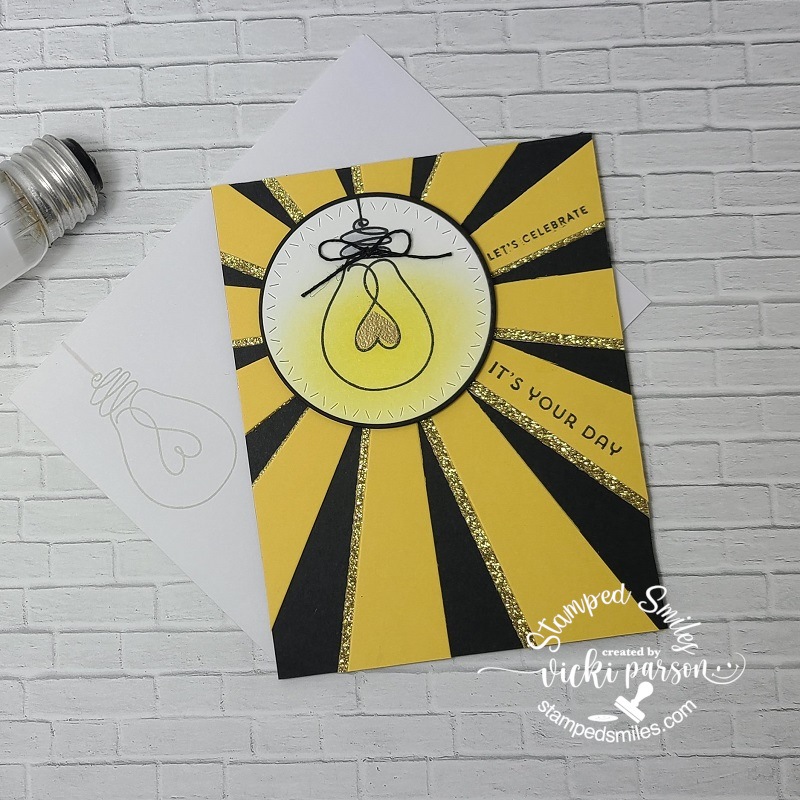
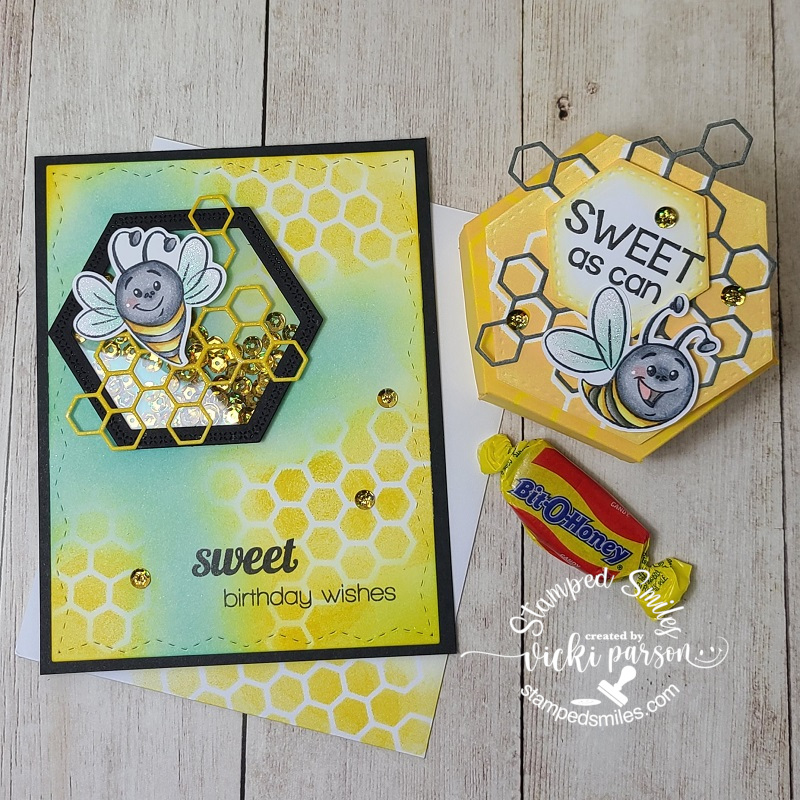
Last month was a birthday card for my dad, so I’ve pulled out a special birthday kit that came out sometime last year from Simon Says Stamp.  Everything I’ve used on the card including the embossing folder, stamps, sentiment strips and paper all came from the kit.  It may be hard to see in the photo, but I’ve foiled over the “super happy” sentiment strip that was included with the kit and glued it over top of the cake slice.

I’ve added some glitter over the candle flame, the yellow stars and the inside of the white embossed “birthday” strip under the cake slice.  I pulled out the blue colors from the striped paper to color the image with using Copic markers and die cut it out to glue over top of the sentiment strip and embossed oval layer.

And speaking of birthdays, I was commissioned to do a 50th birthday card for a guy that is a professional painter and enjoys grilling outdoors.  The first image that came to my mind was this really cute LOTV image.  I printed him out and thought it would be fun to incorporate the birthday number above “the painter” to make it look like he’s in the process of doing it while the paint is dripping everywhere.  So while the boy painter was printed out, I stamped and embossed the numbers above him.

My husband had the idea of the little grill along the edge going “up in smoke”.  So I created a “ground” area for the ladder and the grill to be on.  I stamped the grill image, colored it in and then a liner pen to draw the line to establish the separation.  I then ripped the corner above the grill and sponged some Black Soot distress ink around the grill and corner edging.  I didn’t want the background to be white or black, so I dug out some brick style pattern paper to place behind that corner area before attaching it to the card base.  Hopefully there were some chuckles from it!

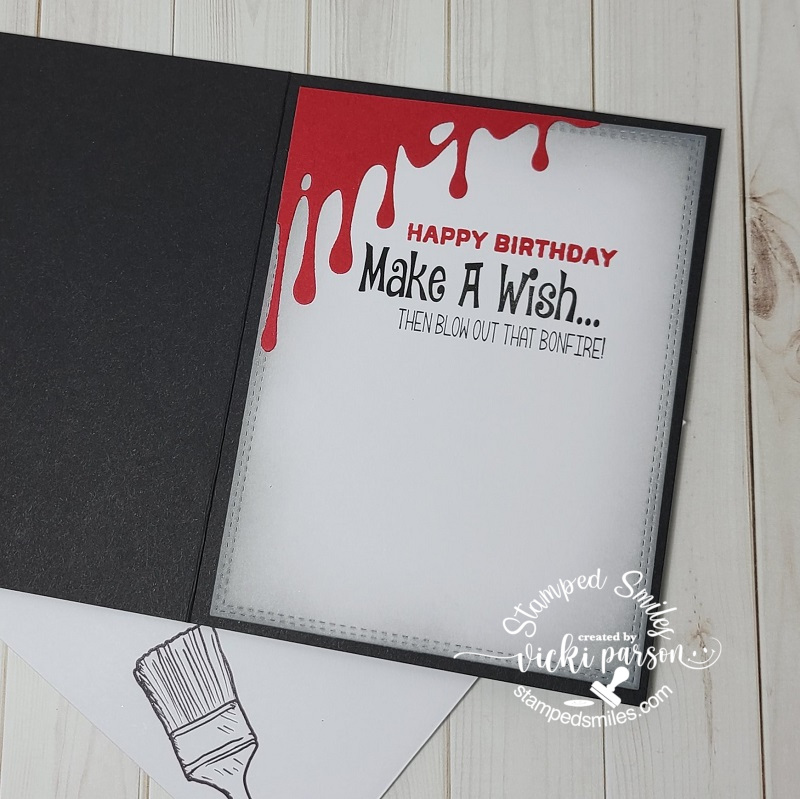
So for the inside of the card, I thought it would be fun to take this corner border die that I received from a Halloween class and make it look like the red paint drip continued on the inside.  Then I found this really funny sentiment to go along with the grilling bit too!  I also sponged some more of that Black Soot distress ink around the edges.

These were really fun cards to do and I enjoyed the coloring process so much!  I find that coloring images really helps me get through some creative blocks…even if it’s a simple image or something that I don’t use, so I’m thankful to at least to be able to do that.  Hopefully I can get back into what I enjoy doing here.

I know people sometimes struggle with masculine style cards, so here are a few examples of cards that I came up with for men.  Hope it helped with some ideas for you too!  Thanks for stopping by today and I’m glad you did!

Challenges:

  1. 613 Avenue Create – Anything Goes
  2. Stamping Sensations – Anything Goes with stamping + use a die (top card only)
  3. Lil’ Patch of Crafty Friends Anything Goes
  4. Pammie’s Inky Pinkies – Anything Goes

Autumn Birthday For My Deer

Hello friends!  Really hope that you’re having a great week as we start to dip down into cooler temps and that means that Autumn is coming to a close (sadly) and winter is upon us along with Christmas!  Are you ready?  I’m working on things…that’s all I can say!  I need to get more motivated for sure!  Many things are already done, but it’s the double checking to make sure…and sometimes it’s not! LOL

Recently, I needed to make a birthday card for hubby, so I pulled out a card kit I had from last year and came up with this one for him:

This was a really fun one to do from the Simon Says Stamp Woodland Whimsy card kit from last year. (I linked the stamp set and dies still available.)   My husband is a huge fan of outdoor wilderness and especially deer in the Autumn season as they can be easier to spot with the falling leaves.  So it just seemed like the type of card to make suited for him.

I’ve colored in all of the images with Copic markers and die cut them out with the exception of the birch trees as there were no dies included with the set.  I placed them behind my die cut circle from the woodgrain paper included with the kit.  I backed it with another piece of the paper from the kit as well.  I even tucked in the back part of the deer’s feet along with a leaf to make it part of the scene.  I like the banner from the set which is left blank so that you can add whatever greeting you want with it.

The little heart above the deer was also fussy cut out and then I covered it with a glitter brush pen as well as some crystal effects over top for the shine. I thought about adding some sequins, but decided it wasn’t needed. The scene was layered over a piece of cardstock included with the kit and then I stamped some of the birch trees onto a coordinating envelope as well.


Also thought I’d share some other projects that I’ve been working on since my last post.  It seems that I’ve become a little addicted to taking those classes and events…honestly don’t need to be taking them, but sometimes it’s just fun to participate in the fun with fellow crafters!  I do enjoy sharing with those like-minded crafters like me! 😁

These are all projects I’ve made using products from Inky Stamper ***If you are on my website, just click on the photos to enlarge them to see better and the wording will also be more visible.

I’ve also been working on some Christmas things that I will share soon as well as some other requested commissioned cards that I’ve recently finished. I would like to get those Christmas cards finished up early for a change!  How about you?!  Are you all done creating for the Holidays yet?

Until next time, thanks for stopping in today friends!

Challenges (For deer card only)

  1. Alphabet Challenge – ‘P’ is for Patterned Paper
  2. Happy Little Stamper – Anything Goes with Dies
  3. Addicted to Stamps and More – Birthdays
  4. Pammie’s Inky Pinkies – Anything Goes
  5. {Cupcake Inspirations} – Fall Foliage
  6. The Crafter’s Café – Male

Amazing Autumn🍂

Hello friends! Happy October! I hope that you’re having a great week so far and looking forward to doing something crafty this weekend for World Card Making Day!!🌍😀 I have decided to post something a bit early as I know there will be tons and tons of special posts planned by many, so I thought it best to post today instead!

IN THE MEANTIME, I DO HAVE A FUN GIVEWAY LOCATED ON MY POST BELOW OR CLICK HERE TO SEE IT!!  YOU HAVE UNTIL OCTOBER 10th TO ENTER…JUST LEAVE ME A COMMENT THAT YOU’RE INTERESTED!!

There are SO MANY things going on this time of the year and maybe that’s why I love Autumn so much. (WCD, Halloween, birthday, Cooler temps, warm clothes, Harvest, yummy foods, pretty colors, changing leaves, Halloween…oops already said that…but you know!)  I am thankful for all of it!  I have a couple of cards from a TE kit I recently got (yes, I know…another one to pile on!), but I fell in love with it so much & I am using it right away! 😁

There is some copper EP that comes in the kit, so I heat embossed both the sunflower and wheat images together so that I could color them both at the same time with some watercolor.  I then cut them both out with the coordinating dies and set aside to work on my background.

The background was so fun!  I’ve used a Bristol Smooth watercolor panel and pulled out some Mica Stains and other sprays from my stash with a spray bottle filled with water and just played.  Some of it I splattered to make “dots”.  I used the “Burlap” background stamp in the kit and randomly stamped the background as well as heat embossed an element and sentiment from the stamp set.  I cut this panel with a die and wrapped some twine around it before attaching to a chocolate truffle card base.  I used some foam strips to pop up the flower and added a twine bow to it.  Finished it off with some Iridescent Rhinestones.

And this is the second card I’ve made using the wheat image that I previously colored with the sunflower image above.  What’s nice about this card is that the background was done using one of the foilable panels from the kit.  I found some copper foil and ran it through my laminator.  I lined up the cut out wheat image with the background and glued it over top cutting off the bottom portion that stuck out.  I also heat embossed a sentiment from the TE clear set in my stash and then punched it out with a circle punch.  I used my blender brush to very lightly add some Sea Salt ink at the top of the foiled panel as well as around the sentiment circle.

Lastly, I attached both the image and sentiment panels onto a piece of copper foil cardstock and then mounted it onto a side folding A2 white card base.  It was simple, but I like the shine it gives.

I had been discussing with someone recently how I really need to make more sympathy cards to have on hand…so here’s a start to getting a pile going hopefully.

Speaking of needing cards, all of the birthday cards from my last post have been spoken for!  Everyone seems to really need birthday cards and like having them on hand.  I can totally relate to that!  I think I need to get some “sorry I forgot” ones thrown in there too! 😂  

I still have some projects that I’ve been working on in the background from some classes I took over the Summer but still haven’t shared yet, so I thought I’d start a little bit at a time and I think these “Autumn themed” cards work with my post today:  (If you’re seeing this post on my website, just click on the photos below in the gallery to see them up close.)

I have taken SO MANY classes, so I still have many more projects to share as I go here!  Hope that you enjoy seeing what I’ve been up to!  It’s just fun to play around and in the process…no matter how little a piece I use…I am using my stash somehow and I’m very happy about that!  At least I’m still crafting anyway! LOL

Thanks for dropping in and have a great crafty weekend!

Challenges to enter for the first two cards only:

  1. Sketch Saturday – Sketch #679 (my second card turned)
  2. Pammie’s Inky Pinkies – Anything Goes
  3. Make My Monday – Embossing (heat on both cards)
  4. Penny’s Paper Crafty – Anything Goes using Paper
  5. Simon Says Stamp Wednesday – Anything Goes
  6. Happy Little Stampers – Watercolor (used on both images)
  7. Creative Knockouts – Fall is in the Air

Working in Washi Encouragement

Hello friends!  Happy Labor Day!  Can you believe we’re in September already?  The time goes so quickly!  I’ve been helping my husband around the house so we can finish up some projects before the weather starts getting cooler on us!  He does keep me busy since being retired! LOL!

As I had mentioned, although I wasn’t posting on my blog, I was still crafting.  I’ve also been trying to organize my craft room with my husband helping me to move things around as my space had really gotten to be over-whelming.  Carrying several card kits (many never used) and boxing them up to store, I realized how many things I actually have and never used!  It’s fun to buy stuff, but I think it’s even better to use something I have…as I’m becoming my own store!  So for this reason, my purpose has really shifted to TRY using what I already have if possible!  I know many of us are in the same boat, so perhaps I can help inspire too!

Here’s a set of cards that I’ve been working on from a virtual class that took place sometime in July.  It was supposed to be a set of 4 cards created with this gorgeous paper, stamp set and washi tape collection from Teresa Collins (Called “Create a Beautiful Life”).  The purple and butterflies really spoke to me, and I got the kit…which I honestly didn’t need, but this is how it’s been!  I was supposed to get some already cut butterflies with the kit, which I didn’t…but it was fine, as of course, I had some dies that worked just fine for these cards, and I decided to go off a bit on my own anyway.

Remember the post I had recently done about the washi tape challenge?  This is what made me think about this card kit class and that I needed to finish it up!  There are a couple ideas in there using some of the pretty washi tape from the TC collection.  I think taking all of these virtual classes has taken a tole and burned me out a bit as well because although I’m making the cards (and have a huge stash of them), I usually still have extra product/material to use up too!  It sort of compounds the problem and doesn’t really help much.  I think it’s just time to consider a heavy freeze on it all!  Or at least until some of my stash gets used up anyway! 🙄

Here’s a closer look at each one of the cards in the set.  If you’re on my website, just click on each photo below to enlarge it or if you are set up with e-mail, it will probably show in original form.  (There’s a caption under each card with the details too.)

I stamped some of the sentiments that were included with the stamp set from the collection, but there were also strips at the bottom of some of the pattern papers, so I took some of them and used them for some of the other cards.

I really like how they’ve turned out and this will be a nice set of encouragement cards to send along for my donation box this month to “The Butterfly Project” for domestic violence.

Really hope they were inspiring for you as well and that you’re reminded to use your own stash of papers, washi tape and other forgotten materials too!

Would love to play in these challenges for fun:

  1. Crafty Sentiments – Anything Goes 
  2. Crafty Creations – Anything Goes
  3. 2 Crafty Critter Crazies – Anything Goes + animals (butterflies count!) 
  4. The Crafter’s Cafe – Anything Goes
  5. Love to Scrap – Anything Goes
  6. Penny’s Paper Crafty – Anything Goes
  7. Cute Card Thursday – Anything Goes (birthday optional)
  8. Just Us Girls – 6 of anything (Didn’t realize it, but used 6 strips of pattern paper on the last card in the gallery!)  Thanks Vicki D!😉

Christmas Cards, Projects and Cookies…ready for Santa!🎅

Hello friends!  We’re here!  We made it to Christmas Eve!😀  My cards have been sent out, my cookies are done and delivered as well as my other little gifts.  This is quite a long post, so grab your hot cocoa or whatever your favorite beverage is and a Christmas cookie or treat and let’s see what I’ve been doing this past week:

So, starting with my Christmas cards, I usually make around 40ish cards each year give-or-take and I only like to make a handful of them at a time for not only boredom of the same design, but for product depletion as well.

So back in July, I purchased this really adorable card kit from Taylored Expressions (included was the Frosty Background Cling and Clear Combo set + more.) that came with coordinated colored envelopes as well as the seals.  So, I made a set of four different colored designs in two of each one.  The snowmen were popped up with foam squares over the backgrounds and I added some fun Snowflake bits that were included with the kit as well.

Next up is another set of cards I made using some more gorgeous products from Taylored Expressions.  I’ve used the Seasonal Sprig stamp and die combo along with the stencil to color them in with.  Some of these I ink blended the backgrounds, so I just used cardstock with a watermark effect and a white heat embossed sentiment.  I used the die to cut an extra frame behind the stamped one for added stability.  I made 4 of each design shown here for a total of 16.

I then made another set of four using the same products, but for these I gold heat embossed the image and sentiment and then used some watercolor for coloring it in with.  I also got some of these coordinating envelope seals to use on about 10 of the 16 cards.  (No longer available in store.)  I’ve also partially ink blended the background behind the frame on these as well.

Here are some cards that I’ve actually made a total of 8 similar designs using the large wording background dies from My Favorite Things.  I’ve used the “Sending Christmas Joy” and “I Really Miss You” dies for all eight of these, but only after I stamped the backgrounds.  I used the MFT Knitted Sweater BG stamp and the Alley Cat BG stamp for a couple of backgrounds before I die cut them.  Then I used the die cut letters to place into the other backgrounds on the cards to get that look.  So it was like creating 2 cards with one cut and filling it all in.  (For the Alley Cat background stamp, I ink blended the background and stamped it as a watermark effect over it and then took the “left over” ink from that to stamp it again to create an additional BG.) I then cut out each of the panels with the MFT Wonky Stitched Rectangle die and placed over a white A2 sized side folding card base.  The penguin image is from the MFT Holiday Penguins set and the bird on the other one is from the MFT “Tweet Holidays” (Not found in store.)

And then of course you don’t want to waste any backgrounds you’ve made, so you make more cards!  I’ve used a couple more images to personalize the design for people too.  I combined the sets Newton’s Nook Whispering Pines and the Lawn Fawn Winter Skies.  I think I took a set from them to create a sentiment to fit my cards as well. (not sure from which set.)

For the other card, I took this cute image from the Whimsy Stamps Gnome for Christmas stamp set, colored him up with my copics and cut him out with the coordinating die to pop him up over my card.

And then for these set of 4 cards, I’ve just die cut a snowflake from some glitter paper and glued in the center of the “O” on each design and popped up a sentiment over that with foam tape stamped and die cut from the Taylored Expressions Mini Strips – Holiday and Mini Strips die.

And as you remember in a previous post those “recycled Crystal Light containers” that I make, I made another set of three of them here.  This time, I’ve used this snowman stamp.  I just used my scissors to fussy cut those cute snowmen out as they were pretty simple to do and then I popped them up over an ink blended tag using the stencil over them.  I used coordinating cardstock and silver heat embossed the sentiment strip at the bottom and of course added my “snowman soup” poem on the back of the containers.  I’ve also added a layer of silver mirror cardstock behind the tags.

And I made a couple of these darling ornaments from a fairly “new to me” company that I was actually introduced to with product during my time as a {Cupcake Inspirations} sweetie DT when they sponsored a challenge a while back.  P.S.  There are a few more days left to enter their current challenge of “SNOWFLAKES” if you want to pop on over to join us too!!

But I was so taken with this darling image and kit from Inky Stampers from this Snow Much Fun Kit.  You get the snowflake ornament (with string), the stamp set and die, papers, wobbler, along with glitter to complete it too!  Well, I wanted to make more than one, so I grabbed another set of Snowflake Ornaments from the store and just added my own papers and glitter from my stash to make it.  

Whew!  I’m ready for that “Looong winter’s nap” now!!🥱 I hope you’ve enjoyed my post today and it has brought you some inspiration and/or a smile somehow!  I have received some beautiful Christmas cards and I so appreciate them and have them all displayed by being pinned around my garland in our pass-through in the living room/dining area.  I think after a bit of rest, I need to finish up my projects for the “Bugaboo Christmas Chaos” that I halted in the middle for to finish up Christmas projects….so I’ll be back soon with that.

In the meantime, I wish a MERRY CHRISTMAS TO ALL AND TO ALL A GOOD NIGHT!!🎅

HOliday Sweets Challenge Reminder for {Cupcake Inspirations}🥧

Hello friends!  Hope you had a wonderful weekend!  I first would like to say a huge thank you to those that have mentioned they were going to send out a Christmas card for Danny (mentioned in previous post below).  I think it will be so exciting to see how many cards he receives and from where around the world!  I think this will help bring him much needed cheer!


Today I have a fun creation with more inspiration for our “Holiday Sweets” challenge over at the {Cupcake Inspirations} blog!  So, I hope that you will drop on over, check out the inspirations from the rest of the sweeties and come share your delicious Holiday Sweets creations with us!

I’m still in a “cookie” mode and looking forward to making some traditional Christmas cookies in my own kitchen soon…so I’ve played around with a recent card kit I’ve received:

I’ve created a cozy and festive table scene full of delicious Christmas cookie treats using several products from an older Christmas card kit and a few other items.  First of all, the cookies from that kit were super fun to put together!  It comes with all the dies and stamps you need to decorate a (craft) cookie with!

I started my card with an A2 sized top folding kraft cardstock piece and used some of the Winter Cabin Papers to create my scene for the “table” and background. The cookies were all created with the stamps, dies and some paper from the kit, but I added some White EP for the frosting and some red Nuvo Crystal Drops for decoration.  There was a felt circle cut in the kit that I cut off to attach over my “table” to place the cookies on.  I also heat embossed the sentiment from the stamp set in the kit with Raven Sparkle EP and die cut with a banner from my stash.  I went around the edges of it with some white Ink.

The hot cocoa mug came from a previous card kit that I stamped, colored and cut out to place on my table scene.  I took the whole scene and layered it over a black piece of cardstock included in the kit and added it to my card base.

Here’s a closer look at those cookies!  You can see that the die cuts have cut the images out right up next to the image line.  I also took a glue pen and added some chunky style glitter from my stash to make some of the cookies look like they’re sugar coated.  You can also see the sparkle from the EP in my sentiment. 

Probably hard to see the bit of shimmer inside the cocoa mug and on the candy cane that I covered with my glitter brush pen, but it’s all shimmery and sparkly in person.  I colored up the mug with my Copic markers and fussy cut out the image.

I hope that you’ve enjoyed my cozy Christmas cookie scene here and are inspired to pull out your favorite Holiday sweets to play along with us too!  Please be sure to stop by the {Cupcake Inspirations} Challenge Blog to see more inspiration from the DT Sweeties!  Looking forward to seeing your creations there!

Thanks for popping in today friends!  I’ll be back very soon with a special post!

Challenges:

  1. Simon Says Stamp Monday – Food and/or Drink
  2. Simon Says Stamp Wednesday – Anything Goes
  3. Aud Sentiments Anything Goes + sentiment
  4. Creative Knockouts – #378 Christmas Delight
  5. Creative Fingers – #198 Anything Goes
  6. Christmas Kickstart – #43 ‘Twas the Night Before Christmas (cookies for Santa!)
  7. Merry Little Christmas – MLCCB28 Anything Christmas Goes

Holiday Sweets for {Cupcake Inspirations}!🥧

Hello friends!  Hope that you’ve enjoyed your weekend!  Thanksgiving is coming up this week and the full Holiday Season has begun and one of the things that most people are thinking about (at least my family anyway!) are those wonderful “Holiday Sweets“!  Yum!😋

This is also our new challenge for the next 2 weeks over at {Cupcake Inspirations}!  So I hope that you are able to start (if you haven’t already) thinking about creating something crafty with those “Holiday Sweets” in mind and join along in the fun with us!  Here’s what I’ve come up with for this challenge:

I remember times with my kids when we did the “milk and cookies” you leave for Santa along with your nice letter about some things you wish for him to bring you. We always wrote the letters to Santa and made sure that we put out the cookies…and usually hot cocoa on Christmas Eve.  There were always candy canes on the tree to pluck off to stir your hot cocoa with as well!

I remembered this fun little Simon Says Stamp Christmas card kit (Christmas Squad) that I hardly made a dent in to use at all, so it was really great to pull out these adorable Doodlebug items with a “milk and cookies” theme in the papers and images! I had unopened packages of cut out images which is the table with the lamp, Santa letter and mug on it.  I took the doggie image from the stamp set, stamped, colored and used the coordinating dies to cut it out with and popped it over the table image panel with foam tape. This panel was cut with a Wonky Stitch Rectangle die as well as the background papers.  I layered everything over an A2 sized top folding red card base.  The image panel was also layered over some of this red cardstock as well after sponging around the edges with some light blue ink.

Lastly, I took a sentiment from the same stamp set and white heat embossed it over another piece of red cardstock that was cut out with a banner die and popped up underneath the image panel with foam tape. (I thought it was the perfect sentiment to add especially for this year to someone you miss!)

Here’s a closer view of the images that I’ve put together onto this panel.  The pup was colored with my usual Copic markers and I’ve used a silver gel pen to color in his collar tag with.

I also had some Doodlebug stickers with the kit and added the bitten cookie with a smile face next to the other cookie on the table.  I also added a candy cane enamel sticker to the table as well as the heart enamel stickers above the table.

The strip of papers in the center of the card came from the backside left over piece that was cut out from the milk and cookies panel in the background.  The colors matched up nicely with the images.

I hope you’ve enjoyed my “Holiday Sweets” card today and it has brought you a smile, a special memory or inspiration.  If you need more inspiration for this challenge, please be sure to check out the {Cupcake Inspirations} Challenge Blog to see the rest of the DT sweeties and what they came up with!  Can’t wait to see what you come up with!

Thanks for stopping in and I’ll be seeing you soon!

**WISHING YOU ALL A VERY HAPPY, HEALTHY AND BLESSED THANKSGIVING**

Challenges:

  1. Simons Says Stamp Wednesday – Christmas
  2. CRAFT – Christmas
  3. Cardz 4 Galz – Cute Christmas
  4. Cute Card Thursday – Sentimental
  5. Crafty Catz – Anything Goes optional Christmas

Choose to be Grateful for Crafty Chefs

Hello friends!  I hope that you’re having a wonderful week so far!  The weekend is here, but it sure has been a beautiful couple of days this week with sunny and warm days so hubby and I were able to go out to walk around a bit before the snow starts hitting us!

Something that is great to go out in nature to see are the critters with the birds and the silly squirrels…we have them EVERYWHERE!  They’re busy gathering and burying their food for wintertime around here.  My thoughts turned to the Simon Says Stamp “Big Thanks Autumn” November card kit (sold out, but not papers) as I love all things Fall/Autumn and this card kit with those beautiful papers spoke to me and I wanted to create with it to make my project for this month’s Crafty Chef’s Group recipe from our lovely friend Meg’s recipe:

There were some blue colored A2 card bases already cut and scored inside the kit, so I used one for my side folding card base here and then layered a dark brown cardstock piece from the kit as well as a piece of copper mirrored cardstock which was then layered over a piece of the decorative papers (I mentioned above) in the kit, which is also where the critter, mushrooms and leaves images came from on this card.

The leafy background paper was cut from a MFT Wonky Stitched Rectangle Die and then I took a strip of the copper mirrored cardstock across the bottom third of the layered pieces and also added some twine wrapped around the bottom of the layers before popping them up with craft foam over the card base.  I die cut a branch from a die in my stash and then fussy cut the images out from the papers included in the kit which were glued or popped up with foam squares over the panel.  I sponged some Tea Stain Distress Ink around the edges of these pieces before attaching.

Lastly, I’ve taken one of the sentiments from the sentiment strips sheet included in the kit and ran it through my laminator with a piece of copper Deco Foil.  (I think that is a cool way to add a little extra something to those sentiments.)  I made a banner out of it, sponged it with some of the ink I used for the images and popped it up over the leafy background piece with foam tape.  

Here’s a closer look at the critters I’ve cut out and how I’ve arranged and popped some of them up to create my scene.  There was also a very pretty SSS Autumn Sequins Mix included in the kit, and I took some of those and added it to the layout and then filled the centers with some gold Stickles glue.

For the Crafty Chef’s recipe that was given, here’s what I MUST use:

  1. Mirror cardstock
  2. 3 layers or more
  3. ribbon (I hope my twine counts!)
  4. image of garden visitors (birds, hedgehogs, etc)

CAN do items:

  1. Sparkle/Glitter (I used sequins and Stickles)
  2. pearls/gems (I did not use) *passed onto next chef.
  3. dry embossing (I did not use)

There is a new recipe given for each month and no pressure to follow along or even when you want to follow along and play…which is great and I’m happy to be able to use up some of the goodies from my stash (NEW AND OLD) and just have fun with it.

I hope you’ve enjoyed my creation today as well and I will be seeing you all again soon!  Thanks so much for stopping in today friend, as I’m very grateful for you!

Challenges:

  1. 2 Crafty Critter Crazies – Anything Goes + animal(s)
  2. Crafty Animals – Anything Goes + animal(s)
  3. Creatalicious – #199 Anything Goes optional Autumn/Thanksgiving
  4. The Paper Girls – #212 Thankful/Grateful
  5. The Divas That Cut Paper – Thanks or Thanksgiving
  6. A Bit More Time to Craft Anything Goes
  7. Lil Patch of Crafty Friends – #146 Anything Goes
  8. QKR Stampede – #408 Anything Goes

Bright Birthday and More Whimsy Retreat Projects!💡

Hello friends!  Hope that you’re having a great week so far!  Hubby and I are trying to figure out how this “retirement thing” goes together! LOL!  I think we’ll be having so much fun and we’re just really excited about the future and what we’ll be doing.

Speaking of which, this past Sunday he also celebrated a birthday and of course I had to make him a card that was suited for an electrician.  I had to add a bit of humor about his age on the inside, but this is what I came up with:

I’ve had this Stampin’ Up! Sunburst die and stamp set and haven’t used it that much since I bought it. (Quite a while ago! Not quite sure how old. LOL) I thought it would make a great light beam for my VERY old Simon Says Stamp ‘Watts Up’ stamp set that was from a past card kit. (circa 2014/2015) …yep, all old!

I die cut the sunburst from some yellow and gold glitter stock that I glued together slightly off-set and then attached it over a side folding A2 sized black card base.  I stamped the sentiments over a couple of the yellow strips with black ink taking care to make room for the circle panel.

I then stamped the lightbulb over a white piece of cardstock and colored the base with Copics and used a marker draw a line above it for the string.  I took a solid heart from the stamp set and heat embossed it with some Gold Metallic Gilded EP and then sponged some yellow ink over the bulb for some glow.  I die cut it out with a circle die and then layered over another die cut circle black piece and popped it up over the sunburst layers with foam tape.

I tied a bow with some black twine and glued it to the light bulb base.  I also stamped the bulb in a lighter gray ink over the envelope and added a string to that as well with a gray marker. (The inside of the card said:  “Old is the new black.” 😆)

———————————————————————————————————–

And I also wanted to share that I’m still plugging away on the several kits that I received from the Whimsy Stamps Virtual Retreat last month!  These are really amazing projects and I’m having lots of fun putting them together still! (Christmas will be coming next. So, stay tuned for those!):

This is a fun interactive card with a pull tab at the top where this cut little dragon slides upwards towards the sky! This kit 9 came with an A2 sized envelope, but I had to make my own envelope slightly larger to accommodate for the pull tab sticking above the card. I’ve added doodle lines around the edges and shadow stamped a sentiment at the bottom for my own added details.
This set was from kit 14. The hexagon shaped box was super fun and even came with the candy! There was also an extra stamped and cut out bee, so I used it to make another card… shaker style! I used the left over honeycomb die cut piece as a stencil on the card as well. I used the envelope that was provided in the kit above and decorated it for this A2 sized card instead. (I know someone that loves these candies…so they might get a surprise at some point! 😉)
And lastly, this was from kit 15 and TOTALLY different than what was photographed in the booklet! First of all, I received a plant image with a die cut speech bubble sentiments and thought it might be cool for a Halloween card on another project, so I saved those to use later. I received an EXTRA stamped sunflower image from kit 22 that I had posted earlier and decided to use it for this card here. I colored it similar to that one and cut it out, but cut off a portion of it on this design. I also changed up the background ink blended colors and splattered some gold paint on this one. Love how it turned out. This will be for an Autumn anniversary card for someone coming soon.

Hope you’ve enjoyed all of my projects today!  Thanks so much for stopping by and I’ll be seeing you soon!

Challenges (For the Birthday Lightbulb card ONLY):

  1.  Retro Rubber – Anything Goes + stamps older than one year
  2. Cardz 4 Guys – Birthday for adult male
  3. Creative Moments – Anything Goes
  4. Crafty Calendar – Anything Goes
  5. Pammie’s Inky Pinkies – Anything Goes
  6. Shopping Our Stash – Tic Tac Toe (I used middle across: String/twine, 5 year old stamp, bright colors)
  7. Watercooler Wednesday – All About Occasions (birthday)

Beautiful Autumn Color Combo for {Cupcake Inspirations}

Happy Monday morning friends!  Hope you all had a great weekend!  The weather has actually been really beautiful this past week and it was wonderful to get outside and look at the pretty colors of the trees changing around us.  I know that it won’t last long, and the temperature will begin to really drop soon…so always need to enjoy it while it’s still here!


Today begins a brand-new challenge over at {Cupcake Inspirations} and there is a beautiful color palette to inspire your creativity to play along with us!  We’d love to see the colors:  Red, Orange and Yellow on your creations this time and we look forward to seeing what you come up with!  Here’s what I’ve come up with for this week’s inspiration:

I fell in love with these cool dies that were included in a past card kit and thought they would be perfect to use for pairing with some blended inks in a background!

I started with a watercolor panel and used Squeezed Lemonade, Mustard Seed, Carved Pumpkin, Crackling Campfire and Fired Brick Oxide Inks to blend over it.  I spritzed over it with water to form the droplet watermarks and once dried, I splattered the panel with both gold and black acrylic paint using a fan brush.  Once this panel was finished drying, I put each leaf die cut down to cover my panel and die cut it, but left them in place.  While leaving the leaves in place, I used the MFT Wonky Stitched Rectangle Die and cut out the panel with it.

I wanted the leaves to stand out a bit more in the background, so I die cut each of the leaves about 3 times each with black cardstock and layered them together with the ink blended ones on top.

I took the sentiment from the Autumn Bundles stamp set and heat embossed it over a strip of black cardstock with some Gilded EP.  Once I cut down the strip, I ran it through the die cut machine to get the Wonky Stitched Rectangle die marks along the edges.  I mounted this panel over a gold mirror cardstock and then over an A2 sized top folding black card base.  Lastly, I added some gold sequins that were included in the Inspiration Box and filled them with some gold Stickles in the centers. 

Here’s a closer view of the leaves and you can see the pretty embossed pattern in the leaves.

Really like how this turned out and I hope you did too!  Be sure to take a look over on the {Cupcake Inspirations} Challenge Blog to see the rest of the inspiration from the design team and join us for this fun color combo!

Thanks for stopping in today and I’ll see you soon!

Challenges:

  1.  Love to Scrap – LTSCB139 Anything Goes November
  2. Dream Valley – #236 Dies and/or Punches
  3. Arty Divas – #31 Anything Goes
  4. Crafty Creations – #415 Anything Goes
  5. The Paper Funday – #23 Anything Goes optional: Thankful