Hello there friends and welcome to April already! I do not know if this year seems to be flying by because I’ve been busy with life or it’s just flying by anyway! Speaking of things flying by…
Today starts up a new challenge over at the Alphabet Challenge Blog! We are on the last letter of the alphabet this time and the hostess has chosen “Z” is for ZOOM(anything that goes fast) for the theme. *Remember that this is a bi-weekly challenge, so you have two weeks to enter* I hope you will find some time to join us in the gallery! Here’s what I’ve created:
How cute is that pup standing on the bike seat to look over his bird friend perched on the basket! The name of these adorable animal friends are called “Gus & Gertie” which are a set of characters designed by Taylored Expressions. (If you click on the link, you can see the full line of them.) The set I’ve chosen is called Gus & Gertie Best Buds. I like these animals because they’re very easy to color!
I could’ve chosen the airplane from the set, but I kept thinking of those electric bikes & scooters you can rent from cities and they seem to go really fast when I see kids whizzing by on them! LOL
I kept my scene in a circle and added some clouds in the background that I stenciled in and then layered some hills/slopes and a grass border on the front. I just popped the “ride or die” sentiment at the top and attached the die cut image with foam tape. I layered the scene onto a black circle base that was attached to a red brick embossed background. All was attached to a top folding A2 white card base.
That’s all for me today! Thanks so much for checking in with me as I enjoy reading what you have to say! Enjoy your weekend and I’ll see you soon!
Challenges:
Critter Crazy – #97 Anything Goes with a Featured Creature
Hello friends! Hope your March is going along well and you’re starting to see some signs of Spring coming! We even have a few flowers trying to pop up out of the ground which is so fun to see! I hope they can hold out for a few cold days ahead.
Today I’m stopping in to share my card for the new challenge over at Sparkles Monthly and we have a very fitting theme of “Easter” this month. I think I’m more than ready to start some Spring related projects, so I look forward to seeing the gallery. Here’s the card I came up with:
How sweet is that bunny passing out his colorful eggs! I pull out an older card kit (2019) and it had this adorable Simon Says Stamp set called “Bunny Wishes” (no longer available) mixed in with the kit which I don’t think came with it, but I wanted to use it with some of the other items that were in the kit like the papers. It was like getting a brand new order and forgetting what I purchased! 😆
I also used this beautiful oval die (not available) from SSS that cuts the oval, the flowers and the stitching marks around it. I added a border of grass to place at the bottom and then I stamped the sentiment from the set and also stamped the “Easter” greeting on another piece of light blue cardstock cut with a banner die. The gingham background was cut with a double stitched rectangle die and then I used the oval die to cut an opening for the bunny scene. I added foam tape around the edges to pop up the panel on an A2 top folding pink card base.
Here’s a close-up view of the cute images that I’ve colored with Copic markers, cut out with the coordinating dies and then popped up over the floral oval scene with foam tape. The extra Easter egg behind the basket was just glued to the scene. It’s hard to see in a photo, but I’ve covered each egg with a glitter brush pen. It’s sparkly IRL.
I did recently get this pretty Iridescent White Cord from SSS and took two strands of it to create a bow and then I attached it to the top of the oval. It gives it a nice sheen and I might be using it again soon!
Thank you for stopping in today! Hope you enjoyed my card and will join us for the challenge this month! Have a great weekend!
Hello friends! I’m back today with one last inspiration for Art Journal Journey to remind you that there are still a few days left to enter your art journal project for this month! So please be sure to hop on over to the Art Journal Journey Challenge Blog to see the details about how to enter. I have really enjoyed all of the inspiration from the gallery! So fun to see what everyone comes up with using my “MUSIC” theme this month! I thank everyone for having me along as a host and sharing your kindness in welcoming me back this year.
I went with some animals this time:
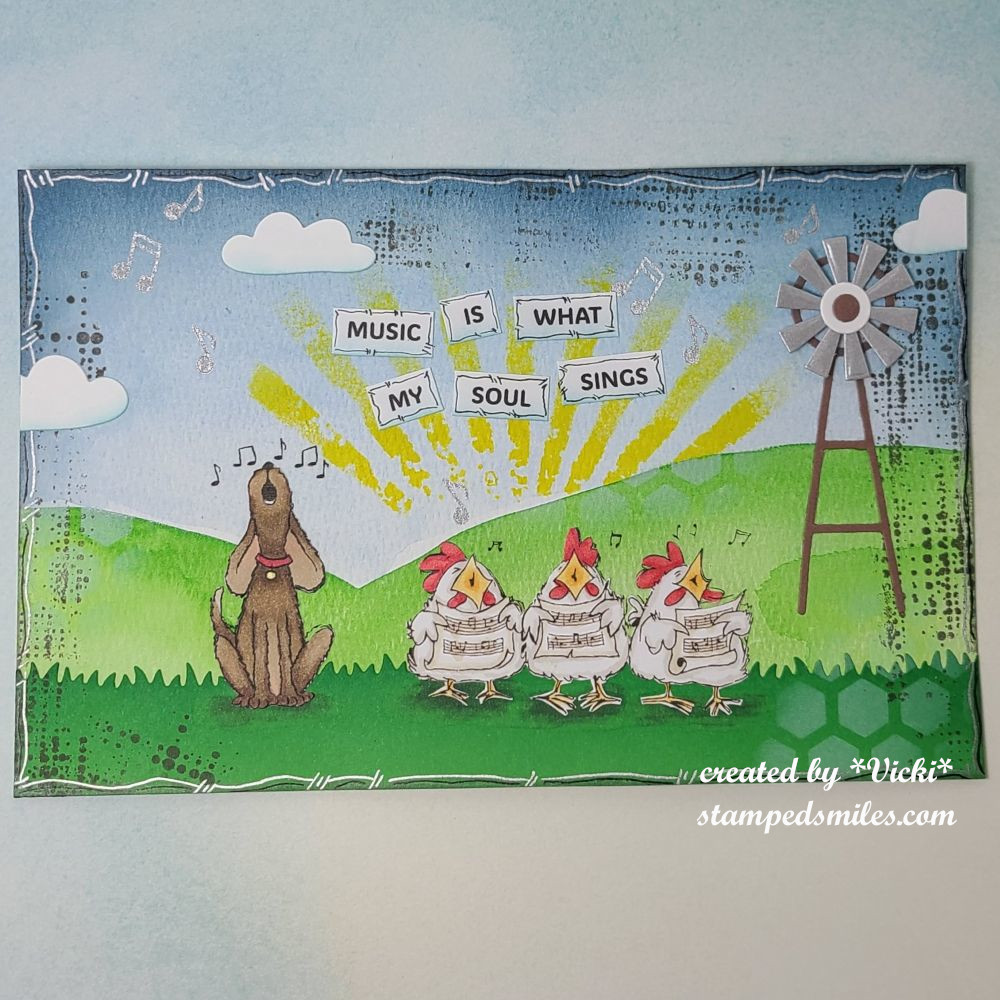
I’m pretty sure that there has to be some sort of music going on at farm too, right?! LOL I found these cute “singing” critters online and thought that a farm scene would be a perfect platform stage for them! This is also the first time that I’ve ever added an interactive element to an art journal page, so that was fun!
For the background: Starting with an 8.5″x 5.5″ watercolor paper, I printed the critters over it in the position that I wanted…this is so that the musical notes showed on the page.
I then used my Kuratake Gansi watercolors and brush to paint a scene starting with blues for the sky, letting that dry and then adding some green hills for the bottom of the scene. I went over the areas a couple of times to get the look I wanted and let it dry. I also die cut a green grassy border at the bottom of the page with green cardstock being careful to place it so that it covered the “legs/feet” of all the critters.
More layers over the background: I used older Tim Holtz stamps to add some texture by stamping brown ink, then I used an old TH stencil and some yellow paint for the “sun rays” around the hill with a sponge to apply it. I also used a sponge with white ink to stencil over another stencil in areas and lastly, I stamped some musical notes in silver ink in a few places.
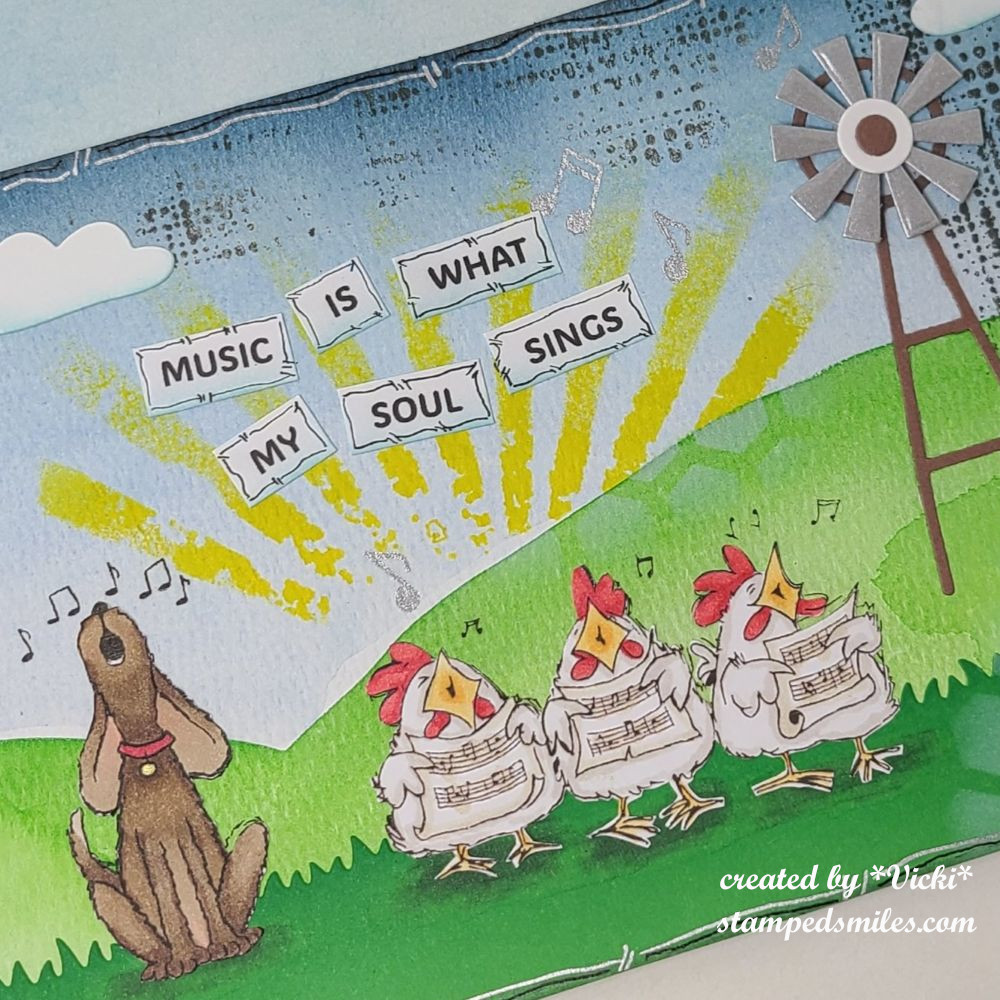
Here’s a closer look at some of the details including the critters.
Since I covered up the critters with the grassy border, I printed out the critters again on a separate piece of cardstock, colored them with Copic markers and fussy cut them out with my scissors. I attached them over top of the printed out ones on the page so that they align with the music notes above them. I used more markers to add some darker shadow grounding underneath each critter before permanently attaching to the page.
For the interactive element: I used a die cut to cut out the pieces for the windmill in the brown, white and silver cardstock pieces. I then used a circle die to cut a hole in the center of the windmill on the page and then added an element that makes the wheel portion spin in a circle when you spin it with your finger.
I went around the edges with some blue ink for the sky, attached some clouds and then printed out the quote on my computer and cut out each word attached to the page. I used some blue ink to lightly add to the bottom of each one.
Lastly, I went around the edges of the page along with the edges of each word with a black micron pen and then I used a silver paint pen to go around the edges of the page again.
It’s a pretty flat page, but it made me happy! What song do you think they’re singing?
I hope you’ve enjoyed my page today as well as my art journal inspiration throughout the month! Thank you so much for your kindness and support! See you soon!
Hello friends! November has come with the pretty leaves on the trees and the coolness in the winds. I always turn to comforting “things” this time of the year and it always gives me a sense of peace before the year comes to an end. A warm fuzzy blanket, socks/slippers, sweaters, etc. is what I usually turn to. What is your comfort “thing”?
I promised to share with you the fun things we did over at the “Inky Escape” event that I recently attended and it was wonderful to see all of my crafty friends again for laughs and fun together. I think I miss them already!
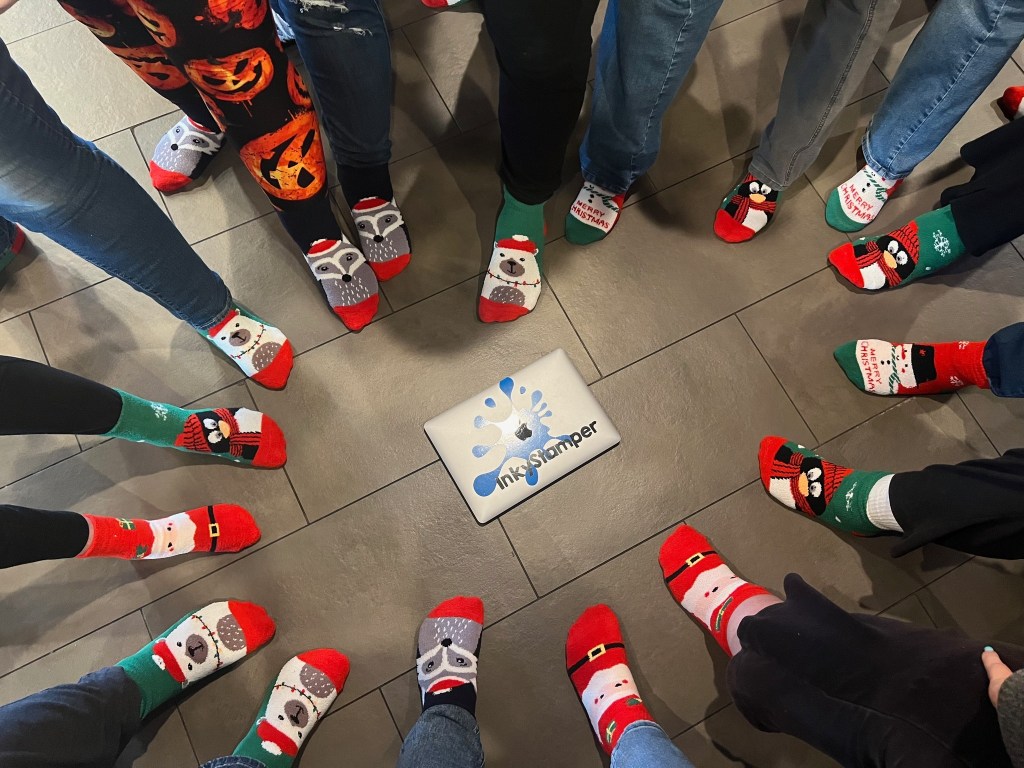
I lifted this fun photo from the Inky Stamper FB page as I don’t have any photos other than seeing what others took. There were a total of 18 of us this time:
Everyone received a “swag bag”…but the case this time was a Christmas stocking full of fun goodies and one of them was that everyone received cute fluffy socks. I’m not exactly sure which one is me in that photo, but I did have a polar bear sock! LOL We each placed one foot in the circle and Chelsea took the photo.
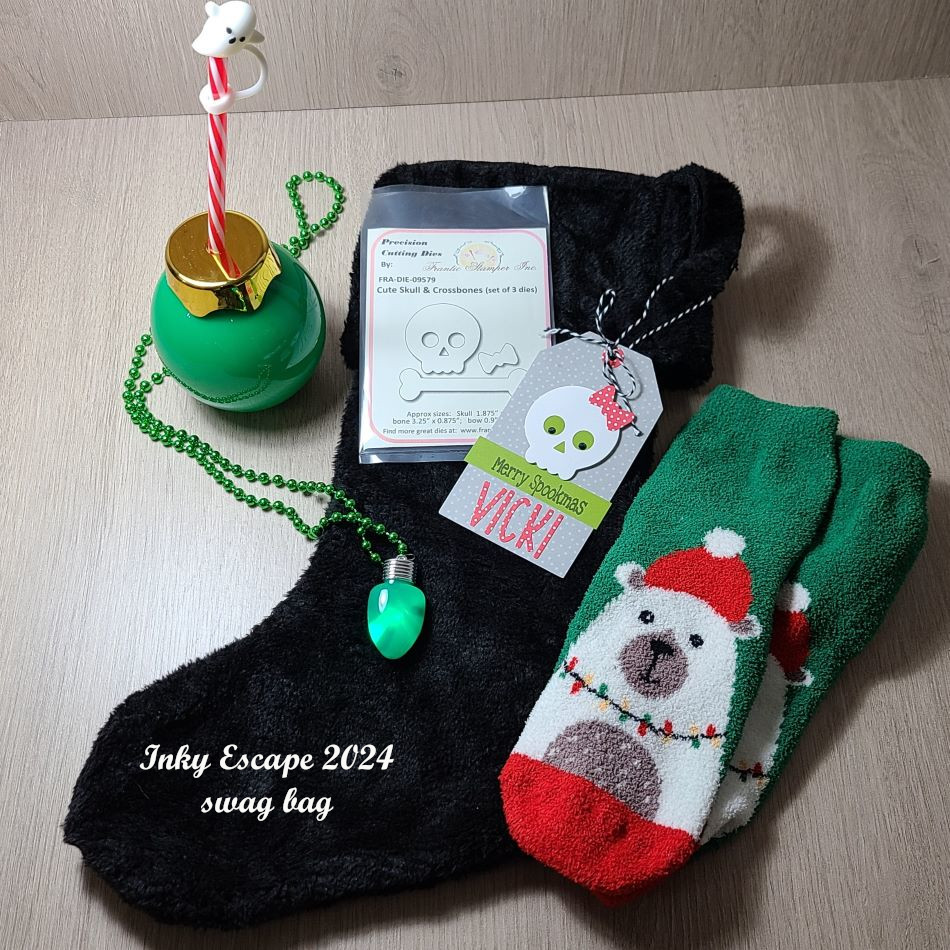
And speaking of the “swag bag”/Christmas stocking…here’s what we each received:
When I got to the event, there was this black stocking on my table with the cute tag attached to it with my name. Each person received a personalized tag on the swag bag, plus the “skull” dies that were used to create the tag which was inside the stocking! There are my polar bear fuzzy socks (I’ve already washed them up by hand so the colors wouldn’t bleed in the wash…and they’re so warm and fuzzy!) I also received the cute “Christmas bulb” drink holder with a candy cane straw and a little ghost stopper for the top! We used these containers to hold the “Jingle Juice” that we drank at some point! And then I received a light up Christmas bulb necklace that has different settings when you push the button the back. The theme for this event was called “Merry Spookmas” which you can see the greeting for that on my personalized tag. So fun!
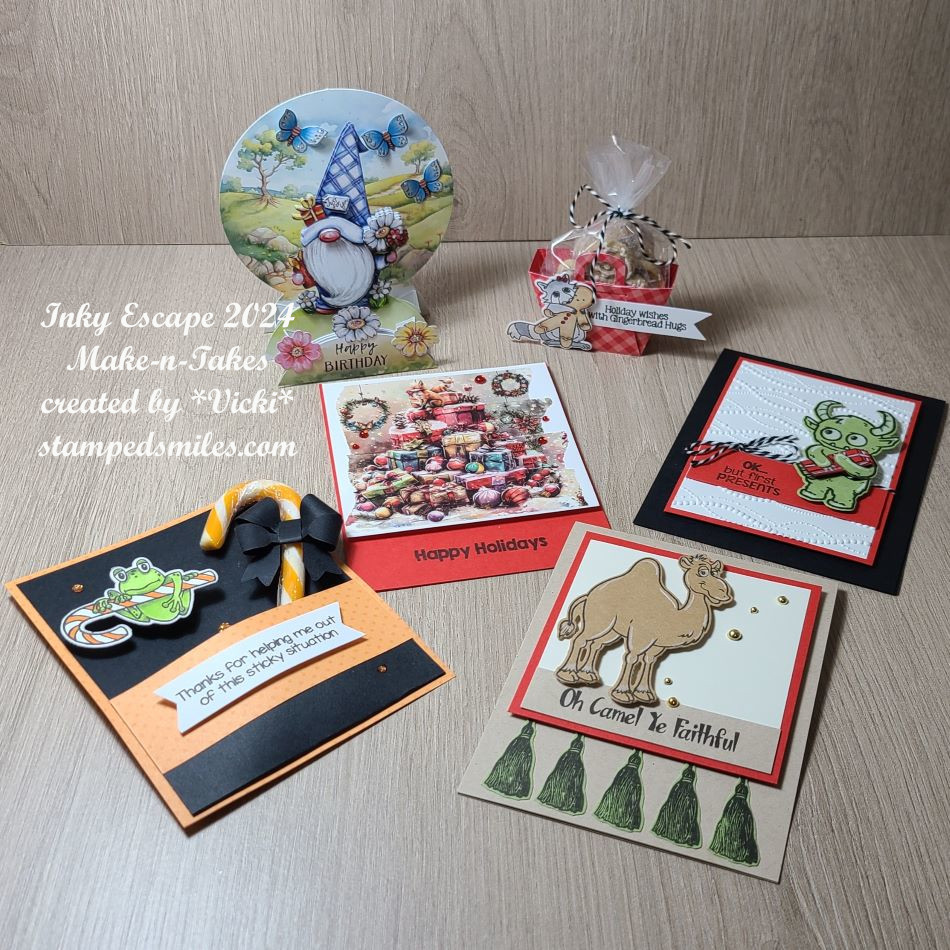
And speaking of fun…here are all of the Make-n-Takes that we created during the event. We sat and made 4 projects and then two of those projects were “bonus” makes using some other special items. (There is a “story” about one of them, but you can check out each project up close in the gallery below.)
*If you are on my website, just click on each photo to enlarge and scroll downward to see more information about each photo while it’s enlarged.*
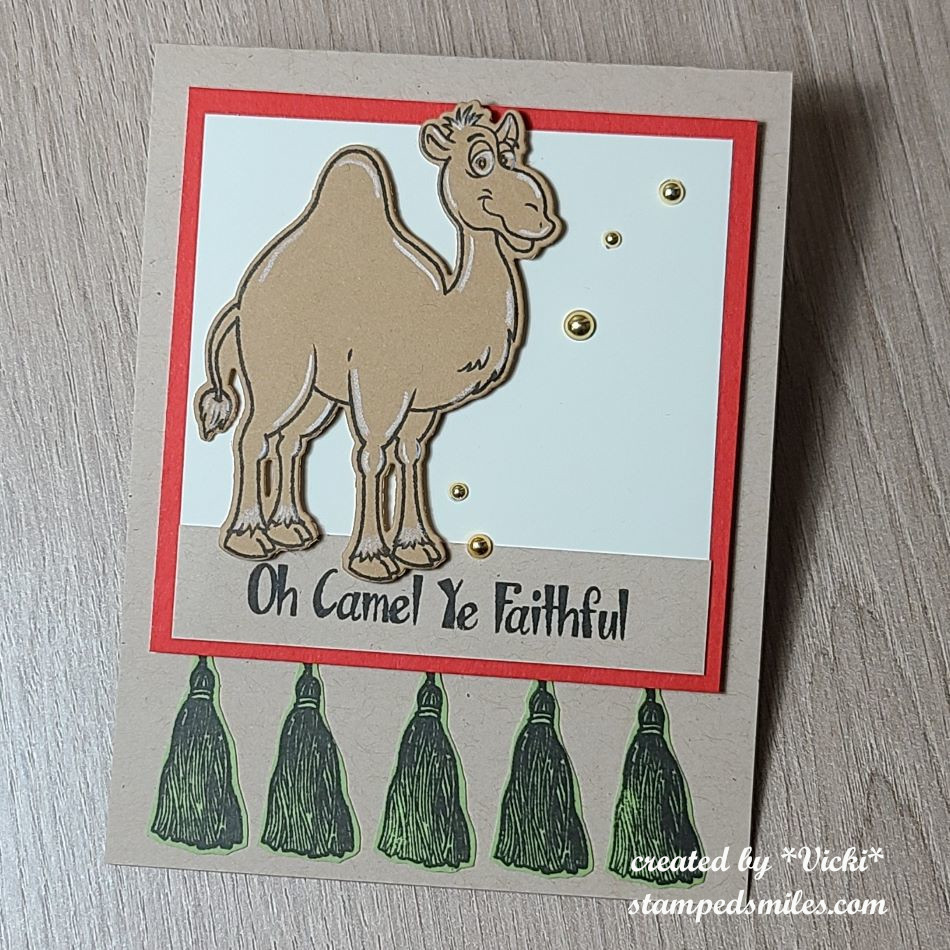
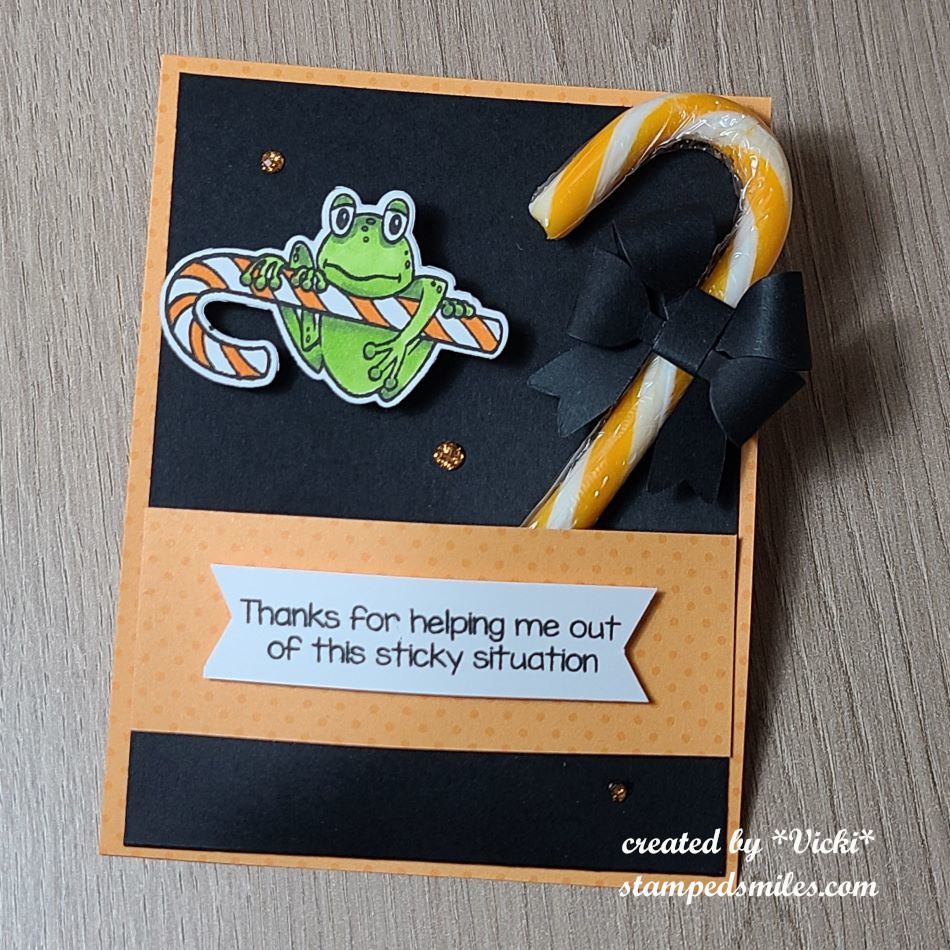
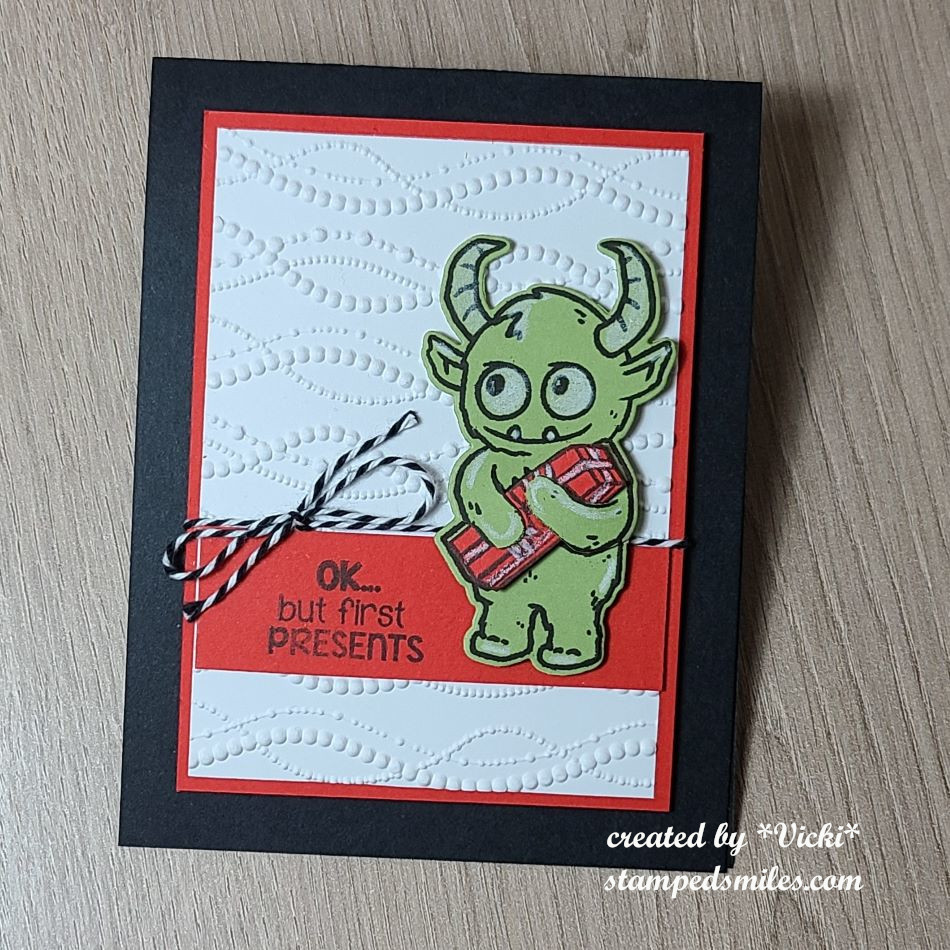
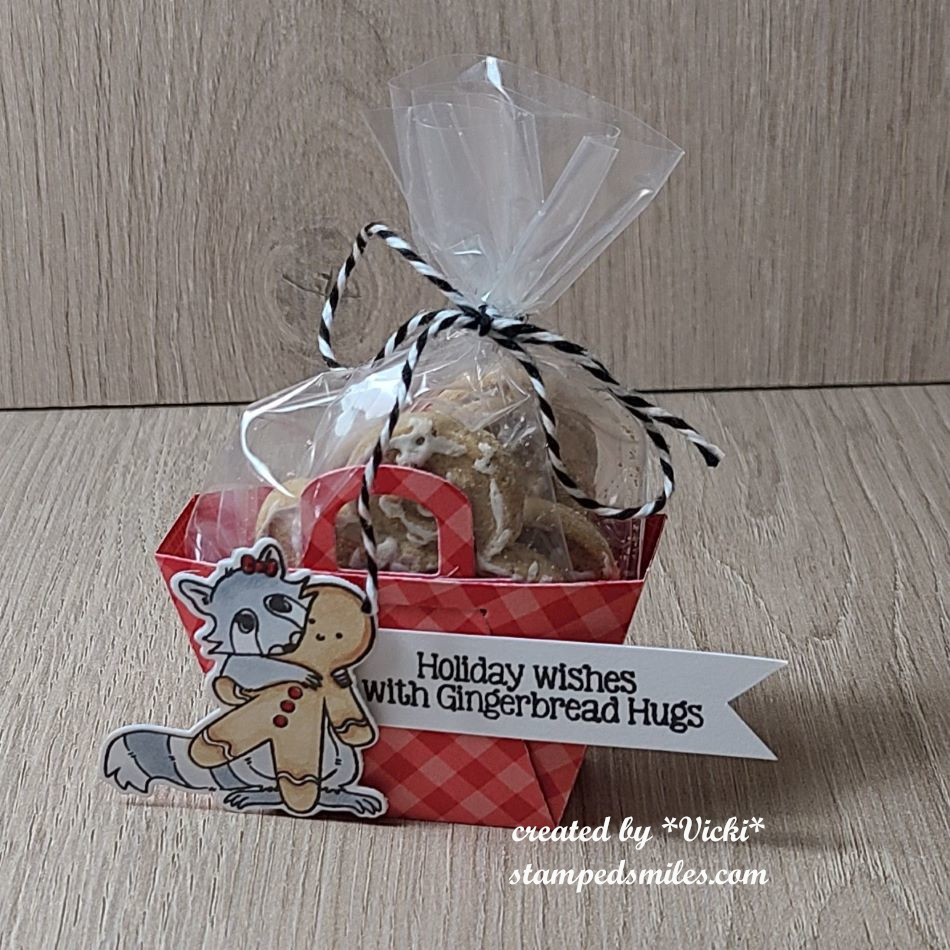
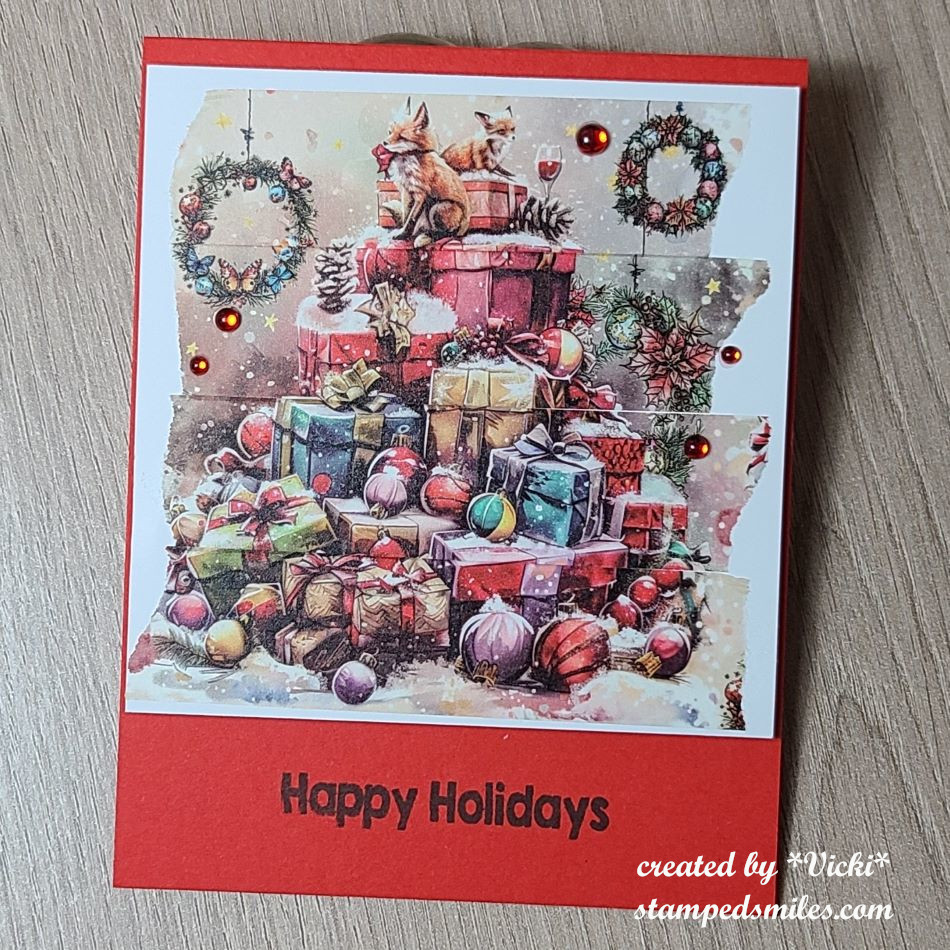
Camel stamp set used. Images were stamped on colored cardstock and cut out.I TOADally FROGgot to run the black cardstock through an embossing folder! Doh! Orange Cream candy cane inside pocket with paper bow and frog on wobbler.My favorite stamp set of this release is the Gifter set. He was stamped on cardstock and cut out. Present was paper pieced inside his arms.Cute gingerbread treat container came complete with gingerbread cookies wrapped with twine!Bonus make-n-take was easy peasy with some very cool Aall & Create washi tape that made this image!We chose the “winter” gnome that we wanted, but mine was so messed up I had to ditch it! I came home and made a birthday one that similar from my own card kit stash! LOL
The first four make-n-takes were made using the brand new Inky Stamper release that came out during this event! You should go check them out now on the website! (They’re all shown on the home page under “Featured Products”.) My favorite is that darling “Gifter” stamp set! I’m sure you’ll be seeing something from that set soon from me! *wink*
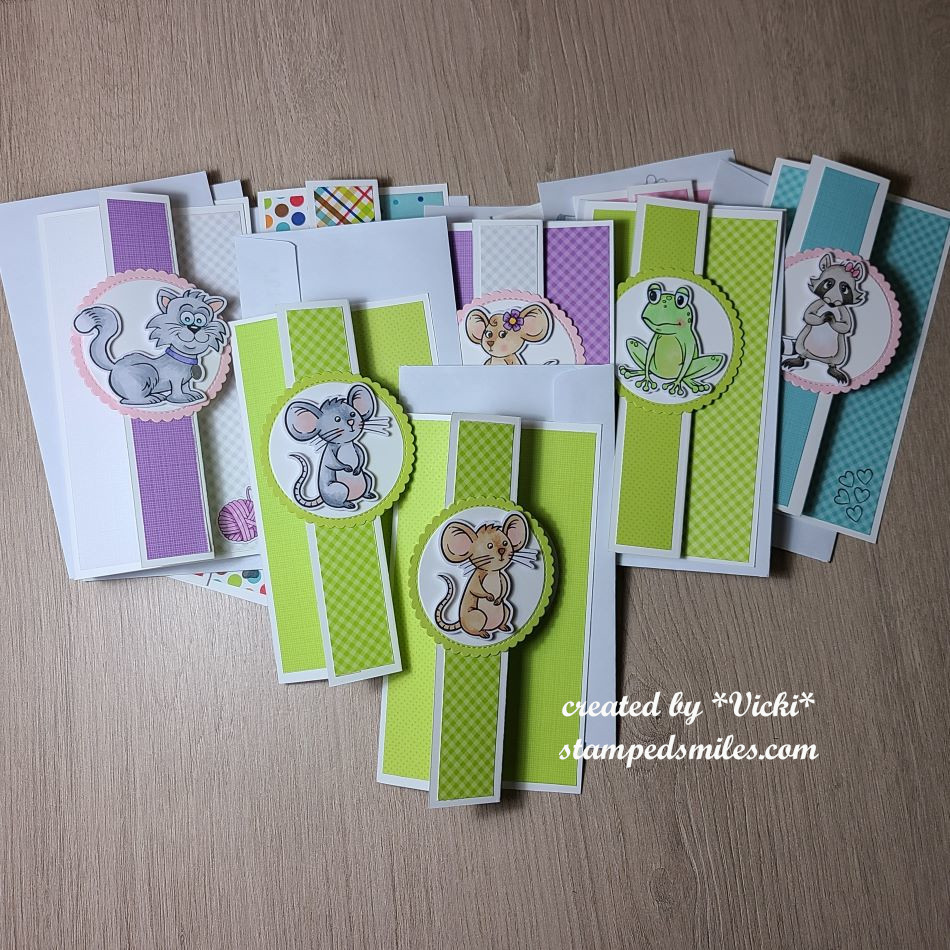
And since I was there to “crop” (as they say), I brought some things to work on that I really wanted to get done. So I decided to pull out some more Inky Stamper images to color and make a “Sheetload of Cards” using the September Sheetload of Cards Template by Crafty Al. If you’re not familiar with her, check out her You Tube Channel and look for all of her “Sheetload of Cards” videos to see how you can find instructions for each month. #SUYSSep2024 #ShowUsYourSheetLoad
I utilized her template to create the full 12 cards as demonstrated. The dimensions of the finished card design is 3.5″ x 6.25″ which I really liked as it helped to use up the full 6″x6″ size of those paper pads! Also, you don’t have to create envelopes for these as they fit perfectly inside those #6 envelopes (3-5/8″ x 6.5″) that you can find at any office supply area of a store.
As you can see, I used a variety of images that I stamped, colored and cut out for each design. I matched up my design papers to coordinate with the images. All of the images I used are from Inky Stamper. All papers come from a variety of Doodlebug Design papers.
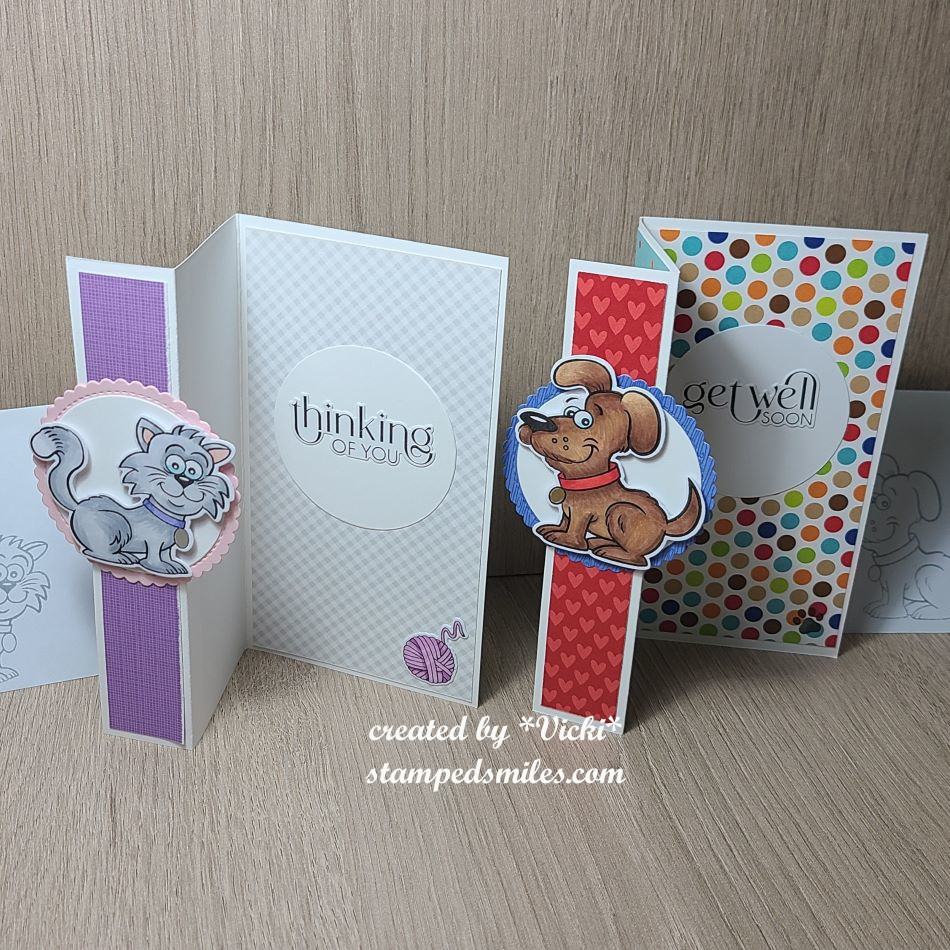
Here’s a closer look at two of the cards I made from the set so that you can see how the card opens up and the greetings on the inside of each card. (Sentiments come from Taylored Expressions.) You can also see the coordinating envelopes next to them with the matching critter stamped in grey ink.
These cards are on the way for a special charity for ill children patients to help lift spirts and I hope each one will!
I know there were so many things going on during the event that I was even surprised that I got all of these finished. They were mostly finished with the exception of the greeting which I added when I got home. I had plenty to do while I was there and also enjoyed all the activities too!
I hope you’ve enjoyed my post today as well! I thank you so much for stopping in!
Hello friends! I can’t believe that February is gone and we’re moving onto March! That month went by quickly, but now I can look forward to Spring coming, which is a good thing!
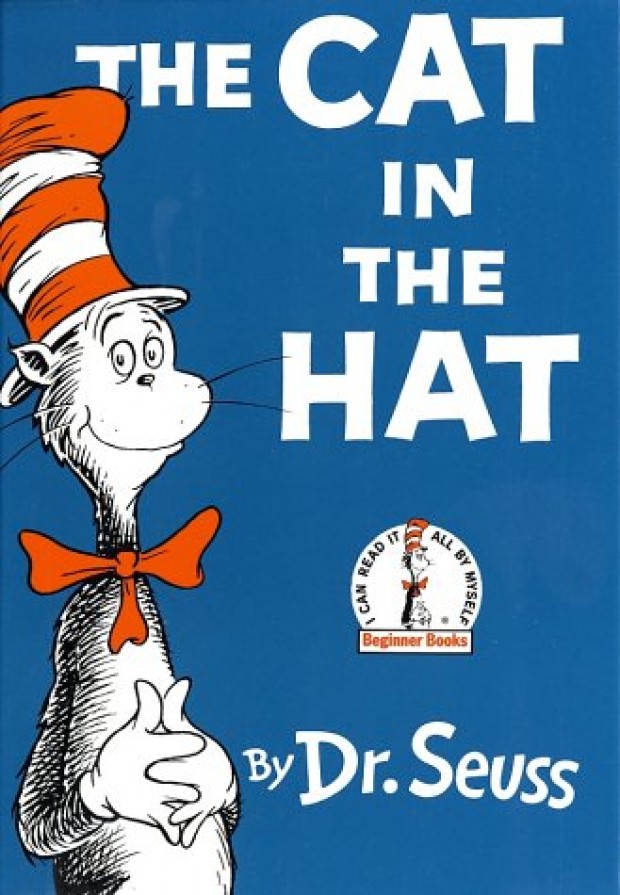
I had won a guest spot over at the Once Upon a Time Challenge blog in January, so I’m sharing my project for the March month’s book title: “The Cat in the Hat“! I remember this book so well as I read it so many times as a child! You can be inspired to create with this book/book cover to make your project for this challenge:
I chose to use the cover photo for my inspiration and I remembered something that I had which went perfectly with this theme in mind too:
I kept my card simple because the book cover photo was simple as well. This is a digital image by Bugaboo Stamps(no longer in business) that I’ve had in my computer for a long time. I still pull one out from time to time as they’re so great to color with! The file name on my computer was “Cat in Hat“. Really love that quote from Dr. Seuss!
I printed the image out twice. Once to cut out the entire image panel and then another to color just the cat’s head, cut out and pop up over the image for dimension. I felt compelled to color the background behind the cat in blue to match the cover photo. It was easy to color because the cat was done in black and white with a pop of red color in certain areas. I also added some glossy accents over his nose.
The image panel was layered over a piece of red scallop and then attached to a top folding white A2 card base. I thought it would be a great card to send for encouragement to someone.
I hope you can play along in the challenge as I’d love to see your take with this book! Thanks so much for stopping by and sharing some time with me! I’ll be back shortly with another challenge post, so stay tuned!
Hello friends! I hope you’ve had a great start to your November so far! It’s been a few minutes since I’ve posted, but I have to say that I’ve been pretty busy in the background! Hoping to share what I’ve been up to soon!
Today begins a new challenge over at the Sparkles Monthly Challenge! This month, we’re looking to see some WINTER ANIMALS! I hope you can join in the fun with us! A reminder that this will be the final challenge for the year as we’ll be on Holiday break until January. Here’s my take on the theme:
My first thought of a winter animal is a penguin of course! I’m a huge fan of them and have so many in my collection…including other than stamp related! These guys are really enjoying winter on this scene! I’m using theMy Favorite Things Playful Penguins stamp set and I started with a stencil from MFT that has “pond” shapes and lightly stenciled the soft blue for a place for my “ice platform” to be.
After creating the “ice pond”, I used some tape to mask off the bottom portion so that I could ink blend a sky at the top. I used some White Opaque Copic and splattered it over the sky area. I then used another MFT stencil to create some snow drifts in the background.
The two penguins, igloo, ice pad and sign were stamped, colored with Copic markers and die cut out to be placed over the scene. I added the flattened penguin to the ice pad and then had the igloo in the background while the sign and penguin are waiting at the side of the pond. I used a pen and wrote “FREE RIDES” on the sign.
I finished it off with a glitter pen over the “ice pad” and igloo and then used some Stardust Stickles over the snow on the sign. I thought it needed some more snow falling down, so I took some sequins and added it to the scene.
If I were on that scene, I would probably be more like the flattened penguin on the “ice pad”!😆 How about you? Do you like the snow?
Thanks so much for joining me here! I hope you like my penguin card and will sharing your favorite winter animal in the challenge too! Have a great day!
Hello friends! I hope you’re having a great weekend! Did you have “good luck” on Friday the 13th? It’s getting closer to Halloween! I don’t send out very many Halloween things, but it’s something that I share with friends and my adult kids because it holds some special memories of just having fun.
Today begins our October challenge at Sparkles Monthly with a theme that was my turn to pick: Things That go ‘BUMP’ in the Night (Does not HAVE to be Halloween!) So, if you’re not a Halloween person, this theme is open-ended. Try nocturnal animals, Santa on the roof, etc. Just have some fun crafting!
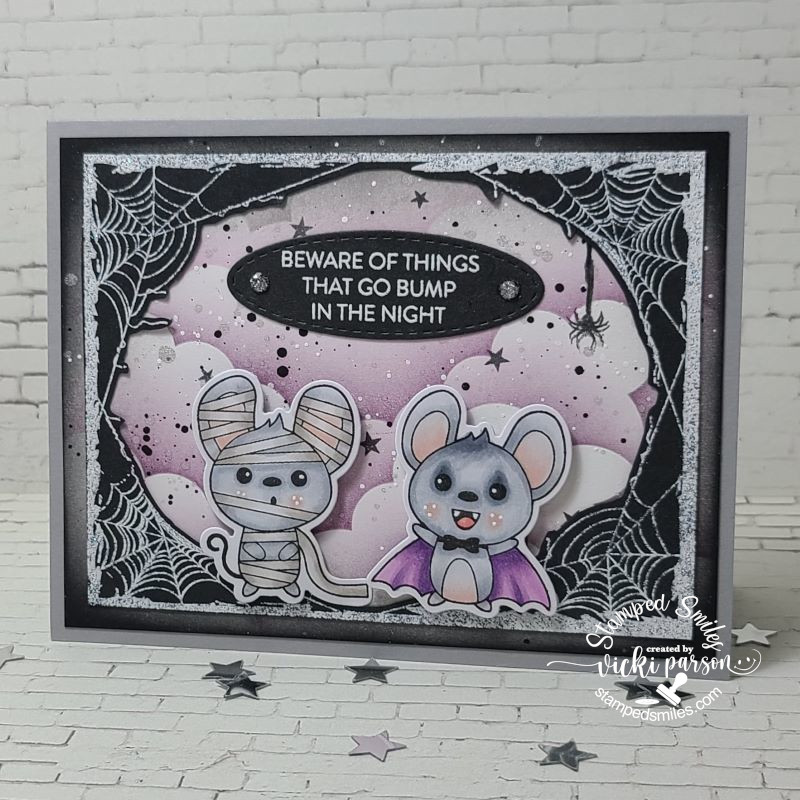
Of course, I love Halloween and had fun making my card:
I thought these mice were just too cute! They were out bumping around in the night trying to be scary but scared each other instead! LOL
The mice came from the STAMPtember collaboration with Whimsy Stamps and the set is called Spooky & Mice. I colored them with Copic markers and die cut them out with the coordinating dies. They were popped up with foam tape over the background.
For my background: I used a cloud stencil on a white piece of cardstock and blended some clouds with purple ink and then blended around the edges with black and grey ink. I then took the SSS Spook Up Some Fun stamp setand stamped black stars over the background and I also white heat embossed the oval sentiment panel that was in that stamp set over black cardstock and set it aside. I’ve also splattered the background with black, white and silver acrylic paints.
While that panel was drying, I heat embossed the Whimsy Stamps Spider Web Frame with a white sparkle EP and then cut the middle of it out with scissors so the cloud background would show. I stamped the spider hanging down onto the background while sizing it up with the frame and then drew a black string with a marker for it. Glued on the frame, attached my oval sentiment panel, and attached it to a top folding A2 sized grey card base. (Then added the mice with foam squares.)
Lastly, I’ve added some silver gems on each side of the sentiment oval and attached a few clear sequins over the night sky background.
Thanks so much for stopping by today! I hope you’ll be able to join along in the fun with us this month! I’ll be seeing you soon!
As You Like It – Favorite Halloween or Fairies & why? (I love to make Halloween theme because it’s so fun with cute, scary or fun characters and I love the colors too!)
Hello friends! Hope you’re doing well and have had a great start to September! It’s hard to believe we’re almost into Autumn already! I’ve been enjoying the outdoors for as long as I can and Autumn around my area is so pretty, so I need to go out in it! Crafting will be waiting for me soon!
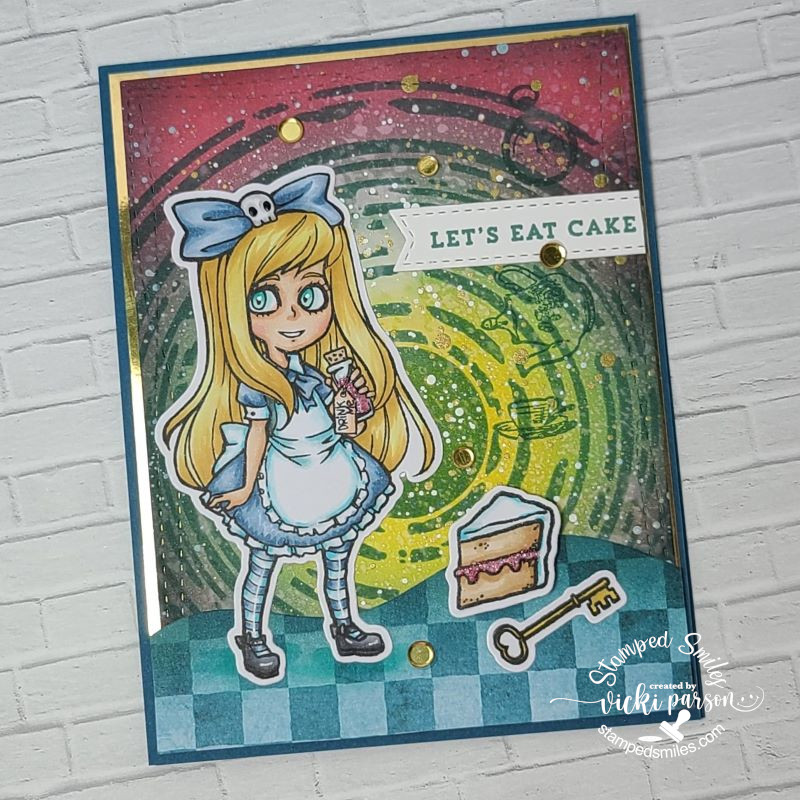
Today starts a new challenge for Sparkles Monthly with the theme of: Alice in Wonderland! So I hope that you will stop by the blog to check out the inspiration and join us this month! Here’s what I’ve come up with:
This was really fun to put together! I have always loved the Alice in Wonderland stuff and I actually have quite a bit of it for crafting, but this stamp set by Visible Image was new to me and something that I had gotten from a win for a challenge I entered a few months back. I also used the Supernova Stencil for the background from the same company.
For the background: I ink blended several colored and then spritzed with water for the watermark effect. I went over it with the stencil in a darker blue ink and spritzed it again. I then added some gold and white ink splatters over top for more texture. It was cut out with the wonky stitch rectangle die and layered over mirror gold cardstock.
I had some Alice in Wonderland papers and used s strip of the blue checks to cut out a wavy border and attached it to the bottom of the stenciled panel. I added these layers to an A2 top folding blue card base. I had some old-fashioned looking stamps which I had for years and stamped a few on the background in blue ink.
I colored “Alice” with Copic markers along with the piece of cake and key and then used the coordinating die to cut them out and attach to the card front. I added some pink glitter to Alice’s drink in her hand and the filling in the cake. I also added some gold sequins over the card. The sentiment was cut out with a banner die which I thought would make for a fun birthday card.
Thanks for stopping by to check out my card and I hope you’ve got some inspiration with it! (I’m a bit behind with so many things, so I will be checking out to see what you’re up to!)
Hello friends! I had another birthday card to make and this person likes panda bears, so I thought I’d go through my stash and see what I had for that. Here’s what I came up with:
So, I found this cute little guy that I believe was a “freebie” a few years back for your birthday month from Lawn Fawn called “Party Panda” and the extra was that “Happy birthday” sentiment as well. There was also a set of coordinating dies with it that cut out the panda as well as the tiny cupcake.
So, to make it a good party, you need more than one panda, so I stamped him out three times and stamped out some “party elements” as well from the Lawn Fawn Party Animalsstamp set, colored and cut everything out with the coordinating dies. These little guys turned out so cute with their party hats on and holding their birthday items to celebrate with another panda friend, of course!
I thought it would be fun to create a green colored frame with the Watercolor Wishes paper cut out with the Outside In Stitched Rectangle and the Reversed Stitched Scallop Rectangle dies to create a frame. I had some additional metallic gold polka dotted papers for the background behind it that were also a freebie with one of my orders. Before attaching it to the back of the green frame, I also added a piece of Noble Fir cardstock cut from the Grassy Border die. Attaching this border to the frame only gave me some room to tuck the pandas behind the grass.
I stamped the sentiment in black, cut it out with my scissors to make a banner and sponged some green ink around it before attaching to the card. Lastly, I added some gold sequins and placed it over an A2 sized top-folding white card base. I decided to create my own envelope with more of that green Watercolor Wishes paper to mail it in.
Well, the green and grass have me thinking of Spring coming and I think I might party like a panda myself when it finally arrives!! 😆🎈 I’m sure ready to be outdoors!
Hope that you’ve enjoyed my card today and have been inspired! I’ll be back Saturday for this month’s Art Journal Page and hope to see you then! Thanks for dropping in!
Hello friends! We’re headed into the home stretch now for Christmas and the end of the year! Are you ready yet? Well I thought that I would try and get some Christmas cards made up and have some fun with it rather than trying to rush things too much.
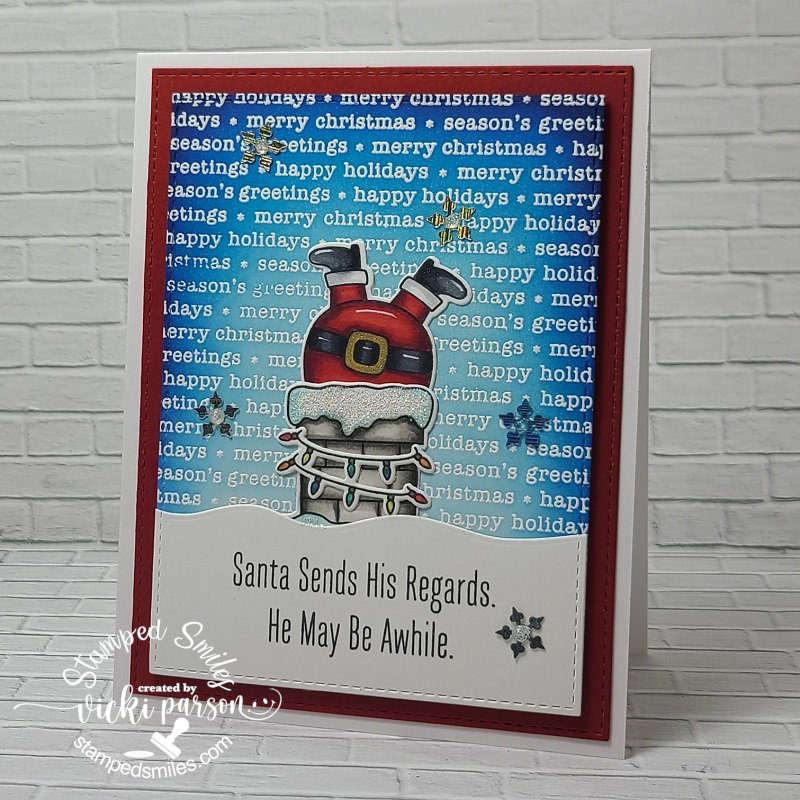
Tee hee! This one makes me giggle! While I was making up some squares for my sampler swap group, I thought I’d use this same MFT Stuffed Santa kit (that I had gotten last year) and made a card along with making the squares too! The squares I made turned out cute too and I’ll share those later on. I added some glitter to the snow on the image and on his gold belt buckle too. The background was white heat embossed with the MFT Christmas Greetings Background and then ink blended with blue inks. Finished off with snowflake sequins and Stickles glitter in the centers of each.
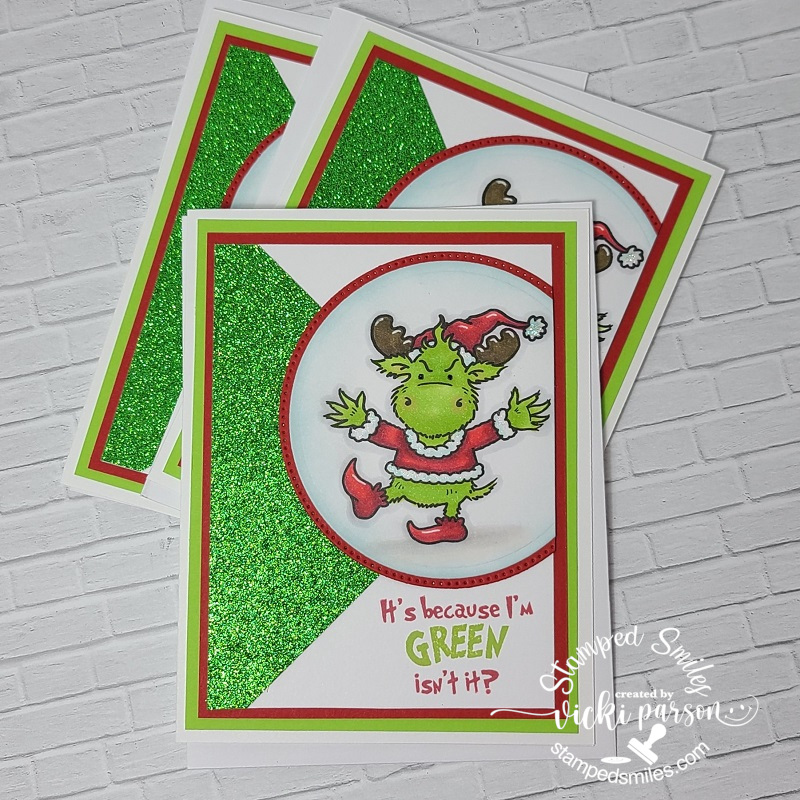
And here’s another set of cards that I made from a previously purchased kit by Riley & Co using the cute Riley as the Grinch stamp. The stamp was included along with the kit and so I just thought it would be nice and easy by just coloring him up, adding my own sentiment and putting it together. So now I want to watch the movie! 😄
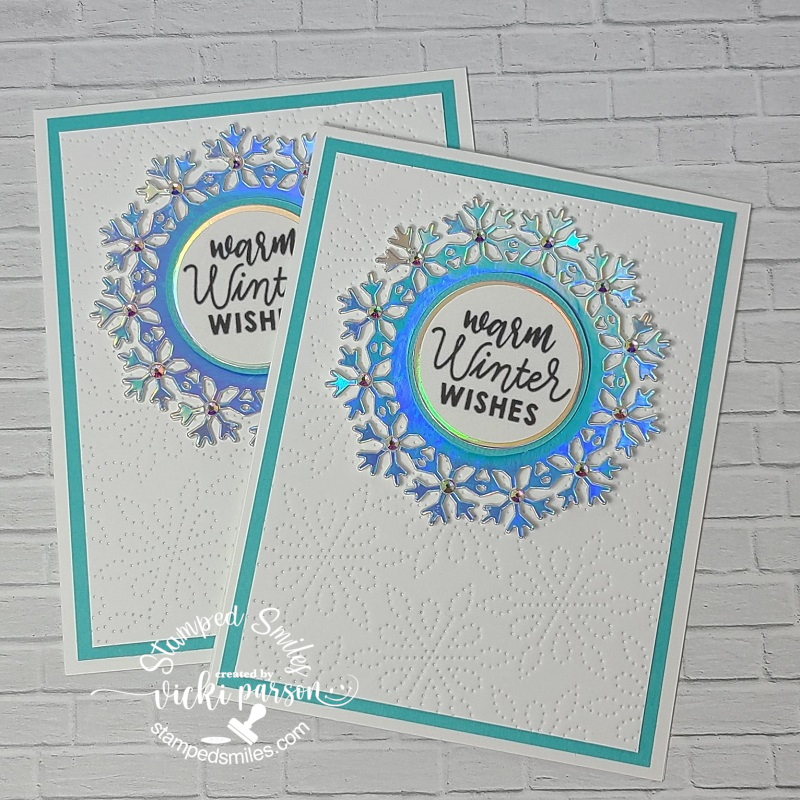
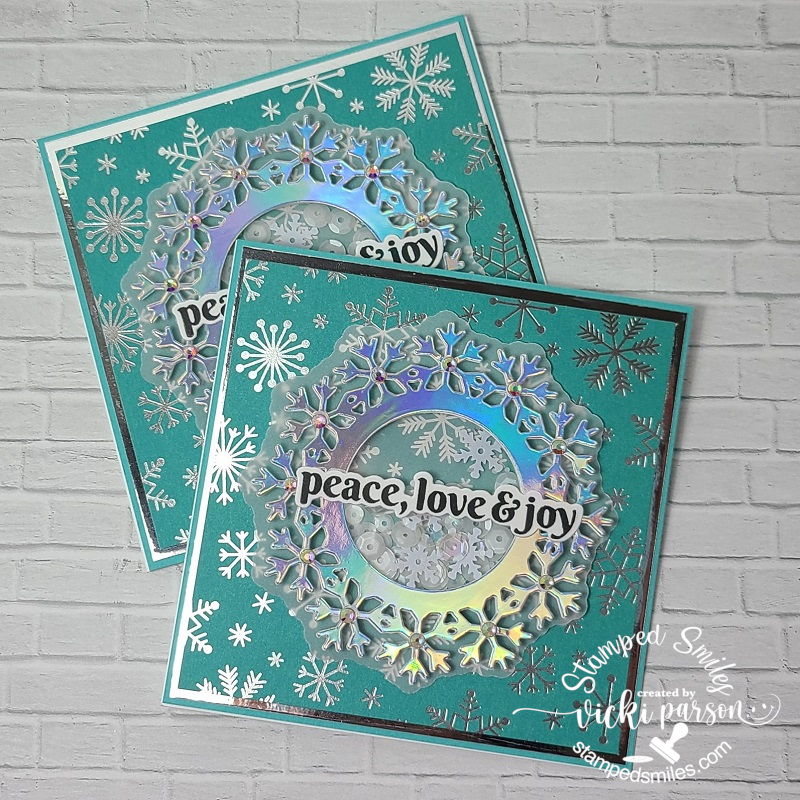
And lastly are some cards that I put together during an OOAK event with the classes that I selected to get the kits for and just enjoyed the process of putting them together. **If you are on my website, you can click on the photos below to see them up close and larger**
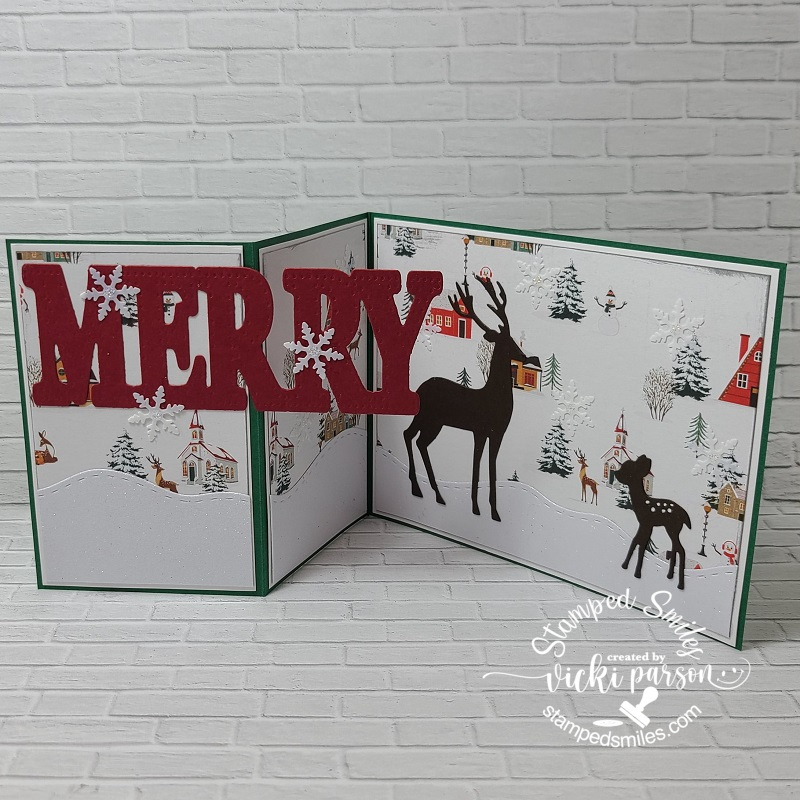
Craft Fancy class – part 1 (spinner)Craft Fancy Class – part 2 (shaker card)Riley & Co – candy lane image (z-fold)Riley & Co – Merry deer (z-fold)Riley & Co – funny bonesInky Stamper – gift card holder inside & mini card
So although I’ve shared several projects here today, I have more craft-making going on so I’m going to shorten up my post and hope that you enjoy the inspiration! I appreciate you stopping by today! See you soon!