Hello friends! I hope that you’re having a great start to your week! We’re almost there as Christmas approaches us quickly! I’ve been enjoying the Season and having fun keeping busy. Currently baking cookies and decided to take a break from that to sit and make a post about all of things that I’ve been doing besides posting!😆
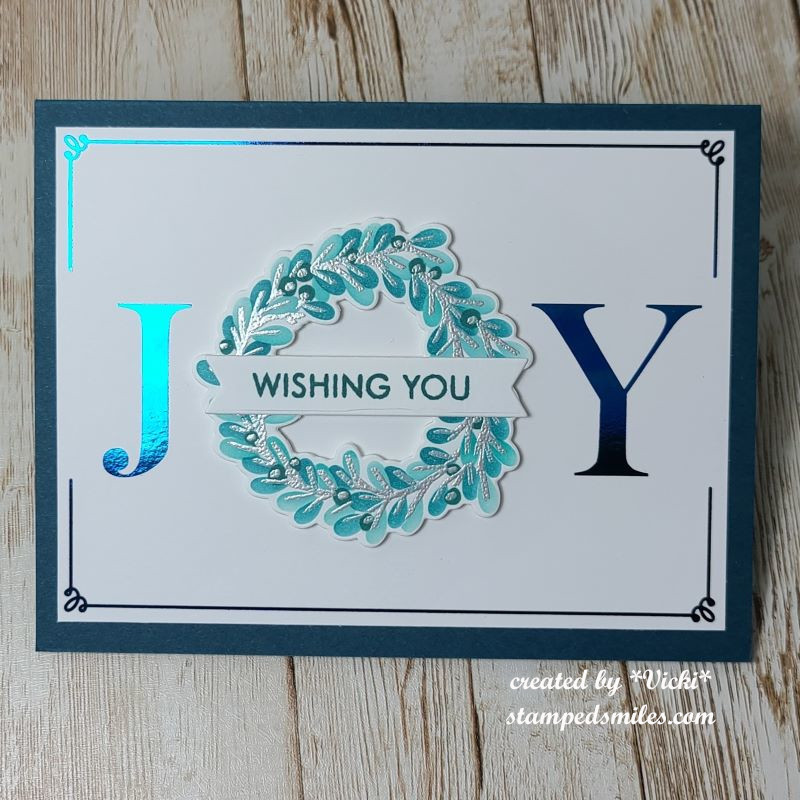
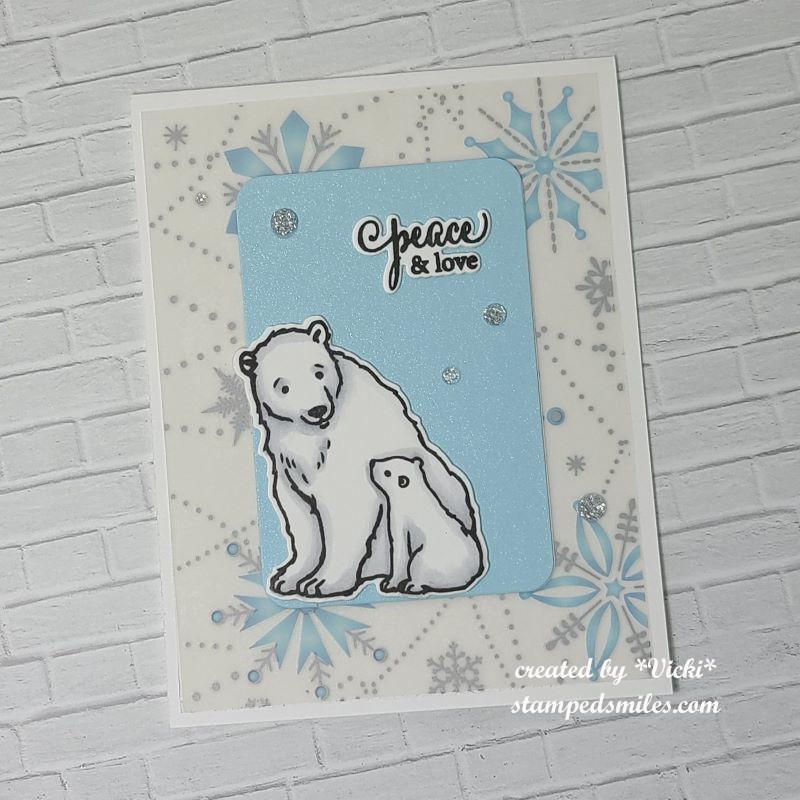
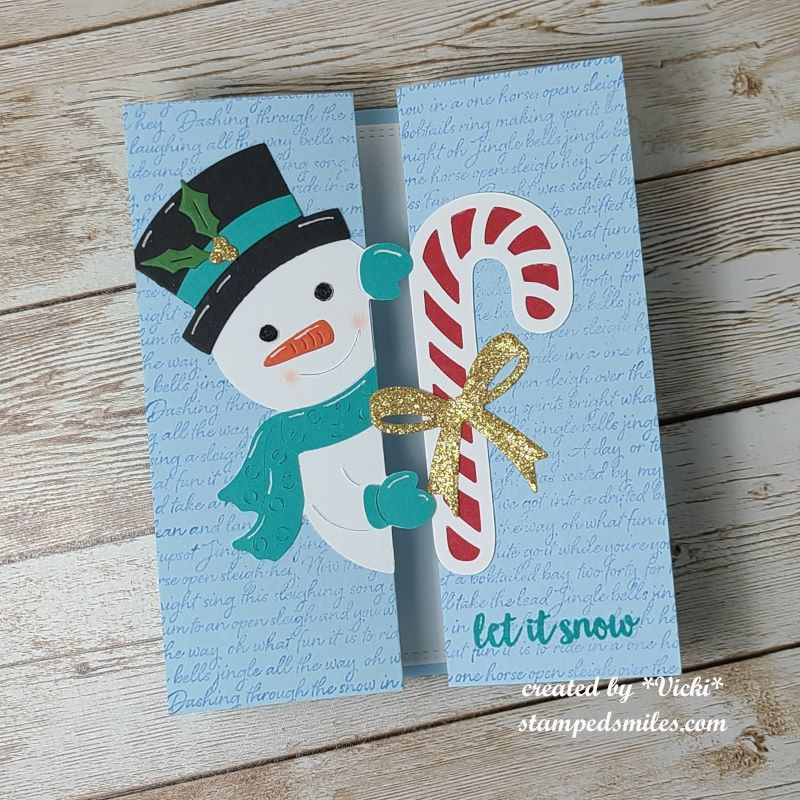
This is just one of the several similar cards that I created for my Christmas cards this year. It came from a Christmas in July card kit from Taylored Expressions. It mainly used the Wreathed in Joy Stamp & Stencil Combo set. There are dies you can cut them out with as well as foilable panels which is shown on this one.
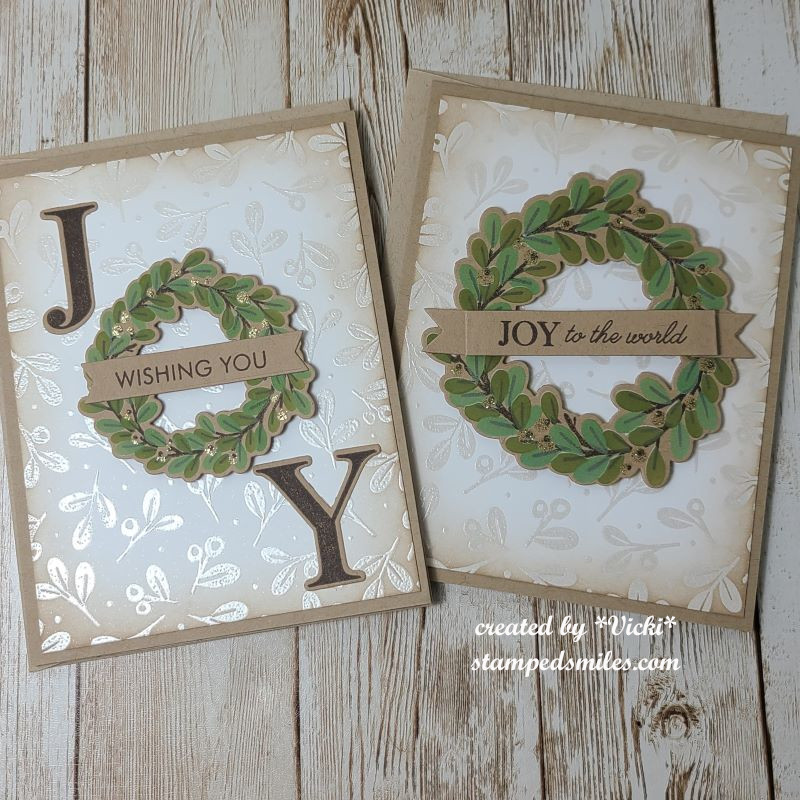
I do not like to make several of the “same thing”, so I’ve changed them up to different colors, layouts, etc. So you can see the different versions I’ve done below. (If you are visiting my web page, just click on each photo to see it enlarged.)
*Apologies for the messy stack for photo taking…it was a lot to do all at once!
Most of these are blue and silver which is my favorite color combination for Christmas colors, so I did about 6 of these.
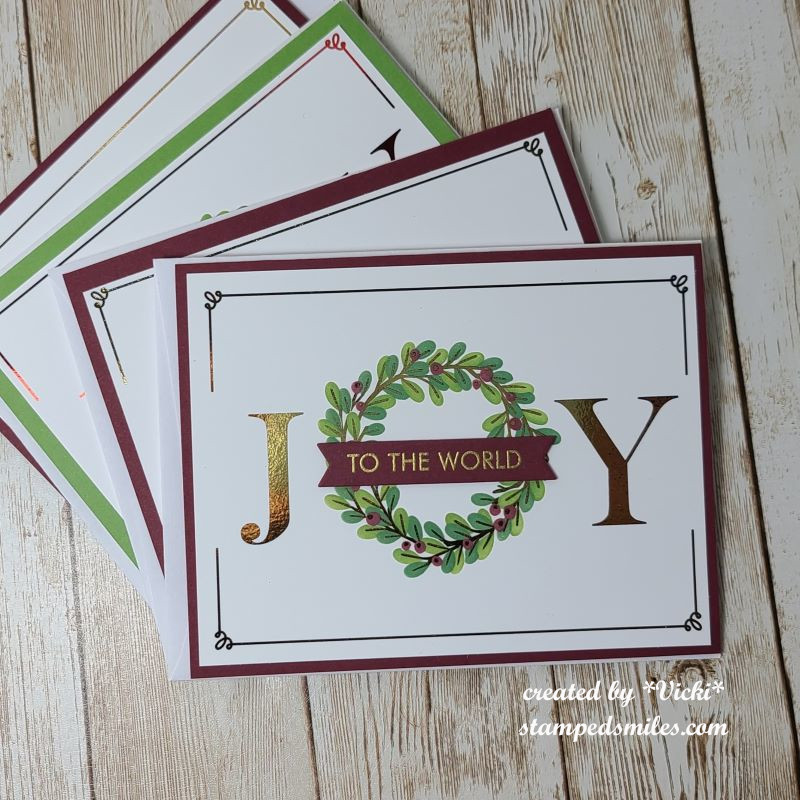
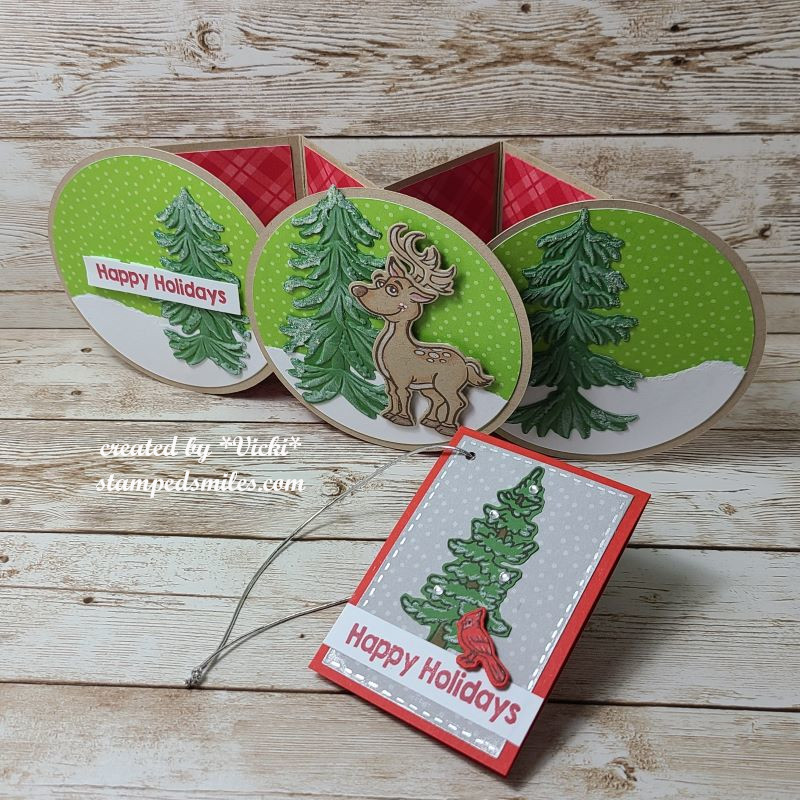
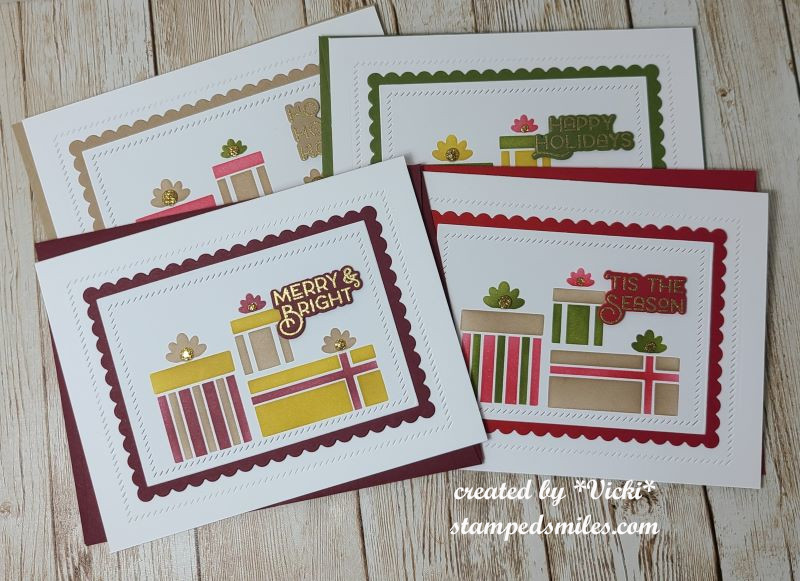
I think these look the most vintage with the soft tones. Only 2 of these.These are more traditional looking with the red and greens, plus some were foiled and some heat embossed. There are 4 of these.These are all pretty similar with the larger wreath used. I changed up the green colors a couple of times. There are 6 of this kind.
I thought these would be enough for all of the Christmas cards to send out, but I realized going back through my list that I wasn’t going to quite have enough.
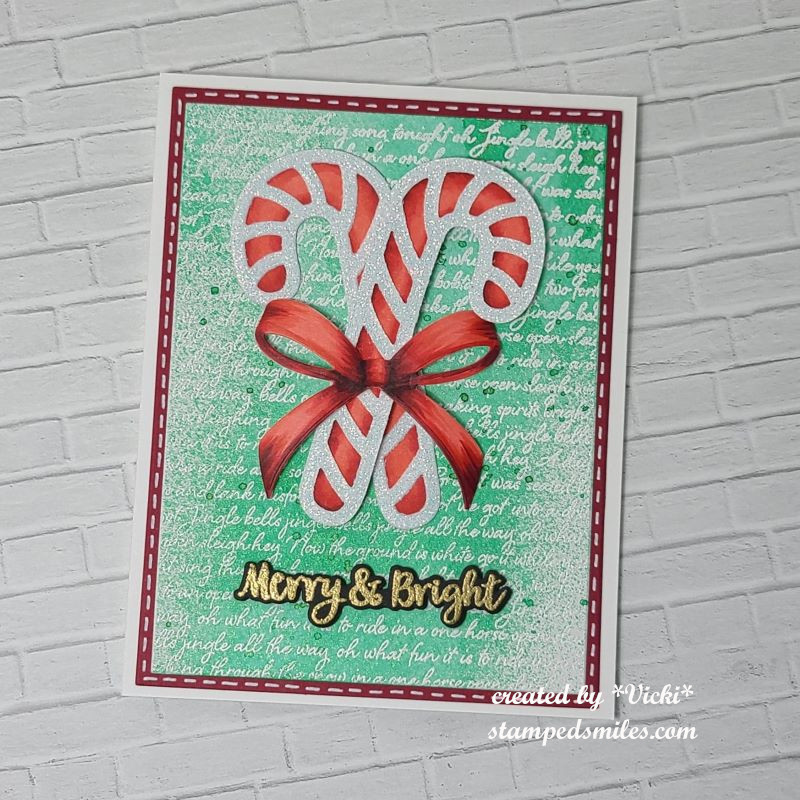
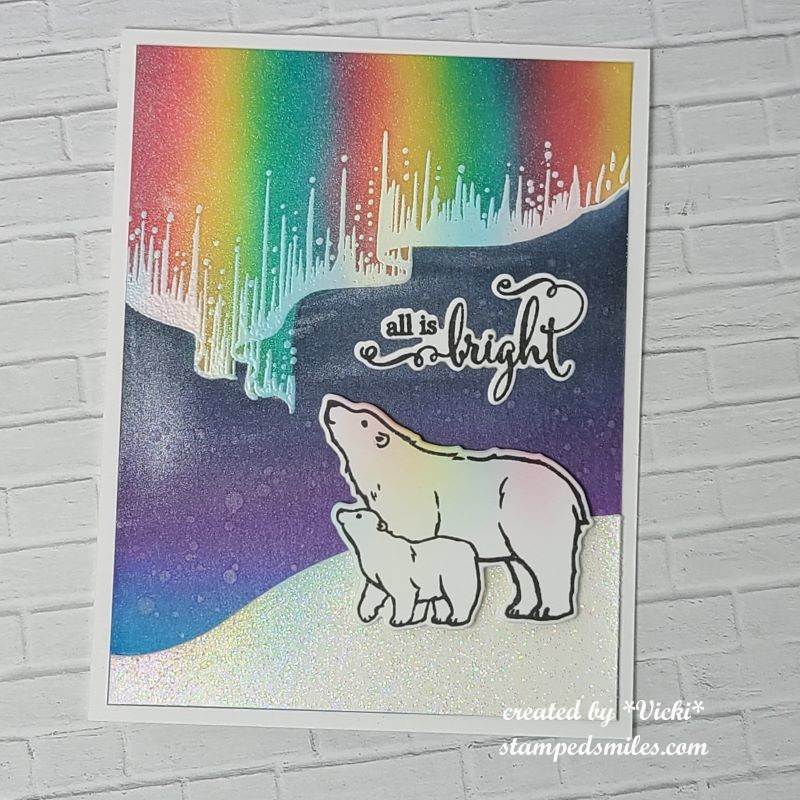
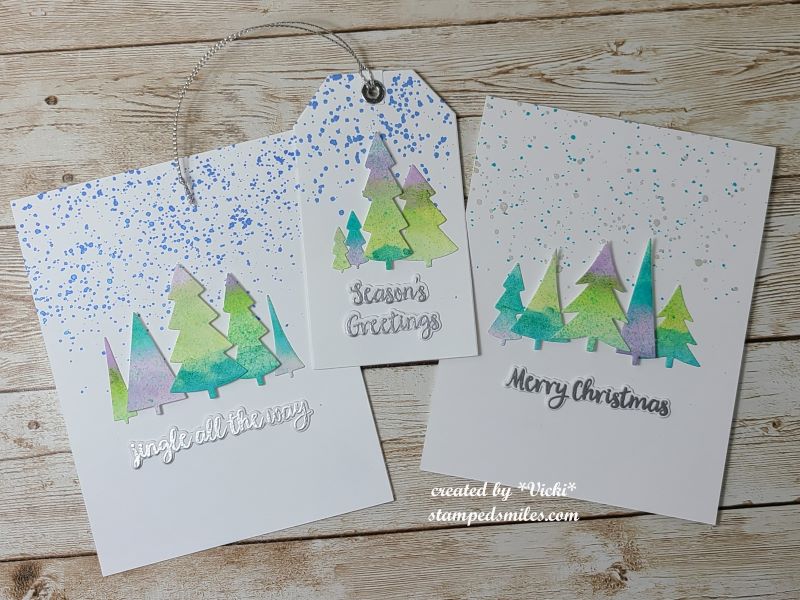
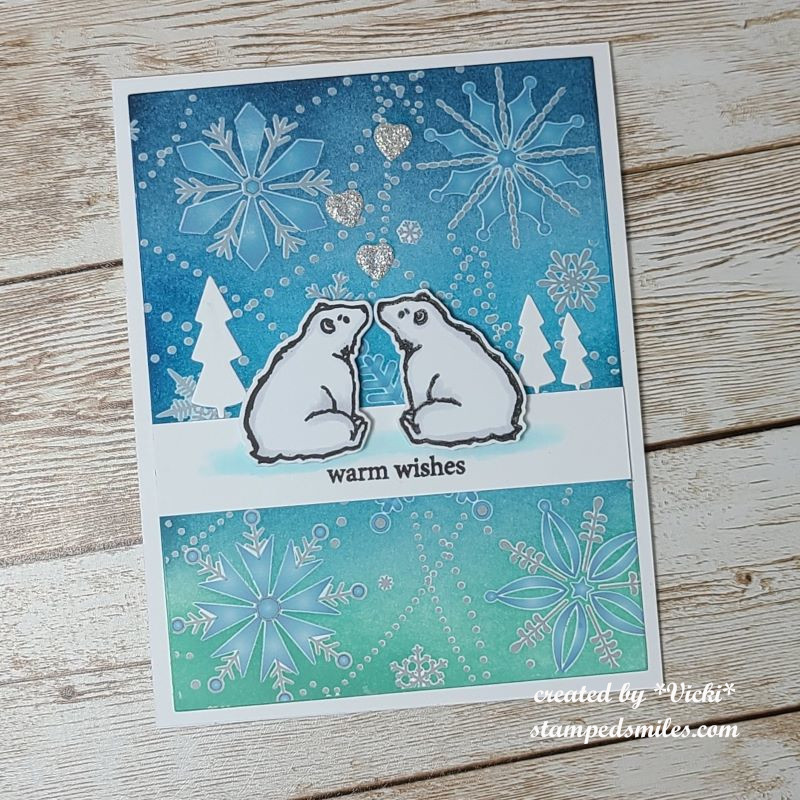
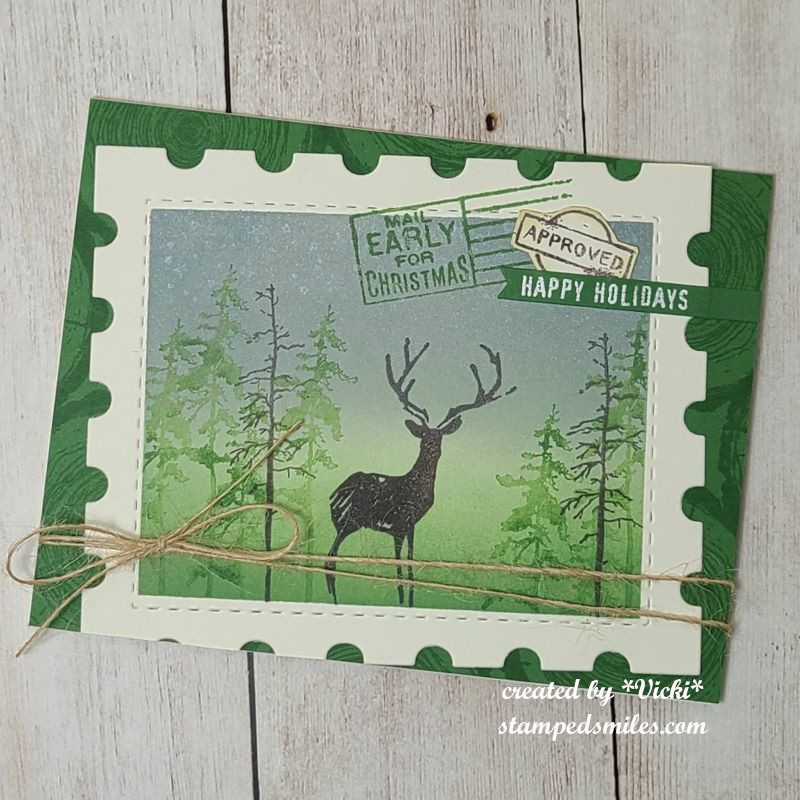
So I’m glad that at the beginning of this month I took a Hero Arts Stamp-a-Longand made several different types of Christmas cards. Here are the results of these below: (Again, if you’re looking on my web page, just click on the photos to enlarge them.)
background using sprays and coloring die cutssimple CAS cardnorthern light mixed media techniqueemboss resist background and dimension die cuttinggift tag card with a pocket inside for holding a gift cardreverse die cutting on gatefold cardlayering tree stamp and gatefold cardusing die cut plate for stencilingWatercolor CAS projectsusing a die cut plate for embossing and masking
mirror stamping technique and rub-on background
So some of these were also taken and used for sending out more Christmas cards. I’m glad that I did the projects for this class or I probably would not have had enough cards.
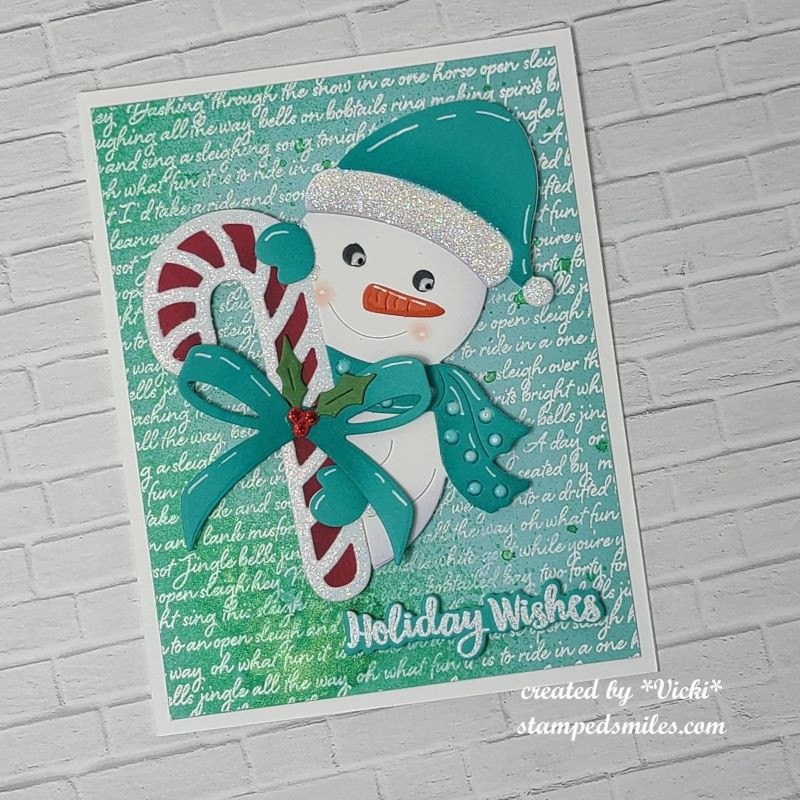
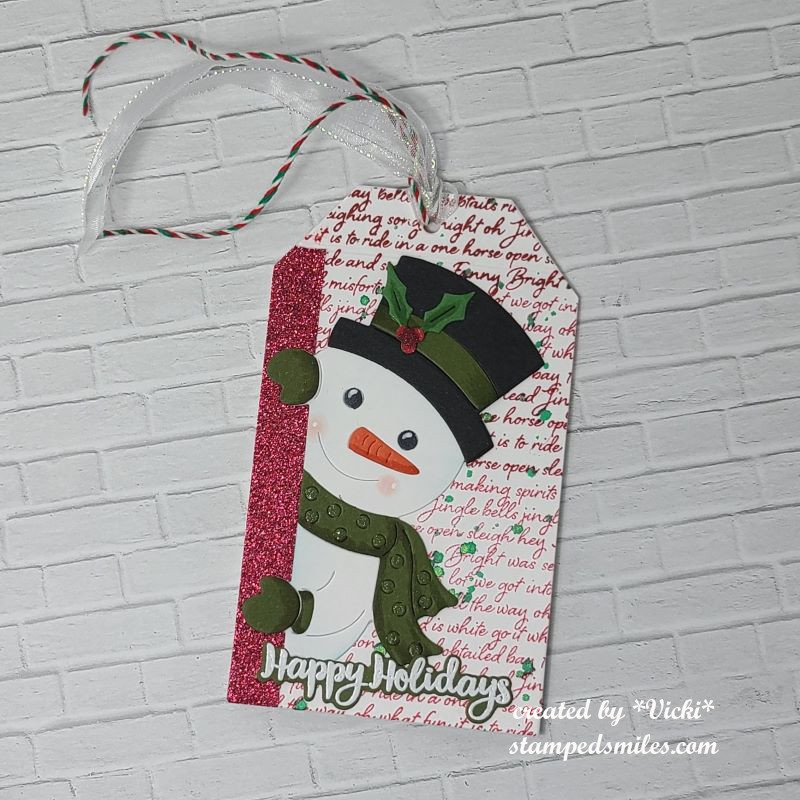
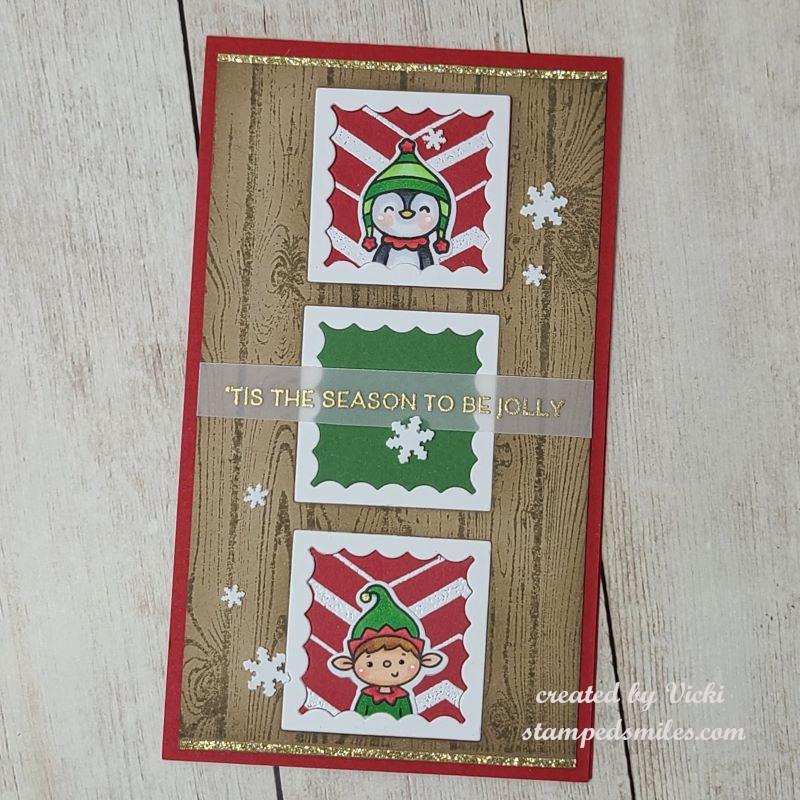
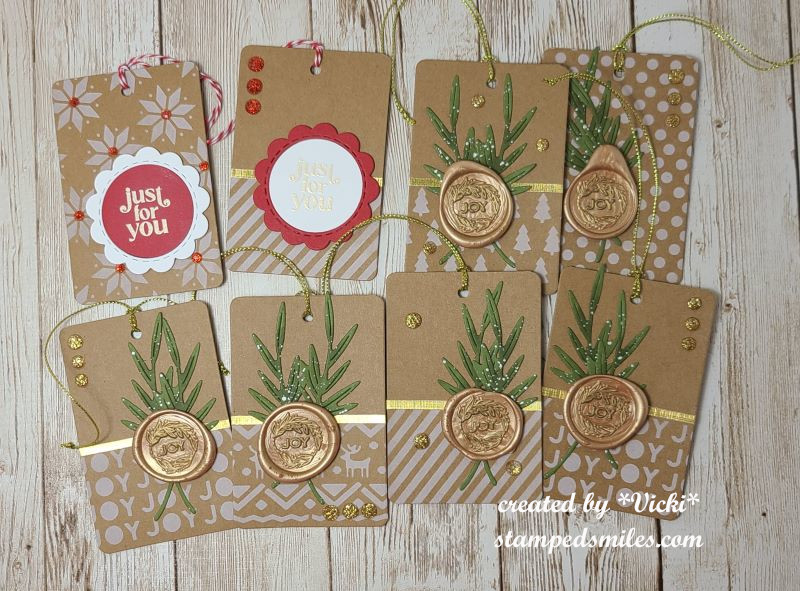
BUT WAIT! That’s not all! I’ve also made a few other Christmas items that I’ve also sent out. I’m also sharing some gifts and gift tags that I’ve made from a Taylored Expressions Advent Calendar that I got this year. I made some more cards and tags. (I tried out wax melting which is something I’ve never done…it was fun) Others are from classes I took or participated in Craft Roulette for.
If you’re on my web page, just click on the photos below to enlarge each one.
a craft roulette challengeanother craft roulette challengeInky Stamper OOAK classcraft roulette challengestencil from my advent calendarmelted wax, tags, pine sprig die and stamp set from advent calendar
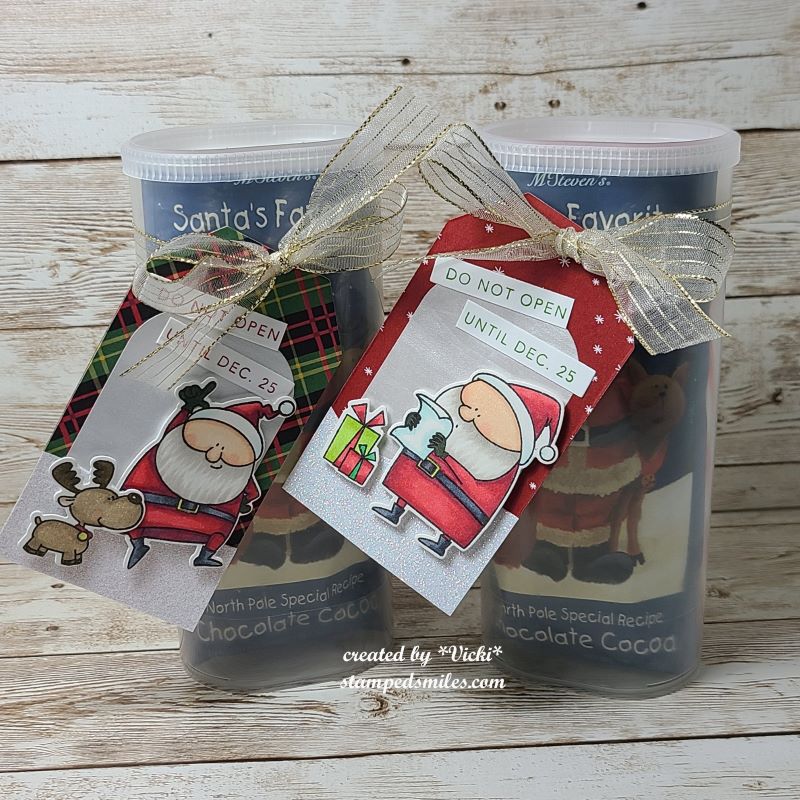
I usually make these every year along with a poem on the back for the hot cocoa ingredients. This one is called “Santa’s Soup”. I might add a few other fun items in there as well! The people that get one of these knows to look inside right away!
Wow, so that was a lot! I know that my blog has been pretty sparse with posts lately and I am finally getting around to posting the things that I’ve been working on, so I hope you’ll get that and you’re able to take some time for yourself this season and enjoy the peaceful quiet moments!
I will be sure to take a moment and catch up with everyone before Christmas arrives. In the meantime, it’s back to cookie making! Thanks so much for stopping in today!❤️
Hello friends! I hope you’re having a good week so far and staying safe wherever you are in the world. Sending hugs to all experiencing a troubled time. I hope that my post can bring a smile to you today.
I needed to create some get well type of cards and so I thought I’d try to incorporate some challenges while working on them which helps me to concentrate more in what I’m doing and maybe think outside the box a bit.
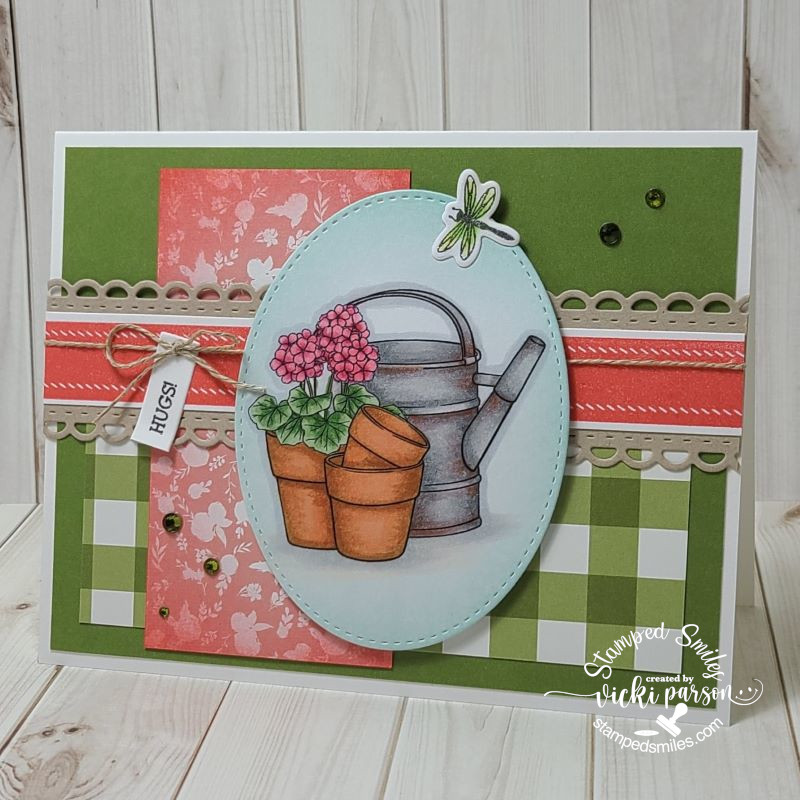
My first card is made with the Beccy’s Place Challenge freebie this month and she also challenged us with a sketch which I’ve decided to use for my card. (see sketch below) I was really happy to use up some more pattern papers with it and I also decided to add a tiny dragonfly at the top to enter another challenge and to adhere to my “bug” theme today!
I printed the image in black and white and colored with Copics. The dragonfly and the center pink strip were stamps that I cut out and added to the design. The rest is pattern paper from my stash except the scalloped kraft border in the center that I cut out with a die. I stamped the sentiment and cut it out to go with my twine around it. *You will notice in ALL of these cards that I’ve used some sparkly gems. I wasn’t aware until posting them! I must be on a kick of wanting to use them!*
And for this next card, I’ve played with a large bug:
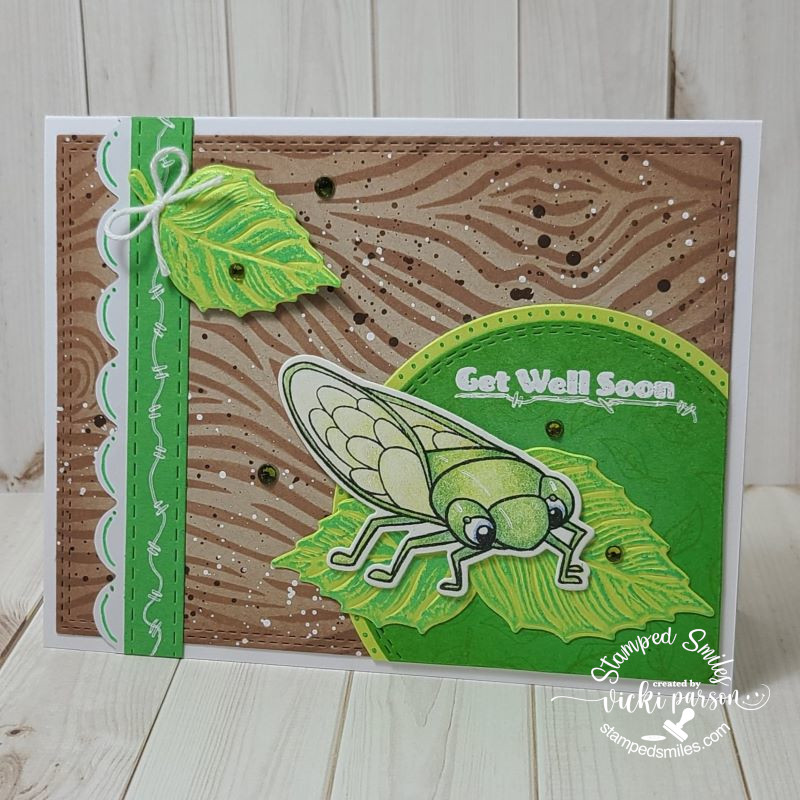
Around my area this time of year, you can hear the sound of these cicada bugs with their distinct noise throughout the trees. My husband likes the sound when a bird catches one! EEW! This bug is a cute one from Inky Stamper called Cicada and I’ve colored it up with pencils this time. Hard to see, but I’ve also added some shimmer with a glitter pen on his wings.
I’ve used the Picket Fence Tree Bark stencil over kraft on the background and then splattered it with brown and white paint. The leaves under the bug and the accent came from the Lisa Horton Variegated Leaf EF+die that I cut over light green cardstock. I used some metallic green wax to go over the details in them. I also used some gel pens to make some doodles around the strip, the circle and under the sentiment along with following a sketch. (details below) You will also notice more sparkly gems! I’m also entering this in the Inky Stamper FB challenge this month which is using an IS bug image.
For my last card I decided to keep this one simple’ish’:
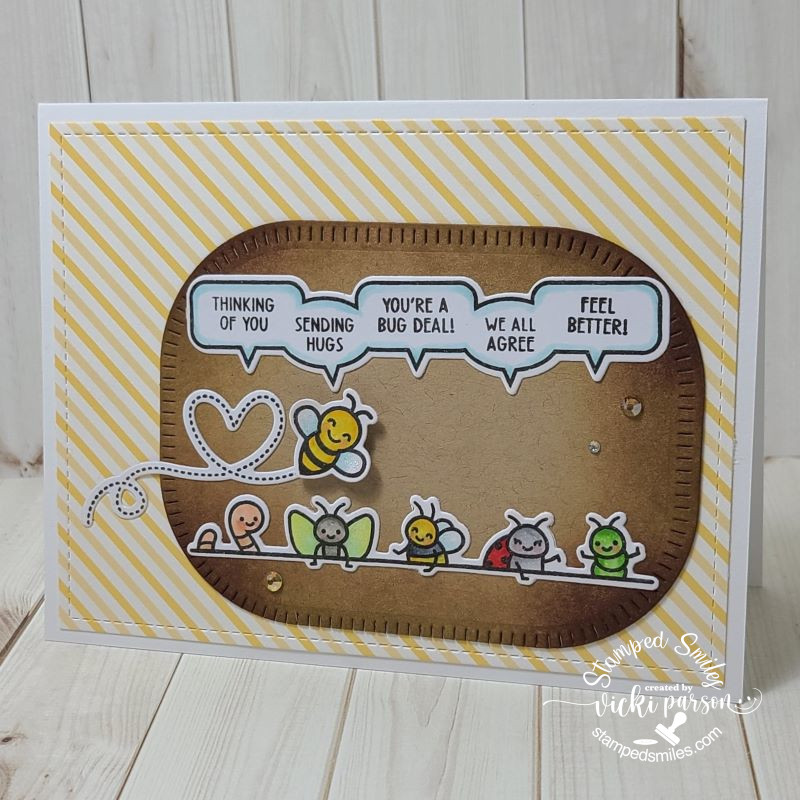
So, I know these aren’t real bugs because I’m not squealing, but these guys are too cute! They’re popping up out of the dirt for a special greeting! I mixed in both a new and older stamp set from Lawn Fawn on this one. I’ve used another sketch for this one and decided to keep it very simple. The hardest part of this was the coloring which honestly wasn’t all that difficult either because they’re small images. I’ve also added some shimmer with a glitter pen on the wings and of course, there’s those sparkly gems again!
Hello friends! It’s been a bit since my last posting! I’m still crafting, but I’m also enjoying the outdoors lately too! I’m just not making the time I need to post on my blog here! However, being on a design team helps to keep me focused on posting and hopefully it’s something that will bring motivation because I need it! So I will try and get some more posts in!
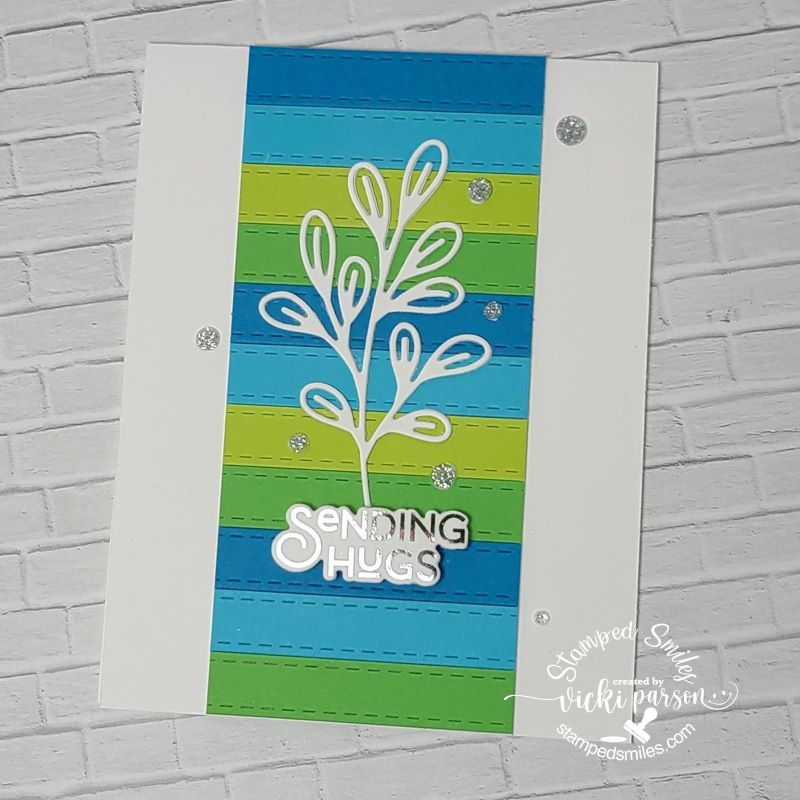
Today starts a new challenge over at the Sparkles Monthly Challenge and the theme is “No Stamping Allowed!” This may seem a bit challenging, but I look forward to seeing what people come up with for it! Be sure to check out the blog to see what the design team has come up with for inspiration! Here’s what I’ve made for the challenge this month:
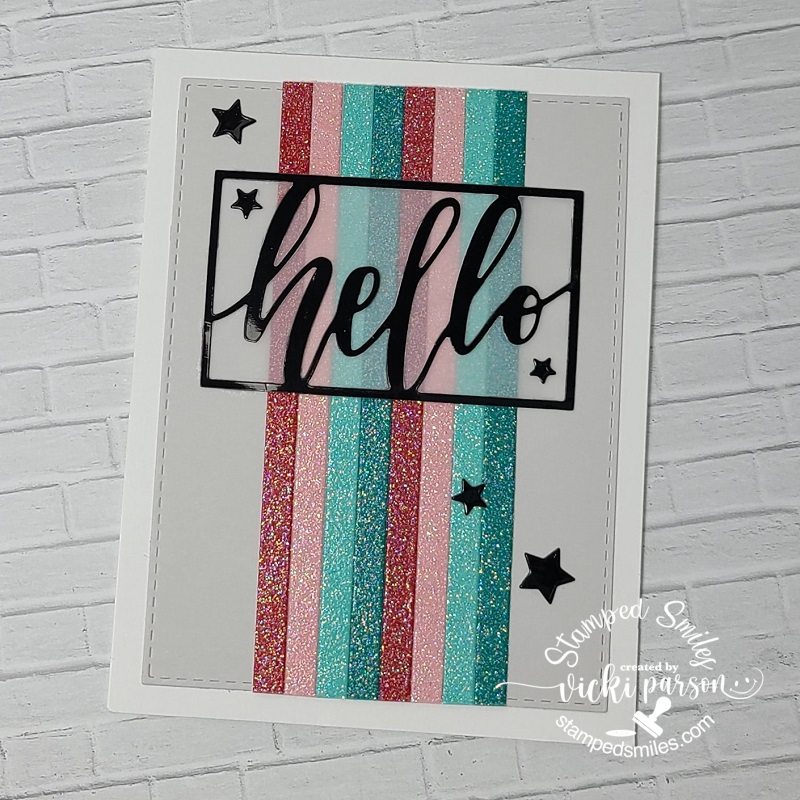
I was trying to channel something that would work and realized that I had these fun strip dies from Taylored Expressions and I wanted to play with some new colors, so I ran with that on the middle of my card front by alternating the strip colors.
I also die cut a frond three times and glued them together for thickness and sturdiness. I attached it over the colored strip panel and then added a sentiment that was already toner printed so that I could foil over it with silver Deco Foil. I also had a die that cut it out which was popped up with foam strips and added to the bottom of the die cut frond. Lastly, I’ve just added some silver glitter drops randomly over the card front.
Hope you’ve enjoyed my non-stamped card today and will think about joining in the challenge with us this month! Thanks so much for stopping in! Have a great week!
Hello friends and happy Wednesday! Today starts a new challenge over at the Sparkles Monthly Challenge Blog and this time we would like to see your CAS (or “clean and simple”) creations! I hope you will hop on over to see the inspiration from the team and consider joining in the fun with us!
Here’s the DT creation that I’ve made for it:
Sometimes I feel that CAS can actually be even more difficult than regular cards and I struggle with thinking I’ve added too much, or it doesn’t look right. I think it’s more of me over-thinking something, though!
It was my son’s birthday yesterday and I thought this would be a great opportunity to make a card for him. He’s a postal carrier, so I thought this cute owl from the Lawn Fawn Special Delivery would work great for this. I started with the LF Stitched Cloud Backdrop and the LF Stitched Rectangle Frames dies to create the main focal panel. I lightly blended some blue ink in a circle before adding the Copic colored postal owl popped up with foam.
Over some red cardstock, I white heat embossed the sentiment. (I don’t remember which LF stamp set it came from) I die cut it with a banner die and popped it up over the cloud panel. I also had an extra die cut heart lying on my table, so I thought it would be great to add with the owl.
Thanks so much for stopping in today! Hope you’ve enjoyed my CAS card and have been inspired to join us this month with your take on the challenge too!
Hello friends! How is your Summer going? It seems like it is really flying by for me! After getting back from the wedding, I have a PILE of things to get finished up, literally! I signed up for classes knowing that I couldn’t participate during the class time, but figured I would finish them up on my own, so along with doing that I’ve decided to also throw in a current challenge project as well and share that today:
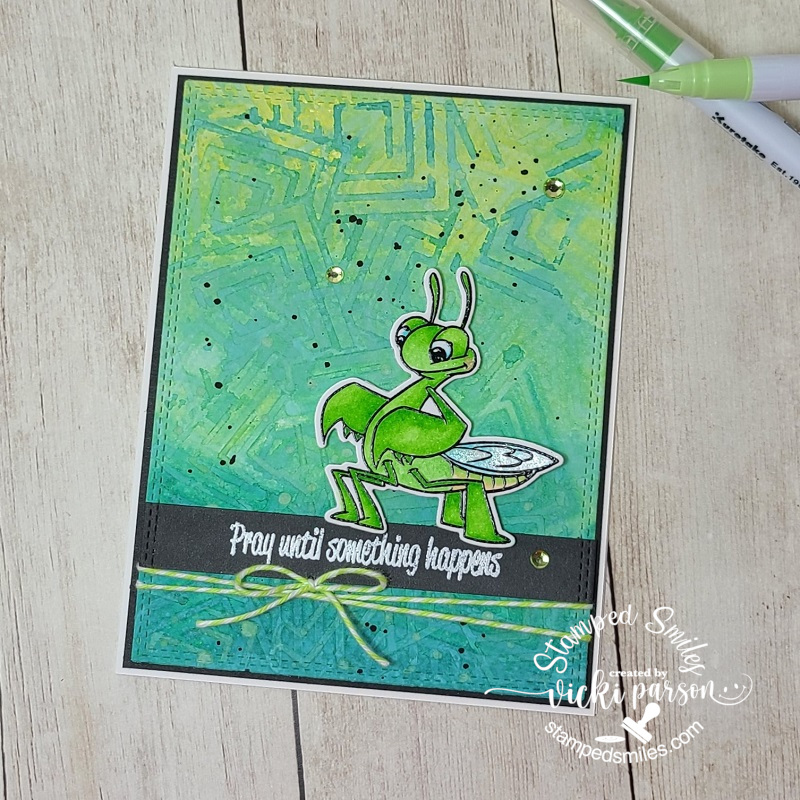
So, this cute little fella came from Inky Stamper called Praying Mantis, of course. The challenge for the month of July in the Inky Stamper Inkspiration FB Group calls for “watercolor” of any kind and so I pulled out my Zig CC Real Brush markers to color him with, cut him out with the coordinating die and even added a bit of the Liquid Pixie Dust on his wing.
For the watercolor on the background, I’ve used an Inky Stamper Watercolor Panel and ran a few different colored Distress Oxide ink pads over it without touching the colors. I then spritzed it with water to saturate and let the colors run together over it. I picked up any extras on my glass mat to completely cover the panel and then I took the Picket Fence Geo Squares Stencil and laid it over top while it was wet, pressed it in and let it just sit until it was dry. I picked up the stencil that had dried ink on it, spritzed it with water and turned the stencil the other way with the ink on it and pressed it onto the panel again and let it dry. This is how the darker ink color showed up on the lighter end. I took some green and black watercolor to spritz over top. Really fun background to play with!
I then white heat embossed a sentiment over a black strip and attached it to the bottom portion of the background and then die cut the panel with a double-stitched rectangle die. I used foam squares to pop up the bug and wrapped some Doodlebug Limeade Twine under the sentiment. This panel was layered over a black piece which was attached to a top folding A2 white card base. I finished it with some Doodlebug rhinestones.
And continuing on with my “Inky Stamper projects”, There was an OOAK event a few days before I left. I didn’t have time to do my projects during the time but finished them up when I returned. We made this fun and unique fold design with a gorgeous butterfly and then of course the mini card to go along with it.
For mine, I colored the butterfly with Copics, popped up the wings with foam tape and added some of that Liquid Pixie Dust which is hard to see in the photo. Then for the mini card, I used some watercolor to color the hydrangea with. The sentiment was white heat embossed.
Super fun projects as always! (I usually make my “mini card” into TWO ATCs, I just did the one so far here.)
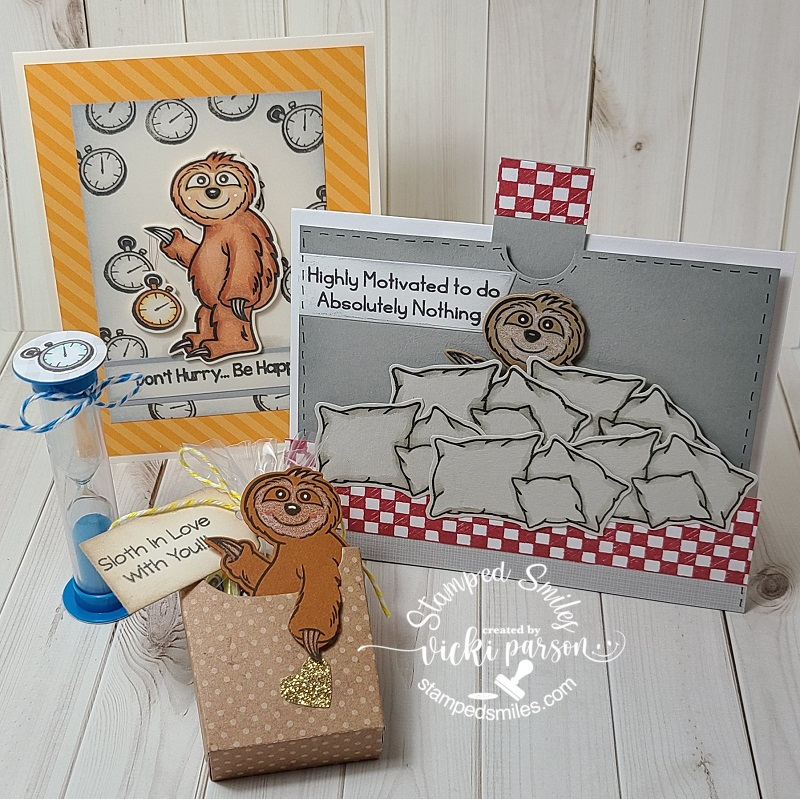
And for my last set of “Inky Stamper projects”, this was for a special class Chelsea held during the time that I was gone. Even though I wasn’t able to attend the fun and games with them live, I went ahead and purchased the kit anyway so I could watch the video at a later date to make all of these fun projects centered around this ADORABLE Sloth!
I pretty much followed along with the way the class projects were made. I added some gold thread on the card in the back with the clocks so that it could hang from the sloth’s claw. I added a glittery heart for the treat container for the sloth to hold as well. The candy inside the container are slow pokes!! 😂 Super cute and fun projects to make! I sort of treated myself to the candy while I was creating!
I also think that there were a few days where I could relate to the sloth too, but glad to get things done!
Really hope you’ve enjoyed my projects that I’ve shared today and are inspired in some way too! Thanks so much for stopping in today…I’ll be sharing more soon! 😉
Hello friends! Hope you’ve had a great Fourth of July weekend and staying cool through this really hot week too! I had planned on scheduling a post or two while I was gone last month, but time just didn’t let me get there and I’m a bit behind, but I wanted to share a couple of masculine cards I made for some men in my life for Father’s Day:
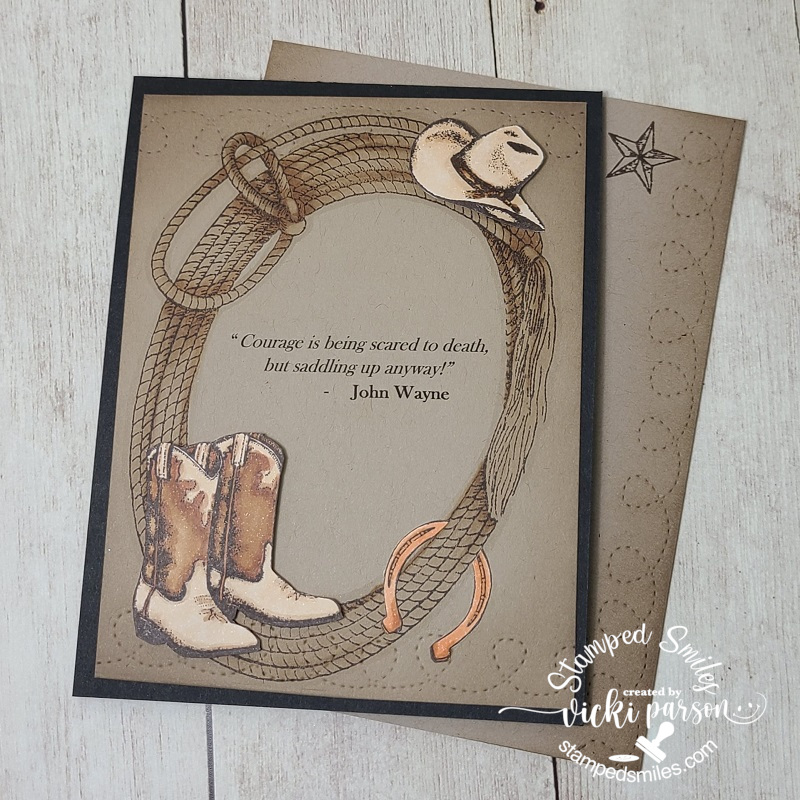
Up first is this card I made for my dad. He’s a huge John Wayne fan and so I thought it would be fun to print out one of his famous quotes for a card. After printing it out, I stamped the large rope lasso image around it from the Whimsy Stamps Cowpoke clear stamp set. I printed the quote over a piece of kraft cardstock and stamped with chocolate colored ink with the rope frame and colored it with Copics. I also cut the other images from the same stamp set over White Copic Blending Card and colored it with Copics. I just fussy cut them out with scissors and placed them over my card front with some foam squares. I cut a section of the horseshoe out so that it “appears” as if it’s hanging around the lasso and glued it over each side of the lasso.
I thought it would be fun to add some more details to mimic the boots by die cutting the loopy stitched borders from the Whimsy Stamps Straight Edger Die Set and then I ink blended around the edges with chocolate ink. I also did this with the envelope you see behind the card too.
He really liked this one! I remember as a child sitting with him sometimes and watching those really old “cowboy movies”. LOL
The next card I made was for my husband…
This card was PERFECT for him! Most of the time, the kids would always tell him that his jokes were NOT funny, but the fact that HE thought they were so funny is what made them laugh! 😂 And then he would claim that they were laughing or smiling, so he knew they liked them!😄
So, when I saw this Dad Jokes stamp set from Lawn Fawn, I knew it would be a good one to have on hand for cards with him. I kept this card a simple one with a grassy stitched border and then I used one of those woodgrain papers from Lawn Fawn and also die cut the LF Father’s Day Border using the same woodgrain paper for it.
I positioned the little chicks to the side with the *crickets* sentiment above them and then the other one laughing while the little chick with the tie is telling the “dad joke”. I popped up the speech bubbles with foam squares. You will also see that I’ve stamped another “dad joke” on the envelope with some ha ha ha next to it as well.
**Side note: My husband’s favorite “dad joke” from the stamp set was…”What’s brown and sticky?…A stick!“** He had to tell that one to the (adult)kids of course! 🙄
Hope you’ve enjoyed my masculine cards today or had a smile! Thanks for dropping in and I’ll see you soon!
Challenges:
The Male Room – Monochrome (Top card only with brown tones)
Alphabet – ‘G’ is for Giggle/humorous card (Second card only)
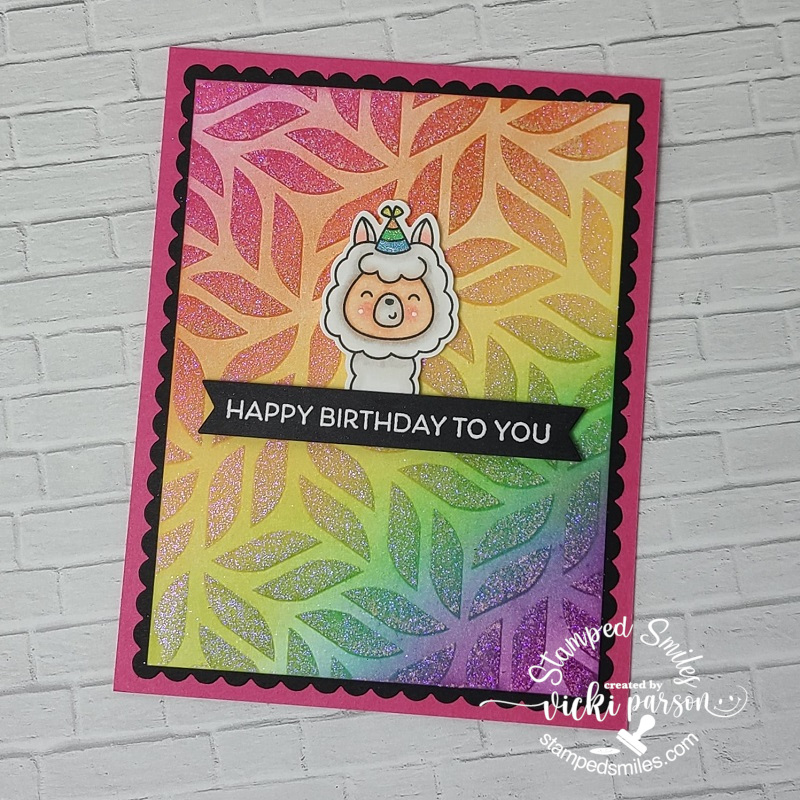
Hello friends! I don’t know about you, but I’m so happy to see the month of May starting! That means the flowers will be coming out along with the warmer weather! It’s also a great time of the year to see a rainbow perhaps?!
Today I’m super excited to be joining the “Challenge Up Your Life” challenge blog as a guest designer! I had previously won a Top 3 and a future guest design spot from a past challenge I had entered, so I’ll be joining them as a guest for April, May and June challenges! Today their new monthly challenge for May is “RAINBOW“. Hope you can share your lovely creations with us this month! (Check out the challenge blog for details and inspiration!)
Here’s my guest design creation for this month’s challenge:
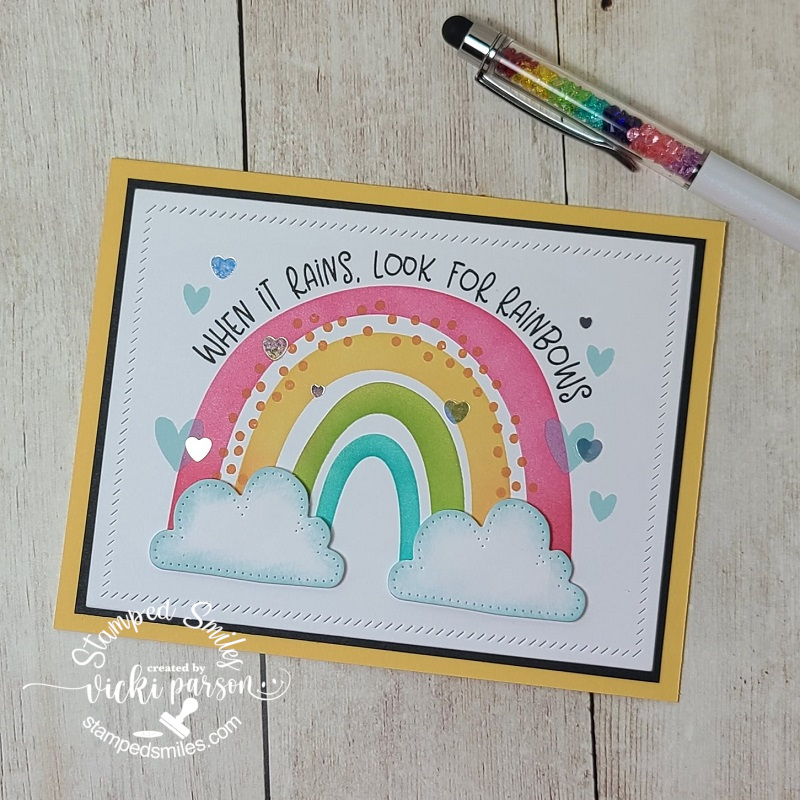
Nothing better than to look up into the sky and see a rainbow! What’s also fun is to be able to create your own and especially on a card to send to someone to brighten their day! I’ve used a previous card kit from Taylored Expressions that contained these products: Make a Rainbow Stencils, Over the Rainbow clear stamp set, Rainbow Cloud Duo dies, and Over the Rainbow Sentiments clear stamp set to create this card. I ink blended the different colors through the rainbow stencil and stamped the orange dots over the rainbow as well as a few hearts in light blue ink. The sentiment was also stamped with black ink over top of the rainbow. I then die cut the one cloud twice from white cardstock and ink blended some light blue around the edges of it and popped it up with foam tape at the ends of the rainbow.
Then the card front panel was run through the die machine using the Taylored Expressions Diagonal Stitch Rectangle dies (Which actually doesn’t cut anything out but creates the lines.) I layered it onto a piece of black to make the rainbow pop a bit more and then attached it to an A2 sized top folding TE Pineapple card base. I also topped it off with a couple of TE Bits & Pieces-Full of Heart sequins.
I knew the minute I went to create for this challenge that my zippered pouch from Taylored Expressions that has the “A Rainbow of Possibilities” sticker over it was what I was going to grab! All of my rainbow things are in it! Makes it easy to grab when you know everything is in there!
I hope you’ll stop over at the challenge blog and join with us to share your rainbow too!
I hope you’ve enjoyed my card or been inspired! Thanks for stopping by and I’ll see you soon!
Hello friends! It seems that I have went MIA on you, but I promise I’m still here! I’ve been really busy “Behind the Scenes” as they say and have many things going on at once that I’m trying to juggle, but I do have TONS of things to share that I’ve been doing and hope you enjoy seeing them! (LOTS of photos!)
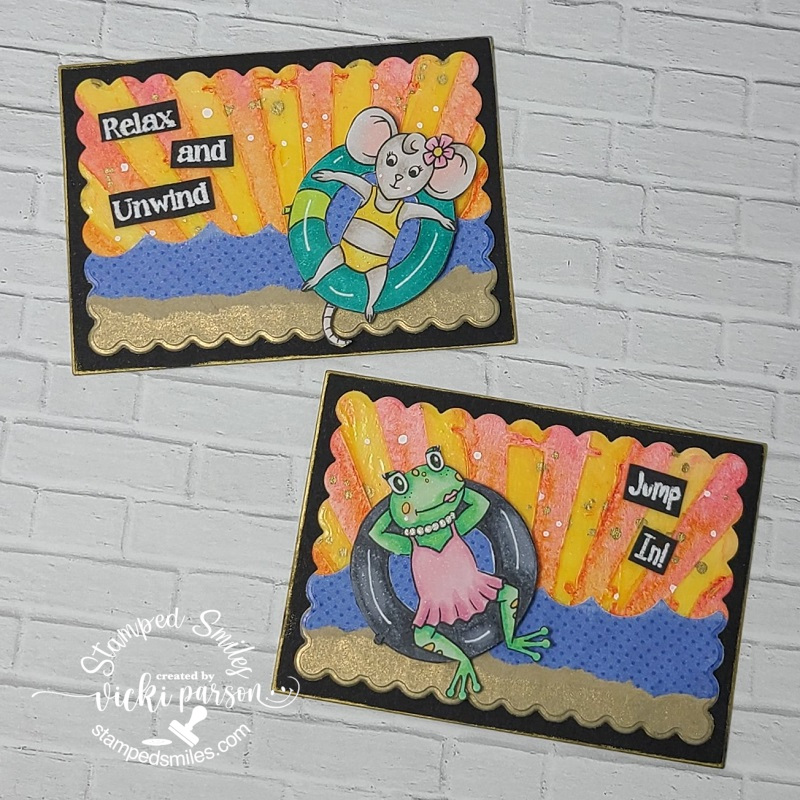
First up I have a couple of fun Summer themed ATC sized cards using some Inky Stamper sets called “Splash” and “Chaise Lounge“. (Still not wanting to warm up much for Spring…so I’m wishing for HOT summer now!😁) I made them for this month’s theme of “ATC sized or mini cards” challenge in their FB group. I started out with a sunray stencil and used some yellow glaze paste and once dried I added some watercolor over it which was resisted by the glaze which gave me this look for the background. I splattered it and then added some strips of blue dotted paper cut from a wave border and then I ripped a piece of gold at the bottom. I cut cut with a scallop die and layered over a black 2.5″x3.5″ piece of black cardstock folded in half and went around the edges with a gold ink pad.
I white heat embossed the sentiments from each stamp set and then cut portions of them out with my scissors to attach over the backgrounds. The images were colored with Copics, fussy cut out and popped up with foam tape over top.
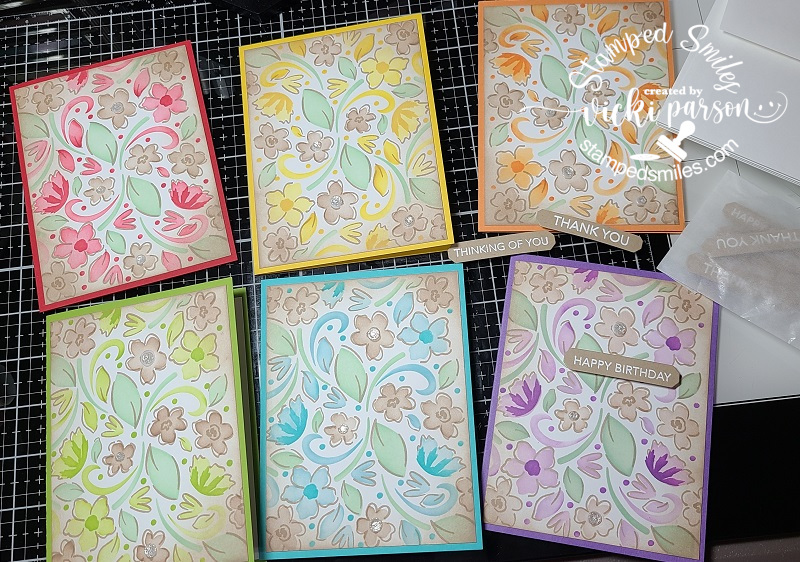
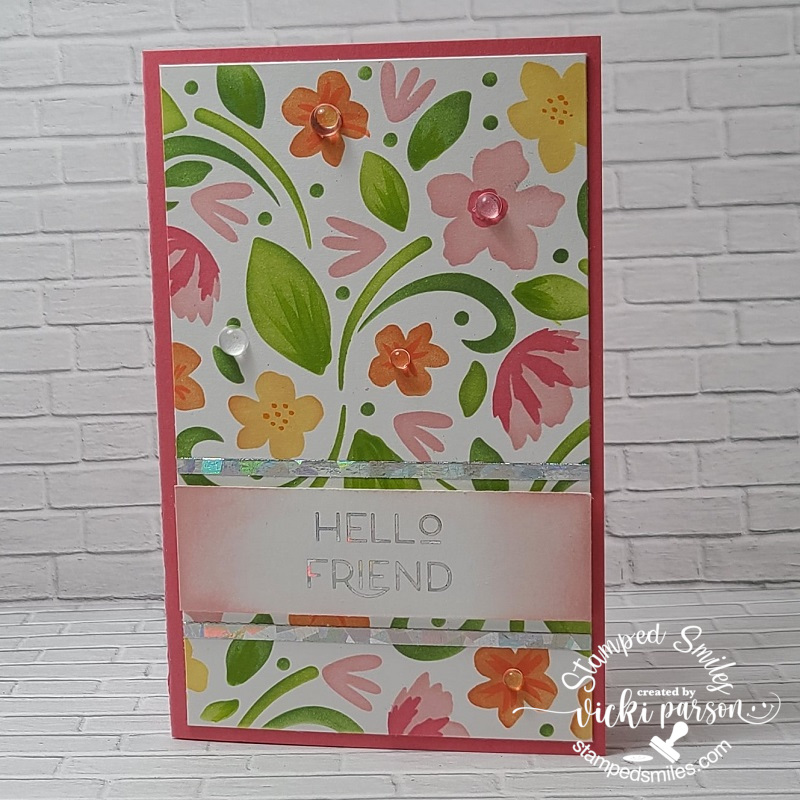
Next, I wanted to share a “Greeting Card Gift Set” that I have made and gave as a gift for someone. I used this wonderful product idea from Taylored Expressions called “Stamp & Give Card Kit 1” and it’s something that I had wanted to put together for a very long time on my own, but this product came along recently which pushed me into gear with no excuse of gathering things together on my own as this was already together for me. All I had to do was do the stamping and stenciling. I coordinated the colors with what was in the set. I like the fact that the recipient of this give set can choose which greeting they want to use for each card and the package of greetings are ready with a foam strip on the back of each one. For my designs, I’ve used the TE “Floral Flurry” Background stamp and stencils which I received from the “Stamp Joy Virtual Event” that I had attended. (not in store as it was exclusive for the event…photos at the bottom of post for that!) I’ve added 3 gems randomly to the fronts of each card.
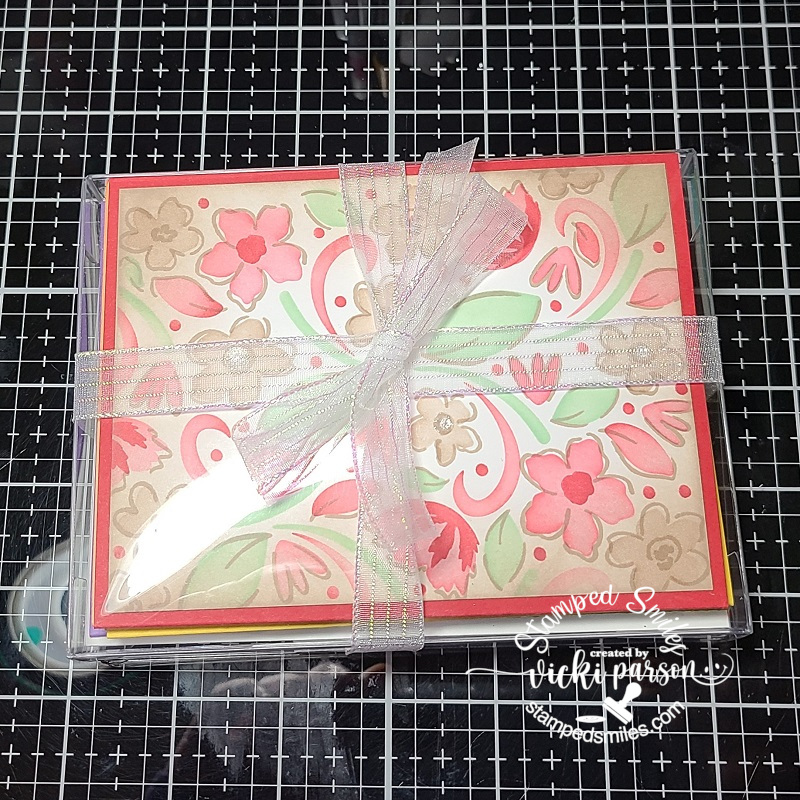
With the kit, it comes with all of the envelopes, card bases, glassine bag to hold all of the sentiment strips, the card fronts and even the acetate box to put them all in. I just added some ribbon once I put all the cards inside. I certainly plan on doing some more of these greeting card gift sets soon! I think it’s always nice to have a set of themed cards all together and ready to go when you need to grab one quickly!
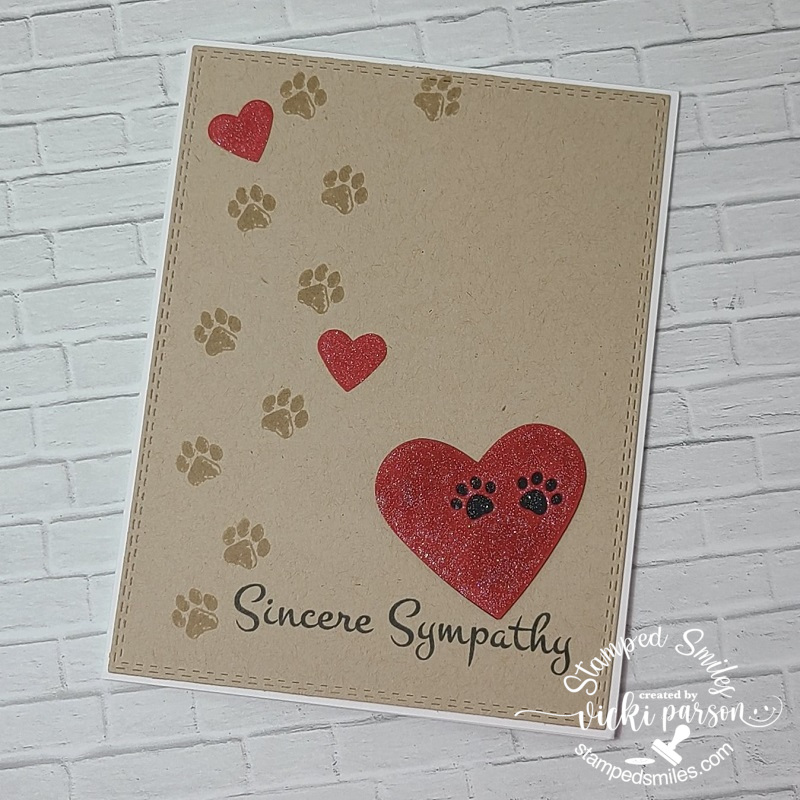
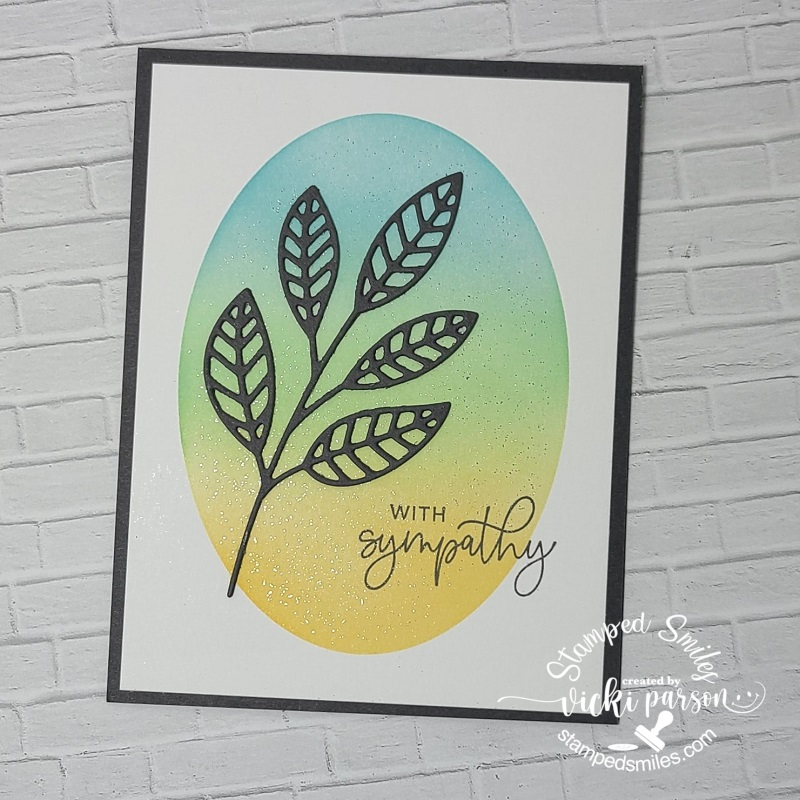
Unfortunately, next up I needed a pet sympathy card and I thought you could never go wrong with paw prints and hearts. I’ve kept this simple and pulled out some favorite Whimsy Stamps “Fill My Heart” and “Furever In Our Hearts” stamp sets for the paw prints and the sentiment. I’ve also used the My Favorite Things “Paw Prints Die-Namics” to die cut a couple of paw prints over the heart that I’ve punched out from red cardstock along with some smaller hearts above it.
I’ve used a glitter brush pen to make the hearts sparkly looking. This was all done over a kraft colored card front that was cut with a double-stitched rectangle die and placed over an A2 sized white card base.
I really need to get a set of pet sympathy going so that I already have them on hand as needed because it seems like I’ve sent many out and don’t have anymore…and I need another one already. I actually need to make sure I have several sympathy cards in general on hand, so I know I’ll be replenishing that soon too.
And lastly, I thought you might want to see all of the projects that I made during my classes and make-n-takes that I’ve done during the Taylored Expressions “Stamp Joy Spring Virtual Event” from last month…gosh, It’s been that long already and I’m just now posting them!🙄
The first four cards were from the classes on the first day (using the same product/style line), and the others are from the second day with all of the Make-n-Takes. If you’re visiting directly on my website, just click on each photo below and it will enlarge so you can see it better along with the typed details about it!
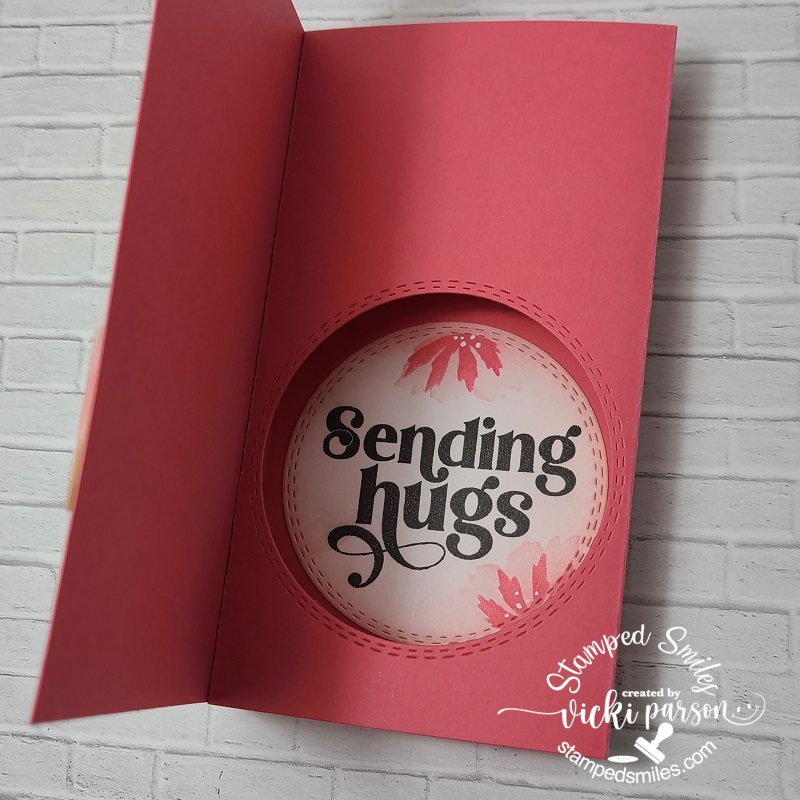
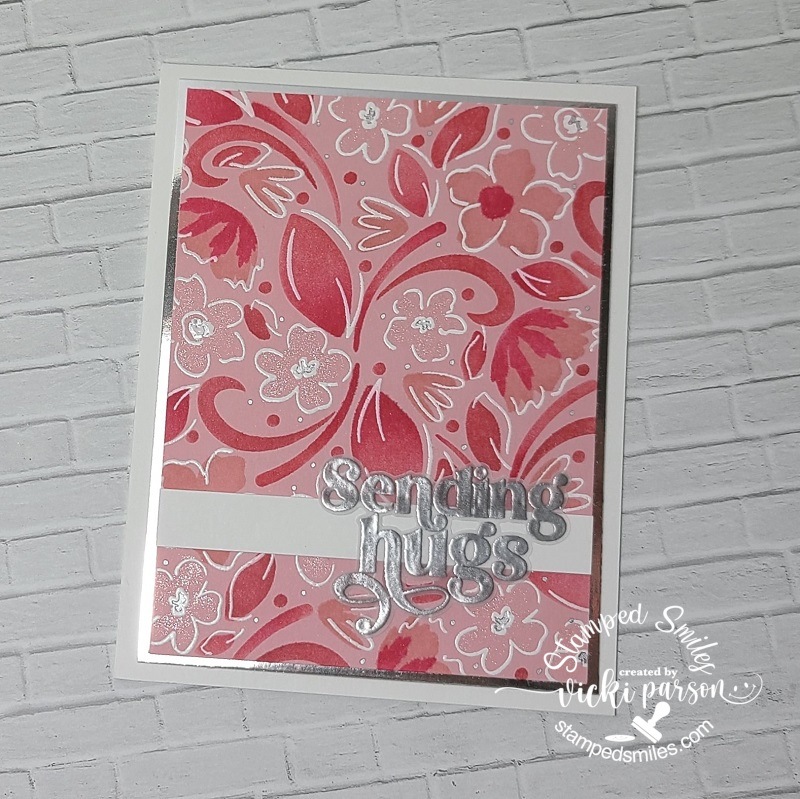
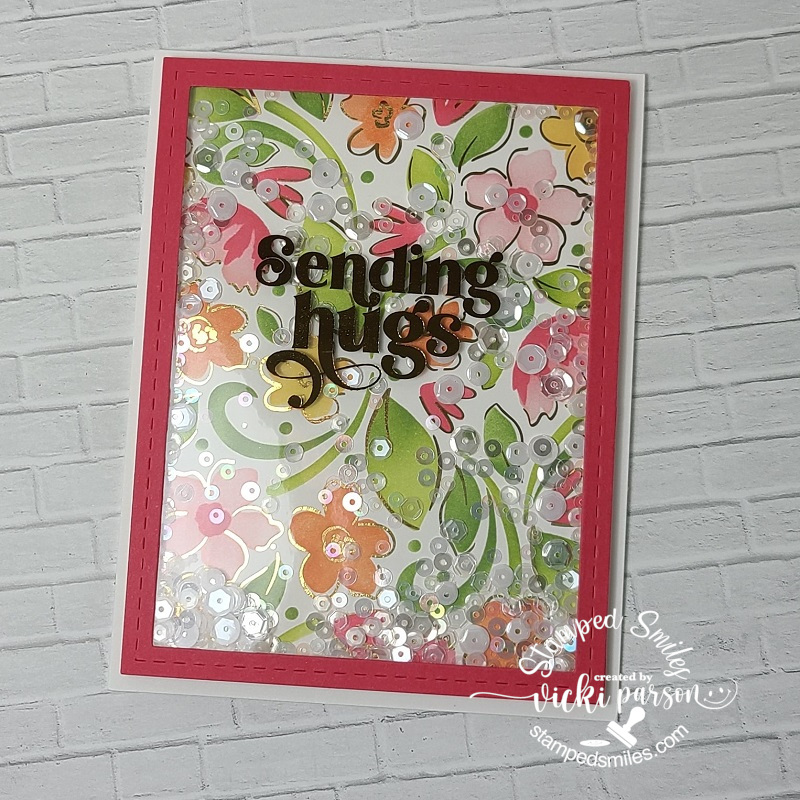
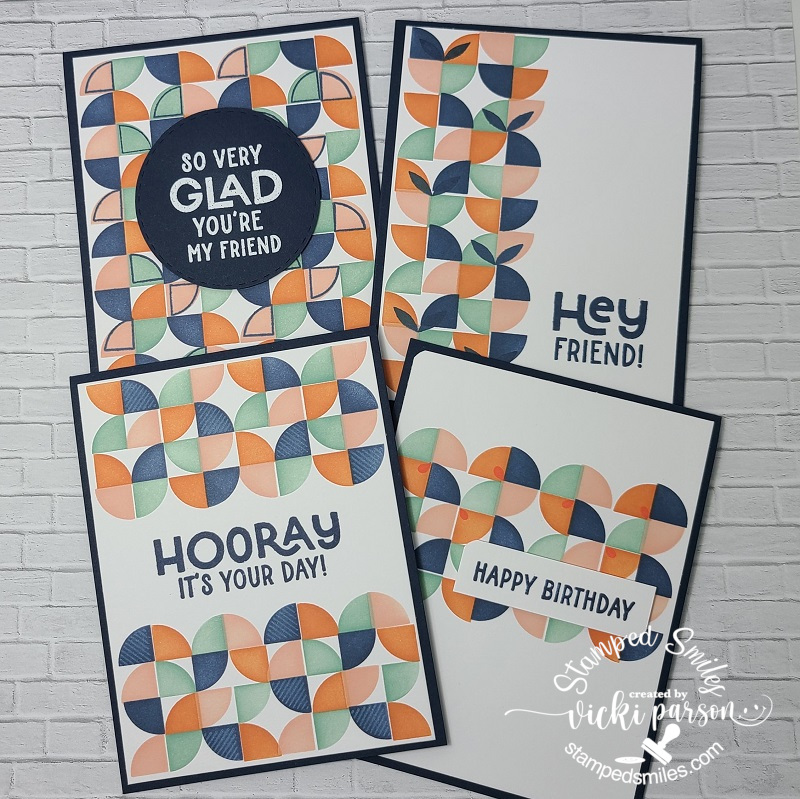
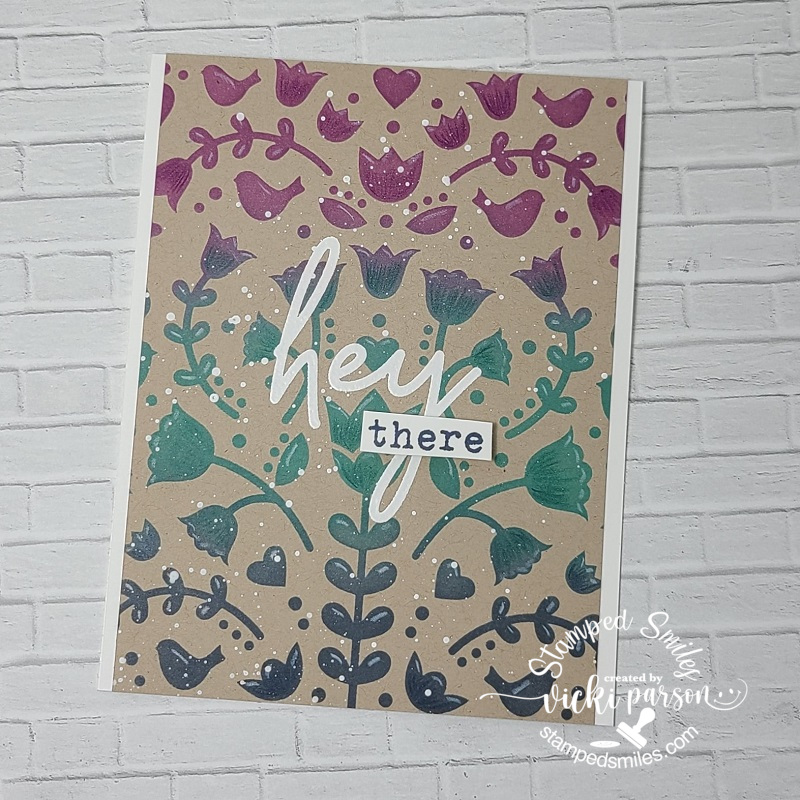
This is the first card in the TE Stamp Joy class series using the “Floral Flurry” products that I also used in the greeting card gift set above in the post. We used some markers on this for details and did some foiling. This is a “special” card….see next photo for the inside.This is a “view finder” style of card, but lays flat for mailing. It’s a mini slim sized card.Second card done with same floral products with some white and silver embossing details.The sentiment on the acetate panel was pre-printed for us and we laminated it along with the background floral panel with gold foil. We turned it into a shaker card.Last card for the classes was done over Toffee cardstock with some splattering details. I’ve used paint for mine.Card one of Make-n-Takes with ink blending and using pixie spray to foil…pretty shimmer!Make-n-Take 2 with a cool secret “ghosting effect” for a mini slim sized card!!Make-n-Take 3 was this set of four cards using a fun “Mod” Create-in-Quads Layering Stencil” and coordinating stamp set for sentiments and accents!Make-n-Take 4 was this cut mini slim sized card with highlight details using a white gel pen.Make-n-Take 5 with ink blended stencil background and adding details with colored pencils. I splattered with white paint.Make-n-Take 6 was one of my faves with the sparkly embossed strips in the middle and the black glossy die cut elements!Make-n-Take 7 was fun with the ink blending and adding glitter paste through stencil. The critter is too cute!
I’m really far behind in catching up with whatever the challenges currently are as well as seeing what’s going on with my fellow blogging friends, so I will get going as soon as I can!
Thanks so much for stopping in and I’ll see you soon!😘
Hello friends! Hope you’re having a great week so far! I have a few cards to share with you today that I’ve made over the weekend having some fun.
I love the cute little grin this goat has! This goat along with all of the images used are from the same stamp set by Inky Stamper. This month, the Inky Stamper FB group challenged us to create a ONE-LAYER only card…not even ribbon/twine, etc. could be used! I haven’t made one of these CAS or one-layer cards for quite some time, but I enjoyed the play with it.
So I’ve used masking paper to create this by stamping the goat over masking paper, stamping the goat over the front of the card and then placing the cut out masked goat to cover him up. I then die cut a circle over another piece of masking paper and placed the left over piece on top of my card where I masked my goat image. All that was left was the circle opening and this is where I ink blended the opening with distress inks. I also stamped the small line of grass with green ink.
I took off the circle mask along with the goat mask. I colored up the goat with Copic markers and then I stamped the triangle image from the same stamp set along with the sentiment. I then added 3 black gems and colored the inside triangles with a glitter brush pen. I also used my corner chomper to round the two bottom corners.
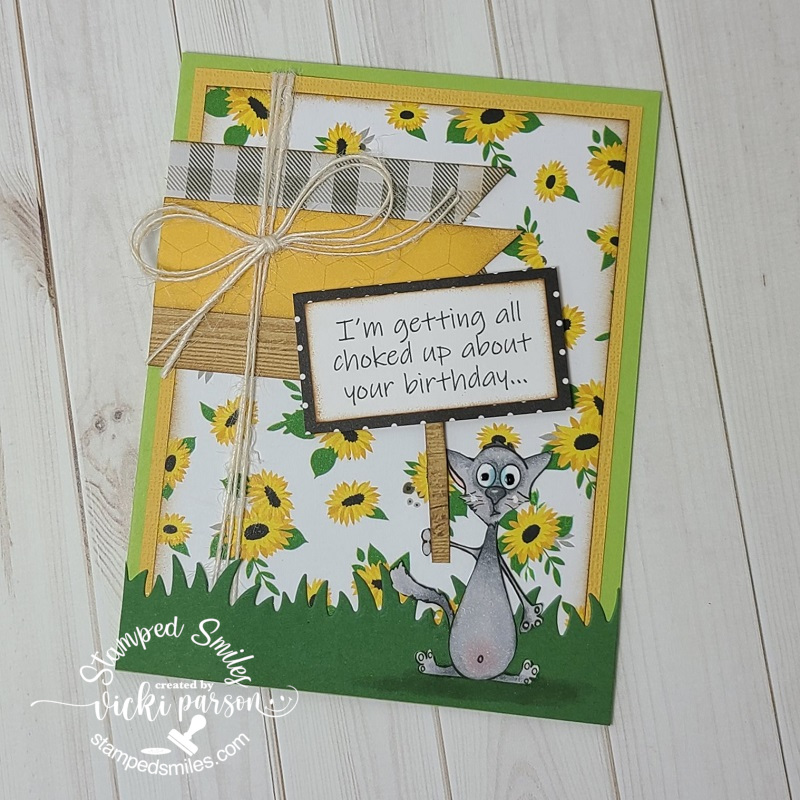
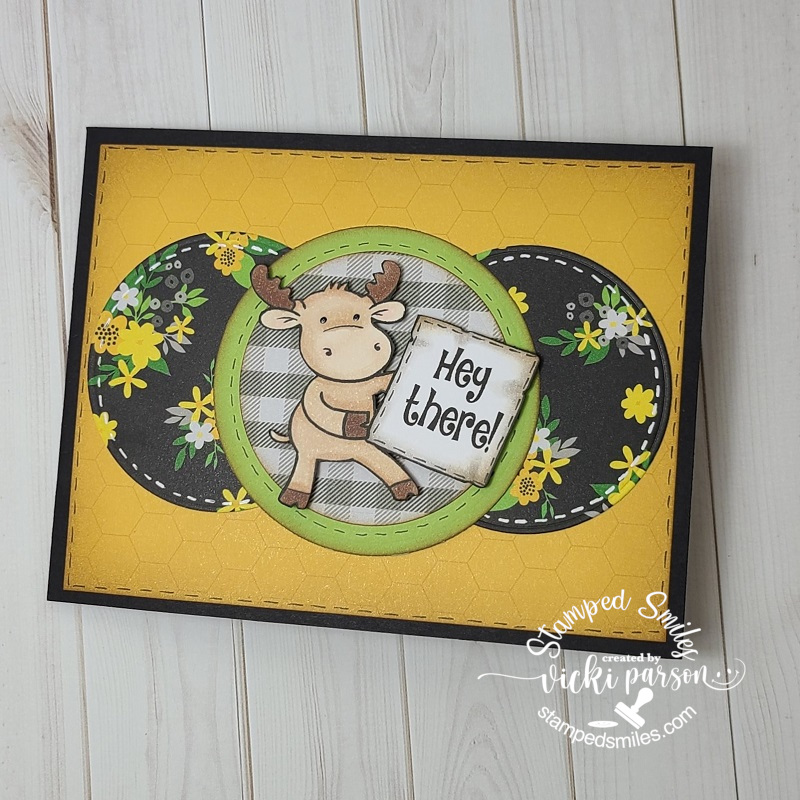
This last weekend there was another OOAK event and there was another fun card kit from Riley and Co. I didn’t attend the entire event, but joined in to see what the new release was about while I was making my cards from the kit. I’m pretty sure that there are no more of these kits left as they sold out of the first batch and had to make more.
The critters are so fun to color, and I really loved these papers from the kit as they have me anxiously awaiting Spring to get here! I’m bundled up, drinking hot liquids and trying to stay warm, but nothing beats a warm Spring Day! 😁
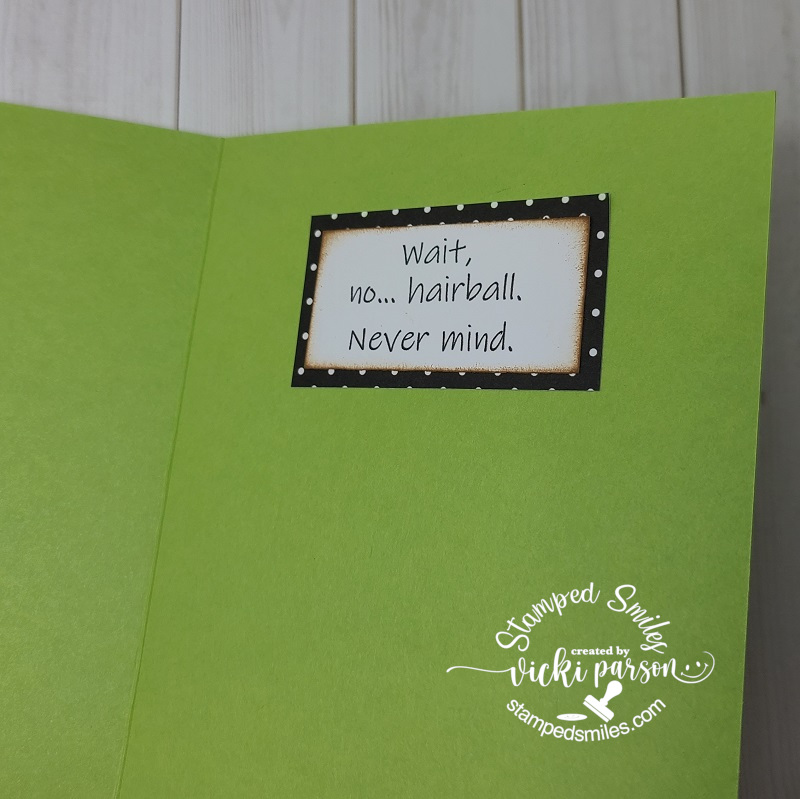
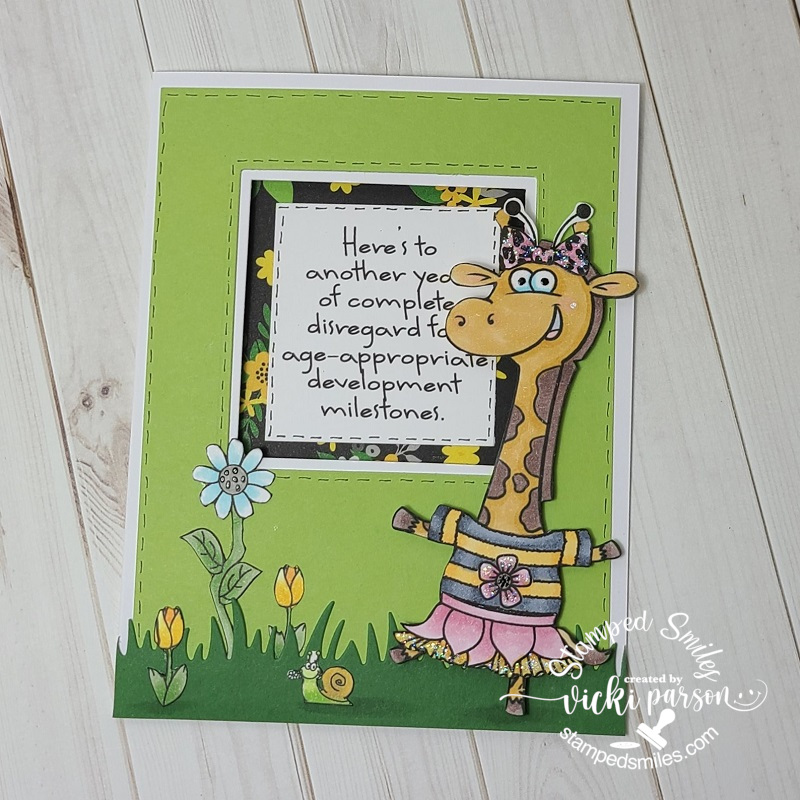
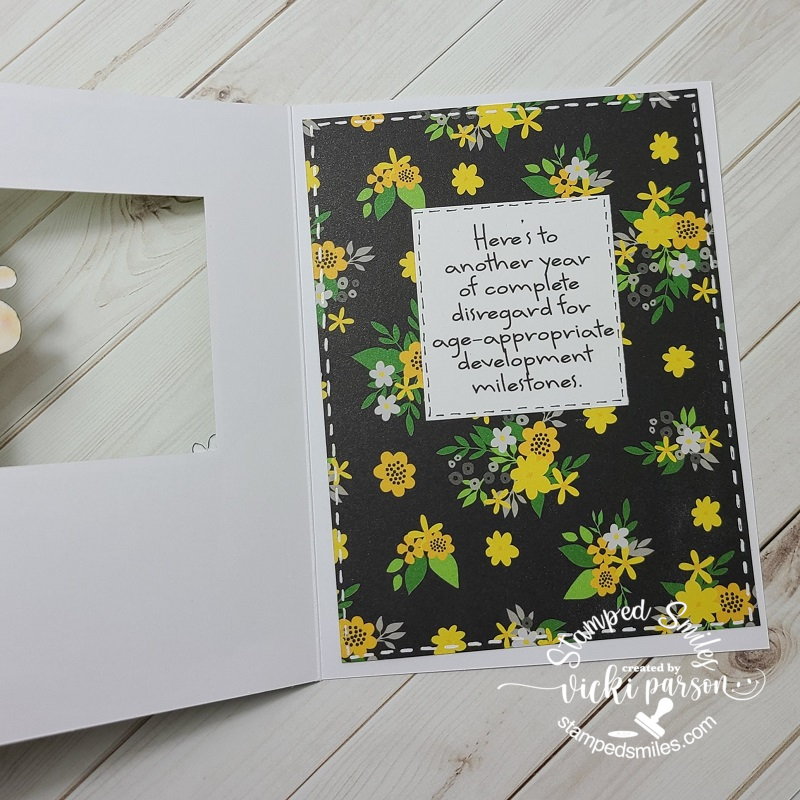
To get a better look at each one of these cards up close along with what’s going on for the insides, check out the gallery below. If you’re directly on my blog website, you can click on each photo below to enlarge it:
The cat’s bugged out eyeballs is too funny! I’ve used foam tape to pop up his sign.To continue with the cat sentiment on the outside, here’s what the inside part says! LOLIt may be hard to tell in the photo, but the sentiment is a window. Check out next photo to see the complete sentiment.Full sentiment for giraffe card…here you can window.This card opens along the side edge…check out next photo to see inside…I sort of messed this one up as I should’ve placed the outward fold back a little more as the card doesn’t completely open and I didn’t have room for the sentiment…so this was changed later.
Just wanted to share my recent makes as I’m still trying to work at finishing up some Valentine cards along with getting going on the wedding invites. Sure enjoy seeing the wonderful inspiration from everyone and hope that you’re all staying safe and warm friends! Thanks for stopping in and I’ll see you soon!