Berry Fun🍇

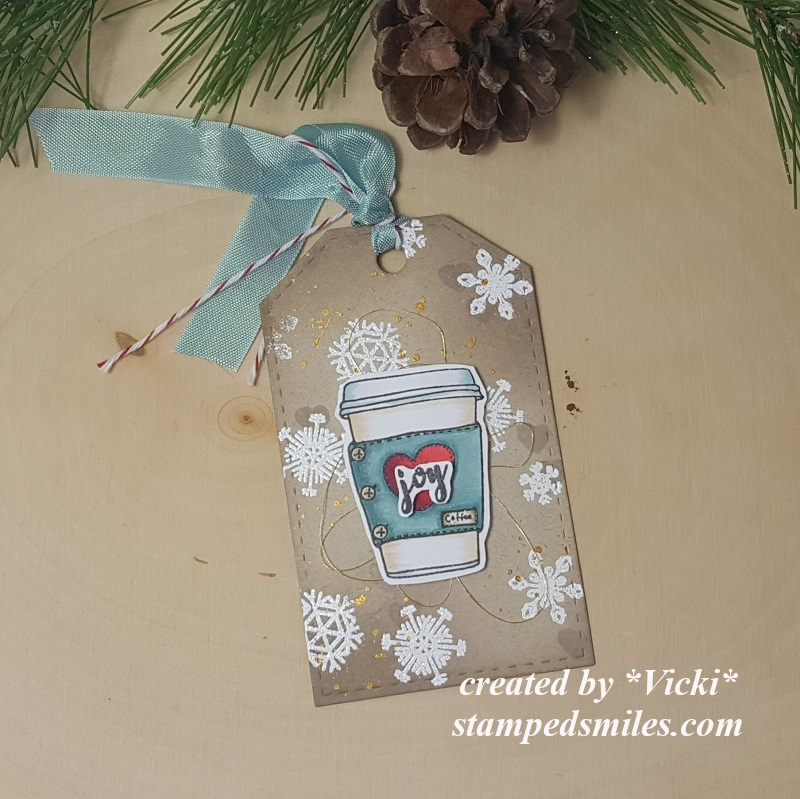
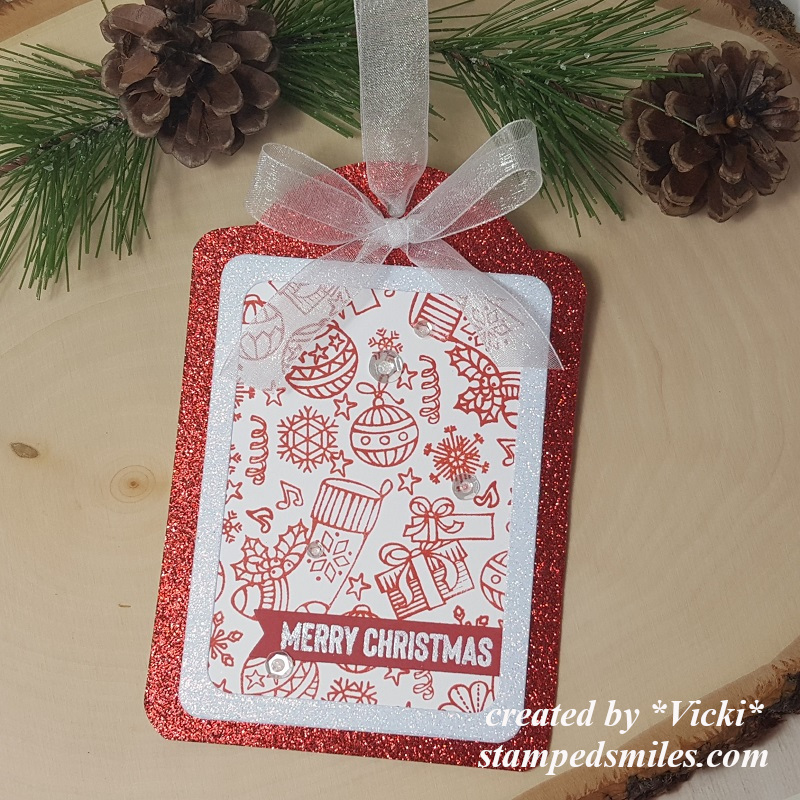
Hello friends!  I’m still sharing some projects that I had been working on from the previous month and hadn’t posted until now.  I’m also having fun creating “behind the scenes”, which is nice to just be able to “relax” and not rush on creating projects just for posting!  I’m keeping that in mind when I tell myself that I’m “behind”!

I think just having some fun is the key!

So earlier, I was “challenged” to use some of the pre-printed “Card Panels“.  These are card panels that are also foilable prints or you can color them, ink blend over them, etc.  So I decided to have some fun and play with a past card kit from my stash:

Vicki-BRMberrycardpanels

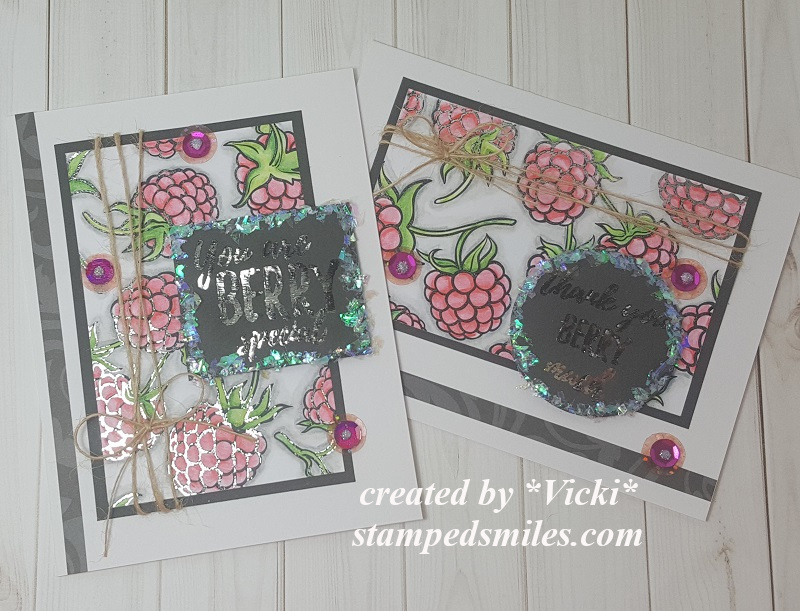
The Berry Thankful Card Panels were used for both of my cards.  I used some colored pencils and a water brush to color in both panels.  But because they’re not a water friendly type of cardstock, you need to be aware of possibly too much moisture in the paper.  So I kept a very light hand with it and just did some basic coloring on them.  Then after I got them colored up, I used my laminator and foiled over them with some Silver Deco Foil sheets.  For the sentiments on the cards, I took out the Berry Thankful stamp set also included in the same card kit, and heat embossed them over the grey cardstock included in the kit with some Foil Reactive EP and ran it through the laminator again with the same color foil I used on the card panels.

After running through the laminator, I used some dies to cut them out with and then I ran some glue along the edges and dipped them in some chunky flaky glitter that was also included with the card kit and popped them up over the card panels (with foam tape) that were placed onto some cardstock in the kit and layered over an A2 sized folded card base.  Before I attached the card panels, I wrapped some twine around them and tied with a bow.

Lastly I added a thin strip of decorative paper and also added some sequins from the kit. I filled them with silver glitter in the centers.

Normally, I would’ve posted a photo of each design, but really wasn’t sure that I would be posting about these on my blog.  So I hope you enjoy the “berry” shinny cards!!😂

Thanks so much for dropping by today and I wish you a very fun and happy upcoming Memorial Day weekend!!  (Wow!  Where did the month of May go?!!)

Challenges:

  1.  Let’s Craft and Create – #159 Anything Goes optional ribbons, lace, twine
  2. Crafty Creations – #409 Anything Goes
  3. My Time to Craft – Food Stuffs #432
  4. Creative Fingers – #186 Anything Goes
  5. QKR Stampede – #398 Anything Goes
  6. Sparkles – Use a real stamp (no digis) ~ sentiments heat embossed
  7. Lil’ Patch of Crafty Friends – #132 Anything Goes
  8. Pammie’s Inky Pinkies – PIP2020 Anything Goes

Inspired By Crafty Friends❤

Hello there friends!

I have to say thank you for your lovely comments and thoughts!  Sometimes, you just never really know about something or how someone feels unless you are told or you ask!  I’m really amazed that there are people I didn’t realize that actually cared if I posted something!  Even if you have stats on your postings, you still don’t know who really DOES like to see what you’re posting.  I’ve had some blog friends that have been around for MANY years, even before this blog platform and I’m so thankful for you guys!  I am always truly inspired by you all for sure!  Thanks for being around!❤  (Even if you don’t comment!!) 😉

I have another card that I didn’t get a chance to share as it was created at the end of February and I never fit it in to post, but I pulled out a very old stamp to play with because I was inspired by a friend to use it:

Vicki-ShellysPenguin

Maybe you have heard or seen the Whipper Snapper Designs stamps?  I’ve had this adorable little penguin for a while now and I think he’s long gone from the website.  I don’t see him in the store, but the name on the side of the wood stamp is “Ice Cream Penguin” and no date.  I have a small collection of their stamps and they’re all older as I haven’t bought anything from them in years and not sure why really.  I hold them in high regard like my old Peanuts Gang/Snoopy wood rubber stamps as you can’t find those any longer either!  I don’t part with them! LOL!

Anyway, inspired by my friend Shelly that was featured on Splitcoast Stampers as the FS681 “mcshmidty” Featured Stamper.  This is a challenge where you find a project from their online SCS gallery and use it as inspiration to create something.  Here’s the card she made that I fell in love with in her gallery:

IMG_6447_12216_by_mcschmidty
card by Shelly Schmidt “mcshmidty” on SCS

I thought it would be fun to use an older stamp I had (I love penguins) and create a birthday style card with it.  I have a few birthdays to celebrate in the colder months, so I was just trying to think ahead and I liked that this could be a masculine or feminine card to give out too!  I can’t remember where I pulled the pattern paper from, but the colors really caught my eye!  Instead of the strip like Shelly has on her card, I made my strip into a banner.  I used a snowflake instead of a sun and two enamel dots.

Vicki-ShellysPenguin-close

I stamped and colored him up with Copic markers.  I used some liquid applique for the end of his hat and dotted his cheeks with a white gel pen.  I used glossy accents over top of the cherry on his ice cream cone.

The sentiment was pulled out from an older My Favorite Things stamp set that I white heat embossed over black cardstock and cut apart.  I also used MFT stitched die cuts for the banner and circle image.

Vicki-ShellysPenguin-flat

I must’ve been in the mood for ice cream before I took a blog break as I just realized my last post had ice cream too! LOL!!  Hope you like my card as I was really inspired by my friend’s card to make it!

Thanks for dropping in and I’ll be seeing you soon!!

Challenges:

  1.  Splitcoast Stampers Featured Stamper – FS681 mcshmidty
  2. Crafty Animals – #38 Anything Goes + animal
  3. 2 Crafty Critter Crazies – #38 Anything Goes + animal
  4. Challenge Up Your Life – #123 Animals
  5. QKR Stampede – #396 Anything Goes
  6. Lil Patch of Crafty Friends – #131 Anything Goes
  7. Crafting Happiness – #47 Anything Goes/optional: birds

I’m Still Crafting!!🎨

Hello there friends!! 😀

I’m doing well and healthy as is my family!  I sure hope that all of my fellow blog friends and readers are staying healthy as well!  Thank you from the bottom of my heart for reaching out to me and asking about my well being!  I really miss you guys!

I haven’t posted since I’ve not been on any design teams and I sort of just “took a personal break” from posting anything on my blog or social media.  The first reason being was that I had lost some “MOJO” and was really struggling with getting inspired and wasn’t really “happy” about what I was creating.  As I had mentioned before, it really does happen to us and sometimes it’s harder to “get over it” at times.  With all that is going on in the world right now, I also had other concerns on my mind as I’m sure many of us have.  So my blog break became even more extended.  Now that I’ve “been away”, I’m stuggling with what exactly I want to do.  I miss my blog friends very much and really enjoyed having this way of communitcating with you all…after all…we love crafting together and we have that in common and it’s something to be happy about to come together for!  So I’m sharing my heart to heart update with you!

WHAT HAVE I BEEN DOING??????🤔

Yes!  I’ve been crafting, but I just haven’t really taken the time to create a post about it.  As you know with blogging, you know that you not only need to take a photo of it, but you have to edit it, watermark it, create/type up the blog post, link all the things and then share it to all of these other social media platforms..so, with that, I just didn’t take the time! LOL!  And….I’m still trying to decide if blogging is something I should continue.  PLEASE, share with me your thoughts.

While I’ve not been posting, I sure have been crafting!  I signed up to take several different classes!   I had planned on going to a couple of retreats that were obviously canceled, so I decided that the online type classes were a way to go and to try to boost up some of that lost MOJO!  While not posting about it, I actually think that may have helped!  I was able to freely create with no time restraints and I didn’t have to worry about typing up a post for social media and “judgment”.  It just turned out to be whatever it was!  So MAYBE posting about whatever comes up for my crafting is a little more “freeing” and it can be whatever it turns out to be?  I don’t know, I guess I will find out!

____________________________________________________________________________________________

I will try and start with about where I left off from the beginning of April and just go forward from there!  Lots of things have been going on “behind the scenes”!  LOL!

Vicki-BMicecreamBday

This is a card I had actually made back in March for a birthday card for someone and just never posted it.  I had pulled out an older birthday card kit and used the stamp set along with the papers from the kit.

I also used the circle shaker pouch as well as some dies from My Favorite Things to create the shaker panel.  the confetti and sequins all came from the card kit I used.

Vicki-BMicecreamBday-close

I used Copic markers to color in the ice cream cone and then I also die cut a heart from the Glitterstock that was included with the birthday card kit and glued it on top.  I took some white twine as I felt a bow on the cone would help tie everything together nicely.  I white heat embossed the sentiment over a strip and swiped some white ink along the edges of it.  It was glued over top of the polka dotted paper and die cut out with a stitched rectangle die.

Vicki-BMicecreamBday-flat

As you can see, I even took an additional image from the stamp set and stamped the envelope to match. (something I’ve been trying to work on when making cards)

I didn’t photograph it, but I also used a gift card pocket die on the inside of the card to tuck a gift card in.  Those little pocket dies come in handy for when you want to mail a gift card!

So please let me know that you’re here and what you think!

Thank you for your continued support during my crafty journey!!  I have more things to post that I’ve been working on, so I’ll be seeing you soon!!

Challenges:

  1.  Crafty Cardmakers – #256 Celebrations
  2. A Bit More Time to Craft – #115 Anything Goes
  3. Creative Fingers – #185 Anything Goes
  4. Stamp & Fun = Creativity – #367 Eat & Drink
  5. Pammie’s Inky Pinkies – PIP2018 Anything Goes

Hot Dog! It’s Birthday Time!

Hello friends!  As you know, I’ve been TRYING to get my MOJO flowing and I REALLY appreciate the feedback that I’ve gotten from you and others about things I can try including non-craft related things!  (Honestly, right now in this world with what is going on, it is hard to concentrate along with worrying about my own family in different ways…so that doesn’t help either!)  But I’ve been trying to find things to keep my mind focused and try new things that are interesting to me…so I will just keep going along and see what happens!!  I would like to continue with as many “stamped smiles” as I possibly can right now….we all need that at this time!

Today’s card was made for my son’s birthday that was this past Saturday:

Vicki-SSSSoPunFriends

I pulled out an older Simon Says Stamp card kit and used the So Pun Friends and the I Chews You stamp sets along with the coordinating dies.  I’ve used the cardstock and cute Doodlebug So Much Pun Papers that came with the card kit as well.  The tag was cut using the My Favorite Things Stitched Tag dies.  I created the hole at the top of the tag with circle punches and the twine is from left over packaging.

I cut the tag shape out again with more of the papers from the kit and then popped up the image tag with foam tape and added some white enamel dots.

On the inside I stamped a birthday greeting and made a pocket to hold a gift card for him.  We usually take him out to dinner for his birthday, but since he’s moved away I had to send him a gift card instead.  Bummer…

Vicki-SSSSoPunFriends-close

Here’s a closer look at the cute smile face images that I colored up with my Copic markers.  I cut out the food images with the So Pun Friends coordinating dies.  For the sentiment, I stamped the speech bubble from the I Chews You stamp set over a piece of the Doodlebug papers and then added the sentiment from the So Pun Friends stamp set in the center of the speech bubble.  I then die cut it out with the I Chews You coordinating dies.  

I used some blue distress ink to blend some color over the center of the white area on the tag and then popped up the speech bubble with some foam tape over that area.  The hotdog at the bottom was also popped up with foam tape as well.

Vicki-SSSSoPunFriends-flat

I actually had some fun pulling out this older card kit to play with and who could resist a hotdog smiling at you?!  LOL!

Thanks so much for stopping in and for your continued support!  It’s very much appreciated and I hope that I helped bring a smile or inspiration to you today! 

I actually have a couple more birthdays coming up that I need to make cards for, so I’m sure you’ll be seeing more of those in the near future too!

Challenges:

  1.  Not Just Cards – March Anything Goes
  2. Little Red Wagon – Etc, etc, etc (3 enamel dots and 3 food images with smiles)
  3. Cute Card Thursday – Celebrate!
  4. TIME OUT – Birthday with optional twist:  die cutting or fussy cutting
  5. Seize the Birthday – #185 Touch of Green or Anything Goes

Let’s Celebrate at 2 Crafty Critter Crazies!

HAPPY NEW YEAR FRIENDS!!!

*I wanted to take a moment to first wish all of my friends and blog readers here an extremely Happy New Year and best wishes for the most amazing 2020 you can have!  I have REALLY appreciated each and every one of you for your friendship, support and comments throughout this last year…it really means so much to me!  I hope to continue to inspire and spread smiles with you in the comng year as well!  HUGS*

Today is obviously the first which means it’s time to start a brand new challenge over at 2 Crafty Critter Crazies!  So remember that you have the entire month to play along and It’s ALWAYS an “Anything Goes + a critter” on your crafty project!  Easy peasy!

Here’s the creation I made for this month:

Vicki-2CCC34-BugabooBday

He’s such a cutie and I think he would be a fun little guy to celebrate with especially since it looks like he’s handing out cupcakes! LOL!!

The sponsor for our challenge this month is Bugaboo Stamps and the team were given some images to play with, so I have used this adorable Birthday Hedgie 02 digital stamp on my card today!

After coloring him up with Copic markers, I used a stitched rectangle die to cut him out with and then layered him onto a blue layer of cardstock along with another yellow layer that was cut from a stitched scallop rectangle die.  I used some craft foam to pop him up over the card front design.

For the card base, I took a top folding A2 sized kraft card base and found some fun birthday papers in similar colors slightly cut down to go over top.  I also found a matching blue dotted strip of paper to place from top to bottom of the card base design.  the sentiment was stamped in black ink at the bottom of the image panel.  This is a new set I got from Simon Says Stamp called Tiny Words.

Vicki-2CCC34-BugabooBday-close

Here’s a closer look at the coloring I’ve done on this cute little guy!  His “hair” actually got a bit more “fuzzy” than what I was going for, but I didn’t want to keep going over him or he might look like he partied a bit too much! LOL!

Of course it’s very hard to see unless you see it person, but I’ve added some shimmer with my glitter brush pen over the cupcakes and little hearts.  I also used some colored gel pens to go over some of the confetti pieces around him.  I also used a white gel pen for his cheeks and I thought he needed some eyeballs and I made those too!

Vicki-2CCC34-BugabooBday-flat

I hope you’ve enjoyed my card today!

P.S.  Just for fun, please share with me if you have any crafty or non-crafty “New Year’s resolutions/goals” for this year!  My goal is to COMPLETELY finish each card I make this year with sentiment/decorated inside, with the envelope and signed on back!  I hope it holds up!  I started with this card!

Challenges:

  1.  Make My Monday – Female Birthday (Thought it could be used for anyone!)
  2. Simon Says Stamp Monday – “Party Time”
  3. Creative Knockouts – Celebrations
  4. QKR Stampede– #378 Anything goes

I’m Going to be Tagging You!

Hello friends!  This year I’ve been really inspired with all of the cool tags I’ve been seeing lately during this festive season and I wanted to join in on the fun too!  So you’re going to be seeing lots of tags from me scattered within my postings for the next several days!

The inspiration that I’ve been seeing comes from Tracey’s 25 Tags of Christmas Event and this is her 9th year of doing it!  Every day there has been some really cool and inspiring tags, so I had to join before the time runs out!  I did make a tag earlier…but a few more are to follow starting now:

Vicki-BMTags-Day 1 and 4

I’ve been wanting to pull out a few of my stash that I and haven’t had a chance to take the time to play with!  So I decided making tags would be a quick and fun way to play around a bit!  These were really fun to make!

Vicki-BMTags-Day1 only

The “Joy Coffee” tag was something that I had actually started during the “Coffee Lovers Blog Hop” this last time and never got around to posting it!  I was trying to combine the two events together as the inspiration for that tag came on Day 1 from Jen Schow’s tag for Altenew inspirational tags post.  I like how she cut out the wording on her globe and I thought I’d do the same idea with the word “joy” over my coffee cup.

I’ve used the Cozy Coffee stamp set and colored in the coffee and fussy cut it out.  I stamped the sentiment from the same stamp set, but only cut out the word “joy” from it and popped it up over the cup.  I also took the hearts from the stamp set and stamped them over the kraft background with kraft colored ink.

I’ve taken the Holiday Essentials stamp set and heat set the snowflakes in the background of the tag with white EP.  Also for the background, I took some metallic gold watercolor and splattered some over it as Jen did on her tag and I liked that subtle look to it.

I’ve taken some gold thread and made a nest under the cut out coffee cup that was popped up with some foam tape over the tag.  (The tag itself was an old die cut from my stash BTW!)  Added seam binding and twine at the top.

Vicki-BMTags-Day 4 only

For this tag, I was really inspired with Kim’s tag on Day 4 of the Uniko post.  LOVED the monochromatic red with all the sparkle!

I really love the glitter paper and I didn’t have a large enough tag die that I wanted to use, so I took a tag from my stash and traced around the backside of the Red Glitter paper and cut out my shape.  I had some rounded rectangle dies (Hero Arts) which I made a frame with the white glitter paper.

Within that frame I took the Holiday Essentials stamp set again and used several of the images to stamp over a piece of white cardstock with red ink.  (It was fun to create a stamped background panel for this!)  I heat embossed one of the sentiments from the stamp set over a red piece of cardstock with the White Sparkle EP…it sparkles really pretty IRL!  I die cut the sentiment out with a banner die and tucked it behind the white frame I made with the stamped images.

I finished the tag with some sparkling clear sequins with some White Blizzard Nuvo Glitter Drops in the center of each one and then I added some white organdy ribbon with a bow at the top.

Hope you’ve been inspired in some way as I’ve been inspired to create these!  Thanks for stopping in and I will have a new post to share again with you tomorrow so stay tuned!

Challenges:

  1.  25 Days of Christmas Tags – Day 1 and Day 4
  2. Always Fun – #138 Anything Goes
  3. The Holly & Ivy Christmas Challenge – Anything Christmas Goes
  4. Try it On Tuesday – Inspired by a Song or Christmas Carol (I was inspired by “Joy to the World” on the first tag and “We Wish You a Merry Christmas” on the second with music notes!)
  5. Through the Craft Room Door – Anything Goes

Z-Fold Gift Card Holder with Digi Doodle Studios for Coffee Lovers Blog Hop + Video Tutorial

Good morning friends!  Aaah!  It sounds like a great morning for coffee, doesn’t it?!  Well it sure does to me anyway!  Today, my post is all about coffee…so grab yourself a cup, sit back and enjoy!

I’m so excited today to share my post with you because Digi Doodle Studios is a first-time sponsor for the Coffee Lovers Blog Hop!  There are lots of fun coffee themed products in the store and I’m thrilled to be sharing some with you today:

Vicki-DDS-CoffeeHop-ZfoldGiftCard

Isn’t she just adorable with coffee in hand?!  This image is called “Ginger” from Digi Doodle Studios and I’ve got her all-colored up front and center of my Z-Fold Gift Card Holder.

If you have ever made a Z-Fold card, then this is something with a little bit of extra added fun with a gift card holder pocket on the inside, plus you can see how the card nicely displays on the front which is perfect for popping into an envelope to mail out to your coffee loving friend!

The papers that I’ve used for this work perfectly with the theme today which are also from Digi Doodle Studios called Coffee Break Digi Papers.  (I love that I never have to worry about running out of my favorite pattern!!)  There are also several sentiments from Digi Doodle Studios used on my project called Coffee Anyone Sentiments.

*If you want to see a video with detailed instructions on how to make one of these Z-Fold Gift Card Holders along with a sharing of the full collection of the digital papers that I’ve used on my project, check out the video below or CLICK HERE to view it on You Tube:

This is such an easy and fun project to put together especially for the up-coming Holidays, but as you can see this is very neutral so that I could easily use it for most any time of the year.

Vicki-DDS-CoffeeHop-ZfoldGiftCard-close

Here’s a closer view of “Ginger” and how I’ve colored her up with Copic markers.  Of course, if you know me, I had to add a bit of sparkle somewhere.  I took a glitter brush pen and added some sparkle to her pink bow, the heart on her coat and the lid and flower on her coffee cup.

I die cut her out with a stitched rectangle die and then layered a piece of brown cardstock die cut with a scallop rectangle die.  For the around the edges of the image panel as well as the other sentiments I printed out, I sponged some Tea Stain Distress Ink around the edges.  The sentiment were cut out with a stitched circle die and then layered with a piece of brown cardstock cut with a scallop circle die.

To keep the image panel in place, a foam dot was used at the bottom panel so that when you pull up on the flap it opens up:

Vicki-DDS-CoffeeHop-ZfoldGiftCard-open

And this is what is so fun, is that when you flip up the front panel, you see how it opens up with the fun coffee sentiments inside and the surprise gift card holder at the top!

I have an urge to go to Starbucks now! LOL!

I hope you’ve enjoyed my fun Coffee themed project today as well as the video tutorial on how to make one yourself!  I’d love to see yours if you make one!  If you have any questions about anything, please let me know!

Now to sip on some more coffee and join in on all of the coffee inspiration today!  Thanks so much for stopping in and I’ll see you again soon!

Challenges:

  1.  Coffee Lovers Blog Hop – Anything Coffee/tea/cocoa/cider related.
  2. Watercooler Wednesday – WWC245 Anything Goes
  3. Simon Says Stamp Wednesday – Anything Goes
  4. As You Like It – Favorite Papers and Why? – Digital papers because I never have to worry about running out of my favorite pattern and I don’t have to worry about storage!

Dies & Punches for Cute Card Thursday

Hello friends!  It’s time for a new Cute Card Thursday challenge!  This week we’d like to see those “Dies &/or Punches” on your creations this week!  These are some of my favorite tools to use in my craft room and we’re looking forward to seeing your take on this challenge!

Here’s what I’ve made for it:

Vicki-CCT600

Nothing says “Fall” to me like those ripe apples ready to be picked and specially to make a yummy caramel apple with as well!  I had so much fun pulling out several of my Lawn Fawn stamps and dies to make this interactive card design!  I haven’t played with my Lawn Fawn stuff for quite a while, so it was time! 🙂

For the interactive pull tab mechanism, I’ve used the Lawn Fawn Magic Color Slider dies along with the Caramel Apple, Thanks a Bushel and Jump for Joy stamp sets to put together this card.  I’ve also used the Jump for Joy and Thanks a Bushel dies to cut out some of the images on my card.  For the pull tab at the top, I took a sentiment from the Push Here stamp set to stamp the “pull here”.

For part of the layers in the card, I took an older Scallop rectangle die no longer available from Lawn Fawn for the white layer.  I’ve also used some Woodgrain cardstock that I’ve sponged with Vintage Photo Distress ink along the edges of it and the plaid paper which is no longer available from LF.  For the layer behind the apple panel and the base of the card I’ve used the LF Sunflower cardstock.

Vicki-CCT600-close

Here’s a closer look at the image that I’ve got colored up with Copic markers.  I just stamped them over some Copic blending card.  For the inside slider where the caramel apple is, I didn’t want to add any layers to it so that it would slide freely.

Vicki-CCT600-upright

Here’s what the card looks like with the slider hidden inside.  I just added some twine to the end of the pull tab at the top.

Hope you’ve enjoyed my interactive card design today using lots of fun dies!

Thanks so much for dropping in today and I’ll be seeing you soon!!

Challenges:

  1.  Lawn Fawnatics – Awesome Autumn
  2. Simon Says Stamp Wednesday – Interactive
  3. Simon Says Stamp STAMPtember Lawn Fawn Collaboration – LF products
  4. Double Trouble – Thing 1:  Mad for Plaid, Thing 2:  Use Your Stuff Challenge entry (see below), Thing 3:  Tag &/or Frame
  5. Use Your Stuff – Tag &/or Frame
  6. Sheepski Designs – Die Cuts &/or Punches
  7. Little Red Wagon – Fruit

It’s Fall Y’All!

Hello friends!

For my card today I’ve used acrylic bubbles and that is one of my faves to use on pretty much ANY style of creation I’m making and here you can see why:

Vicki-BMbloghop-DD

Fall is certainly my most favorite time of the year and I really enjoy creating with all of the fun Autumn style products.  The wreath and sentiment that I’ve used are from the Fall Y’All stamp set and I’ve cut it out using the Fall Y’All Cut File that you can get for your cutting machine.  I have a Cricut, so I’ve used that to cut it out with.

Now that cut file does NOT cut out the center of the wreath, so I just poked my scissors in the center of it that made a large enough hole so that I could fussy cut around the inside of it.    The cut file will also cut around for your sentiment.

The base of the card is an A2 top folding card.  I took a couple of the leaf images from the Autumn Essentials stamp set and heat embossed a couple of them on the card base with the Gilded EP.

I then glued on the cut-out wreath image, popped up the sentiment in the center with foam tape and also added some gold thread behind it before attaching.  I took some white ink and sponged around the edges of the card base and then finally attached the acrylic bubbles over the card.

Vicki-BMbloghop-DD-close

Here’s a closer look at the image and how I’ve got it colored in.  I’ve used Copic markers to color it along with the leaves on the sentiment.  I also took some distress ink and sponged around the edges of the cut images.

For the sentiment, I first stamped it with the black ink and then cleaned off the stamp and then stamped it again with the embossing ink.  I sprinkled the Gilded EP over the sentiment and then brushed off the EP on the leaf areas as I didn’t want those embossed.  I heat set only the wording.

Vicki-BMbloghop-DD-flat

I hope you’ve enjoyed my creation today and were inspired in some way!

Challenges:

  1.  Crafty Gals Corner – Fall Colors
  2. Cardz 4 Galz – Welcome Autum/Fall
  3. A Bit More Time to Craft – Anything Goes
  4. The Creative Crafters – Anything Goes
  5. Pammies Inky Pinkies – PIP1937 Anything Goes
  6. Crafty Cardmakers – Autumn Colors

Birthday Wishes for Digi Doodle Studios

Hello friends!  🙂   Happy Labor Day!  I hope you’ve enjoyed your weekend and I hope you get a nice relaxing Labor Day Monday included with it!  I’m enjoying a nice relaxing long weekend hanging out with hubby.

I have a very sweet card to share with you today using an adorable image from Digi Doodle Studios:

Vicki-DDDS-PupParty-Sept2

Awe!  Such a cute pup, isn’t it?!  I love how sweet this one turned out with the colors which I thought would be great for a little one’s birthday.  I have used this adorable image called Jasper’s Cupcake for my card plus some really fun digital papers from the Let’s Celebrate Digital Background Paper Collection!

I based my card around the colors of those papers and I just love the little pops of blue in them, so I found some cardstock to match up with them and started to put together my card design.

I layered the “Birthday Streamers” paper over a piece of blue cardstock and then sprayed it with some “Shimmer Craft Spray” (Which I’ll be sharing in an up-coming video so stay tuned!)  Then I mounted these layers onto a pink A2 sized top folding card base.

I then took a strip of the “Birthday Chevron” paper and wrapped some white organdy ribbon around it and attached it to the front of the card base.  I added my colored image panel onto a piece of blue cardstock and then mounted this over a piece of pink cardstock that was cut out with a stitched scallop rectangle die.  Lastly I added a sentiment and punched it out with a circle punch and added a punched out scallop circle in pink behind it and popped it up with foam tape over the design.  As you can see both of the image panel and the circle sentiment was sponged around the edges very lightly with some blue ink too.  (I almost forgot that I took some white ink and sponged around the blue edges of the cardstock too!)

I then added my ribbon bow to the right side of the card and glued a pink pearl in the center of it and added on the sequins randomly over the card.  I really like how that blue frames this design and picks up the blues from the papers too.

Vicki-DDDS-PupParty-Sept2-close

Here’s a closer view of the image and how I’ve colored it in!  I just adore that pup and it looked like he needed a few extra “spots”, so I added one on his back and then gave him a darker colored tail and a different colored paw too!

After coloring this up, I took a glitter pen and covered the pink balloon as well as the frosting on the cupcake for a bit of shimmer.  You’ve got to make that frosting look sugary right?!  I wish you can see the shimmer more in the background because it looks really cool!  You can sort of see it at the top of the photo.  However, if you check out my up-coming video, I’m hoping the camera will do it justice!

Vicki-DDDS-PupParty-Sept2-flat

I hope you’ve enjoyed my little party pup card here today!

Thanks for checking out my post today!  I appreciate ALL of your kind thoughts!  I’ll see you again soon!

Challenges I’d like to enter:

  1.  {Cupcake Inspirations} – CIC477 Food and Drink
  2. Little Red Wagon – Foodie
  3. Watercooler Wednesday – WWC236 All About Occasions
  4. Crafty Animals – #30 Anything Goes + animal
  5. Pearly Sparkles – Add a Ribbon and/or Bow
  6. Sheepski Designs – Die Cuts and/or Punches