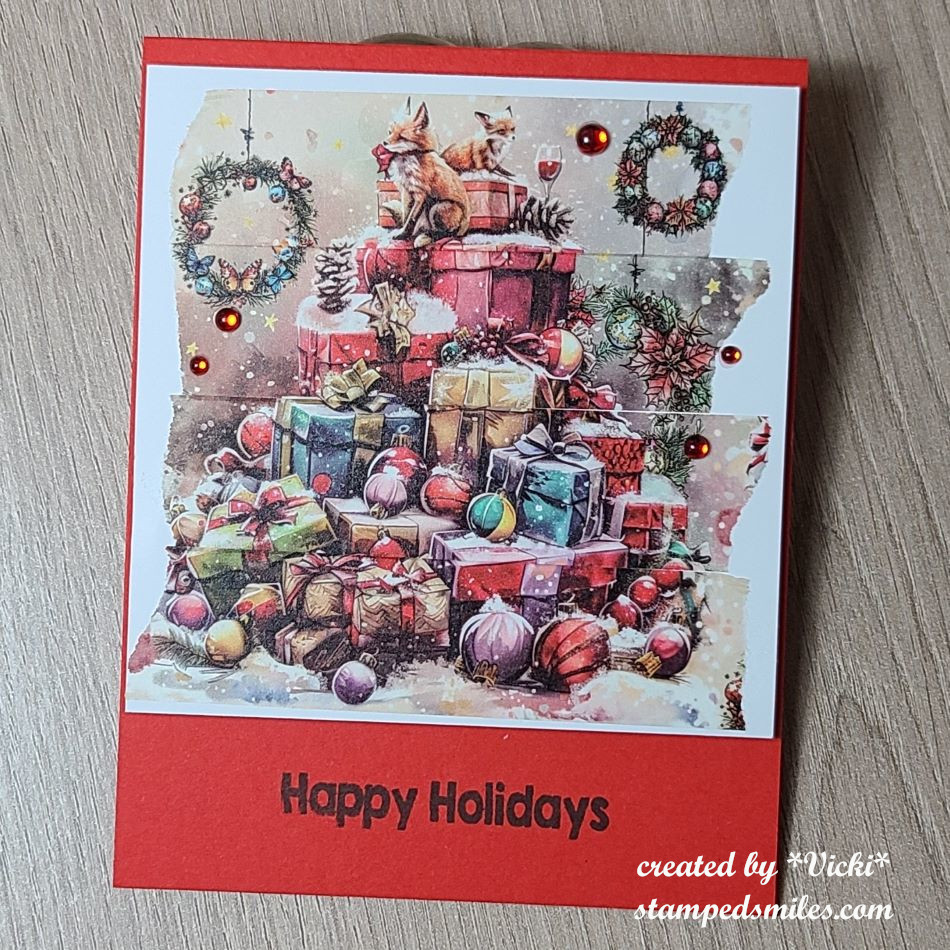
Reveal of Inky Escape! (Craft Retreat)

Hello friends!  November has come with the pretty leaves on the trees and the coolness in the winds.  I always turn to comforting “things” this time of the year and it always gives me a sense of peace before the year comes to an end.  A warm fuzzy blanket, socks/slippers, sweaters, etc.  is what I usually turn to.   What is your comfort “thing”?

I promised to share with you the fun things we did over at the “Inky Escape” event that I recently attended and it was wonderful to see all of my crafty friends again for laughs and fun together.  I think I miss them already!

I lifted this fun photo from the Inky Stamper FB page as I don’t have any photos other than seeing what others took.  There were a total of 18 of us this time:

Everyone received a “swag bag”…but the case this time was a Christmas stocking full of fun goodies and one of them was that everyone received cute fluffy socks. I’m not exactly sure which one is me in that photo, but I did have a polar bear sock! LOL We each placed one foot in the circle and Chelsea took the photo.

And speaking of the “swag bag”/Christmas stocking…here’s what we each received:

When I got to the event, there was this black stocking on my table with the cute tag attached to it with my name.  Each person received a personalized tag on the swag bag, plus the “skull” dies that were used to create the tag which was inside the stocking!  There are my polar bear fuzzy socks (I’ve already washed them up by hand so the colors wouldn’t bleed in the wash…and they’re so warm and fuzzy!)  I also received the cute “Christmas bulb” drink holder with a candy cane straw and a little ghost stopper for the top!  We used these containers to hold the “Jingle Juice” that we drank at some point!  And then I received a light up Christmas bulb necklace that has different settings when you push the button the back.  The theme for this event was called “Merry Spookmas” which you can see the greeting for that on my personalized tag.  So fun!

And speaking of fun…here are all of the Make-n-Takes that we created during the event.  We sat and made 4 projects and then two of those projects were “bonus” makes using some other special items.  (There is a “story” about one of them, but you can check out each project up close in the gallery below.)

*If you are on my website, just click on each photo to enlarge and scroll downward to see more information about each photo while it’s enlarged.*

The first four make-n-takes were made using the brand new Inky Stamper release that came out during this event!  You should go check them out now on the website! (They’re all shown on the home page under “Featured Products”.)  My favorite is that darling “Gifter” stamp set!  I’m sure you’ll be seeing something from that set soon from me! *wink*


And since I was there to “crop” (as they say), I brought some things to work on that I really wanted to get done.  So I decided to pull out some more Inky Stamper images to color and make a “Sheetload of Cards” using the September Sheetload of Cards Template by Crafty Al.  If you’re not familiar with her, check out her You Tube Channel and look for all of her “Sheetload of Cards” videos to see how you can find instructions for each month. #SUYSSep2024 #ShowUsYourSheetLoad

I utilized her template to create the full 12 cards as demonstrated.  The dimensions of the finished card design is 3.5″ x 6.25″ which I really liked as it helped to use up the full 6″x6″ size of those paper pads!  Also, you don’t have to create envelopes for these as they fit perfectly inside those envelopes (3-5/8″ x 6.5″) that you can find at any office supply area of a store.

As you can see, I used a variety of images that I stamped, colored and cut out for each design.  I matched up my design papers to coordinate with the images.  All of the images I used are from Inky Stamper.  All papers come from a variety of Doodlebug Design papers.

Here’s a closer look at two of the cards I made from the set so that you can see how the card opens up and the greetings on the inside of each card. (Sentiments come from Taylored Expressions.)  You can also see the coordinating envelopes next to them with the matching critter stamped in grey ink.

These cards are on the way for a special charity for ill children patients to help lift spirts and I hope each one will!

I know there were so many things going on during the event that I was even surprised that I got all of these finished.  They were mostly finished with the exception of the greeting which I added when I got home.  I had plenty to do while I was there and also enjoyed all the activities too!

I hope you’ve enjoyed my post today as well!  I thank you so much for stopping in!

Mix it Up With Paper Piecing!

**THIS IS POST TWO OF TWO FOR TODAY!  SCROLL BELOW TO SEE MY POST FOR THE GDT CREATIVE ARTISTE.  THANK YOU!**

Hello friends and a happy November!  I think that the last two months completely flew by and here we are getting closer to the end of the year…what?!  I hope that you look forward to happy times ahead and lots of crafting fun too!  I’m thankful you’re here with me, so let’s get this month started.

Today begins a new challenge over at the Mix It Up Challenge Blog and it’s always “Anything Goes with an optional theme“.  The optional theme this time is “Paper Piecing“! (This challenge is open for 6 weeks, so you have plenty of time to enter!)  Here’s what I came up with using this theme:

I absolutely love the look of quilts, but I like to keep my making of quilts done with paper!  So I thought this theme would be great for making a quilt pattern design for Christmas.  I normally paper piece stamped images, but I wanted to do something different this time and pull out more stash items and use them!

Several months ago, I purchased a card kit from Taylored Expressions called “Pieced Patterns” and I loved the concept of cut out squares attached over a “map” to follow along on how/where to place the squares.  It’s really easy to piece different colors/patterns together to make a design.  Some squares were also cut diagonal and I stamped a tone on tone pattern over some of the squares before they were cut out.  Then they were placed over the “map” design and cut out with a square die.  I also cut the stitched scallop frame to go around the square pattern.  I die cut a white snowflake twice to layer in the center of the pattern and added a red gem in the middle of it.

I attached the paper pieced pattern over a white card front that was cut with the Taylored Expressions Pierced Lattice Cutting Plate that was then attached to a top folding A2 white card base.  For the sentiment, I white heat embossed it from the Taylored Expressions Jingle All the Way stamp set and cut it out with the coordinating die.  It was popped up at the bottom with thin foam tape.

I can see this might be fun with several different squares cut out ahead of time to place over the different “map” designs to create multiple design patterns ready for cards!  It’s just a matter of taking the time to cut out all of the squares.


I have decided to create a “bonus” card using the same “paper piecing” technique, but with a stamped image this time…as we all need more Christmas cards, right?!  

For this card, I pulled out an older card kit from my stash (2016) and used the Doodlebug pattern papers that was included with the kit.  The papers are too cute not to use and hoarding them is not a good idea! 

I stamped the tree onto a stitched white rectangle, then stamped the tree, star and banner over some of the pattern paper, carefully cut it out and attached it to the stamped tree and white panel.  Before I attached the stamped pattern pieces, I used my Copics to color in the tree stump and outline around the tree.  I also added some details to the pattern pieces for shading as well.

 The banner was popped up with foam tape and I attached all the layers together over a top folding red A2 card base. All the cardstock/papers were included in the kit. I’ve added some red rhinestones on the tree where the ornaments were to finish it off.

Anyway, hope you’ve enjoyed all of my projects today and I hope you will take some time to check out the challenge blog to see what the other talented designers have made.  I look forward to seeing what you make!  Have a great day!

Challenges:

  1. Inkspirational – #327 Seasonal (Winter/Christmas) 
  2. Pammie’s Inky Pinkies – PIP2443 Anything Goes
  3. Cardz 4 Galz – #237 Showcase Your Patterned Paper (second card)
  4. Crafty Catz – #681 Anything Goes with optional twist: use dies/punches (top card, but dies used on both of them!)
  5. Lil Patch of Crafty Friends – #240 Anything Goes
  6. Penny’s Paper Crafty – #583 Anything Goes Using Paper

October Art Journal-A Strange Feeling

Hello friends! **THIS IS A PRE-SCHEDULED POST AS I’M AWAY AT A STAMP RETREAT!!** 

The weather is finally starting to cool down now and we’ve finished cleaning the yard to prepare for winter months to follow soon.  Halloween will also be here in a few days, so I thought it would be fun to make my page today with that in mind!

Today is the monthly Art Journal Page collaboration with my crafty friend, Carol (from Crafty-Stamper)! We get creative trying to use up our never-ending stash piles along with a prompt for each month.  I know she always has great inspiration to share, so please check out her blog too! Here’s my AJ page with the “SMASH OUR STASH” October prompt of ODD/Oddities” (anything unusual or strange): 

I don’t know if this is considered odd to anyone else, but I certainly do!  This weird scientist looking guy has a strange facial expression as he’s holding up a head in the bottle!  I’ve put so many details in this page that I thought you’d need to see close-up photos below.

For my background:  Starting with a 5.5″ x 8.5″ heavy watercolor paper with pre-punched holes at the top for binding later, I sprayed the background with mica sprays in Hocus Pocus, Jack-O-Lantern and Flickering Candle.  I sprayed some extra water over top to get them to blend together as they seem very concentrated and they didn’t move much over the watercolor paper after spraying a few times.  I took a leaves stencil inked over places with light brown ink.  I then ink blended the edges with black ink and stamped some lettering stamped randomly.  Lastly, I splattered with black and gold watercolor. 

Upon a closer look at the bottom:  I needed an area for shelves to hold the potion bottles, so I took some Tim Holtz Halloween collage paper and attached it with matte medium.  It crinkled a bit, but I sort of liked that look.  I then found some decorative strips in my stash and added those for the “shelves”.  The crow and “curious” ephemera was also found with all of my Tim Holtz Halloween stash….along with the paper doll “guy”.  I cut off a head from one of them to place inside the jar.  I added some thin metal wire around the jar and cut a slit in the guy’s hand to make it look like he’s holding it.  I also added a bit of color to the guy’s flower and bow tie on his jacket outfit with markers.  BEFORE popping up the paper doll guy to the page, I ripped some black cardstock for the ground underneath him and tucked in the bones.

For the Bottles:  I used a Taylored Expressions “If You Dare” Stamp & Stencil set to make all of the bottles.  I also used the TE “If You Dare Halloween Labels” to foil and cut out to place over each jar.  To die cut some extra “strange things” to put inside a few of the jars and the bones at the bottom, I die cut pieces from the TE “Little Bits Cauldron Confetti” dies.  (The die cut bats from this were also used on the top of the page.)  For more finishing details, I doodled in some of the jars and then added some colored glitter/sparkle and pearl drops for the inside contents.  If you look closely at the crow’s eye, you can see I’ve added a tiny dot of yellow sparkle.  Some of the details were popped up and some were just glued down.

A closer look at the top:  Mostly die cut pieces were used at the top and the first I put down was the spider web and spider from Whimsy Stamps called Spiders and Webs…they’re huge!  (this store is so good at spooky things!)  I drew a line with a black marker from the spider to the web.  For the window, I die cut it out from a really old Mama Elephant die I’ve had in my stash…not sure if it’s still available.  BEFORE I placed the window down, I die cut the moon from the Lawn Fawn Shadow Box Halloween Add-On die set.  I blended in some yellow and gray  and covered it with a glitter sparkle pen.  I added the die cut bats and placed the window over top.

Lastly, I took some Tim Holtz Halloween clippings word strips and added to the page.  I took a black marker and went around the strips above the paper doll “guy”.

I know there are people that are not Halloween fans or care for the spooky things, but I really enjoy the weirdness of it all and have fun making things with it!  In the words of Lydia from Beetlejuice:  “I myself am strange and unusual“.

Winona Ryder in a hat as Lydia in Beetlejuice

I do hope you’ve enjoyed my page today and I really appreciate you stopping by!  I will be back later with things we’re doing at the retreat!  See you soon!

Challenges:

  1. Art Journal Journey – Autumn Colors & Inspiration (Purple, orange, yellow and black!)

Halloween Hauntings

Hello friends!  It seems like this month has really flown by as I now realize that Halloween will be here next week and I wanted to get some cards sent out that I’ve made!

So here are my Halloween cards for this year….I had so much fun!

This one was so much fun putting together and it wouldn’t have been put together if it weren’t for the parameters on Craft Roulette #237 this week!  The four parameters consisted of these – 1. Project: Pop Up Card, 2. Colors: Trick-or-Treat, 3. Element: Boutique and 4. Random: jewelry

I used the Lawn Fawn Platform pop-up die and the build a house die with the Halloween add on plus a few other dies and stamp sets all from Lawn Fawn.  The front “welcome” sentiment was printed out from my computer and I made up the “Bougie BOO-tique” language to fit with the parameters of the challenge.😆  These ghosts are all blinged up and hanging out around their favorite “BOO-tique” to catch up on all of the latest trends in style!  One is wearing a necklace, another a tierra, another carrying a purse, another styling glasses with bling and the front ghost has earrings and a sparkle wand.

The background was done with the Lawn Fawn Platform Pop Up Add On around the back of the pop up.  I ink blended and then splattered with white Copic Opaque White mixed with water to get the starry night background.  This card went to my husband because he really enjoyed it and said that it wasn’t going anywhere, but it does lay flat for mailing.


This card was done for an Inky Inkspiration Challenge over on FB for September and they were asking for a slimline card.  I’m more into making the mini slimline size rather than a full size, so that’s what I went with!  I’ve used the cute Bat stamp set for all of the images, except for the background panel, which you’ll notice it looks like a BINGO card and it is!  It was the game that we played in a Zoom class that I took with Inky Stamper and we actually used this Bat stamp set for the projects we made and the BINGO card was included.  I decided instead of throwing it away, that I would use it as background paper for my card.  I just stenciled in some gray clouds over top and stamped some bats from the set with it.  The rest were just cut out and placed on the card with the bat being popped out with foam tape.

(I would’ve showed photos from the class, but I forgot to take photos of them!)

And here’s another card I made for World Card Making Day using the fun sketch from the Inky Stamper Inkspiration Group on FB.  I’ve used this really CUTE Zombie stamp set from Inky Stamper for this card.  I had so much fun coloring him up!


And this last card I made for someone who loves the spookiness of the season almost as much as I do!  I pulled this really cool image from an older paper pack by Whimsy Stamps.  In fact, all of the images on this card came from this store.  

I die cut the image out with the WS ATC Antique Frames including the sentiment that was white heat embossed.  The background was black heat embossed with the WS Vintage Wallpaper stamp over kraft cardstock.  I sponged some black ink around the edges which was also cut out with the WS Wavy Pieced Rectangle dies.  I cut out a few ghosts from white cardstock using the WS Boo die set and sponged some green ink at the very bottom edges.

I thought it would be fun to make the eyeballs of the skeleton and the edges of the ghosts glow in the dark, so I used some glow-in-the-dark embossing powder over them and finished off the sentiment panel with green gems.  (It’s too hard to take a photo of the glow-in-the-dark!)


Well that’s it for me today with all of the Halloween cards!  I hope you’ve enjoyed them or have been inspired in some way!  Thanks so much for stopping in and I’ll see you again on Saturday with another Art Journal Page for the month! 

Challenges:

  1. Creative Fingers – #287 Anything Goes
  2. Sisterhood of Snarky Stampers ‘H’ is for Halloween
  3. Lil’ Patch of Crafty Friends – #240 Anything Goes
  4. Pammie’s Inky Pinkies – #PIP2442 Anything Goes
  5. Make My Monday – #237 A Spooky Halloween
  6. Two Old Bats – Anything Goes Halloween
  7. Crazy for Stencils – Anything Goes using stencils + Halloween (2nd bat card)
  8. Unicorn Autumn/Halloween

May AJ Page-Never Forgotten

Hello friends!  I hope that your month has been going well so far!  We’ve been doing lots of things outdoors and enjoying the time as much as possible until the temperatures climb higher and gets too hot.  I’m enjoying it now, but unfortunately, there will be storms this weekend in my area.

This weekend (Monday) is also Memorial Day for those of us in the U.S.  The date and name may vary by different countries, but it’s all about remembrance of our active military who’ve died.  I wanted to create my art journal page today in reflection of this.

  • It’s time for the monthly Art Journal Page collaboration with my crafty friend, Carol (from Crafty-Stamper)! We get creative trying to use up our never-ending stash piles along with a prompt for each month.  I know she always has great inspiration to share, so please check out her blog too! Here’s my AJ page with the “SMASH OUR STASH” May prompt of “MATERIAL”-(use fabric/cloth in some way): 

For the “material/cloth/fabric” prompt, it got me thinking because I don’t sew very much.  Sometimes I get out my sewing machine, but rarely!  I do have some fabric scraps and I thought it would be fun to cut out some squares with pinking shears!  Then I had to figure out what to do with them!

For the background:  I used a 5.5″ x 8.5″ of canvas heavy weight paper with the pre-punched holes at the top made with my Bind-It-All Machine and painted over it with some Crisp Blue Americana acrylic paint.  Once dry, I sprayed some silver metallic over it.  (You can see some of the shine at the top.)  I didn’t know how busy looking the fabric squares would look, so I decided to stop there.

Although I did cut several different squares of fabric patterns, my eyes were pulled to the red, white and blues which were perfect for Memorial Day.  I pulled out only those type of colors and used some fabric glue to attach over the background randomizing the patterns.  I also took some silver and navy ribbons to attach at the top and bottom areas where the fabric squares stopped.

The poem was a memory that I had during a vacation time with my husband when we ran into a memorial with a park bench and this poem was engraved with birds around it.  I looked it up and printed it out on my computer over a parchment paper.  I ripped it out and sponged the edges.  I also printed out the “forgotten” at the top and cut it out in a banner.  The poem was popped up with foam tape over the fabric squares.  “Do Not Stand at My Grave and Weep” – by Mary Elisabeth Frye

The stars and “never” letters were die cut and attached and I finished it with red rhinestones next to the “forgotten” banner.

  • Hope you’ve enjoyed my art journal page today and I really appreciate you stopping in!   I wish you all a wonderful weekend!

Challenges:

  1. Art Journal Journey – Poems
  2. Creative Artiste Anything Goes Mixed Media
  3. Love to Craft – #80 Anything Goes
  4. Simon Says Stamp Monday – Let’s Art Journal
  5. Crafting Happiness – #176 Any Craft

Playing With Paper Blocks and Bunnies

Hello friends! Easter is coming for us for very soon and I’ve been enjoying all of the Spring that’s starting to come up outside with flowers and buds on the trees!  It’s still a little cool, but hopefully the weather will even out and stay warmer!

Since I’ve been trying to get motivated for Easter, I’ve pulled out some papers from my stash and have been inspired to CASE (copy & share everything) a friend that really inspires me to use things I have!  First, I’d like to share a fun Easter card that I’ve made for a sketch challenge that I was inspired by as well:

That sitting bunny is so cute!  (Thank you Carol…more on that later in post!)  If you check out the sketch from the Sketch Saturday challenge blog (see in challenge list below), you will see all of the fun angle strips in the sketch.  I thought it would be fun to pull out some Easter papers from my stash.  I wasn’t sure how to do the background until I saw that this sitting bunny worked perfect for a part of the paper pad that had this wheelbarrow image in it!  I cut it out from the paper and placed the bunny on it.

For the background of the card, I thought it would be fun to use my stencils to create a scene with grass and clouds.  The wheelbarrow bunny fit in the open area and then I used the angles from the sketch to cut pieces with the same Easter paper pad.  I just eyeballed everything by marking notches and lining those notches in my paper trimmer to get a straight cut.  Even the solid paper on the base layer came from the paper pad.  I just cut it A2 size to fit over an A2 top folding white card base.

The sentiment was stamped and cut out with the coordinating die.  I added some shadow under wheelbarrow with a green marker (not really the color I wanted, but it worked), and colored a bit of pink on the bunny too.  I added teal rhinestones next to the sentiment and done.


Next, I wanted to share something else that I was inspired by from my friend Carol at https://ourlittleinspirations.blogspot.com who sent me a very cool card and kind gift:

She always inspires me with her “snippet” creations and coming up with cards like this one to utilize those pattern papers we hoard so much!  The pattern is very pleasing to the eye and so I wanted to create one myself!  With all of the papers I have, I’m sure I could make a zillion cards! 😆  I also love how she used a monochromatic green theme with it…which I will need to try another one with this idea!  You should go check her blog out and be inspired too!

Also, she was very kind in sending me these die cut sitting bunnies & stools!  I do not know exactly where this bunny is from, but I’ve seen it around the craft world.  So cute!  Thank you so much for your kindness and inspiration my friend! 

So here’s the card that I created inspired by Carol.  I really love plaids and I thought it would be fun to re-create her design which I measured out her pieces and cut based on what I thought they were.  It was really fun and not as hard as it looks like it might be.  I wrote the measurements and cut from the same Easter paper pad as I used on the card above.  I started with a white base…that way if I messed up, it wouldn’t matter too much.  The sentiment piece was also from the same paper pad.  I just white heat embossed the sentiment and added some stitch details with a white gel pen.

I used one of the sitting bunnies that Carol provided me with, and tried to match up what I had from my stash the best I could to die cut some hearts along with the A2 side folding card base.

I brushed the hearts with a glitter brush pen and called it done.


I had so much fun playing with these paper blocks and bunnies!  I hope you’ve enjoyed my creations and inspiration today as well!  Thanks so much for stopping by!  C U SOON!

Challenges:

  1. Sketch Saturday – #746 optional twist: feature an animal (top card)
  2. Simply Create Too – Bunnies & Blooms #198 (top card)
  3. Make My Monday – Spring, Flowers, Weather, etc. #221 (top card)
  4. Fab ‘N Funky – Spring (top card)
  5. Daring Cardmakers – Spring is in the Air (top card)
  6. The Paper Funday – Anything Goes optional: dies #63 (top card)

Hearts and Flowers for Sparkles Monthly Challenge

Hello friends!  I hope you’re having a great week so far and enjoyed a nice Valentine’s Day yesterday with some yummy sweets!  We enjoyed some treats of our own! 😉

Today I have a new challenge to share with you for the Sparkles Monthly Challenge blog and this month the lovely Dawn would like to see some “Hearts & Flowers” on your creations!  Although Valentine’s Day is over, I think hearts are great for adding any time of the year, so check out the inspiration from the design team and here’s what I’ve made:

I’ve made a mini slim card using the Taylored Expressions Hearts in Bloom Layering Stencils which are so great for mass producing several cards at once.  For this card and the other cards below, I decided I wanted to use the TE Hearts in Bloom Foil Panels which works with these stencils. I foiled them with gold foil.  I think the foiling adds such a pretty shine and glitter.  I also used the TE Love & Hugs Foil Panels for the sentiment and die cut it out with the coordinating die set.

So after foiling everything, I used the stencils to create the pretty bouquet of flowers with the hearts in it and then added a frame around the edge with a TE Diagonal Stitch Mini Slim die that doesn’t cut anything, but adds those slash marks.  I used some foam tape to pop up the foiled sentiment and just attached everything to a coordinating mini slim card base.

I couldn’t just make this one to show you, so here is the whole set of cards I’ve made together:

Those stencils create all of these patterns at one time.  I just lined the foil panels up at one time and then used each stencil for the colors.  If you didn’t want to use the foil panels, you could also just use the stencils on one sheet of cardstock and then cut them apart to make the card fronts.

I found these sets to become very addicting!  And just like that, two of them have been sent out!  

I’ve been really busy with creating behind the scenes and I will be sharing more soon!  I will be around to see what’s been going on with you all shortly!  I really appreciate your kindness and support…it really means so much!❤️  Thanks for stopping in!

Challenges:

  1. Try it On Tuesday – Hearts &/or Flowers
  2. Make My Monday – Love
  3. Allsorts – Anything Goes/Hearts
  4. Ally’s Angels – Anything Goes
  5. Little Red Wagon – Show Us Some Love/Valentine
  6. Crafty Gals Corner – Add a Heart
  7. Simon Says Stamp Wednesday– Fun with Foil

Art Journal Inspiration and Valentine’s Day Cards!

Good evening friends!  Tomorrow is about “LOVE” for Valentine’s Day!  I hope that whatever you’re doing that you spend it with those that you love or at least tell someone how much they mean to you!  I have a special post this evening that is dedicated or inspired by love. ❤️

First up is my art journal page with the prompt/theme of “LIGHT/KEEPING IT LIGHT” that I’m guest hosting this month for the Art Journal Journey Challenge.   It’s been so fun to see all of the wonderful art created so far!

This page was inspired by not just the “light” prompt for the challenge, but it was also inspired by the love of my life.  We have spent many moons together and have enjoyed our time in the moonlight as we both love nature and have spent some time traveling and seeing some beautiful things.  I’m so thankful to have had these special memories with him.

For the background:  I started with a 5.5″x8.5″ watercolor with pre-punched holes at the top with my Zutter machine.  I used my watercolor to create the blue sky background with an idea of where I was going to place the moon.  I left that area to watercolor in the yellow rather than the blue.  I then used some white opaque copic watered down and splattered over top for stars.  The “moon” was die cut in white with a heart shaped die and I added a moon stencil over top to make it look like a heart shaped moon and glued it in the center of the watercolor background.

The bottom portion was made with just ripping some cardstock and ink blending one with the greens and one with greys and black.  I die cut the trees in black and glued them in place and then added the ripped layers over top.

I stamped the Lavinia Stamps “Star Gazers” stamp in black in and fussy cut it out.  I colored the rocks they were sitting on as well as their wings and popped them up on the grey ripped border.  I also hand drew more rocks around them and used a white gel pen to highlight.  I added some glitter to the wings.  Lastly, I wrote over black cardstock with a white gel pen, cut them out and attached to the ripped green border.  I then used a black pen to doodle around the words.


Next up are a few Valentine cards that I’ve made.  I’m actually really bummed because I would’ve shared another two cards that I made, but I forgot to take photos of them before I sent them out!  I used a pizza theme and they were so fun! 

This first one is for my husband and I’ve used the Craft Roulette #201 parameters to create it:

We had to make an easel card, so I decided to make a heart shaped one.  I’ve used the cute skunk from Lawn Fawn with all of the “sweets”. (which was also one of the parameters)  My husband loves his sweets!  I also had to use “quiet” colors and some sort of bokeh, so I’ve made a bokeh background and used a solid heart stamp in white over the blended colors.  It reminds me of those conversation hearts.  This skunk makes me smile!

This is another fun card that I’ve made for a friend!  I couldn’t wait to use this fun mosaic heart from Taylored Expressions.  It came as a freebie for a limited time with a Valentine release.  I like that it comes with the solid heart backer which makes putting it together easier.   I ink blended a panel in two shades of pink and then die cut the heart with the pieces.  I used the frame cut in white and then popped in the ink blended pieces inside the frame.  

The embossed heart background was made after cutting out a piece of Bubblegum cardstock with the postage rectangle die.  I stamped and die cut the sentiment over top of the heart and added some gold rhinestones. 

And this card was done for the Inky Stamper FB challenge which was to create a square card.  I have made this one 4.25″ square and used the cute Snail stamp set along with some Doodlebug papers which you can also find in their store.

I just stamped, colored and cut out the images, added a border at the bottom and cut out a scallop square in white and stenciled some clouds at the top.  More pink papers onto a white square card base and called it done!  There’s nothing better than getting snail mail!

  • I hope you’ve enjoyed my heart-filled post today and you’ve been inspired in some way!  Thanks so much for stopping in and I’ll see you again on Thursday for a new challenge to try!  Happy Valentine’s Day!

Challenges:

  1.  Art Journal Journey – LIGHT/KEEPING IT LIGHT (art journal page only)
  2. Crafty Animals – #80 Anything Goes + animal (skunk card)
  3. Critter Crazy – #83 Anything Goes + critter (snail card)
  4. Pearly Sparkles Love/Have a Heart (skunk card)
  5. Creative Knockouts – #514 Love/Valentine’s Day (skunk card)
  6. A Place to Start – Monochrome (mosaic heart card – pink)
  7. Aud Sentiments – #310 Dies/Love/Wed/Anniversary + sentiment (skunk card)
  8. Creative Inspirations – For Someone You Love/Special Friend (mosaic heart card)
  9. The Male Room – Valentine/Use a Heart (skunk card)
  10. Crafty Catz – Anything Goes optional: Valentine/Love (snail card)

December AJ Page-Keep Dancing + book and review

Hello friends!  Hope you had a great Christmas and were able to make some wonderful memories!  I can’t believe that we are ready to close out another year!  The time just goes way too fast and there’s so much more to look forward to!  I think the theme for my upcoming year is in this title post – KEEP DANCING!!!🕺

The last Saturday of the month (AND THE YEAR!) brings us to the monthly Art Journal Page collaboration with my crafty friend, Carol (from Crafty-Stamper)! We get creative trying to use up our never-ending stash piles along with a prompt for each month.  I know she always has great inspiration to share, so please check out her blog too! Here’s my AJ page with the “SMASH OUR STASH” December prompt of “Previous Prompt”:

Since this is the time of the year that we have a “look back”, I thought it would be fun to take one of this year’s previous prompts and come up with a new AJ page.  I chose April’s prompt of “SHINNY/SPARKLY”, and you can catch that page in the photos below or see my previous blog post HERE.

There’s nothing quite shinny or sparkly than New Year’s Eve!  I always think of the ball dropping on Times Square in New York, but it also had me thinking of a disco ball that is very sparkly.  Found this image online and printed it out.  Cut it out with a circle die and then added a bit of colored shading with my markers in grey.  I took a sponge to add glue to the entire ball and then covered it with chunky glitter.   I added some sparkle images and filled them with silver glitter and then die cut the numbers and glued them over top of the ball.

For the background:  It’s just a 6″x9″ black cardstock pre-punched at the top and then splattered with silver watercolor.  I added some music notes and die cut stars.  For the bottom, I used some woodgrain texture paper and cut strips to make a wood floor for the Riley the Moose disco dancer.  A silver metallic paint pen was used for the ball string at the top and the wording around the top of the ball.

I stamped, colored and hand cut the moose and popped him up over a die cut shadow for under his feet.  I typed a quote on the computer and printed it out over silver cardstock.  While it was still wet, I sprinkled clear EP over top and cut rounded corners for the page.  Lastly, I just popped up the glittered ball with foam tape and added some silver rhinestones at the bottom.

  • I thought it would be fun to do a review of all of the monthly pages that were created this year.  I put the months in order below.  (If you are on my website, just click on the photos to enlarge them.)

I pre-punch the holes at the short side of the pages each month and then at the end of the year, I use my machine to bind them together to make a book.  I add covers and decorate them.  There is a post with last year’s book HERE.

For this year, I went with the vertical look and added a stretch cord to keep them together better.  I also tried out the napkin with the cover:

The napkin is at the bottom with the foil marble look.  My husband got some napkins for New Year’s, and I thought I’d try it out.  I added some chipboard, stamped and cut out numbers and added some wooden pieces.  I used the rose papers for the covers on the inside as well as the back of the chipboard covers.  It was put together with my Bind-It-All machine and coils.

I hope you’ve enjoyed seeing my Art Journal Journey throughout the year as I sure have enjoyed doing them!  I get to pull from my stash to use, but there is also so much more to use!  So this means that I will for sure be continuing with this journey and I hope you’ll join me too!

Thank you so much for stopping by to have a look back.  Wishing you peace, love and health for the upcoming 2024 year!  See you in the next year friends!!!🎉

Challenges:

  1. Art Journal Journey – Above Us Only Sky (New Year’s Eve Ball Drop on Times Square with stars in the sky!!!)
  2. Crafting From the Heart – Anything Goes #8
  3. Creative Artiste – Anything Mixed Media Goes with option of Christmas
  4. Alphabet – ‘T’ is for Texture (texture on the top page with woodgrain floor, the chunky glitter disco ball.  Texture on the book with chipboard, wood pieces and paste.)

Lots of Joy Mailed Out!

Hello friends!  I hope that you’re having a great start to your week!  We’re almost there as Christmas approaches us quickly!  I’ve been enjoying the Season and having fun keeping busy.  Currently baking cookies and decided to take a break from that to sit and make a post about all of things that I’ve been doing besides posting!😆

This is just one of the several similar cards that I created for my Christmas cards this year.  It came from a Christmas in July card kit from Taylored Expressions.  It mainly used the Wreathed in Joy Stamp & Stencil Combo set.  There are dies you can cut them out with as well as foilable panels which is shown on this one.

I do not like to make several of the “same thing”, so I’ve changed them up to different colors, layouts, etc.  So you can see the different versions I’ve done below.  (If you are visiting my web page, just click on each photo to see it enlarged.)

 *Apologies for the messy stack for photo taking…it was a lot to do all at once!

I thought these would be enough for all of the Christmas cards to send out, but I realized going back through my list that I wasn’t going to quite have enough. 

So I’m glad that at the beginning of this month I took a Hero Arts Stamp-a-Long and made several different types of Christmas cards.  Here are the results of these below:  (Again, if you’re looking on my web page, just click on the photos to enlarge them.)

So some of these were also taken and used for sending out more Christmas cards.  I’m glad that I did the projects for this class or I probably would not have had enough cards.

BUT WAIT!  That’s not all!  I’ve also made a few other Christmas items that I’ve also sent out.  I’m also sharing some gifts and gift tags that I’ve made from a Taylored Expressions Advent Calendar that I got this year.  I made some more cards and tags.  (I tried out wax melting which is something I’ve never done…it was fun)  Others are from classes I took or participated in Craft Roulette for.

If you’re on my web page, just click on the photos below to enlarge each one.

Wow, so that was a lot!  I know that my blog has been pretty sparse with posts lately and I am finally getting around to posting the things that I’ve been working on, so I hope you’ll get that and you’re able to take some time for yourself this season and enjoy the peaceful quiet moments!

I will be sure to take a moment and catch up with everyone before Christmas arrives.  In the meantime, it’s back to cookie making!  Thanks so much for stopping in today!❤️