December AJ Page-Keep Dancing + book and review

Hello friends!  Hope you had a great Christmas and were able to make some wonderful memories!  I can’t believe that we are ready to close out another year!  The time just goes way too fast and there’s so much more to look forward to!  I think the theme for my upcoming year is in this title post – KEEP DANCING!!!🕺

The last Saturday of the month (AND THE YEAR!) brings us to the monthly Art Journal Page collaboration with my crafty friend, Carol (from Crafty-Stamper)! We get creative trying to use up our never-ending stash piles along with a prompt for each month.  I know she always has great inspiration to share, so please check out her blog too! Here’s my AJ page with the “SMASH OUR STASH” December prompt of “Previous Prompt”:

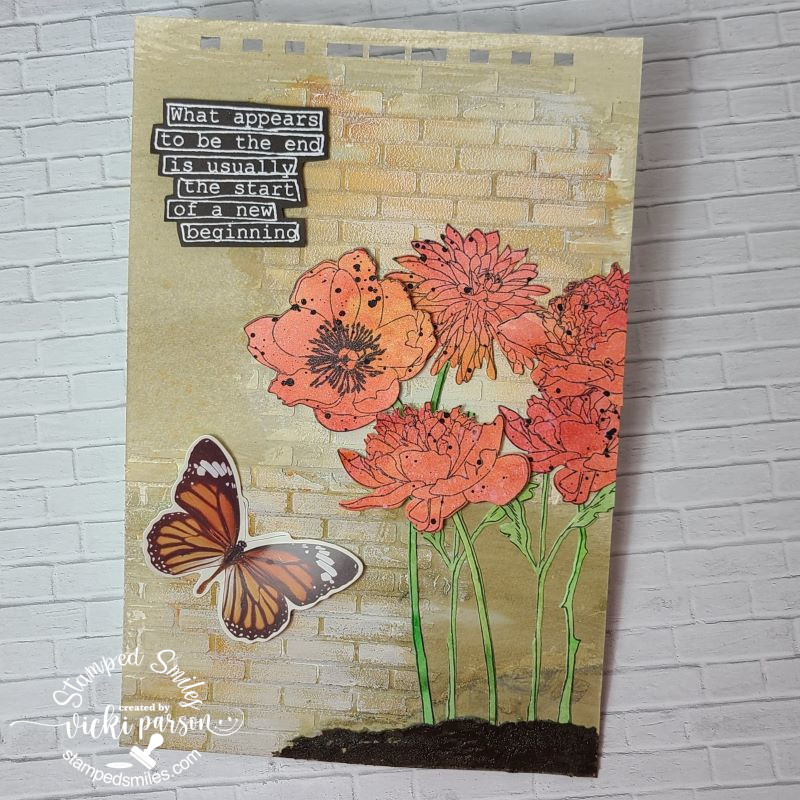
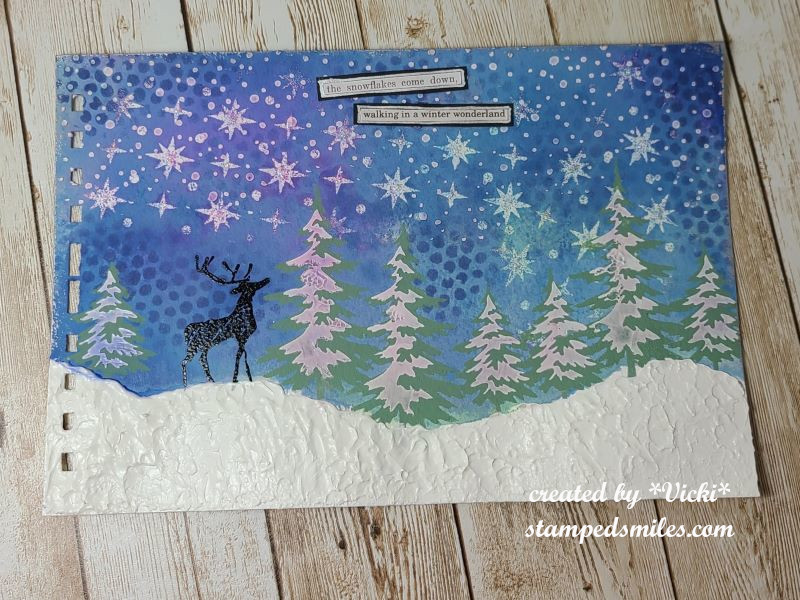
Since this is the time of the year that we have a “look back”, I thought it would be fun to take one of this year’s previous prompts and come up with a new AJ page.  I chose April’s prompt of “SHINNY/SPARKLY”, and you can catch that page in the photos below or see my previous blog post HERE.

There’s nothing quite shinny or sparkly than New Year’s Eve!  I always think of the ball dropping on Times Square in New York, but it also had me thinking of a disco ball that is very sparkly.  Found this image online and printed it out.  Cut it out with a circle die and then added a bit of colored shading with my markers in grey.  I took a sponge to add glue to the entire ball and then covered it with chunky glitter.   I added some sparkle images and filled them with silver glitter and then die cut the numbers and glued them over top of the ball.

For the background:  It’s just a 6″x9″ black cardstock pre-punched at the top and then splattered with silver watercolor.  I added some music notes and die cut stars.  For the bottom, I used some woodgrain texture paper and cut strips to make a wood floor for the Riley the Moose disco dancer.  A silver metallic paint pen was used for the ball string at the top and the wording around the top of the ball.

I stamped, colored and hand cut the moose and popped him up over a die cut shadow for under his feet.  I typed a quote on the computer and printed it out over silver cardstock.  While it was still wet, I sprinkled clear EP over top and cut rounded corners for the page.  Lastly, I just popped up the glittered ball with foam tape and added some silver rhinestones at the bottom.

  • I thought it would be fun to do a review of all of the monthly pages that were created this year.  I put the months in order below.  (If you are on my website, just click on the photos to enlarge them.)

I pre-punch the holes at the short side of the pages each month and then at the end of the year, I use my machine to bind them together to make a book.  I add covers and decorate them.  There is a post with last year’s book HERE.

For this year, I went with the vertical look and added a stretch cord to keep them together better.  I also tried out the napkin with the cover:

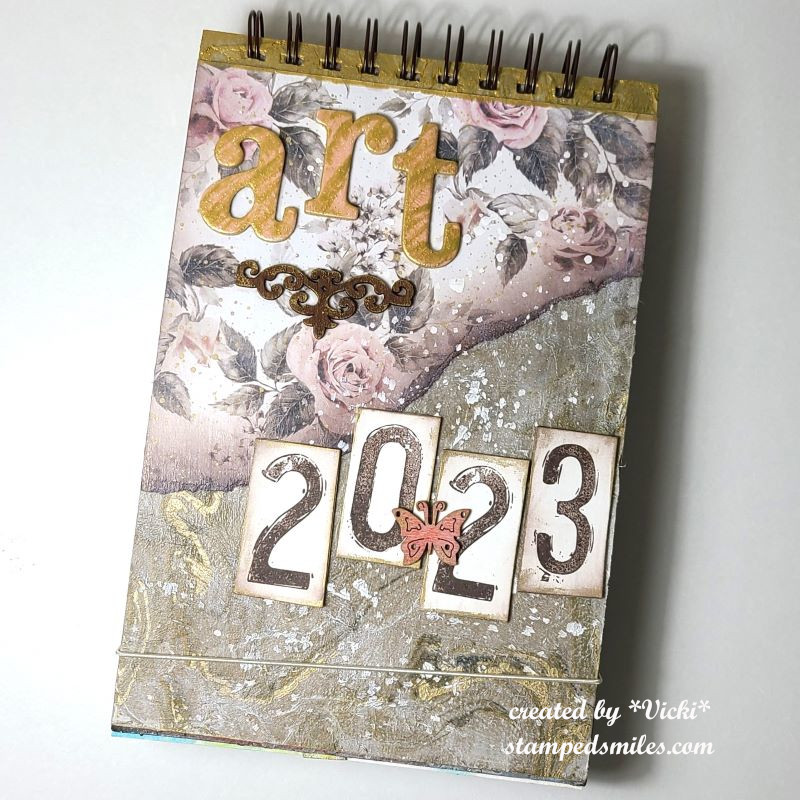
The napkin is at the bottom with the foil marble look.  My husband got some napkins for New Year’s, and I thought I’d try it out.  I added some chipboard, stamped and cut out numbers and added some wooden pieces.  I used the rose papers for the covers on the inside as well as the back of the chipboard covers.  It was put together with my Bind-It-All machine and coils.

I hope you’ve enjoyed seeing my Art Journal Journey throughout the year as I sure have enjoyed doing them!  I get to pull from my stash to use, but there is also so much more to use!  So this means that I will for sure be continuing with this journey and I hope you’ll join me too!

Thank you so much for stopping by to have a look back.  Wishing you peace, love and health for the upcoming 2024 year!  See you in the next year friends!!!🎉

Challenges:

  1. Art Journal Journey – Above Us Only Sky (New Year’s Eve Ball Drop on Times Square with stars in the sky!!!)
  2. Crafting From the Heart – Anything Goes #8
  3. Creative Artiste – Anything Mixed Media Goes with option of Christmas
  4. Alphabet – ‘T’ is for Texture (texture on the top page with woodgrain floor, the chunky glitter disco ball.  Texture on the book with chipboard, wood pieces and paste.)

Lots of Joy Mailed Out!

Hello friends!  I hope that you’re having a great start to your week!  We’re almost there as Christmas approaches us quickly!  I’ve been enjoying the Season and having fun keeping busy.  Currently baking cookies and decided to take a break from that to sit and make a post about all of things that I’ve been doing besides posting!😆

This is just one of the several similar cards that I created for my Christmas cards this year.  It came from a Christmas in July card kit from Taylored Expressions.  It mainly used the Wreathed in Joy Stamp & Stencil Combo set.  There are dies you can cut them out with as well as foilable panels which is shown on this one.

I do not like to make several of the “same thing”, so I’ve changed them up to different colors, layouts, etc.  So you can see the different versions I’ve done below.  (If you are visiting my web page, just click on each photo to see it enlarged.)

 *Apologies for the messy stack for photo taking…it was a lot to do all at once!

I thought these would be enough for all of the Christmas cards to send out, but I realized going back through my list that I wasn’t going to quite have enough. 

So I’m glad that at the beginning of this month I took a Hero Arts Stamp-a-Long and made several different types of Christmas cards.  Here are the results of these below:  (Again, if you’re looking on my web page, just click on the photos to enlarge them.)

So some of these were also taken and used for sending out more Christmas cards.  I’m glad that I did the projects for this class or I probably would not have had enough cards.

BUT WAIT!  That’s not all!  I’ve also made a few other Christmas items that I’ve also sent out.  I’m also sharing some gifts and gift tags that I’ve made from a Taylored Expressions Advent Calendar that I got this year.  I made some more cards and tags.  (I tried out wax melting which is something I’ve never done…it was fun)  Others are from classes I took or participated in Craft Roulette for.

If you’re on my web page, just click on the photos below to enlarge each one.

Wow, so that was a lot!  I know that my blog has been pretty sparse with posts lately and I am finally getting around to posting the things that I’ve been working on, so I hope you’ll get that and you’re able to take some time for yourself this season and enjoy the peaceful quiet moments!

I will be sure to take a moment and catch up with everyone before Christmas arrives.  In the meantime, it’s back to cookie making!  Thanks so much for stopping in today!❤️

Guest Design for Try it On Tuesday

Hello friends!  I hope that you’ve had a great start to your December month!  I promise I haven’t been hiding, but it’s a busy time of the year and I’ve been doing all of the Holiday things, so my time has been limited.  I’m glad to have just now finished up some Christmas cards!😉

Speaking of Christmas cards, I have something fun to share with you today!

TioT Guest Designer 2023

Last month I had won a top 5 in a challenge and was asked to be a guest designer for this Try it on Tuesday challenge!  I really enjoy playing along in the challenges to keep motivated, so I was thrilled!   For THIS challenge, the theme is “Santa Claus is Coming to Town” which inspired me to pull out this fun Santa stamp for a chuckle:

So, this is Santa’s excuse for being late!  Like me, he’s NOT hiding…just delayed!😆

The stamps and die cuts came from an older My Favorite Things card kit I had called “Stuffed Santa“.  I had fun putting this one together and was the beginning of the cards made to send out this year. (It was my plan to be early, but you know how THAT goes!)

For the background:  I ink blended in a couple of blue oxide colors with the center panel fading to the lightest color.  I sprayed the panel with some shimmer spray for that cold frosty shimmer sky.  I then splattered some white opaque Copic mixed with water for the snowfall.

The Santa, hands, sentiment bubble, and lights around the chimney were all stamped and colored with Copic markers.  I die cut them out along with the chimney, snow and rooftop pieces.  I die cut the pieces with white and used my Copic markers to color in the chimney, roof, window and lights around the roof line.  For the sentiment panel on the house at the bottom, I cut it to size and used my Copic markers to color the same as the roof peek.   I added the sentiment to it, and made this the “base” for the house.

To finish it off, I added some chunky glitter to the die cut snow on the chimney and roof.  I also used a glitter pen to add some sparkle to the inside window panels and the Christmas lights.  I also used some foam squares to pop up the sentiment bubble and Santa’s mittens.

Hope you’ve enjoyed my card today and that you’ll play along with this fun challenge over at Try it on Tuesday as well!  Thanks so much for dropping by!

Challenges:

  1. Pammie’s Inky Pinkies – 2349 Anything Goes
  2. Ally’s Angels – Anything Goes
  3. Crafty Catz – #662 Anything Goes
  4. Daring Cardmakers – One Word Prompt: LIGHT (Christmas lights and window light)
  5. Gem of a Challenge – Anything Goes
  6. Inkspirational – Designer’s Choice: Add Glitter
  7. Krafty Chicks – Stamp Act

Grateful & Encouraged

Hello friends!  It’s Thanksgiving tomorrow for us in the United States and I’d like to send a heartfelt Thanksgiving greeting to you all!  I would also like to say a huge thank you to everyone for your kindness and friendship.  I’m very grateful for you and encouraged by your support!

I’ve been working on several things and haven’t spent the time to photograph and share everything yet, but I will be sharing soon.  In the meantime, I’d like to share a few projects that I’ve made in lieu of the Thanksgiving holiday:

I don’t normally send Thanksgiving cards, but it’s a great way to say thank you to someone that hosted a dinner or brought something to share or just spend time with you!  That is the ONLY turkey stamp I own!  The stamp set is called “Sassy Thanksgiving” by CZ Designs at Simon Says Stamp.  I thought the sentiments in it were too cute and funny.  You certainly could make this any type of thank you as well.

This is also a fancy/fun fold card called a “Swing Easel Card”.  I found a tutorial using a vertical style on You Tube here – SWING EASEL TUTORIAL (I also used the same detail of embossing an additional panel with leaves and went over the texture with some gold paste.)

I made another panel for the center area and ink blended some blue that faded out and then splattered some gold paint over it.  I then layered it over a piece of gold that fits in the center panel of the easel.  I gold heat embossed the large sentiment and cut it out with the die.  It was popped up over the leaves.  I also cut an additional strip with the gold for the “catcher” of the front panel of the easel card.  I added the turkey and leaves along with the stamped sentiment on the inside bottom.


Autumn is my favorite time of the year and I enjoy using the colors and images in the cards I make, so here’s more that I’ve made:

I’ve made a couple of encouragement cards to send out to some people and I’ve used a favorite card kit from my stash by Taylored Expressions.  The images come from the stamp set Wheatfield Dreams.  I’ve used an oval die and oval mask to do some ink blending and just cut out the colored image to pop them over top.  Both sentiments were copper heat embossed.

I kept the backgrounds simple with the one on the left stamped with a background stamp from TE and the other was cut out with a wonky stitch die and layered over a green card base.

Hope you’ve enjoyed my creations, and I am so grateful you’ve chosen to stop by!❤️

Challenges:

  1. Creative Fingers – Anything Goes
  2. Lil Patch of Crafty Friends – Anything Goes
  3. Pammie’s Inky Pinkies – Anything Goes
  4. Crafting Happiness – Thanksgiving/Harvest #148
  5. Four Seasons – Fall Season
  6. The Crafty Addicts – Anything Goes
  7. Crafts Galore Encore – Anything Goes

Mixing It Up with a New DT!

Hello friends!  Happy November!  The time is getting closer and closer for Christmas to arrive and so the Christmas cardmaking ramps up!  Have you started on yours or have them done?

new-miucb-designer-badge

I’m very excited to announce that I’ve joined up as design team member over at the MIX IT UP CHALLENGE BLOG!  Woot! 🎉 Really happy to be supporting a fellow blog friend Leslie with one of the many challenges she runs!  Thanks for having me along!  So, I hope you’ll go check it out and play along with us!  The challenges run for 6 weeks which is plenty of time to enter and these challenges are always “Anything Goes” with an optional twist involving a technique of some sorts.  Sounds fun to me!  And I can use any products I like!  Count me in!

For the November challenge this month, we have “Anything Goes with optional stamping (use clear or rubber – no digis)” This is my first creation with the team, and I look forward to seeing what you come up with for the challenges too, so I hope you can join!

Of course, I love to stamp!  I have SO many and why not use them?!  I was lucky enough to have gotten the STAMPtember Trinity Stamps set called: “Sledding Gnomes” (no longer available) and it was so fun to play with for this card.  I also decided to make it a slimline card which I haven’t made in quite a while.

For the background:  I white heat embossed some snowflakes from the Simon Says Stamp “Frozen Fractals” stamp set (no longer available).  Then I took some Oxide Inks in Mermaid Lagoon, Blueprint Sketch and Chipped Sapphire to ink blend over the embossed snowflakes for an embossed resist technique.  Lastly, I’ve splattered some Copic Opaque white with water and a fan brush.  This panel was cut out from the Trinity Stamps Stitched Card Panels & Window Slimline dies.

I stamped, colored and die cut the characters and cut out some white cardstock using a Lawn Fawn Stitched Hillside Borders die set.  I arranged the slopes and tucked in the trees behind each layer and popped up the characters with foam tape.  I also white heat embossed the sentiment with red cardstock and die cut it out, which was popped with foam tape.

Here’s a closer look at the coloring: (using Copic markers)

Before attaching the stitched slopes to the bottom of the heat resist snowflake panel, I sprayed some shimmer spray to give it a snow look.  I attached this panel to a red piece that was cut from the Trinity Stamps Scalloped Card Panels & Banners Slimline die set.  I then layered both of these panels to a white side folding slimline card base measuring 8.5″ x 3.5″.

Lastly, I’ve added some Stickles Stardust glitter to the gnome hat ends and the hat on the reindeer.  You can see where I’ve added some white highlights with a gel pen and then I took some gold glitter gems and attached randomly.

I hope you’ve enjoyed my project today and will stop by the Mix It Up challenge blog to check out the rest of the inspiration and play along with us this month!  Remember you have 6 weeks!

Thanks for stopping in today!

Challenges:

  1. Crafty Catz – Anything Goes optional: 4-legged critter (reindeer)
  2. Daring Cardmakers – A Bit of Bling (shimmer spray, Stardust Stickles, and gold glitter gems)
  3. Allsorts – Embossing Heat/Dry (heat embossed snowflakes & sentiment)
  4. ABC Christmas – ‘U’ is for “Use it Up” & ‘V’ is for “Vertical” (I made a vertical slimline card and I used up my supplies of sprays, glitters and gems!)

It’s Halloween!

Hello friends!  Tomorrow is Halloween and so I thought I’d share some cards that I’ve made that were sent out to people. 

The dog and cat ghosts are too cute from Newton’s Nook!  I love their “howling”!  Not much to color and I’ve used the dies to cut them out and pop over the background with the paper pad from NN as well.  I heat embossed the sentiment over a die cut banner and then added a frame around the edges with some holographic paper.

I made this for someone who loves Halloween almost as much as I do and also has both a dog and cat.  The cat’s name is Spooky! LOL

And here’s another card I’ve made using some Taylored Expressions products.  I first ink blended the background in a couple of blue tones with dark blue around the edges and then splattered some silver watercolor for the stars.  I used a layered moon stencil to the moon effect and then die cut the witch in glitter black cardstock.  The sentiment was white heat embossed and cut out with a banner die.  I’ve also used another frame of the holographic cardstock.

And last but not least, I’ve made this card and not necessarily for Halloween, but this was made for my husband’s anniversary card.  We’ve been married 24 years and we both feel the same about Halloween/spooky things! LOL  I found these fun digital images from Etsy to print out and then I fussy cut part of one to add to another.  I stamped the background with a background stamp I had covered with roses and blended some inks around the heart.  I also added some black gems around it and covered the rose “Jack” is holding with a glitter pen.


Hope you’ve enjoyed my post today!  Thanks for dropping in and I hope you all have a wonderfully fun and spooky Halloween!👻

Challenges:

  1. Little Red Wagon – Trick or Treat
  2. Papercraft – Happy Halloween
  3. Creative Crafting Uncles – Halloween
  4. Penny’s Paper-Crafty – Anything Goes using paper
  5. Simon Says Stamp Wednesday – Anything Goes
  6. Krafty Chicks – All Occasions (bottom card anniversary)
  7. Sweet Stampin’ – All Hallow’s Eve

October AJ Page-Thriller Mix

Hello friends!  Halloween is very near! 💀 I have been working on a few Halloween cards and will be posting those as soon as I know they’ve been received.  But today’s project is about Halloween in mixed media art journal form!  I do enjoy crafting Halloween!

Very excited to be doing the monthly Art Journal Page collaboration with my crafty friend, Carol (from Crafty-Stamper)! We get creative trying to use up our never-ending stash piles along with a prompt for each month.  I know she always has great inspiration to share, so please check out her blog too! Here’s my AJ page with the “SMASH OUR STASH” October prompt of “MIX” (mix colors together from any media):

For this month’s prompt, MIX, I have to say that I love to mix up colors to see what they look like.  I have SO many bottles of watercolor and of course watercolor is fun to mix up…so I went with that for my background.

For the background:  Hard to tell, but I’ve used eight different colors of watercolor that was applied to a pre-punched 6″ x 9″ Canson 140# cold press paper.  I also used a circle stencil to apply some white ink over it for a bokeh effect.  I also stamped some random words and gears.  (Stamperia and Tim Holtz)  I also took some of the green watercolor used in the background for a few splatters.

Showing my age here but does anyone remember the Micheal Jackson “Thriller”?!  It’s perfect for Halloween!  I thought I needed to add a title to my page to represent the Halloween theme and this song came to my mind! 😆

I found some cool lettering that I used my Cricut machine to cut them out with in both gold metallic (also cut gears with) and some dark grey cardstock.  I glued them together with a slight off-set so the gold shows through.  I also used some Nuvo Glow in the Dark liquid drops around the edges of the letters.  I wanted to make it really “goopy” so I heated it up with my heat gun so that it bubbled.

The bottom of the page has the really cool Steampunk skull image that came from an Etsy store.  I used another image of it to fussy cut the hat and then popped it up over the image on the paper.  If you look at the center bottom of his hat, I added a gear with a clear drop in the center of it.

I’ve also added a talk sticker and rub-on from Tim Holtz.  I added a couple more metal gears from my stash to go with the gold cut out ones.  Lastly, I’ve taken some silver metallic wax and went around the edges of the page and slightly over top of the skull’s hat.

Hope you’ve enjoyed my art journal page today!  I sure had fun putting it together!  Thanks so much for stopping by today!  

Challenges:

  1. Art Journal Journey – In Gear
  2. Creative Artiste – Anything Goes Mixed Media #98
  3. Try it On Tuesday – Halloween
  4. Two Old Bats Halloween – Anything Goes Halloween
  5. Simon Says Stamp Monday – Spooky!

Things That go ‘BUMP’ in the Night for Sparkles Monthly

Hello friends!  I hope you’re having a great weekend!  Did you have “good luck” on Friday the 13th?  It’s getting closer to Halloween!  I don’t send out very many Halloween things, but it’s something that I share with friends and my adult kids because it holds some special memories of just having fun.

Today begins our October challenge at Sparkles Monthly with a theme that was my turn to pick: Things That go ‘BUMP’ in the Night (Does not HAVE to be Halloween!)  So, if you’re not a Halloween person, this theme is open-ended.  Try nocturnal animals, Santa on the roof, etc.  Just have some fun crafting!

Of course, I love Halloween and had fun making my card:

I thought these mice were just too cute!  They were out bumping around in the night trying to be scary but scared each other instead! LOL

The mice came from the STAMPtember collaboration with Whimsy Stamps and the set is called Spooky & Mice.  I colored them with Copic markers and die cut them out with the coordinating dies.  They were popped up with foam tape over the background.

For my background:  I used a cloud stencil on a white piece of cardstock and blended some clouds with purple ink and then blended around the edges with black and grey ink.  I then took the SSS Spook Up Some Fun stamp set and stamped black stars over the background and I also white heat embossed the oval sentiment panel that was in that stamp set over black cardstock and set it aside.  I’ve also splattered the background with black, white and silver acrylic paints.

While that panel was drying, I heat embossed the Whimsy Stamps Spider Web Frame with a white sparkle EP and then cut the middle of it out with scissors so the cloud background would show.  I stamped the spider hanging down onto the background while sizing it up with the frame and then drew a black string with a marker for it. Glued on the frame, attached my oval sentiment panel, and attached it to a top folding A2 sized grey card base. (Then added the mice with foam squares.)

Lastly, I’ve added some silver gems on each side of the sentiment oval and attached a few clear sequins over the night sky background.

Thanks so much for stopping by today!  I hope you’ll be able to join along in the fun with us this month!  I’ll be seeing you soon!

Challenges:

  1. Two Old Bats Halloween – Anything Goes Halloween
  2. Crafty Animals – Anything Goes with an animal
  3. Critter Crazy – Anything Goes with a featured critter
  4. Creative Inspirations – Autumn or Halloween
  5. Craft Rocket – Autumn and/or Halloween
  6. As You Like It – Favorite Halloween or Fairies & why? (I love to make Halloween theme because it’s so fun with cute, scary or fun characters and I love the colors too!)
  7. Most Magical Time of the Year – Anything Halloween or Christmas
  8. Creative Moments – “It’s Alive!”

More Christmas Smells

Hello friends!  Since it’s still so very warm outside, I thought it would be fun to do a bit of coloring which I haven’t really done much of lately and create another Christmas card in July!  Hope you are staying cool…or warm depending on where you live! LOL

Vicki-InkNSplatterdigi-gingerbread

A cup of cocoa with marshmallows, a candy cane and a chocolate cupcake with a gingerbread friend to share it with sounds wonderful to me!  You may recognize the image from Digi Doodle Studios, which is where this retired image is from called “Jacks Ginger Cocoa Mug“.   It was just nice to be able to spend time coloring up a cute image and enjoy more from my long-forgotten stash!  I’ve used Copics to color the image and cut it out with my square dies to layer for my card design.

I thought the brown gingham papers went well with the cardstock that I’ve used from Stampin’ Up! called Baked Brown Sugar. I wanted to also bring in some red to the design because of the candy canes/peppermints in the image.  I layered a piece of lace ribbon over it and then popped up the layered colored image on top.  I used a photo corner punch for redder in the right top corner of the image.

The sentiment was white heat embossed over the Baked Brown Sugar cardstock and cut out with a stitched banner die.  The sentiment is also from a retired Pink & Main stamp set I had in my stash.  Lastly, I added some round peppermint clay accents to finish it off.

Hope you’ve enjoyed my Christmas card today or have been inspired for Christmas..or food!  Thanks for stopping by!

Challenges I’d like to enter:

  1. Christmas Kickstart – Gingerbread Treats
  2. Rudolph Days Challenge – Anything Goes Christmas (June)
  3. Merry Little Christmas – Anything Goes Christmas
  4. Crafter’s Cafe – Christmas in July
  5. Double D – Christmas in July
  6. Creative Knockouts – Christmas in July
  7. Crafty Catz – Anything Goes with optional Christmas in July

Patriotic Pandemonium

Hello friends!  I had a day of some crafty fun and wanted to share things I’ve made for some challenges.  I absolutely love the red, white and blue colors.  Most of the time it’s associated with patriotic colors and July 4th Holiday, but I’ve decided to take not just the colors, but the theme using one stamp set and a sheet of paper to create different looks with it.

First up is this really cute mouse waving his flag with a fun patriotic theme…which is what this new stamp set from Inky Stamper (called Americana) was intended for.  I printed out some freebie papers and used them on all of my cards here today.  I colored Ralph up with Copics and popped him up on a scallop circle silver glitter cardstock and stamped the sentiments and stars with red and blue inks.  I also added some sequins from the Stars & Stripes sequins mix at Inky Stamper and added some silver Stickles in the centers of those as well as the stars.  I also added one of the flags from the sequins mix next to the sentiment at the top.  (I’ve used these on all of these cards too.)

I’ve made this card for SCS Teapotter Tuseday challenge as a Patriotic Congrats card for someone in the military whose been promoted to Colonel, so this worked out really well for sending this one out.

For this card, I wanted to share that a teeny tiny image from a stamp set can be fun to use in a different way as well.  I took the “bomb popsicle” image that was stamped and colored and popped them up with foam tape over die cut stars from white glitter cardstock.  I’ve used some more of the freebie papers and added a sentiment that was white heat embossed over red cardstock and cut out with a banner die.  The tiny red stars came from that sequins mix I mentioned above.

I made this card based on a sketch for a challenge that I wanted to enter before it ended too.  (Check it out in the challenges listed below.)

And lastly using this same stamp set, freebie papers, sequins mix and color theme, I made a Christmas card with it.  I took the little star image from this stamp set and stamped it several times, colored it in and fussy cut several of them out.  It’s not that bad when you’re cutting and watching videos while you do it!

I took a circle die and traced a circle with a pencil so that I would have a guide as to where to create my wreath.  I stamped a few stars directly on the circle area and then erased the line before I colored them.  the other stars that I fussy cut, I glued some on and popped some up with foam squares.  I also added an extra star in the center of the silver bow on the wreath.

I added some silver sequins from the same sequins mix mentioned above and then placed some silver Stickles in the centers of them as well as in the center of the stars.

These were so much fun to make with all of the same products and color theme to challenge myself with.  I hope you’ve enjoyed them too or been inspired in some way.  Thanks for dropping by!

Challenges:

  1. Try Stampin’ On Tuesday – sketch + cold treats (card 2)Mix Up July 615
  2. Crafting Happiness – Anything Goes (card 1)
  3. Four Seasons – Anything Goes Summer (card 2)
  4. Crafty Animals – Anything Goes with animal (card 1)
  5. Critter Crazy – Anything Goes featuring animal (card 1)
  6. Pearly Sparkles – Christmas in July (card 3)
  7. Crafty Calendar – Anything Goes (card 1)
  8. Challenge Up Your Life – Patterned Paper (all cards use papers)
  9. The Paper Fun Day – Anything Goes optional: red, white & blue (all cards)
  10. Try it On Tuesday – Use 3 colours (red, white and blue)