Hello and happy Friday! Thank you so much for the congrats from my last post about the baby! I look forward to meeting our new family member soon! It’s starting to get really warm over my way, so it’s a great time to be indoors with the cool air and craft.
Today starts a new challenge over at the Alphabet Challenge Blog! Our next letter is E and the hostess has chosen “E” is for Embossing (heat or dry) *Remember that this is a bi-weekly challenge, so you have two weeks to enter* I hope you will find some time to play along! Here’s what I’ve created:
I absolutely love to emboss! I first fell in love with stamping because of the magic of heat embossing and then fell in love again when those embossing folders came out! So I’ve decided to do both versions for my card.
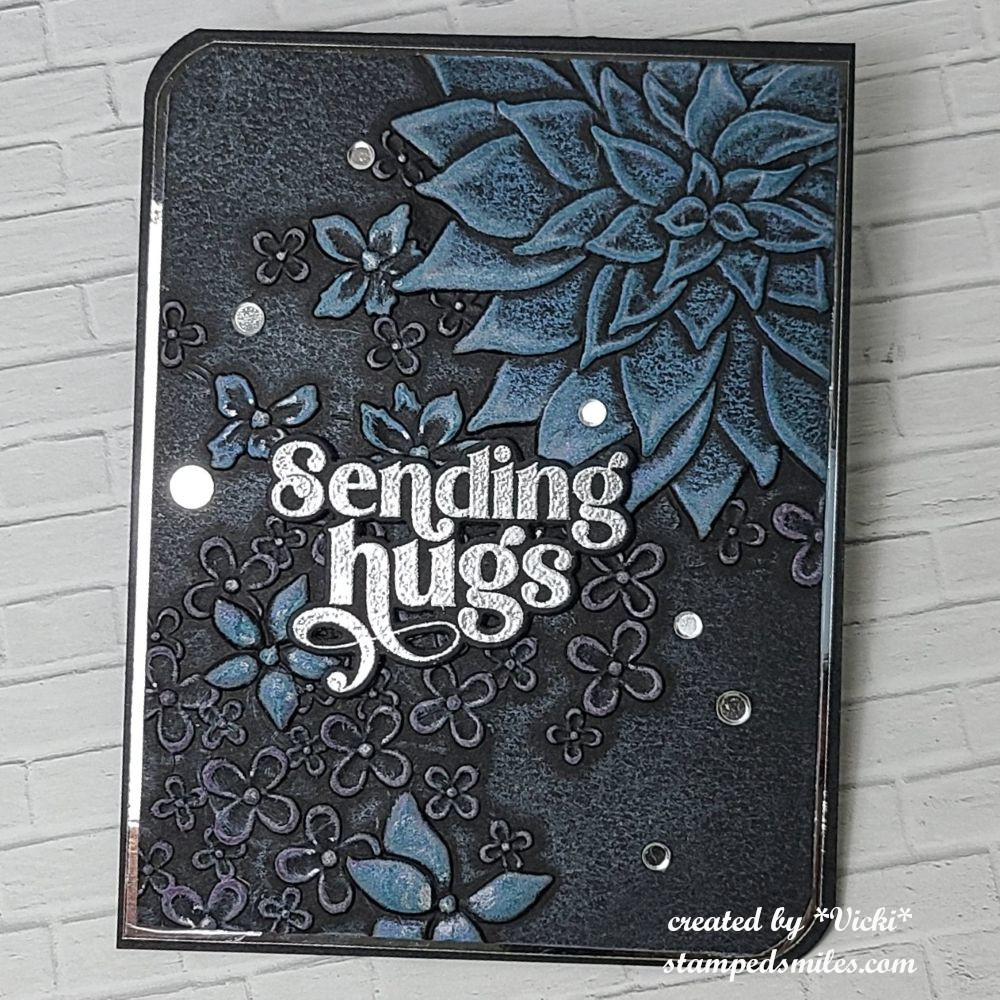
I haven’t had a chance to use this Drifting Flowers embossing folder from Simon Says Stamp. I thought it was so pretty! I wanted to emboss in black and try out my Lisa Horton Interference Inks with it, so after I embossed it, I used my finger to rub white ink over the raised areas. I then used the LH Interference Inks over that once it dried. (I can’t remember exactly what colors I used, but it basically started as an experiment and I had several pads open!) I also used a silver ink pad to rub the centers of each flower minus the large one.
I should also mention that some of the white ink was very slightly rubbed over the open areas as well because I got a white streak on it…so I just continued to rub all over those areas until blended in. I didn’t mind the look.
While the inks were drying, I silver heat embossed the sentiment and cut out it with the coordinating die. I additionally cut out two more for added thickness and attached to the panel. I layered this embossed panel onto a mirror silver layer with both of these layers getting rounded on two ends with my corner chomper. I added these onto a chomped top folding A2 black card base. Lastly, I added some silver sequins.
Please be sure to stop by the challenge blog to see the inspiration from team as well! I look forward to seeing your embossed projects in the gallery. Thanks so much for stopping by today and I hope you like my card. See you soon!
As You Like It – Favorite: to add a sentiment or not and why? (I most always have sentiments on my cards because I feel it’s important when sending a greeting card to someone and it’s hard for me to leave it blank.)
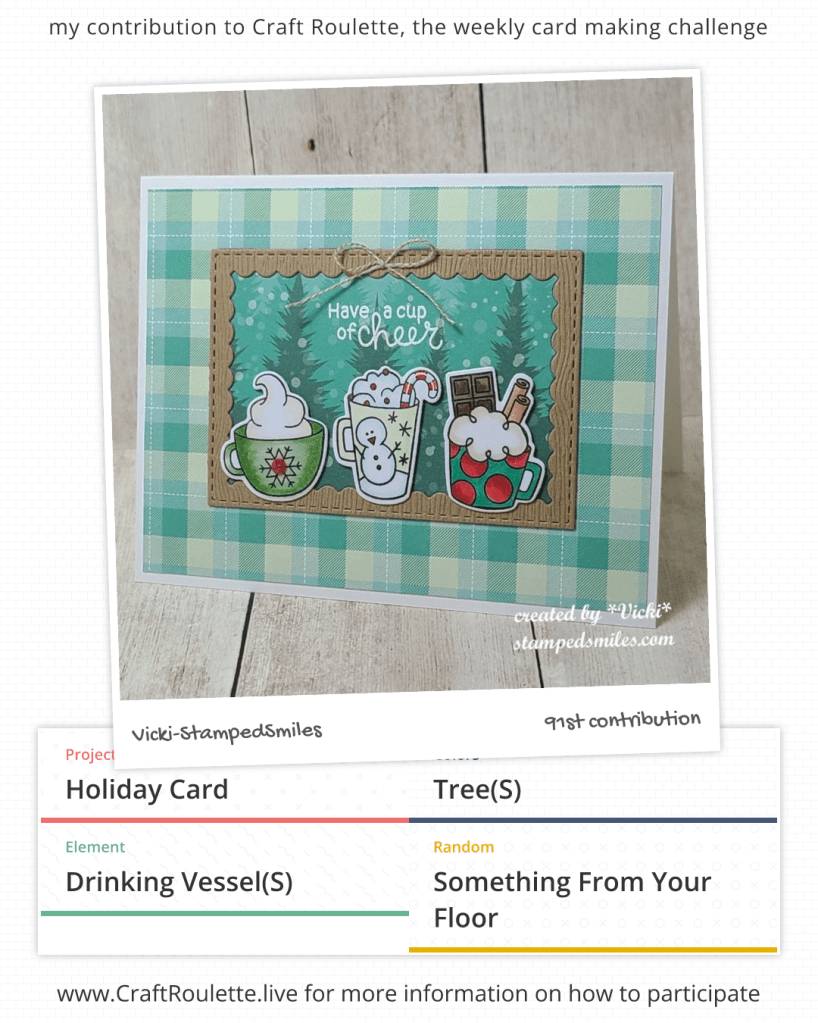
Hello friends! Just wanted to pop in to wish you all a Merry Christmas and to share some final Christmas creations that I’ve made basically within the last few weeks! Some of these are cards that I’ve sent friends and family and some are recent makes for Craft Roulette challenges.
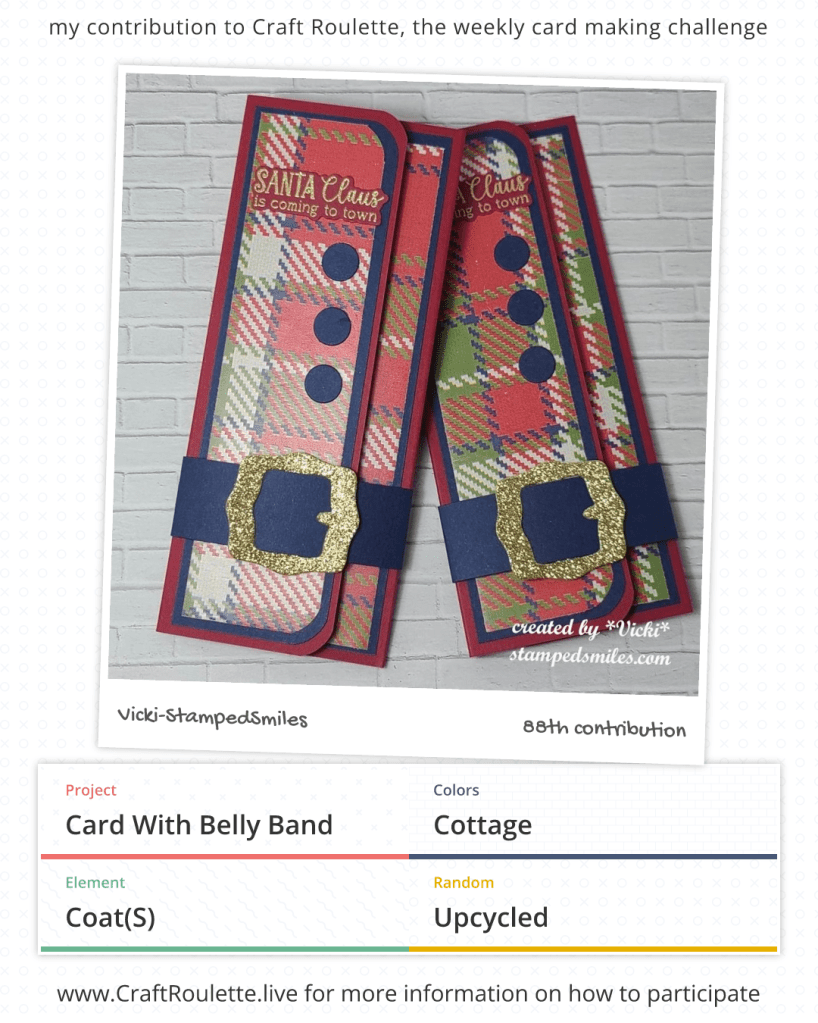
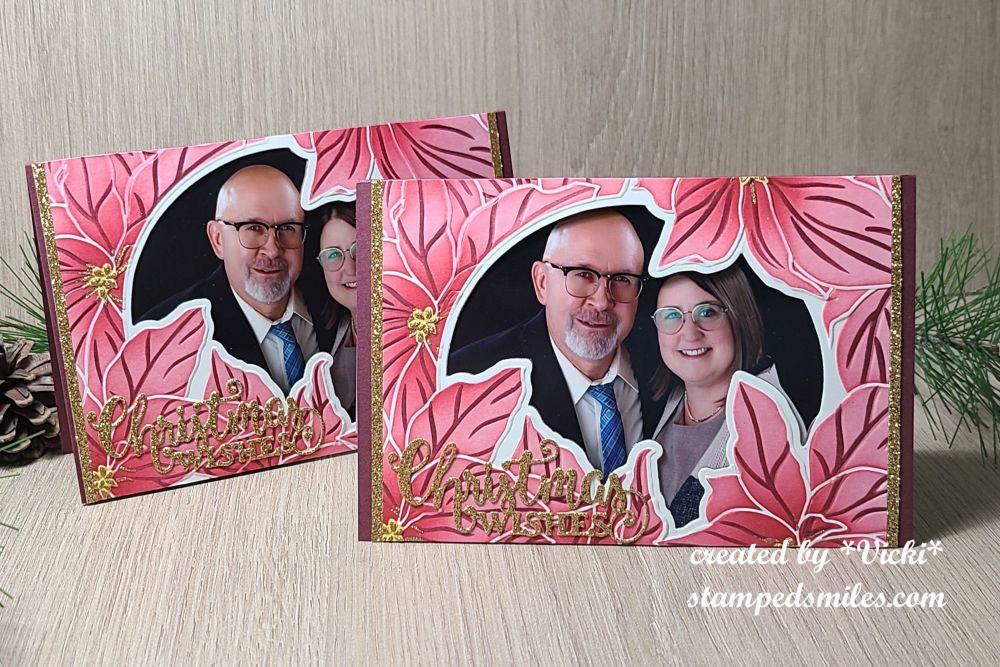
(These are money holders for Christmas with recycled wrapping paper)
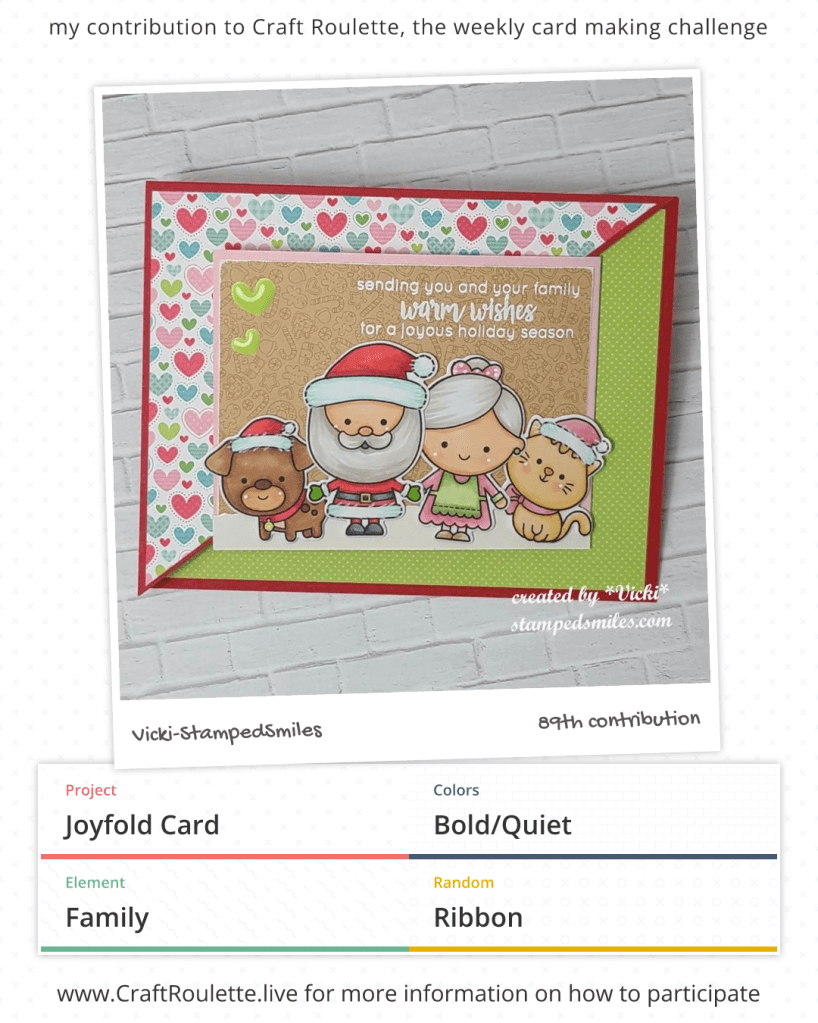
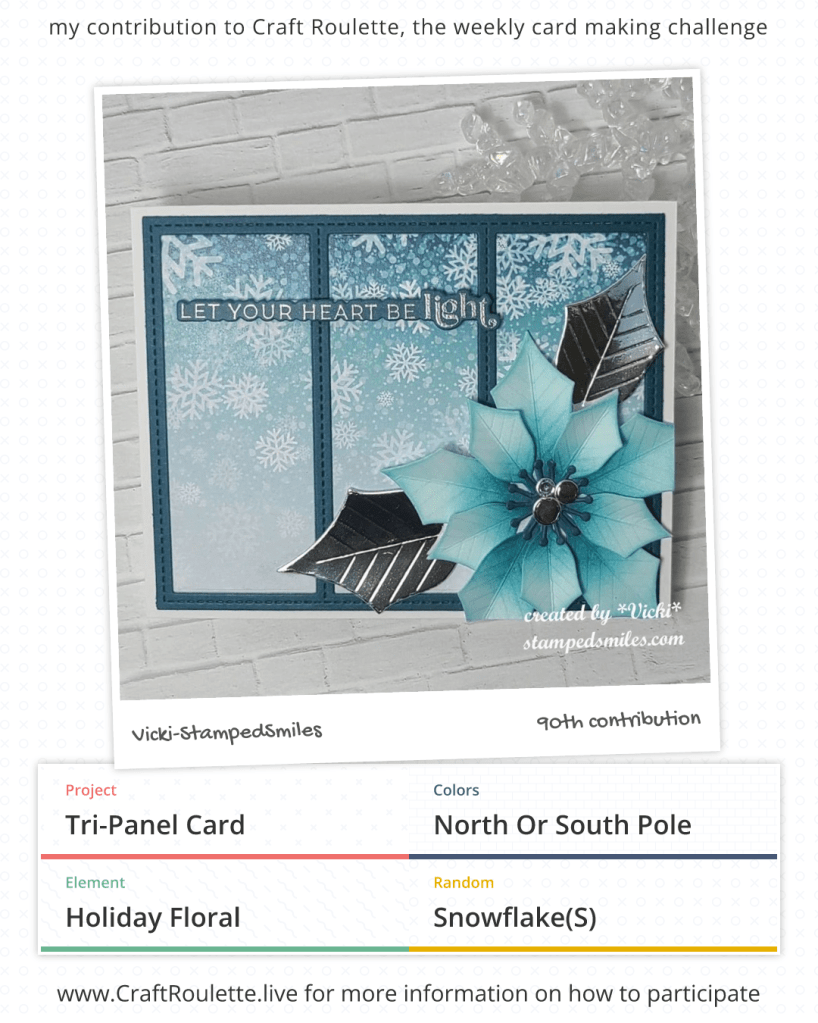
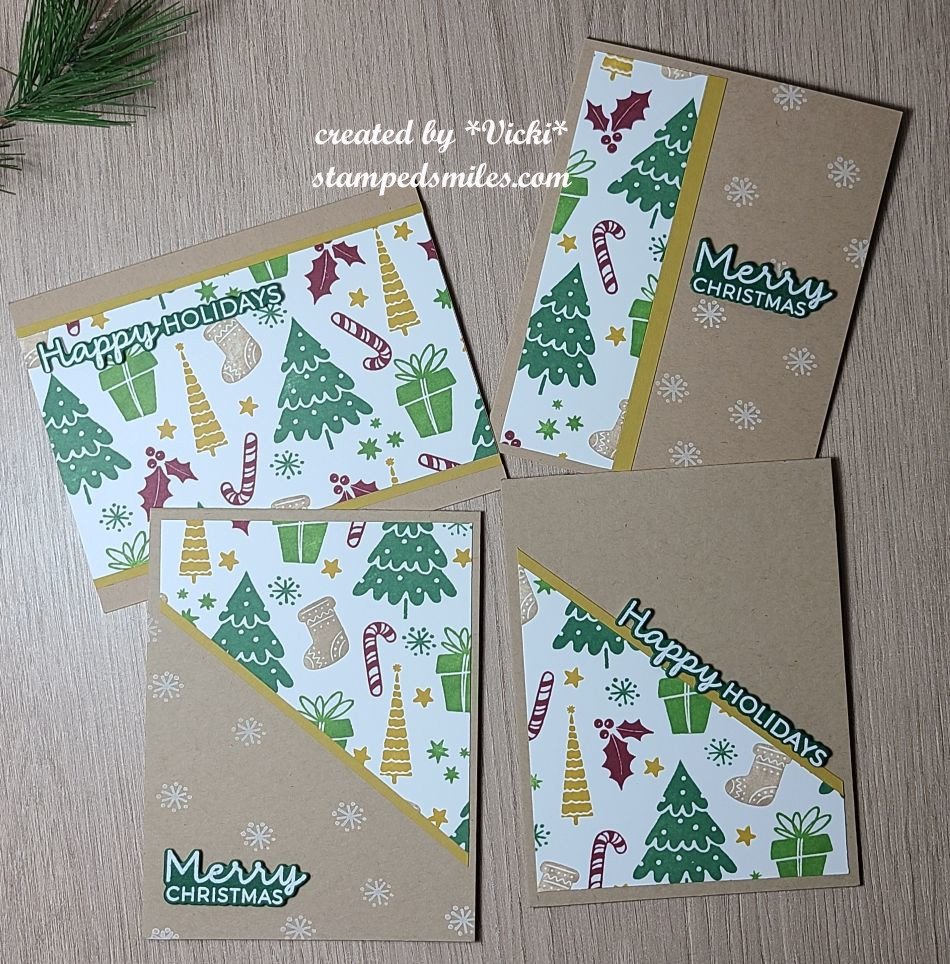
(This is a diagonal joy fold card design)(Tri-Panel Card for me was 3 layer panels on the front! LOL)
(Always stepping on those tiny gems on my floor!)
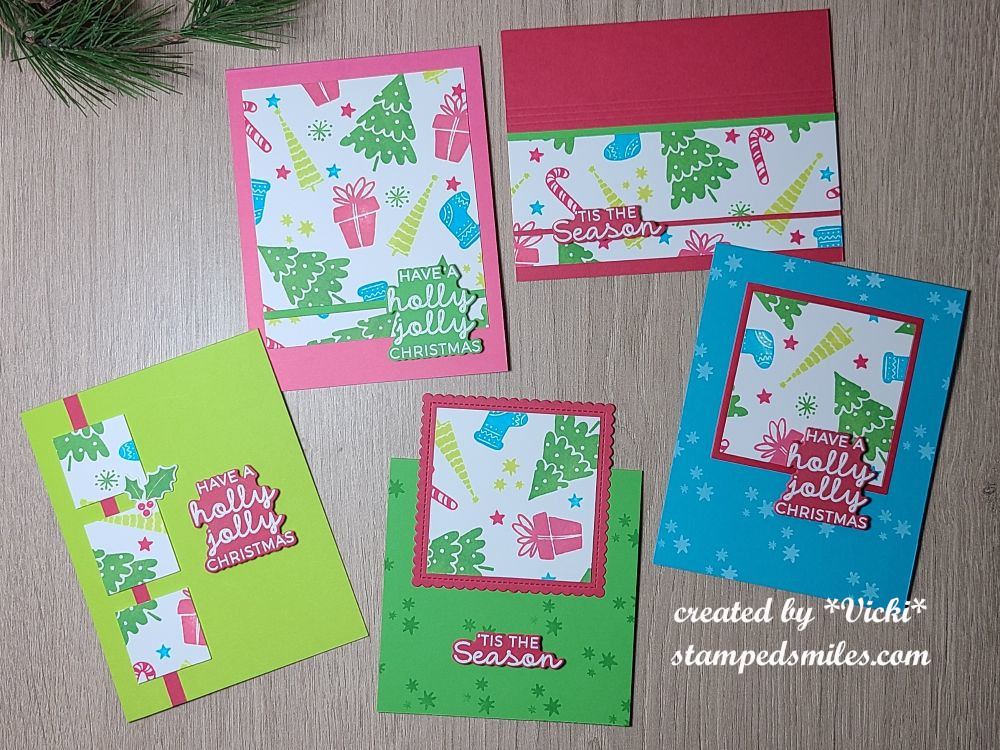
Hopefully the next several cards have been received by everyone they were sent to, but if not, maybe the surprise will be which one you will get! I don’t like making several at one time, so I’ve split up the design in sessions using the Taylored Expressions Make It Merry Stamp Set along with the Happy Half Sheets: (I’ve made my own “map” with the images)
Hope you’ve enjoyed all of my Christmas projects this year and a very special thank you for being apart of the crafting journey with me! I’m so thankful for the friends I’ve met along the way!
ALERT!! GIVEAWAY!!
Since this is the season of giving, I would like to gift someone that would like to receive this set that I have collected myself (over the entire year as an extra) to give away to someone:
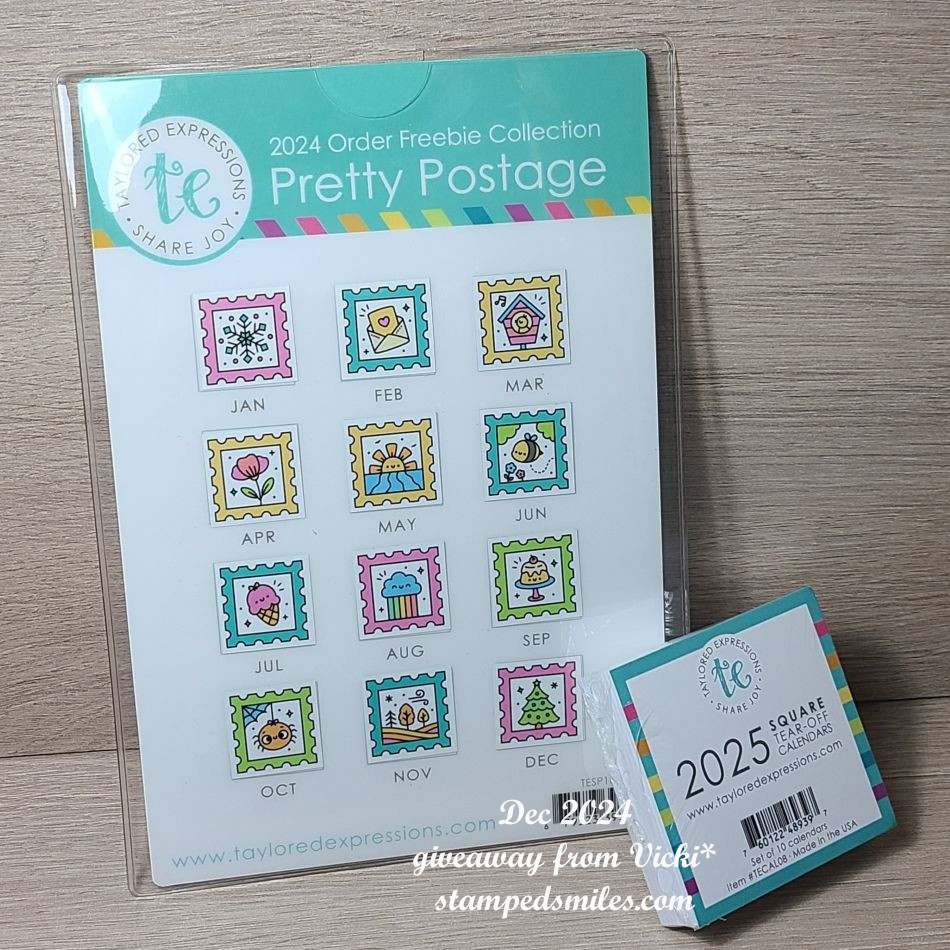
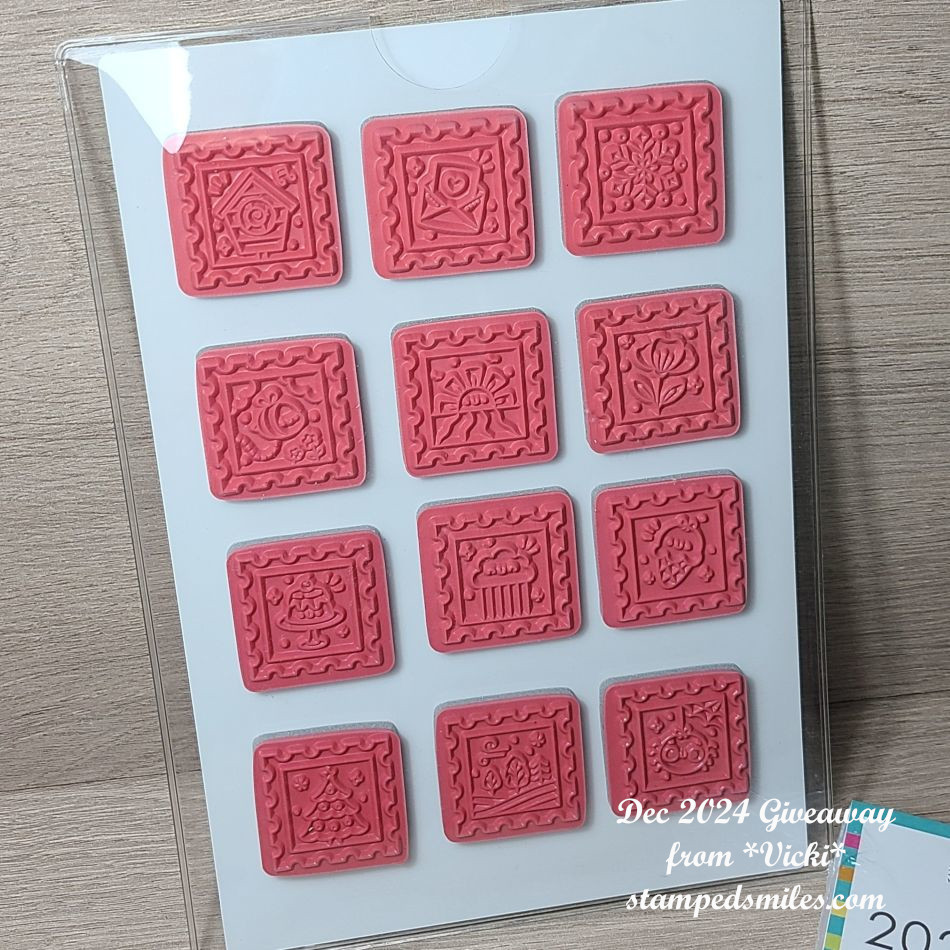
If you’re NOT familiar with Taylored Expressions, this is a collection of the “freebie” rubber stamps that a person receives when placing an order. Each month the stamp image changes to something else. I have not only collected a set for myself, but I’ve also collected another entire set (12 rubber stamps) to give to someone else that would like one! I have included the sturdy laminated Collection card, in addition, a sturdy plastic sleeve in which to store it all in. Plus, I’ve also included a set of 2025 tear-off calendars in a package of ten to go with it!
You can purchase these in the store here under the Pretty Postage Collection, but I’m giving them all away in one set for the entire year as I’ve collected them. I did NOT include the Pretty Postage die set that cuts out the images, but you can purchase your own by clicking on the link.
If you are interested in this give away from me (no affiliation with any company), please just leave me a comment below to tell me that you’re interested in the give away. THAT’S ALL YOU NEED TO DO, BUT YOU HAVE TO TELL ME IF YOU’RE INTERESTED IN GIVE AWAY!
You will need to leave your comment below by January 3rd, 2025 to enter. I will announce here on my blog who won by January 5th, 2025. (The winner will need to be in contact for mailing out prize.)
P.S. If you have been collecting and looking for one you’re missing, let me know which month and I’ll see if I have it as I have several months that are extras! (I know that I do NOT have any August left, though.)
Just wanted to send out a little Christmas cheer to a crafty friend! It doesn’t matter where you live, I will be happy to mail it out…so please don’t let that stop you! It’s just a special gift from one crafter to another to enjoy!
Thank you for making my crafting journey a special one and for joining me here to share inspiration with one another! Looking forward to more in the coming year!
Wishing you and yours a VERY Merry Christmas with lots of joy and love!
(I will be back after Christmas (Saturday) to share an art journal page with you!)
Hey friends! Wow, how in the world did Christmas get here so darn fast?! I feel like we just got through Thanksgiving and then things were a blur after that!😳 So, I’m also now realizing that it’s been a whole month since I’ve posted! YIKES!
Since it IS December…and the middle of it…that means today starts the December challenge over at Sparkles Monthlyand for this month, our hostess is asking to see Christmas Transport on your project. Be sure to stop by the blog to see what the rest of the team has created for you. Here’s my project for this challenge:
For me, Christmas transport is not planes, trains or anything busy or noisy, but something a little more outdoors around the countryside. There’s nothing better than a good road trip with snow falling and the smell of fresh pine in the air! I live in an area where there are lots of tree farms to pick out your perfect tree. (Do I pick out a real tree? Nope…but I do love them and the smell. Just not the mess. LOL) I prefer to visit the trees and not chop one down.
I’ve used the adorable Inky Stamper set called Vintage Truck and I’ve decided to add the tree image to the back of his truck as he’s taking it home to decorate for Christmas! I’ve fussy cut the image out after coloring and even added a snowflake stamp to the truck door from the Inky Stamper Toboggan stamp set. I’ve also stamped a few more along with the larger snowflake and cut out to add to the background of the card.
For the background, I’ve used some paper from the Lisa Horton A Festive Tapestry pack as it was perfect for a landscape of trees. At the bottom, I’ve used the road die from Lawn Fawn and then placed it over my tree landscape and added the truck over it by popping up with foam tape so it looks like he’s on the road.
So while making this card, I had the song stuck in my head and so I found a perfect sentiment to go with it from the Inky Stamper Tree stamp set. I white heat embossed over a green piece and cut out a banner to add to the top left of the card. Everything was placed over a white A2 top folding card base and I lastly added some Iridescent Clear Drops in the center of the snowflakes.
Hope you’ve enjoyed my card for you today and I hope that you’ll hop on over to the challenge blog and play along! I’d love to see what you come up with!
Hello friends! For those that celebrate the July 4th holiday, I hope you had/ having a great weekend! We usually do a cookout and later watch fireworks. It was a bit hot and humid so we didn’t stay outdoors very long and watched a movie instead.
WARNING: PHOTO HEAVY POST!!!!
I think I may have posted about this before, but last year I was introduced to Craft Roulette (a papercraft game show on You Tube) by Chelsea from Inky Stamperwhen she was a guest on there last year. I quickly became addicted to it and have been playing quite regularly. In fact, this is Chelsea’s third time as a guest on there and I wanted to share what I’ve made for episode #222 that aired on You Tube Friday July 5th, 2024.
The parameters this week are…
PROJECT – Dutch Door (create a card/project with dutch door)
COLORS – Gnomes (whatever inspires those colors to you)
ELEMENT – Movie
RANDOM – Building Blocks
If you’re interested in playing along, check out the Craft Roulette website on how to enter and watch the episode! You can watch/play along on You Tube with them every Friday evening. (Check what time zone you’re in compared to the Central US time zone used for Craft Roulette live shows.) You have until Sunday evening to play. If you enter the Craft Roulette #222 episode by then, you can also enter your card over at Inky Stamper Inkspiration Group on FB for a chance to win a prize from her as well. So check it out!
I think this one turned out cool using the Inky Stamper Alien stamp set! I have my alien (which is my “movie” element parameter) colored up with pencils and cut out with the die. I stamped the molecule (which is my “building blocks” random parameter in red ink over a piece of Doodlebug graph paper. I sponged the edges of this piece with some grey ink before attaching it to the bottom portion of the card. The sentiment also came from the same stamp set that was white heat embossed over black and cut out with a banner die and popped up with foam squares.
To create the “Dutch Door” card for the project parameter, I just used a black A2 card base and cut the front in half so that only the bottom portion of the card opens up. For the torn hole behind the alien, I used the Lisa Horton Torn Aperture 3D embossing folder and die. I used some silver mirror for the outer edges and black for the back along with a piece of white for the background details. I finished it off with some Pinkfresh Studio Ice clear drops.
Here’s the inside of my Dutch door card. I took a white piece of cardstock for the inside of the card along with the white piece from behind the torn aperture on the front and ink blended a galaxy background with reds, blues, greens, yellows and black which works with the “gnomes colors” for the colors parameter. I sprayed the background with water, let it dry and then I white heat embossed the sentiment from the alien stamp set and then I used silver watercolor to splatter over top of both pieces.
I attached the insert for the aperture back in with the silver frame and attached it to the front bottom portion with half of it sticking up above it. (As you can see in the photo above.) The alien was attached over the aperture with foam squares.
Had a lot of fun making this one and playing along using the parameters!
Obviously, I don’t post the cards I make every week for Craft Roulette on my blog, but I thought I’d share all the creations that I made last year since my very first contribution that I’ve done. I thought I’d save the cards for posting at the end of each year to look back on them. I started in January of last year and only skipped a couple of them. This card today will be my 72nd contribution!
So here’s a gallery of cards that I’ve contributed since I first discovered Craft Roulette in January of 2023 up to December 2023: (I will post the cards for this year in December!)
If you’re on my website, click on the photos to see enlarged
Wow! That was ALOT of cards! I placed the episode #s on each one for reference on what the parameters would’ve been. So this is what happens when I don’t post!
I have fun trying out the parameters each week and entering. I did win a prize one week from The Paper Insider which was a box of gorgeous papers. They’re all so gorgeous that I seem to be hoarding them and not used any of it!🙄 That will be a goal for one of these weeks for sure!
Hope you’ve been inspired with my post today and maybe I’ll see you over at Craft Roulette sometime! Thanks so much for stopping in today!
Hello friends! I hope that you’re having a wonderful week! I’m excited about the changes I’m seeing outside with the weather! Looking forward to that cooler temperature and pretty colors!
I wanted to do a bit of “house keeping” regarding my blog. I apologize if you’re having problems trying to leave a comment. I’ve had a few people contact me about this and I noticed that when I cleared the “cookies/cache” from my end…it somehow changed the appearance of my blog comment area…I don’t know why!? I did find out that if you start typing in the comment box, buttons above the box will appear in which you can choose how to login. I suggest that if you don’t have a WordPress/Gravatar account, to choose the envelope button to leave your name and e-mail address that way. (The Facebook login does not work.) Then you can hit the reply button below the box to publish it. I tried letting the commenter leave an anonymous reply (without having to type in name and e-mail), but then I’ll have NO idea who it is unless a name is given within the comment, so I had to re-engage that again. I have also contacted a support person to help me navigate what’s going on and maybe I can get it back the way it was before. I do apologize if it’s giving you a problem. You can also go to gravatar.com to create an account which will work with ANY WordPress platform blog….but you don’t have to unless you want to do that! You should still be able to leave a comment regardless. Thank you for taking the time to care enough to share your support with me…I deeply appreciate it!
So now to get on with some crafting projects! I’ve had to change gears on the seasonal makes and create some cards that I needed to send out to some people and they all happen to be in blooms:
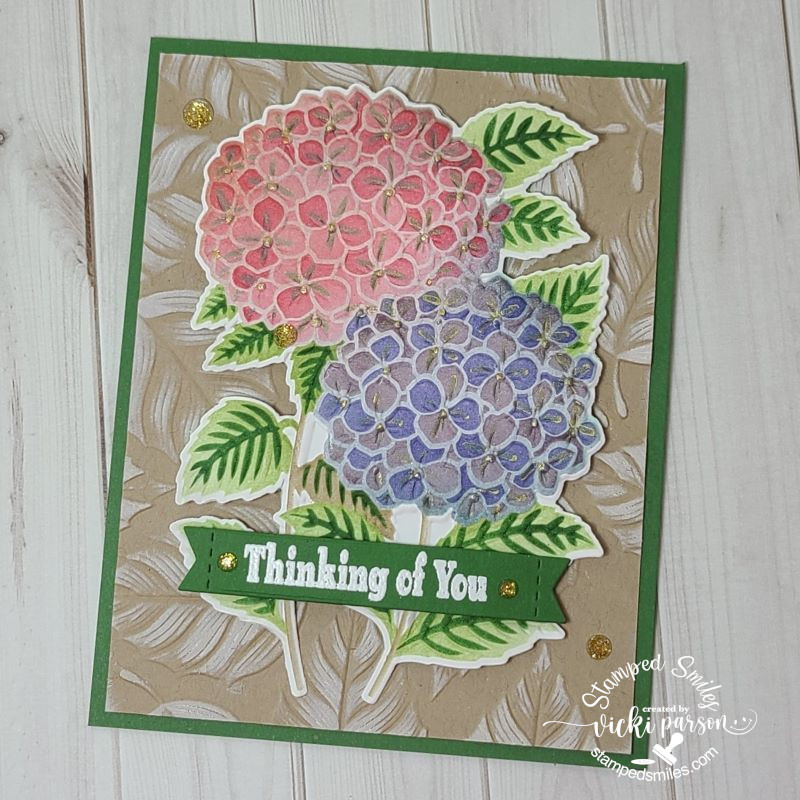
First up is a “thinking of you” card creating for a friend using several Lisa Horton products. These particular LH products all came from Inky Stamper.
I started with the craft background and embossed it with the LH Variegated Leaf 3D embossing folder and went over the texture with white ink. I then used the LH Hydrangea Stencil/Die/Embossing Folder to create the blooms…love how it turned out! I took some gold ink on the last layer of the stencil to go over the centers of the flowers. I popped the bloom up over the embossed craft background and white heat embossed the sentiment from the IS Pig Cause stamp set and cut it out in a banner to place over the blooms. I finished it with some gold gems.
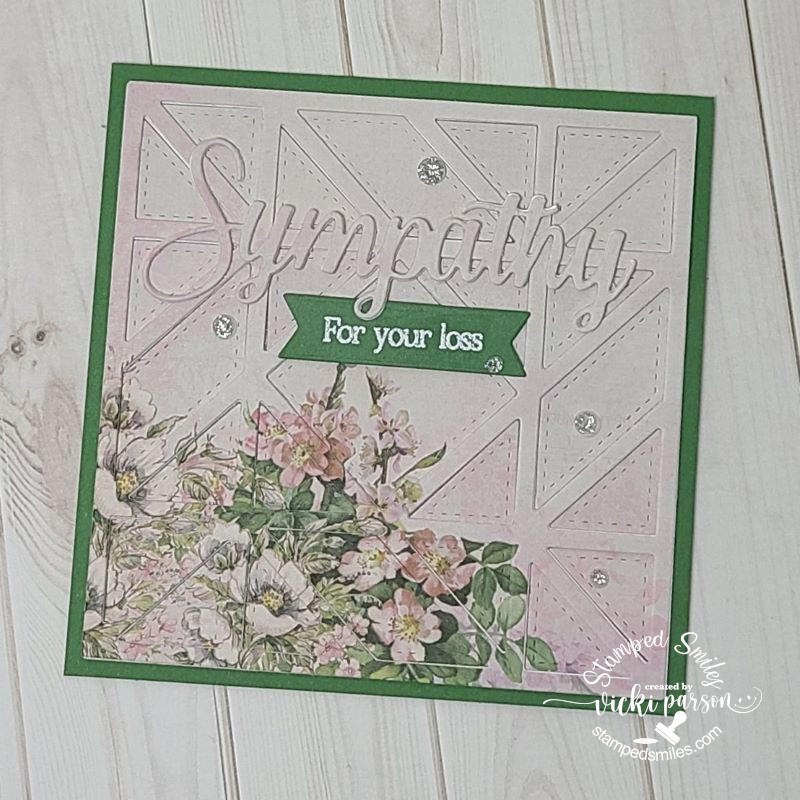
My next card is a sympathy card needed for a craft friend who lost a loved one. This person likes to cross-stitch and quilt, so I thought this MFT stitched quilt die (this one retired) would be fun to do over some pretty floral papers. I had to die cut several white frames with it and lay the centers of the paper cut pieces on the first frame and then I layered two more of the white frames over top with the last pattern paper over that to give it that 3D look. (Not sure where the paper came from other my stash!)
I cut the sentiment from the Whimsy Stamps Sympathy/Heartfelt/Condolences die set and layered it in the same way I did the quilt frame die. I also white heat embossed the sentiment from the WS Deepest Sympathy stamp set and cut it out from a banner to attach right underneath the “p” in the die cut word. I finished this one off with some clear gems.
And on a happier note, I’ve made another bloom card to wish someone turning 75 years young a happy birthday! This is the first chance I’ve had to use this fun die set from Taylored Expressions! The bottom container came from the TE Antique Pails die set. I stamped the TE Burlap Background over it with the same color ink as the cardstock as well as Butter Cream ink to give it some texture. The flower arrangement was cut out from the TE Garden Variety die set in various colors. I also brushed some of the same colors in the centers of the flowers. The centers of the flowers have a silver metallic enamel dot.
For the frame, I’ve used the TE Diagonal Stitch Rectangle die that only leaves the marks but doesn’t cut anything out. The sentiment was stamped and cut out with the TE All Together-Occasions 2 set/die and popped up with foam squares over the panel.
I think the most fun was arranging the flowers in the container!
I hope you’ve enjoyed my cards today and you’ve been inspired! Thank you so much for stopping by! I appreciate you! Have a wonderful weekend!