**DON’T FORGET TO ENTER THE GIVEAWAY I’M OFFERING IN THIS POST – OR SCROLL BELOW THIS POST TO SEE!**
Hello crafty friends! I hope that you all had a happy Christmas time with your loved ones and friends! 2025 is quickly approaching us and I know there will be lots of changes coming to look forward to! Although I’m not feeling 100%, so I think I’m going to rest for the remainder of what’s left of the year🤒.
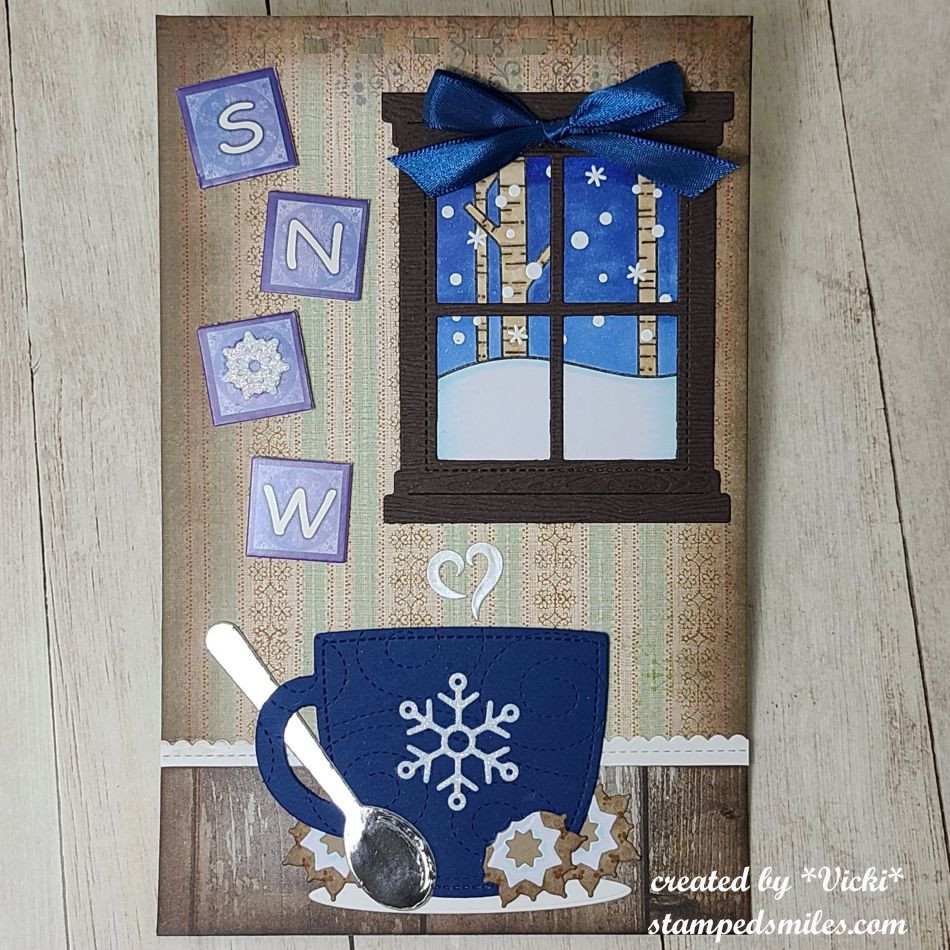
Today is the monthly Art Journal Page collaboration with my crafty friend, Carol (from Crafty-Stamper)! We get creative trying to use up our never-ending stash piles along with a prompt for each month. I know she always has great inspiration to share, so please check out her blog too! Here’s my AJ page with the “SMASH OUR STASH” December prompt of “FOUND OBJECT(S)” (something you found or discovered): (I’ve also combined 2 other past prompts with this one that I’ve missed out on earlier in the year!)
SNOW SNOW SNOW! I know people that hate it and people that love it! Whatever YOUR favorite place to be with it…or not…mine is being inside the warmth and watching it from the window! I don’t mind shoveling if I need to help my husband, but I enjoy watching it peacefully from the window.
The prompt for THIS month (December) is “Found object(s)” and I found some VERY pretty blue ribbon on a present this year and decided to keep it…and I have plenty left for another project! I used it above the die cut window. (This page is my normal 5.5″ x 8.5″ with pre-punched holes at the top…I would have a book finished, but I wasn’t feeling well enough to get one done, so I’ll have to do it later.)
And for the other prompts I’ve missed this year: August I was away and didn’t get to complete that one and the prompt for that month was “Vintage/Old“. The background wallpaper area looks vintage to me and it came from a VERY old pack of paper that I’ve had along with the letters on the side of the window. I also missed November and the prompt for that month was “Food“. I love me a good cup of cocoa in the winter and I thought I would make myself some Linzer cookies to add with it in the shape of snowflakes with frosting on them! I even took a bite out of the one in front of the cup!
Since I’m not feeling well, I’m going to stop typing and get some sleep now. Please let me know if you have any questions about the page as I’d be happy to answer!
Thanks so much for taking the time to stop in! I really appreciate it and will try to reciprocate when I feel better. Happy New Year friends and I’ll see you in 2025!
**THERE WILL BE TWO POSTS FROM ME TODAY. THIS IS THE FIRST POST OF TWO**
Hello friends and happy November! The weather has finally decided to give us a bit of a cool down and it feels more like that Autumn Season right now. We’ve been waiting on some rain as it’s been dry and then the wind blew in some cool with it too! I always like to give Autumn it’s “due justice” as it never seems to have a spotlight as much I think it should.
I’m very excited to share a mixed media project I made for a guest design spot (that I had won a top spot from a previous challenge). I was asked to join this month as a guest designer for the Creative Artiste Mixed Media Challenge Blog!
The theme for these monthly challenges is always “Anything Goes Mixed Media“. So be sure to check out the wonderful inspiration from the team and share your mixed media project over there! I look forward to seeing your inspiring makes!
I’m always excited when I have an “excuse or reason” to get out all of my mixed media things and play around to make something! I thought since it was November, it would be a great time to pull out the Autumn media:
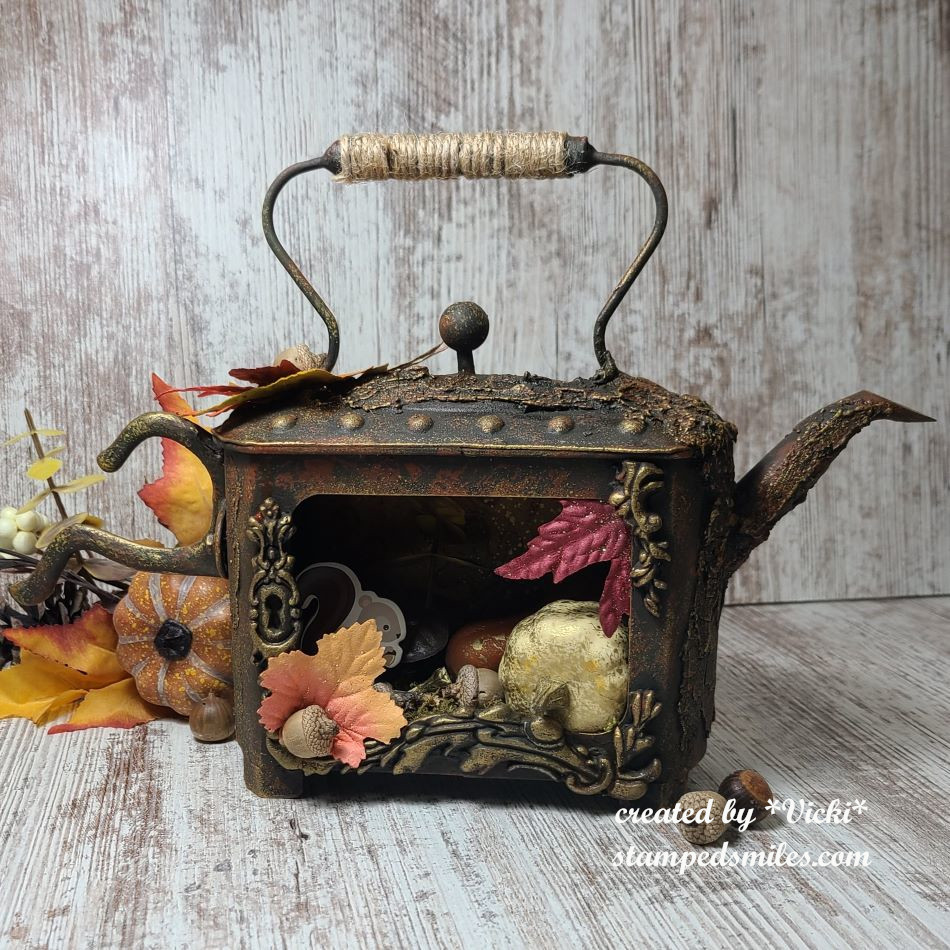
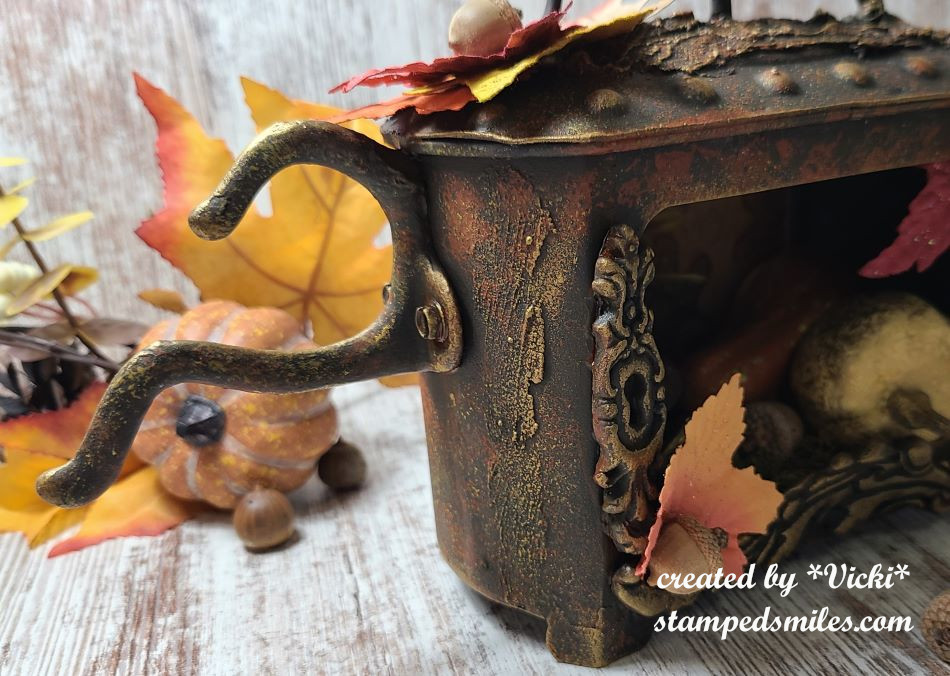
I made this fun center/accent piece for Autumn and pulled out the cool Finnebair rusty metal teapot from my shelf to finally decorate on! It actually looks pretty cool by itself, but I had to add some other details to it that I thought would make it my own.
For the base: The only thing that was missing for me was a “handle” for my teapot and I went through my husbands things and found an old metal coat hook that I had him screw onto the side. I also had some extra pieces laying around from the molds I made with resin, so I attached those along the frame opening with 3D matte gel. I wanted to also add some texture to my teapot and that’s where I added some crackle paste in various areas…all of these things had to dry for quite some time. It didn’t look pretty at that point as those pieces were white. LOL The “hurry up and wait” had begun.
After the long drying time: I started by covering the entire thing with two layers of black gesso so that all of those white areas were completely covered up. I pulled out some acrylic paints in Raw Umber, Burnt Orange and very light touch of Marigold. I started with the darkest color first and did not use a brush to apply the layers. Instead, I used a sponge after each layer was dry. I very lightly and sparingly used the yellow. I even went back in with the Burnt Orange and Raw Umber to get the look I was wanting.
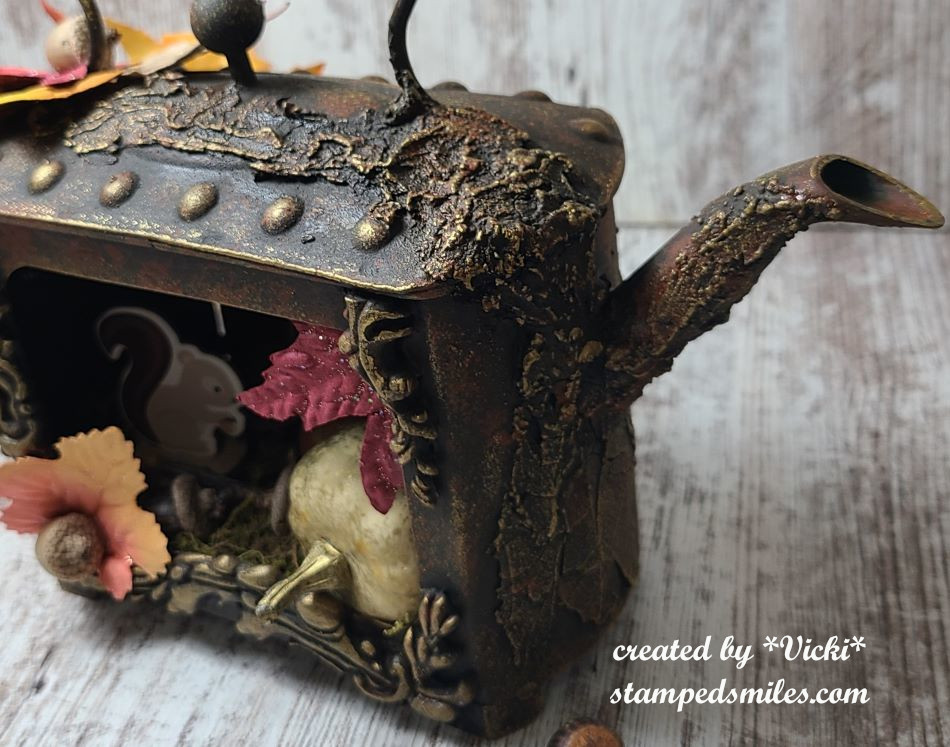
After all of the painting, I used more of the 3D matte gel and wrapped some jute/rope around the top handle.
Going to the right side of the teapot, you can see where I’ve added all of that crackle paste and the painting that I’ve done over it. The only thing missing at this point was the “highlights” to make it look like a found rusty metal teapot. Since it was Autumn themed, I pulled out the Finnebair Vintage Gold Waxand rubbed over the raised areas with my finger. You can see the look it gives over the paste and decorative molds around the frame and even the raised “dots” along the top of the teapot.
Moving over to the left side of the teapot, you can see where I’ve screwed in the metal hook to the side of the teapot. I just incorporated the silver screws with the design by adding paint. I told my husband that I thought it looked cool to turn the coat hook up-side-down as it looked more like a handle.
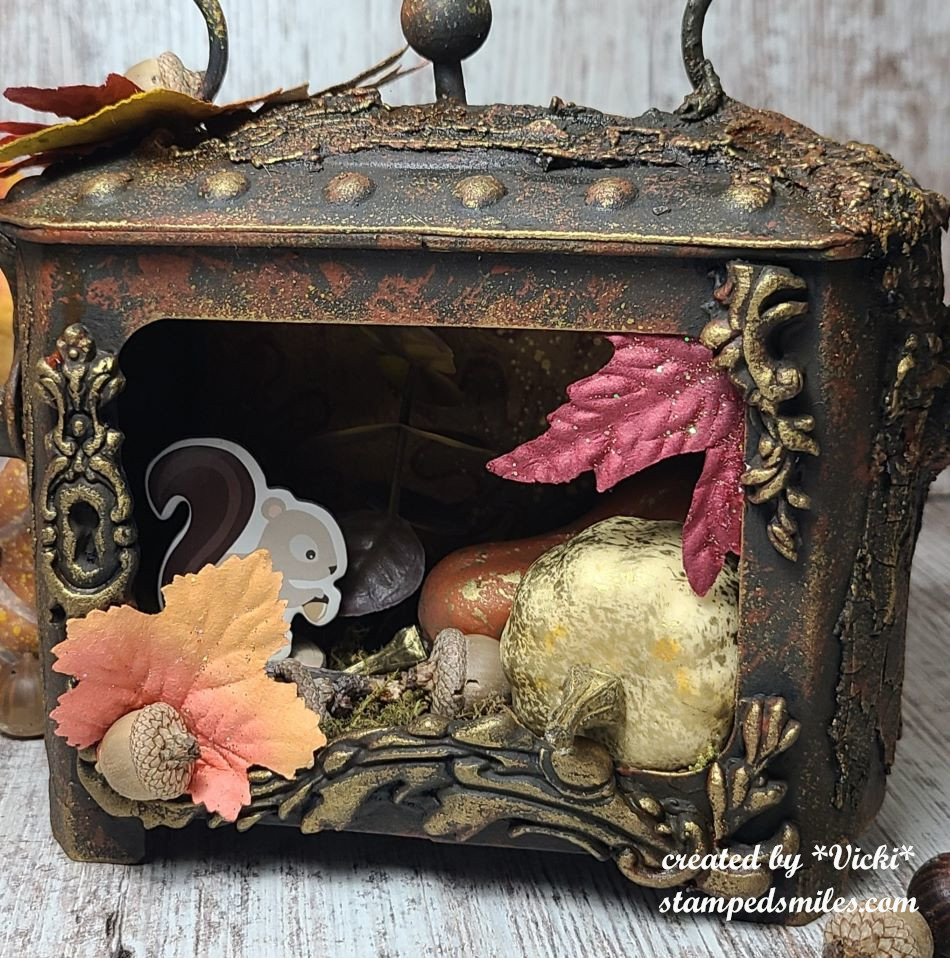
And now if we take a closer look to the inside of the teapot frame, you will see an Autumn scene in there. The back of the teapot comes out so you can decorate how you’d like. I know it’s a bit hard to see in the photo, but I found some leafy background paper to attach over the metal backing and I also splattered some gold paint over it.
For the bottom of the teapot, I attached some woodland moss mixture with 3D matte gel and also used it to attach the gold splattered gourds, eucalyptus, a wood slice, a cardboard squirrel, sticks and some acorns. I also went around the outside areas to attach some Fall leaves and more acorns. The only thing I didn’t have in my stash were the acorns and sticks. My husband said that he could get them for free…and of course he went to our local park and picked them up! LOL So those are the only “real” things on my teapot.
I had thought about maybe adding some fairy lights inside at the top so the inside would be more visible, but not sure if I would like that or not…what do you think?
And in case you might want to know, the measurement of the teapot are 12″ across (including the added metal coat hook), 8″ tall and about 3.5″ in depth. I currently have it sitting in my cabinet at home.
I hope you’ve enjoyed my mixed media teapot! I would love to see your mixed media project as well if you play along with us this month at the Creative Artiste Challenge Blog!
Thanks so much for stopping in! Stay tuned as I will have another post coming up in a couple of hours!
Challenges: (if this project doesn’t fit with your challenge, just delete.)
Hello friends! **THIS IS A PRE-SCHEDULED POST AS I’M AWAY AT A STAMP RETREAT!!**
The weather is finally starting to cool down now and we’ve finished cleaning the yard to prepare for winter months to follow soon. Halloween will also be here in a few days, so I thought it would be fun to make my page today with that in mind!
Today is the monthly Art Journal Page collaboration with my crafty friend, Carol (from Crafty-Stamper)! We get creative trying to use up our never-ending stash piles along with a prompt for each month. I know she always has great inspiration to share, so please check out her blog too! Here’s my AJ page with the “SMASH OUR STASH” October prompt of “ODD/Oddities” (anything unusual or strange):
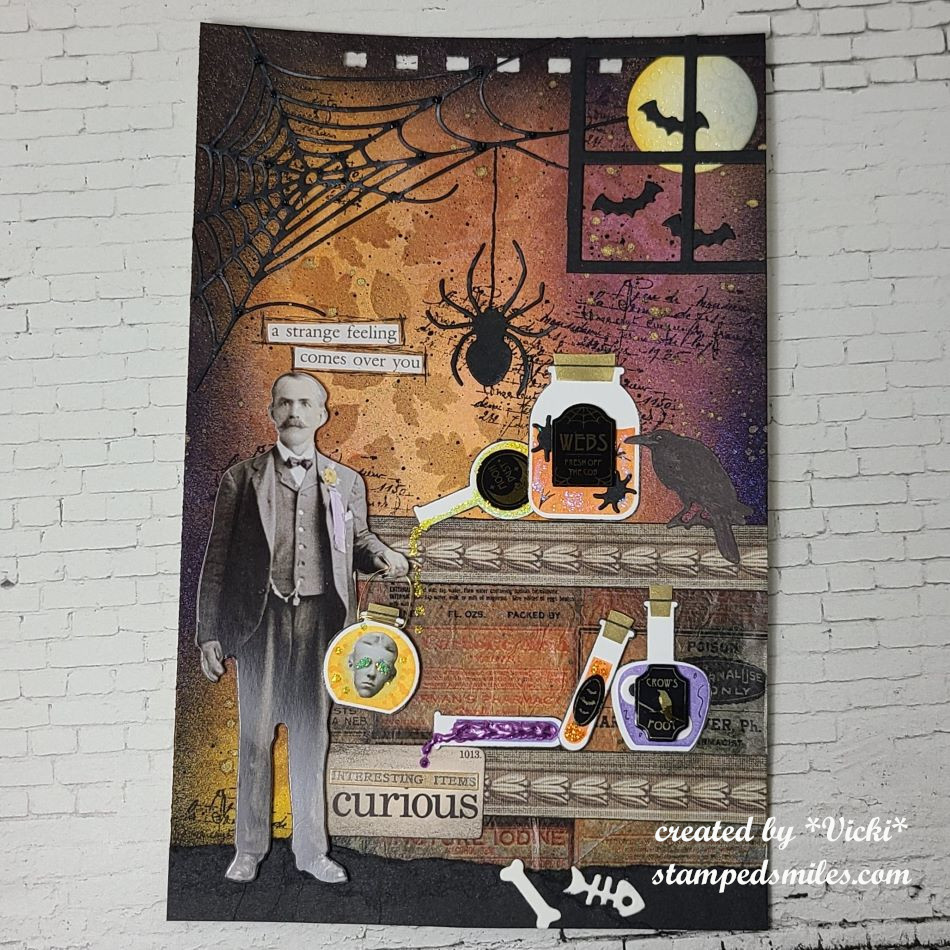
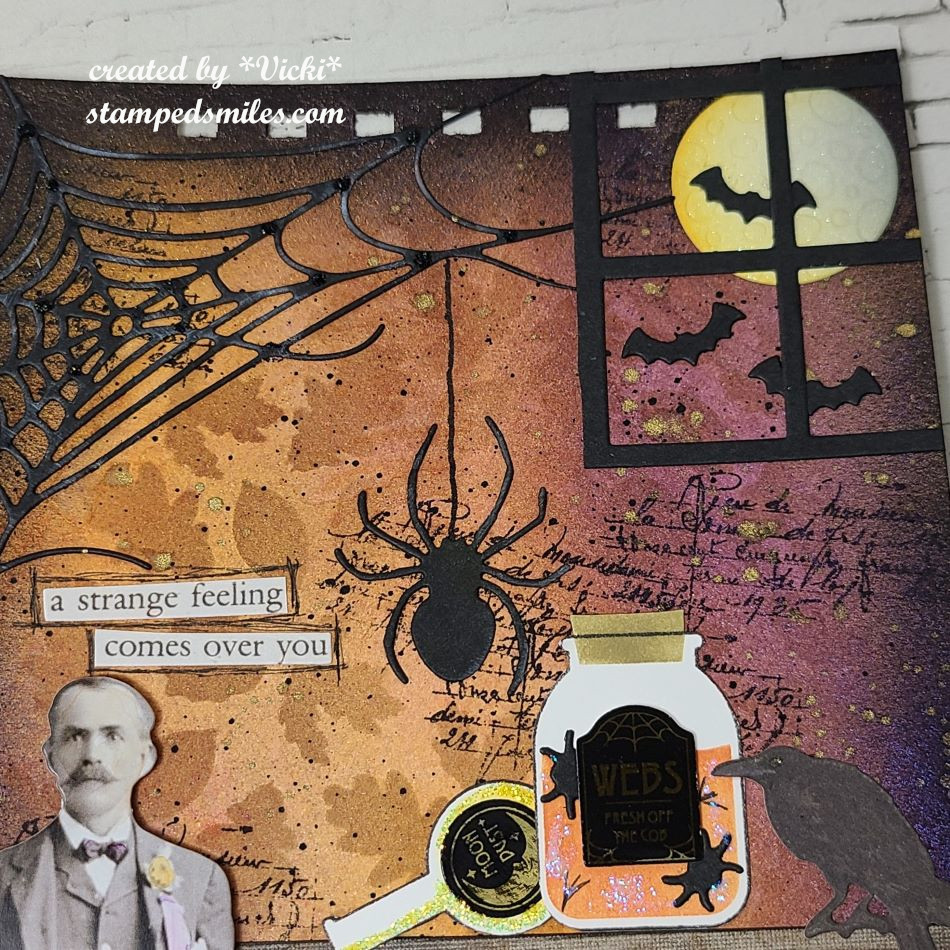
I don’t know if this is considered odd to anyone else, but I certainly do! This weird scientist looking guy has a strange facial expression as he’s holding up a head in the bottle! I’ve put so many details in this page that I thought you’d need to see close-up photos below.
For my background: Starting with a 5.5″ x 8.5″ heavy watercolor paper with pre-punched holes at the top for binding later, I sprayed the background with mica sprays in Hocus Pocus, Jack-O-Lantern and Flickering Candle. I sprayed some extra water over top to get them to blend together as they seem very concentrated and they didn’t move much over the watercolor paper after spraying a few times. I took a leaves stencil inked over places with light brown ink. I then ink blended the edges with black ink and stamped some lettering stamped randomly. Lastly, I splattered with black and gold watercolor.
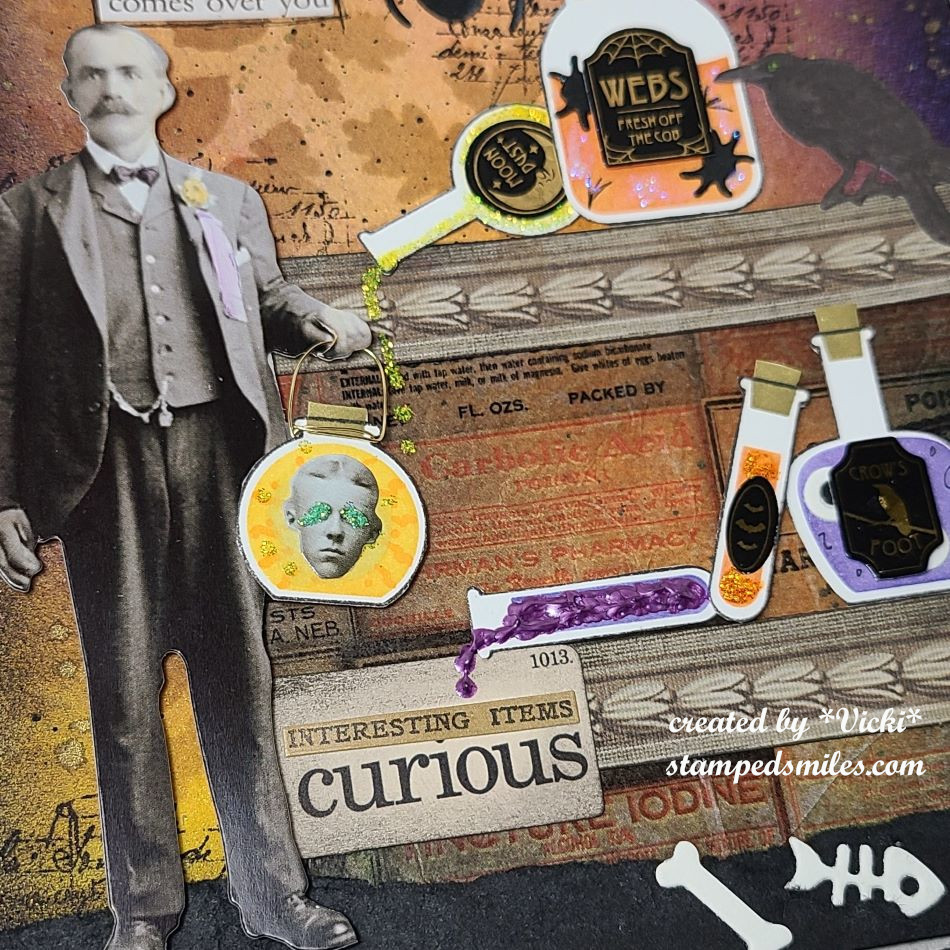
Upon a closer look at the bottom: I needed an area for shelves to hold the potion bottles, so I took some Tim Holtz Halloween collage paper and attached it with matte medium. It crinkled a bit, but I sort of liked that look. I then found some decorative strips in my stash and added those for the “shelves”. The crow and “curious” ephemera was also found with all of my Tim Holtz Halloween stash….along with the paper doll “guy”. I cut off a head from one of them to place inside the jar. I added some thin metal wire around the jar and cut a slit in the guy’s hand to make it look like he’s holding it. I also added a bit of color to the guy’s flower and bow tie on his jacket outfit with markers. BEFORE popping up the paper doll guy to the page, I ripped some black cardstock for the ground underneath him and tucked in the bones.
For the Bottles: I used a Taylored Expressions “If You Dare” Stamp & Stencil set to make all of the bottles. I also used the TE “If You Dare Halloween Labels” to foil and cut out to place over each jar. To die cut some extra “strange things” to put inside a few of the jars and the bones at the bottom, I die cut pieces from the TE “Little Bits Cauldron Confetti” dies. (The die cut bats from this were also used on the top of the page.) For more finishing details, I doodled in some of the jars and then added some colored glitter/sparkle and pearl drops for the inside contents. If you look closely at the crow’s eye, you can see I’ve added a tiny dot of yellow sparkle. Some of the details were popped up and some were just glued down.
A closer look at the top: Mostly die cut pieces were used at the top and the first I put down was the spider web and spider from Whimsy Stamps called Spiders and Webs…they’re huge! (this store is so good at spooky things!) I drew a line with a black marker from the spider to the web. For the window, I die cut it out from a really old Mama Elephant die I’ve had in my stash…not sure if it’s still available. BEFORE I placed the window down, I die cut the moon from the Lawn Fawn Shadow Box Halloween Add-On die set. I blended in some yellow and gray and covered it with a glitter sparkle pen. I added the die cut bats and placed the window over top.
Lastly, I took some Tim Holtz Halloween clippings word strips and added to the page. I took a black marker and went around the strips above the paper doll “guy”.
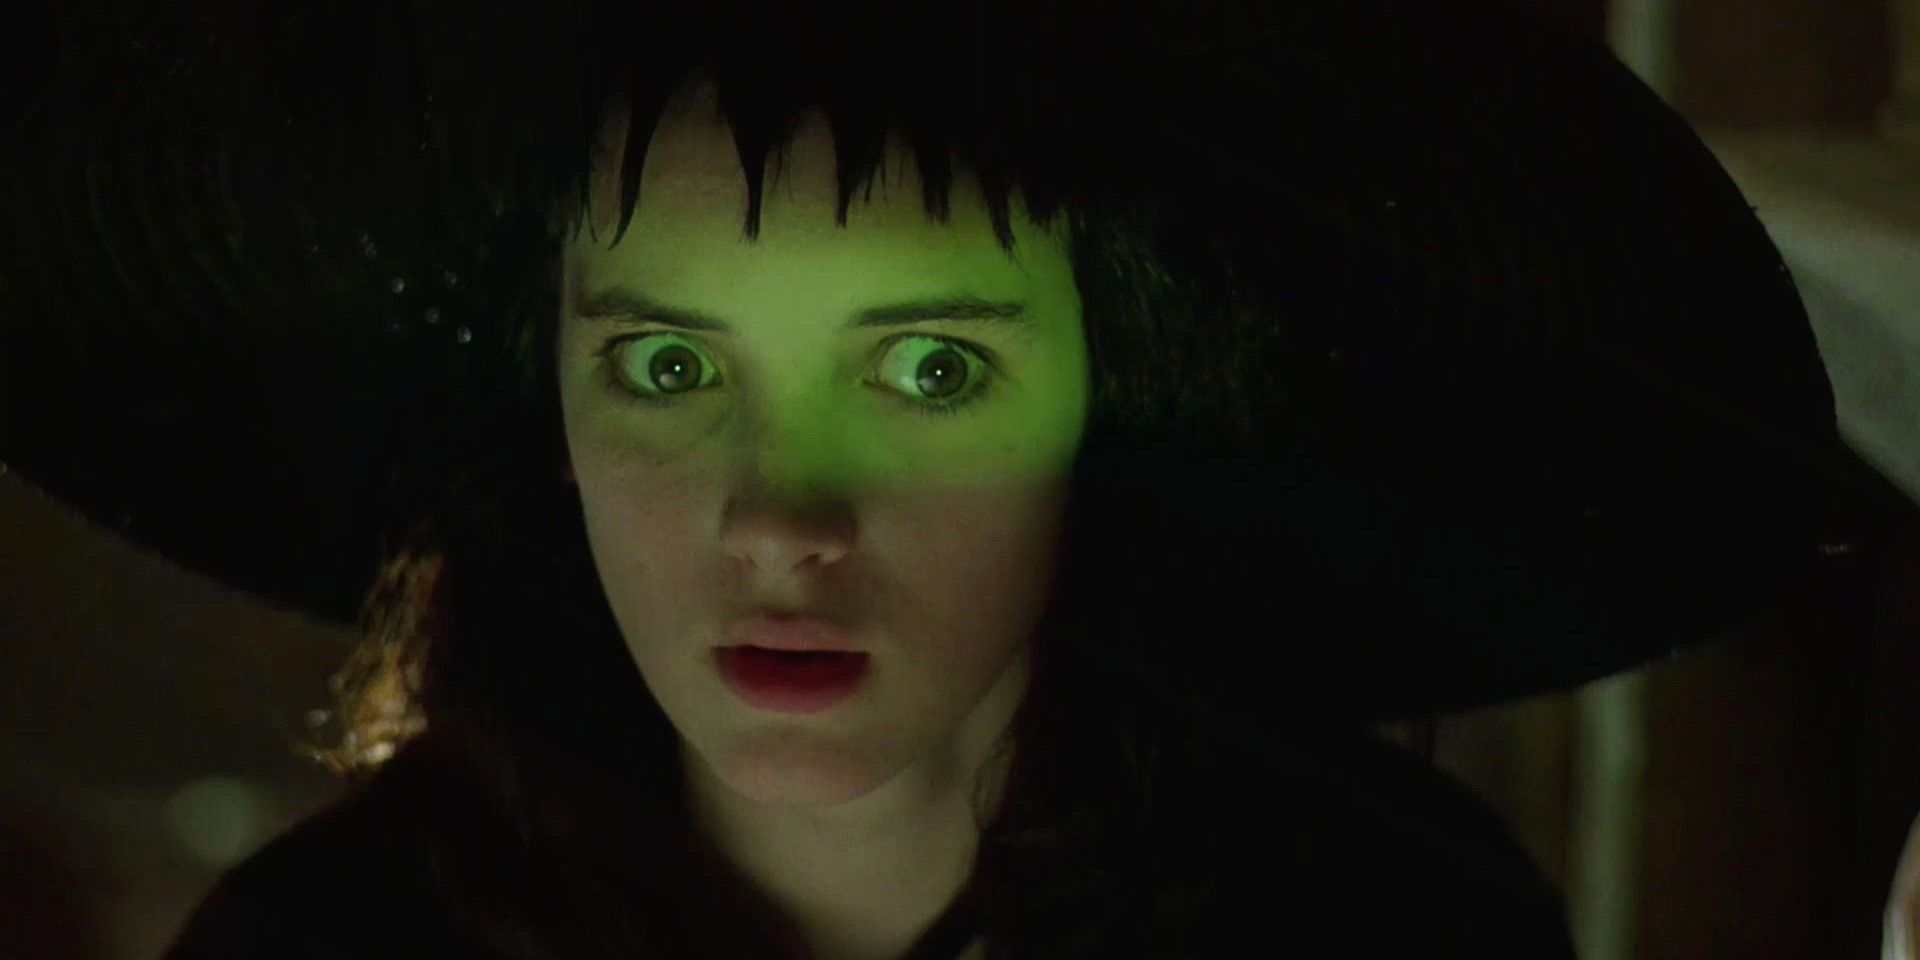
I know there are people that are not Halloween fans or care for the spooky things, but I really enjoy the weirdness of it all and have fun making things with it! In the words of Lydia from Beetlejuice: “I myself am strange and unusual“.
I do hope you’ve enjoyed my page today and I really appreciate you stopping by! I will be back later with things we’re doing at the retreat! See you soon!
Challenges:
Art Journal Journey – Autumn Colors & Inspiration (Purple, orange, yellow and black!)
YAY! I’m back…but a tad bit late for my monthly AJ post! (So sorry about that Carol!!) I’m trying to get back into crafting again as it feels like I’ve been away from it for a long time! It was a fun, crazy, beautiful time away and there a few photos below this post if you care to see….
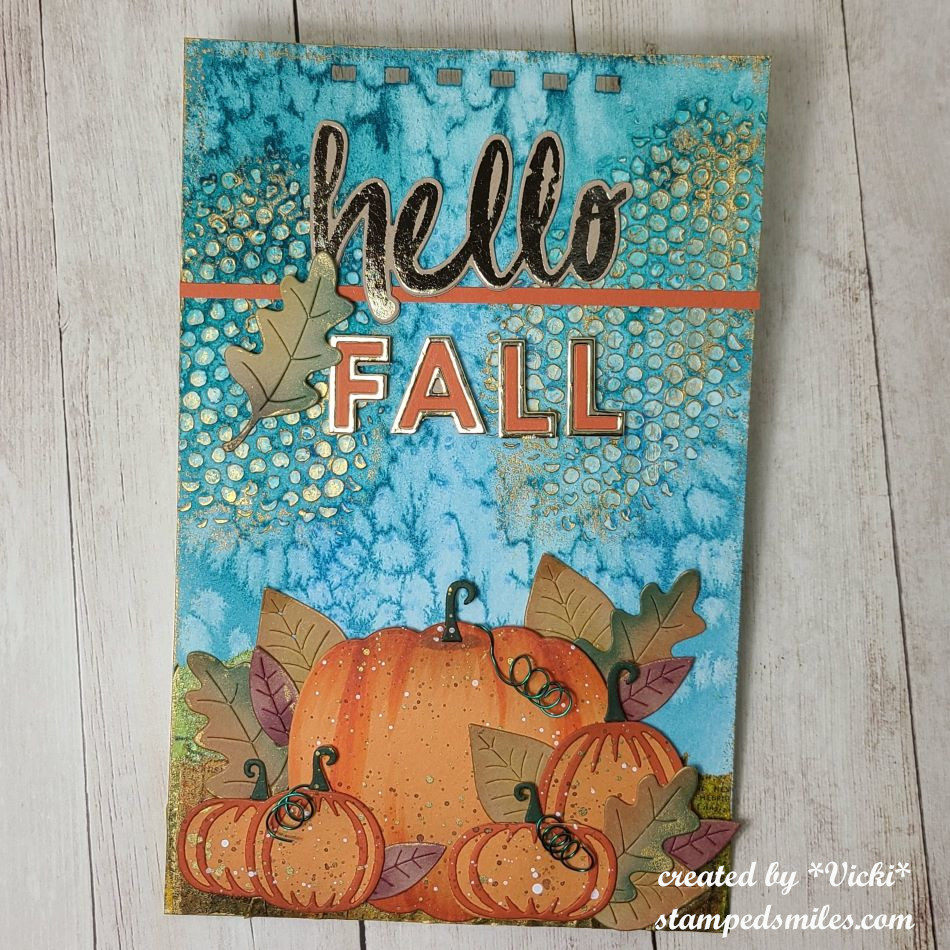
BUT FIRST, TODAY (BETTER LATE THAN NEVER)….is the monthly Art Journal Page collaboration with my crafty friend, Carol (from Crafty-Stamper)! We get creative trying to use up our never-ending stash piles along with a prompt for each month. I know she always has great inspiration to share, so please check out her blog too! Here’s my AJ page with the “SMASH OUR STASH” September prompt of “TEXTURE” (anything to create texture):
Texture is something that I really enjoy using, but sometimes when you’re making cards, you don’t always want that texture or bulk adding to your design because you want to be able to slide it into an envelope to mail out. Doing an art journal page with lots of texture and bulk is something I can do because it’s my own piece of art to keep and it’s fun to play with lots of media from my stash to create it!
For the background: I started with my usual 5.5″ x 8.5″ heavy weight watercolor panel with pre-punched holes at the top using my Bind-It-All machine. Starting with some media paste and my “go to” dotted stencil, this was a quick way to add texture to the background. I then pulled out some watercolor in blue tones and covered over the background with it and sprinkled some sea salt over it, let it dry completely and then brushed it off. This leaves some cool effects to the watercolor and it creates some texture as well!
Moving down the page, I have die cut lots of pumpkins and leaves! These are all die cut sets from Taylored Expressions that I’ve had in my stash for a few years now. All the pumpkins were cut from orange cardstock. For the largest pumpkin, I’ve used my Copic markers to give it some dimension/texture. The other pumpkins had another piece that I cut from a darker orange cardstock. The stems all cut from green cardstock. I decided to splatter some brown, gold and white paints all over them for even more texture. Before attaching the pumpkins, I used some printed tissue paper that was sprayed with color and scrunched up and attached to the bottom of the page with media paste. Lots of texture going on at the bottom here!
For the leaves, I die cut them out from kraft cardstock and ink blended over them in various fall colors. You will notice around the edges of the leaves as well as the textured paste background on the page, that I’ve used some gold wax and rubbed around the edges and over the texture. I then arranged all of the leaves and pumpkins at the bottom of the page with some popped up with foam tape. I’ve also taken some green wire and curled it to use for a couple of the pumpkins that were attached to the back of them.
Lastly, I’ve added the sentiments that were die cut, gold foiled and attached at the top along with the thin strip of orange cardstock. The “FALL” letters were popped up with foam tape as well as a portion of the leaf on the side of it.
Really hope you’ve enjoyed my art journal page today! It was fun getting messy and playing around with crafting again! I really missed doing it!
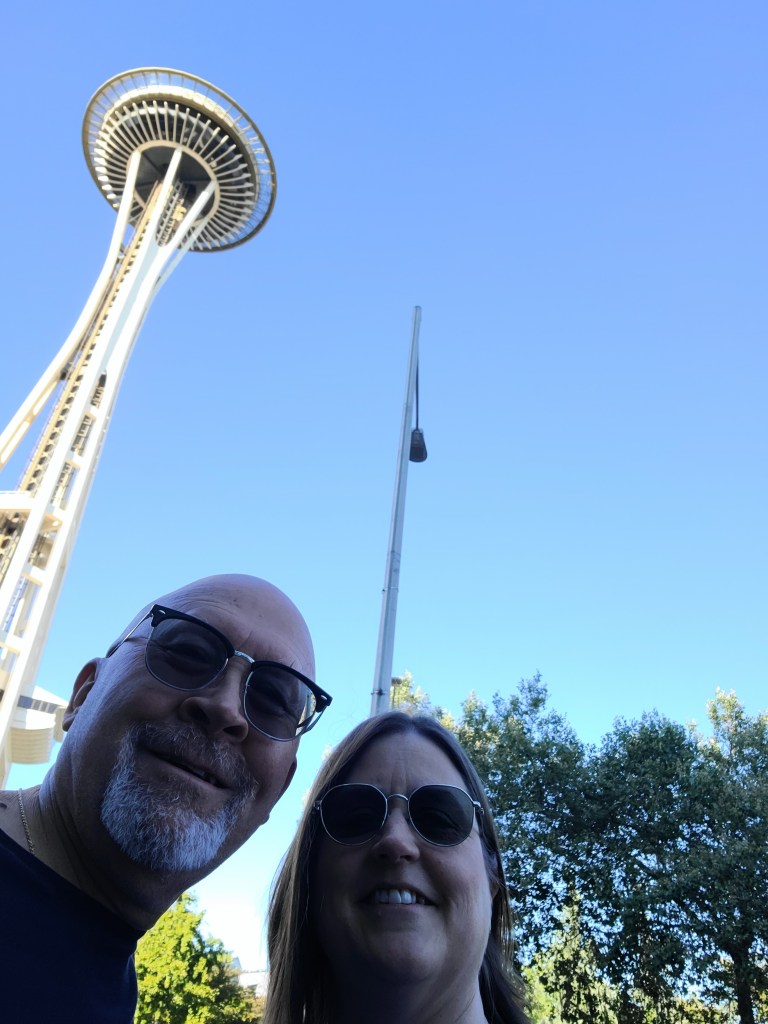
Here are just a couple of photos to share on our time away. We started by flying to Seattle as we’ve never been and visited the Space Needle. We took a bus to Canada where we boarded a Cruise ship that took us into Alaska to see the glaciers! We sailed for a week, but went further up to Denali Park in Alaska where we stayed an additional week and made our way back home. This was certainly a once in a lifetime experience that we’ll never forget! The photos look nowhere close to how gorgeous it was to see in person.
While we were traveling on our way back home, it seems that one of our pieces of luggage decided to take a trip to Mexico! So once we figured all that out, got our luggage back and tons of laundry, cleaning, groceries to get, done….I had an appointment to get an impacted tooth removed the other day! Been feeling a little overwhelmed, but starting to get better!
THANK YOU SO MUCH FOR YOUR KIND SUPPORT, COMMENTS AND COMING TO VISIT ME HERE! I’VE MISSED CRAFTING AND CATCHING UP WITH ALL OF YOU! HOPE YOU ENJOY YOUR WEEKEND AND SEE YOU SOON!!
Hello friends! I have a project to share which is a great send off post for an announcement of a blog break I’ll be taking for the next month🛳️🛫.
I wanted to share a project I made by request of my husband which was to recycle a plain notebook for traveling, so I pulled out some Doodlebug items and had some fun:
This is the front cover of the notebook which I covered with some Doodlebug papers, but I thought it would look way to busy, so I decided to tone down the papers by adding a wash of white paint over it. I think it makes the stamped images stand out better.
I’ve used a wave border die to cut some blue cardstock so that the boat could be in the “water” and I’ve added the sentiment underneath it. I stamped and colored the boat and airplane images and die cut them out with the coordinating dies. I also die cut a few clouds to add to the scene.
When I attached the painted pattern papers to the notebook, I decided to add an additional strip along the side of the wire spiral before adding the waves. I then took a black marker to create stitch marks with.
On the inside cover of the notebook, I took some more of those Doodlebug papers and attached them to the inside. I’ve made a pocket using the same papers that I’ve used on the front cover and you can see how bright and colorful they are which is why I decided to paint over them.
I added one of the cards from the paper pack to the front of the pocket and then I put a few pieces of washi tape with the airplane postage and travel stamps on the notebook paper.
And this is the inside back cover which was done similar to the inside front cover.
If you look inside the pocket of this, you can see that I’ve also made a bookmark for him that I’ve laminated. He can use it for his notebook or for another book he may be reading.
And here is the back of the notebook. This is where I’ve added a black elastic closure for the book BEFORE attaching any papers to it. The strips from the paper pack help to give it a little design and I’ve also included another shallow pocket.
He seems very pleased with it and has already put it to good use including the pockets and bookmark! He’s already wrote in it too! I tried to be sneaky and write a secret message on one of the random pages within the book, but he found it too early! I don’t get much past him!
I have lots of fun papers and ephemera left over from this cute Doodlebug paper pad, so I will probably be using it for a special scrapbook at some point…hopefully more on that later.
I would like to also let you know that I will be MIA for a while as we will be away on a much needed vacation time!
Thank you so kindly for stopping in and enjoy the rest of your summer!
Hello friends! I hope that you’re enjoying your August so far! Recently, we’ve been experiencing much cooler temperatures than we normally have this time of year, so it’s been great to go out for a few walks.
I’m ALMOST caught up with things that I haven’t posted, with the exception of a few birthday cards that I’ll share later. For today, I’d like to share some projects that I’ve made at an event I attended back in April along with a class from Inky Stamper.
But first, here are a few projects I’ve made for their recent challenges:
This is a tag I’ve made for the Inky Stamper Inkspiration FB Group July challenge. The challenge was to make a tag and I thought I’d try out a fun idea of making a pocket for my tag that held another tag inside so that you could put a message and a gift card.
I’ve used some Limeade Dots/Stripe 12×12 Doodlebug paper to cut it out with and used a border die to help with the pocket decoration. I cut another tag to place inside the pocket for a special message and to include a gift card. At the top of the inside tag, I’ve made little “charms” with images from the Inky Stamper Margarita stamp set. I’ve also stamped the background of the inside tag. I don’t usually color with pencils, but this time I decided to pull them out.
To get the sentiment to fit around the pocket border, I had to curve the stamp a bit to make it work with the tag.
So the Inky Stamper Inkspiration FB Group challenge for August was to use a white pencil. This happens to be a favorite to use for Chelsea with her images and it does make for a nice quick highlight. So the images were just stamped on colored cardstock and I used the white pencil to highlight them with.
I decided to combine this with last week’s Craft Roulette Episode #226 with the parameters of – Project: “See-through” (I made a see-through shaker card) Colors: “Jungle” (I used greens and browns for my jungle) Element: “Teacher(s)” (The sentiment says it all!) Random: “Tangle” (There are a tangle of leaves inside shaker element.)
Back in April there was an Inky Stamper Inky Escape event that I attended and here are some projects that I made from the Make-n-Takes that were provided as well as some of the projects that I was working on using the new release that came out during the event:
(If you are on my website, click each photo to enlarge it and read the captions)
The tag was made my Chelsea that was attached to my “swag bag” and the box was a make-n-take project. There was a moon pie included with project, but when I came home, I added 4 Ghirardelli chocolate squares to show how many fit inside.This card uses the same stamp set as the tag above. The background is a scratch ‘N’ sniff made with Kool-Aid.This was a light up card using the Pear Blossom EZ Light.Cute make ‘N” take with a magnet on the back of the baby roo that fits inside the mama pouch slit!This was an extra make ‘N’ take using some ALL & Create Washi Tape! Cool!
There is actually another Inky Escape coming up in October that I’m attending and I’m sure it will be fun with Halloween and Christmas theme combined!
While I was there, I worked on some more of my own projects using some of the new sets:
I decided to take and use one 6×6 paper pack from my stash and it seemed to go really well with the outer space theme and I love the purple colors from this set. I’ve used the following Inky Stamper stamps sets: Astronaut, Big Words, & Alien.
Click on the photos below to see a close up look at each card:
Before the Inky Escape Event, there was also an on-line class from Inky Stamper that I took part in and that’s because I thought the projects were super cute! Here are the projects that were completed for this class:
These were both created with the Inky Stamper Hedgehog stamp set. The Journal Book , the Doodlebug DIY Snow globe and Doodlebug dimensional stickers/shaker balls were all provided with the class. I decided to add a few extra elements with mine. The tiny hedgehog on top of the snow globe was included in our box, but not apart of the projects…but I thought it would be fun to add it!
Speaking of Doodlebug, while I was at the Inky Escape Event, Chelsea had a few things on sale and I snagged a kit and special ordered the Doodlebug Frame with it. So when I got back home and the frame came in, I wanted to do my project right away:
I have this displayed in my stamp room and I love the rainbow of colors in it with the different crafty tools in smile faces! The size is 8in. x 8in. with a glass on the front. Although it’s not really that visible in the photo, it is actually quite dimensional.
I think it goes well with the black frame that matches my black frame with the crafty squares swap group I was in. (You can see that post here.)
Whew!😳 I’ve been really busy this year, but I don’t think you would’ve known this without my posting about it! I’m glad that I’ve gotten caught up with things that I’ve done and hopefully I won’t be doing posts like this in the future! It just seems like so much all at once!
Anyway, there we go and now I need to finish and send out a few birthday cards coming up, so I will catch up with that later as well! For now, thanks so much for stopping in and keeping tracks of my sporadic postings! I will be back to share a DT post for a challenge coming!
Hello friends and happy weekend! It’s the start of the Olympics and it’s something that I enjoy catching up on a few events here and there when I can as it’s very inspiring to see these dedicated athletes perform. I do hope you’re enjoying your weekend however you’re spending it.
It’s time for the monthly Art Journal Page collaboration with my crafty friend, Carol (from Crafty-Stamper)! We get creative trying to use up our never-ending stash piles along with a prompt for each month. I know she always has great inspiration to share, so please check out her blog too! Here’s my AJ page with the “SMASH OUR STASH” July prompt of “WATER” (actual water or the look of it):
Do you enjoy watercolor? Do you enjoy the water? I happen to really like both! I think I am more apt to dabble in the watercolor medium than I am to actually be IN the water though!😆 I decided to use both for my page today. It would be a dream of mine if I could ever experience sailing…maybe one day!
Background: I started with an 8.5″ x 5.5″ pre-punched holes on a Canson coldpress watercolor panel and painted the background with my Kuretake Gansi Tambi watercolors and a brush. I started with the yellow and worked my way out to the darker color. I wanted a warm sun with a contrast of darker sky/clouds over to the left. I stamped the birds to the right corner.
For the clouds, sails and water, I pulled out some fabric and die cut the pieces out with the exception of the boat. I stamped the boat with Staz On ink over the fabric and hand cut just the sails out with scissors for the fabric. The boat was stamped on cardstock, colored with watercolor and cut out. I used fabric glue to attach all of the fabric pieces.
I popped up the bottom layer of the dotted fabric water waves with foam tape and used a micron pen to make the stitch marks. I also went around the edge of the page making stitch marks. The sail boat was tucked in between the waves and I added a button with thread on the bottom of the boat.
The clouds were attached on the background with the fabric glue and then I stenciled with white ink over top of that and added a few marks with a white gel pen on the clouds.
Lastly, I printed out the quote and die cut it out with a stitched banner die. It says:
“Withstand the storm, and when the wind doesn’t blow you away, adjust your sails.”
I sponged around the edges of the banner with blue ink and attached it to the page.
I hope you’ve enjoyed my art journal page today! Thank you for taking the time to stop in and I hope you have a fantastic day!
Challenges:
Art Journal Journey – “I’ve got a notion” (sewing related items) fabric/stitching
Hello friends! Happy July! I can’t believe that June is gone and the 4th of July Holiday is gearing up now! I’m looking forward to some happy times ahead through the Summer and I hope you are too!
Today begins a new challenge over at the Mix It Up Challenge Blog and it’s always “Anything Goes with an optional theme“. For the optional theme this time, we’d like to see some “Veggie Stamping“! (In other words: use vegetables as your source for stamping with!) I’ve never done it before, but I gave it a try! Here’s what I came up with:
Now I’ve heard of people carving food as art, but I don’t think I’ve ever really seen anybody actually use vegetables/food as a stamp! Have you ever tried this? I encourage you to give it a try and join in the challenge with it because it was so much fun to play!
For my vegetable stamping, I didn’t want to use ink pads in fear of contaminating/ruining it, so I decided to use some acrylic paints instead. I grabbed some veggies from the fridge along with a plate to hold the paints and cut the veggies to dip into the paint piles. My husband decided to come around and snap a photo of what I was doing, so I thought I’d share my mess:
I was actually in the process of cutting out the “veggie flowers” when he took the photo, but I started with some acrylic paper because I was using paints and cut the paper large so I had plenty of room to play around. It was a bit of trial to figure out how each veggie would look. I thought it worked best to dry out the veggies as much as possible on a paper towel. The coral large flower came from the red pepper. I found that using a paint brush to apply it to the veggie was a better look. Then I dipped the celery end to make the purple flowers. The shallot was used to create the teal flower (the shallot was applied the same as the pepper) and I used the end of the carrot for the center of the flowers with yellow paint and then I used a broccoli to dab on the center of the flowers as well with some dark grey paint.
I then tried to arrange the flower bouquet how I wanted on my card base after cutting out the flowers. I took a paint brush with (no kidding) celery green colored paint and painted the stems coming from each flower. For the “leaves”, I used the same paint and dabbed the celery end around the stems.
I finished out my card by stenciling the brick background before attaching the cut out flowers. I popped some of the flowers up with foam tape and then I white heat embossed a sentiment over dark grey cardstock and popped that up over the bottom of the bouquet. This was attached to another panel of grey cardstock that I attached to a top folding white A2 card base. I topped it off with a few gems.
So what do you think? First time trying it out and just playing around having fun is all! A little abstract for sure, but hopefully they do look like flowers on here🏵️! I’m really looking forward to seeing what everyone does with this! Hope you can play along too! (Remember you have 6 weeks to enter! So plenty of time to play!)
THANKS SO MUCH FOR POPPING BY TODAY! HAVE A GOOD ONE & I’LL SEE YOU SOON!
Hello friends! Happy weekend! I hope you’re enjoying yourself with whatever you have going on. It’s hard to believe that it’s almost time for us to celebrate the 4th of July holiday!
We’ve been having higher than normal temperatures this time of year and you never really know if that humidity is going to circle back up in the air to create a thunderstorm. Nature can be a wonderful thing though, and this is what the focus is for my page.
It’s time for the monthly Art Journal Page collaboration with my crafty friend, Carol (from Crafty-Stamper)! We get creative trying to use up our never-ending stash piles along with a prompt for each month. I know she always has great inspiration to share, so please check out her blog too! Here’s my AJ page with the “SMASH OUR STASH” June prompt of “DISTRESS”-(rough up/sand/rip, etc):
So taking this approach with the prompt of “distress”, I thought it called for green colors and lots of nature collage type elements from my stash! I have tons of those Tim Holtz ephemera packages, so I pulled those out along with distress oxide sprays. I haven’t used those in quite a while.
For the background: I started with a 5.5″ x 8.5″ (pre-punched holes with the Bind-It-All machine) very heavy weight canvas paper. I started with a couple of pieces of ripped printed papers and distressed/inked the edges of it with Vintage Photo Distress Oxide ink. I then took a Tim Holtz stencil and randomly applied paste over it. After the paste dried, I placed the panel into a box and sprayed it with variations of water and distress oxide sprays in Peeled Paint, Rustic Wilderness, Fossilized Amber and Vintage Photo. I added water and dried with my heat tool after each color until it was blended as I liked. I took off the Vintage Photo cap and splattered a few drop with it.
Before applying the ephemera pieces, I had a solid fern stamp that I randomly stamped with Rustic Wilderness Distress Oxide ink. I also stamped a few of those “rain drop” images randomly in the center of the page with black waterproof ink. I removed the background color out of the images with a watercolor brush and then added back in a touch of blue color from an ink pad lid. I used a white gel pen to add a highlight and covered the drops with a glitter brush pen.
Finishing the page, I’ve stamped the bug and magnifying glass, colored them in and added some acetate behind the magnifying glass, I ripped, sanded and distressed the edges of the page, the card behind the bird and randomly over the background. Before attaching the pieces, I took some white pearl wax and rubbed over the stenciled paste areas. I also sanded around the edges of the black sentiment strips. I attached all of the ephemera pieces and popped the card and butterfly pieces with foam tape. I added a safety pin to the card and glitter to the tops of the flowers in the corner. (hard to see in photo)
The sentiment at the top reads: if you want to find happiness, find gratitude.
Another prompt I worked on with this is the challenge over at Art Journal Journeywhich was “What Makes You Happy“. So although nature helps with happiness for me, I find that happiness is multi-faceted with the purpose being exactly what the sentiment says. I thought it went perfectly with this page.
Since my husband is retired and we now have time to take little road trips here and there and sometimes stop along the way to find an interesting trail or nature walk or park to explore. We’ve had some great times doing this and I love being out in nature especially among the trees after a gentle rain. The smell and coolness in Autumn are fabulous for this!
Click on a photo to enlarge it if you’re on my website:
This was quite a wordy post, but I hope you’ve enjoyed my inspiration today and how it was inspired. Thanks so much for joining me today and please check out Carol’s blog too!
Hello friends! Happy June! Hope you’ve been enjoying your month so far! It’s going to start warming up at the end of this week which means I’ll probably start spending more time indoors with the air conditioning and hopefully have some time crafting! Yay!
I’m super excited to share my post with you today as I’ve been asked to be a guest designer for this challenge at Try It On Tuesday! Always happy to be apart of the challenges and support them as much as I can as they help to inspire creativity!
I’m loving the challenge theme for this one which is “BOOK PAGES”! There are several different ways to go with it, but here’s my take with the challenge:
I am an avid reader and I do love turning the pages of a good book, but sometimes you can come across an old book that is in bad shape or even a book that has no meaning to you and that you might normally throw away. I don’t do that, but I keep it instead for purposes of using in my crafts! I do the same with magazines, etc. Sometimes I use the illustrations for art journaling, etc. I’ve even kept some for the purpose of gift wrapping. How about you? Do you keep things like this for anything? If you do, then this challenge would be a great for using it up! I’ve even seen some decorative papers that have a “book page look” which would be suitable, I think, for the challenge as well!
For my card: I’ve used a cover plate die (unknown) and cut the pieces from a book page and then cut it again in black cardstock so that I could use the frames. I took some brown ink to sponge around the edges and in the center randomly, so that it wasn’t so stark white. I then splattered it with both black and white paints, wrapped some twine with a bow around and placed it on a side folding A2 black card base.
The flower image: I took another book page and stamped/heat embossed the Bursting Blooms stamp from Taylored Expressions(retired/not in store) and cut it out with the coordinating die. I had some fun watercoloring the image with some Daniel Smith watercolor samples and than I sponged around the edges with some more of the brown ink before attaching to the card with thin foam squares. (I also cut an additional piece of white cardstock for added thickness as some book pages can be thin.)
To Finish: I’ve taken the Taylored Expressions Sundry Sentiments and white heat embossed the sentiment over black cardstock and cut it out with the coordinating die. I attached it to the card along with some black rhinestones.
I love how this one turned out and I hope you do too! Please be sure to pop on over to the challenge blog and check out all of the inspiration from the team! I look forward to seeing your creation in the gallery as well!
Thank you for stopping in today and I’ll be sharing more with you soon!