Hello friends! I hope you’re having a great month so far and looking forward to a great weekend ahead! I know it’s starting to get “crunch time” with the Holidays quickly approaching us in a few weeks, so it’s time to get those Holiday cards finished up and sent out!
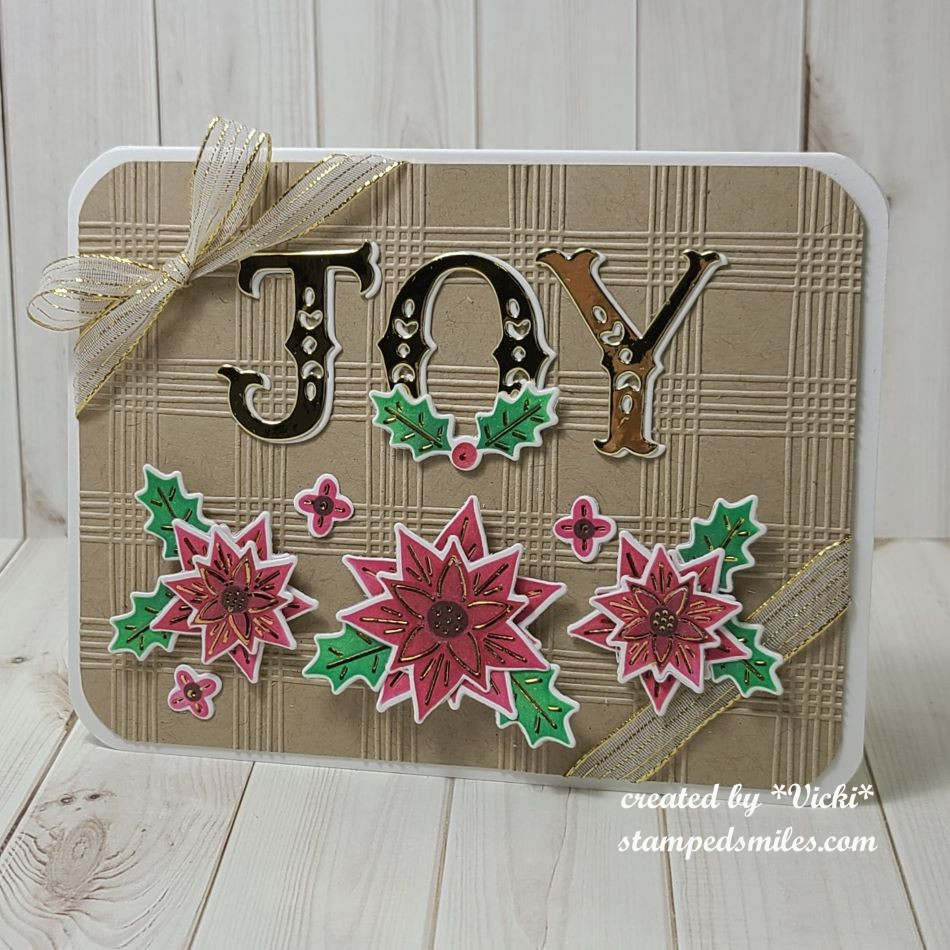
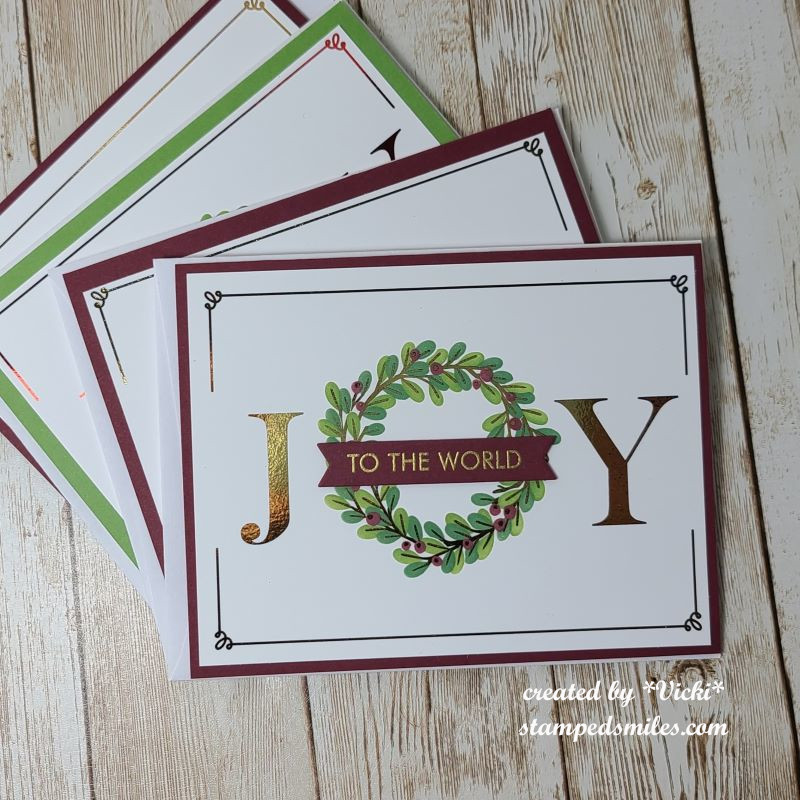
Today starts the November challenge over at Sparkles Monthlyand for this month, our hostess is asking to see Christmas Florals on your project. Be sure to stop by the blog to see what the rest of the team has created for you. Here’s my project for this challenge:
After I foiled the panel, I used the coordinating layered stencils to go over it. I was almost thinking that I might not want to cut the panel out after blending it because I liked it so much, but I wanted to try out the die that cuts each of the blooms out. I love that the center of the large poinsettias has an extra cut in the center to lift up the edges too. I ended up layering two of the poinsettias together for each one for even more dimension. I layered some of the leaves around them and they were popped up over the card with foam tape again.
For the background of the card, I used the TE Sketched Plaid embossing folder over a toffee cardstock. I took some gold ribbon and wrapped it around the two corners with the top one in a bow. I then attached this over a white top folding A2 card base. I used my corner chomper to round the corners of the base and toffee card panel.
Lastly, I die cut the “JOY” letters in white and gold mirror cardstock and attached them by slightly off-setting them before placing on the card front. I added the holly to the “O” and a few more of the tiny blooms that were cut out from the blended panel to finish off the card.
I hope you’ve enjoyed my card today or have been inspired to get those holiday makes going by joining in the challenge with us this month! I look forward to seeing what you create! Thanks so much for stopping by and I’ll see you soon!
Hello friends! November has come with the pretty leaves on the trees and the coolness in the winds. I always turn to comforting “things” this time of the year and it always gives me a sense of peace before the year comes to an end. A warm fuzzy blanket, socks/slippers, sweaters, etc. is what I usually turn to. What is your comfort “thing”?
I promised to share with you the fun things we did over at the “Inky Escape” event that I recently attended and it was wonderful to see all of my crafty friends again for laughs and fun together. I think I miss them already!
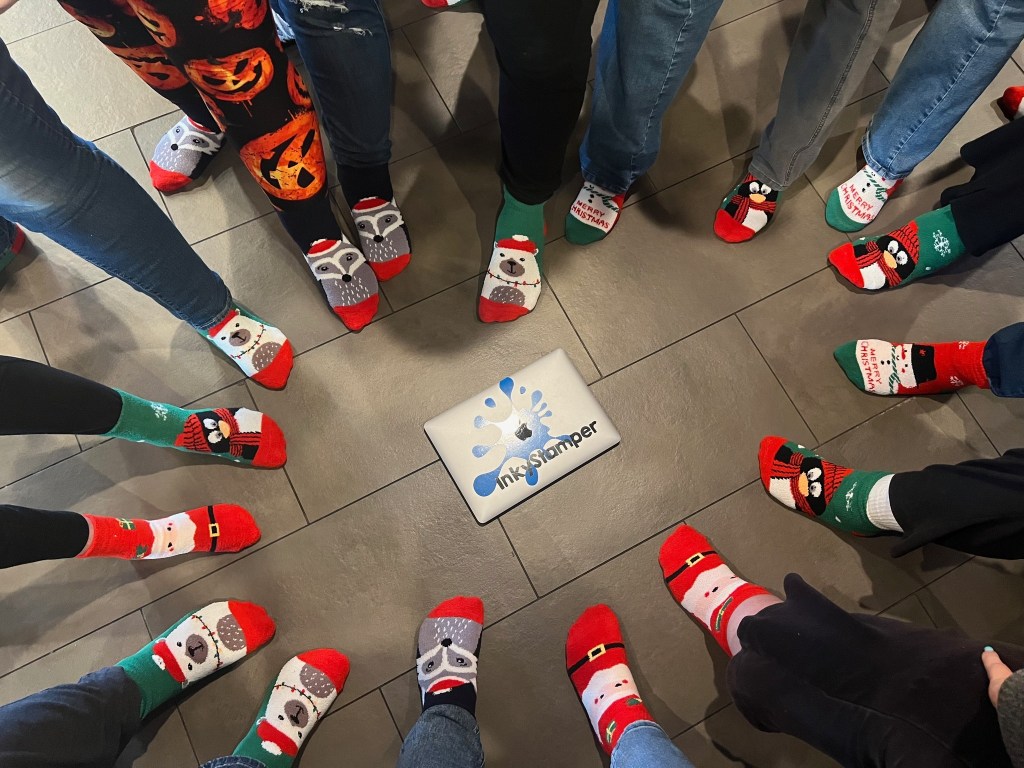
I lifted this fun photo from the Inky Stamper FB page as I don’t have any photos other than seeing what others took. There were a total of 18 of us this time:
Everyone received a “swag bag”…but the case this time was a Christmas stocking full of fun goodies and one of them was that everyone received cute fluffy socks. I’m not exactly sure which one is me in that photo, but I did have a polar bear sock! LOL We each placed one foot in the circle and Chelsea took the photo.
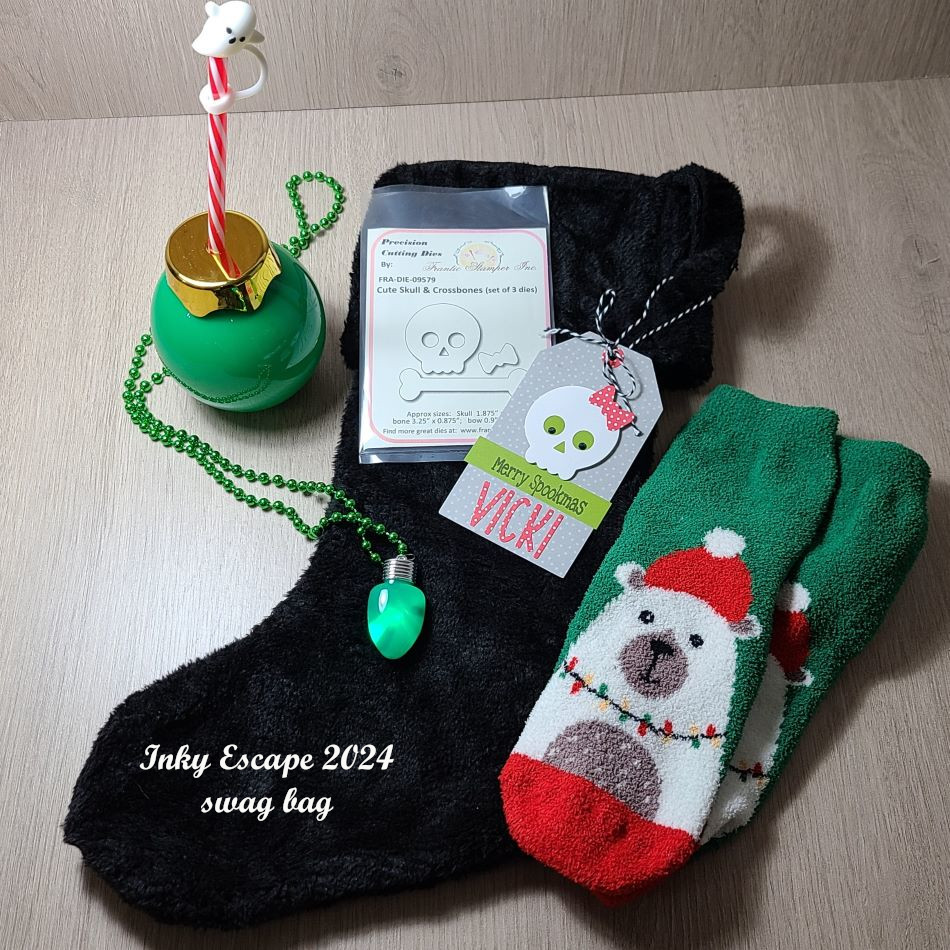
And speaking of the “swag bag”/Christmas stocking…here’s what we each received:
When I got to the event, there was this black stocking on my table with the cute tag attached to it with my name. Each person received a personalized tag on the swag bag, plus the “skull” dies that were used to create the tag which was inside the stocking! There are my polar bear fuzzy socks (I’ve already washed them up by hand so the colors wouldn’t bleed in the wash…and they’re so warm and fuzzy!) I also received the cute “Christmas bulb” drink holder with a candy cane straw and a little ghost stopper for the top! We used these containers to hold the “Jingle Juice” that we drank at some point! And then I received a light up Christmas bulb necklace that has different settings when you push the button the back. The theme for this event was called “Merry Spookmas” which you can see the greeting for that on my personalized tag. So fun!
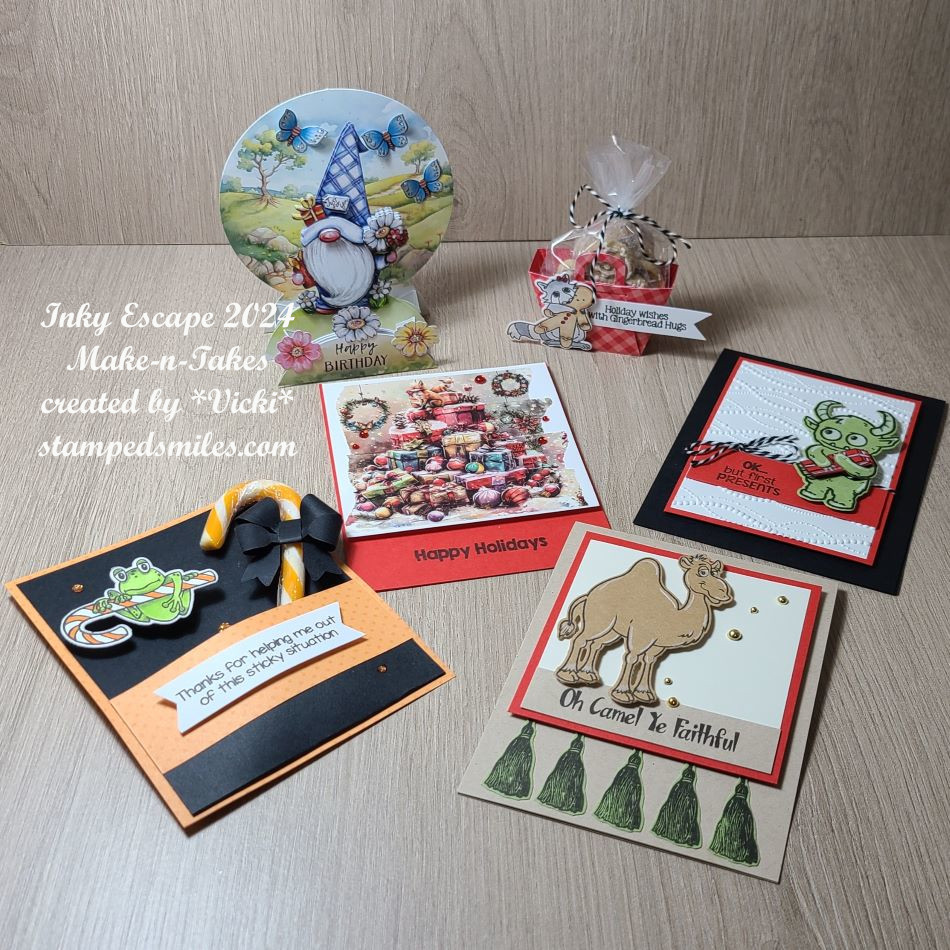
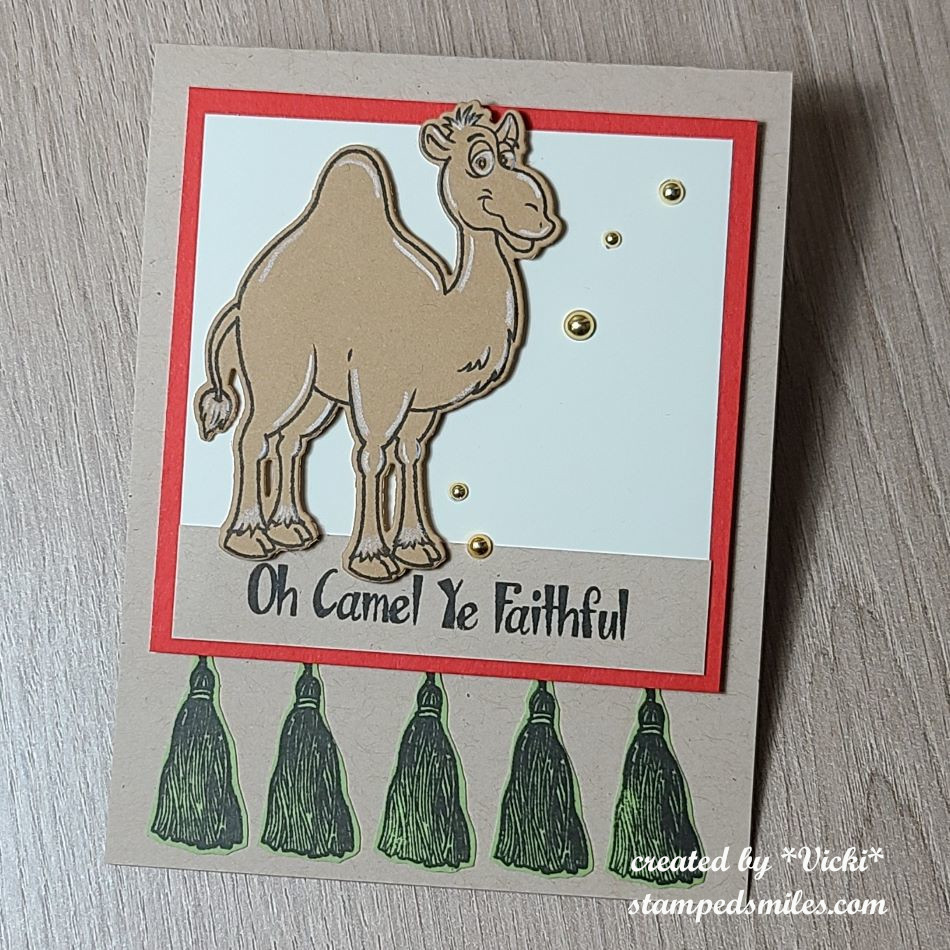
And speaking of fun…here are all of the Make-n-Takes that we created during the event. We sat and made 4 projects and then two of those projects were “bonus” makes using some other special items. (There is a “story” about one of them, but you can check out each project up close in the gallery below.)
*If you are on my website, just click on each photo to enlarge and scroll downward to see more information about each photo while it’s enlarged.*
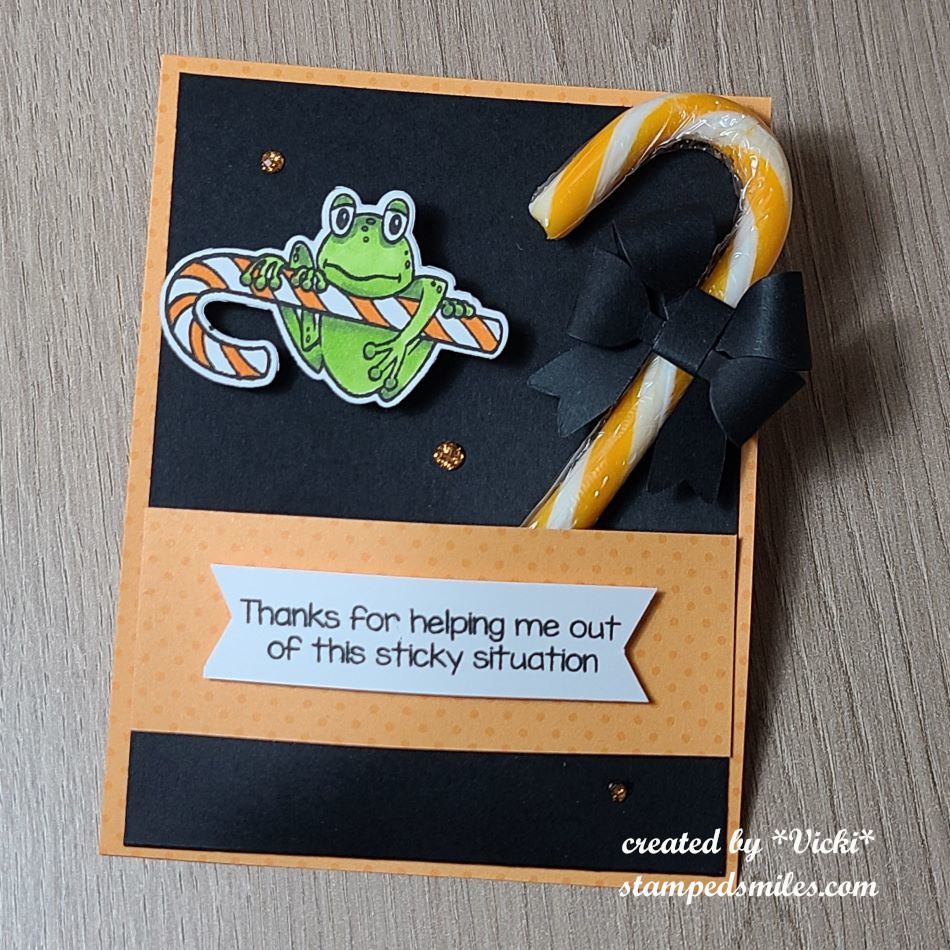
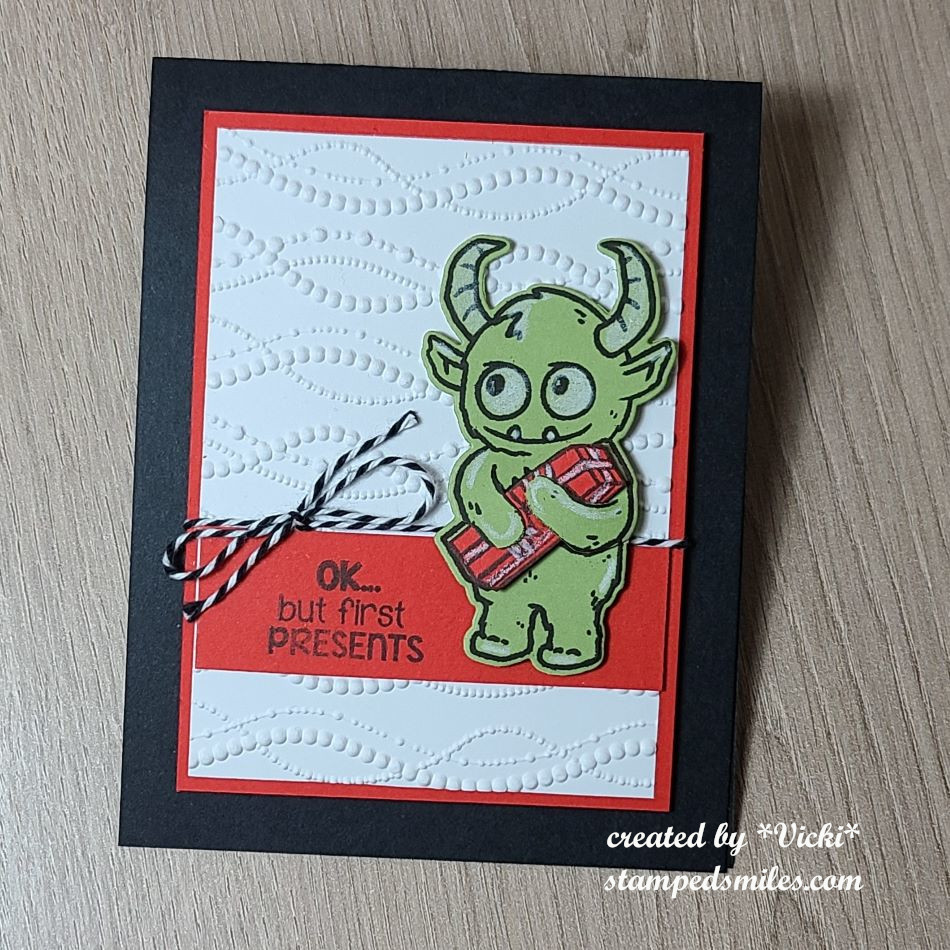
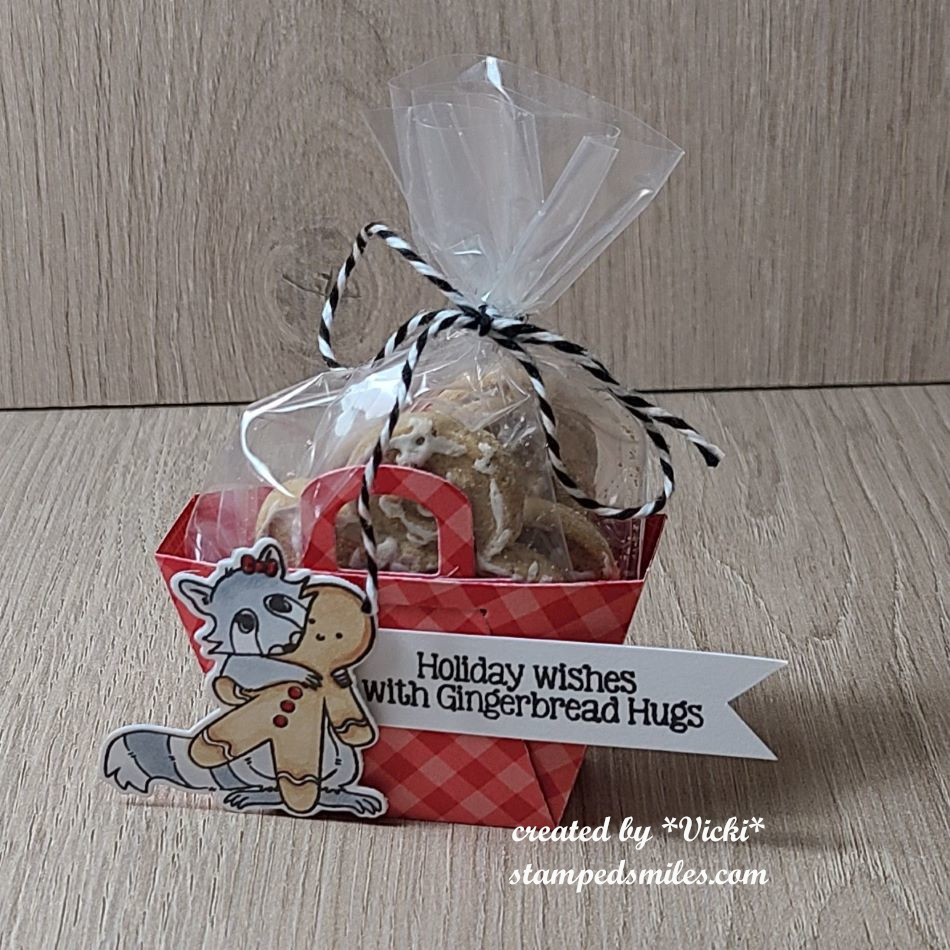
Camel stamp set used. Images were stamped on colored cardstock and cut out.I TOADally FROGgot to run the black cardstock through an embossing folder! Doh! Orange Cream candy cane inside pocket with paper bow and frog on wobbler.My favorite stamp set of this release is the Gifter set. He was stamped on cardstock and cut out. Present was paper pieced inside his arms.Cute gingerbread treat container came complete with gingerbread cookies wrapped with twine!Bonus make-n-take was easy peasy with some very cool Aall & Create washi tape that made this image!We chose the “winter” gnome that we wanted, but mine was so messed up I had to ditch it! I came home and made a birthday one that similar from my own card kit stash! LOL
The first four make-n-takes were made using the brand new Inky Stamper release that came out during this event! You should go check them out now on the website! (They’re all shown on the home page under “Featured Products”.) My favorite is that darling “Gifter” stamp set! I’m sure you’ll be seeing something from that set soon from me! *wink*
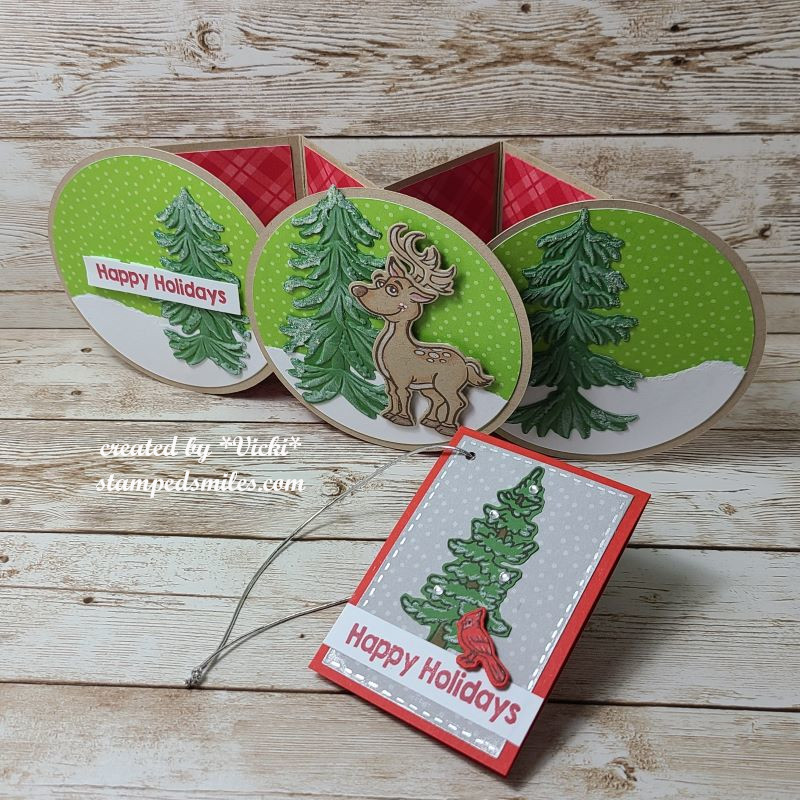
And since I was there to “crop” (as they say), I brought some things to work on that I really wanted to get done. So I decided to pull out some more Inky Stamper images to color and make a “Sheetload of Cards” using the September Sheetload of Cards Template by Crafty Al. If you’re not familiar with her, check out her You Tube Channel and look for all of her “Sheetload of Cards” videos to see how you can find instructions for each month. #SUYSSep2024 #ShowUsYourSheetLoad
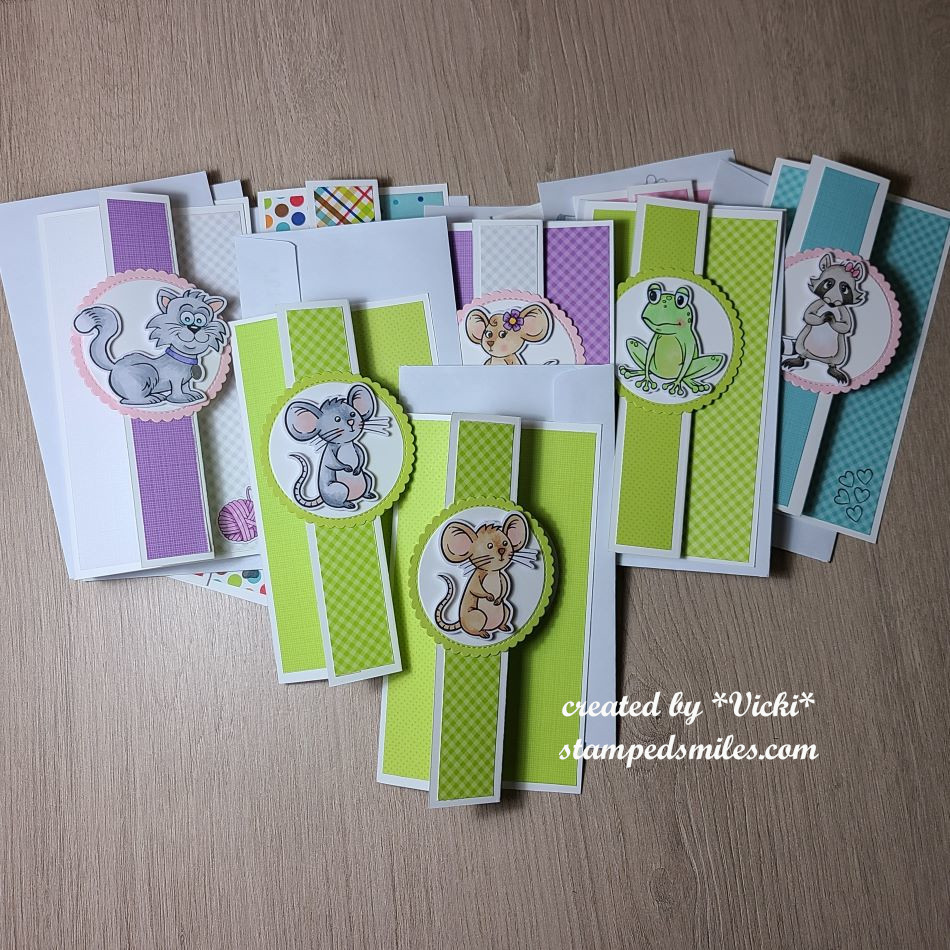
I utilized her template to create the full 12 cards as demonstrated. The dimensions of the finished card design is 3.5″ x 6.25″ which I really liked as it helped to use up the full 6″x6″ size of those paper pads! Also, you don’t have to create envelopes for these as they fit perfectly inside those #6 envelopes (3-5/8″ x 6.5″) that you can find at any office supply area of a store.
As you can see, I used a variety of images that I stamped, colored and cut out for each design. I matched up my design papers to coordinate with the images. All of the images I used are from Inky Stamper. All papers come from a variety of Doodlebug Design papers.
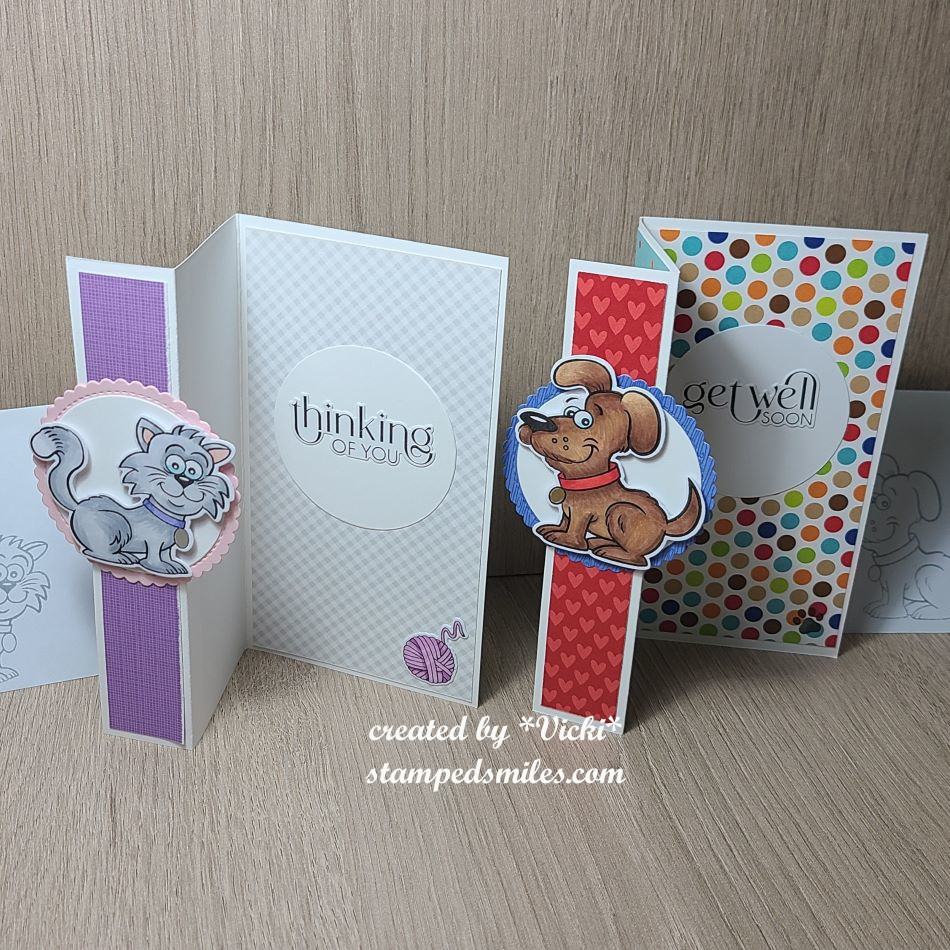
Here’s a closer look at two of the cards I made from the set so that you can see how the card opens up and the greetings on the inside of each card. (Sentiments come from Taylored Expressions.) You can also see the coordinating envelopes next to them with the matching critter stamped in grey ink.
These cards are on the way for a special charity for ill children patients to help lift spirts and I hope each one will!
I know there were so many things going on during the event that I was even surprised that I got all of these finished. They were mostly finished with the exception of the greeting which I added when I got home. I had plenty to do while I was there and also enjoyed all the activities too!
I hope you’ve enjoyed my post today as well! I thank you so much for stopping in!
**THIS IS POST TWO OF TWO FOR TODAY! SCROLL BELOW TO SEE MY POST FOR THE GDT CREATIVE ARTISTE. THANK YOU!**
Hello friends and a happy November! I think that the last two months completely flew by and here we are getting closer to the end of the year…what?! I hope that you look forward to happy times ahead and lots of crafting fun too! I’m thankful you’re here with me, so let’s get this month started.
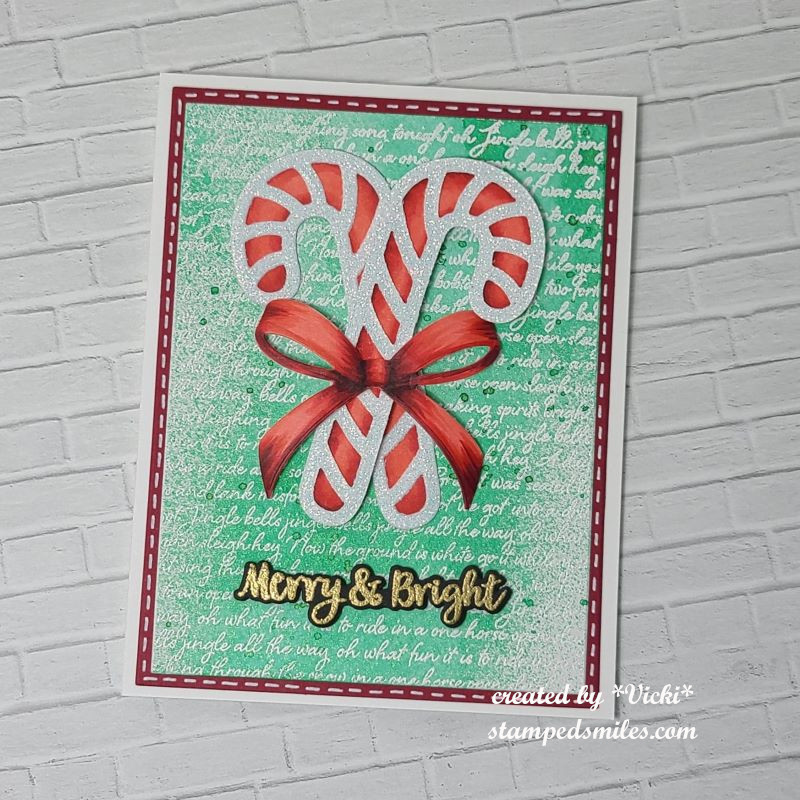
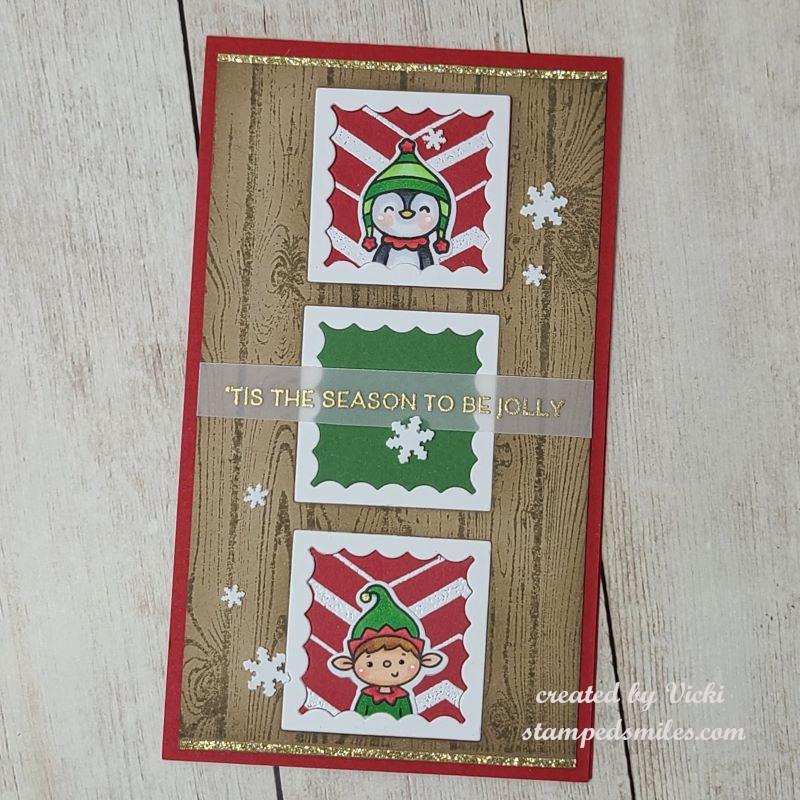
Today begins a new challenge over at the Mix It Up Challenge Blog and it’s always “Anything Goes with an optional theme“. The optional theme this time is “Paper Piecing“! (This challenge is open for 6 weeks, so you have plenty of time to enter!) Here’s what I came up with using this theme:
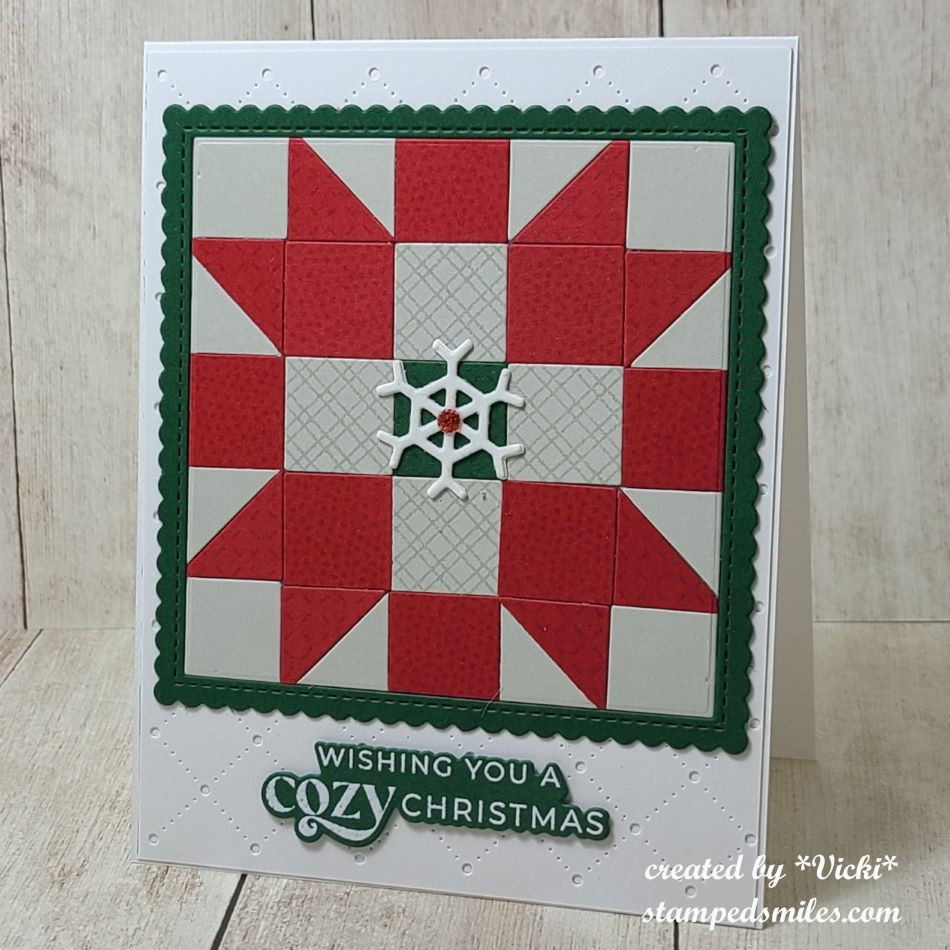
I absolutely love the look of quilts, but I like to keep my making of quilts done with paper! So I thought this theme would be great for making a quilt pattern design for Christmas. I normally paper piece stamped images, but I wanted to do something different this time and pull out more stash items and use them!
Several months ago, I purchased a card kit from Taylored Expressionscalled “Pieced Patterns” and I loved the concept of cut out squares attached over a “map” to follow along on how/where to place the squares. It’s really easy to piece different colors/patterns together to make a design. Some squares were also cut diagonal and I stamped a tone on tone pattern over some of the squares before they were cut out. Then they were placed over the “map” design and cut out with a square die. I also cut the stitched scallop frame to go around the square pattern. I die cut a white snowflake twice to layer in the center of the pattern and added a red gem in the middle of it.
I can see this might be fun with several different squares cut out ahead of time to place over the different “map” designs to create multiple design patterns ready for cards! It’s just a matter of taking the time to cut out all of the squares.
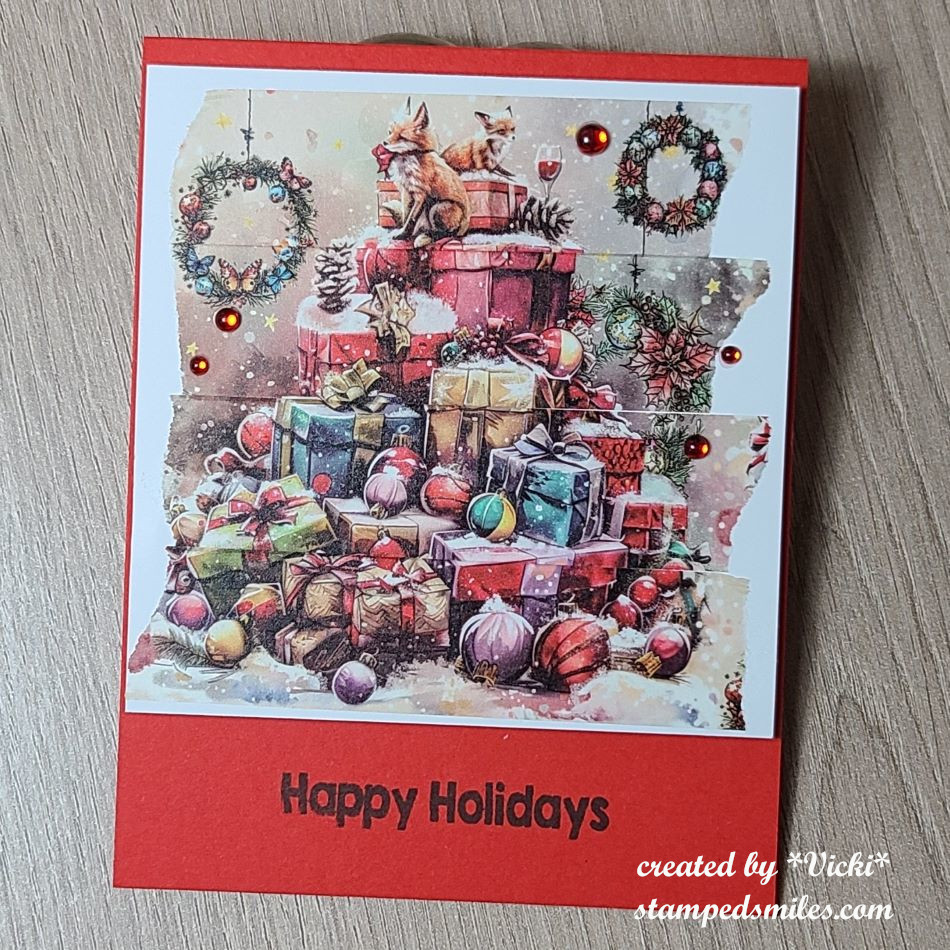
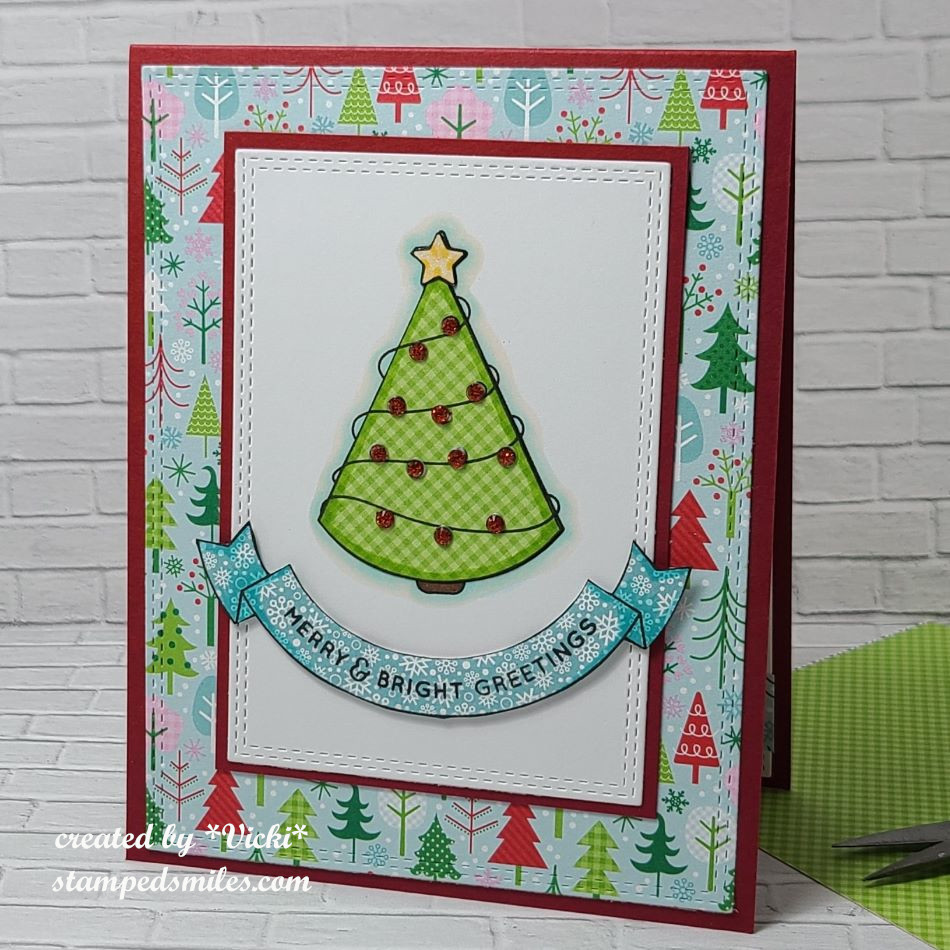
I have decided to create a “bonus” card using the same “paper piecing” technique, but with a stamped image this time…as we all need more Christmas cards, right?!
For this card, I pulled out an older card kit from my stash (2016) and used the Doodlebug pattern papers that was included with the kit. The papers are too cute not to use and hoarding them is not a good idea!
I stamped the tree onto a stitched white rectangle, then stamped the tree, star and banner over some of the pattern paper, carefully cut it out and attached it to the stamped tree and white panel. Before I attached the stamped pattern pieces, I used my Copics to color in the tree stump and outline around the tree. I also added some details to the pattern pieces for shading as well.
The banner was popped up with foam tape and I attached all the layers together over a top folding red A2 card base. All the cardstock/papers were included in the kit. I’ve added some red rhinestones on the tree where the ornaments were to finish it off.
Anyway, hope you’ve enjoyed all of my projects today and I hope you will take some time to check out the challenge blog to see what the other talented designers have made. I look forward to seeing what you make! Have a great day!
Hello friends! Hope you’re enjoying your day so far and staying warm! We’ve just recently survived a very cold below freezing temps in my area, so going outdoors is not that pleasant even bundled up! So with that, I stay inside and find crafting to be my happy space!
I’m very excited to be joining with my crafty friend, Carol (from Crafty-Stamper) for another year of SMASHING OUR STASH!🎉 I love the inspiration that we bring each other as well as accountability for getting those piles of stash used up! Thank you for joining me again and please be sure to check out the wonderful inspiration on her blog too! Here’s my AJ page with this month’s prompt of “COLD” (anything related to this word):
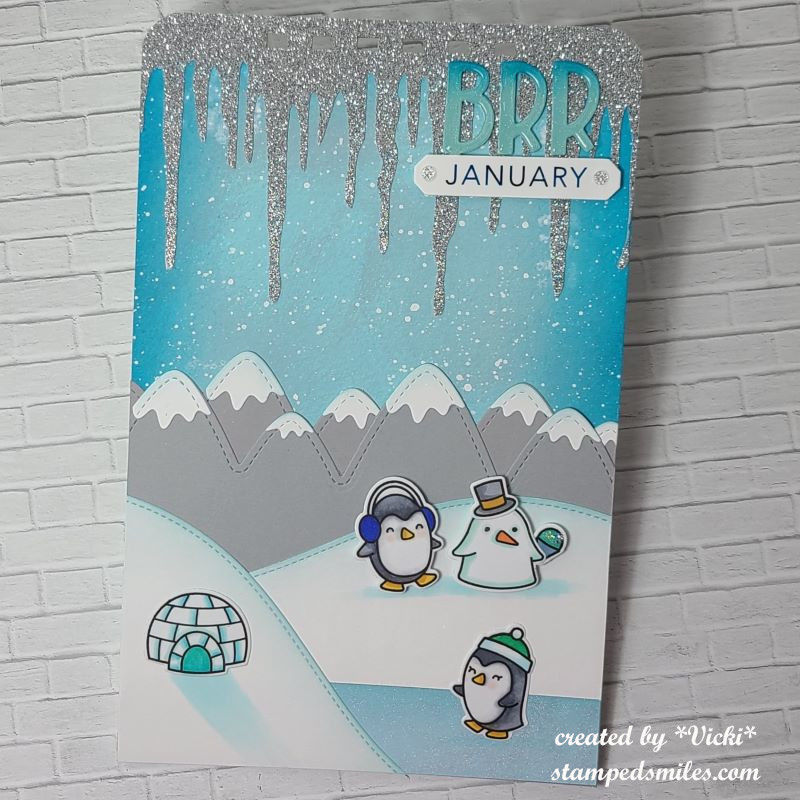
Of course when I think of cold, I think of my favorite animal…the penguin!! I pulled out some Lawn Fawn stamps to use on my page today. Lots of blues and silver and sparkle help with the feeling of cold too! I have so many sparkly items, so it was great to use some up!
For the background: I started with a piece of Canson Watercolor 140# coldpress 5.5″x8.5″ pre-punched holes at the top and covered it with blue colored acrylic paints using a baby wipe. I also went around the edges with a darker blue and then used a number stencil with white paint which you can barely see as I’ve covered most of it up. I then splattered with white paint using a fan brush for the snow.
I also found a cool icicle border and cut it out with my Cricut machine in silver glitter cardstock for the top of the page. I then used my Zutter machine to punch the holes again and used a corner chomper to round the top edges.
For the bottom: I used all Lawn Fawn border dies for the mountains and snow hills. The blue ice water the penguin is standing on is just a straight piece of blue cardstock covered with a glitter brush pen. I also used Stickles glitter to cover the snow cone that the penguin snowman is holding.
The lettering was done with a Lawn Fawn alphabet die that I ink blended in blues and covered with crystal effects. I foiled over the “January” word with blue foil and cut it out with a die and placed a couple of silver rhinestones next to it. This was popped up with foam underneath the “BRR” letters.
I hope you’ve enjoyed my AJ page today and have been inspired in some way! Thanks so much for stopping in!
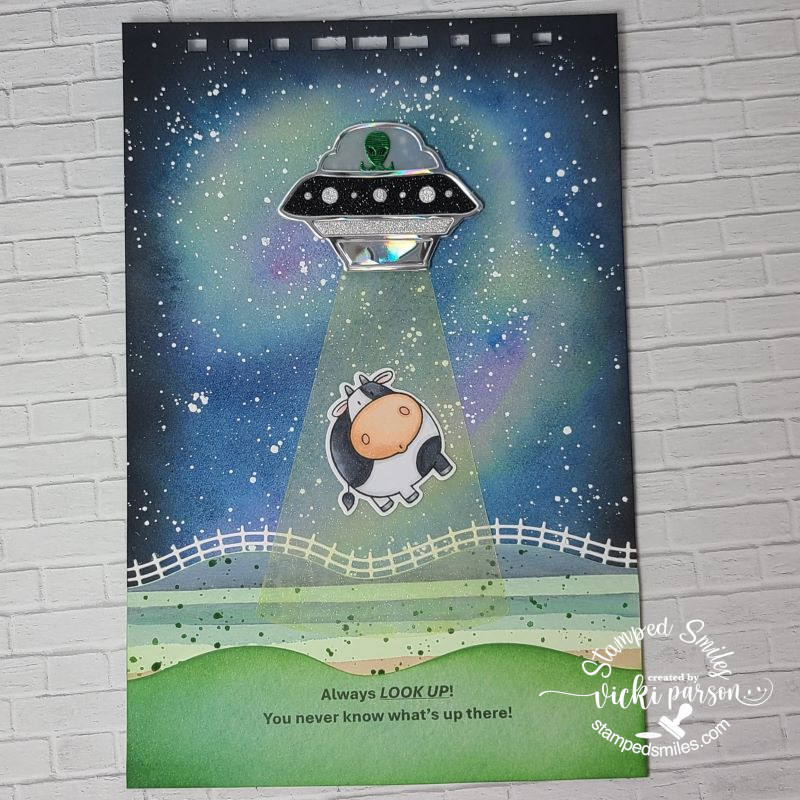
Hello friends and welcome to 2024!🎉 I’m looking forward to a year filled with many happy memories and fun! I’m wishing these things for you as well! So to get the year started, I’m inviting you to a fun challenge to play along with at the Mix It Up Challenge!
The theme is always ANYTHING GOES with an optional theme of MIXED MEDIA! With these challenges, you have plenty of time to enter as they run for 6 weeks! I look forward to seeing what you come up with!
I know that mixed media can seem a bit intimidating, but it’s only using more than 1 extra medium of any kind on your creation. I usually do that anyway! Here’s the card that I came up with for this challenge using the Mixed Media option:
I’m really loving how this turned out! I’ve used another fun card kit from Taylored Expressions with the Snow Crystals card kit. (no longer available)
Background: I started by white heat embossing the Swirling Snow Background Stamp over watercolor cardstock. I used different shades of blue watercolor with a bit of turquoise in there as well. I spritzed it with water to get the “watermark” look and let it dry. I then used some Copic opaque white mixed with water and splattered some over top for another layer of snow. After it was dry, I also filled in the circles with a glitter brush pen.
I die cut the snowflake die in navy and again in white cardstock 3 times. I layered the navy at the bottom over the background. The three snowflakes cut out with white were glued together and then I took 2 layers of sparkle silver embossing powder to heat set. I layered the embossed snowflake slightly tilted from the navy snowflake and attached over top. I also silver embossed the sentiment over a navy strip and added some “dash marks” with a white gel pen before attaching to the background.
Finished off the card by running the edges of the background panel with liquid glue and then attaching some chunky glitter to the edges. I also attached a silver rhinestone in the center of the snowflake. It’s so glittery and shiny in person!
Thanks so much for stopping in today and I hope that you will take the time to play along with us! Be sure to check out the Mix It Up Challenge Blog for the design team inspiration!
Hello friends! Hope you had a great Christmas and were able to make some wonderful memories! I can’t believe that we are ready to close out another year! The time just goes way too fast and there’s so much more to look forward to! I think the theme for my upcoming year is in this title post – KEEP DANCING!!!🕺
The last Saturday of the month (AND THE YEAR!) brings us to the monthly Art Journal Page collaboration with my crafty friend, Carol (from Crafty-Stamper)! We get creative trying to use up our never-ending stash piles along with a prompt for each month. I know she always has great inspiration to share, so please check out her blog too! Here’s my AJ page with the “SMASH OUR STASH” December prompt of “Previous Prompt”:
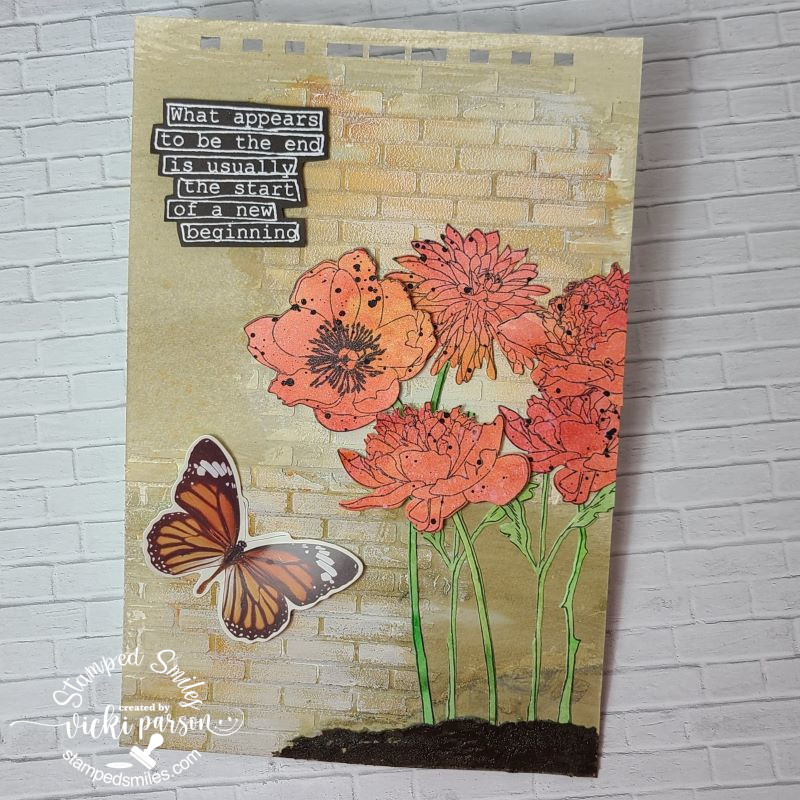
Since this is the time of the year that we have a “look back”, I thought it would be fun to take one of this year’s previous prompts and come up with a new AJ page. I chose April’s prompt of “SHINNY/SPARKLY”, and you can catch that page in the photos below or see my previous blog post HERE.
There’s nothing quite shinny or sparkly than New Year’s Eve! I always think of the ball dropping on Times Square in New York, but it also had me thinking of a disco ball that is very sparkly. Found this image online and printed it out. Cut it out with a circle die and then added a bit of colored shading with my markers in grey. I took a sponge to add glue to the entire ball and then covered it with chunky glitter. I added some sparkle images and filled them with silver glitter and then die cut the numbers and glued them over top of the ball.
For the background: It’s just a 6″x9″ black cardstock pre-punched at the top and then splattered with silver watercolor. I added some music notes and die cut stars. For the bottom, I used some woodgrain texture paper and cut strips to make a wood floor for the Riley the Moose disco dancer. A silver metallic paint pen was used for the ball string at the top and the wording around the top of the ball.
I stamped, colored and hand cut the moose and popped him up over a die cut shadow for under his feet. I typed a quote on the computer and printed it out over silver cardstock. While it was still wet, I sprinkled clear EP over top and cut rounded corners for the page. Lastly, I just popped up the glittered ball with foam tape and added some silver rhinestones at the bottom.
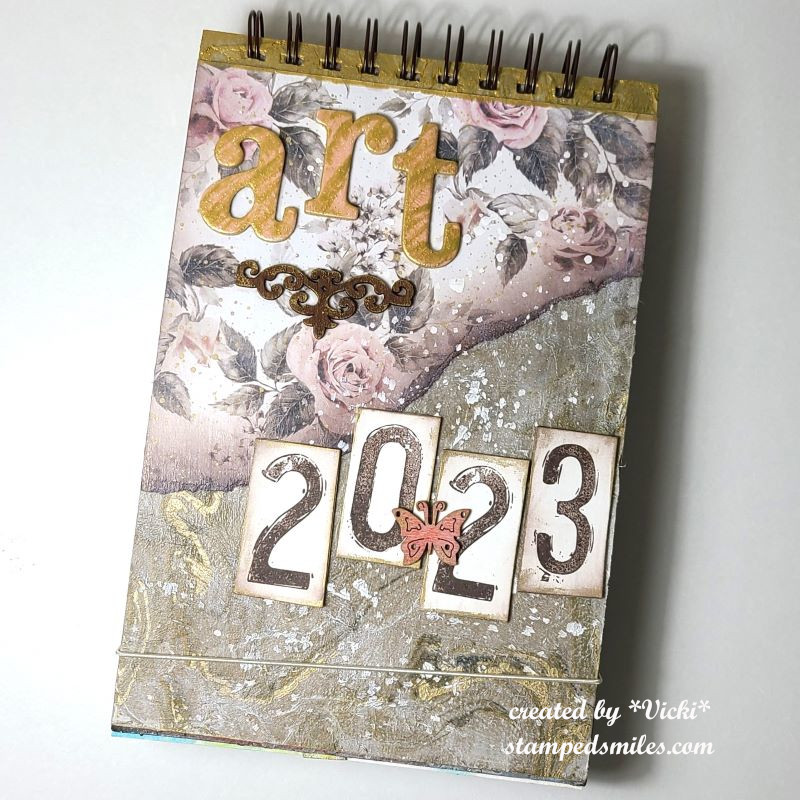
I thought it would be fun to do a review of all of the monthly pages that were created this year. I put the months in order below. (If you are on my website, just click on the photos to enlarge them.)
I pre-punch the holes at the short side of the pages each month and then at the end of the year, I use my machine to bind them together to make a book. I add covers and decorate them. There is a post with last year’s book HERE.
For this year, I went with the vertical look and added a stretch cord to keep them together better. I also tried out the napkin with the cover:
The napkin is at the bottom with the foil marble look. My husband got some napkins for New Year’s, and I thought I’d try it out. I added some chipboard, stamped and cut out numbers and added some wooden pieces. I used the rose papers for the covers on the inside as well as the back of the chipboard covers. It was put together with my Bind-It-All machine and coils.
I hope you’ve enjoyed seeing my Art Journal Journey throughout the year as I sure have enjoyed doing them! I get to pull from my stash to use, but there is also so much more to use! So this means that I will for sure be continuing with this journey and I hope you’ll join me too!
Thank you so much for stopping by to have a look back. Wishing you peace, love and health for the upcoming 2024 year! See you in the next year friends!!!🎉
Challenges:
Art Journal Journey – Above Us Only Sky (New Year’s Eve Ball Drop on Times Square with stars in the sky!!!)
Creative Artiste – Anything Mixed Media Goes with option of Christmas
Alphabet – ‘T’ is for Texture (texture on the top page with woodgrain floor, the chunky glitter disco ball. Texture on the book with chipboard, wood pieces and paste.)
Hello friends! I hope that you’re having a great start to your week! We’re almost there as Christmas approaches us quickly! I’ve been enjoying the Season and having fun keeping busy. Currently baking cookies and decided to take a break from that to sit and make a post about all of things that I’ve been doing besides posting!😆
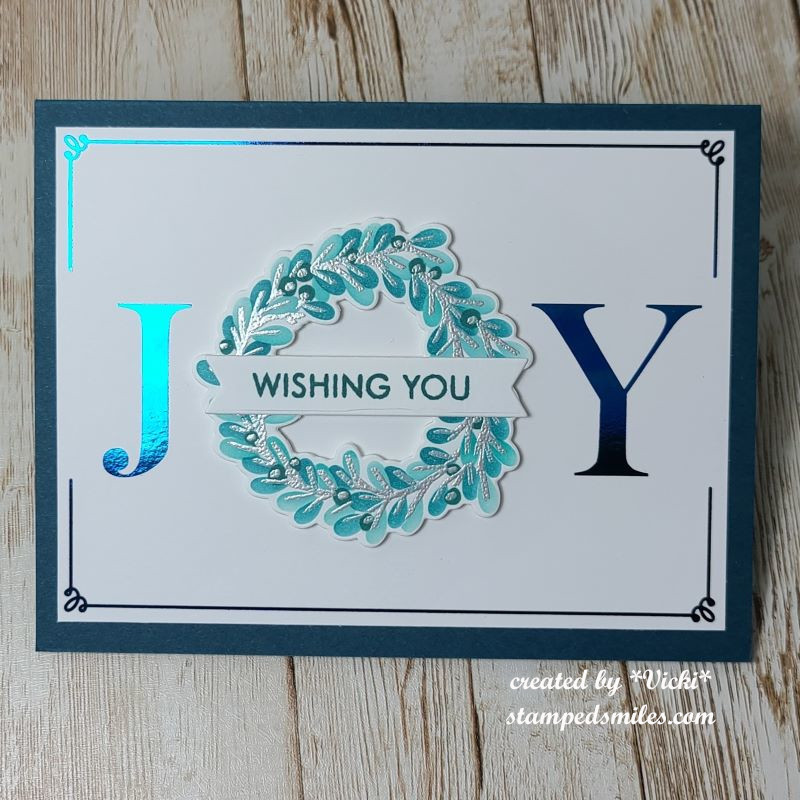
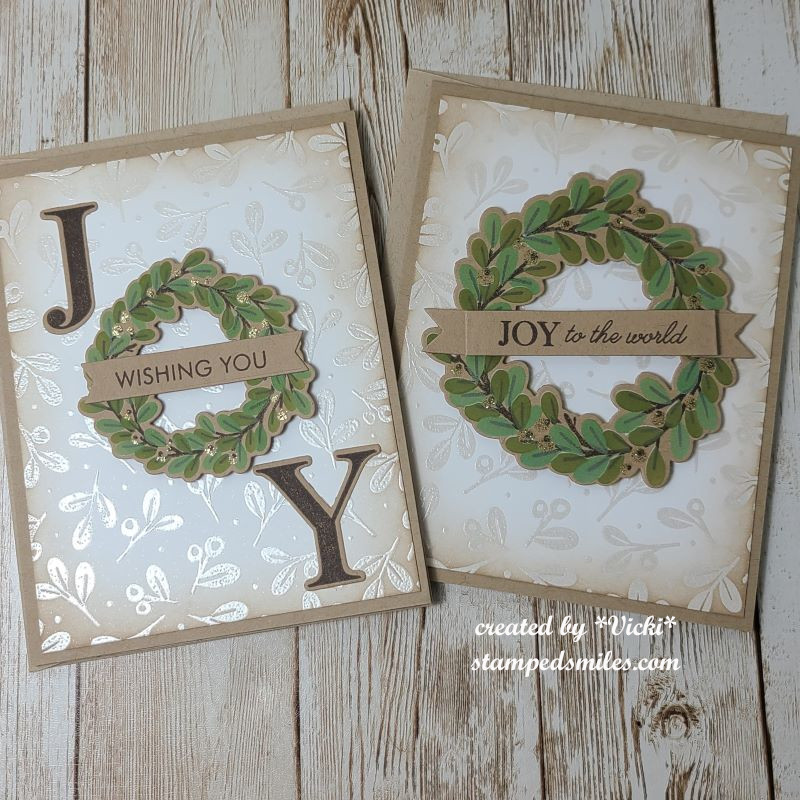
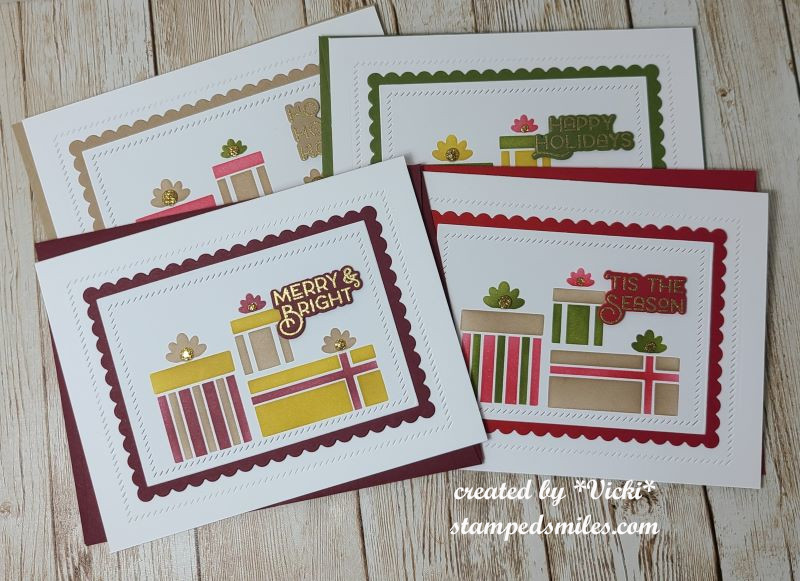
This is just one of the several similar cards that I created for my Christmas cards this year. It came from a Christmas in July card kit from Taylored Expressions. It mainly used the Wreathed in Joy Stamp & Stencil Combo set. There are dies you can cut them out with as well as foilable panels which is shown on this one.
I do not like to make several of the “same thing”, so I’ve changed them up to different colors, layouts, etc. So you can see the different versions I’ve done below. (If you are visiting my web page, just click on each photo to see it enlarged.)
*Apologies for the messy stack for photo taking…it was a lot to do all at once!
Most of these are blue and silver which is my favorite color combination for Christmas colors, so I did about 6 of these.
I think these look the most vintage with the soft tones. Only 2 of these.These are more traditional looking with the red and greens, plus some were foiled and some heat embossed. There are 4 of these.These are all pretty similar with the larger wreath used. I changed up the green colors a couple of times. There are 6 of this kind.
I thought these would be enough for all of the Christmas cards to send out, but I realized going back through my list that I wasn’t going to quite have enough.
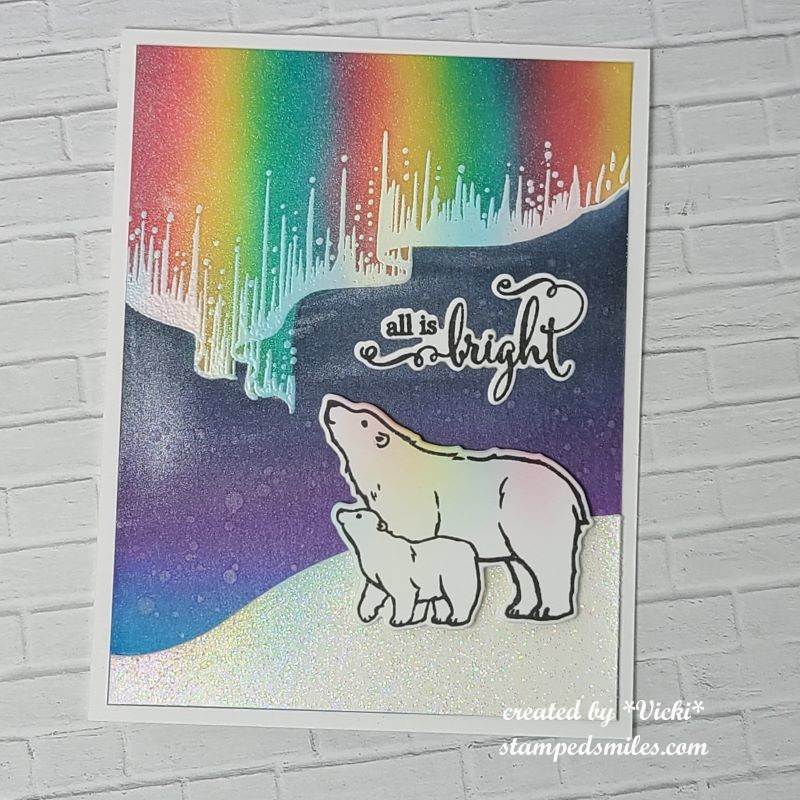
So I’m glad that at the beginning of this month I took a Hero Arts Stamp-a-Longand made several different types of Christmas cards. Here are the results of these below: (Again, if you’re looking on my web page, just click on the photos to enlarge them.)
background using sprays and coloring die cutssimple CAS cardnorthern light mixed media techniqueemboss resist background and dimension die cuttinggift tag card with a pocket inside for holding a gift cardreverse die cutting on gatefold cardlayering tree stamp and gatefold cardusing die cut plate for stencilingWatercolor CAS projectsusing a die cut plate for embossing and masking
mirror stamping technique and rub-on background
So some of these were also taken and used for sending out more Christmas cards. I’m glad that I did the projects for this class or I probably would not have had enough cards.
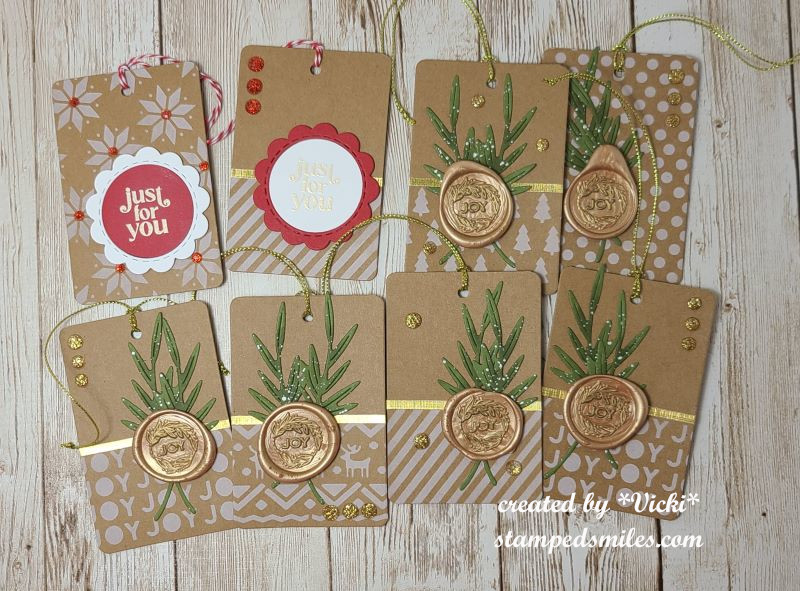
BUT WAIT! That’s not all! I’ve also made a few other Christmas items that I’ve also sent out. I’m also sharing some gifts and gift tags that I’ve made from a Taylored Expressions Advent Calendar that I got this year. I made some more cards and tags. (I tried out wax melting which is something I’ve never done…it was fun) Others are from classes I took or participated in Craft Roulette for.
If you’re on my web page, just click on the photos below to enlarge each one.
a craft roulette challengeanother craft roulette challengeInky Stamper OOAK classcraft roulette challengestencil from my advent calendarmelted wax, tags, pine sprig die and stamp set from advent calendar
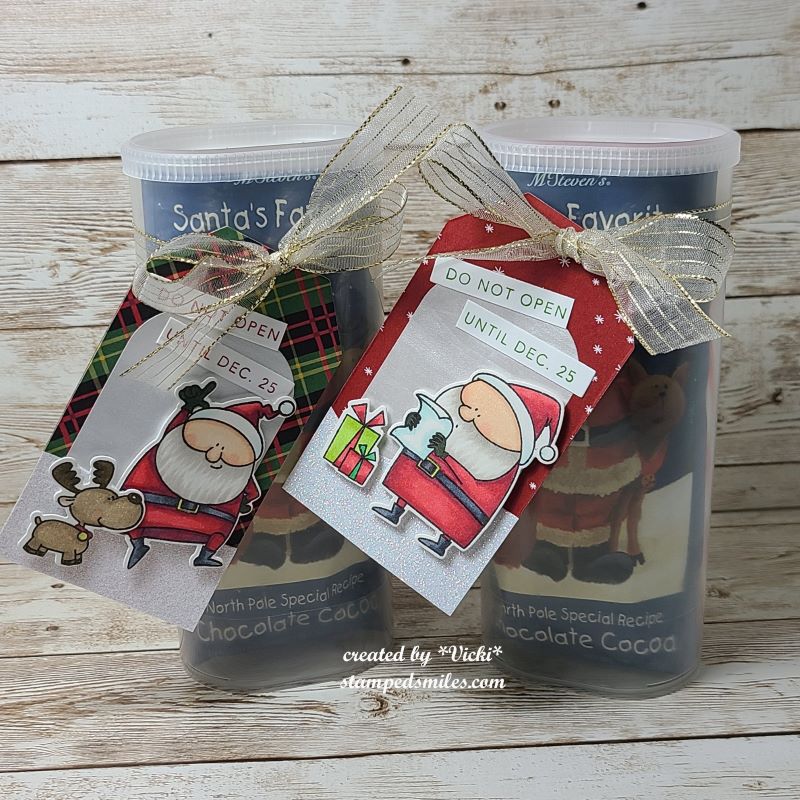
I usually make these every year along with a poem on the back for the hot cocoa ingredients. This one is called “Santa’s Soup”. I might add a few other fun items in there as well! The people that get one of these knows to look inside right away!
Wow, so that was a lot! I know that my blog has been pretty sparse with posts lately and I am finally getting around to posting the things that I’ve been working on, so I hope you’ll get that and you’re able to take some time for yourself this season and enjoy the peaceful quiet moments!
I will be sure to take a moment and catch up with everyone before Christmas arrives. In the meantime, it’s back to cookie making! Thanks so much for stopping in today!❤️
Hello friends! I hope that you’ve had a great start to your December month! I promise I haven’t been hiding, but it’s a busy time of the year and I’ve been doing all of the Holiday things, so my time has been limited. I’m glad to have just now finished up some Christmas cards!😉
Speaking of Christmas cards, I have something fun to share with you today!
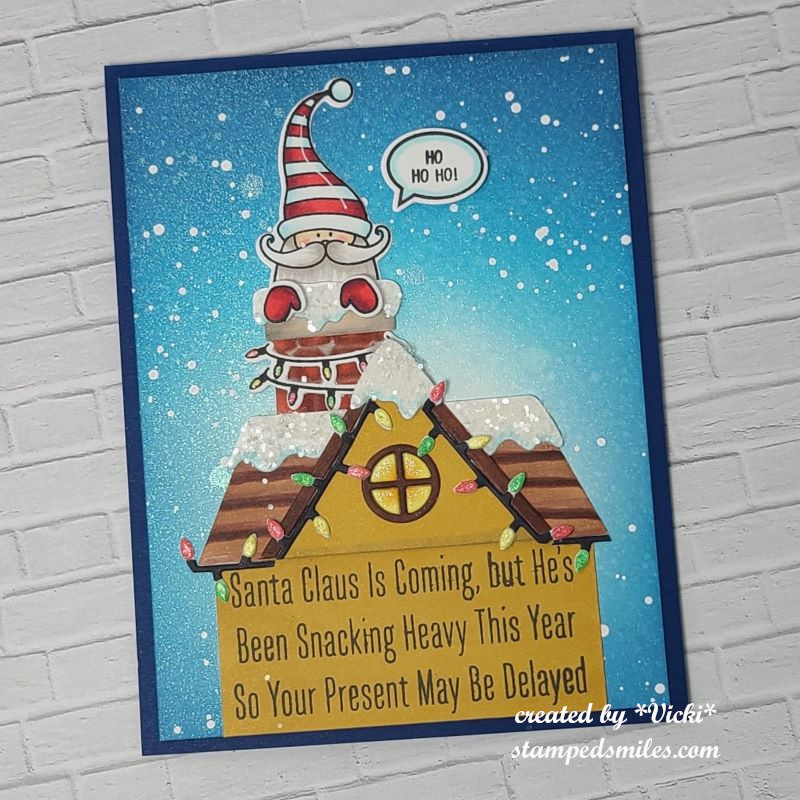
Last month I had won a top 5 in a challenge and was asked to be a guest designer for this Try it on Tuesday challenge! I really enjoy playing along in the challenges to keep motivated, so I was thrilled! For THIS challenge, the theme is “Santa Claus is Coming to Town” which inspired me to pull out this fun Santa stamp for a chuckle:
So, this is Santa’s excuse for being late! Like me, he’s NOT hiding…just delayed!😆
The stamps and die cuts came from an older My Favorite Things card kit I had called “Stuffed Santa“. I had fun putting this one together and was the beginning of the cards made to send out this year. (It was my plan to be early, but you know how THAT goes!)
For the background: I ink blended in a couple of blue oxide colors with the center panel fading to the lightest color. I sprayed the panel with some shimmer spray for that cold frosty shimmer sky. I then splattered some white opaque Copic mixed with water for the snowfall.
The Santa, hands, sentiment bubble, and lights around the chimney were all stamped and colored with Copic markers. I die cut them out along with the chimney, snow and rooftop pieces. I die cut the pieces with white and used my Copic markers to color in the chimney, roof, window and lights around the roof line. For the sentiment panel on the house at the bottom, I cut it to size and used my Copic markers to color the same as the roof peek. I added the sentiment to it, and made this the “base” for the house.
To finish it off, I added some chunky glitter to the die cut snow on the chimney and roof. I also used a glitter pen to add some sparkle to the inside window panels and the Christmas lights. I also used some foam squares to pop up the sentiment bubble and Santa’s mittens.
Hope you’ve enjoyed my card today and that you’ll play along with this fun challenge over at Try it on Tuesday as well! Thanks so much for dropping by!
Hello friends! Hope everyone has had a wonderful Thanksgiving for those that celebrate. And with that, there is also the Black Friday deals, and today is “small business Saturday”. So have you’ve gotten some really good deals or do you shop during this time? I don’t really shop too much during this time, but I enjoy hearing about the great deals everyone has gotten!
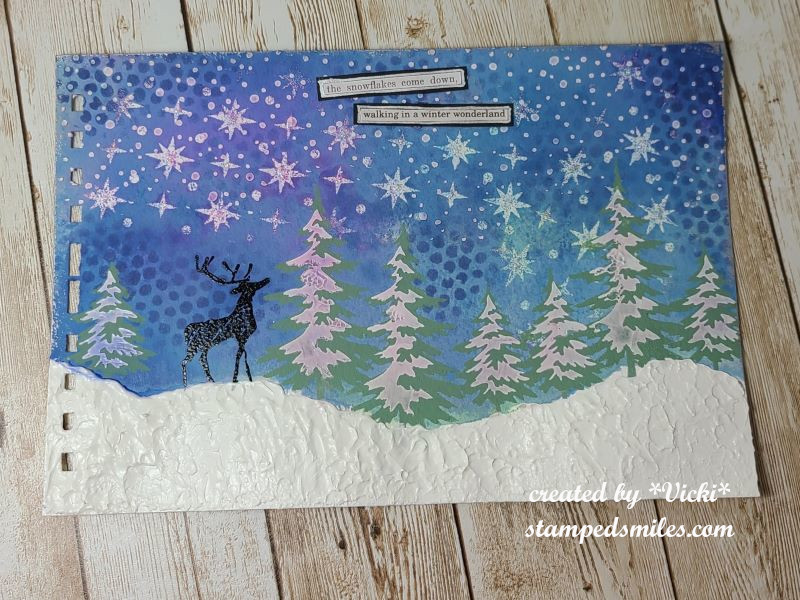
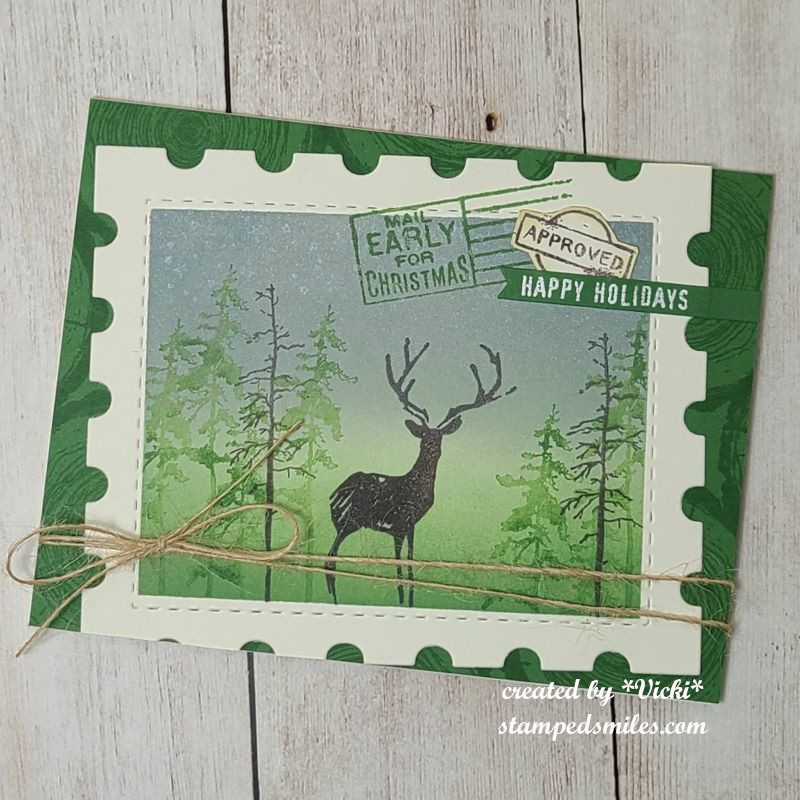
The last Saturday of the month also brings us to the monthly Art Journal Page collaboration with my crafty friend, Carol (from Crafty-Stamper)! We get creative trying to use up our never-ending stash piles along with a prompt for each month. I know she always has great inspiration to share, so please check out her blog too! Here’s my AJ page with the “SMASH OUR STASH” November prompt of “STENCILS” (can also make your own):
I do love stencils, don’t you?! I have lots of them in my stash and I don’t always use them as much as I’d like to, so how fun to pull out several of them for this month’s prompt! All of the ones I’ve used on my page are from Tim Holtz. The entire page is stencil expect for the deer, sentiment and bottom snow! (I would’ve used the deer for a stencil too, but I don’t have one.)
For the background: Started with my usual 6″x9″ 140# watercolor pre-punched holes on the side. I took the large star looking stencil and sponged some VersaMark ink over it towards the top of the page and heat embossed it with clear EP. (This made a “resist” for the ink I layered on top.) I took a long strip of masking paper and ripped it to create some hills for the bottom. I needed to mask so the colors didn’t go over it. I took several different colors of Distress Oxide sprays along with spritzing with water to help the colors move around and made a few layers with this. Once dry, I went over the background with the dotted stencil and sponged ink over it with a blue color.
For the tree stencil, I needed to be sure that it would cover the background I created, so I used some green paint to sponge over the stencil, but because the background is blue, it’s sort of harder to see the green. This stencil also had a second part where you can cover each tree with another layer for either another green or snow. So I used some Hero Arts white paste to cover it with. I also used the same paste to add another layer of stencil to the sky for snowfall.
The silhouette deer is a stamp that I stamped with black pigment ink and then I heat embossed it with clear EP. My final touch to the page was to take the Hero Arts white paste and cover the hills at the bottom using my spatula. Really love the dried look of the paste as it has a wonderful shine to it which works great for snow! It didn’t take as long as I thought it would to dry. (About 2 hours it was hardened.)
I found a couple of the Tim Holtz sticker quotes to go with my theme, added to black cardstock and went around the edges with a silver paint pen. I cut them out with scissors and glued to the page. I took some silver wax and went around the edge of the page with my finger and lastly added some glitter drops to a couple of the centers of the “stars” in the sky.
Hope you’ve enjoyed my art journal page today or have been inspired! I appreciate you taking the time to stop in!
Challenges:
Art Journal Journey – Nature (I love nature in the wintertime! So pretty covered in snow!)
Hello friends! I hope you’ve had a great start to your November so far! It’s been a few minutes since I’ve posted, but I have to say that I’ve been pretty busy in the background! Hoping to share what I’ve been up to soon!
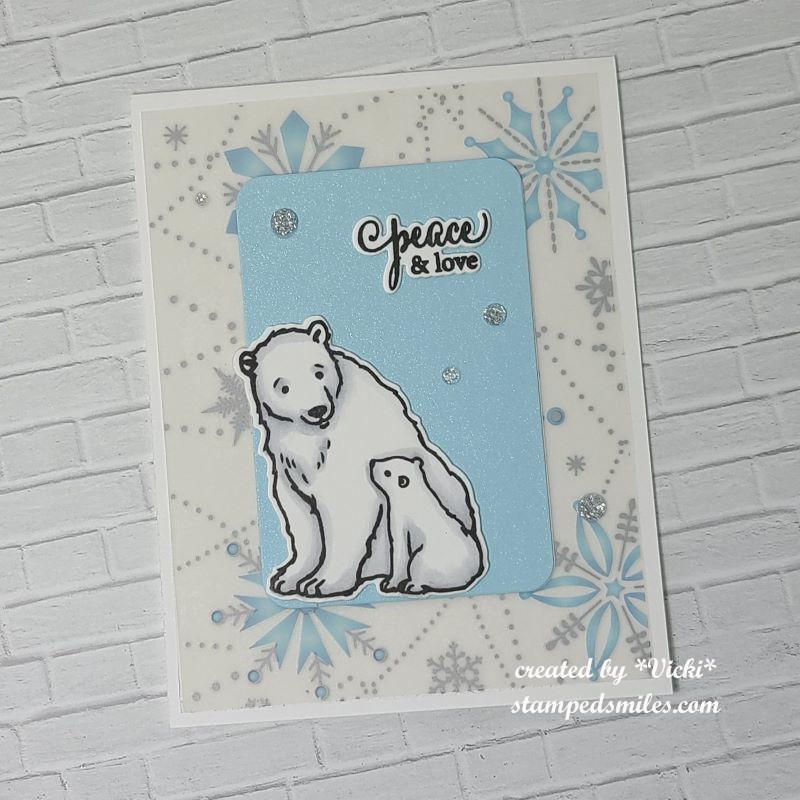
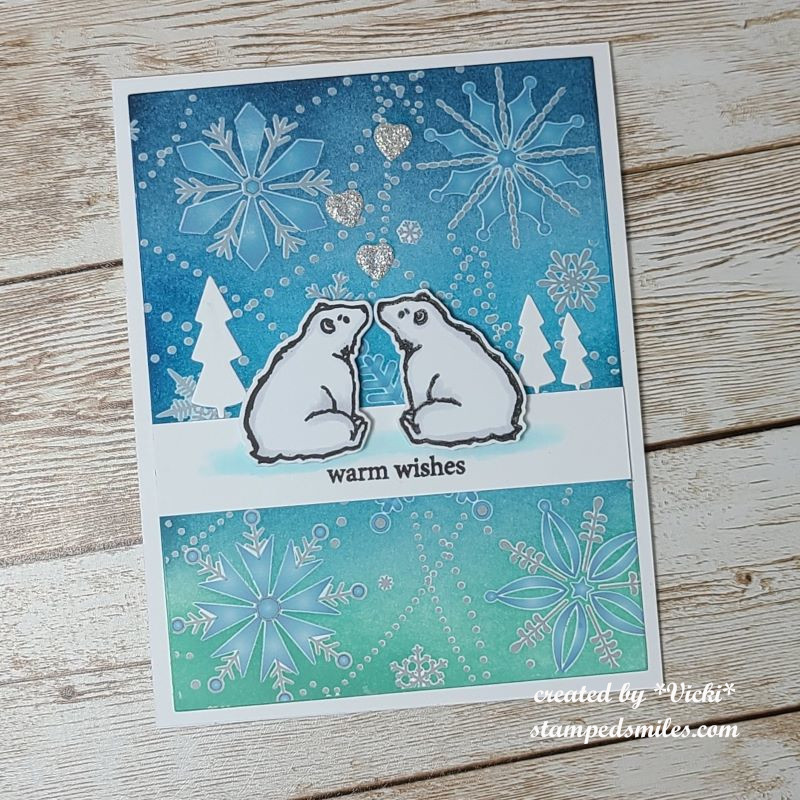
Today begins a new challenge over at the Sparkles Monthly Challenge! This month, we’re looking to see some WINTER ANIMALS! I hope you can join in the fun with us! A reminder that this will be the final challenge for the year as we’ll be on Holiday break until January. Here’s my take on the theme:
My first thought of a winter animal is a penguin of course! I’m a huge fan of them and have so many in my collection…including other than stamp related! These guys are really enjoying winter on this scene! I’m using theMy Favorite Things Playful Penguins stamp set and I started with a stencil from MFT that has “pond” shapes and lightly stenciled the soft blue for a place for my “ice platform” to be.
After creating the “ice pond”, I used some tape to mask off the bottom portion so that I could ink blend a sky at the top. I used some White Opaque Copic and splattered it over the sky area. I then used another MFT stencil to create some snow drifts in the background.
The two penguins, igloo, ice pad and sign were stamped, colored with Copic markers and die cut out to be placed over the scene. I added the flattened penguin to the ice pad and then had the igloo in the background while the sign and penguin are waiting at the side of the pond. I used a pen and wrote “FREE RIDES” on the sign.
I finished it off with a glitter pen over the “ice pad” and igloo and then used some Stardust Stickles over the snow on the sign. I thought it needed some more snow falling down, so I took some sequins and added it to the scene.
If I were on that scene, I would probably be more like the flattened penguin on the “ice pad”!😆 How about you? Do you like the snow?
Thanks so much for joining me here! I hope you like my penguin card and will sharing your favorite winter animal in the challenge too! Have a great day!