Let’s keep on celebrating! We are on day 5 of celebrating over at {Cupcake Inspirations} with another feature of sponsors for our 500th “birthday celebration” challenge!! Yeehaw!🥳
Today, we are highlighting Newton’s Nook – check out the challenge blog for more details about this sponsor.
I adore the stamps from this company and already own some faves..including retired ones that I refuse to give up! LOL! I have recently gotten some new ones to party with though! Check it out…
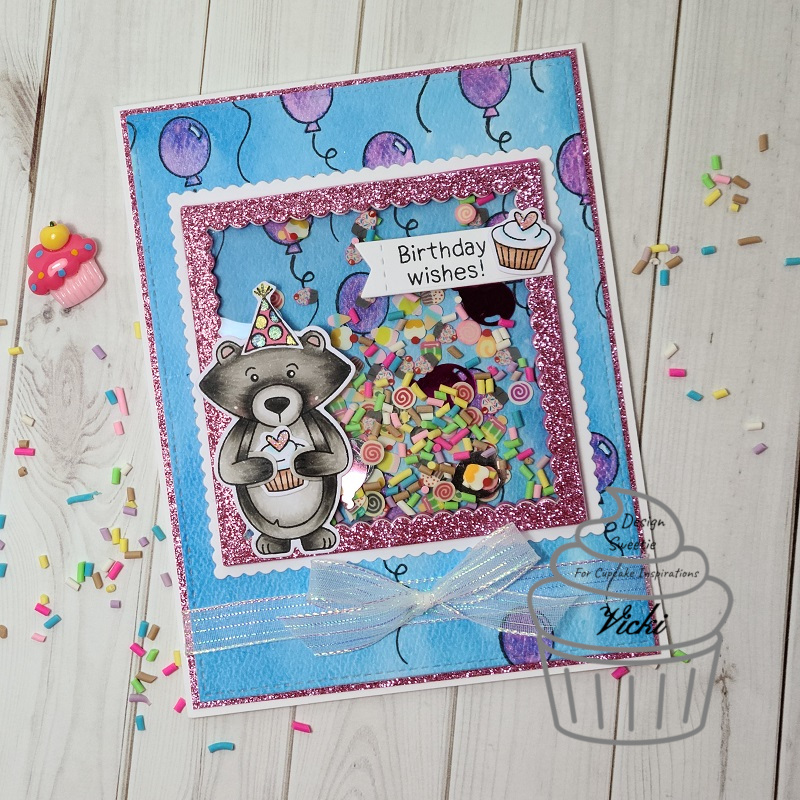
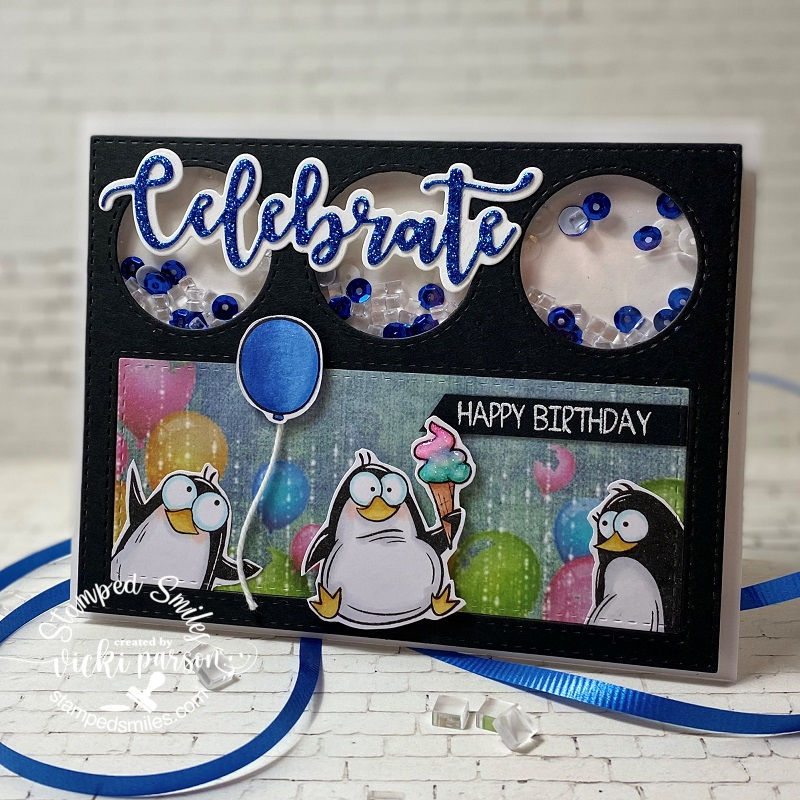
Winston is one of the cute characters I adore! I’ve used the Sending Hugs stamp set with the coordinating dies. And the special thing about the coordinating dies is that they cut out the arms of each of the characters within the set so that they can be holding different objects! I think that’s too cute!
So I’ve colored up my Winston character with Copics and for the item he’s holding, you can see he has a cupcake, which is included in this set! I stamped, colored and die cut an additional cupcake next to the banner sentiment which was included with the set as well.
For the background, I’ve done some fun watercoloring. I’ve used a balloon image from a retired set “Winston’s Birthday” which is also where I’ve got his party hat from as well. Love it along with the “Winston’s BBQ” set that I won’t give up either! LOL!! I pull it out pretty much every Father’s Day! (I made a cute apron card with it this year and forgot to take a photo of it! Sigh….)
I photographed the card laying flat so that you could see the fun shaker contents inside the square frame! Lots of sprinkles, little cupcakes and balloon sequins in there! I thought it needed a pink glittery frame along with metallic shine on the party hat too! I finished it off with a metallic clear ribbon bow at the bottom.
Hope you’re having fun with the inspiration so far and I’ll see you again tomorrow!
Challenges:
- 2 Crafty Critter Crazies – Anything Goes + animal
- Papercraft – #61 animals
- Crafty Animals – Anything Goes + animal
- Pammie’s Inky Pinkies – PIP2033 Anything Goes
- Simon Says Stamp Wednesday – Oh So Cute