Hello friends! I hope you’re having a great week so far and enjoyed a nice Valentine’s Day yesterday with some yummy sweets! We enjoyed some treats of our own! 😉
Today I have a new challenge to share with you for the Sparkles Monthly Challenge blog and this month the lovely Dawn would like to see some “Hearts & Flowers” on your creations! Although Valentine’s Day is over, I think hearts are great for adding any time of the year, so check out the inspiration from the design team and here’s what I’ve made:
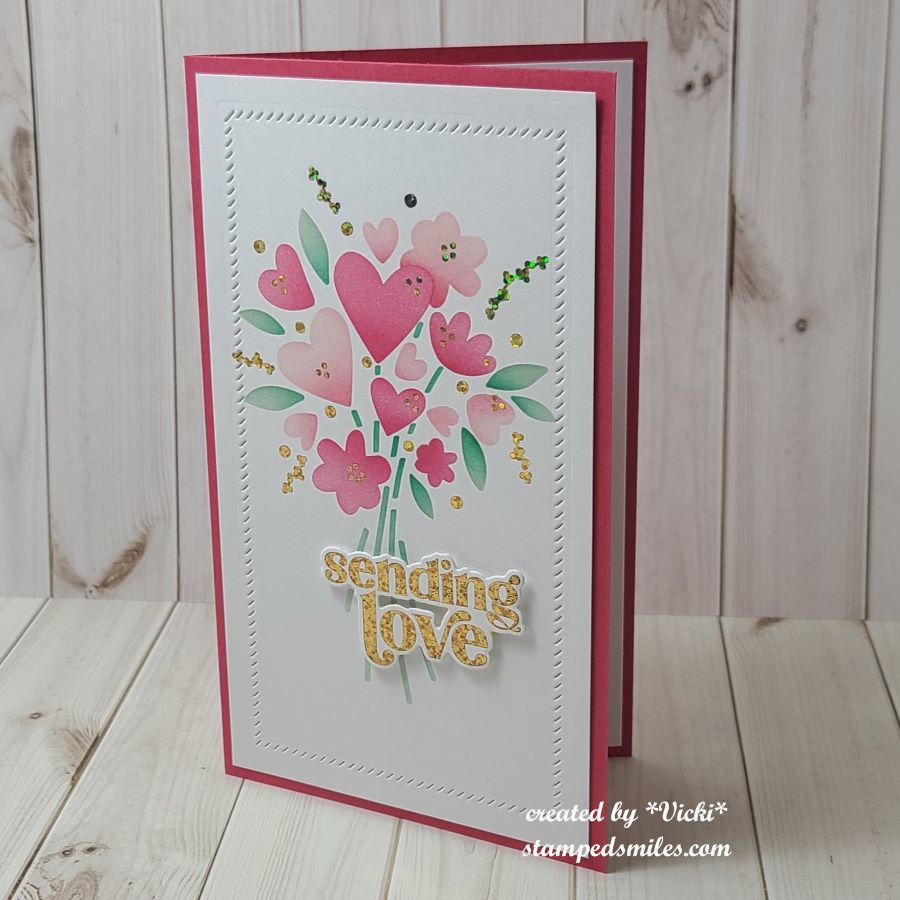
I’ve made a mini slim card using the Taylored Expressions Hearts in Bloom Layering Stencils which are so great for mass producing several cards at once. For this card and the other cards below, I decided I wanted to use the TE Hearts in Bloom Foil Panels which works with these stencils. I foiled them with gold foil. I think the foiling adds such a pretty shine and glitter. I also used the TE Love & Hugs Foil Panels for the sentiment and die cut it out with the coordinating die set.
So after foiling everything, I used the stencils to create the pretty bouquet of flowers with the hearts in it and then added a frame around the edge with a TE Diagonal Stitch Mini Slim die that doesn’t cut anything, but adds those slash marks. I used some foam tape to pop up the foiled sentiment and just attached everything to a coordinating mini slim card base.
I couldn’t just make this one to show you, so here is the whole set of cards I’ve made together:
Those stencils create all of these patterns at one time. I just lined the foil panels up at one time and then used each stencil for the colors. If you didn’t want to use the foil panels, you could also just use the stencils on one sheet of cardstock and then cut them apart to make the card fronts.
I found these sets to become very addicting! And just like that, two of them have been sent out!
I’ve been really busy with creating behind the scenes and I will be sharing more soon! I will be around to see what’s been going on with you all shortly! I really appreciate your kindness and support…it really means so much!❤️ Thanks for stopping in!
Hello friends! Happy November! The time is getting closer and closer for Christmas to arrive and so the Christmas cardmaking ramps up! Have you started on yours or have them done?
I’m very excited to announce that I’ve joined up as design team member over at the MIX IT UP CHALLENGE BLOG! Woot! 🎉 Really happy to be supporting a fellow blog friend Leslie with one of the many challenges she runs! Thanks for having me along! So, I hope you’ll go check it out and play along with us! The challenges run for 6 weeks which is plenty of time to enter and these challenges are always “Anything Goes” with an optional twist involving a technique of some sorts. Sounds fun to me! And I can use any products I like! Count me in!
For the November challenge this month, we have “Anything Goes with optional stamping (use clear or rubber – no digis)” This is my first creation with the team, and I look forward to seeing what you come up with for the challenges too, so I hope you can join!
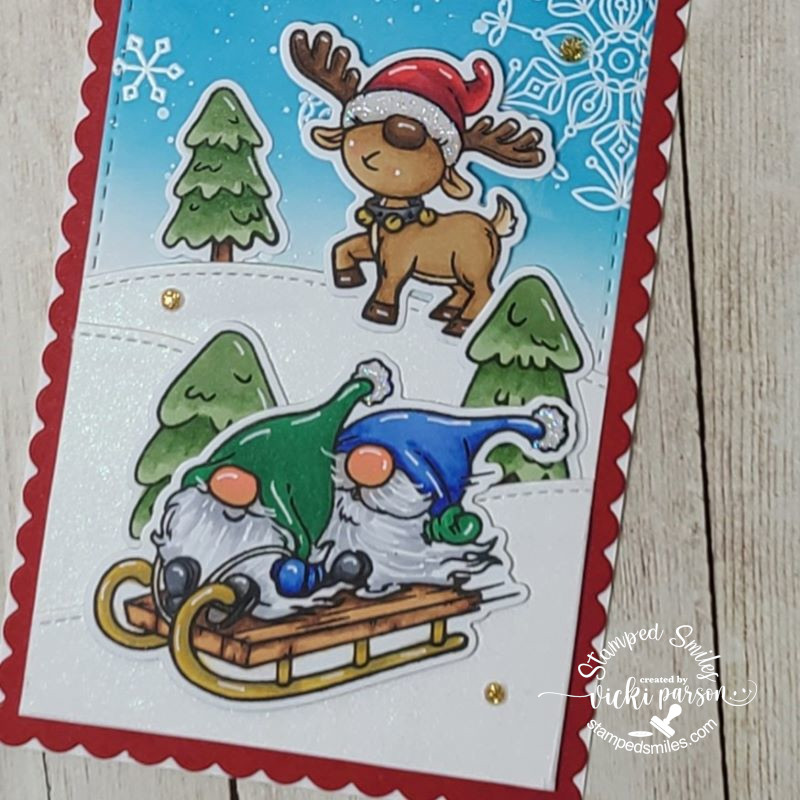
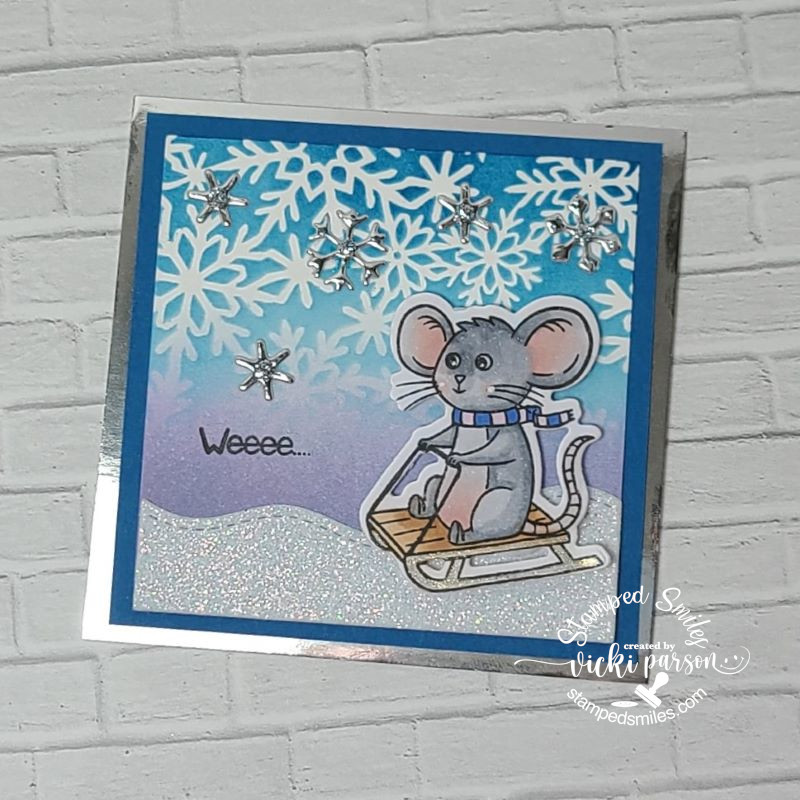
Of course, I love to stamp! I have SO many and why not use them?! I was lucky enough to have gotten the STAMPtember Trinity Stamps set called: “Sledding Gnomes” (no longer available) and it was so fun to play with for this card. I also decided to make it a slimline card which I haven’t made in quite a while.
For the background: I white heat embossed some snowflakes from the Simon Says Stamp “Frozen Fractals” stamp set (no longer available). Then I took some Oxide Inks in Mermaid Lagoon, Blueprint Sketch and Chipped Sapphire to ink blend over the embossed snowflakes for an embossed resist technique. Lastly, I’ve splattered some Copic Opaque white with water and a fan brush. This panel was cut out from the Trinity Stamps Stitched Card Panels & Window Slimline dies.
I stamped, colored and die cut the characters and cut out some white cardstock using a Lawn Fawn Stitched Hillside Borders die set. I arranged the slopes and tucked in the trees behind each layer and popped up the characters with foam tape. I also white heat embossed the sentiment with red cardstock and die cut it out, which was popped with foam tape.
Here’s a closer look at the coloring: (using Copic markers)
Before attaching the stitched slopes to the bottom of the heat resist snowflake panel, I sprayed some shimmer spray to give it a snow look. I attached this panel to a red piece that was cut from the Trinity Stamps Scalloped Card Panels & Banners Slimline die set. I then layered both of these panels to a white side folding slimline card base measuring 8.5″ x 3.5″.
Lastly, I’ve added some Stickles Stardust glitter to the gnome hat ends and the hat on the reindeer. You can see where I’ve added some white highlights with a gel pen and then I took some gold glitter gems and attached randomly.
I hope you’ve enjoyed my project today and will stop by the Mix It Up challenge blog to check out the rest of the inspiration and play along with us this month! Remember you have 6 weeks!
ABC Christmas – ‘U’ is for “Use it Up” & ‘V’ is for “Vertical” (I made a vertical slimline card and I used up my supplies of sprays, glitters and gems!)
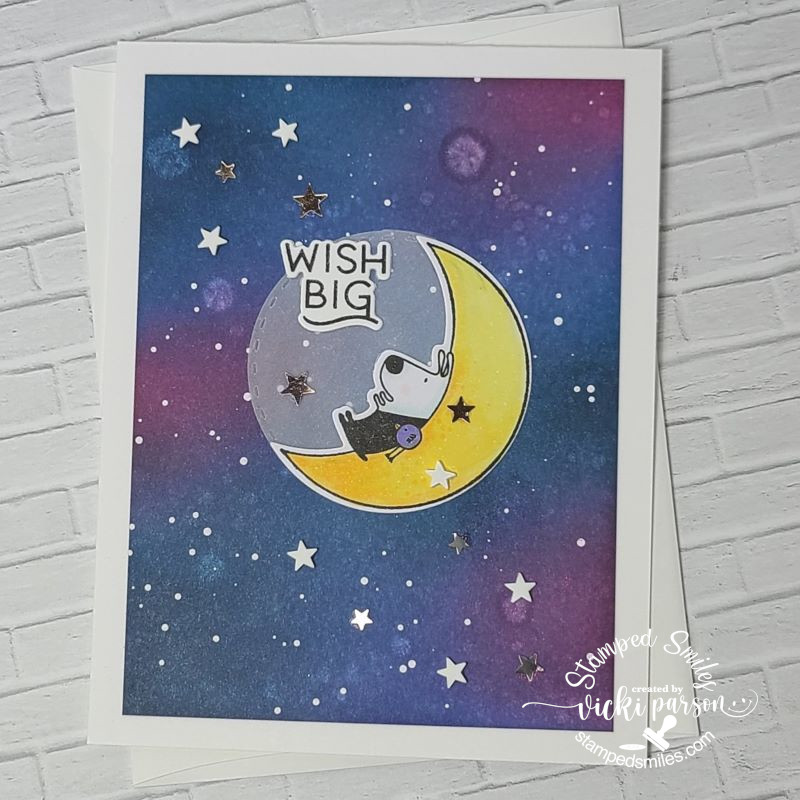
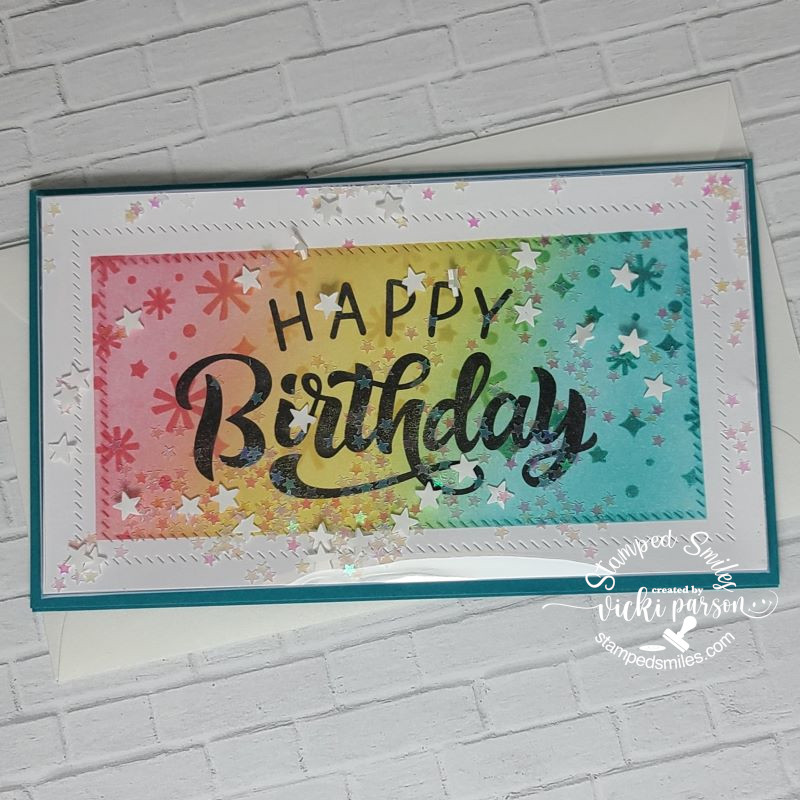
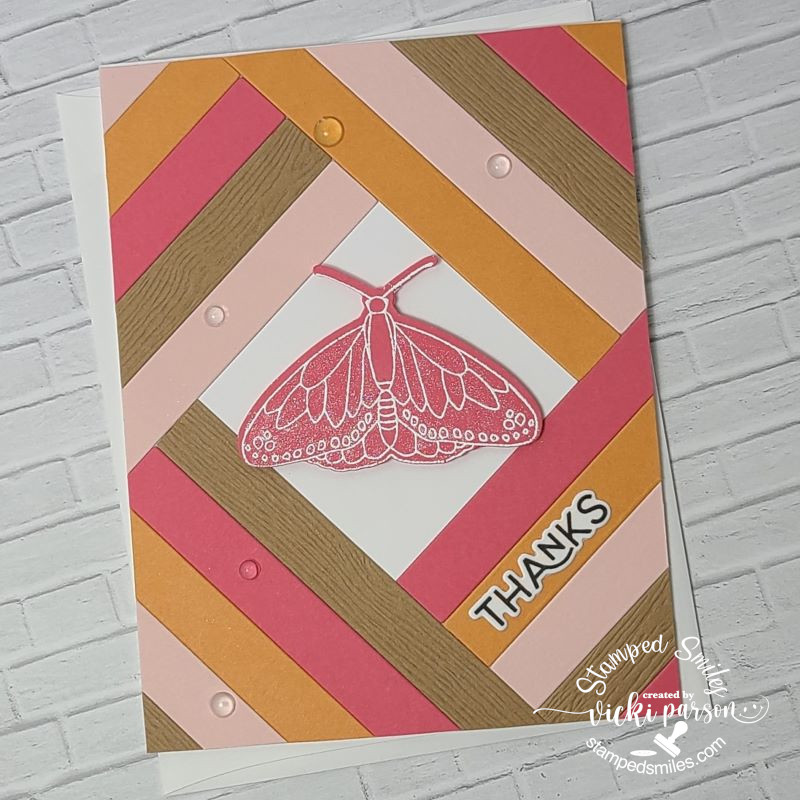
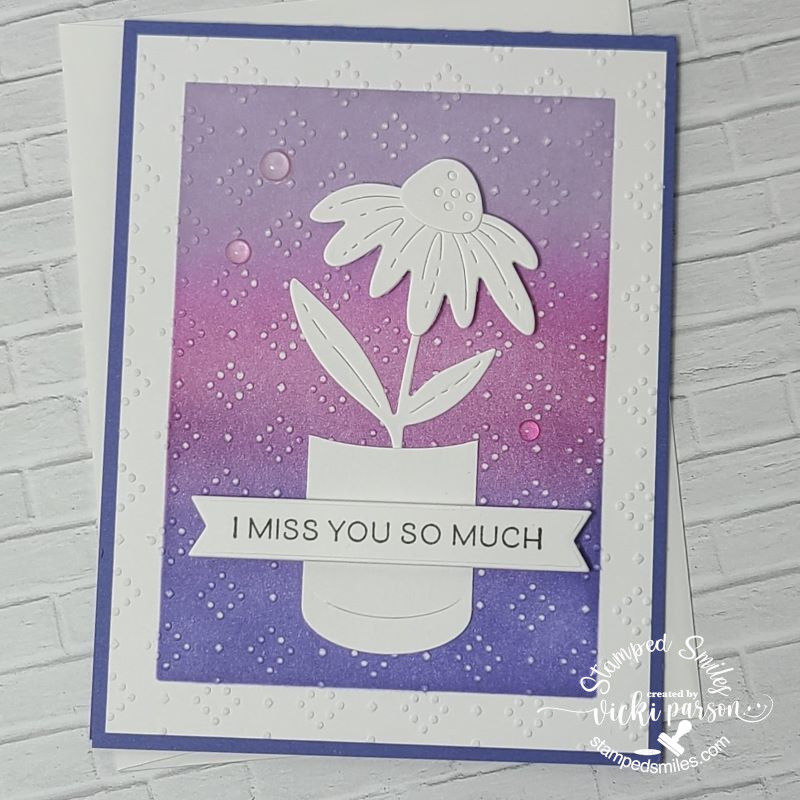
Happy April friends! We have finished March already and onto Easter very quickly approaching! I hope you’re enjoying all things Spring coming up your way! We’ve had several storms and we’re in the tornado season as well, so I hope everyone is staying safe out there whatever the weather. I do have some things that I had previously finished and wanted to share:
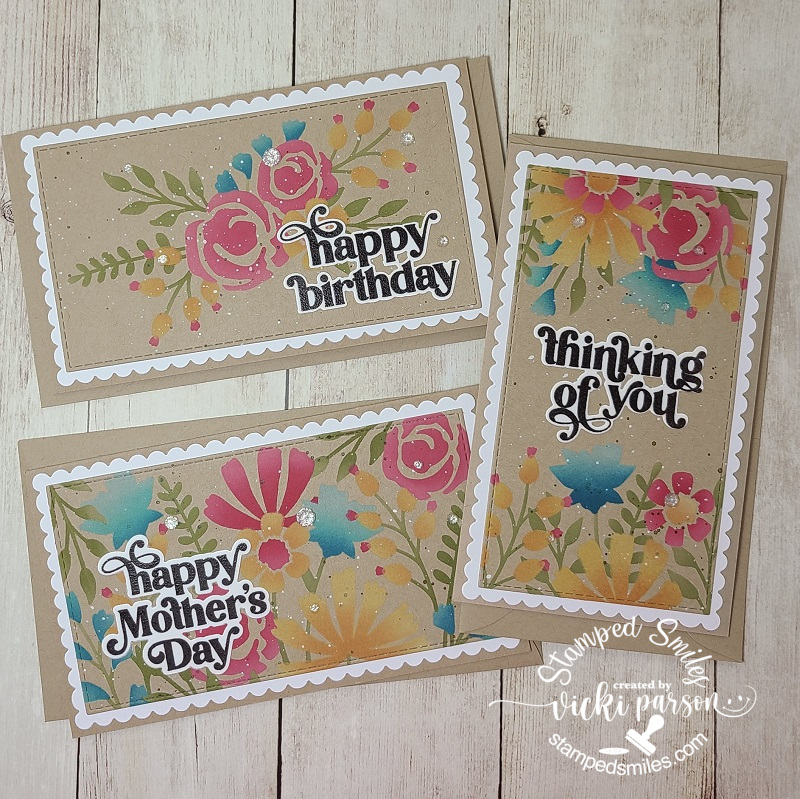
First, I wanted to share about the Virtual Stamp Joy Event by Taylored Expressions that I participated in a few weeks ago. I always have so much fun and enjoy the motivation that it seems to generate! I’m sharing them in the gallery below, so if you’re on my website post, then just click on each photo to enlarge it.
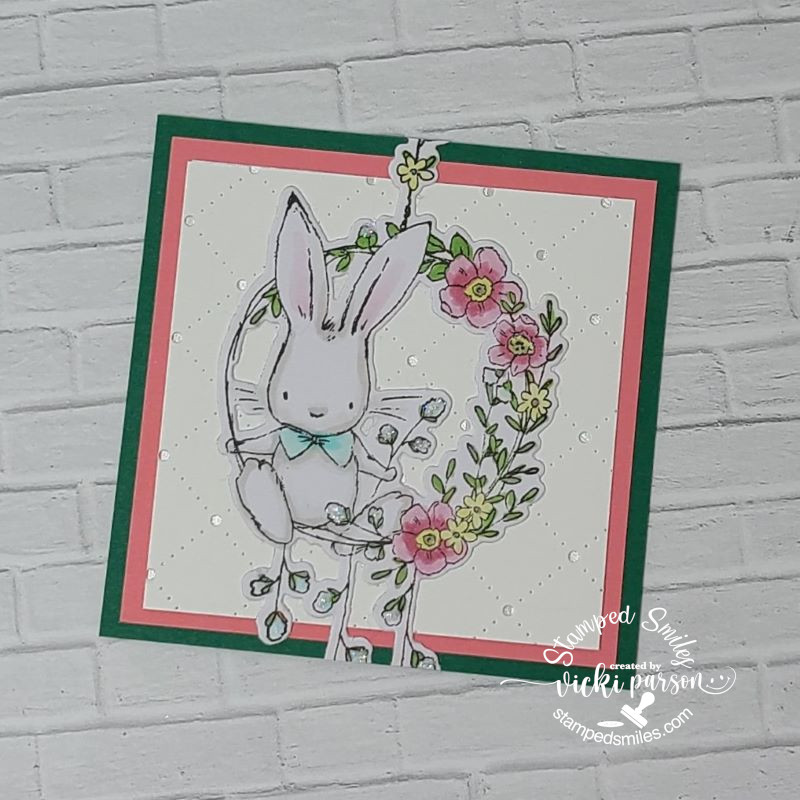
The first four photos were from a class using the same floral stamp set and the others are from the next day of make-n-take projects. Please let me know if you have any questions about any of them!
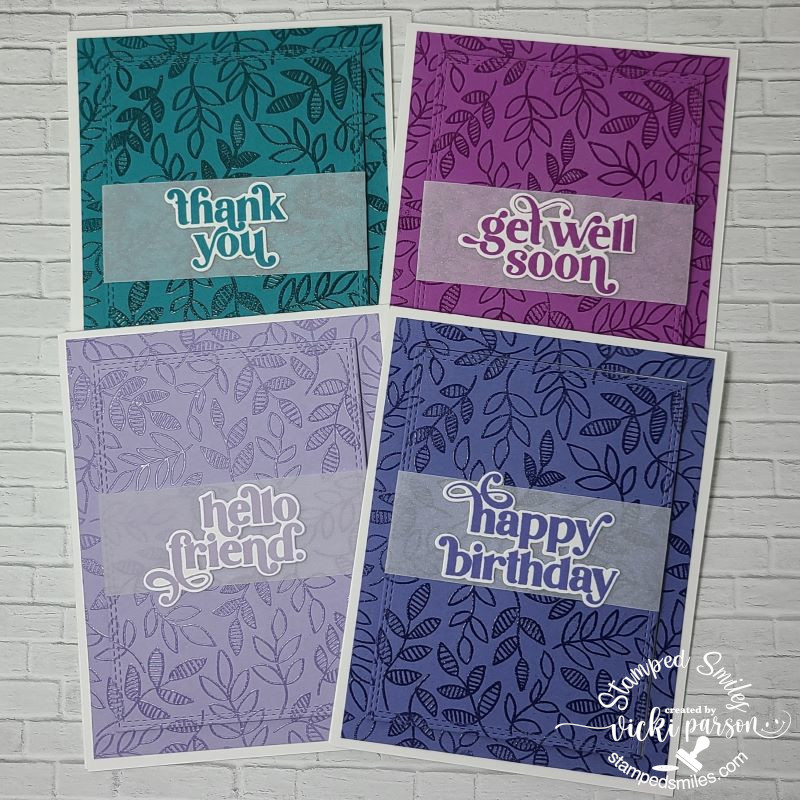
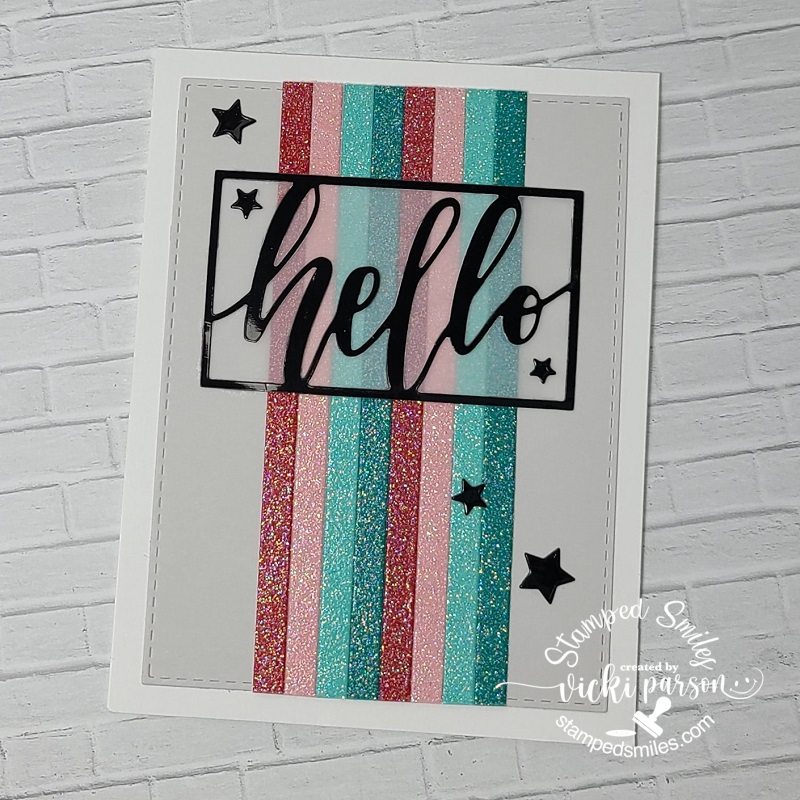
The last set of four cards were a “mass production” using a background stamp in different colored cardstock panels and clear heat embossing over them. The class sample had “hello” sentiment on each one, but I changed up the sentiments and have placed them in a card box to give them out with envelopes as a gift for someone.
Hope you’ve enjoyed the inspiration as much as I enjoyed putting them all together!
From the end of last year up until this last month, I didn’t have much time with the Holidays and everything going on, but as you may have seen in previous posts, I participate in a “square sampler swap” and when everyone sends out their squares, we then complete a home décor piece with all of the squares, so I thought I’d share mine finally completed:
CLICK PHOTOS BELOW TO ENLARGE
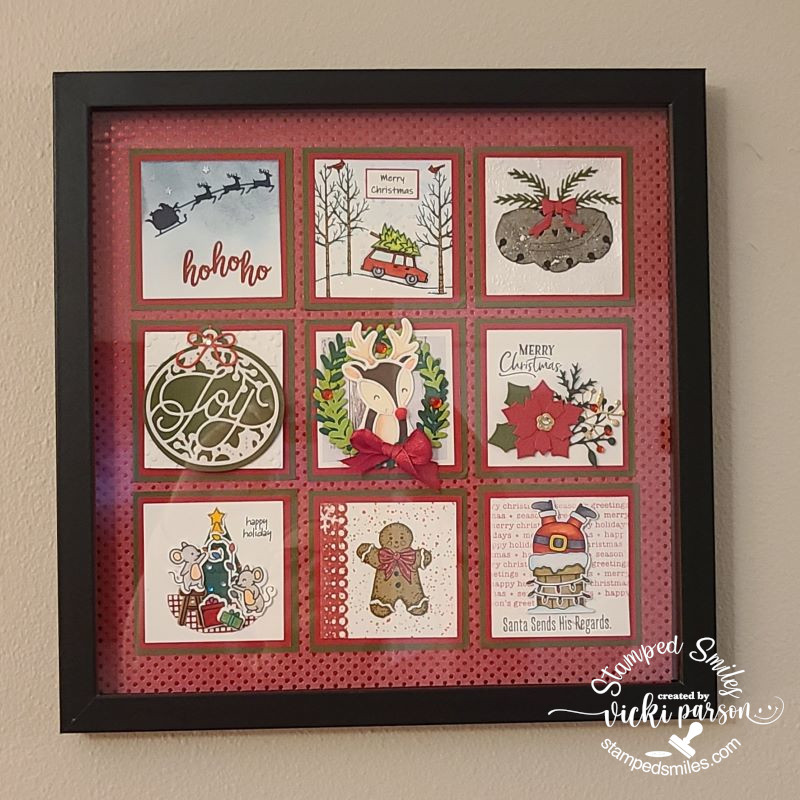
This was for the Christmas Sampler SWAP and you can see that I’ve used a black shadow box frame for my sampler and placed some red with red metallic dotted paper behind it. The square on the right is the one that I made. (I’ve used My Favorite Things products for my square.)
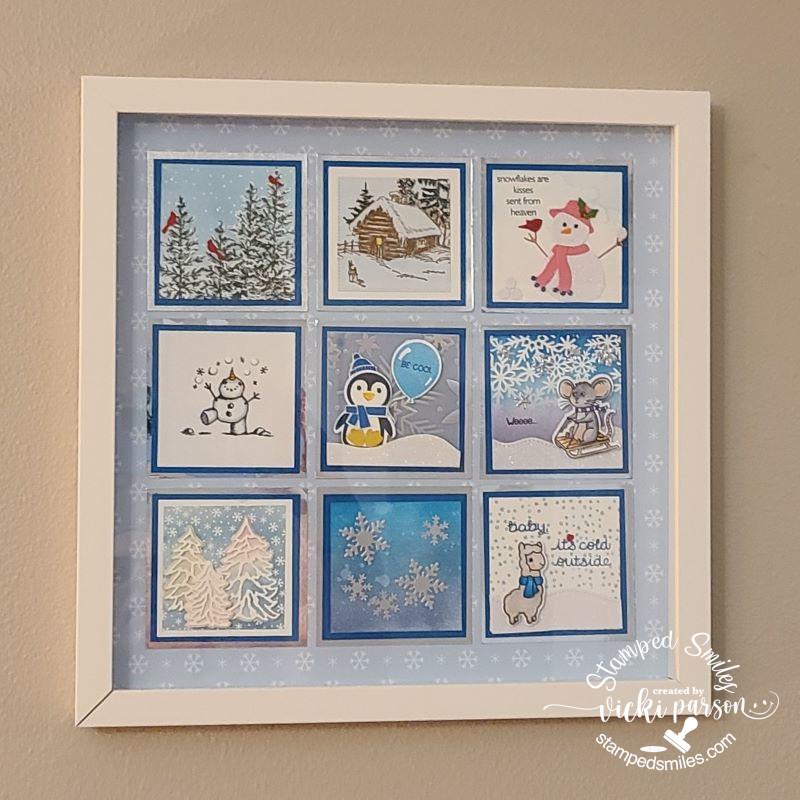
This was for the Winter Sampler SWAP and I went with a white shadow box for this one. I’ve placed some soft blue snowflake papers for behind my sampler as I thought it was soft enough to not look too busy. The square on the right is the one that I made. (I’ve used Inky Stamper products for my square.)
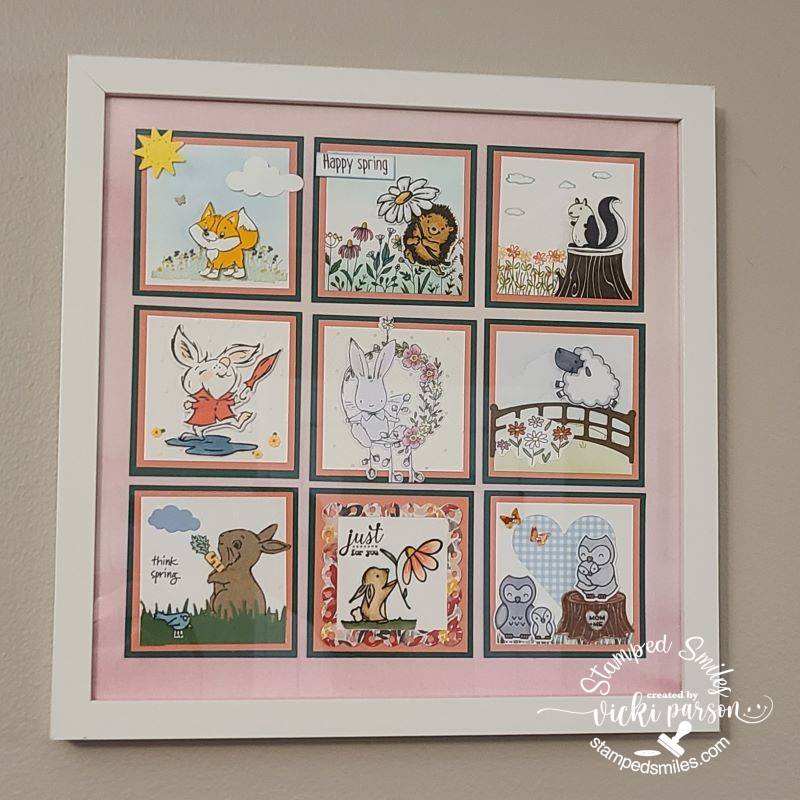
And recently we finished up our Spring Animals Sampler SWAP that I used another white shadow box for the sampler. I’ve added a piece of pink colored “Watercolor Wishes” paper from Lawn Fawn behind it. It looks a little off in the photo, but it looks better IRL. The square on the right is the one that I made. (I used Taylored Expressions products for my square.)
Not sure if we’re doing any more or not, but I had so much fun making the squares to swap with friends!
Lastly, I have a fun little thing to give to whoever is interested in these Taylored Expressions dies + foil-it panels package. (It’s not sold in stores anywhere as it was a free gift with purchase) I have an extra and so I thought I’d give it away to someone! Just leave me a comment below if you’re interested and I’ll pick someone from the comments.
Leave a comment below if you’re interested!
That’s all I have for today! Thanks so much for stopping in! I’ll be seeing you soon!
Happy weekend friends! It’s almost time for Valentine’s Day which means we share our appreciation to those that we love! I like to make cards that are great for any time of year and hearts are versatile enough to do this without being specifically Valentines. Here are a few cards that I’ve made with this in mind:
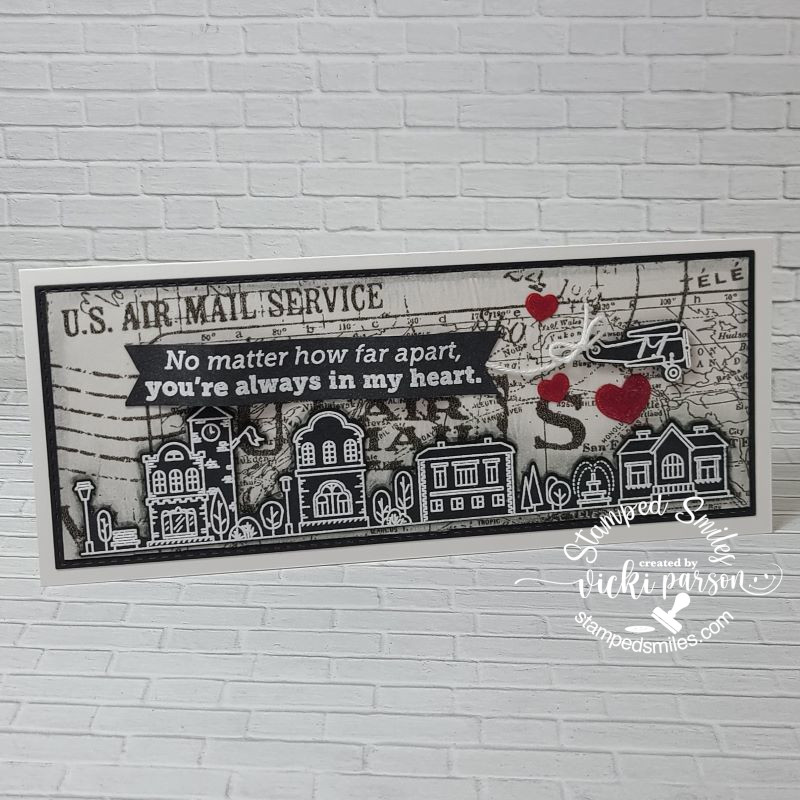
I actually participated in last week’s Craft Roulette #149 and the perimeters were: 1. tissue/vellum 2. collage 3. far away 4. three pops of red. So…while watching, I had decided that I was going for the Tim Holtz Postale Tissue Wrap that was already collaged with images. I decided because of the collage images, that I was going to find an airplane image to use with it and my thoughts turned to an older Simon Says Stamp card kit I had with the “Home Sweet Home” stamp set. I white heat embossed the airplane, the long building strip and the sentiment over black cardstock. It seemed to lend itself to a slimline card design, so that’s what I went with and used collage medium to attach the tissue to the background. Once it dried, I glued the die cut buildings strip and went around it with a Big Brush marker that I smudged to create the shadow effect.
I made a banner with the sentiment and attached a white string to the back and tied a bow with it to the airplane and popped up the plane with foam tape. The collage background panel was layered over a black piece that was attached to a standard slimline top folding card base.
Here’s a closer view of the details so that you can see them a bit better. My “three pops of red” came from 3 hearts that I cut out with red cardstock. The die was from the coordinating set with the stamps. I attached them around the airplane and covered them with a glitter brush pen.
If you’re interested in seeing what the Craft Roulette is all about, you can check them out live every Friday night around 6:00 pm CST. I will be doing this tonight as well! It’s just something fun to get your crafting thinking and I love that I can pull out my stash and use it up!
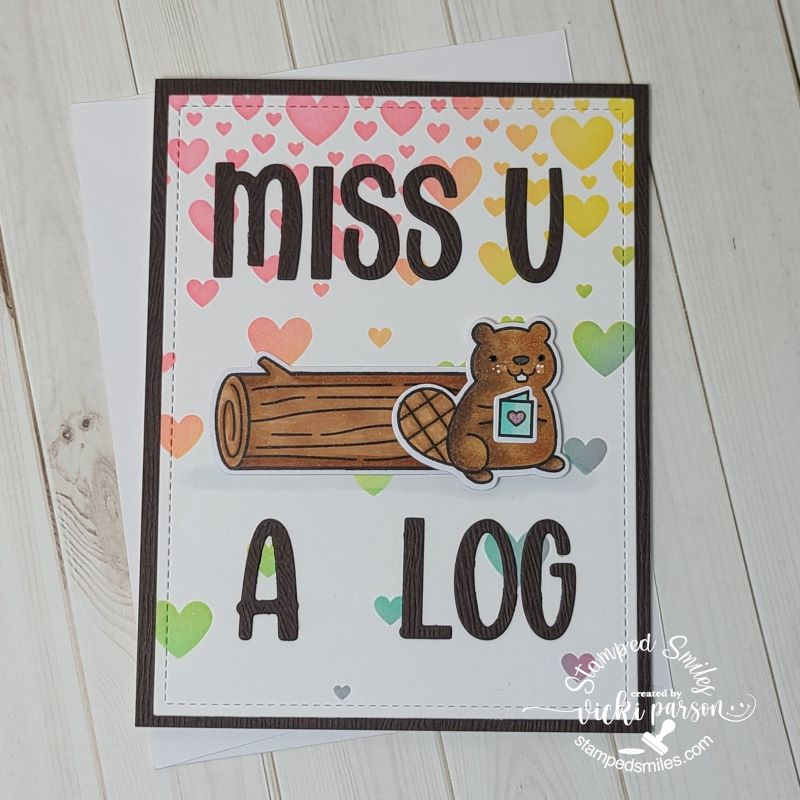
And of course I couldn’t help but follow along with the Lawn Fawn Create With Us “Wood You Be Mine?” class! There’s a little inside joke about Woodchucks chuckin’ wood with my son and I couldn’t resist sending him one of these cards. (CLICK ON THE PHOTOS ABOVE TO SEE THEM LARGER IF YOU’RE ON MY WEBSITE)
I just pretty much followed along with the same design as they shared in class with the exception of the background stencil. I didn’t have the same one they used, so I pulled out one from Taylored Expressions that is no longer available. but if you’d like to follow along with the class, you can check it out here.
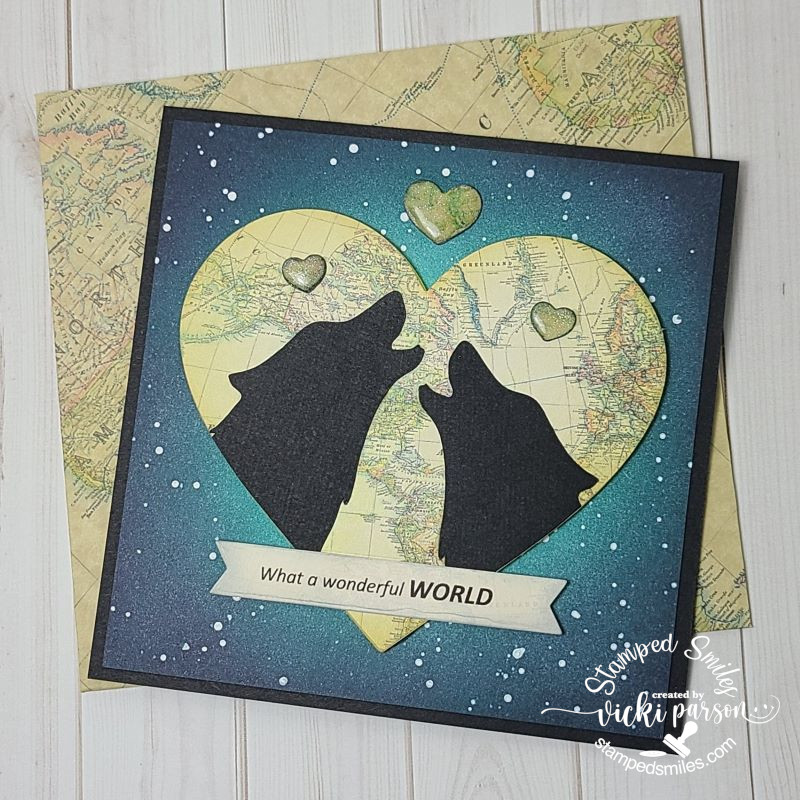
And lastly, I wanted to share a commissioned card that I made for someone that requested a card to give to their partner. Not really too specific other than they liked wolves and the “What a Wonderful World” by Louis Armstrong lyrics somewhere displayed on the design. So here’s what I came up with:
I did not own any stamps with wolves on them, so I turned to my Cricut machine to cut out a silhouette wolf and then I flipped it to cut another one so that they faced each other. I wanted to give the appearance of the wolf couple howling together. LOL I also had some digital map paper that I could print out to use for the hearts as well as making an envelope with it too.
The background was ink blended with the center being lighter toned in blue and then I splattered some white over top for a night sky or an “outer space” looking sky…however you’d like to interpret it, I suppose. I cut a large heart with the map paper and arranged the two wolves over it so that, although it’s the same image flipped, I can make them look like different wolves and then cut off the bottom portions. I popped up the large heart with foam. I also used the same papers to cut smaller hearts above them and added some glitter and covered them with crystal effects to make them shinny. I printed out the lyrics on my computer and cut it out in a banner shape to attach below the wolves.
Hope you’ve enjoyed my “love” creations today and have been inspired in some way! Thanks for stopping by!
Hello friends! Hope your week is getting off to a great start. I can’t believe that January is over and we’re starting a new winter month already, but at the same time I’m already feeling like this cold weather can move along faster to Spring!
Today I have a couple of creations that I’ve made using those Inky Stamper products and playing a little “Craft Roulette” too! Chelsea was on Craft Roulette and if you’ve never seen it play out in action, take a look at the You Tube channel to see what it’s about! She was on episode #146 and here’s my card that I’ve made with her perimeters:
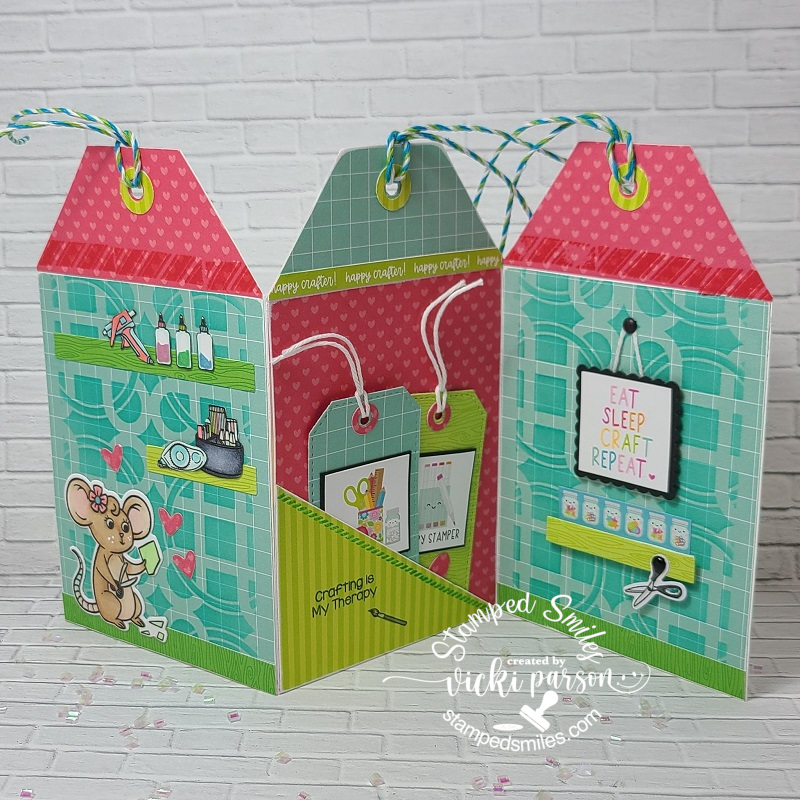
I had so much fun with this and I’ve never made a tag shaped accordion card before, but it was stuck in my head to give it a try and pull out the Inky Stamper Craft Room set to create it. The “Roulette Wheel” spun on: Double Tags, shelf/shelves, 2 shades of green and something in the background.
The two shades of green were easy with using the Doodlebug Paper Packs and adding in a few other greens to the coloring. I’ve also made two tags and placed them inside the pocket area in the middle of the accordion design. I used a stencil in the background of the other two panels and of course I added some crafty goodies to the shelves in Rosie’s craft room! The accordion card was easier than I had anticipated and just made a mini slim line size design by cutting off the edges to create the tag shape. The hole and reinforcers were made using punches and dies. You can see that I’ve colored up, cut out “Rosie” in her craft room where she is cutting her design going through her creative head!
When it’s all folded up and closed, this is what the card looks like. I could always add a sentiment on the back, but I thought this would be fun to send to a fellow crafter for sure! I just wish my shelves looked this organized! And I always try to use another thing from my stash as I pulled out lots of twine that gets thrown in a bin, so it was nice to use for the tops of each tag area. (Maybe on the back of the card, the crafter can add items to use up on their next project and display it! LOL)
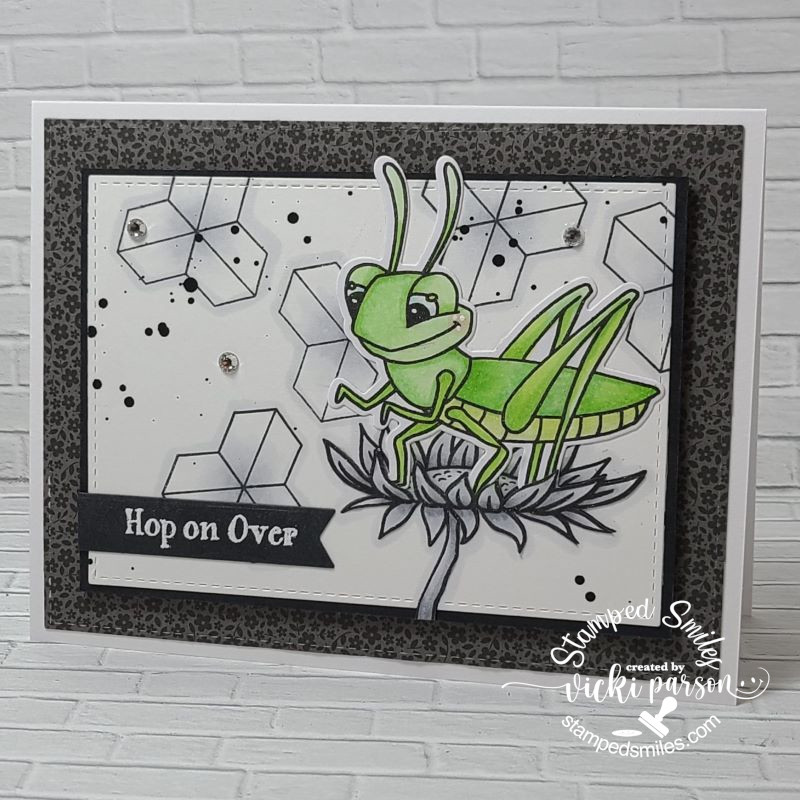
And here’s another card that I’ve done for the January challenge on the Inky Stamper Inkspiration FB Group which was to use: Black, white plus one other color:
I decided to pull out the Grasshopper set and make everything in the background black and white, but just color the grasshopper in green. All of the elements including the sentiment came from the same stamp set. I splattered some black paint over the background and the images were colored with some cool gray Copic markers. I white heat embossed the sentiment over black and cut it out with a banner die.
Behind the white panel, I took a piece of the black floral paper from the Doodlebug Floral & Graph Paper Pad and attached that to a white top folding A2 card base. It was a fun and easy card to put together!
Thanks so much for “hopping” over here today! Hope you’ve been inspired or smiled!😊
Hello friends! It’s been a minute or two since my last posting as I had been sick and then totally lost my “MOJO” during that point! So I was trying to get it going again with a few Halloween projects! I have been playing with some new Taylored Expressions goodies and I thought it would be fun to give away some TE stuff as well!😀 Stay tuned to the end of this post!
click on the photos below to enlarge them if you’re on my website:
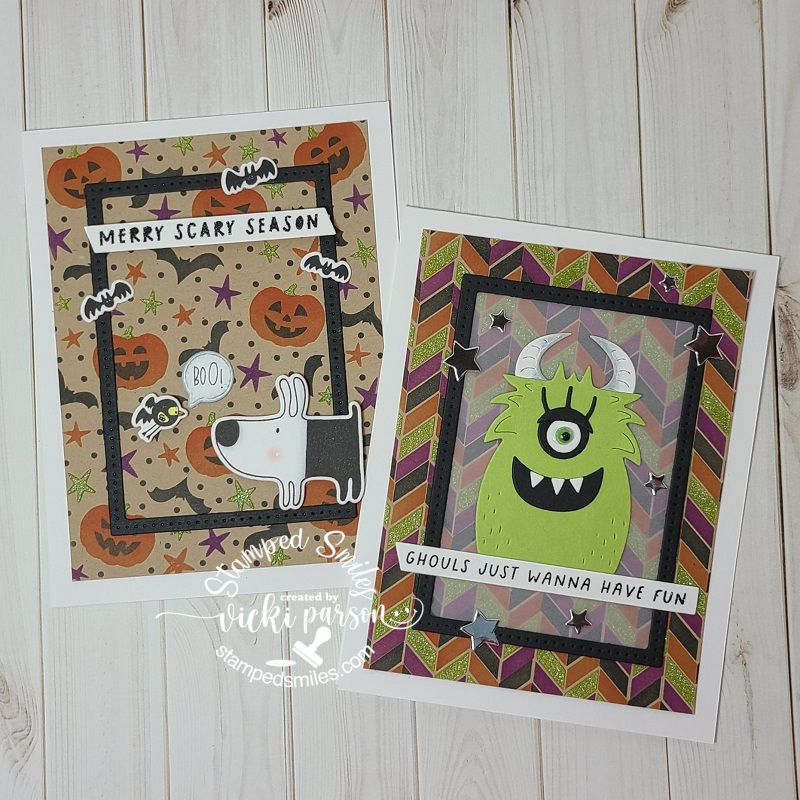
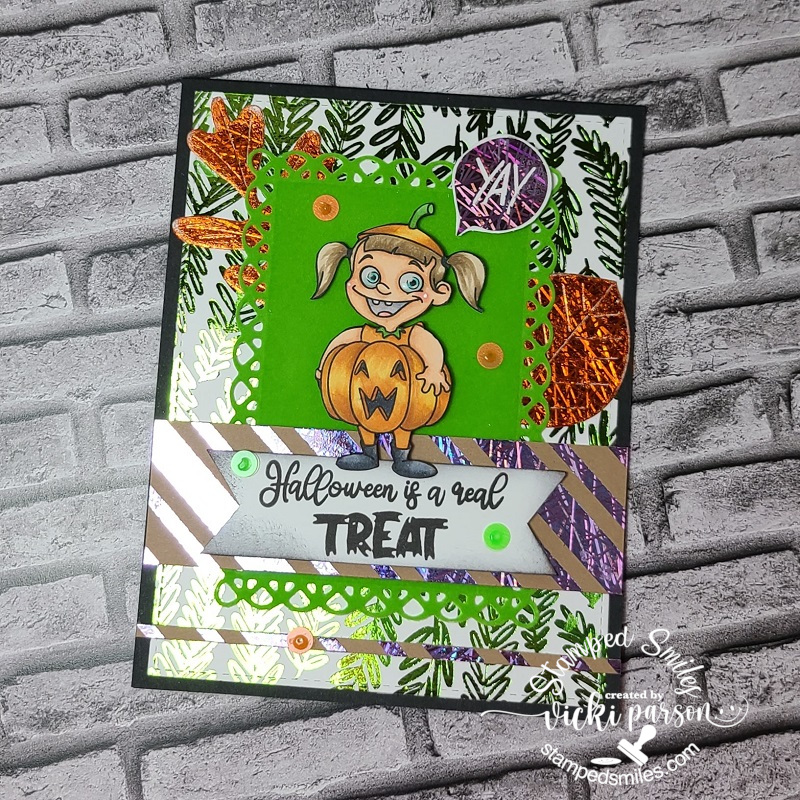
Now how cute are all of these critters, ghouls and creeps?! As you may remember from my last post, I had been having so much fun creating with the Taylored Expressions Create-in-Quads stencils, so I had my play with the Halloween Create-in-Quads with the makes above! I stenciled some black, candy corn, plum punch and lime zest colors, plus I went over the lime zest with some glow-in-the-dark glitter paste. The stencil quads make two A2 sized backgrounds as well as the cat and witch cauldron too! There is also coordinating dies to cut out the cat and witch that I used to cut out for the second set of cards. For all of the cards, I’ve used the TE Frame in Frame 3 dies (free from an order a while back) that was cut with some black cardstock. I’ve also used the TE Simple Strips-Halloween stamped and heat embossed with some black glitter EP and cut out with the TE Asymmetrical Simple Strips Die for each card.
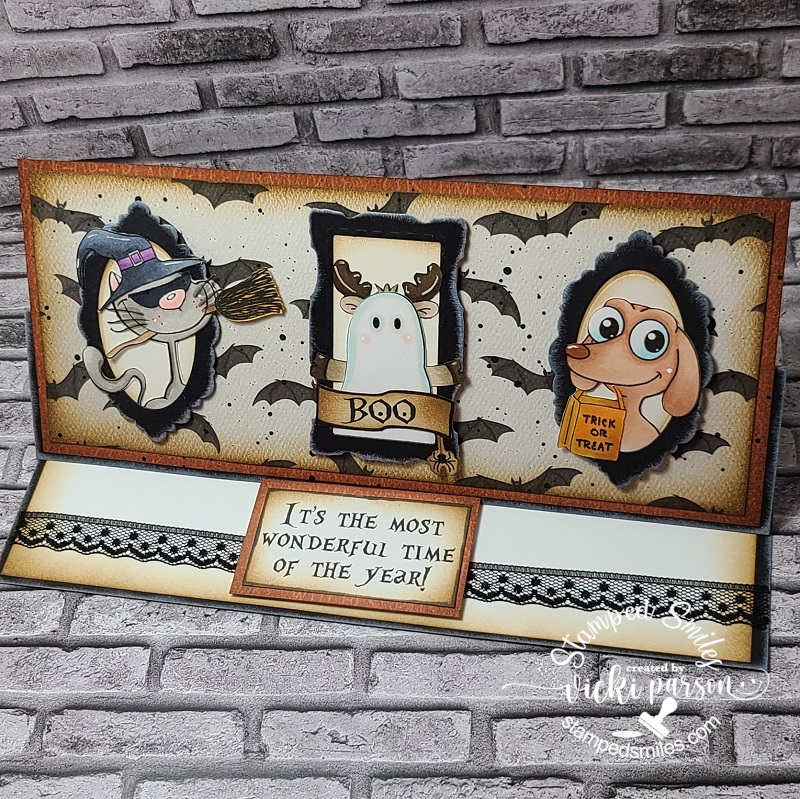
The set of cards on the left were created with the stenciled backgrounds and then with the black frames, I’ve added a character from a “free with purchase” Gus & Gertie Halloween stamp set. The bird saying “boo” is in a bat costume. 😅 I popped up the sentiment strip, bird and dog with foam tape. I die cut the “boo” sentiment with a speech bubble die from my stash. The ghoul card was made with the awesome TE Monster Squad die set. I placed a piece of vellum behind the black frame, so the ghoul stood out a bit more, die cut my pieces as I wanted and attached it right above the sentiment strip. I added a green googly eye as well as a few die cut stars from silver metallic cardstock.
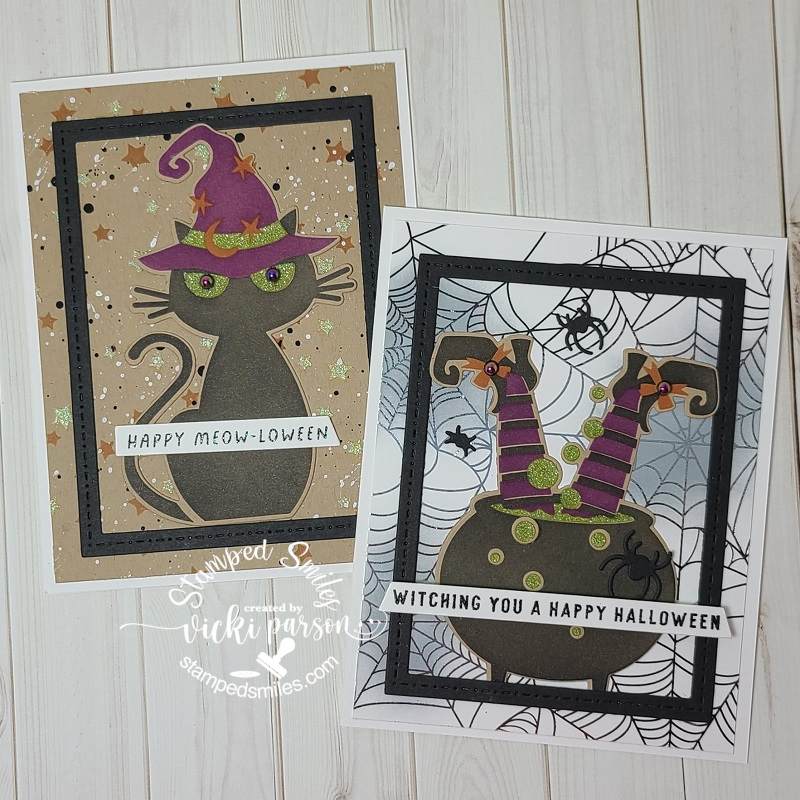
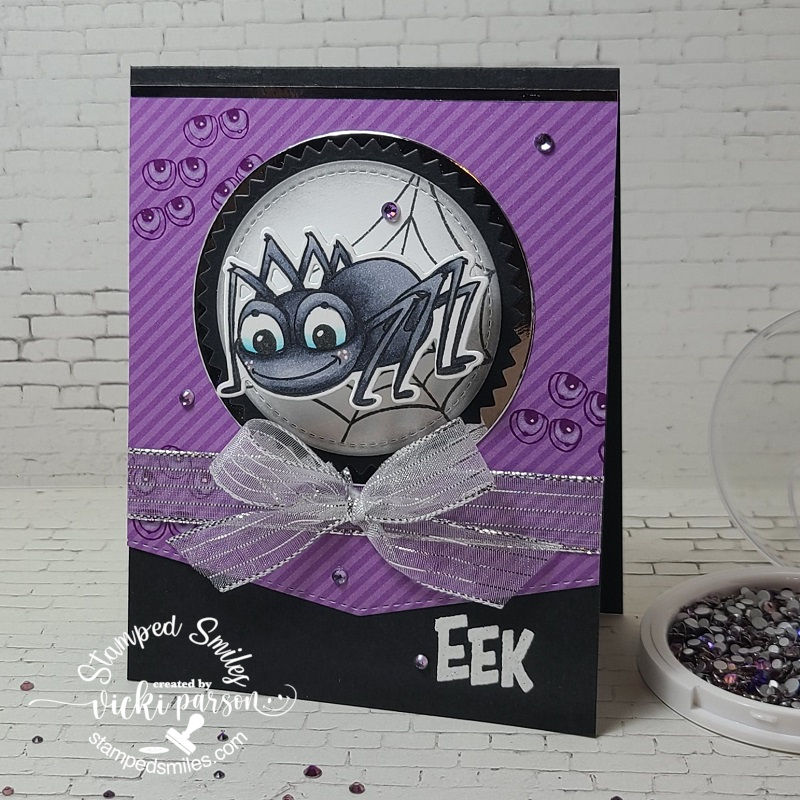
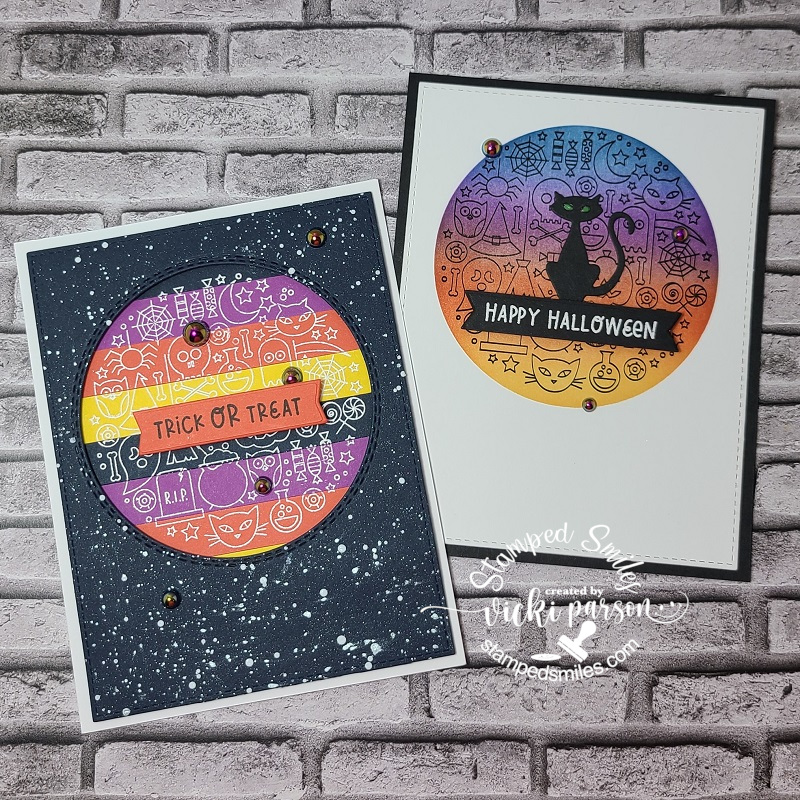
The set of cards on the right was put together with a couple of different unique backgrounds. On the black cat card, I used the TE Superstar Rotating Stencil and stenciled once with candy corn and only rotated once using the glow-in-the-dark glitter paste again. I finished it by splattering black and white paint over it. Topped it off with the black frame, the kitty and sentiment strip. I also used some Cosmic Drip Drops for kitty’s eyes. (These were also used on the bows of the witch’s shoes too!) For the witch background, I silver foiled one of the TE Foil It-Spiderweb panels and then ink blended some grey ink over a couple of the webs. I then added the black frame, the witch and the sentiment strip. Lastly, I added a couple of spiders cut out with the TE Little Bits-Spiders die set.
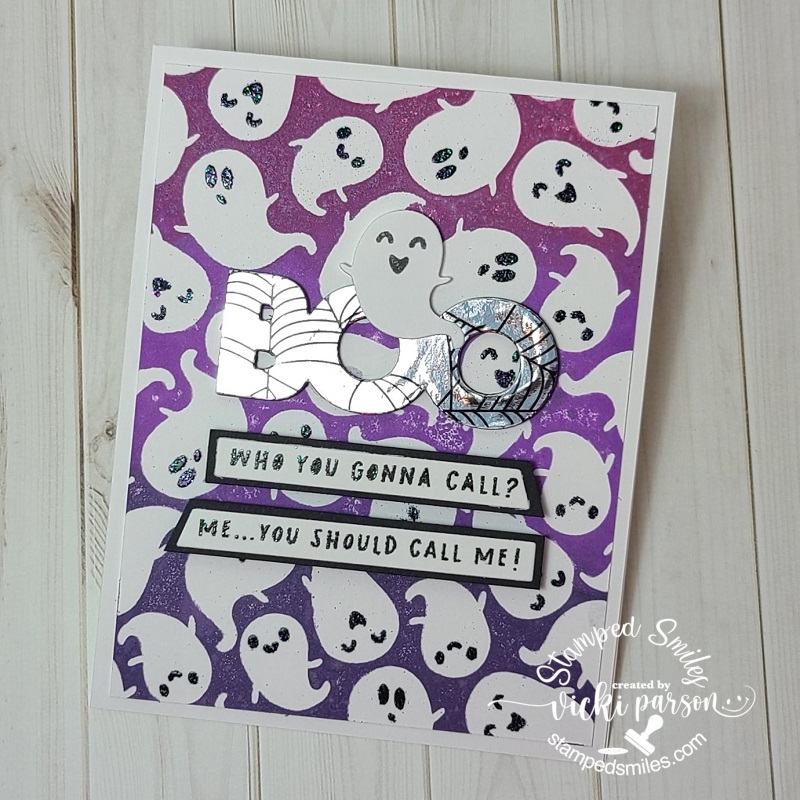
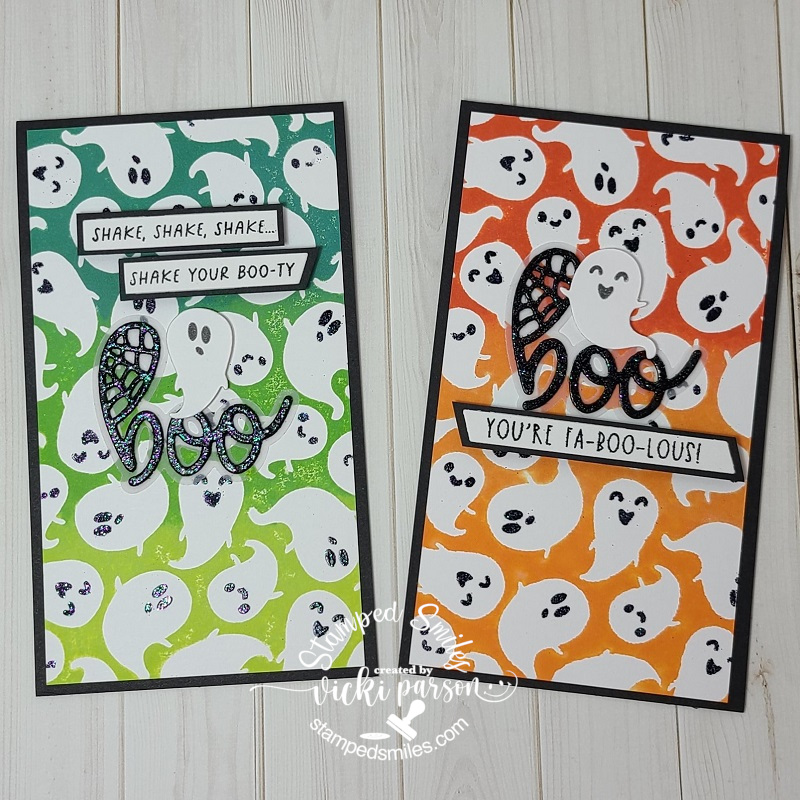
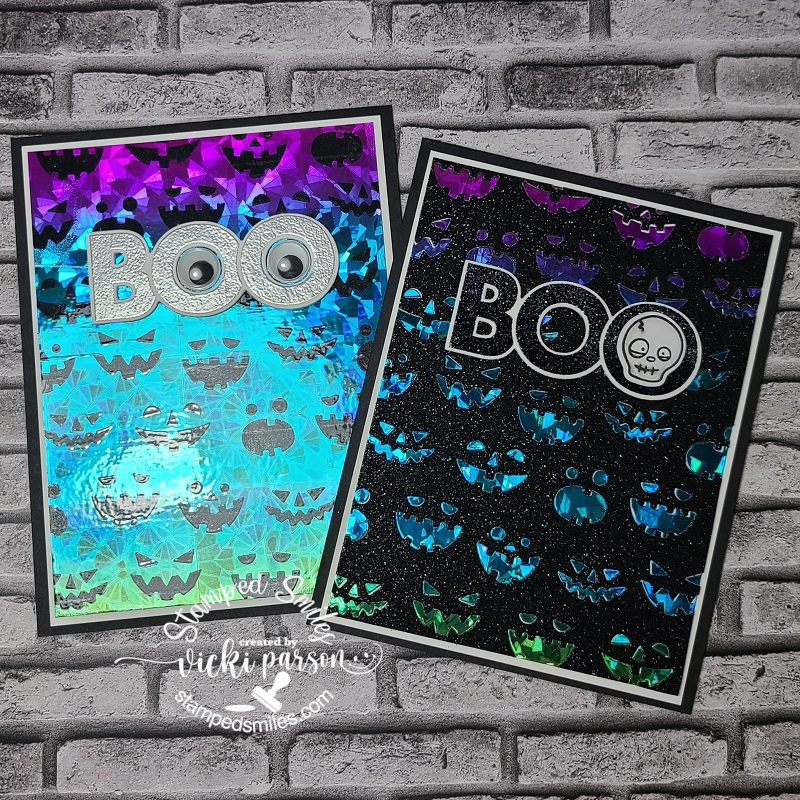
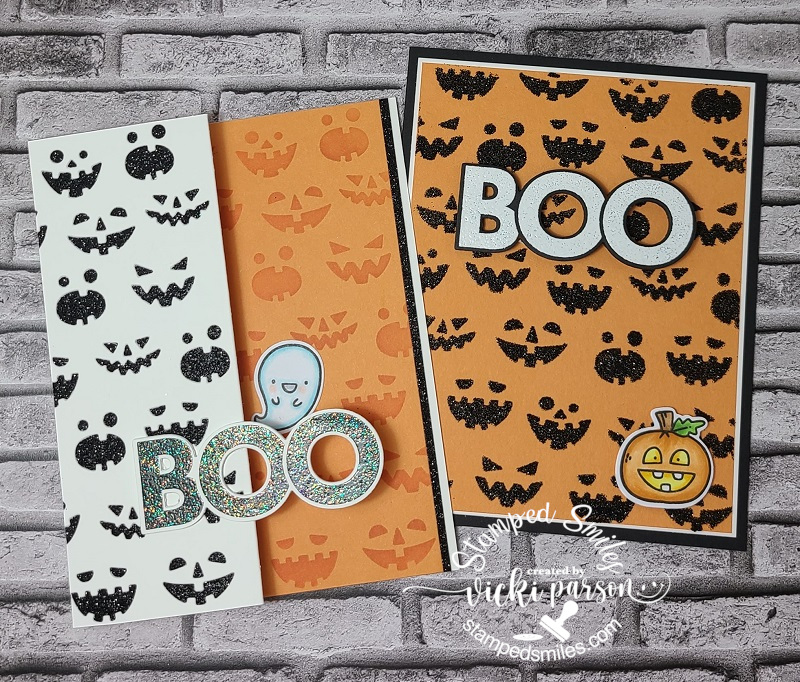
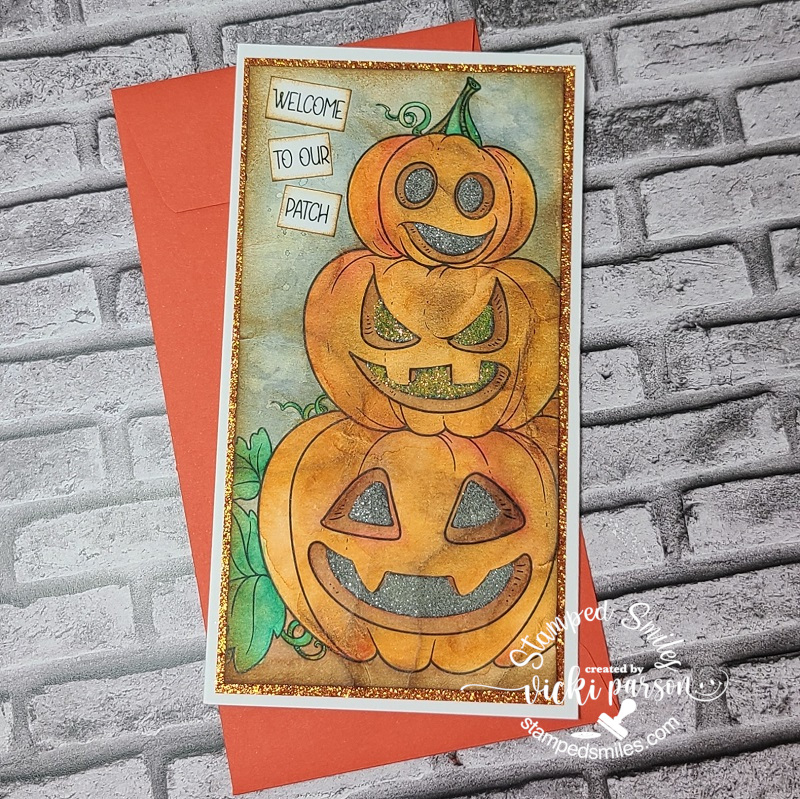
These ghosts make me smile every time I see them with those faces! 👻 For these set of cards, I pulled out the TE G-G-G-Ghost Stamp & Stencil Combo. I didn’t used any TE inks but pulled out my oxide inks for an ombre looking color to make these different backgrounds. The stencil was used for the faces by heat embossing some black glitter EP over VersaMark ink through the stencil. The purple is A2 sized and the set of cards on the right as mini slim cards. I continued using my sentiment strips that were previously used on the card sets above, but with these I’ve added a black layer that I just cut from cardstock. I’ve also used TE Ghost Gang Die & Clear Combo set to cut out the ghosts popped up around the sentiments and stamped their faces.
For the purple ghost card, I used the silver foil negative from the “witch spiderweb background” card and foiled a cut out TE On the Block-Boo Shadow die which was popped up with several layers of die cut black ones. I popped up the die cut ghost over the foiled “boo” as well as the sentiment strips.
For the set of mini slim cards, I did pretty much the same style as the purple, but for the “boo” sentiment I used the TE Boo Script + Backer and die cut 2 of the sentiments with black cardstock and then heat embossed it with the black glitter EP. I placed it over the vellum die cut backer and attached to the card front. I popped up the ghosts and the sentiment strips with foam tape.
**GIVE AWAY!!!**
(CLOSED)
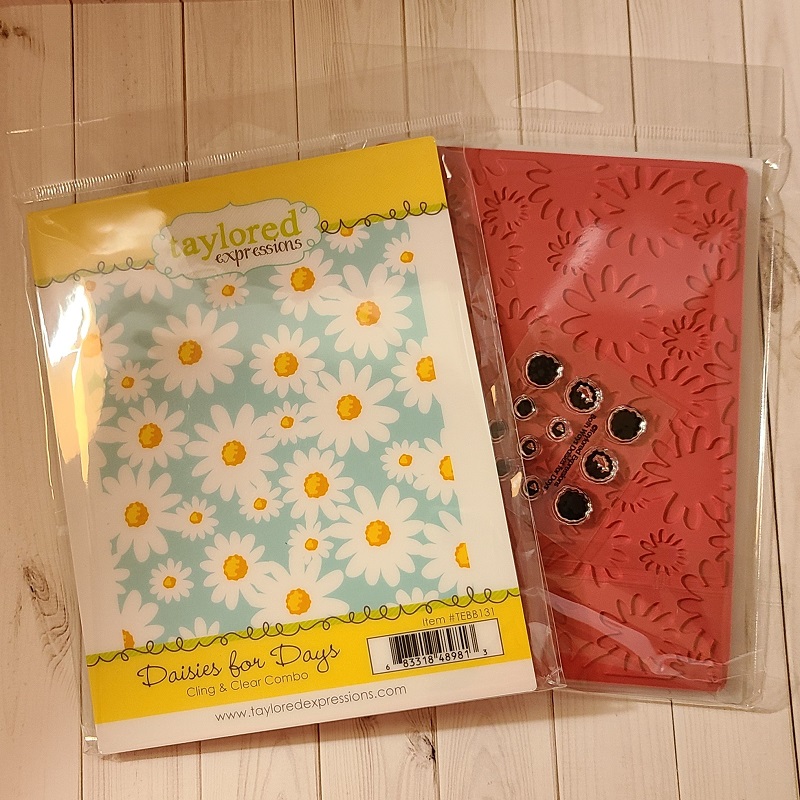
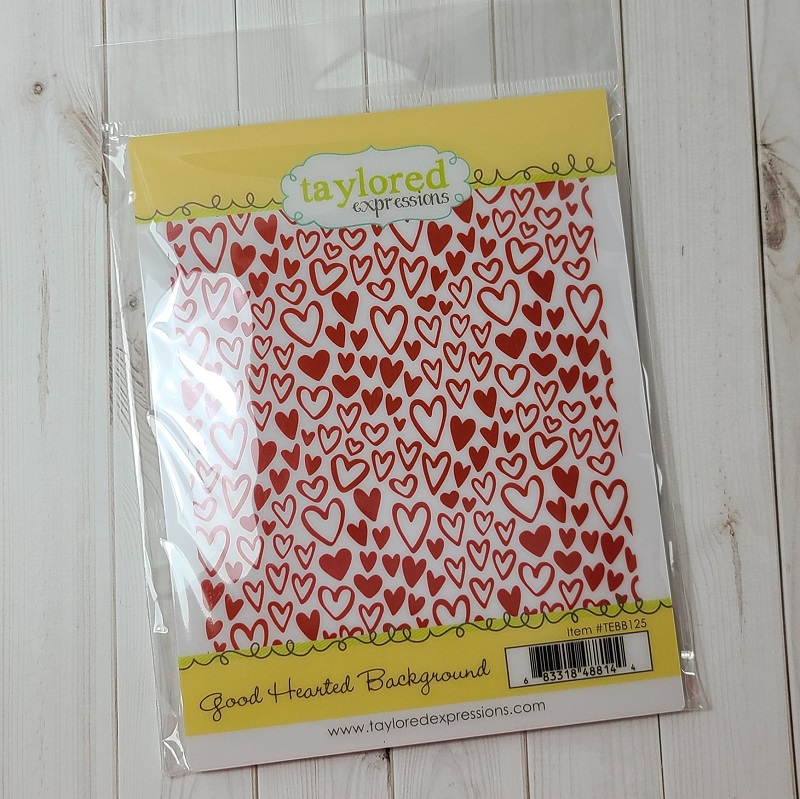
So, because I’ve placed some TE orders, I have gotten multiple sets (duplicates) of goodies!! If you or someone you know would like to get one of these stamp sets, please let me know in the comments below! (Which one(s) you want!) I have FOUR large rubber stamps to give away!! Check it out….
Click on each photo below to enlarge if you’re on my website!
I have TWO of these sets to give away!!
These are all background A2 sized rubber stamps. The last stamp photographed is “Winter Village Background” which measures approx. 6.25″ x 2.5″ in size. I have TWO of the “Daises for Days” to give out. (See the photo where it shows the clear stamp set included for stamping the flower centers.) The “Good Hearted Background” stamp is perfect for almost any occasion just by adding a quick sentiment with it! I also have a little “extra” to go along with each one of these to accompany the package too!
If you click on the names in orange above, you can see some examples using them on the TE website for ideas!
Just leave me a comment below if you’re interested in my give away and tell me which one(s) you’re interested in by September 22nd, 2022 which is the first day of Fall for us here in the U.S. This will give everyone time to see the post and tell a friend that might be interested too! – CLOSED!!!
Thanks so much for stopping by and sharing your support and inspiration with me as it helps keep me going! 😉
Hello friends! I hope that you are having a great week so far! After the little “heat wave” hit us, I’ve been enjoying some ‘nicer’ outdoor temperatures, finally. As you may have read in a previous post, I had been working on my son’s wedding invites as well as some thank you cards for them to send out afterwards. I will be sharing that later on, but today I have some other “mass production” that I’ve been working on in addition to those:
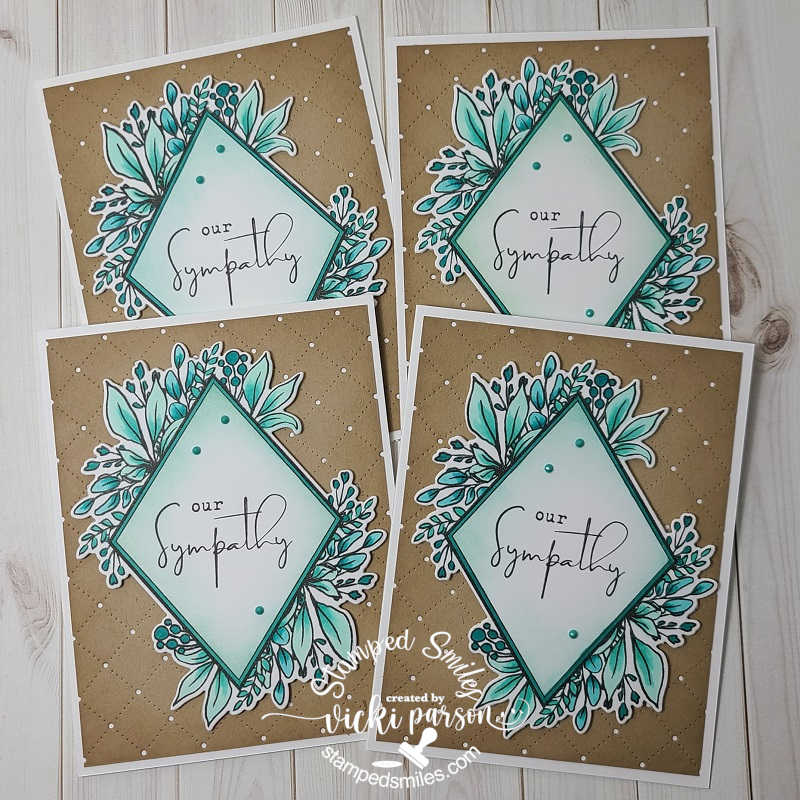
First up, I’d like to share a set of cards I’ve made for the Taylored Expressions Fans FB Group challenge for May which calls for “4-8 mass-produced cards. (similar or identical)” & the colors “Poblano Pepper with Confetti Cake“. I do not own the Poblano Pepper, but I do have a small cube of Confetti Cake ink.
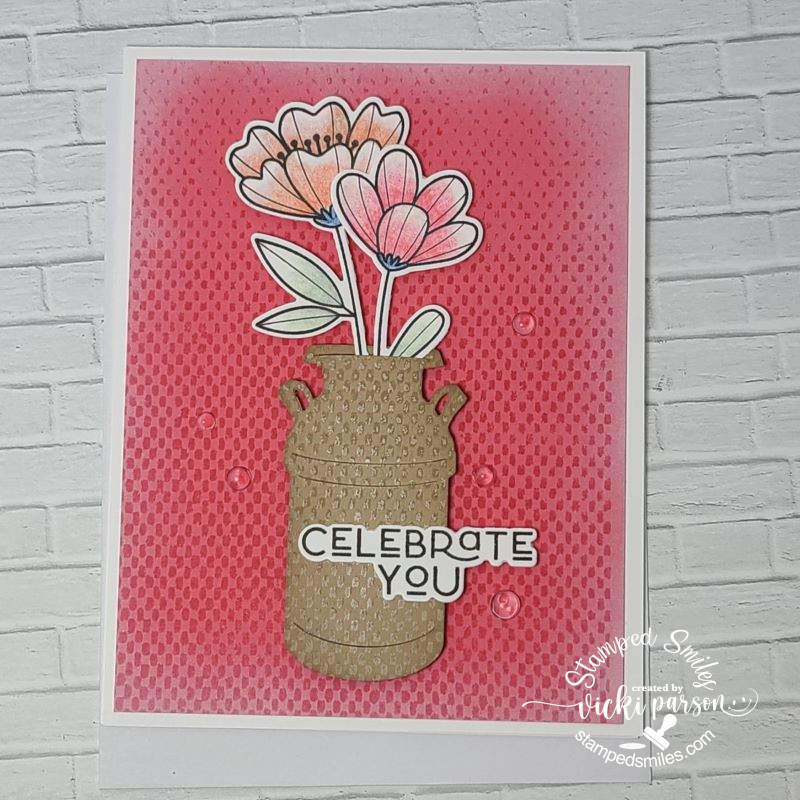
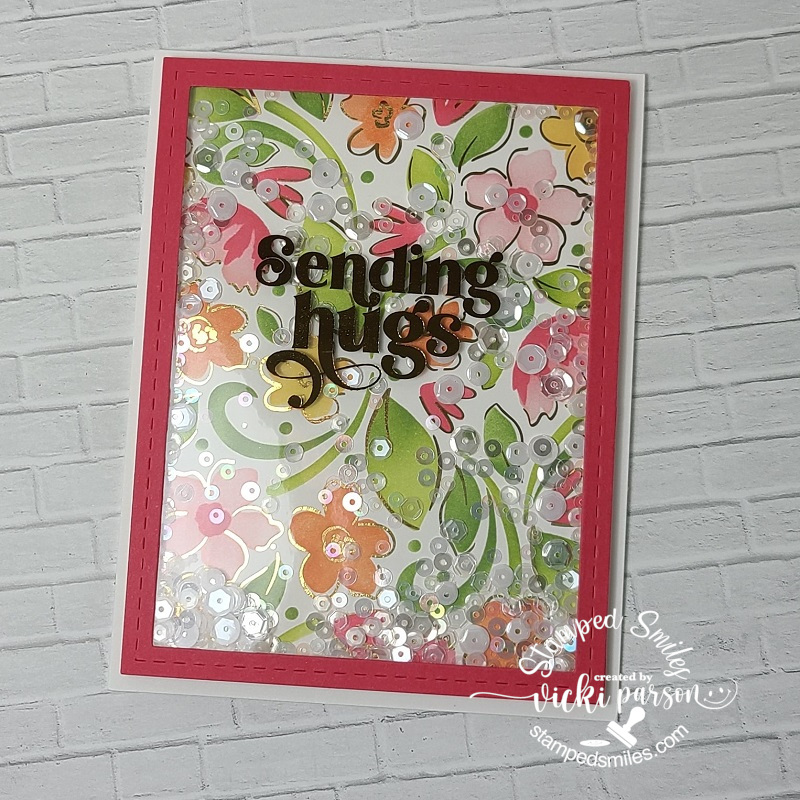
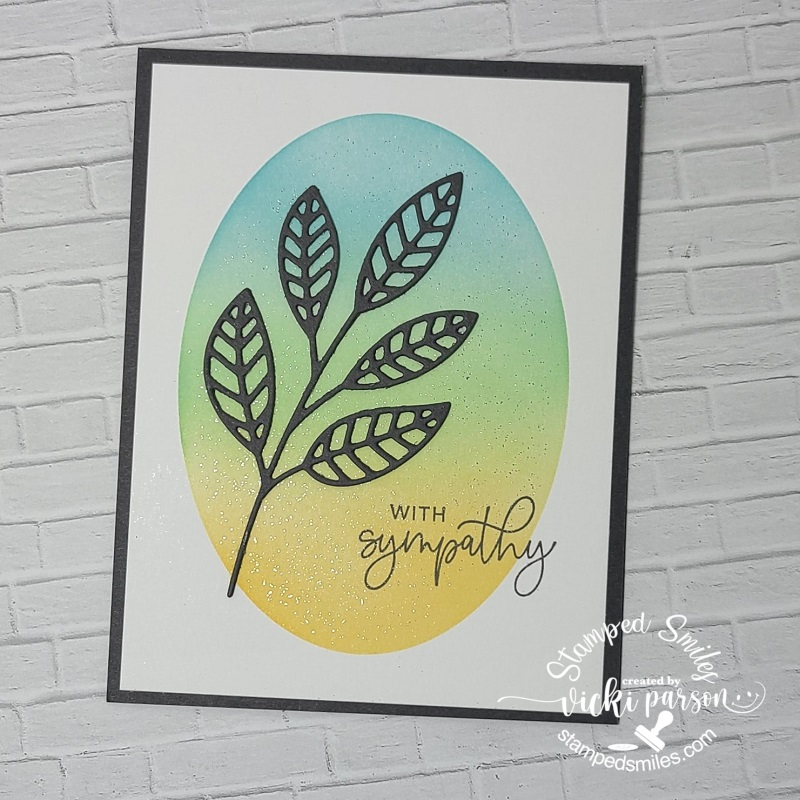
I’ve been wanting to create several sympathy cards so that I had them on hand instead of making at the last minute for one, so I was happy to get these made. I decided it was just easier to make them identical so that I didn’t have to decide how to arrange or cut my papers, etc. I’ve used the Taylored Expressions Diamond Botanicals with dies as well as the TE Diamonds Masking Stencils for the main image. The background uses the TE Pierced Lattice Cutting Plate over a piece of Toffee cardstock.
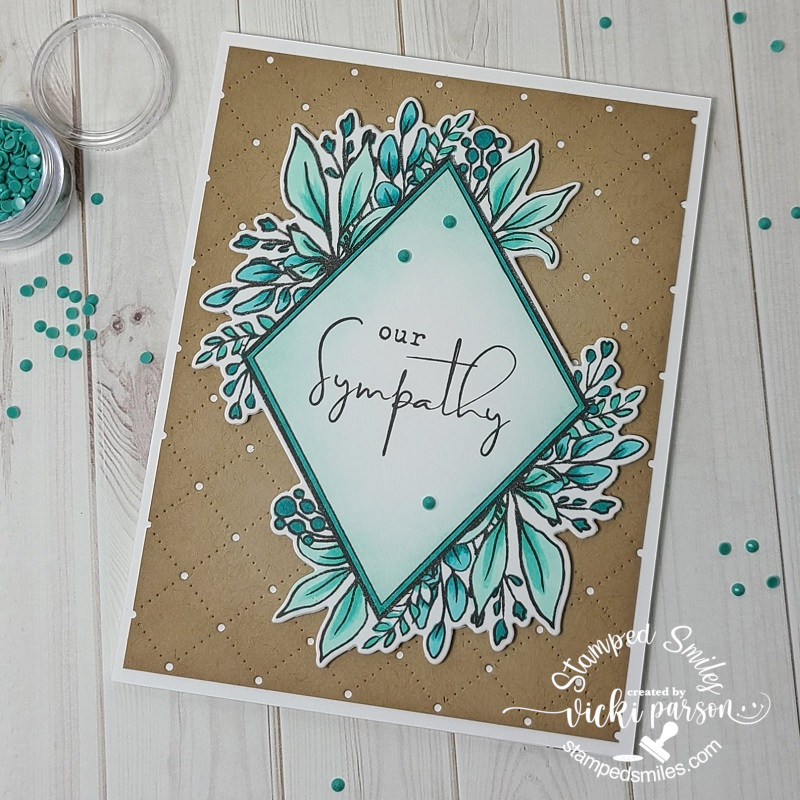
Here’s a close-up look at one of the cards. I stamped the floral image in black ink as well as the sentiment from the stamp set and then took one of the Diamonds masking stencils with some Confetti Cake Ink to softly blend around the edges of the sentiment area with it. I also used a blender brush to blend around the edges of the cut Toffee layer too.
Since I only had the Confetti Cake ink color, I matched up the coordinating colors with my Copic markers and colored in the image using only those color tones. I think it worked out great for sympathy cards. After I colored up the images, I used the coordinating die cut and popped it up over the Toffee cut panels with foam tape squares and then layered it over a side folding white A2 card base. I finished each one with some of those coordinating TE Pastel Tiny Diamonds. (Although the suggested listed coordinating colors on the website don’t have the Poblano Pepper or Confetti Cake, I thought it matched up rather nicely to this anyway.) I think these cards work out great for mailing too.
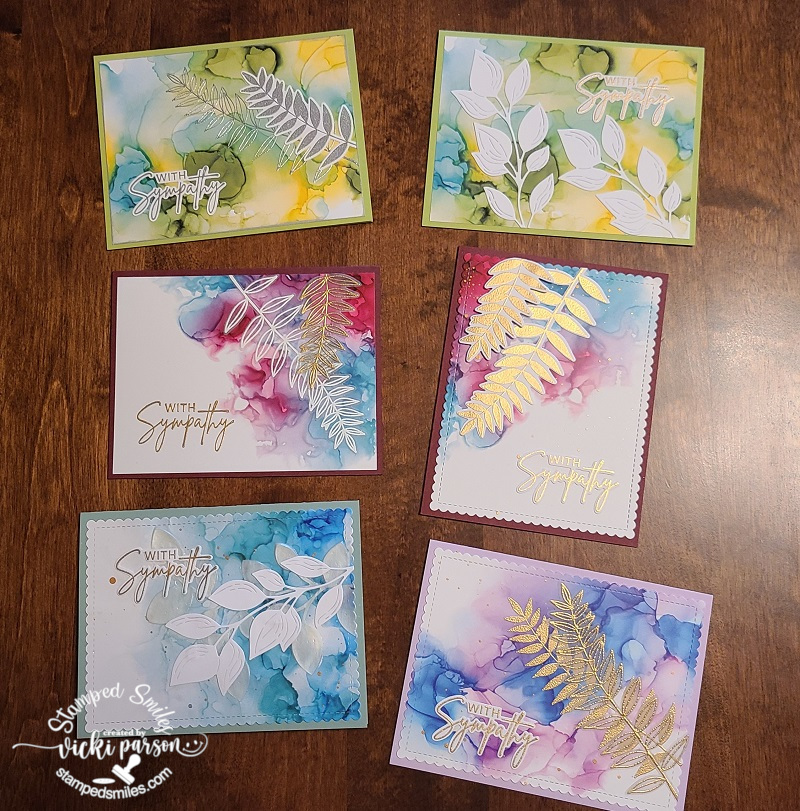
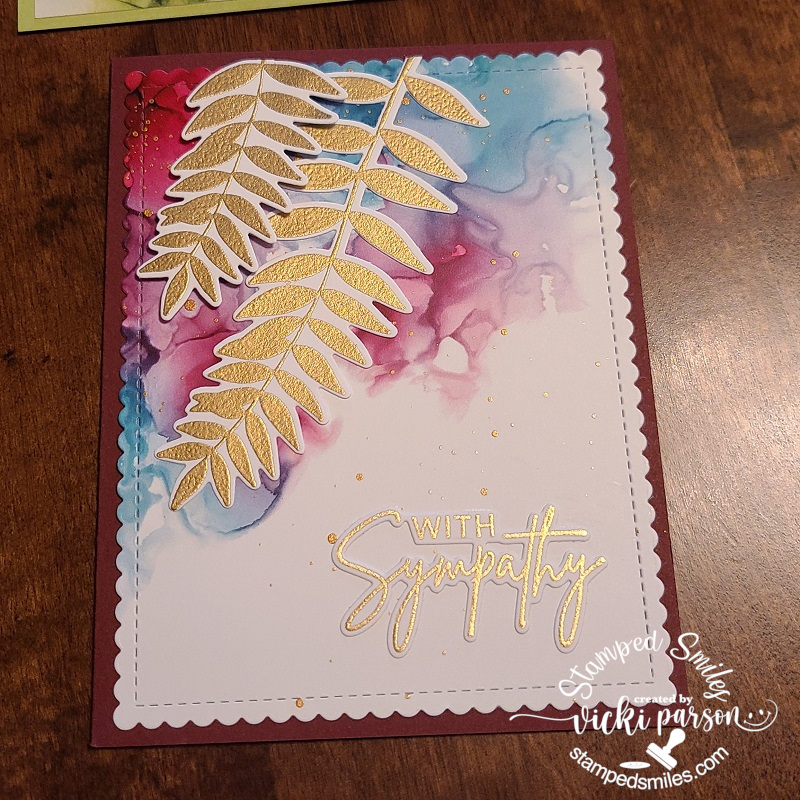
And speaking of sympathy cards and Taylored Expressions, I thought it would be great to create a nice gift set too:
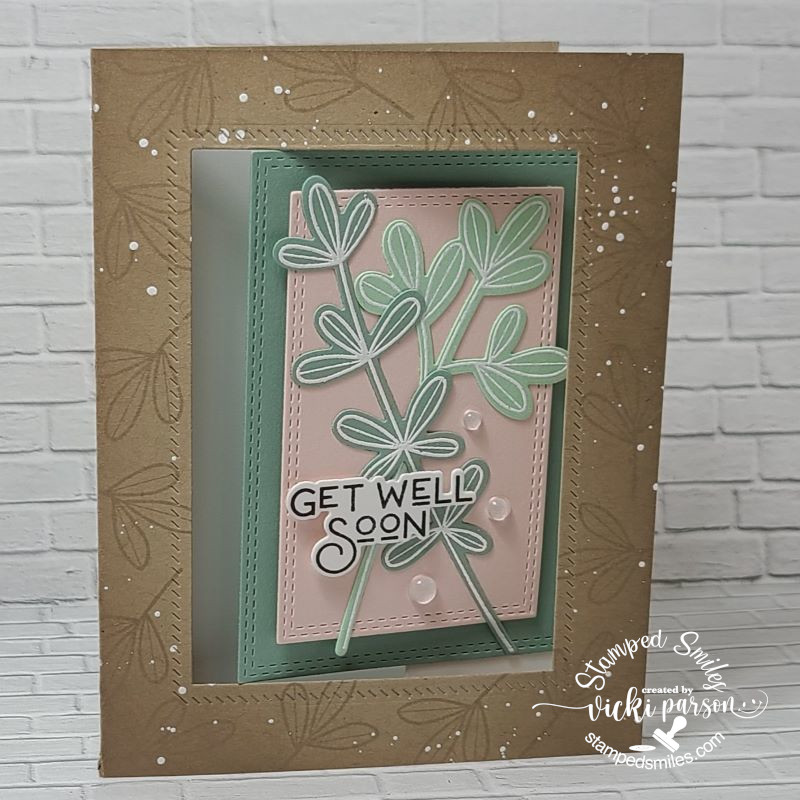
If you remember one of my previous posts, you may remember where I created a greeting card gift set (CLICK HERE). I’ve went along with the same idea here and made them all sympathy related cards using my own acetate box and some Taylored Expressions products. These were all quick and easy to pull together using the Taylored Expressions Done for You Alcohol Ink Background Panels along with a previously released card kit stamp set/die.
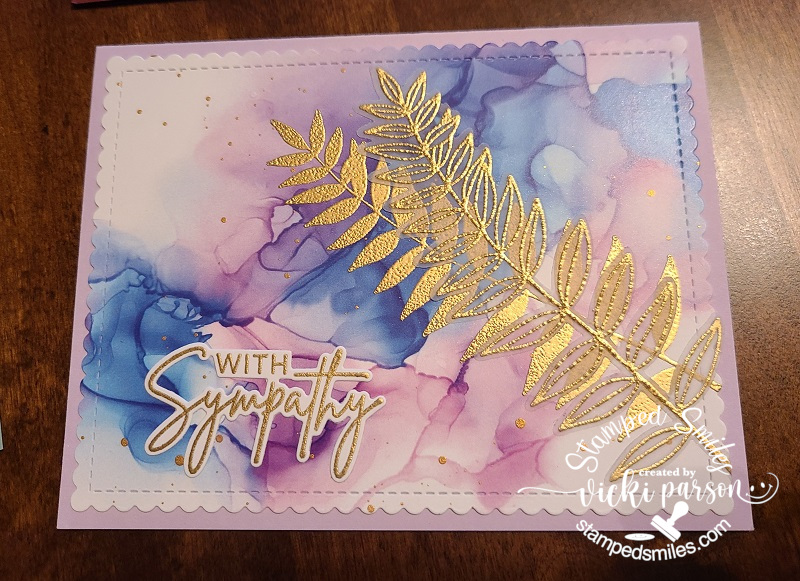
I decided to heat emboss several of the fern images with white, gold and silver over a few of the panels, some over white and vellum and then cut out. I placed them along with the heat embossed sentiments cut out and arranged them over the panels. I matched up the cardstock that I had from my stash with the panels to create the completed cards.
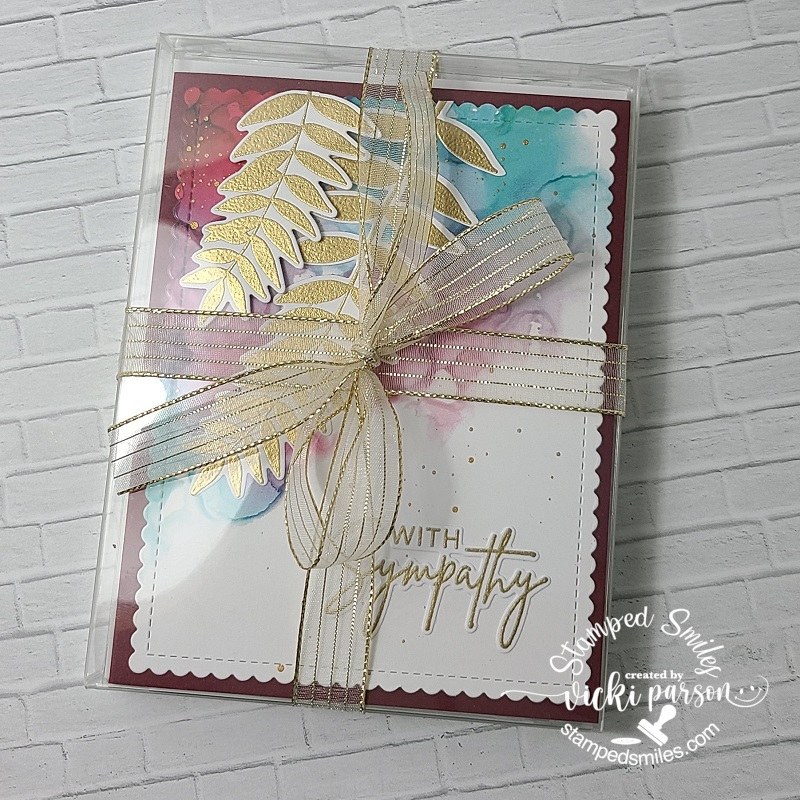
Here’s a gallery of a few of the cards up close along with the finished gift box tied with a ribbon: (Just click on each photo from my website to see them enlarged.)
I think this will make a nice gift for someone as I always hear people saying they never have a sympathy card on hand when they need one or for those people that don’t make their own cards too.
And lastly, I’ve made a couple sets of mini slimline style cards using the Taylored Expressions In the Garden-Triple Slim Layering Stencil:
I quickly fell in love with this quad type of stencils especially with these gorgeous florals! I love the way these floral panels are different from one another, and you can stencil them all up with the same color in one pass! I needed a couple of Mother’s Day cards, so making all of these at once sure came in handy for bonuses too!
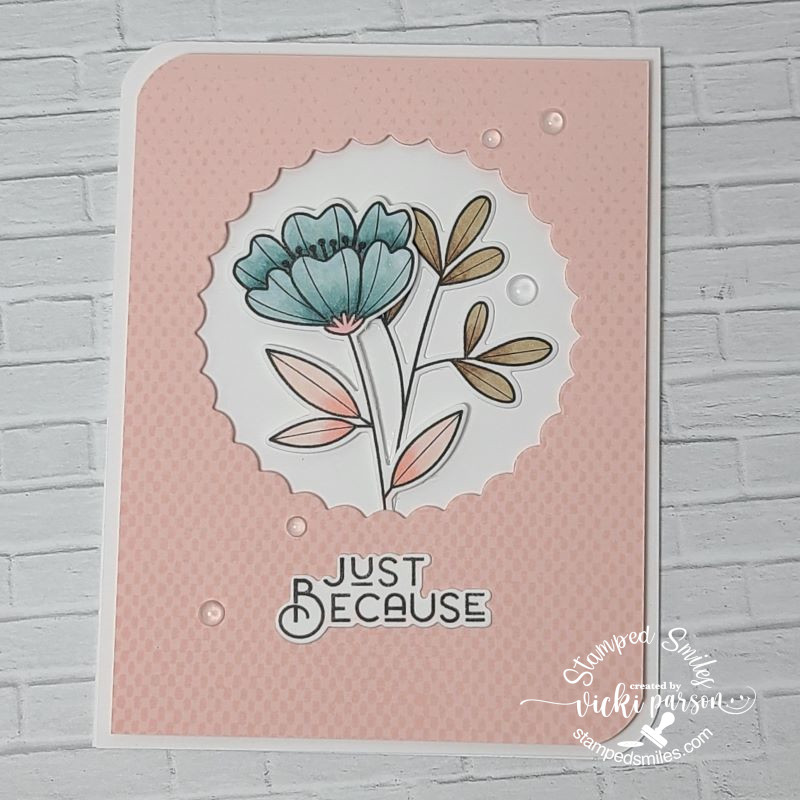
Using the “craft-along” video from Taylor and Heather, I used the same, or similar colors that was used, added my black splatters and then used the TE On Occasion with dies as well as the TE Get the Word Out-Mother’s Day with dies for the sentiments where I white heat embossed over black cardstock and cut out. I just glued to the panels and attached each panel to a white mini slimline card base.
And then here’s another set of mini slimline cards using the same products as above except I used Toffee instead of the white cardstock for these. I also stamped the sentiment with dark brown ink over white cardstock and then cut them out to place over the stenciled panels.
I also used both dark brown and white paint to make the splatters over these. I also used the TE mini slimline stitched and scallop die cuts for these cards and then layered them over top of a Toffee mini slimline card base. I’ve also added a few TE white rhinestones for a bit of sparkle too.
I also think that these would make great greeting card gift sets as well! So, then it’s just a matter of which ones to keep and which ones to give away as a gift!?🤔
Hope you’ve enjoyed my mass production post today or have been inspired in some way. Thank you so much for taking the time to drop in and say hi as I enjoy hearing from you!
Challenges:
Creative Friday – No patterned paper (top set of cards only)
Colour Crazy Craft – Anything Goes with coloring (top set of cards only)
Hello friends! It seems that I have went MIA on you, but I promise I’m still here! I’ve been really busy “Behind the Scenes” as they say and have many things going on at once that I’m trying to juggle, but I do have TONS of things to share that I’ve been doing and hope you enjoy seeing them! (LOTS of photos!)
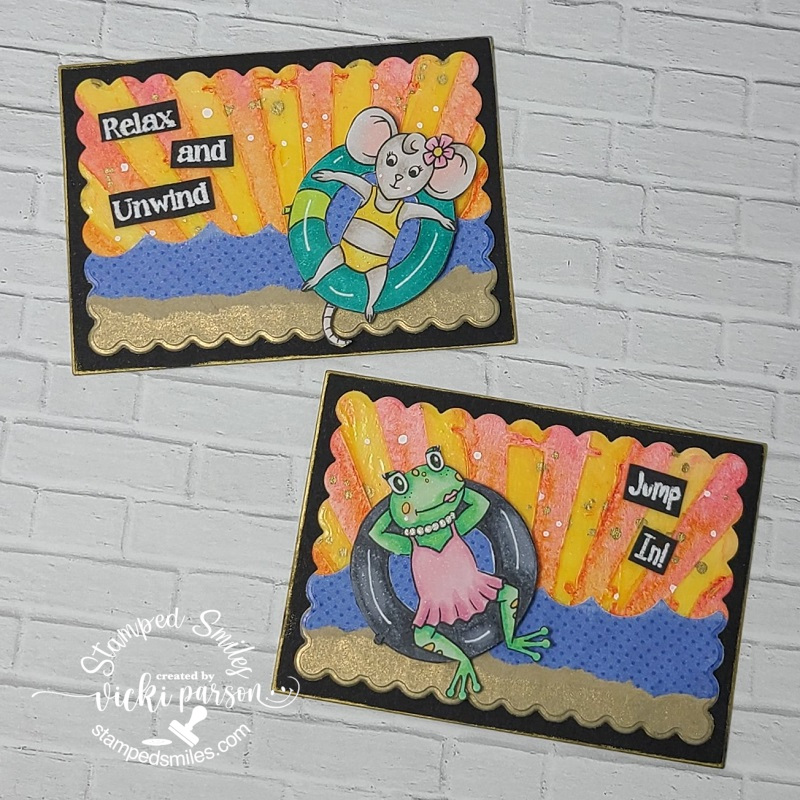
First up I have a couple of fun Summer themed ATC sized cards using some Inky Stamper sets called “Splash” and “Chaise Lounge“. (Still not wanting to warm up much for Spring…so I’m wishing for HOT summer now!😁) I made them for this month’s theme of “ATC sized or mini cards” challenge in their FB group. I started out with a sunray stencil and used some yellow glaze paste and once dried I added some watercolor over it which was resisted by the glaze which gave me this look for the background. I splattered it and then added some strips of blue dotted paper cut from a wave border and then I ripped a piece of gold at the bottom. I cut cut with a scallop die and layered over a black 2.5″x3.5″ piece of black cardstock folded in half and went around the edges with a gold ink pad.
I white heat embossed the sentiments from each stamp set and then cut portions of them out with my scissors to attach over the backgrounds. The images were colored with Copics, fussy cut out and popped up with foam tape over top.
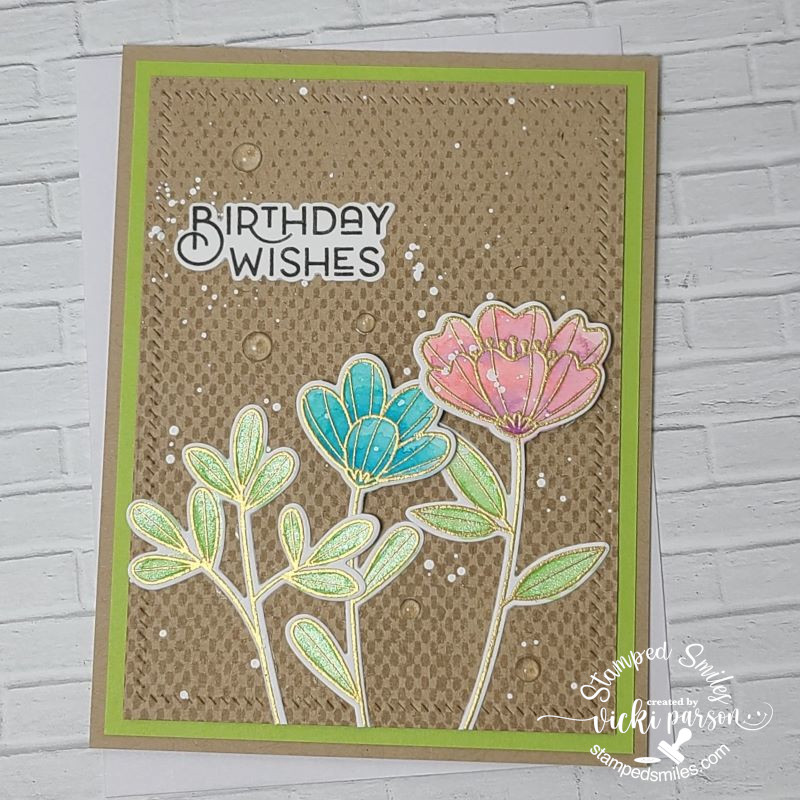
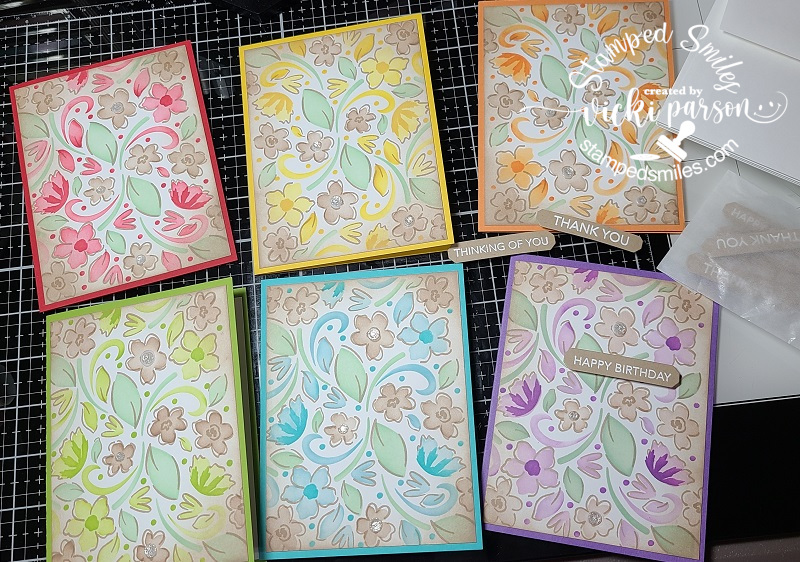
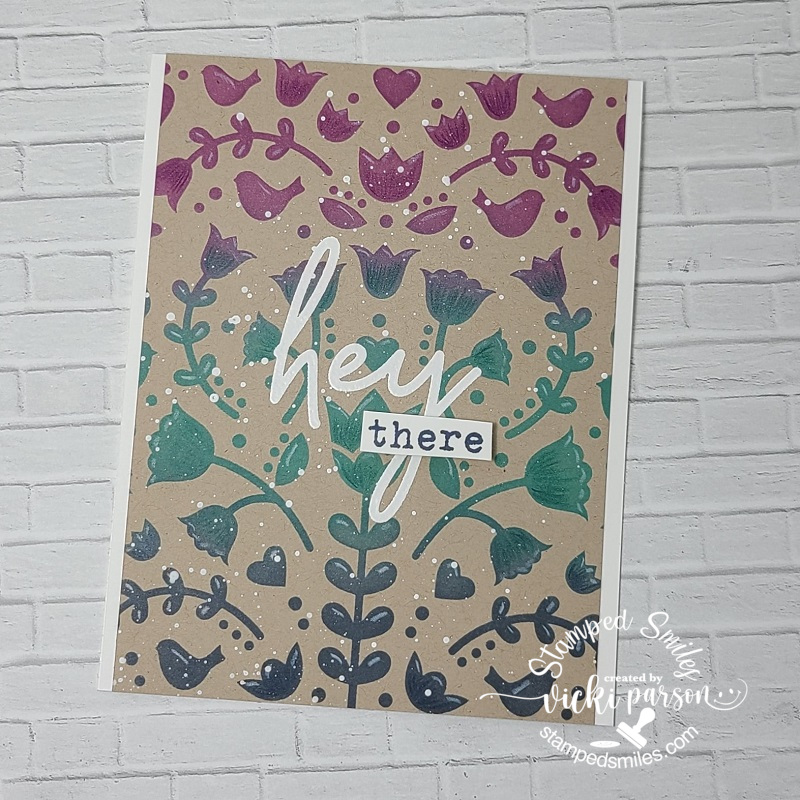
Next, I wanted to share a “Greeting Card Gift Set” that I have made and gave as a gift for someone. I used this wonderful product idea from Taylored Expressions called “Stamp & Give Card Kit 1” and it’s something that I had wanted to put together for a very long time on my own, but this product came along recently which pushed me into gear with no excuse of gathering things together on my own as this was already together for me. All I had to do was do the stamping and stenciling. I coordinated the colors with what was in the set. I like the fact that the recipient of this give set can choose which greeting they want to use for each card and the package of greetings are ready with a foam strip on the back of each one. For my designs, I’ve used the TE “Floral Flurry” Background stamp and stencils which I received from the “Stamp Joy Virtual Event” that I had attended. (not in store as it was exclusive for the event…photos at the bottom of post for that!) I’ve added 3 gems randomly to the fronts of each card.
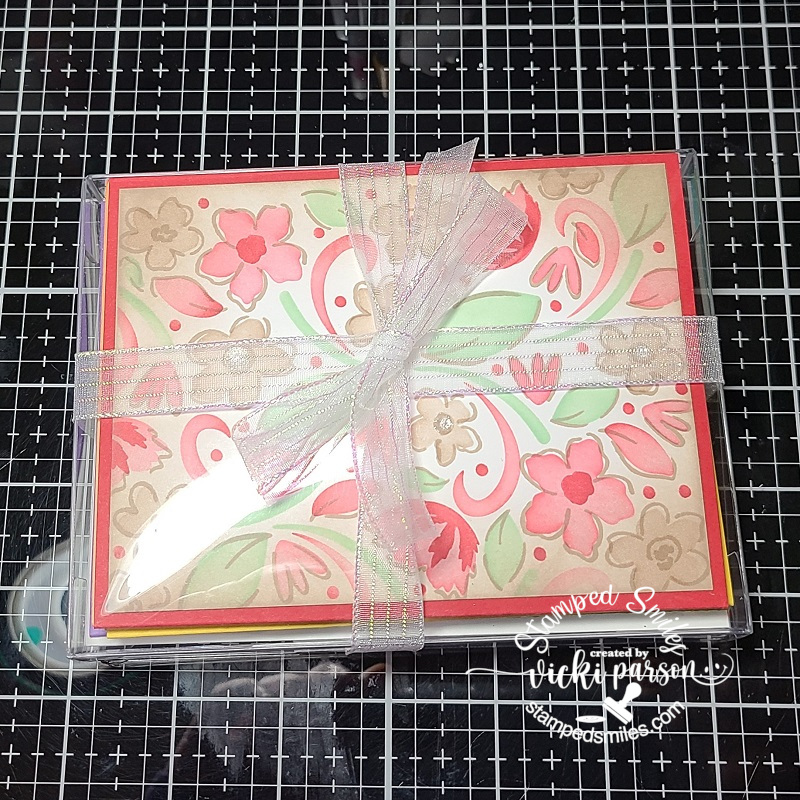
With the kit, it comes with all of the envelopes, card bases, glassine bag to hold all of the sentiment strips, the card fronts and even the acetate box to put them all in. I just added some ribbon once I put all the cards inside. I certainly plan on doing some more of these greeting card gift sets soon! I think it’s always nice to have a set of themed cards all together and ready to go when you need to grab one quickly!
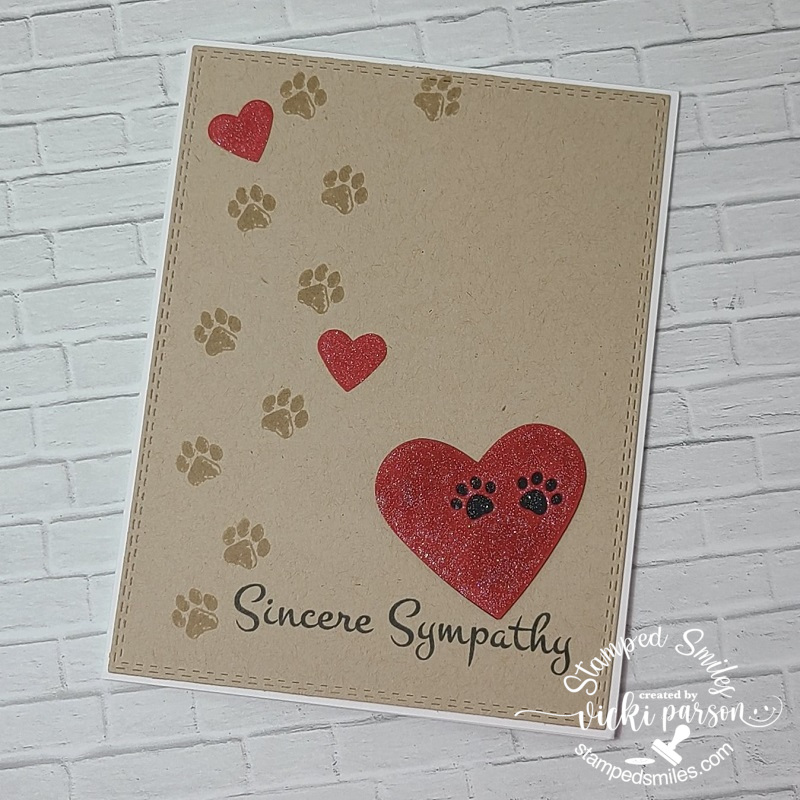
Unfortunately, next up I needed a pet sympathy card and I thought you could never go wrong with paw prints and hearts. I’ve kept this simple and pulled out some favorite Whimsy Stamps “Fill My Heart” and “Furever In Our Hearts” stamp sets for the paw prints and the sentiment. I’ve also used the My Favorite Things “Paw Prints Die-Namics” to die cut a couple of paw prints over the heart that I’ve punched out from red cardstock along with some smaller hearts above it.
I’ve used a glitter brush pen to make the hearts sparkly looking. This was all done over a kraft colored card front that was cut with a double-stitched rectangle die and placed over an A2 sized white card base.
I really need to get a set of pet sympathy going so that I already have them on hand as needed because it seems like I’ve sent many out and don’t have anymore…and I need another one already. I actually need to make sure I have several sympathy cards in general on hand, so I know I’ll be replenishing that soon too.
And lastly, I thought you might want to see all of the projects that I made during my classes and make-n-takes that I’ve done during the Taylored Expressions “Stamp Joy Spring Virtual Event” from last month…gosh, It’s been that long already and I’m just now posting them!🙄
The first four cards were from the classes on the first day (using the same product/style line), and the others are from the second day with all of the Make-n-Takes. If you’re visiting directly on my website, just click on each photo below and it will enlarge so you can see it better along with the typed details about it!
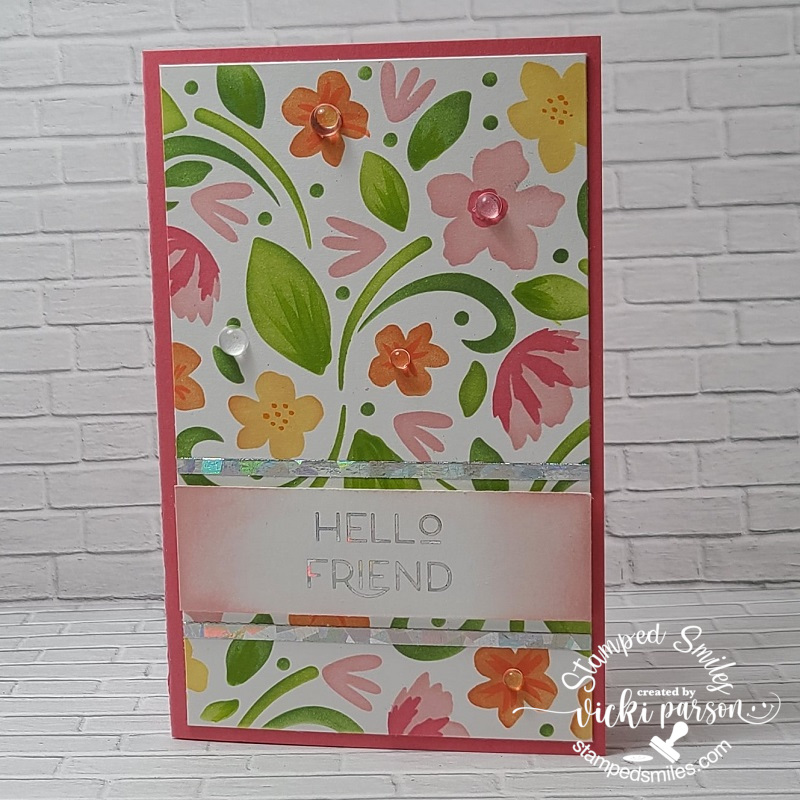
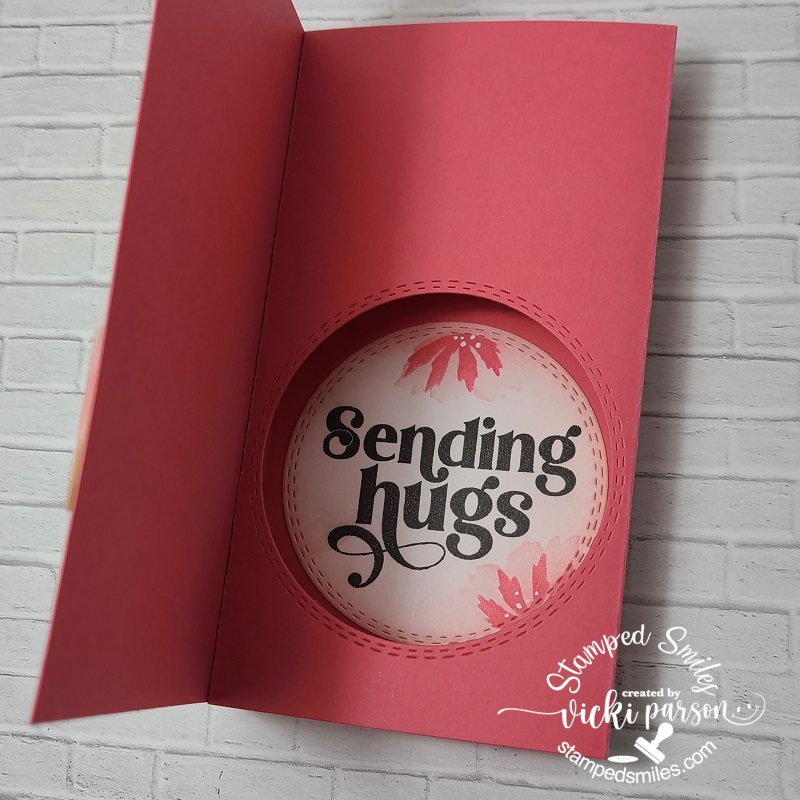
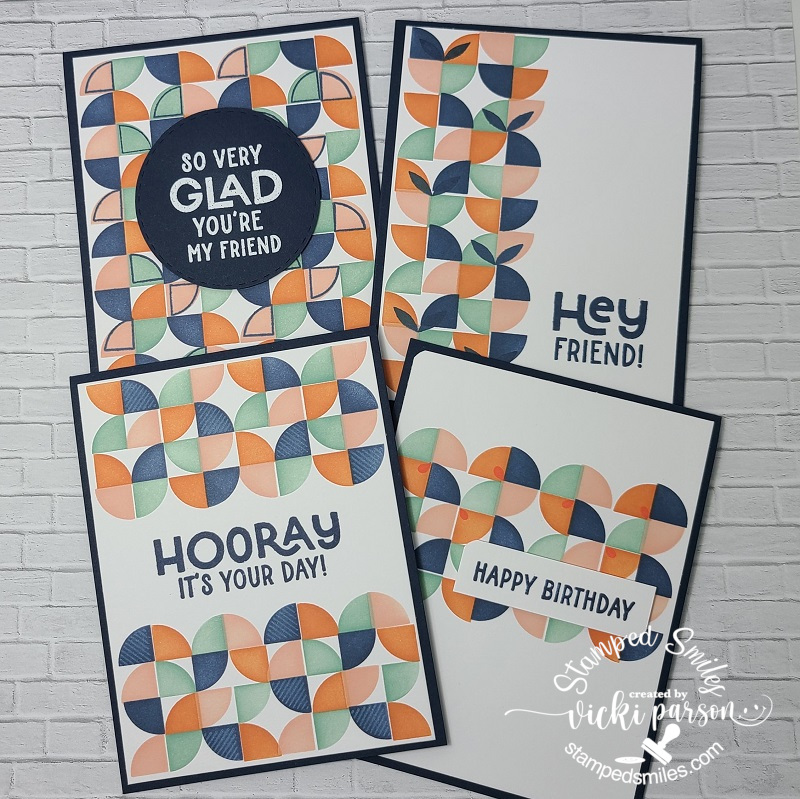
This is the first card in the TE Stamp Joy class series using the “Floral Flurry” products that I also used in the greeting card gift set above in the post. We used some markers on this for details and did some foiling. This is a “special” card….see next photo for the inside.This is a “view finder” style of card, but lays flat for mailing. It’s a mini slim sized card.Second card done with same floral products with some white and silver embossing details.The sentiment on the acetate panel was pre-printed for us and we laminated it along with the background floral panel with gold foil. We turned it into a shaker card.Last card for the classes was done over Toffee cardstock with some splattering details. I’ve used paint for mine.Card one of Make-n-Takes with ink blending and using pixie spray to foil…pretty shimmer!Make-n-Take 2 with a cool secret “ghosting effect” for a mini slim sized card!!Make-n-Take 3 was this set of four cards using a fun “Mod” Create-in-Quads Layering Stencil” and coordinating stamp set for sentiments and accents!Make-n-Take 4 was this cut mini slim sized card with highlight details using a white gel pen.Make-n-Take 5 with ink blended stencil background and adding details with colored pencils. I splattered with white paint.Make-n-Take 6 was one of my faves with the sparkly embossed strips in the middle and the black glossy die cut elements!Make-n-Take 7 was fun with the ink blending and adding glitter paste through stencil. The critter is too cute!
I’m really far behind in catching up with whatever the challenges currently are as well as seeing what’s going on with my fellow blogging friends, so I will get going as soon as I can!
Thanks so much for stopping in and I’ll see you soon!😘
Hey friends! I know it’s well into October and so you may be wondering where in the world have my Halloween posts been? Today was gloomy and foggy out…and it’s getting evening, so it was a good time to post! If you know me, then you know I love all things Halloween, but I’ve actually been in the background lurking with my Halloween projects! Bwhaa!! I just haven’t had time to sit and make a post for them yet. The reason for that is, of course, I’m taking too many classes and doing events that I’m like a “mad scientist” in the background with all of the crafting things, but haven’t been sharing them! So, I’ve decided to set aside some time to create a post with all things Halloween! (Don’t worry, there will be more special ones coming too!)
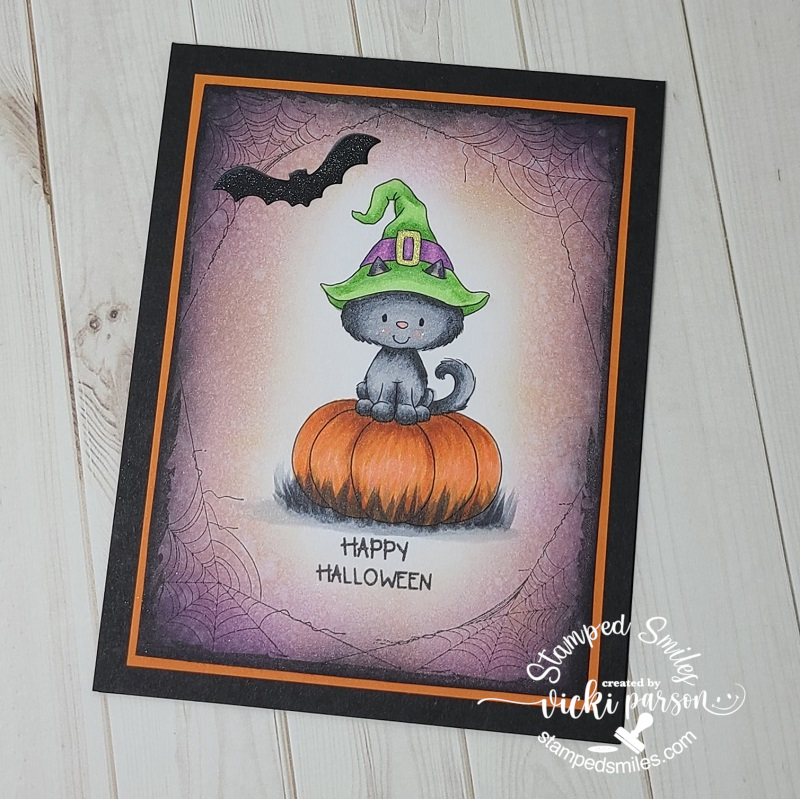
Now isn’t this one a cutie?! I’ve received this free digital image especially from the Whimsy Stamps World Card Making Day Event on Facebook that they usually hold every year and have some fun games and challenges. This image was created by Crissy Armstrong of course and she even did a cute little tutorial with it, so I had to color it up!
I’ve used Copics for the coloring and even made a shadowy creepy black/gray grass along the bottom of the pumpkin. The hat buckle was colored with a gold gel pen. The sentiment came from an older Whimsy Stamps candy corn set I had in my stash. For the background, I’ve used my favorite Whimsy Stamps Spider Web Frame background stamp to go around kitty. I then used a couple of different Distress inks to sponge around the edges and then spritzed water over it & blotted it up with a paper towel to make it even “creepier” looking. I layered it over an orange layer from my stash and then placed this over an A2 sized top folding card base. I also die cut a bat from an old freebie from Whimsy Stamps years back to glue at the top of the scene and covered it with a glitter brush pen. Super fun!
Now I want to enter this into the annual Whimsy Stamps 31 Nights of Halloween that they do every year! Check out the event with lots of Halloween inspiration & fun if you’re interested! I always love to play along, and I think Whimsy Stamps has some of THE best products for crafting Halloween!
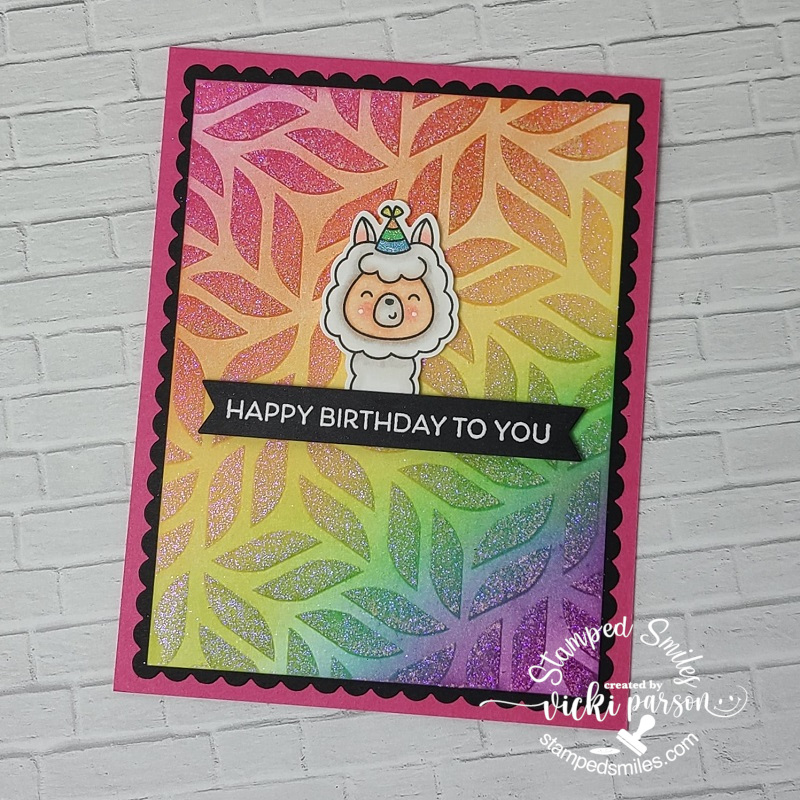
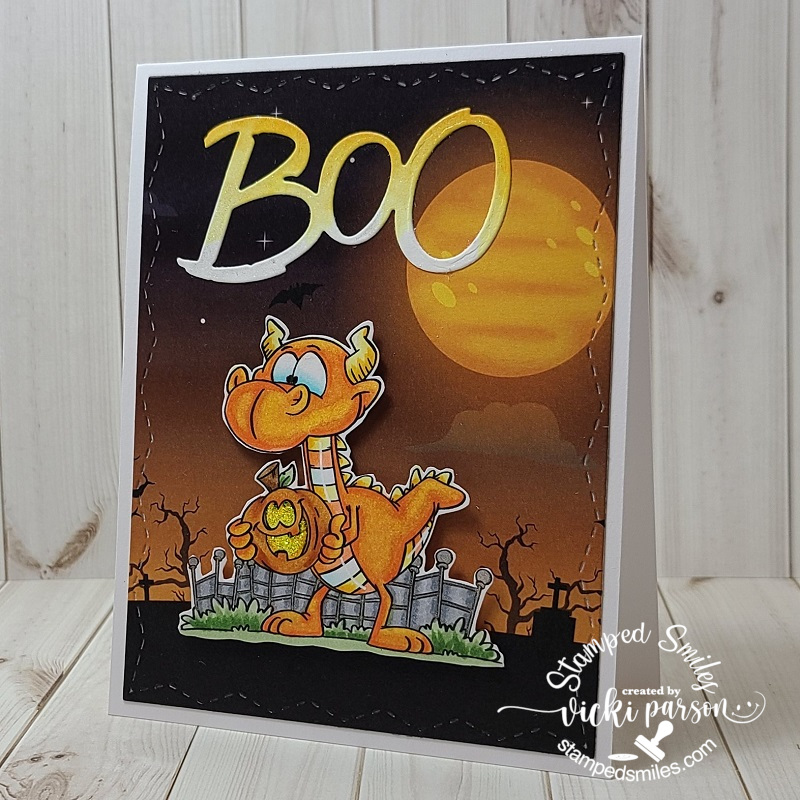
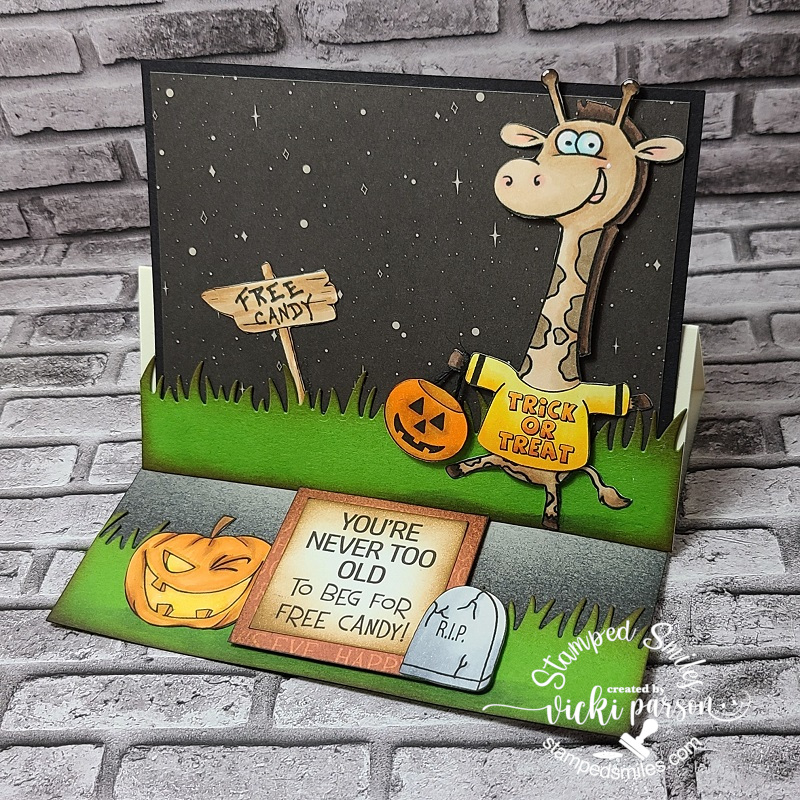
And this is another card I made for the Whimsy Stamps WCMD Event challenge using a fun Autumn/Halloween mood board. (The event is over, but it was super fun!) The first thing about the mood board I noticed was all of the orange and fun jack-o-lanterns that popped out at me. Plus, this was another cute freebie digital image given to us during the event.
So I colored up this dragon using mainly orange tone Copics with a “candy corn” effect. I also used it for the die cut sentiment at the top that was cut out from the Whimsy Stamps Boo die set. Hard to tell in the photo, but I covered it with the glitter brush pen too. I popped up the “dragon guy” over a piece of the Whimsy Stamps 6×6 Haunted Paper Pack cut with the Whimsy Stamps Zig Zag Stitched Rectangle Dies. It was all layered over a white A2 top folding card base. I also added some yellow Stickles to the pumpkin’s face.
And since I’ve been doing so many classes, I thought I’d just create another gallery full of Halloween projects that I’ve done. I have actually been working on some books and journals as well as mixed media projects and not sure if I’ll get them finished up before Halloween as I’ve been busy, but it’s always fun to get creative and messy especially for all things creepy and spooky! 💀 Hope you enjoy! – (If you’re viewing this on my website, just click on the photos to enlarge them to see)
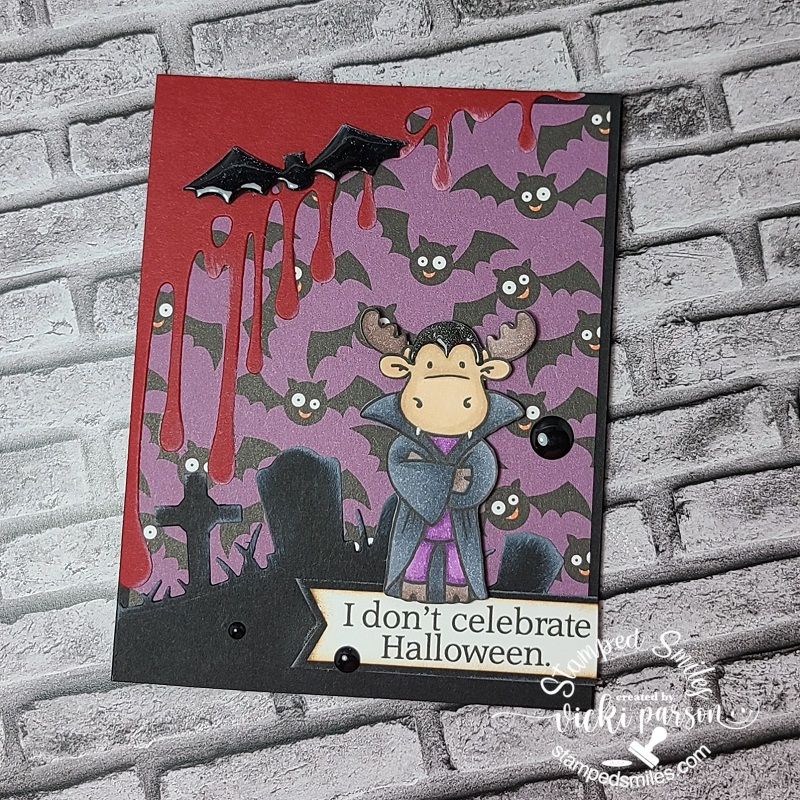
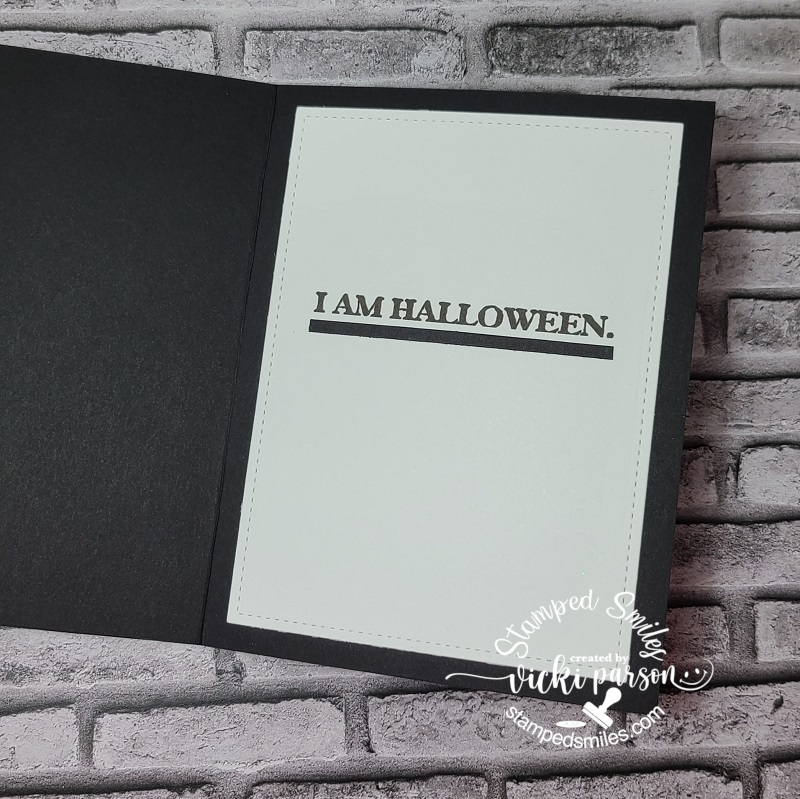
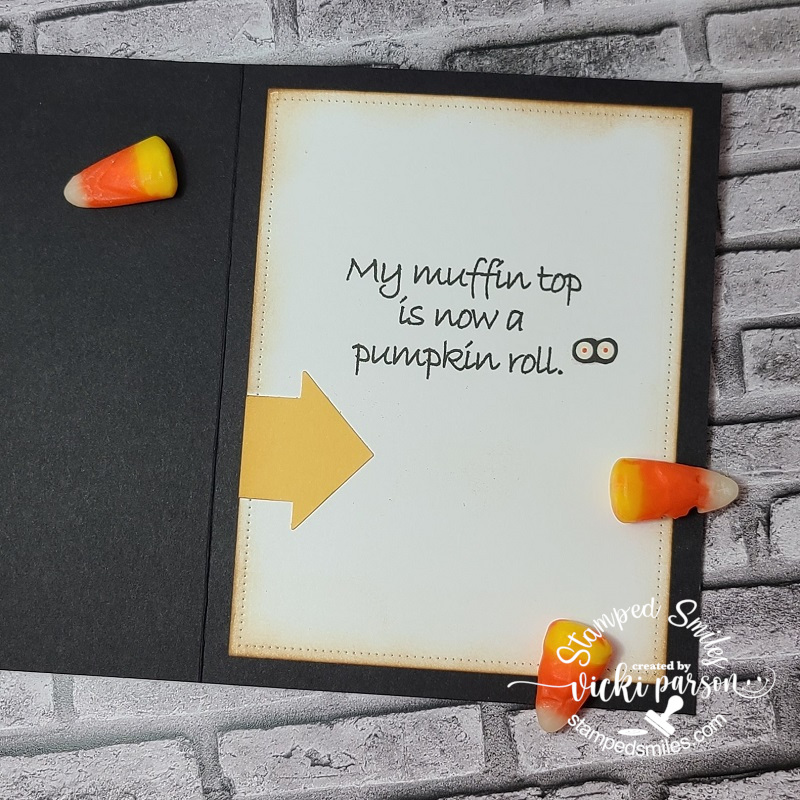
This was a fun one I made using a sketch for the Inky Stamper’s World Card Making Day Event! I had to pull out the Spider set and stamp up the eyeballs for the background! The spider was die cut out over the circle with an added wobbler on him! So fun!A class that Taylor taught using a special Halloween bundle showing how to foil. This is the second portion of Taylor’s class using the same Jack-o-Lantern Cutting Plate.Here’s another set of Halloween cards taught by Taylor for a virtual event I attended in Aug. (I think I over did it on the splatter! LOL)This was a Lawn Fawn class with this set of projects during the Aug virtual event. The back project is a gable box.This was a DecoFoil class class from the Aug virtual event…LOTS of foil! The green background is felt.This was a watercolor mini slimline class taught during the Aug virtual event. I’ve used glow-in-the-dark glitter for the inside faces except the center one was just yellow glitter.From a Riley & Co Halloween class. This is an easel slimline card.Another Riley & Co easel type card. LOLTEE HEE! A Riley & Co Dracula topped with glossy accent hair. Also added it to the bat too. See next photo for the inside……inside of Dracula card. LOLRiley & Co is so funny! The cat is on a wobbler!This card reminded me of Jimmy Fallon’s Friday Thank you notes! (If you’ve ever caught one of those shows!) See what I mean in the next photo for the inside of this card……ha ha! inside of Thank you Halloween Candy…
Whew! Was that a lot of Halloween or what?! Many of these things just give me a big chuckle and I just think they’re so fun especially now that I’ve looked back on them. Although many of these projects were created earlier this Summer, I thought it would be a good time to share them with you. #MakeHalloween365 I still have more Halloween up my sleeve soon, so stayed tuned!
Thanks so much for stopping by this evening and I hope you’ve enjoyed my Halloween projects here! HAPPY CRAFTING
Hello friends! Happy Monday! Hope that you’ve had a wonderful weekend and are ready for Christmas to come! This Friday will be Christmas Day and I’m happy to have everything finished and ready to deliver the cookies and presents to family and enjoy the time with my husband. Hoping that next year will be looking much different too! Are you ready for Christmas or just ready for the year to be finished? 😉
Today is the start of a new challenge over at {Cupcake Inspirations} with the theme of “SNOWFLAKES“! The only difference for this challenge is that it is only lasting for ONE week instead of the noraml 2 weeks. Also, this will be my final post as a design team member for them as well. I have really enjoyed being apart of this team as what’s better with crafting than with a cupcake inspired theme, right?!🧁😋 So I’m sure I’ll be inspired to play along with the challenges in the future as I have been! Hope you’ve enjoyed my creations for this challenge. Here is my “snowflake” cupcake inspired project for today:
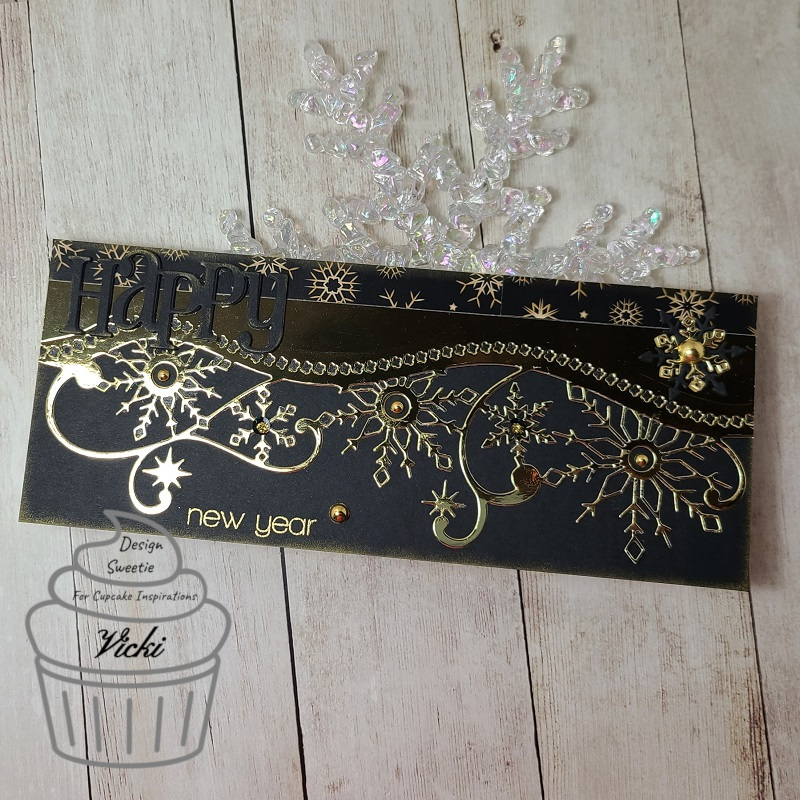
I thought it would be appropriate to create a New Year’s themed card for this challenge as I don’t really need to make any more Christmas cards, but sometimes I forget to send out a Christmas card to someone and don’t realize it until later, so that’s when a New Year’s card can come in handy! LOL!
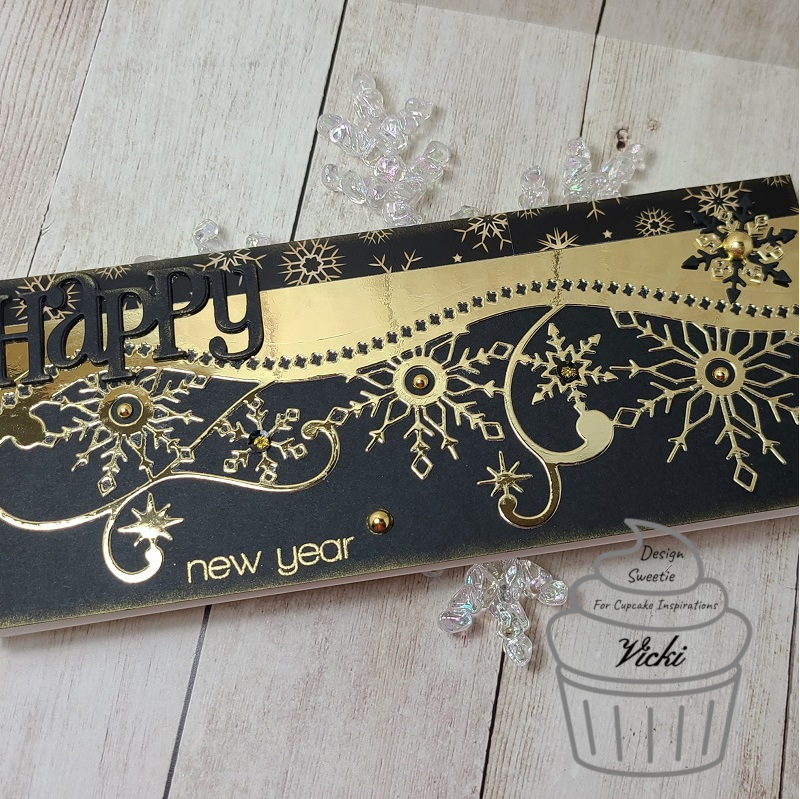
I absolutely LOVE the fabulous slimline dies that Whimsy Stamps has! Such a huge selection of them and I spotted this gorgeous Elegant Snowflakes and Border die and thought it would make some really incredible slimline style cards no matter what color scheme you have in mind! I knew that I first wanted to try it out with some metallic mirror cardstock, and I was also inspired by these gorgeous Gilded Holiday papers from Whimsy Stamps with the snowflakes in gold and black colors. It looked elegant like the die, so I pulled out a strip to fit across the top, but because it’s 6 x 6, it didn’t fit, but I decided to piece the strip together anyway and I don’t really think you can tell that much until you look up closely to know that it’s there.
So, I then layered the gold metallic die cut piece right underneath the strip that was attached to a 3.5 x 8.5 black cardstock layer. There are also a couple of extra snowflake dies included with that border die, so I used them layered together (one in gold and another in black cardstock) on the right side of the slimline design.
To create the sentiment on the card, I used the Whimsy Stamps Happy Sayings Clear Stamp Set and gold heat embossed it along the bottom of the black card panel. I also took the Whimsy Stamps Happy Large Word die and die cut it out in black cardstock several times to layer together for thickness. Before attaching it to the card, I used a gold ink pad and brushed around the edges with it as well as the entire black card front panel before attaching all together. I then layered it over a white top folding slimline card base.
Here’s a closer view of the gold metallic die along with the gold heat embossed sentiment as well as the gold inked edges around the design. I’ve also decided to add some gold Drip Drops from Taylored Expressions in the center of some of the snowflakes as well as a couple of black sequins that I filled the centers with some gold Stickles with.
Of course I think it looks so much more elegant, shinny and sparkly in person as it’s hard to photograph and be able to capture all of the lighting that you see when you’re holding it in your hands!
Hopefully by sharing a few different angled photos, you’re able to see some of these details in this card design.
Please be sure to stop by the {Cupake Inspirations} Challenge blog and come join us with your “snowflake” creations this week and check out the inspiration from the design team whle you’re there! REMEMBER: You have only ONE WEEK to enter! Can’t wait to see what you come up with!
Thanks for stopping by today and I’ll be seeing you soon with another post soon!