Hello friends! Have you’ve been enjoying the month of July so far? We finally got some rains, but now it’s humid and warmer. That’s OK because it’s always warm this time of year anyway and a great time for crafting indoors with the air conditoning!
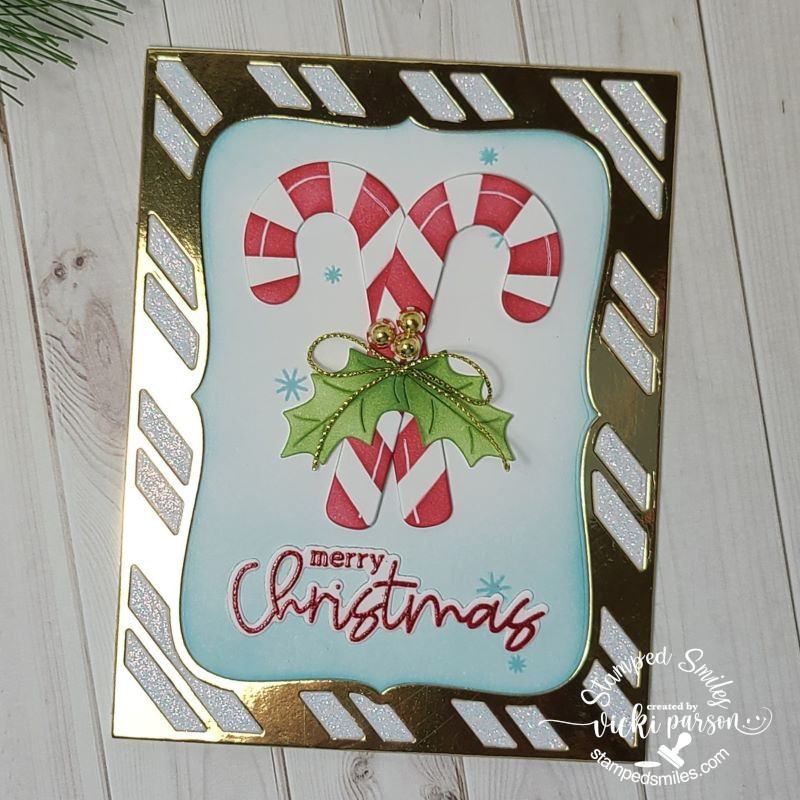
Today starts up a new challenge for the Sparkles Forum Monthly Challenge Blog with the theme: Christmas in July! It’s a favorite for many card makers this month so that they can get an early start on those Christmas cards without having to wait last minute to get them all done. I don’t have an outrageous amount to send out, but I do like to donate and I have done 5 Christmas so far! So if you’re up for it, make a Christmas card and join the gallery at the challenge! Here’s the card that I’ve made:
There’s nothing like the smell of peppermint for Christmas (for me anyway!) I had gotten this Candy Cane Lane card kit from Taylored Expressions last year and never really used it, so I thought this would be a good time to pull it out.
In the set, there came this cover plate die and I cut it out in the following, gold mirror, white glitter and white cardstock in A2 sizes. I paper pieced each one over an A2 sized white card base front. I added some light blue ink blending around the edges and bottom of the center panel and stamped a few “snowflakes” in the same color.
I die cut the candy canes and leaves and ink blended/stenciled those stacked together. I used a white gel pen for the highlight over the canes, added a gold cord bow and some gold drip drops for the “berries”. There was a stamp set with sentiments that I stamped out in red and then went over top of it with VersaMark ink so that I could emboss some Peppermint smelling embossing powder over it…that’s where the smell of peppermint came in for me! I die cut it out with the coordinating die and glued it at the bottom of the candy canes.
Hope you can join the challenge with your Christmas cards this month! Thanks so much for dropping in today!
Hello friends! It’s been a bit since my last posting! I’m still crafting, but I’m also enjoying the outdoors lately too! I’m just not making the time I need to post on my blog here! However, being on a design team helps to keep me focused on posting and hopefully it’s something that will bring motivation because I need it! So I will try and get some more posts in!
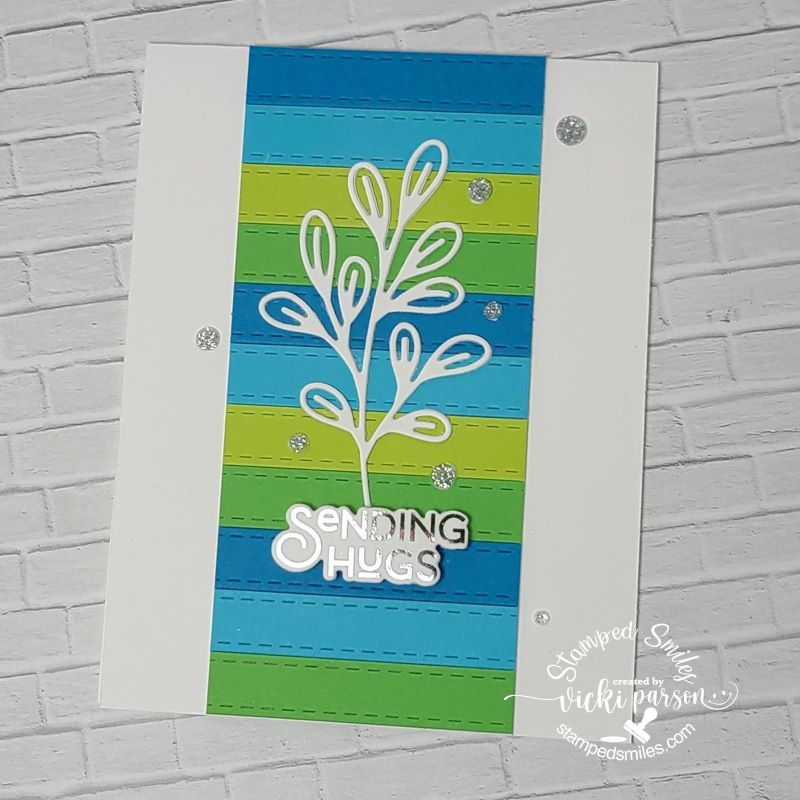
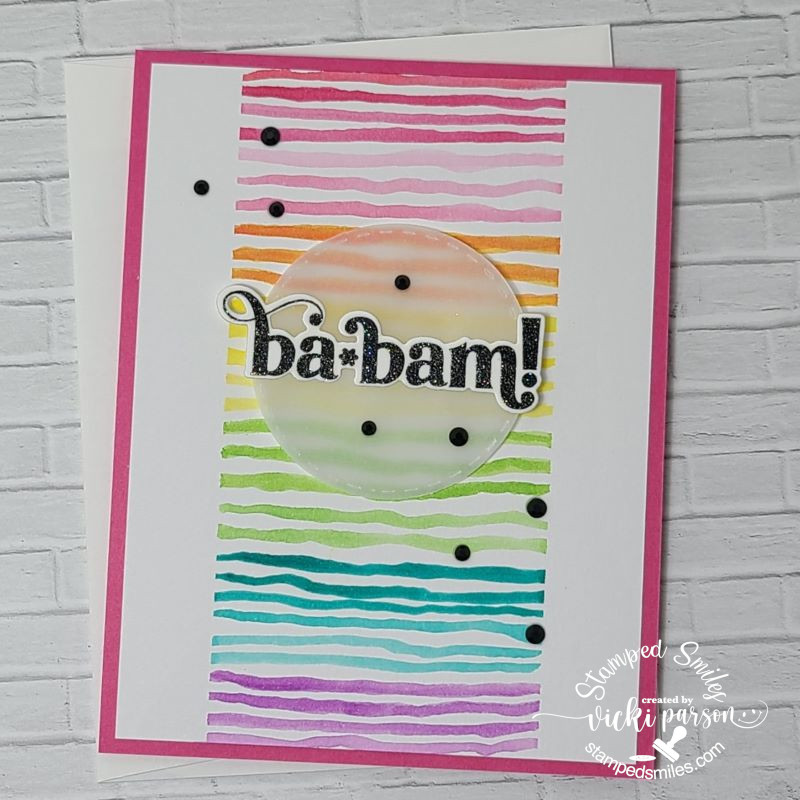
Today starts a new challenge over at the Sparkles Monthly Challenge and the theme is “No Stamping Allowed!” This may seem a bit challenging, but I look forward to seeing what people come up with for it! Be sure to check out the blog to see what the design team has come up with for inspiration! Here’s what I’ve made for the challenge this month:
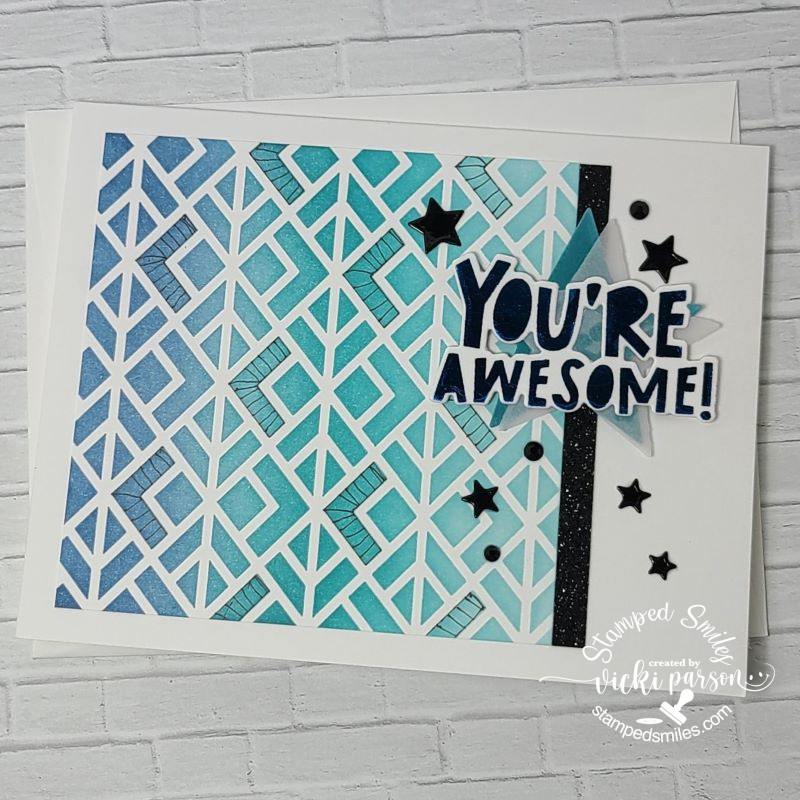
I was trying to channel something that would work and realized that I had these fun strip dies from Taylored Expressions and I wanted to play with some new colors, so I ran with that on the middle of my card front by alternating the strip colors.
I also die cut a frond three times and glued them together for thickness and sturdiness. I attached it over the colored strip panel and then added a sentiment that was already toner printed so that I could foil over it with silver Deco Foil. I also had a die that cut it out which was popped up with foam strips and added to the bottom of the die cut frond. Lastly, I’ve just added some silver glitter drops randomly over the card front.
Hope you’ve enjoyed my non-stamped card today and will think about joining in the challenge with us this month! Thanks so much for stopping in! Have a great week!
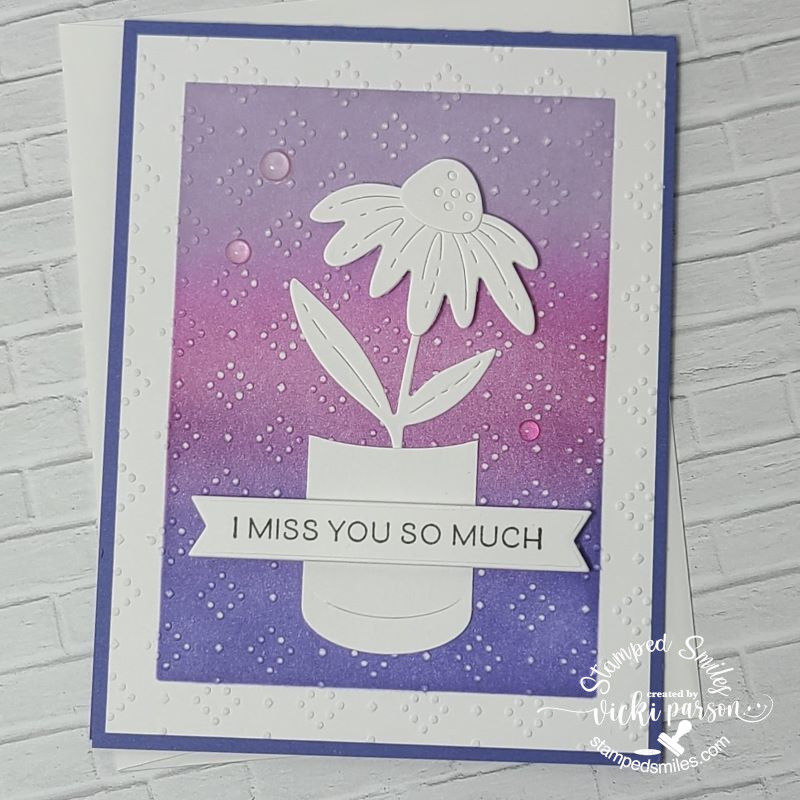
Hello friends! I hope you’ve had a lovely Mother’s Day weekend and are enjoying the month of May so far! I look forward to seeing those beautiful blooms and digging in the garden!
Today starts a brand new challenge over at the Sparkles Monthly Challenge and the theme is “Things with Wings“! This is a good one as there’s several ways to interpret it! Be sure to check out the blog to see what the design team has come up with for inspiration! Speaking of design team, Caz is looking to add to the team, so be sure to check out the details if you would be interested in joining. Here’s what I’ve made for the challenge this month:
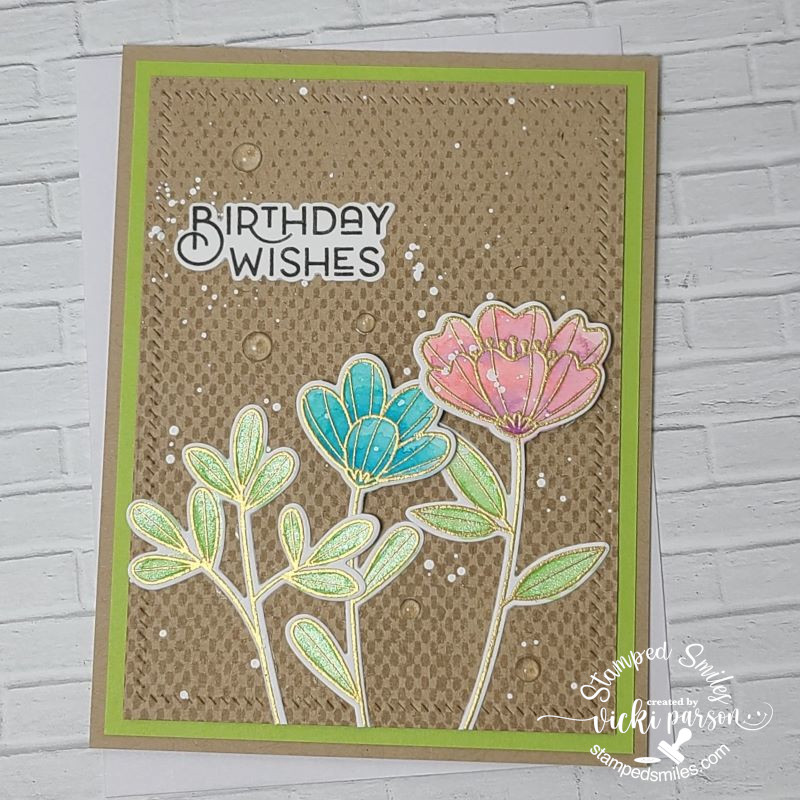
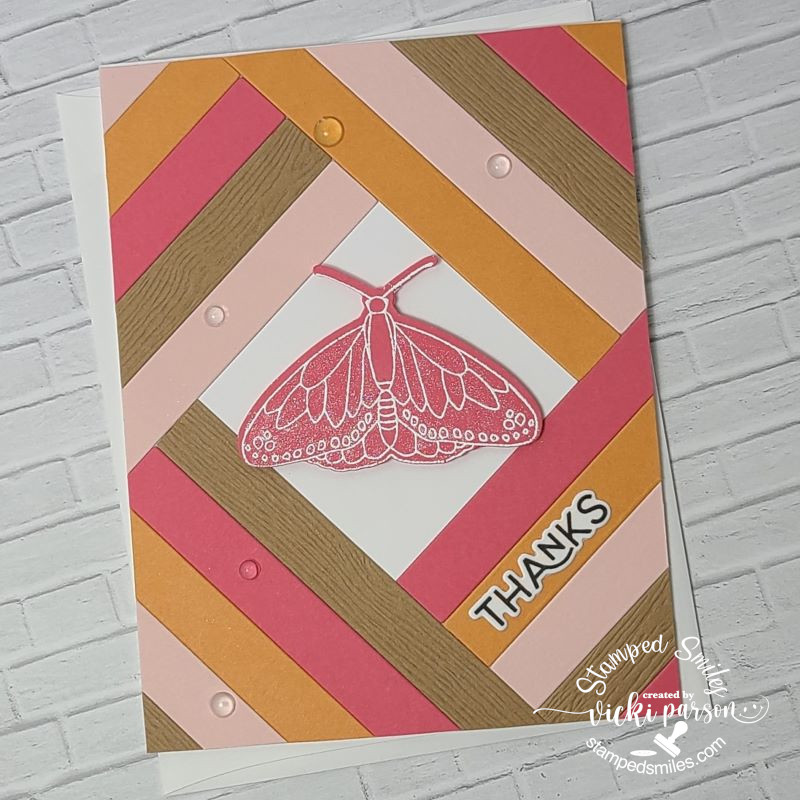
I thought the butterfly from this Taylored Expressions stamp set called Endless Joy would be so fun to color and use for this challenge. They were stamped with Copic markers and cut out with the coordinating dies.
For the background, I’ve taken the rectangle masking stencil and blended some blue ink over the center and then I’ve added an additional stencil over top of it and blended bluer to get the pattern. I then added some raw umber paint and opaque white Copic to splatter over top of it. I cut out a stitched frame and added it over the blended area.
I added the flowers and butterfly to the card by gluing and popping out the smaller flower as well as the wings on the butterfly. The sentiment was gold foiled and cut out with a coordinating die that was glued at the top. I added some highlights on the butterfly with a white gel pen and added some Stickles glitter to the center of the flowers. The white panel was attached to a top folding A2 white card base.
I hope that you have enjoyed my card today! I hope that you will stop into the challenge and play along with us this month! Looking forward to seeing the gallery of wings!!
Happy April friends! We have finished March already and onto Easter very quickly approaching! I hope you’re enjoying all things Spring coming up your way! We’ve had several storms and we’re in the tornado season as well, so I hope everyone is staying safe out there whatever the weather. I do have some things that I had previously finished and wanted to share:
First, I wanted to share about the Virtual Stamp Joy Event by Taylored Expressions that I participated in a few weeks ago. I always have so much fun and enjoy the motivation that it seems to generate! I’m sharing them in the gallery below, so if you’re on my website post, then just click on each photo to enlarge it.
The first four photos were from a class using the same floral stamp set and the others are from the next day of make-n-take projects. Please let me know if you have any questions about any of them!
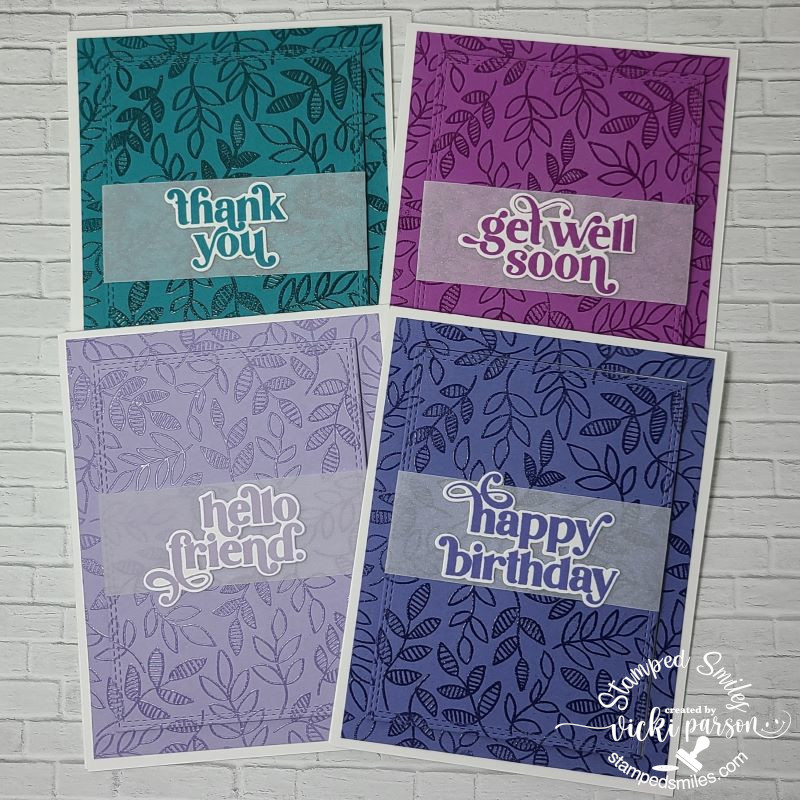
The last set of four cards were a “mass production” using a background stamp in different colored cardstock panels and clear heat embossing over them. The class sample had “hello” sentiment on each one, but I changed up the sentiments and have placed them in a card box to give them out with envelopes as a gift for someone.
Hope you’ve enjoyed the inspiration as much as I enjoyed putting them all together!
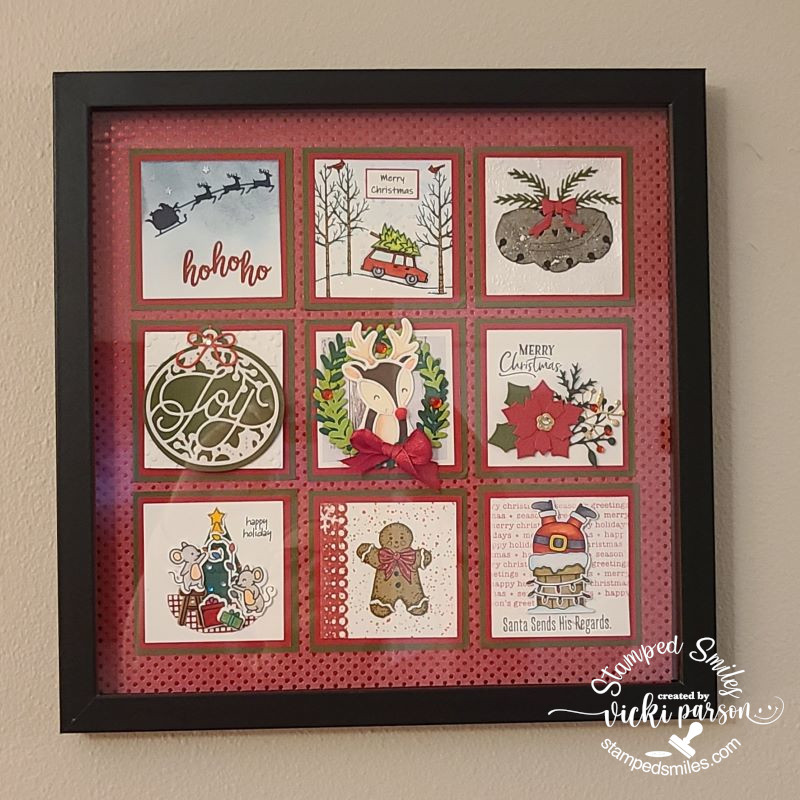
From the end of last year up until this last month, I didn’t have much time with the Holidays and everything going on, but as you may have seen in previous posts, I participate in a “square sampler swap” and when everyone sends out their squares, we then complete a home décor piece with all of the squares, so I thought I’d share mine finally completed:
CLICK PHOTOS BELOW TO ENLARGE
This was for the Christmas Sampler SWAP and you can see that I’ve used a black shadow box frame for my sampler and placed some red with red metallic dotted paper behind it. The square on the right is the one that I made. (I’ve used My Favorite Things products for my square.)
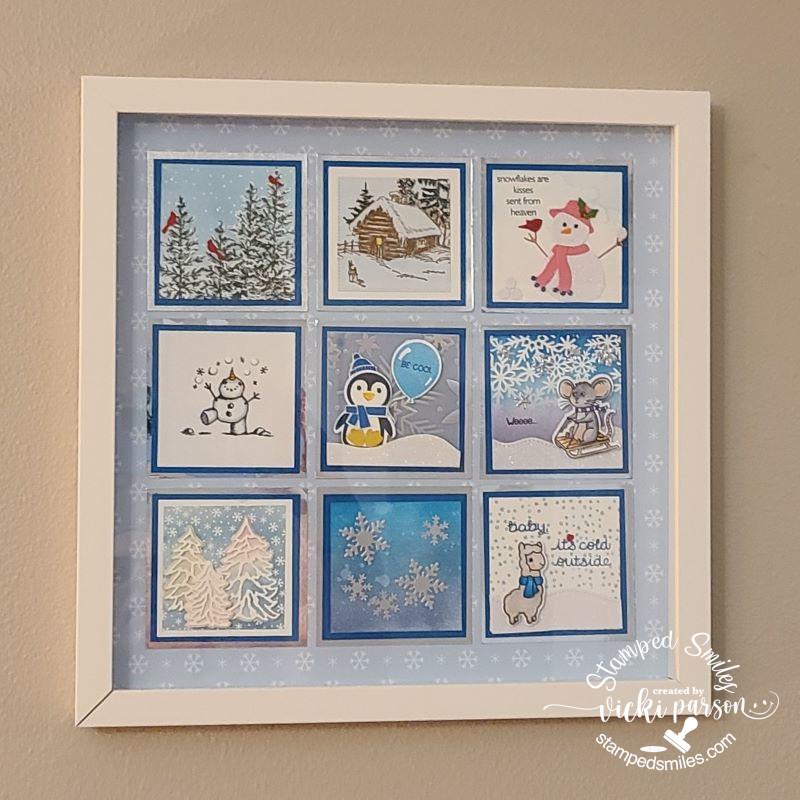
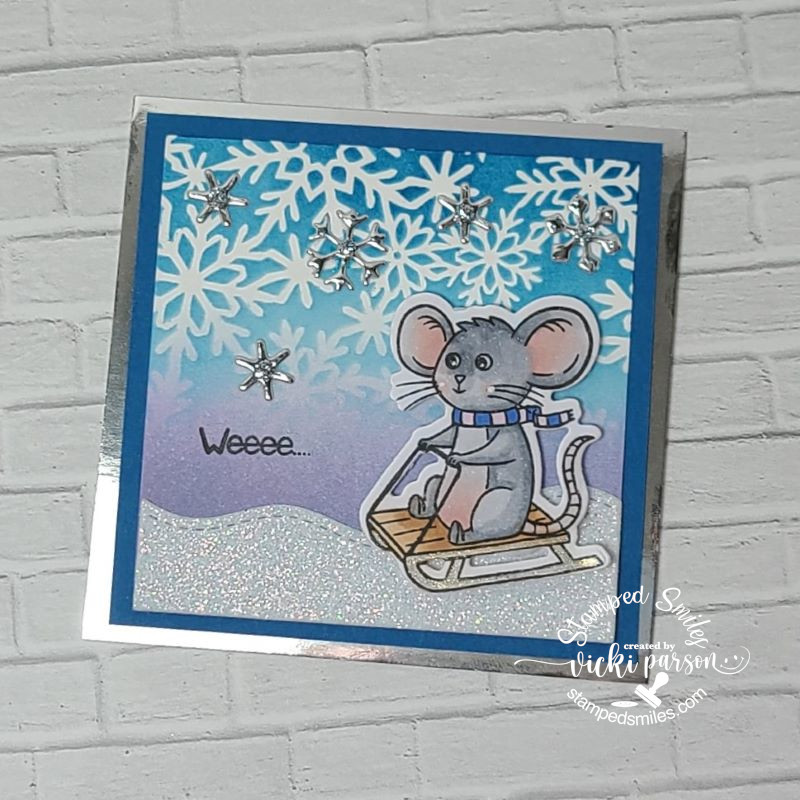
This was for the Winter Sampler SWAP and I went with a white shadow box for this one. I’ve placed some soft blue snowflake papers for behind my sampler as I thought it was soft enough to not look too busy. The square on the right is the one that I made. (I’ve used Inky Stamper products for my square.)
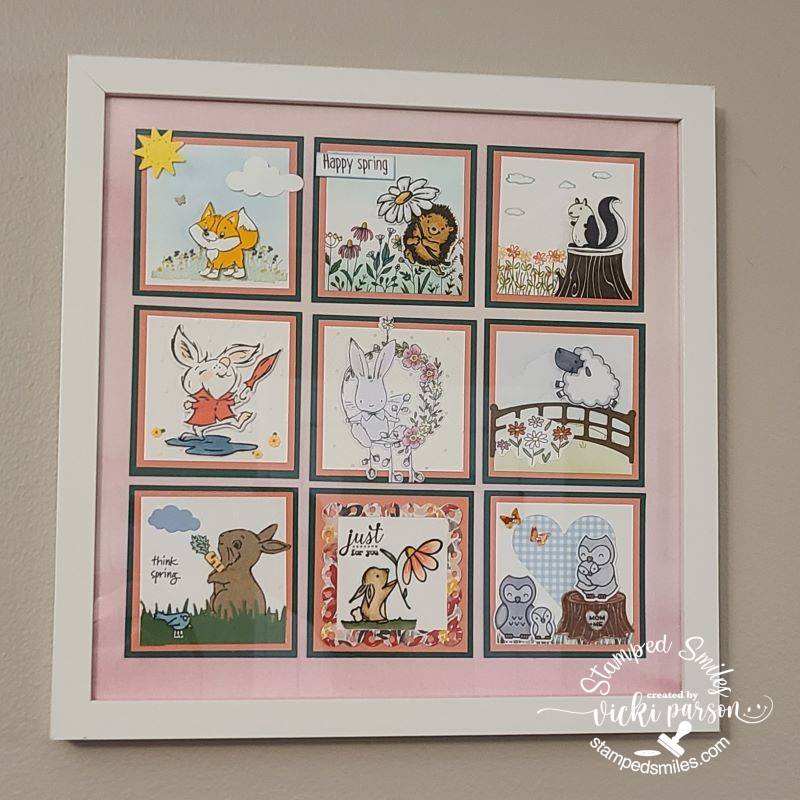
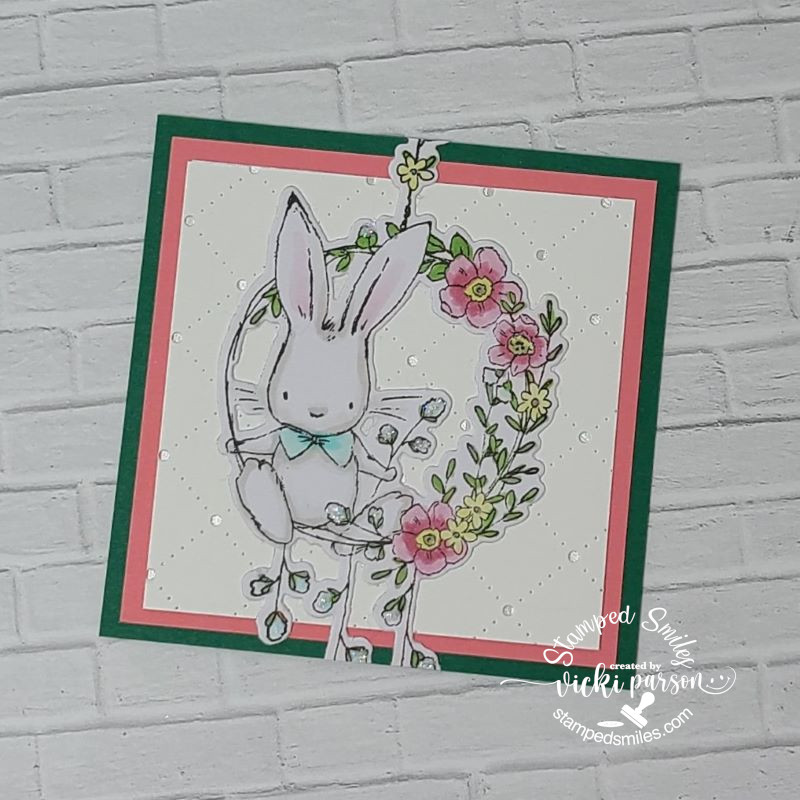
And recently we finished up our Spring Animals Sampler SWAP that I used another white shadow box for the sampler. I’ve added a piece of pink colored “Watercolor Wishes” paper from Lawn Fawn behind it. It looks a little off in the photo, but it looks better IRL. The square on the right is the one that I made. (I used Taylored Expressions products for my square.)
Not sure if we’re doing any more or not, but I had so much fun making the squares to swap with friends!
Lastly, I have a fun little thing to give to whoever is interested in these Taylored Expressions dies + foil-it panels package. (It’s not sold in stores anywhere as it was a free gift with purchase) I have an extra and so I thought I’d give it away to someone! Just leave me a comment below if you’re interested and I’ll pick someone from the comments.
Leave a comment below if you’re interested!
That’s all I have for today! Thanks so much for stopping in! I’ll be seeing you soon!
We’ve made it to 2023!🎉 Congratulations and a huge welcome! I’m so thrilled to have you with me for another crafty year and honored to be apart of your creative journey in some way.
Towards the end of last year…which was a few months ago…I was asked to create a set of those calendar cards that I had made last January which you can view in my previous post HERE. If you look at the calendars at the bottom of the post, it explains the details. In sharing those, someone asked me to create a set with a particular theme in mind for giving as Christmas gifts.
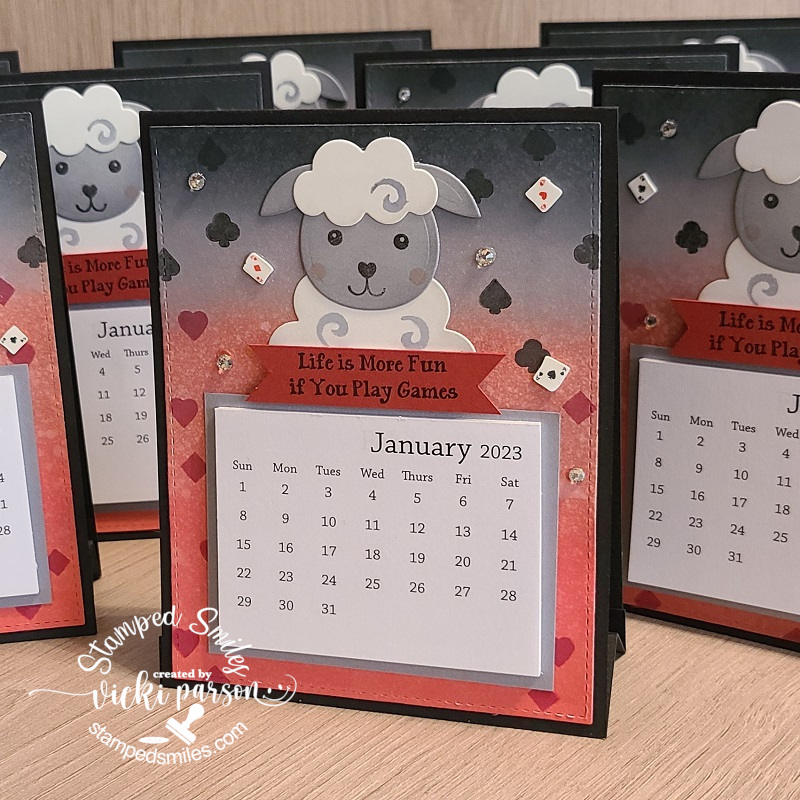
I was given instructions to use a sheep image for their card/game group that call themselves “Sheeples”. 😄 The first one that came to my mind was this adorable little die cut set from Taylored Expressions called Spring Squad Die & Clear Stamp Combo. I love the added stamp set to create the details of the characters! And of course, I’ve also used the TE Mini Tear-Off Calendars.
For the background, I wanted to incorporate some game theme items with this cutie, so I pulled out the fun stamp set from Inky Stamper called Game Night, of course! I ink blended the background panel with some reds and black/gray Oxide Ink colors and spritzed it with water for some texture. Once dried, I added the different “suit” images in the corresponding colors of the suits. I also stamped a sentiment from this same stamp set and die cut a banner with it to pop up under the sheep. Lastly, I’ve added a few Playing Card Shaker Elements and rhinestones.
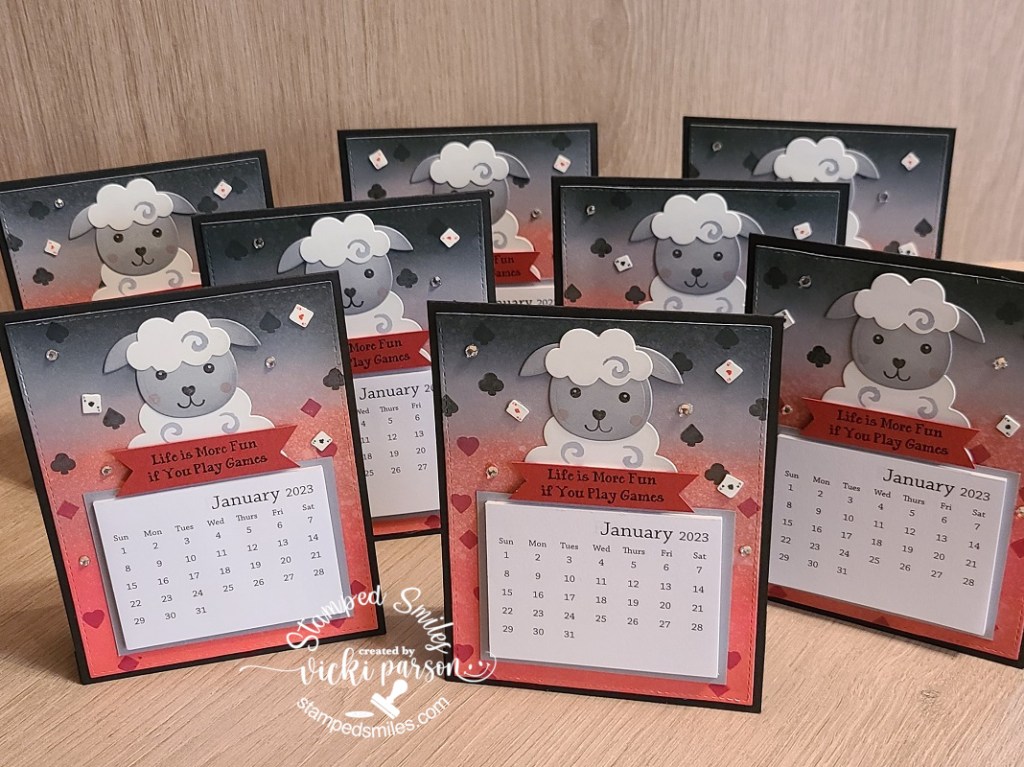
In total, I needed to create 8 of these calendars and I think they turned out really cute and fun! I didn’t know if there were any masculine members of the group, so I wanted to keep it for use either way and I’m glad I did as it was needed. So, these are each A2 size that can fold flat and fit inside A2 envelopes for mailing if you needed. Then the recipient can stand them up to remind them of their next game night fun throughout the year! She seemed pretty pleased with them, so that was great too! And of course, she received them in plenty of time for Christmas giving, but I’m just now getting them posted.
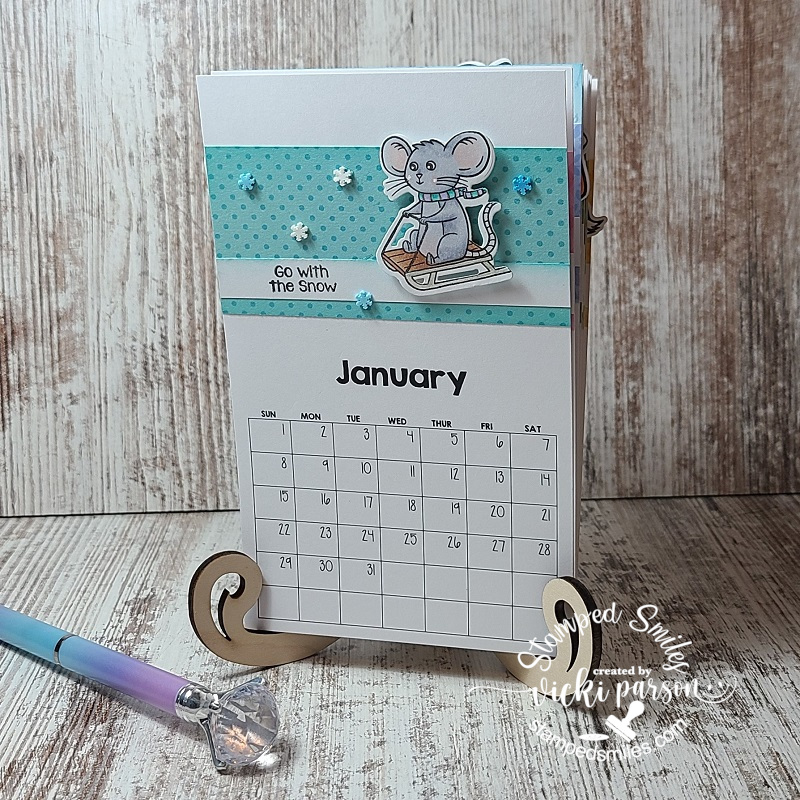
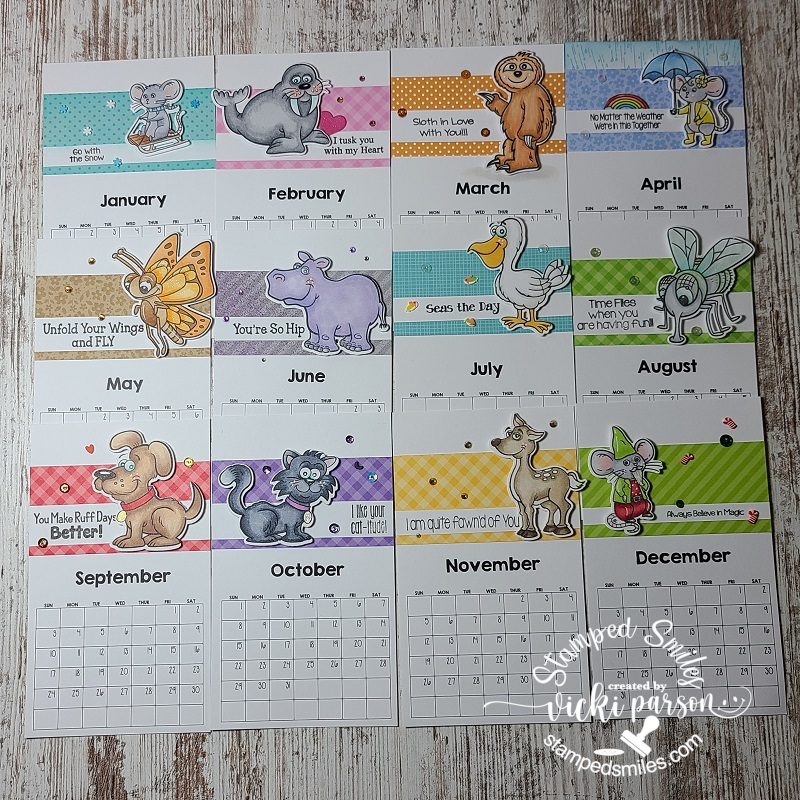
I enjoy creating a new calendar for my craft room every year and there is a fun 2023 Calendar Kit from Inky Stamper that I completed.
Every year Inky Stamper comes out with these calendars that comes with all of the calendar month cards plus pre-stamped and cut images along with a sentiment strip and papers for each month. It also includes some sort of stand to display them on. (I like to use the previous year calendar to make cards with too!)
I was able to get them all colored and assembled for this year and have it displayed on a shelf next to my computer so that I can flip through each month and enjoy. I enjoy taking the time to sit and color especially with it being cold and snowy again over my way.
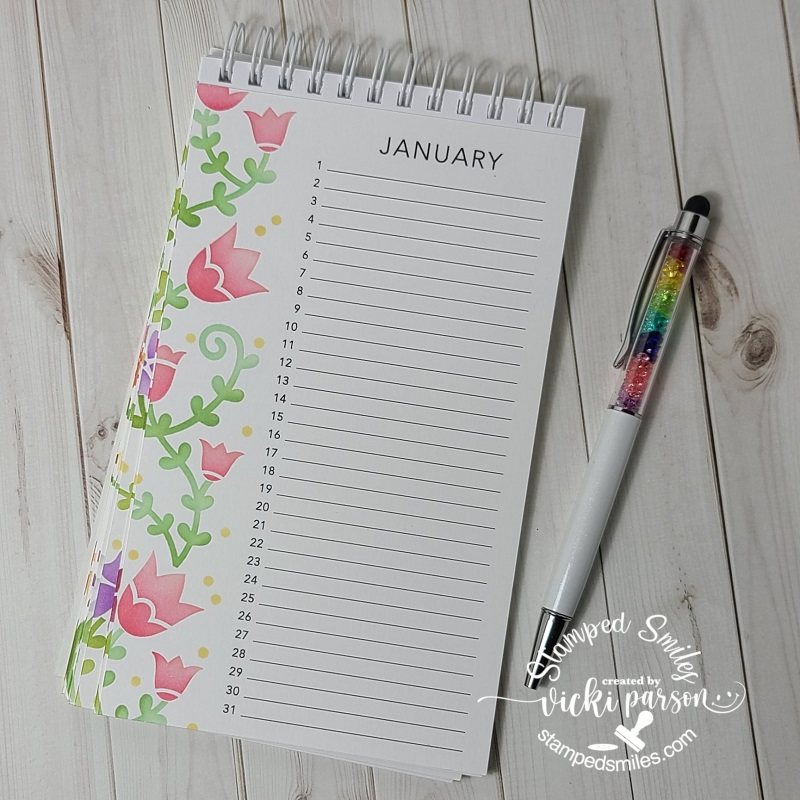
And since this post is all about calendars, I thought I’d take the time to complete TWOPerpetual Occasions Calendars from Taylored Expressions that I had gotten sometime last year for gifts and never got around to finishing them up.
I’ve just turned it to January to show, but you can see the other pages of the calendar on the bottom corner that were all stenciled up similarly. The link above takes you to the class kit which includes the TE Perpetual Occasions Calendar, the TE Calendar Coil plus the video class instructions from Taylor on how to put everything together. You can also get the TE Floral Vines Layering Stencils that work with this calendar which I’ve used with these that I made.
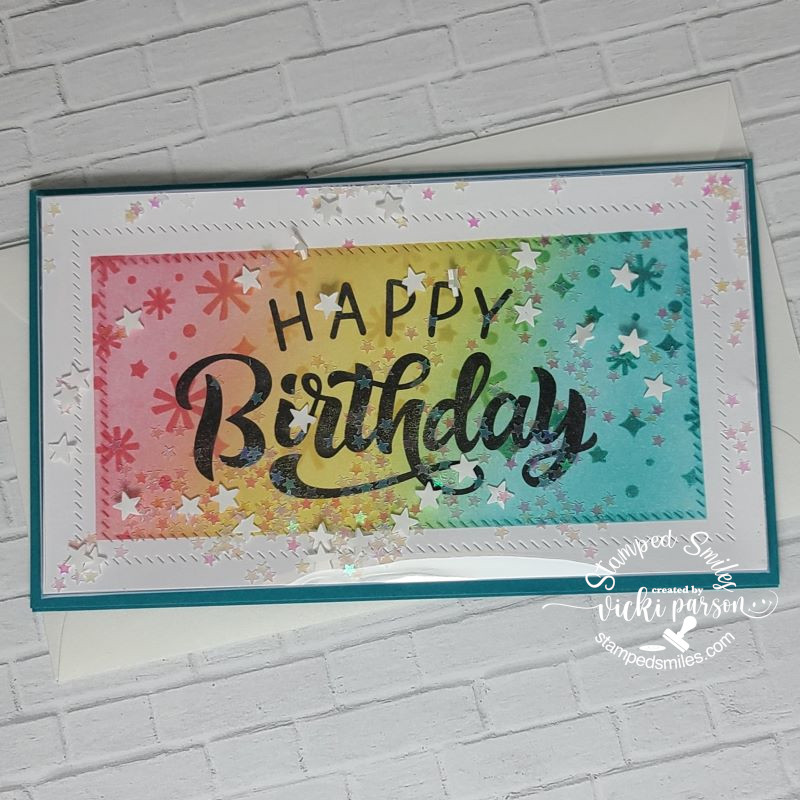
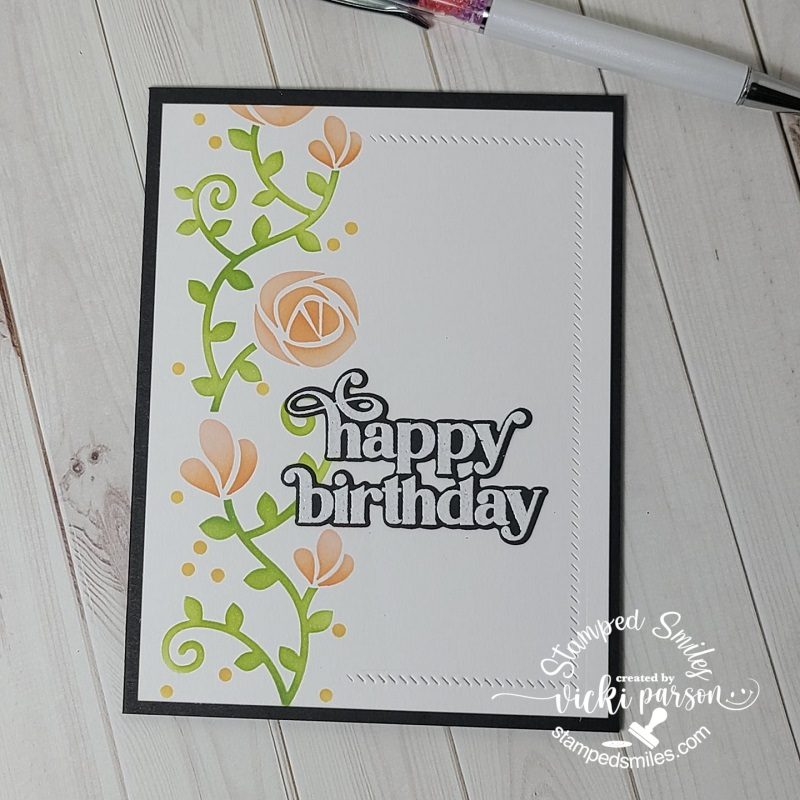
And of course, you can also use these same stencils to make a pretty card too! I’ve taken the same stencils that I’ve used on my calendar and made a birthday card. I took the instruction from Taylor’s class and applied it similar to my own card using the TE Diagonal Stitch Rectangle die to partially cut one side of the stenciled panel. I also pulled out the TE On Occasion stamps & dies to white heat emboss over black and cut out over the front of the card.
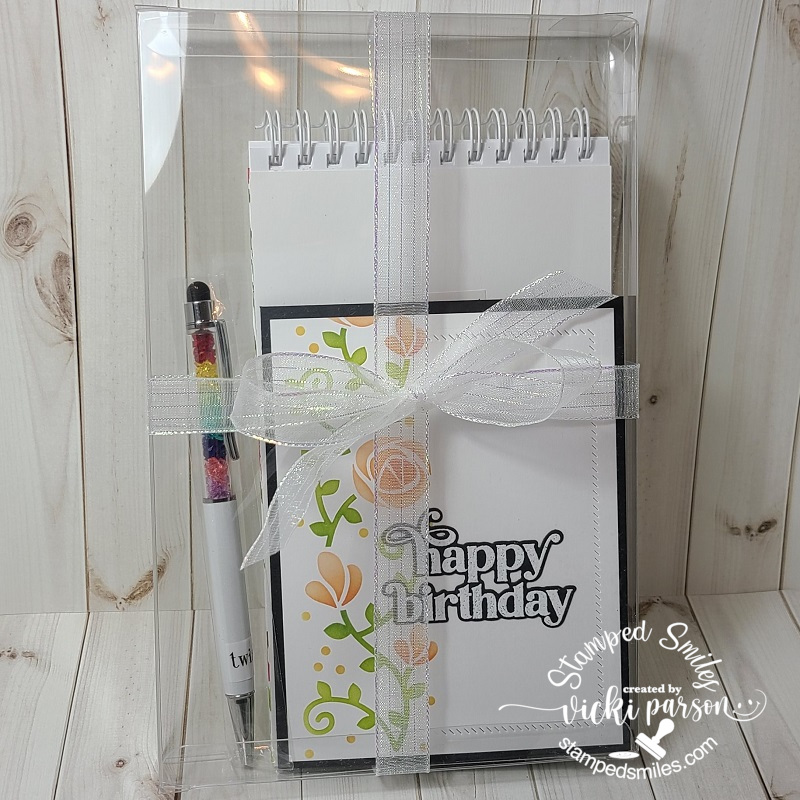
And then after creating two sets of the perpetual calendars and birthday cards to match, I’ve added a rainbow pen that I had previously purchased from Taylored Expressions (no longer in the store) and placed them all inside these TE 5×8 Clear Calendar Boxes. I pulled out some ribbon in my stash and wrapped it around the boxes. I now have two completed birthday gifts with cards this year! Yay! I feel like I’ve accomplished something ahead of time for a change!
I hope you’ve enjoyed my New Year calendar post today and have been inspired to start getting crafty! Thanks so much for stopping in and I’ll see you soon!
Challenges:
Creatalicious – Anything Goes optional something new (new calendar kit for 2023)
Just wanted to share some Christmas cards I made this year and wish each and everyone a peaceful, loving and joyful season!
Made with the Taylored Expressions Woodland Reindeer Silhouettes stamps & dies and the Woodland Reindeer Deco Foil Transfer Sheets. The sentiments were foiled from the TE Simple Strips in Reverse Christmas Panels. The shaded oval panel was blended on by using the TE Oval Masking Stencils and I splattered the background with white paint.
This card was made using a TE freebie (not available for purchase) and created in the same way with the card on top except this one has the sentiment in the center rather than the reindeer. I also foiled a couple of the snowflake/stars randomly over it and rounded the corners.
Thanks so much for your continued support my friends!!!
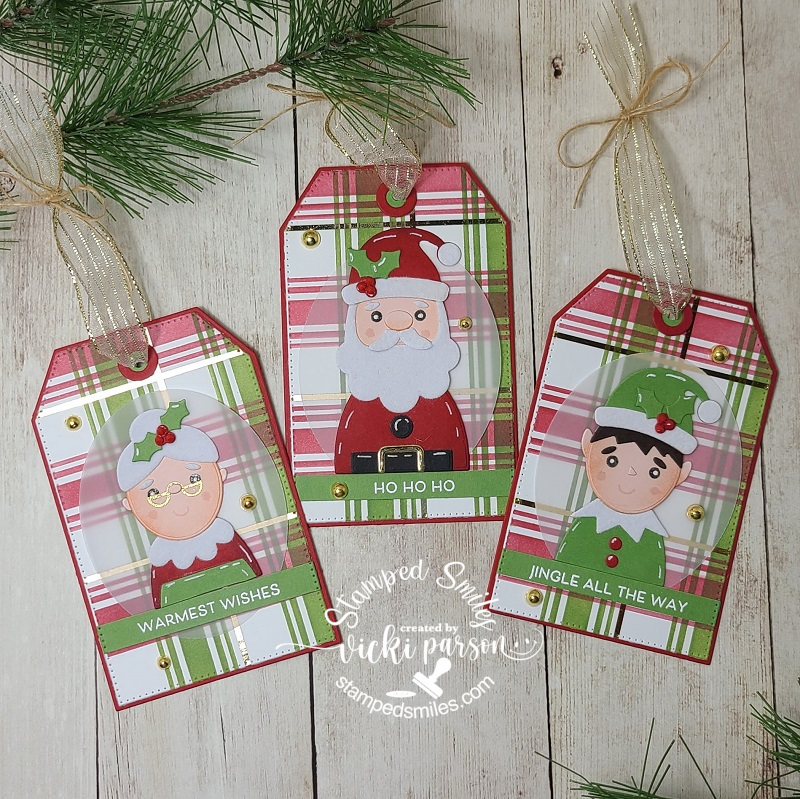
Hello friends! I thought I’d take some time for making up some tags which is something that I really enjoy doing, but don’t do it very often. They’re so nice to have a batch made up ahead of time so that you can pull one out as you need it instead of trying to hurry through making something. It’s always better to have fun instead of rushing!
This trio of tags was a bit time consuming, but it was nice to finally pull out some things that I’ve been wanting to play with and use without being in a hurry. The characters are from the Taylored Expressions Holiday Squad die set. The tags themselves were cut from the TE Pierced Stacklets dies, the TE Tag Stacklets 2 dies and the TE Tag Reinforcements dies. The background for the tags was made with the TE Foil It-Plaid Layering Panels that I foiled in gold along with the stenciling from the TE Plaid Layering Stencil set. The sentiments were white heat embossed from the TE Just Saying-Christmas stamps. I’ve used various colors of Taylored Expressions papers and inks and then finished the embellishments for the “holly berries” using the red from TE Tiny Diamonds-Bold set and then I also used the TE Gold Drip Drops in the background. The ribbon and twine from my stash at the top.
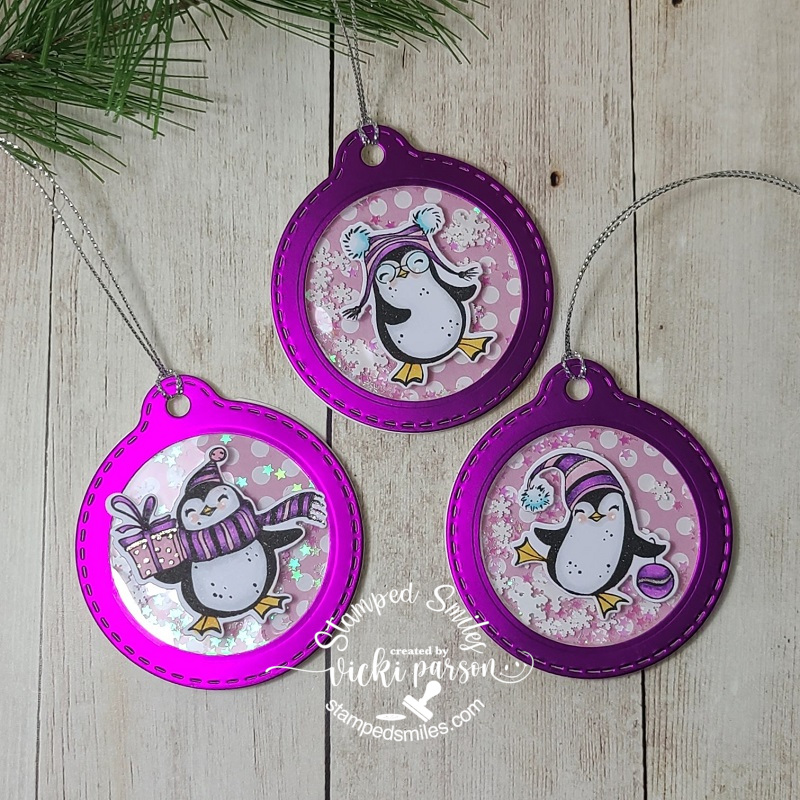
My next trio of tags here was really fun with these adorable penguins from Taylored Expressions Dancing Through the Snow stamp set and dies. I placed them over top of the transparency that was used to create a shaker tag behind the penguins. I used the TE Tag Stacklets 3 dies and also used some pink polka dotted papers from a free paper pad I received with an order. The bright shinny purple paper came from my stash I’ve had for quite a while and thought it would be a fun non-traditional color to use with these. I filled the shaker tags with the TE Bits & Pieces-Snowflakes and the TE Bits & Pieces-Sparkly Stars.
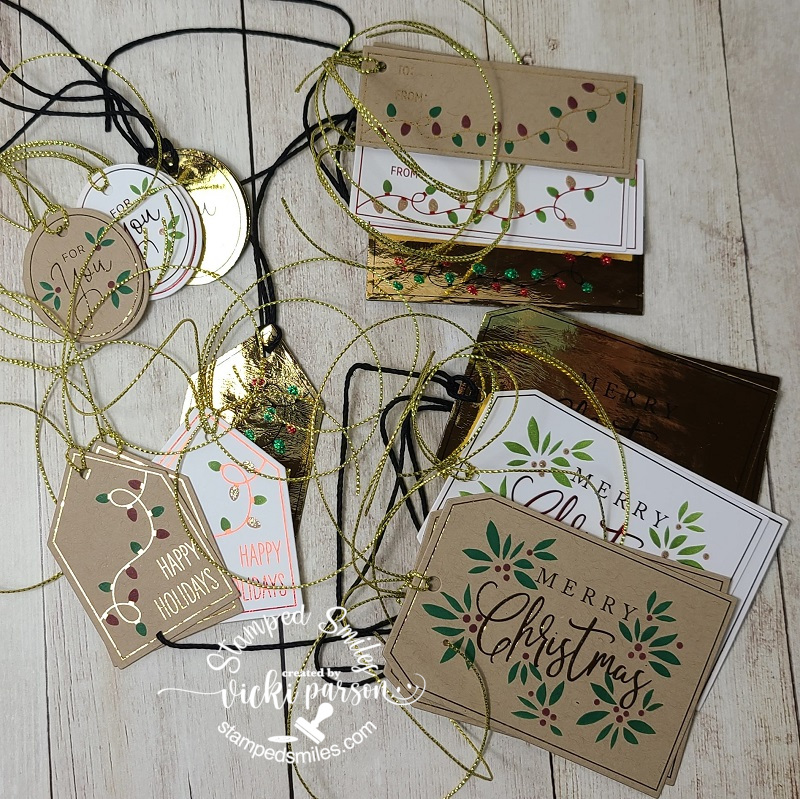
And these tags were a little hard to photograph with all of that cording in the way! (Pardon my photograph skills! LOL) They’re smaller than the tags above, but they work great for different packaging sizes! These were easy and fun as I’ve done mostly foiling with these using the Taylored Expressions Foil It-Simple Tags Holidays panels and the stencil to go with it. I cut them all out at the same time with the coordinating dies. The tags with the black cording are the negatives from foiling the toffee-colored tags and are mostly completely foiled. I just used different colored Stickles glitter to create the Christmas lights on those. (Really been having fun with the foiling this year!)
And lastly, I wanted to share a set of tags that I’ve made using various Inky Stamper sets! I decided to go through all of the different Christmas sets that I have from them and pull out the ones that I either haven’t used or barely used to play with them. The tag at the top was made with the Inky Stamper Fox set that I really enjoyed coloring. The presents at the bottom and the Santa hat were colored and fussy cut from the same stamp set. I made the background of that one with the Falling Snowflake Stencil with white ink and heat embossing over it with sparkly white embossing powder.
The tag on the bottom left is another fun shaker tag! I pulled out the Inky Stamper Nutcracker set to color him up and cut out with the coordinating die. He was placed over the acetate on the shaker tag. I used a scallop circle tag die with gold foil cardstock that I cut out the center with a circle die, added some papers for the background from the Doodlebug Buffalo Check/Woodgrain paper pack. The shaker bits inside are the Shaker Garnish which is really lightweight and still make a great shaker sound too!
The bottom right tag was cut from an Infinity Tree die set. I sponged the edges with some white ink and punched a hole at the top to make it a tag. That cute little truck is from the Inky Stamper Vintage Truck set that I colored and cut out with the coordinating dies. I used a fun Lawn Fawn road die to place him over and then stamped the sentiment from the stamp set with white ink. I also added some snowflake sequins above him with the Icicles sequins mix. And both blue and red Doodlebug Twine was used for two of the tags. The other ribbons/cord from my stash.
Thanks so much for stopping in today! Hope you’ve been inspired and enjoying the Season!
Hey there friends! Hope you’re having a wonderful week so far! We’re getting closer and closer to Halloween already!🎃 I haven’t made as many Halloween makes as I usually do, but as the day gets closer I’ve been more in the mood to pull out some things to have fun with my stash and my thoughts turned to “Grumpy”.
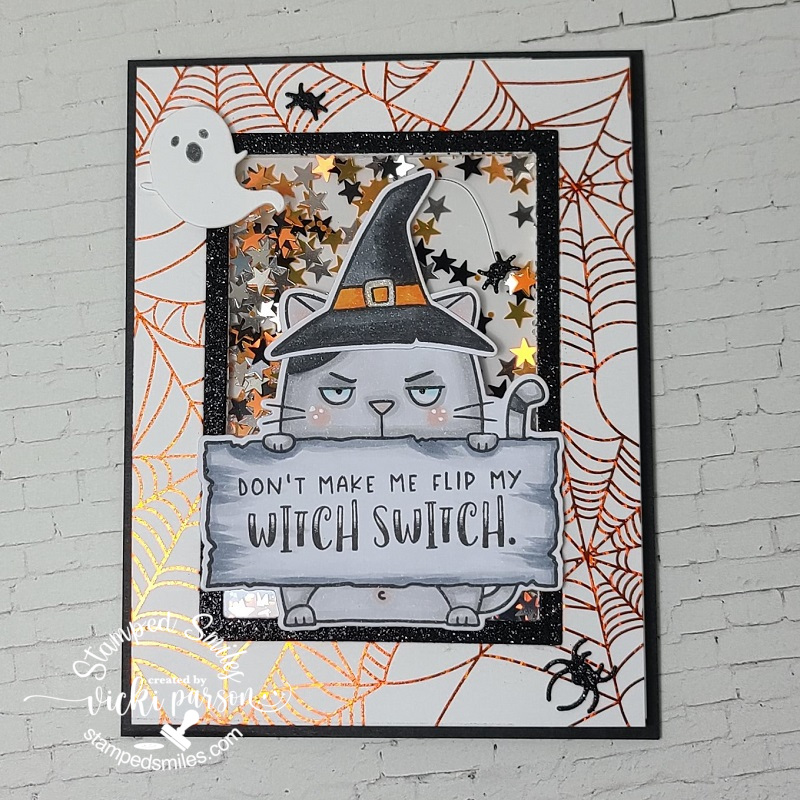
If you’re not familiar with “Grumpy”, this is the Big Grumpy Cat from Taylored Expressions. I absolutely love the “Grumpy” and “Grumplings” line and I don’t pull them out as much as I’d like to. Since it’s closer to Halloween, I’ve also pulled out the Big Grumpy-Halloween accessory set to go along with him too! (The only thing I used from this set was the witch hat and the sentiment.) I’ve stamped, colored and cut out each of these items for my card.
The #TEMakerChallenge has the theme this month of using Oreo & Sugar Cube with the option of adding any other pop of color. I’ve decided to pop in an orange color for mine. The theme was also “Sparkle & Shine” through foiling, heat-embossing, glitter paste or sparkly cardstock.
So, for the “Sparkle & Shine” I’ve taken a Foil-It Spiderweb panel and foiled some orange Deco Foil over it. I then took one of the Frame in Frame 3 dies to cut out the middle of this panel, added some acetate over the opening and made it into a shaker panel. I die cut the same frame as well as the Little Bits-Spiders die from some black Glitter Cardstock. I attached these pieces onto the web panel along with adding the Grumpy Cat with his hat string and extra spider attached to him over the acetate. I attached double-sided foam around the opening and added some “shaker stars” in the colors orange, black and silver. And lastly, I thought it would be fun to pop up a left-over ghost I had from a previous project at the top! (I think the ghost is in fear of the “witch switch”!) 😂
I also have another “grumpy” card to share…
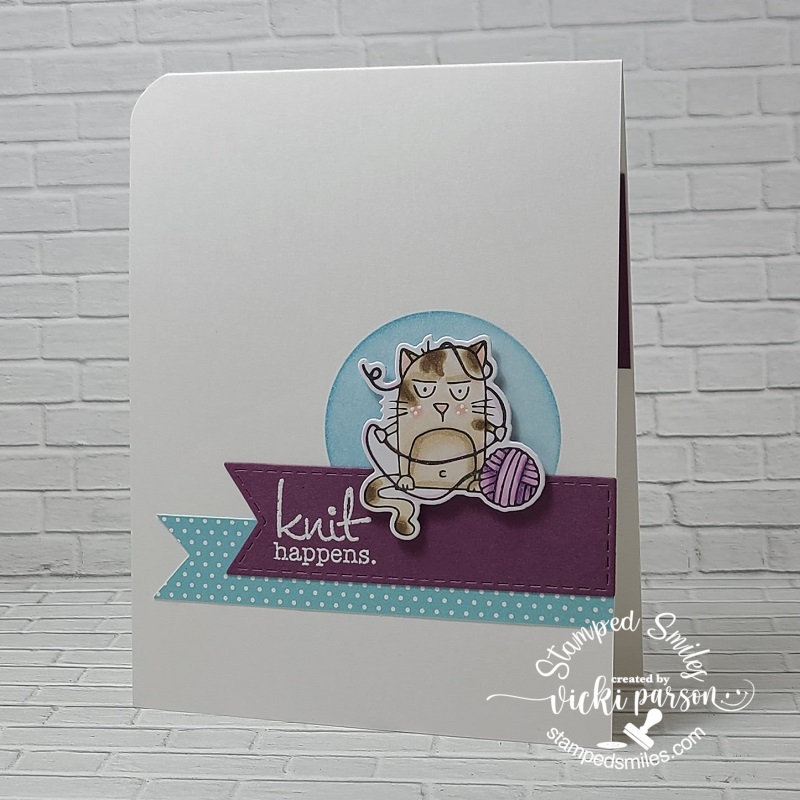
So this card was made to send a smile to a friend. I’ve used a cat for this one as well from the Taylored Expressions “Grouchy Grumplings” set which I don’t believe is available in the store any longer.
I kept it a simple card by stamping, coloring and cutting out the grumpy. I ink blended a circle that fit him with blue ink, white heat embossed the sentiment and cut it out from the TE Stitched Banner Stacklets. I popped grumpy with foam tape over the sentiment banner and circle. I also used some TE decorative papers from my stash and cut out a banner with it using my scissors. A corner chomper was used to round the top left corner of the card to finish it off.
I hope you’ve enjoyed my “Grumpy” projects today and have been inspired in some way! Really appreciate you stopping in!
Hello friends! The weather has been really nice over my way so I’ve been taking advantage of it by enjoying the outdoors before it starts changing into more chilly temperatures. All of the prize winners have contacted me and the packages have all been sent out. I have received notice that the U.S. winners have gotten their packages and hopefully the overseas will be arriving soon. My thoughts are also with those that were affected from Storm Ian and hope for healing and recovery as soon as possible.
Although it’s been a while since I last posted, I have been working on some things for SWAPs and a few other cards that I had created as well to share with you.
please click on the photos below to see them close-up
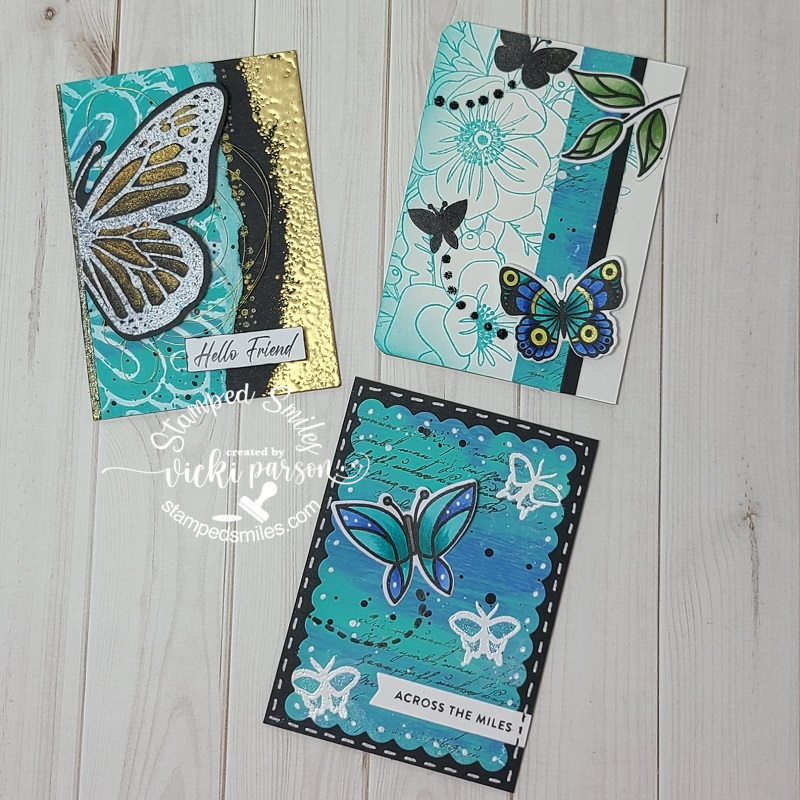
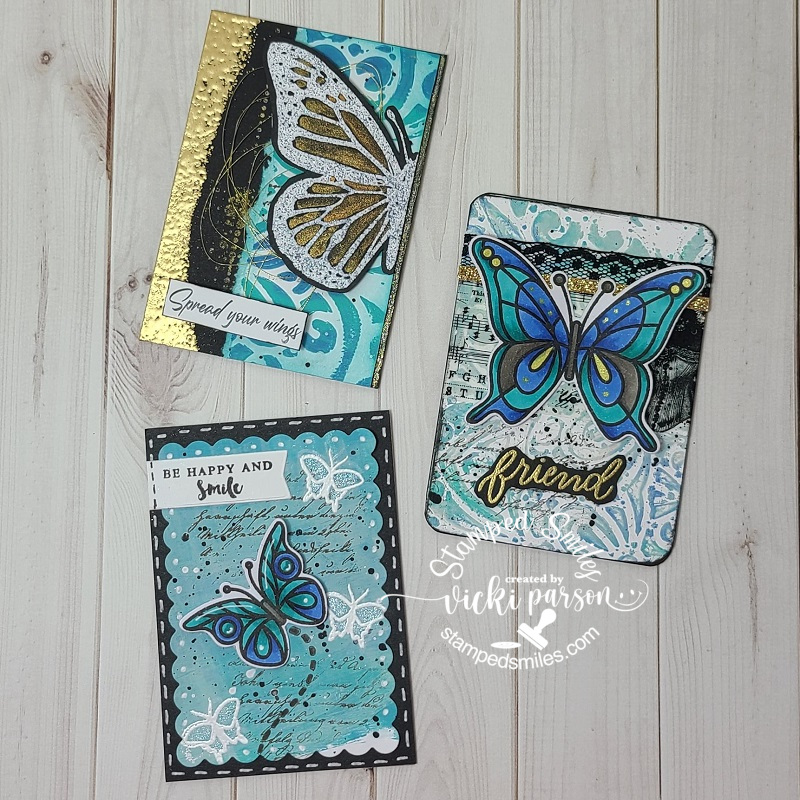
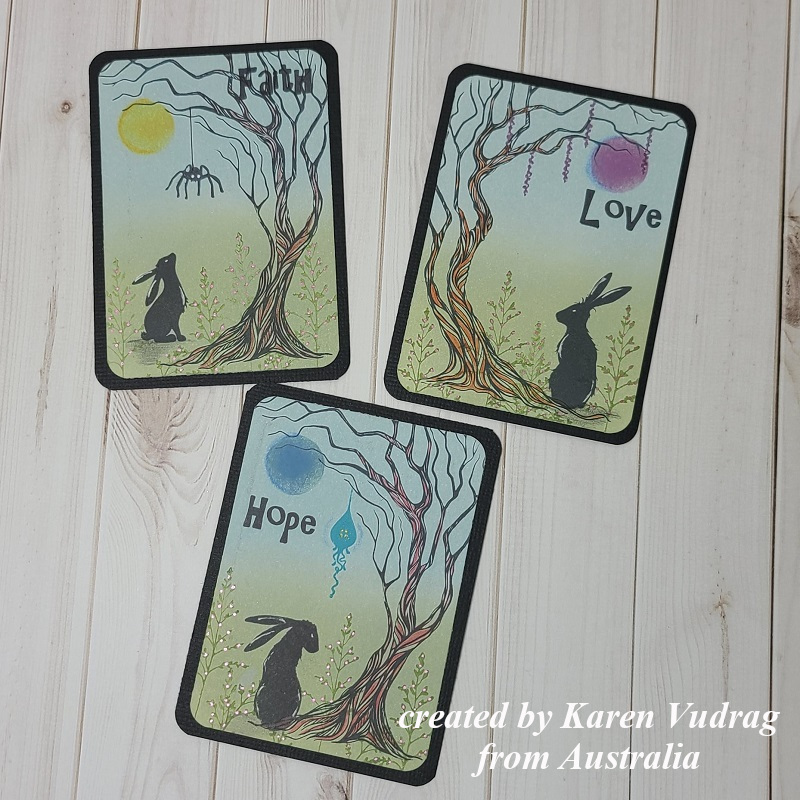
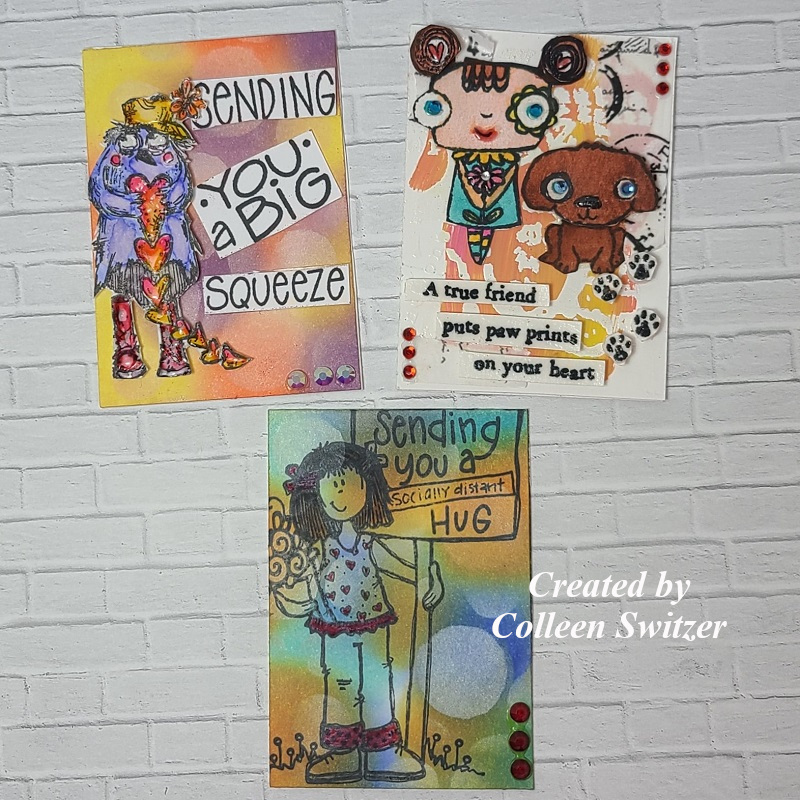
Within a FB Group that I’m in, we could choose to join an ATC SWAP with the theme of “Friendship” and these are the cards that I had created. I swapped with two others and then kept one set of three for myself. I was excited because this is the first ATCs I’ve sent overseas and really enjoyed making the collection. I thought the butterfly theme with similar colors would work keeping the “Friendship” in mind…
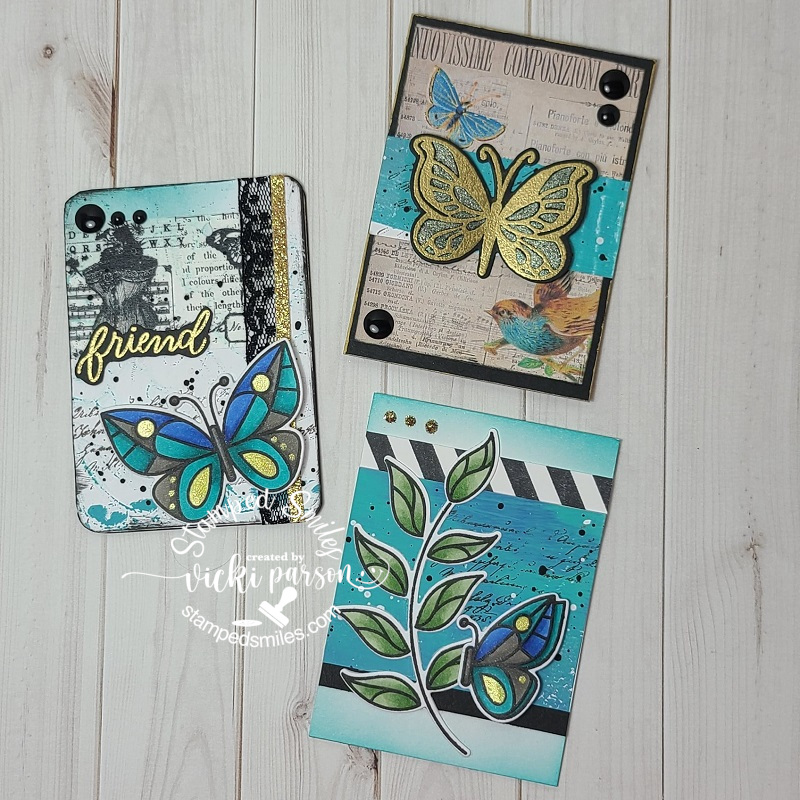
And then below are the set of ATCs I’ve received from my SWAP partners in return. The first lady sent her ATCs from Australia and the other lady was from the UK I believe. Love them and was excited to receive them to add to my book.
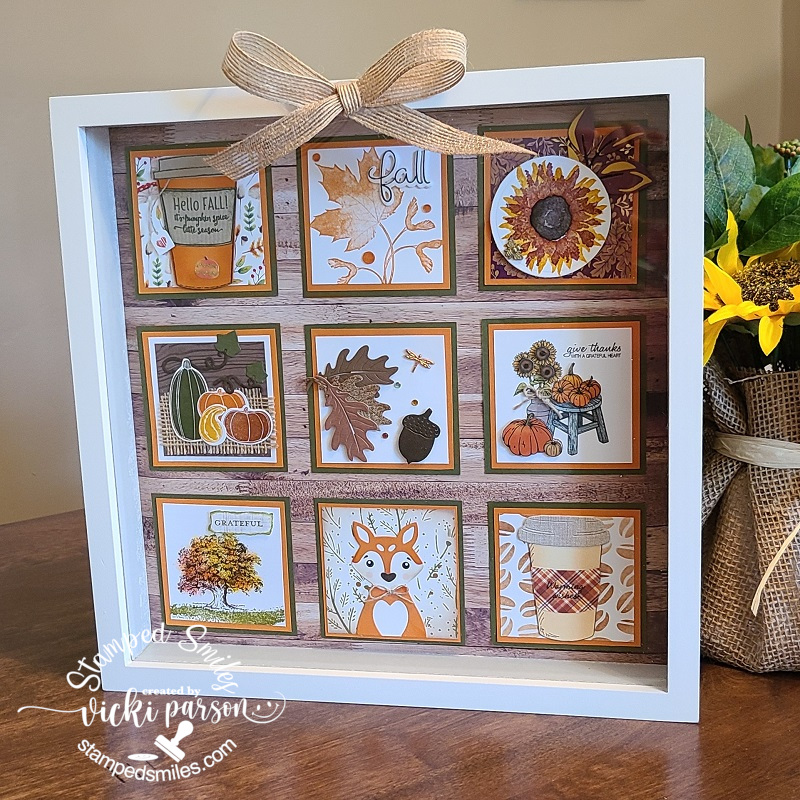
I was also involved in another “StampedSampler SWAP” making those squares like I had done with my Summer one if you remember that with my friends Patti, Shirley and Donna. This time our squares were the theme of Autumn/Fall using the Stampin’ Up! colors Pumpkin Pie and Mossy Meadow. It’s so fun to see them come in and then put it all together in the frame! Here’s how mine finished out:
For my Sampler frame, I used some different colored woodgrain pattern paper to attach the squares to and this frame is a bit different than my Summer Sampler (Check it out in THIS POST if you want to see that one.) It can stand on a table surface or you can hang it up. I also decided to add a burlap bow at the top of the frame using a hot glue gun.
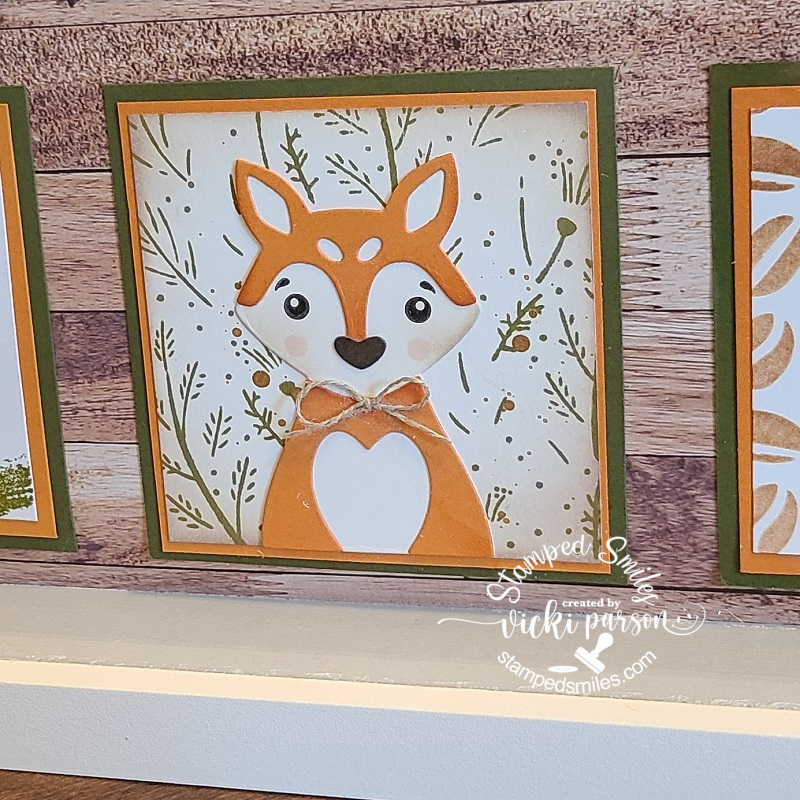
This is the Sampler Square that I had made using the adorable fox from the Taylored Expressions Woodland Squad Die & Clear Stamp Combo set. The background was stamped with the TE Four Seasons Stamp & Stencil Combo set using ONLY the background stamp in one color. I then using some gold acrylic paint to splatter over it. I also added a twine bow to the fox. I believe we’re going to be doing another one for Winter too…stay tuned!
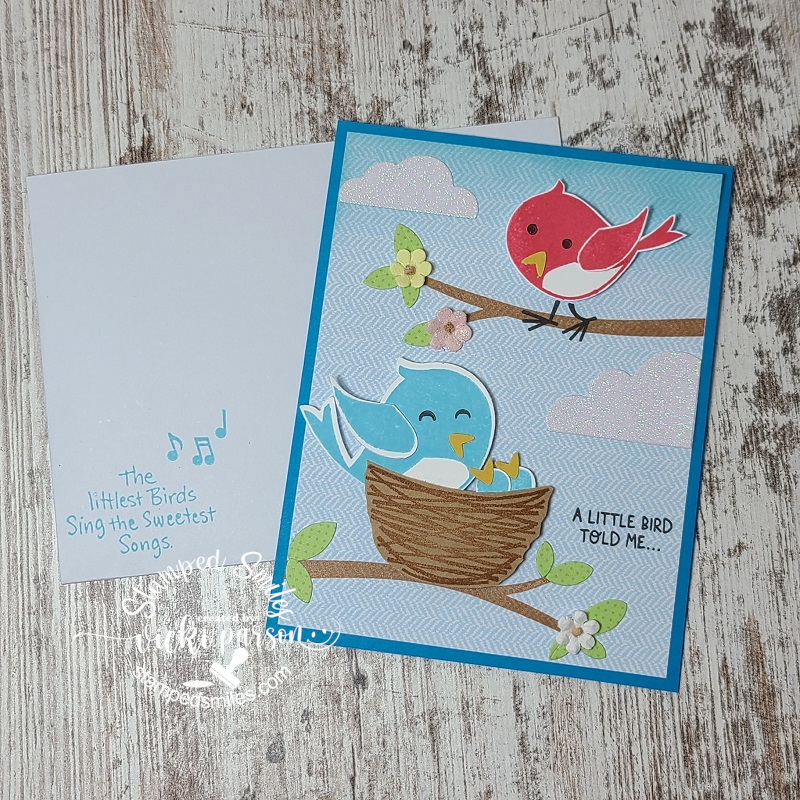
My friend Patti had also sent me an extra card kit from one of her classes along with her SWAP square, which I thought was so nice…so I had some fun putting it together as I don’t have this set which I believe is a Stampin’ Up! one.
The card kit had all of the pieces in it along with the stamped birds cut out, the stamped branches and sentiments (even on the included envelope) along with cut glitter clouds and flowers! There was a sheet with photo and instructions so I just followed along except I die cut some leaves for the branches from a piece of scrap green paper I had. Now I have a cute little birthday card ready to send out, so thank you for the fun Patti!😉
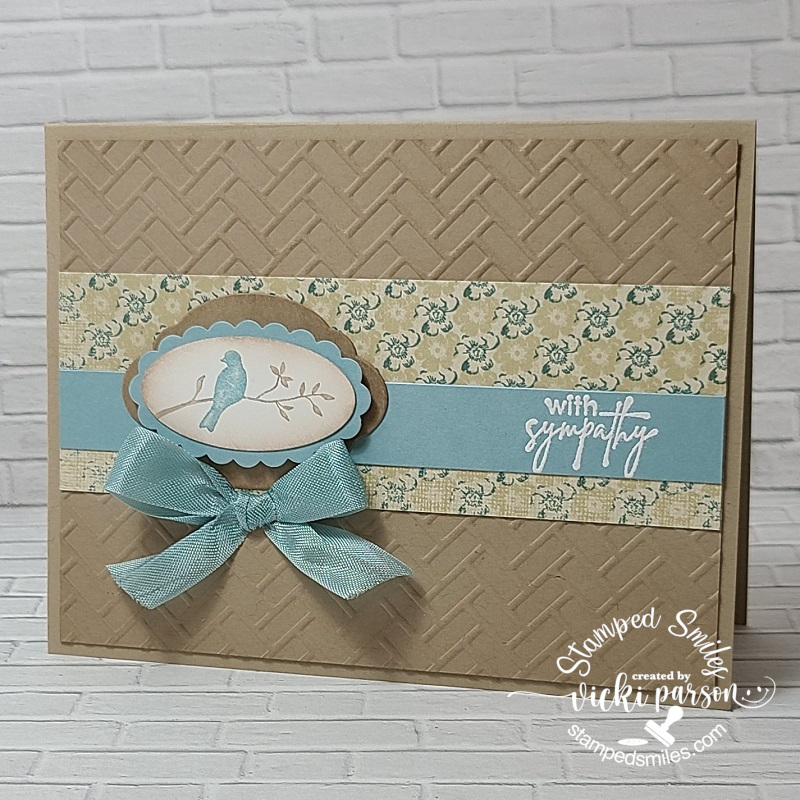
And speaking of birds and Stampin’ Up!, I had to make a sympathy card for someone that lost their pet bird. I was looking through my stash and found an older Stampin’ Up! set with a bird silhouette which I thought would be good for a sympathy card like this. I was inspired to pull out more of my older Stampin’ Up! stash to use so I used some old punches, ribbon and paper for my card as well.
I hope you’ve enjoyed the inspiration today and I thank you so much for stopping in! If you have any questions about my post, please let me know. Have a great day and see you soon!
Hello friends! It has been while since my last posting, but was having some back issues and hobbling around a bit which is never a fun thing to deal with, but I’m getting a bit better day by day. Hoping to get back to doing some crafting soon! I’m going to be working on an AJ page for tomorrow’s post…so stay tuned!
I realized that my giveaway had ended and I needed to pull some winners of the Taylored Expressions background stamps for 4 people!😀 So the way I drew out the names, I did sort of “old school” by printing out the names of everyone according to which stamp or stamps that were indicated via comments from the GIVEAWAY POST. So if you were only interested in one of the stamps, your name only went in the draw for just that particular stamp. If you indicated that you were interested in all of them, then your name went in for each one. I cut the names in strips, wadded them up and had my husband hand-pick out a name strip for each stamp. If there was a duplicated name, I would’ve had him draw another, but there was not any duplicates. Here are the winners for each stamp……..
WOOO-HOOO!!🥳🎈 CONGRATULATIONS TO ALL OF THE FOUR WINNERS!!!
If you are one of the winners above, please be sure to CONTACT ME via the form and share your snail mail address with me so that I can promptly mail out your stamp package to you! (I will also try contacting you myself to let you know you were a winner as well.) I would appreciate you contacting me as soon as you can so I can get your stamp to you. If I don’t hear from you within 2-3 weeks, then I will try to draw another winner to claim it.
I’m very sorry if you were not a winner THIS time, (blame my husband!😁) but you never know when I’ll have “extra duplicates” in my craft room that I’d like to share with a fellow friend! Thank you for your kind support! Happy crafting!🤗