Anything Goes at Cute Card Thursday With Curly

Hello friends!  I hope you’re all having a wonderful week so far!!  It’s really starting to feel like Summer now with the warmer temps!

Today is a new challenge this week over at Cute Card Thursday!  This week we have our “Anything Goes” challenge with our sponsor Whimsy Stamps!  So of course, I am using a cute image from Whimsy Stamps for my card today:

Vicki-WSCurly-June6

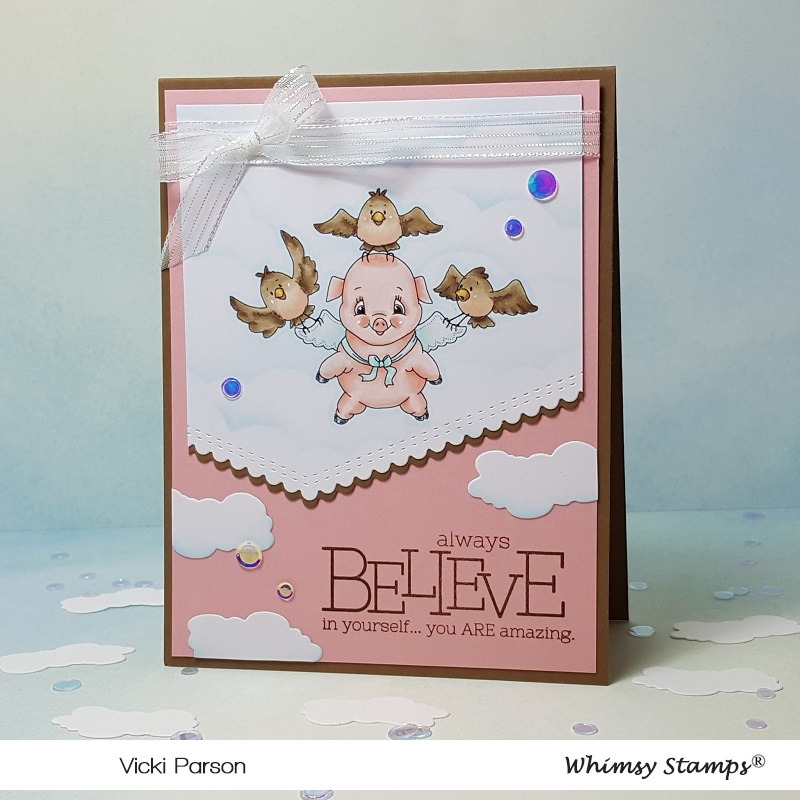
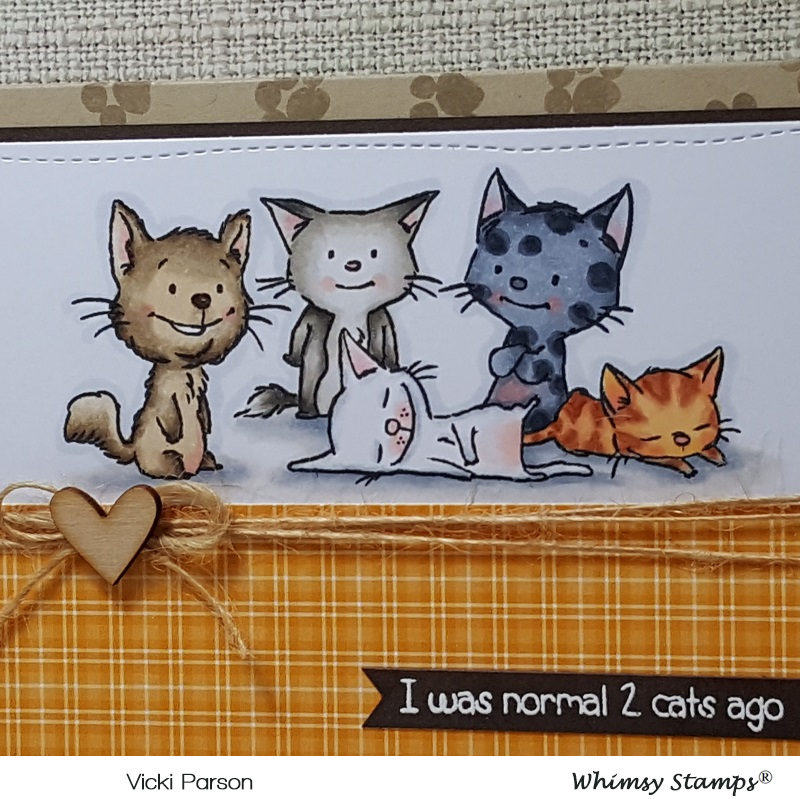
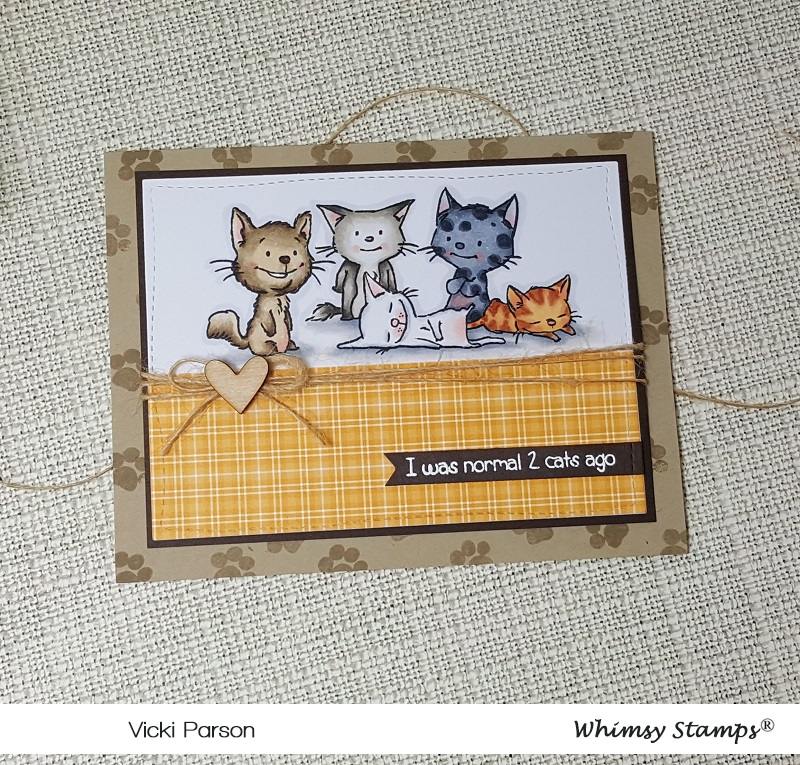
Tee hee!  This little guy holding the tiny “sea creature” makes me smile and giggle!  I’m not really sure what reaction he has about it!  His name is just as cute too!  This is Curly from Whimsy Stamps.  I thought he needed a scene, so I made one for him.

I started with some Bristol Smooth watercolor paper and masked off the line between the sky and the sand.  I used my Distress Inks to blend in the colors.  After doing the sky, I thought that it was a bit too dark, so what I did was take a baby wipe and swiped it across which lightened up the colors the way I wanted them for the sky.  The bottom “sand” portion was also masked, and I blended the bottom blue color into the sandy colors which created a nice shoreline.  I then took a water bottle and spritzed some water droplets over it to create “texture” for the sand.  I also took some Copic markers to create more texture with the pointillism technique, plus added some white ones with a gel pen.  the water at the bottom was covered with a glitter pen.  (You can see better details in the photos/description below.)

Vicki-WSCurly-June6-close

So, I’ve got him all colored up in the following Copic markers:

  • Flippers/water gear – B32, B34, B37, Y11
  • Swim Trunks – R32, R35, R37, Y11, Y15
  • Sea Creature – BV23, BV29
  • Hair – E41, E43, E44, E47
  • Skin – E000, E00, E02, E11, E21, R20
  • I used gel pens to color lines on trunks and cheeks, I’ve used a glitter pen over the “sea creature” and his flippers along with the bottom water area.

I fussy cut this image and used some liquid glue to attach over my scene.

Vicki-WSCurly-June6-flat

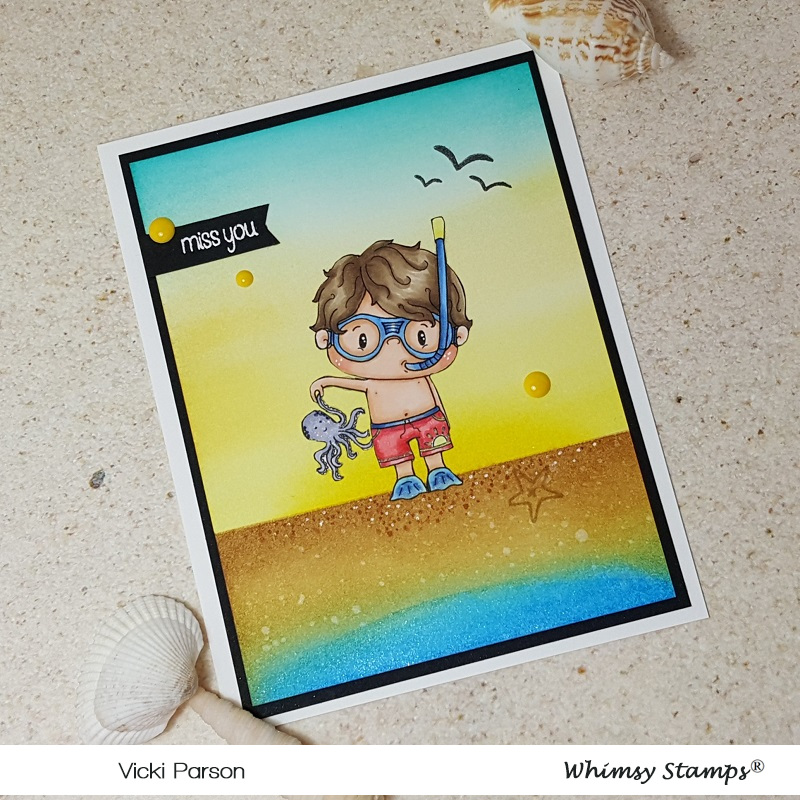
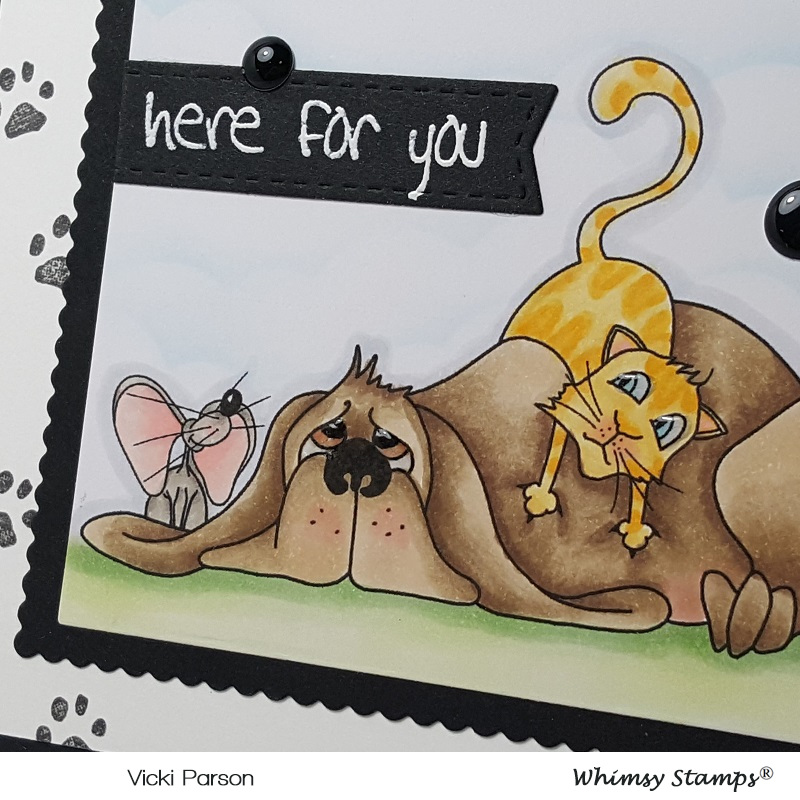
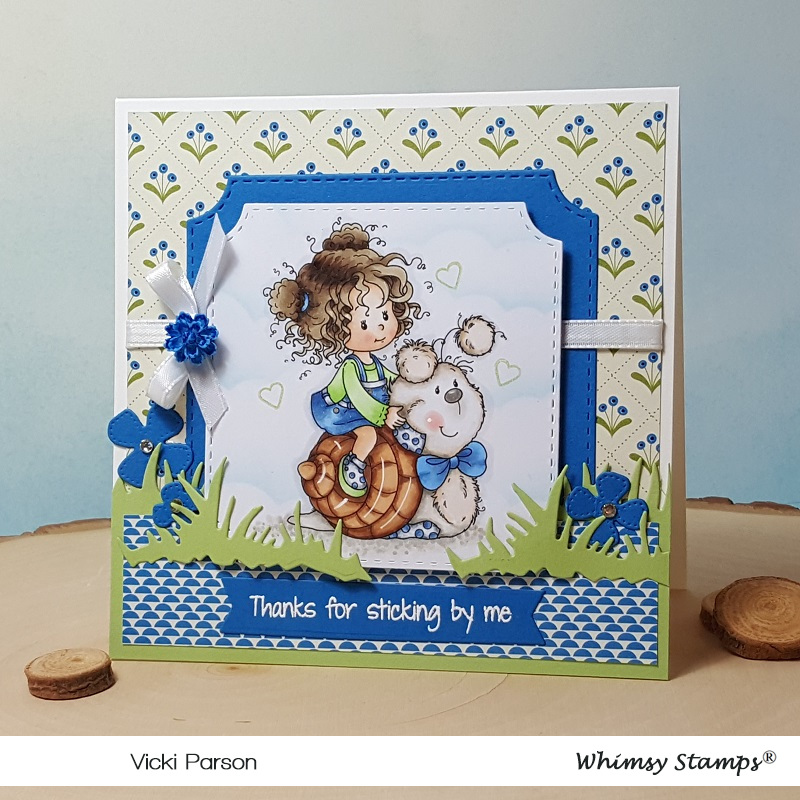
For the scene, I stamped the birds in the sky and a star fish image from an older Whimsy Stamps clear stamp set. I then took the sentiment from the WS Everyday Mini Sentiments and white heat embossed it over a black strip of cardstock and then used my scissors to cut out a banner to attach over the scene.  I layered this over another piece of black cardstock that was attached to an A2 sized top folding white card base.

Lastly, I’ve taken some WS It’s a Party enamel dots and added them to the card.

Hope you’ve enjoyed my card today! Thanks for stopping in!  I’ll be seeing you tomorrow for some fun news!

Challenges for this card:

  1.  A Bit More Time to Craft – Anything Goes
  2. Crafty Friends – Men/Boys
  3. Sweet Stampin’ – World Ocean’s Day/Anything Goes
  4. Use Your Stuff – Summer Fun
  5. Always Fun – Summer Fun
  6. Unicorn – For the Men/Boys

Bee Happy for Whimsy Stamps June Release!

Hello friends!  There is so much to “bee” happy about for sure!  It’s been sunny out lately; it’s the weekend and I have some fun creations to share with you for the Whimsy Stamps June digital release today! 🙂

Vicki-BeHappy-June1-Trio

Check out these ADORABLE bees!!  I have made 3 different cards because I just couldn’t stand not being able to color each one of these which are all included in this set!  I have used Crissy Armstrong’s “Bee Happy” digital stamp set.  This is a set that was previously released as a stamp set, but now available in digital format starting this month!  Good news that you can now choose between either format you prefer!

I’ve sized each of these bees in the format to fit onto a 4″ square card design.  I’ve cut them out with a hexagon die cut and layered another black piece of cardstock behind each one.

For the background, I’ve taken a yellow piece of cardstock slight smaller than the 4″ square top folding white card base and embossed it with a fun hexagon embossing folder.  Before attaching them to the card base, I’ve added some black ribbon at an angle over it.  I then attached the image panels and added the ribbon bow which I then placed a bee wooden accent to the center of each one.

The story with the black splatters actually came about from an accident I had!  I opened up a black shimmer pen over top one of the cards and it had a leak in it!  When I popped open the cap, it spilled all over my card!!  OH NO!!!  Obviously, I had all of my cards done at this point and I loved the way I had colored them….so I just decided to “go with it” and added some more splatters to each one.  I actually like the way it looked after I completed it!  They look like “busy bee’s” now! TEE HEE!

Vicki-BeHappy1-BeeMine

Here’s a closer look at the “couple bees” image.  For each one of the hexagon image panels, I’ve taken a black marker along the edges to make the stitch lines.  I went around the edges of the image panel with some Tumbled Glass Distress Ink and ink foam blending tool for each card.  Also, for the sentiments on each card, I found an old “bee” style stamp set and used it to go with them.  I believe that the “Bee Happy” rubber stamp set comes with sentiments that go perfectly with these cuties!

Here’s how all of the bees were colored up with the Copic colors:

  • Wings/around bees – B00, B000
  • black stripes/nose/feet and hands – W9, W7, W5
  • Yellow stripes – Y17, Y15, Y13, Y11, R20 (cheeks)
  • The tiny heart from the sentiment was colored with Y15 and then I’ve added some Nuvo Glitter Drops over it.
  • All the wings for each card were covered with the Wink of Stella Glitter Pen.

Vicki-BeHappy2-BirthdayBee

This little dude was so fun to color up with his party accents! 🙂  Here are the Copic colors I’ve used for the accessories:

  • bag – E87, E84, E81
  • hat balloon, party hat, tissue from bag – V12, V15, YG11, YG13, YG25, YR04
  • I’ve covered the purple on his hat with the Nuvo Glitter Drops
  • The wings and balloon were covered with the Wink of Stella Glitter Pen

Vicki-BeHappy3-BzzzFriend

I just love how he’s trying to hand out a flower to you! 🙂  Here’s the following Copic colors that I’ve used for the flower:

  • flower stem – YG61, YG63
  • flower middle – Y15 (I covered it with the Nuvo Glitter Drops again)
  • flower petals – R32, R35, R37
  • His wings were covered with the Wink of Stella

I hope you’ve enjoyed my bee creation today!  Please be sure to BUZZZZ on over to the Whimsy Stamps store!

Thanks so much for stopping by and I’ll see you again soon!

Challenges I’d like to enter:

  1.  Through the Craft Room Door – Anything Goes
  2. TGIF – #TGIFC214 Create a Set!
  3. Aud Sentiments – Nature + a sentiment (hoping bees are apart of nature)
  4. Creative Knockouts – Embossing Delight (embossing folder on each card)

Thinking of You with Fleur

Hello friends!  I hope that you had a lovely weekend!  Here we are with the last week of May already and Summer is showing itself in many ways right now.  I do love seeing the flowers everyone has been sharing posts of with their yards full of blooms coming up everywhere!

Today I have this card using a cute Whimsy Stamps Digital stamp:

Vicki-Fleur-May28

This cutie was released this month by CC Designs called “Fleur“.

I just love the ring of flowers in her hair!  I’ve actually printed her out twice so that I could cut a few extra flowers to add to the accents of my design!

For my card, I’ve taken a panel from the Rustic Woods and Brick digital papers and used that for the background of my design.  I took a marker and added some dash marks for a stitch look.  I added this piece to a 5″ square top folding suede card base which I sponged around the edges with some white ink.  I did the same for the die cut fence panels and the circle layer behind the image.

I’ve taken a piece of decorative paper from my stash and sponged some ink around it and also wrapped some organdy ribbon around it before attaching to the card front base.  I then die cut some grass to go over my fence border.  My image was cut with a stitched circle die and sponged around the edges with the same ink as the decorative paper.  This was layered over top of the suede circle panel, and these were popped up with some craft foam.  I’ve added the bow and the cut-out flowers from the extra printed out image and then I’ve added a flower gem in the center of the bow.  Each flower including the ones on the image were filled with some Nuvo Honey Gold Glitter Drops.  I stamped a sentiment from the Whimsy Stamps Everyday Mini Sentiments clear stamp set with the same suede color ink.

Vicki-Fleur-May28-close

Here’s a closer look at the coloring on this image.  I’ve used the following Copic colors to color her in with:

  • Hair – Y00 (used for base), Y11, YR21, YR24, YR27
  • Skin – E21, E11, E00, E000, R20
  • Outfit/Shoes – E89, E87, E84, E81
  • Flowers – BG000, BG10
  • White gel pen used for cheeks and around hair flowers.
  • Ground/shadow – C1, E0000

You can also see the details from the Nuvo Glitter Drops that I’ve used in the center of the flowers including the one in the center of the bow.

Vicki-Fleur-May28-flat

Thanks so much for stopping by!  I enjoy reading your thoughts! 🙂  See you soon!

Challenges:

  1.  Little Red Wagon – Flower Frenzy #498
  2. The House That Stamps Built – M2219 Anything Goes
  3. Pammies Inky Pinkies – PIP1921 Anything Goes
  4. Crafting From the Heart – Anything Goes

It’s Party Time!

Hello friends!  It’s been sort of a crazy few days with our weather!  Usually it’s pretty warm and sunny, but we’ve been having some severe rain and cooler temps.  Plus more rain coming, so I guess I’ll be in my craft room playing!  🙂

Today I have this happy party fellow from Whimsy Stamps to share with you:

Vicki-WSPenguin Bday Party-May21

Isn’t he adorable?!  This image is called Penguin Birthday by Crissy Armstrong.  This was previously released as a rubber stamp, but this month it has been released in digital format so you can have either option available!

I have cut him out with the Whimsy Stamps Notched Squares die set and cut an additional piece in black cardstock for a layer behind him.  For the base of my card, I’ve used a green colored 5″ square top folding card base and attached a piece of striped paper across the lower section and sponged some white ink along the edges of the green card base panel.  I then used a piece of 1/2″ score tape across the top of the striped strip panel and then used some fun glitter over top of it and burnished into the tape.

I’ve also used this same glitter to go over the Whimsy Stamps Happy Large Word die cut out from some double-sided sticker paper.  I white heat embossed the “birthday” over a strip of black cardstock that I’ve cut into a banner and placed it directly underneath the glittered word die.  This came from the Happy Everything Clear Stamp set.

Vicki-WSPenguin Bday Party-May21-close

Here’s a closer look at the coloring I’ve done on this cutie.  You can also see the fun details of the glitter that I’ve used on the word die.  I love the sort of “confetti flex” contained in this glitter.  It’s something I got in a sample size from a card kit a couple of months ago and it’s great for birthdays! 🙂  Hard to see in the photo, but I’ve also used a clear glitter pen to go over the balloon and present.  I sponged around the image panel with some of the same green ink that I’ve used for the card base cardstock color.  I’ve used the following Copic markers to color him with:

  • Penguin – C8, C5, C3, C1, R00, R000, YR27, YR24, Y32
  • Balloon, party hat, present – YG01, YG11, YG13, V17, V15, V12
  • Shading, shadows, ground – C3, C1, E0000

Vicki-WSPenguin Bday Party-May21-flat

It’s always nice to have a good selection of birthday cards on hand when you need to hurry up and send one out and I think this one is great for any gender or age.

Challenges:

  1.  Little Red Wagon – Happy “BIRD”day!
  2. Creative Fingers – Anything Goes
  3. QKR Stampede – #348 Anything Goes
  4. Allsorts – Happy Birthday!!!
  5. Seize the Birthday – Anything Goes + toppings=Balloons!!

P.S.  I know that many of you have been asking for updates on the bird nest situation and so here’s another photo of what we were able to capture:

20190520_185442

After the flowers were done blooming, we were able to get more of a clear shot and CAREFULLY get close enough to get the mother Robin sitting on her nest!  Like I had mentioned, she doesn’t like it when we go out there.  She chirps at us and waits for us to leave.

20190520_184645

Here is one of her standing in the nest.  We think that she may have hatched those eggs as it looks like she might be feeding the babies!  So next time we’ll check back in and see if we can get a look at those babies in there! 🙂

Hope you’ve enjoyed my post today!  Thanks for stopping by and I’ll see you soon!!

Fairy Princess Bunny With a Pocket!

Hello friends!  Hope you have enjoyed your weekend.  Yay!  We are finally getting some decent weather to be outside in!  It’s been rainy and chilly for a while, so it’s been nice to see some sun the last few days!

Today I have this really sweet image to share from Whimsy Stamps May Digital release and a fun extra added element with it!

Vicki-PC Fairy Princess Bunny Tag

I have made a tag using this really sweet Pollycraft image from Whimsy Stamps called Fairy Princess Bunny.  Isn’t she so sweet?!  I found some pretty papers to go with her and placed it over a purchased kraft colored tag that I sponged some white ink around the edges.

After placing the papers where I wanted them and trimming it down, I also attached a lace trim on each end of the papers over the tag.  The papers also had a bunch of sentiments included in the pack, so I added the circle sentiment to the tag and then die cut a kraft piece to layer behind it.  I also added some flowers and the ribbon at the top and then finished it off with some clear sequins.

Vicki-PC Fairy Princess Bunny Tag-close

Here’s a closer view of the coloring I’ve done on this cutie.  I’ve used Copic Markers to color her in with using the following markers:

  • Dress, shirt, shoes, socks – B37, B34, B32, B01, B00, B000
  • Bunny, bunny ears – R11, R00, R000, C3, C1, C0
  • Wings – R00, R000, E000, BG000
  • Hair – YR30, E41, E43, E44, V95
  • Skin – E000, E00, E11, E21, R20, R00
  • Grass – G24, G21, G20
  • I used gel pens to make dots on wings and color in the crowns on the girl and bunny heads.  I also used a Wink of Stella glitter pen to go over the wings.

After I colored her in, I cut her out from a circle stitched scallop die and then sponged around the image with a cloud stencil and distress ink.  I also sponged around the edges of the scallop circle with another color of distress ink and mounted her over the tag with a piece of craft foam behind her.

Vicki-PC Fairy Princess Bunny Tag-otherside

So, when you flip the tag over, you can see that I’ve made a little pocket with the same papers I’ve used on the front of the tag.  I thought this would be a cute way to give out a gift card to your “Fairy Princess”.  The tag happens to be the perfect size for adding a pocket for a gift card to fit into.

Vicki-PC Fairy Princess Bunny Tag-flat

I hope you’ve enjoyed my little tag creation today!

THANKS SO MUCH FOR DROPPIN BY!!  HAVE A GREAT DAY!!

challenges:

  1.  Crafty Creations – Anything Goes
  2. Fab ‘N’ Funky – Anything Goes #437
  3. Crafty Catz – Anything Goes with optional twist of females
  4. QKR Stampede – Anything Goes #347
  5. Crafting By Designs – Fantasy

Bubble Bath Beauty

Hello friends!  Yes, I’m still here! LOTS of fun stuff to share!

Today, I have a silly kitty card to share with you today:

Vicki-Bath Cat-May7

Oh my, that face just really cracks me up!!  It’s been several years since I have ever had to give a cat a bath, but I believe that’s pretty much how they feel about water in general.  I have used this Whimsy Stamps digital image called Bath Cat by Crissy Armstong.  (It was previously released as a rubber cling stamp, but now you can also get it in digital format if you prefer that!)

I started out my card with a piece of white cardstock and clear heat embossed several of the solid circle images from the Whimsy Stamps Circles Circles Circles clear stamp set.  I then took a few of the distress ink colors and blended them over the heat embossed circles.  The ink resisted those and then I spritzed it with some water and dapped it with a paper towel for water droplets.  I heat embossed the sentiment with white EP and cut it out in a banner to attach over my background.

The circle inked background was corner chomped on two of the corners and then I placed it over a blue A2 sized top folding card base which I also corner chomped the same two corners on that as well.  I then added the image panel and popped it up over some craft foam to attach to the front of the card.  I then cut off the edge of the circle with my scissors and lastly added some clear sequins to the design.

Vicki-Bath Cat-close-May7

Here’s a closer look at the coloring I’ve done on the kitty.  I’ve used the following Copics to color him in with:

  • Kitty – W7, W5, W3, W1, R11, R00
  • Bathtub – B24, B21
  • Bubbles – BG000
  • Duckie – Y17, Y15, Y13

After I cut the image out with a circle die, I sponged around the edges of it with some of the distress ink I used on the background.  I used a Wink of Stella glitter pen on some of the bubbles and then used some Nuvo White Blizzard Glitter Drops on the water drops.

Vicki-Bath Cat-flat-May7

This one gave me a chuckle and sometimes even when you are feeling yucky, you just want someone to tell you that you are beautiful!

Thanks for dropping in today!  I’ll see you again soon!

Challenges:

  1.  Simply Create Too – Anything Goes (no twist)
  2. Daisy Chain – Anything Goes
  3. Pammie’s Inky Pinkies – PIP1918 Anything Goes
  4. Get Creative – Anything Goes (no twist)
  5. Crafty Animals – Anything Goes + animal

Whimsy Stamps May Release + Anything Goes for Cute Card Thursday!

Hello friends!  Hope you are having a great week so far!

Today starts a brand new challenge over at Cute Card Thursday!  The theme for our challenge this week is an easy peasy “Anything Goes” theme!  Whimsy Stamps is also our sponsor this week and I have used one of the brand-new May digital releases for my card here:

Vicki-Penguin Prezzie-May2

This really SWEET penguin by Crissy Armstrong was previously released as a rubber stamp and now it’s available in digital format too!  I’ve used the Penguin Prezzie digital stamp on my card here along with some other Whimsy Stamps products!

The image panel was cut out with the Whimsy Stamps Notched Squares Dies Set and mounted over a piece of black cardstock.  I added some pearls in each corner.  For the tiny hearts and the “mom” sentiment at the bottom, I have used the Whimsy Stamps Mom’s Layered Flowers clear stamp set.  I stamped the tiny hearts around the penguin with some pink ink and the “mom” sentiment at the bottom over the pink gingham paper with black ink.  I also stamped the sentiment ‘for you’ with black ink on the image panel from the Whimsy Stamps Everyday Mini Sentiments clear stamp set.

I found some soft pink gingham paper to use and mounted it over another piece of black cardstock and another piece of gold cardstock too.  After adding the ‘mom’ sentiment, I took three strips of gold cardstock to add for accent pieces and then added some lace in the center strip that I wrapped around the card front panel.  I attached these layers onto a white 5×5 top folding card base.  The penguin image panel was popped up in the center with some foam tape.

Vicki-Penguin Prezzie-close-May2

Here’s a closer view of the coloring I’ve done on this image.  These penguins are so fun to color!  I have used the following Copic markers on my image:

  • penguin – C8, C5, C3, C1, blender, YR24, Y15, Y11
  • present – BG45, BG13, BG10
  • bow – R85, R83, R81, R00
  • ground shading – C1, E0000

Vicki-Penguin Prezzie-flat-May2

Although I think you could use this cute penguin image for a birthday or even Christmas, I thought since we are in the month of May, it would be a great card to send to mom!  All you need is to make it with a few feminine colors along with lace and pearls for accents!

Thanks so much for stopping in today and I appreciate your kind comments so much!

Whimsy Critters Everywhere!

Hello friends!  Hope you are having a wonderful week so far!  I have been busy in my craft room trying to prepare for a class next week along with trying to help my son pack and move out of state…so my plate has been a bit full lately.  I do have a couple of really fun critter creations that I’ve made using some Whimsy Stamps products today:

Vicki-WS-ADSKitties-April24

If you don’t remember, Whimsy Stamps has come out with a couple of really adorable clear stamp sets to help promote their “Adopt Don’t Shop” campaign with $1 of the sale from each stamp sold going to the Gulf Coast Humane Society.  Vicki-WS-ADSKitties-close-April24

Now, normally I am a “dog fan”, but I know many of my blog friends and several others are huge cat fans as well!  I have also been requested to make up some cat friendly cards too!  So, I thought this would be such a great opportunity to make one!  I’ve used the adorable Adopt Don’t Shop CATS clear stamp set for this one.

Vicki-WS-ADSKitties-flat-April24

I have used a kraft colored A2 sized top folding card base and stamped the little paw print from the stamp set with the same color around the edges.  I also took the humorous sentiment from the set and white heat embossed it over a piece of espresso cardstock and cut a banner strip from it.  This same color of cardstock was used as a layer behind the kitty image panel that I’ve cut out with the WS Hand Stitched Nested Rectangles die.  I covered up the bottom portion of this panel with some plaid papers.  I then wrapped some twine around the middle of it and tied a bow which I have attached a wood veneer heart in the middle.


Vicki-WS-I'veGotYourBack

Here’s another card I had made to help cheer someone.

Vicki-WS-I'veGotYourBack-flat
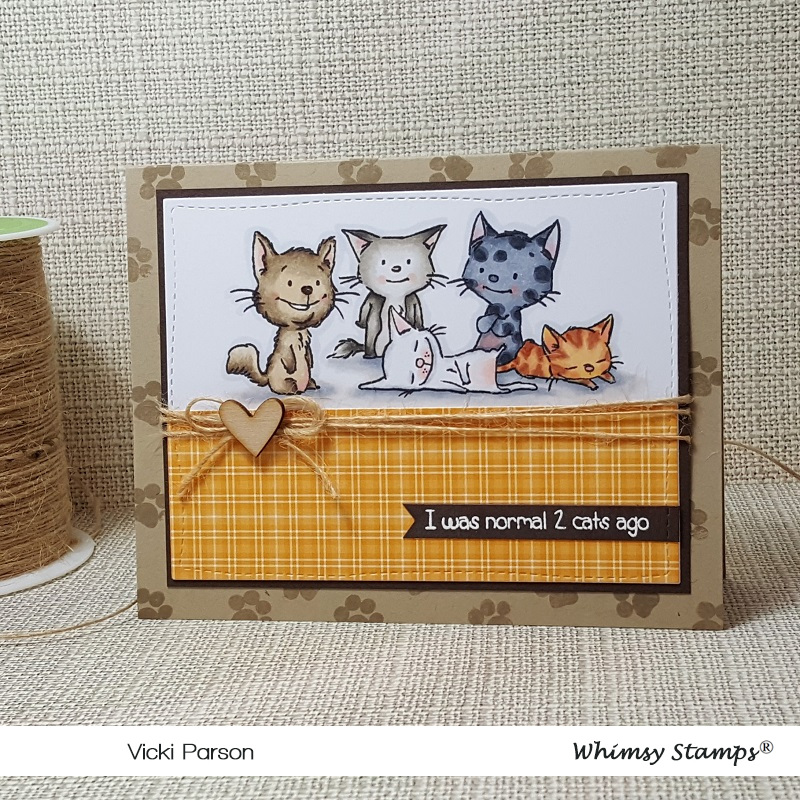
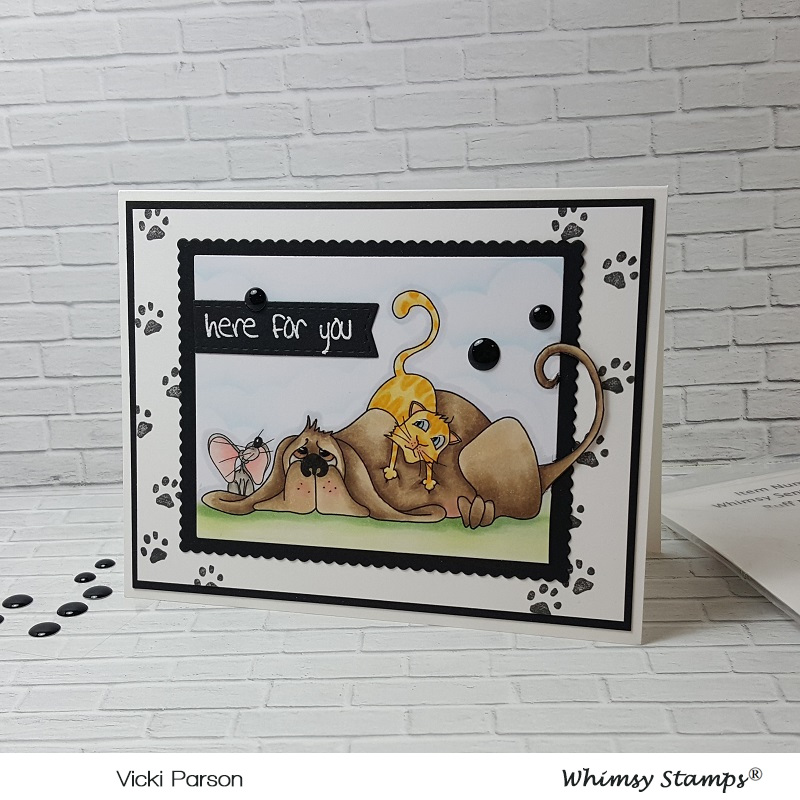
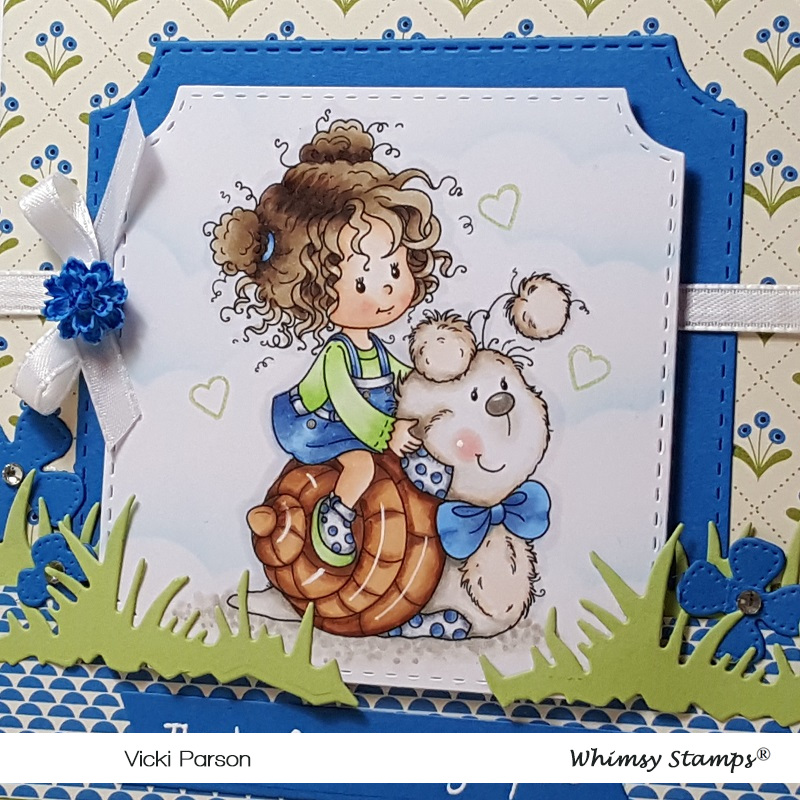
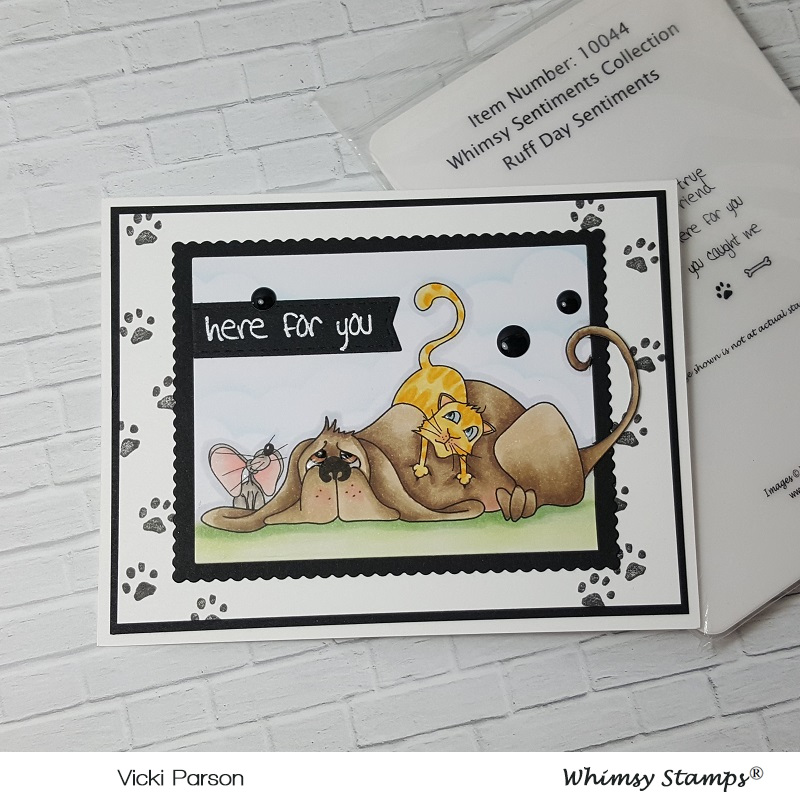
Here’s a pop quizz…. if you’ve known Whimsy Stamps for a while, does this particular image look familiar to you?  It’s a VERY old one and also one of the very first rubber stamp sets that Whimsy Stamps sold!  I believe mine is dated 2009!  I wanted to keep it as I’ve been a part of this company off and on since it started! 🙂  Really cool to still have it.  Obviously, it’s not available for purchase, but they did offer it as a freebie during their “Adopt Don’t Shop” party event last month.  The paw prints along the edges were also used from an older stamp set from Whimsy Stamps as well.  (You can see a portion of it on the right side of the photo above.)Vicki-WS-I'veGotYourBack1

Both of these images were colored with Copics.

The sentiment came from the same stamp set and was white heat embossed and cut out with the WS Quick Strips Die set.  I cut around the pup’s tail and then used a rectangle die to cut the rest of the image out and then layered onto a black piece of cardstock cut from a scallop rectangle die.  I layered the paw print piece, another piece of black cardstock and the image panel onto a white top folding A2 sized card base.  Lastly, I’ve added a few black enamel dots and even gave their eyes some shine with glossy accents.

Thanks so much for dropping in today!  Hope you’ve enjoyed my critter cards!  I’ll be back again tomorrow with a different kind of critter! 🙂

Challenges:

  1.   Crafty Catz – Anything Goes
  2. Creative Fingers – Anything Goes
  3. QKR Stampede – #344 Anything Goes
  4. Pammie’s Inky Pinkies – PIP1916 Anything Goes
  5. Creative Moments – Anything Goes

I Believe I Can Fly!

Hello friends!  It’s been a while since my last post, but the reason is that I was of course having some computer problems!  I had to reset my whole computer back to the factory setting and try to get it back up and going to what I had.  Thankfully because of my drive, I didn’t loose any photos or anything!  I think it’s back up to “normal” now, but it was scaring me there for a few days!

Speaking of “normal”…I’m not sure pigs can fly, but boy is this image so CUTE!

Vicki-WS-WhenPigsFly-Week3

I’m using this new April digital stamp by Crissy Armstrong for Whimsy Stamps called When Pigs Fly.  I love how he’s looking down as if he’s looking at the clouds below him with a huge smile!  I thought the sentiment from the Whimsy Stamps Bold Statements clear stamp set was the perfect compliment for this image too.

I took a cloud stencil and some Tumbled Glass distress ink with the foam blending tool to sponge on some clouds around the image.  I cut off the bottom portion of the image panel with the Whimsy Stamps Envelope Edger die set and cut an additional piece from the suede-colored cardstock for a layer behind it.  I also cut out some clouds from an older Whimsy Stamps die that I had and sponged some more of the distress ink on the bottom of each one to layer and stamp the sentiment in suede ink over a pink panel.  I added some pretty shimmer ribbon with a bow at the top of these layers and then attached it all over a top folding A2 sized suede card base.  Lastly, I’ve added some Studio Katia Crystal Clear Confetti sequins randomly over the card.

Vicki-WS-WhenPigsFly-Week3-close

Here’s a closer view of the image and how I went about coloring it in using Copic markers.  Here’s what I’ve used:

  • pig:  R20, R11, R00, R000 – wings:  BG13, BG10, BG000 – hooves:  C8, C5, C3
  • birds:  E47, E44, E43 – beaks:  E43, E41, Y11 – bellies:  E43, R00, Y11
  • I used white gel pen for cheeks and covered the wings with Wink of Stella

Vicki-WS-WhenPigsFly-Week3-flat

Something to note about my card is that because this was a digital stamp, I was able to size it the way I wanted to accommodate my card design.  This is what is great about a digital stamp.  You may not like it as small as what I’ve made mine for coloring purposes, but I didn’t mind it at all and enjoyed putting this together.  Hoping to give it to someone special soon! 🙂  Hope you like it too!

Thanks so much for dropping in today!  Now that computer is back up and running, I will be back again tomorrow with another post!  Have a great day!

Challenges for this card:

  1.  Krafty Chicks – Chicks/birds
  2. Pammies Inky Pinkies – PIP1915 Anything goes
  3. A Bit More Time to Craft – Anything Goes
  4. Crafting From the Heart – Anything Goes
  5. Little Red Wagon – Look Up, Way Up (things in the sky)

Whimsy Stamps Cuddly Ride

Hello friends!  🙂

It’s been SO gorgeous outside with this wonderfully warm weather we’re having right now, so I find it hard to stay indoors right now!  We have rain coming, so I will be able to get some crafting done then!

Swinging by to share this really sweet digital image by Sylvia Zet for Whimsy Stamps called Cuddly Ride!  They have sold the rubber stamp version, but now they’re releasing these older images as digital files now!  So weather you like the rubber stamp or the digital images, it’s great to know that you can choose either!

Vicki-WSCuddlyRide-Apr9

I got her colored up in the following Copics:

  • Snail shell – E29, E27, E25, E23, E21
  • Snail body – W5, W3, W1, E21, E000, R20
  • Snail bow/patches, girl outfit – B37, B34, B32, YG13, YG11, C5, C3, C1
  • Girl’s Hair/Skin – E49, E47, E44, E43, E40, R20, R00, E21, E11, E00, E000
  • Pointillism under snail – W3, W1, W0
  • Used a white gel pen for highlights on snail and covered the ground with a Wink of Stella glitter brush pen

After coloring her up, I also sponged some clouds behind her with a stencil and then cut it out with the Whimsy Stamps Notched Square Dies.  I’ve also cut an additional larger blue layer for behind the image.  For the blue flowers scattered around as well as for the pieces for grass accents on my card, I’ve used the Whimsy Stamps No-See All Seasons Tree Dies.

I’ve taken a sentiment from my stash (retired Whimsy Stamps) and white heat embossed it over a piece of the blue cardstock and then I’ve used the Whimsy Stamps Quick Strips Die Set to cut it out.  Lastly, I’ve added some ribbon, a bow with a resin flower glued over the center of it and then I’ve added some rhinestones to the centers of the blue flowers.

Vicki-WSCuddlyRide-Apr9-close

From the same sentiment stamp set that I’ve used, I took a tiny heart image and stamped it with green ink around the colored image.  Of course, I tried to capture the wonderful shimmer underneath the snail where I’ve colored the Pointillism technique, but it just won’t show up in photos very well, but I just love the shimmer under him!  I also used a silver metallic gel pen to color the “buttons” on the girl’s jumper.

Vicki-WS-CuddlyRide-Apr9-flat

I thought she turned out really cute and I think this would make a wonderful card for that special friend who is always by your side!

That’s all for me now.  I think I may need to go back outside and enjoy some fresh air and sunshine before it’s gone!  Have a lovely day!

Challenges:

  1.  Simon Says Stamp Wednesday – Animal Antics
  2. Crafting With an Attitude – Anything Goes
  3. Creative Knockouts – Anything Goes
  4. Crafty Catz – Anything Goes + optional:  Use Your Dies
  5. Creative Fingers – Anything Goes
  6. Simply Create Too – Anything Goes