Hello friends! I hope you’re having a great weekend! Did you have “good luck” on Friday the 13th? It’s getting closer to Halloween! I don’t send out very many Halloween things, but it’s something that I share with friends and my adult kids because it holds some special memories of just having fun.
Today begins our October challenge at Sparkles Monthly with a theme that was my turn to pick: Things That go ‘BUMP’ in the Night (Does not HAVE to be Halloween!) So, if you’re not a Halloween person, this theme is open-ended. Try nocturnal animals, Santa on the roof, etc. Just have some fun crafting!
Of course, I love Halloween and had fun making my card:
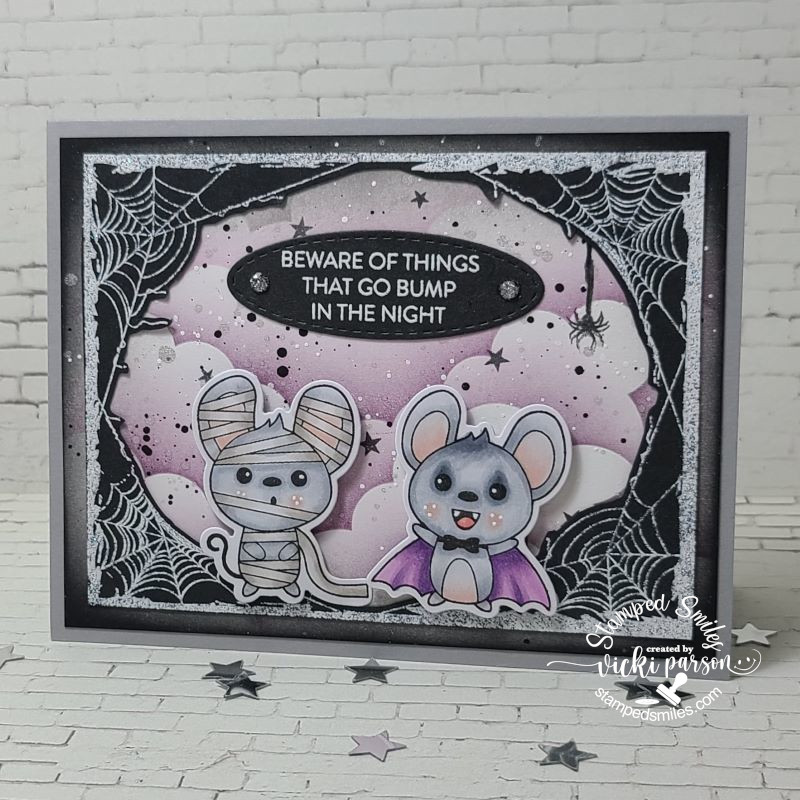
I thought these mice were just too cute! They were out bumping around in the night trying to be scary but scared each other instead! LOL
The mice came from the STAMPtember collaboration with Whimsy Stamps and the set is called Spooky & Mice. I colored them with Copic markers and die cut them out with the coordinating dies. They were popped up with foam tape over the background.
For my background: I used a cloud stencil on a white piece of cardstock and blended some clouds with purple ink and then blended around the edges with black and grey ink. I then took the SSS Spook Up Some Fun stamp set and stamped black stars over the background and I also white heat embossed the oval sentiment panel that was in that stamp set over black cardstock and set it aside. I’ve also splattered the background with black, white and silver acrylic paints.
While that panel was drying, I heat embossed the Whimsy Stamps Spider Web Frame with a white sparkle EP and then cut the middle of it out with scissors so the cloud background would show. I stamped the spider hanging down onto the background while sizing it up with the frame and then drew a black string with a marker for it. Glued on the frame, attached my oval sentiment panel, and attached it to a top folding A2 sized grey card base. (Then added the mice with foam squares.)
Lastly, I’ve added some silver gems on each side of the sentiment oval and attached a few clear sequins over the night sky background.
Thanks so much for stopping by today! I hope you’ll be able to join along in the fun with us this month! I’ll be seeing you soon!
Challenges:
- Two Old Bats Halloween – Anything Goes Halloween
- Crafty Animals – Anything Goes with an animal
- Critter Crazy – Anything Goes with a featured critter
- Creative Inspirations – Autumn or Halloween
- Craft Rocket – Autumn and/or Halloween
- As You Like It – Favorite Halloween or Fairies & why? (I love to make Halloween theme because it’s so fun with cute, scary or fun characters and I love the colors too!)
- Most Magical Time of the Year – Anything Halloween or Christmas
- Creative Moments – “It’s Alive!”