Hello friends! I hope that you’re having a great start to your week and are staying safe and warm in your world.
Today I’m sharing a collection of creations that I never seem to have in my stash because it’s never really something that I think about when creating…and I always seem to be making them as needed rather than having a few on hand. Even though, a couple of these were needed, I decided to make duplicates to have on hand this time around.
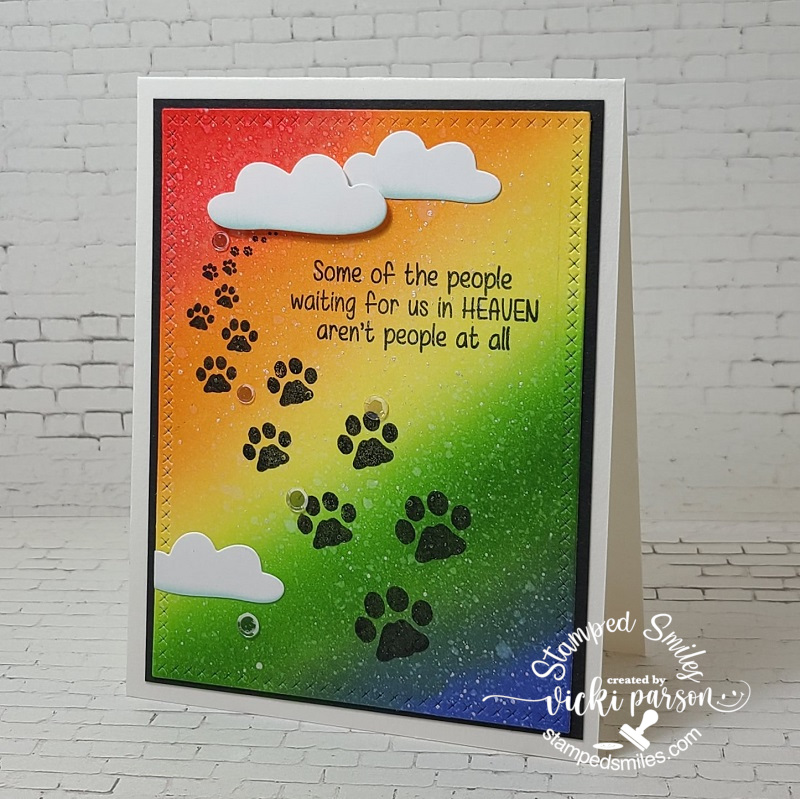
As you can see, this is a pet sympathy card I created, and one was needed to send to a friend that had recently lost her special companion. For anyone that has lost a pet knows how this feels and I wanted to be sure to send something special her way. It’s always great to have one on hand when needed.
I’ve used this wonderful stamp set from Whimsy Stamps called Furever in Our Hearts. I started by ink blending the background with distress inks in Candied Apple, Carved Pumpkin, Squeezed Lemonade, Mowed Lawn and Blueprint Sketch on a piece of Neenah Solar White. I sprayed the panel with water and used a towel to blot up the water droplets. I then took some white shimmer paint mixed with water and splattered it over top with a paint brush.
I cut out the panel with a Lawn Fawn Cross-stitched die. I used my Brilliance Black pigment ink to stamp the paw prints and sentiment over top of it so that it would show up over the background. I die cut a couple of clouds out (MFT I think) and lightly sponged the bottom of them and placed them over the areas I wanted with popping up the one cloud using foam tape at the top of the paw prints. I layered this panel onto a piece of black cardstock and then layered them both over a white A2 sized top folding card base. I finished it off with a few sparkling clear sequins.
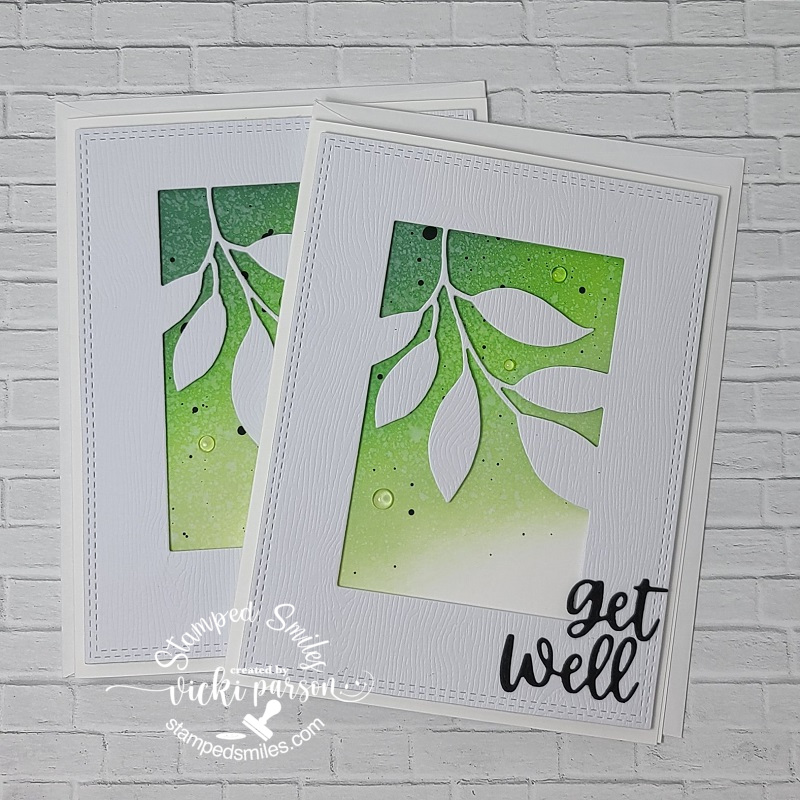
Another card that I needed was for someone that had recently been through a surgery, and I actually didn’t have any more “get well” in my stash… again, so I decided to create a duplicate of this one too. This set of cards along with the set of cards below actually were the results from the previous OOAK event I had attended, and these were part of a class I had taken. So, this class actually came in handy!
All of the papers including that beautiful die (from Memory Box-Verdant Leaf Collage), Get Well Soon die, and dewdrop water droplets came with the kit. I subtly changed up the design given for the class by adding black paint splatters and changing up the die cut lettering and the layering of the papers. I really liked doing more of that ink blending and then having it fade to the white for a soft look. The outside woodgrain frame was popped up with foam tape.
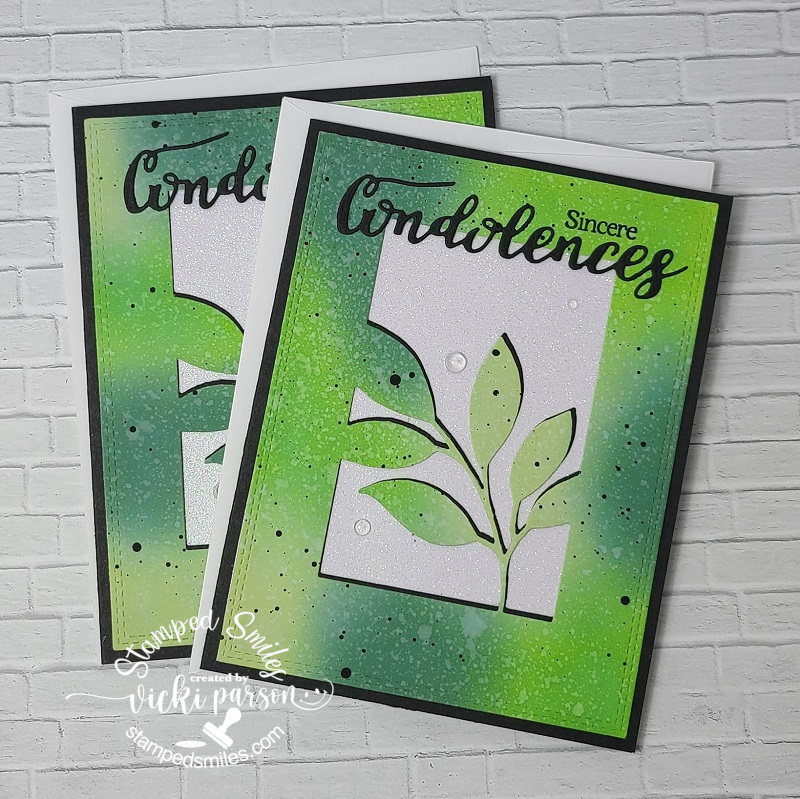
And here’s the second set of cards created within the same class using the same Memory Box die and ink blended colors. I changed up the layout with these as well by making the card base black (instead of white like shown in class) and instead of the sentiments used in class, I created my own version with the Whimsy Stamps Deepest Sympathy clear stamps and the WS Sympathy Heartfelt and Condolences die set. I also added the black paint splatters to the ink blended panels like on the set above.
I thought these sets made for some really nice cards to have on hand when needed. I’m not sure that I would’ve actually sat down to make up these types of cards in production if I hadn’t have taken the class, so I’m glad I did.
Thanks so much for stopping in today! Hope I have inspired your crafty inspiration in some way! I’ll be seeing you soon!
Challenges:
- Crafty Calendar – Anything Goes
- Happy Little Stampers – Anything Goes with Dies
- Lil’ Patch of Crafty Friends – Anything Goes
- Stamping Sensations – Anything Stamped with optional add a die
- Addicted to Stamps and More – Make Your Mark
- Watercooler Wednesday – All About Occasions
- Penny’s Paper-Crafty – Anything Goes using paper