Ghostly Haunts with Digi Doodle Studios + a Bag-a-lope Video Tutorial!

Hello friends and happy weekend to you!  Hope that you have some fun included in your weekend.

Today I’m sharing this really adorable digital stamp set from Digi Doodle Studios called “Ghotstly Haunts” and I had SO much fun with it that I made several projects using it including a fun video tutorial that may give you ideas for not only your favorite goblin, but for other fun ideas that I’ll reference:

Vicki-DDS-Bag-a-lope video

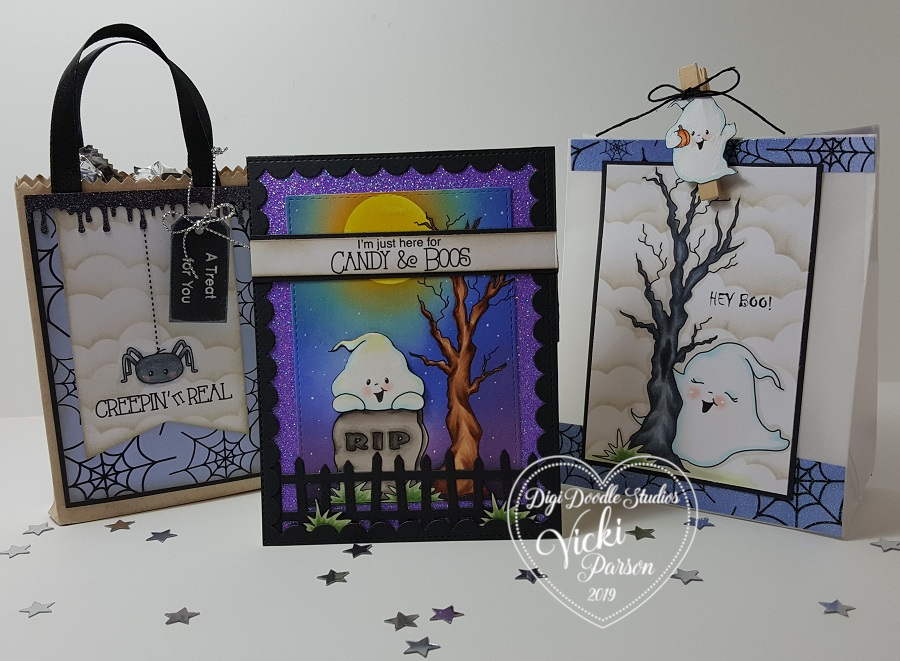
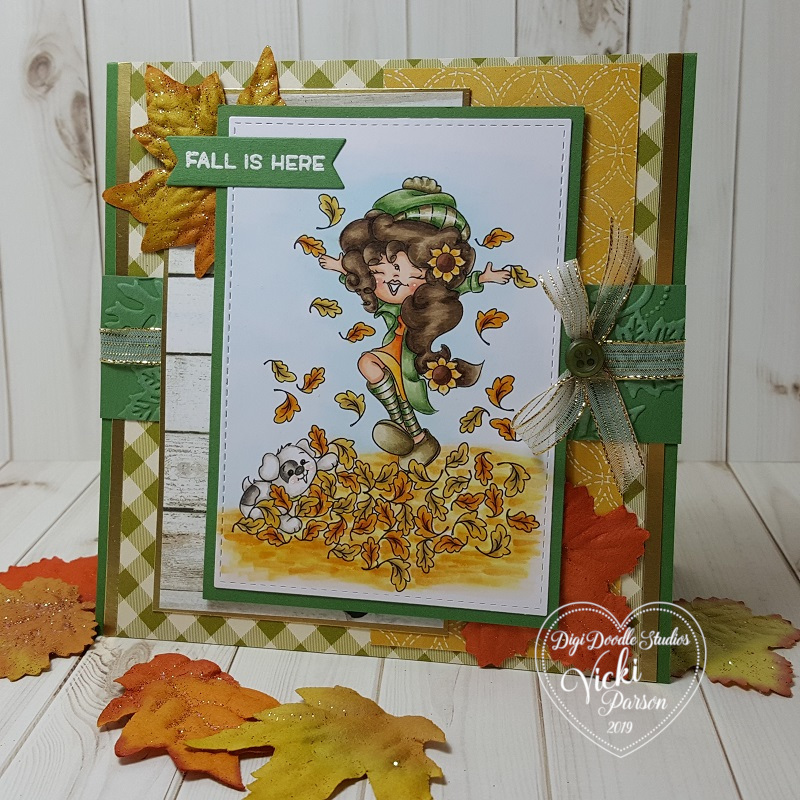
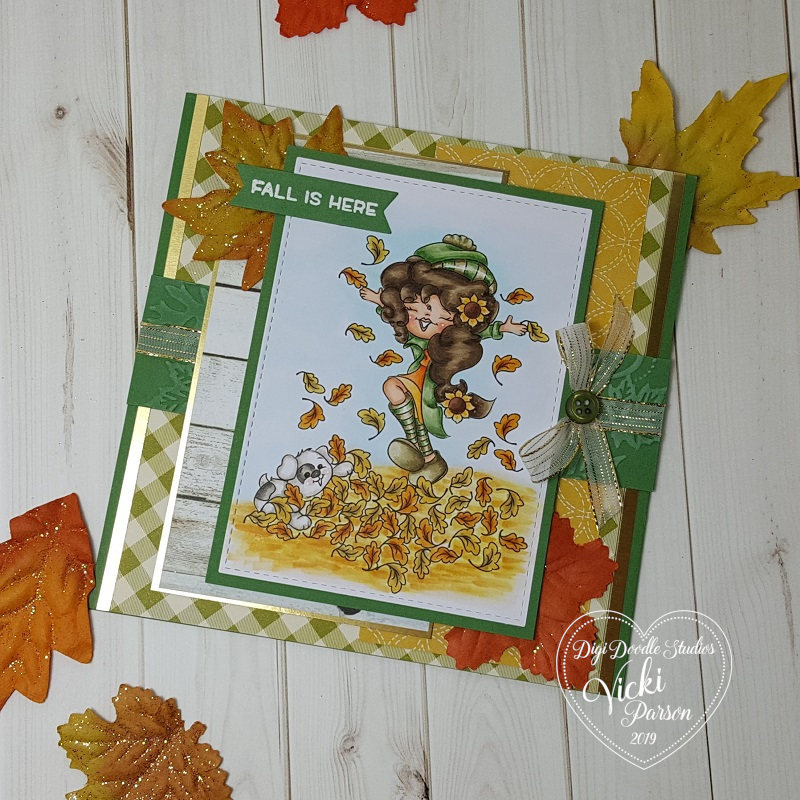
Now how cute are the ghosts in this set?!  As you can see, I had tons of fun creating several projects using the Ghostly Haunts Pairables digital stamp set!

The two projects on the ends are actually what I’ve created for the “bag-a-lope” video tutorial.  If you’ve been crafting for as long as I have, then I’m sure you’ve heard of this idea somewhere along the way.  People buy up those dies, but this way seems so much easier and cheaper to deal with to me.  Here’s the project idea that I share in the video:

Vicki-DDS-Bag-a-lope1

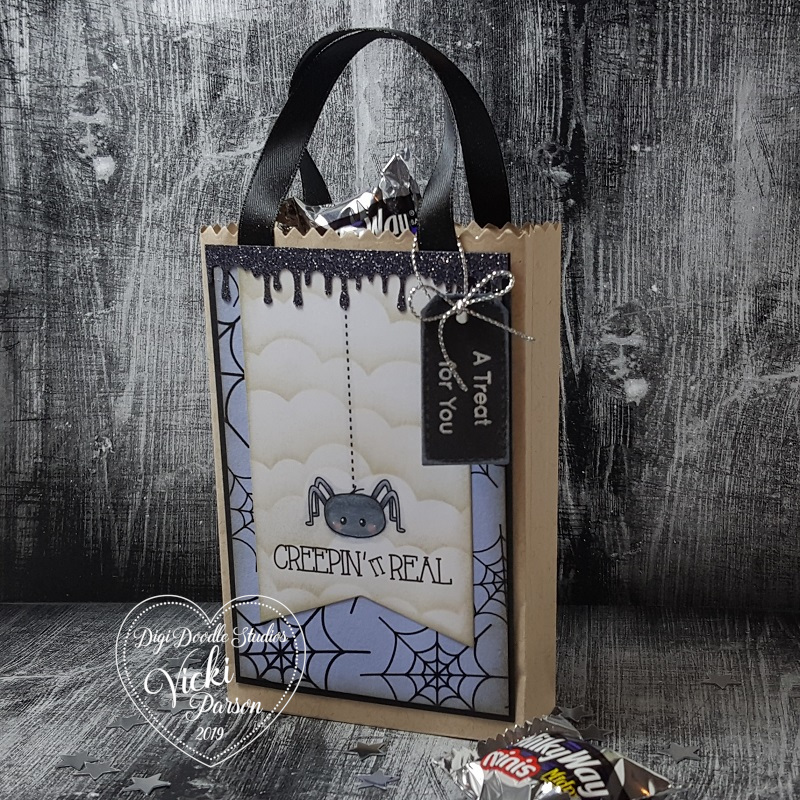
This is such a fun and easy bag to create and fill with treats for your favorite goblin!  You can fill with yummy treats or a small gift.  It would be great to put a gift card inside with some tissue or bag fill too!  Not only for Halloween, but for Christmas too!

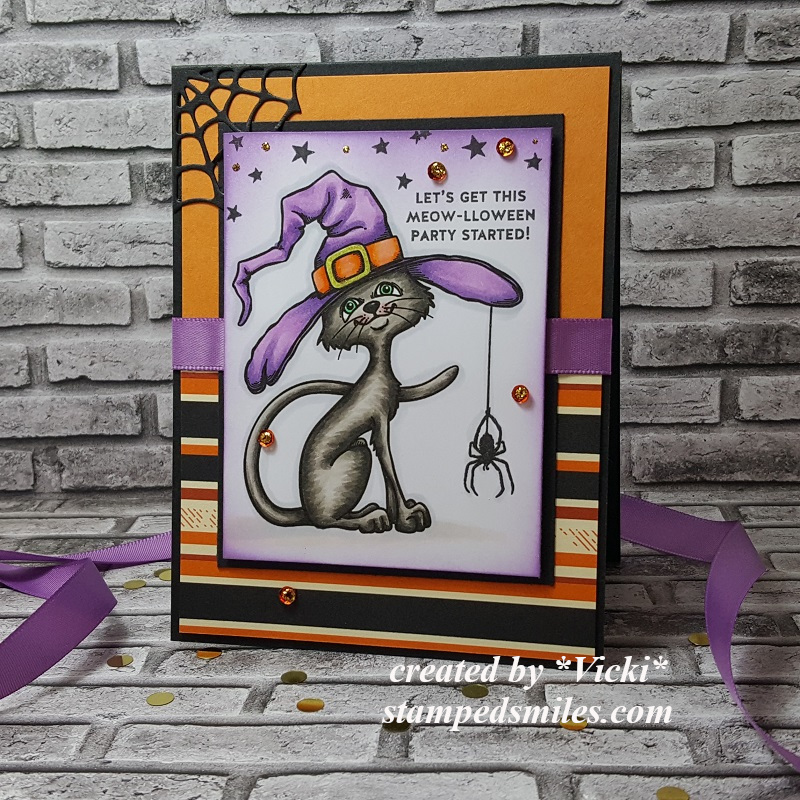
In the video below, I share how I created this bag along with another fun project using the same idea with just a plain old envelope!  That’s all you need to make these along with your own ideas!  I’ve used the Ghostly Haunts Pairables set to create the fun spider web paper in the background as well as the spider and sentiment.

If you’d like to see how to create this treat bag along with some other fun ideas with tips and tricks, then be sure to watch my video tutorial below or CLICK HERE to view it on You Tube. – If you haven’t yet, please be sure to hit “like”, comment and subscribe to my channel!

Vicki-DDS-Bag-a-lope2

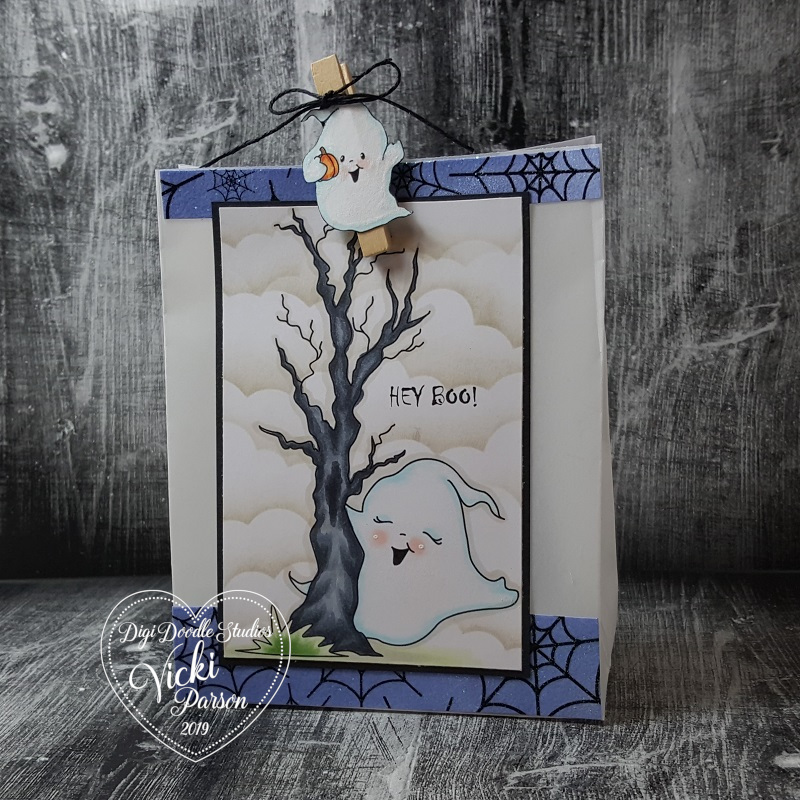
As seen in the video, I have also used this adorable set using the same “bag-a-lope” idea to create a fun Lumiere using a vellum envelope.  I have printed out an additional ghost and attached him to the clip on the top of the bag.  LOL!

For the spider web strips at the top and bottom, they were the same left over papers that I’ve used on the treat bag above, but for these strips I’ve heat embossed over them with some clear sparkle EP.  It’s hard to see in the photos, but I’ve taken a sparkle glitter brush pen and covered every single ghost on my projects.  I’ve used my Copic markers to color in all of the images after printing out my scenes from the computer.  The sentiment for this project was actually made by myself using a font from my computer.

Vicki-DDS-Bag-a-lope-candle

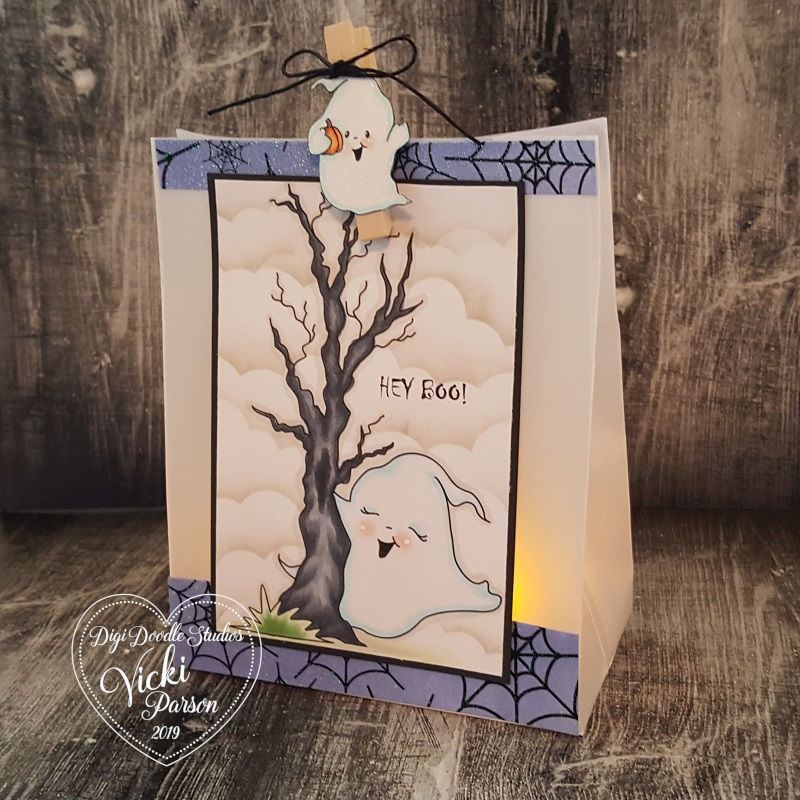
Here you can see how the battery tea light candles are glowing through the vellum Lumiere bag.  I also thought this would be a fun idea for Christmas time as well!

Vicki-DDS-Ghostely Haunts

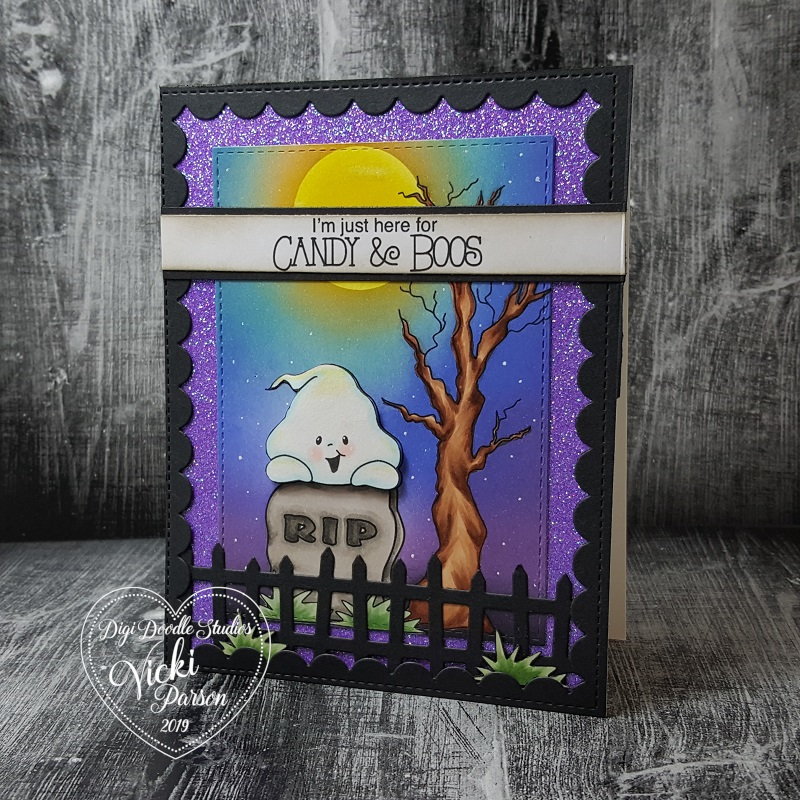
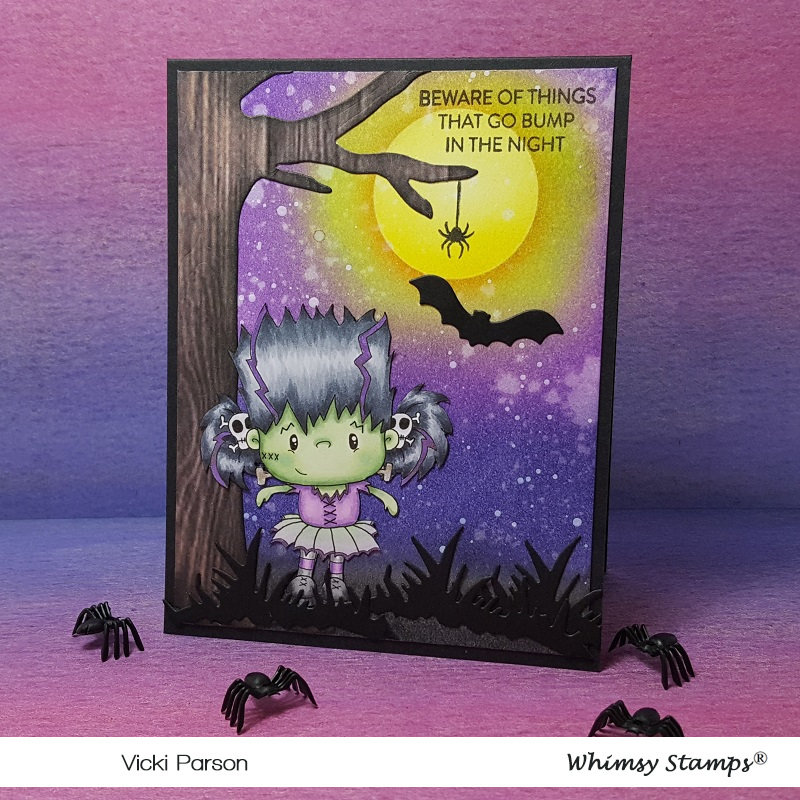
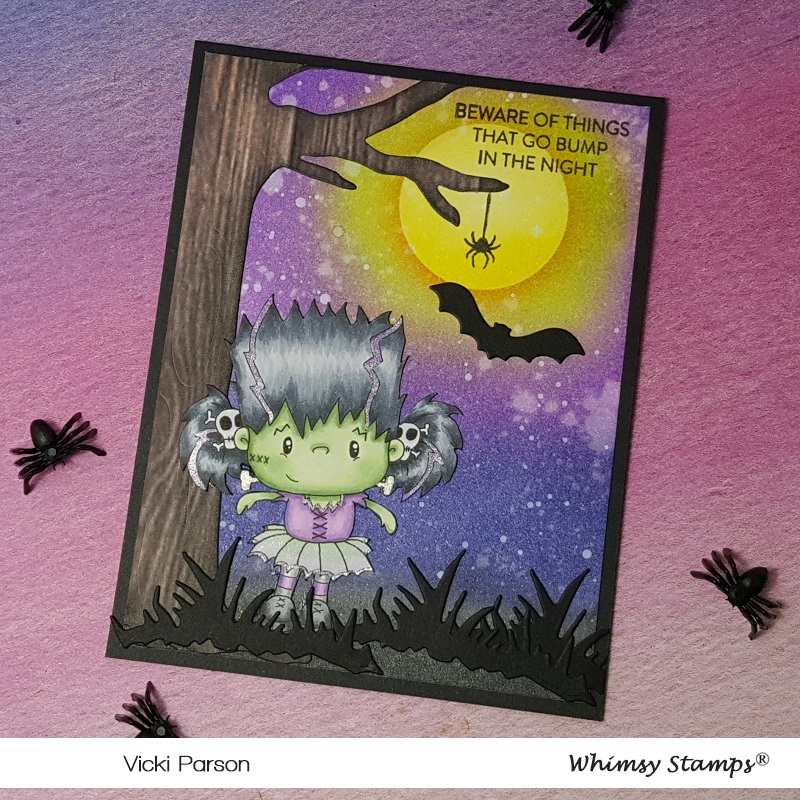
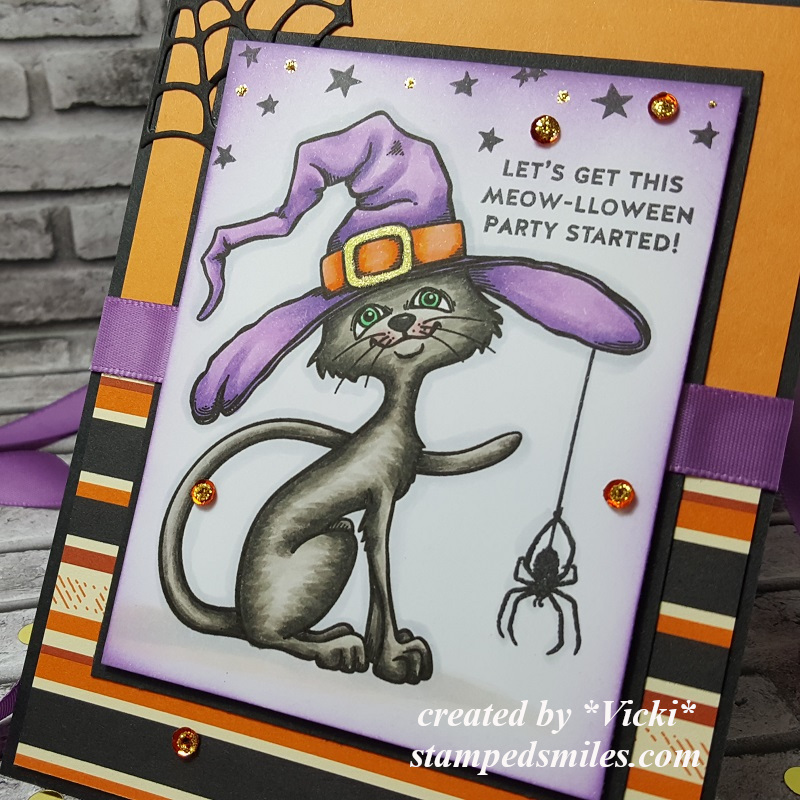
Lastly, I HAD to create a card using this adorable digital set too!

For this card, I created the scene on my computer and printed it out.  I printed it out again over some masking paper.  I cut the images out of masking paper and put them over the printed out scene so I could do the ink blended background.  I actually fussy cut the ghost and popped him up over the tombstone.  I covered him with a glitter brush pen too!  (I’ve also added a touch of “moon glow” on the top of his head.

I die cut the scene and attached it over a piece of purple glitterstock and then die cut the black frame to go over top of the card.  Before adding the frame, I attached the die cut fence and a couple more pieces of “grass” from the digital stamp set.  That sentiment cracks me up!  I sponged over it, added to a black strip and attached it over the card front panel.  This was all attached to an A2 sized top folding card base.

Hope you’ve had as much looking at my projects as I had making them! Thank you so much for dropping by today and I’ll be seeing you soon!

Challenges:

  1.  Try it On Tuesday – Witches/Wizards/Halloween
  2. The Creative Crafters – Anything Goes
  3. Creatalicious – October Anything Goes with optional Autumn/Halloween
  4. Simon Says Stamp Wednesday – Halloween
  5. The Male Room – Halloween
  6. Krafty Chicks – #477 Ghost Card
  7. CRAFT – Box or Bag
  8. Creative Knockouts – Halloween
  9. TGIF Challenges! – #tgifc234 – Happy Halloween

Spots and Dots for Cute Card Thursday

Hello friends!  Hope you’re having a great week so far.  The month of October is flying right through and I know once Halloween gets here, it will be the end of the year before we know it!

Today starts a new challenge over at Cute Card Thursday this week!  We are looking for “Spots and Dots” on your creations this time!  We look forward to seeing your take on this one!

For my card, I decided to keep it rather simple:

Vicki-CCT604

This card is using items from the Simon Says Stamp Sweet Birthday Limited Edition card kit which has since been sold out, but I know that you can still purchase a few of the items that were included in the kit.

I started out by taking the SSS Celebrate stencil from the kit and spread on some Deco Foil Transfer Gel over a white piece of cardstock from the kit and let it completely dry before moving on.  After it was dry, I took the Rainbow Shattered Glass transfer foil sheet and put it through my laminator.  It looks so pretty and shinny with a wow factor to it!  I cut this piece down and layered it over a black scallop square die cut panel.  I then layered these pieces over the green colored Tim Holtz Metallic paper from the kit.

For the square card, I used a black top folding 4.25″ black card base and then layered another piece of that green metallic paper over it.  I took a ‘dotted’ piece of paper from the Honey Bee Over the Rainbow papers (included in the kit) and layered it over top of the metallic green.  Then I added my foiled balloons panel over this.

Lastly, I took the sentiment from the Simon Says Stamp Sweet Birthday stamp set and white heat embossed it over a piece of black cardstock that I trimmed down to a banner and popped up over the card with some foam tape.

Vicki-CCT604-flat

I really didn’t want to add too much more to it as it was for a male and I think with all of that foil and shine, it really didn’t need much else!  I think it’s fun, simple and really cheery looking especially with that foiling done.

I know that I’m getting this fun kit out again very soon as I am in need of another birthday card to send to someone that needs a good birthday cheer!

Challenges:

  1.  Pammie’s Inky Pinkies – PIP1941 Anything Goes
  2. Crafty Cardmakers – Sparkle
  3. Through the Craft Room Door – Anything Goes
  4. A Bit More Time to Craft – Anything Goes
  5. Watercooler Wednesday – WWC243 Masculine Anything Goes

Thanks so much for stopping in and sharing a bit of myself with you!  Wishing you a beautiful day friends!

Merry and Bright for Whimsy Stamps

Hello friends!  Hope you all had a wonderful weekend!  I had another great weekend out with hubby, but this time we visited Starved Rock National Park.  Really amazing nature hike we took and I’m wore out!  I sure wish I was able to do more hiking than what we did, but what we did do was amazing.  I will share some photos soon of our last two weekends out.

For today I have a sweet image from Whimsy Stamps to share with you and another Christmas card that I was able to add to my pile which is always nice to have!

Vicki-WSPolarBearXmasTree

This little guy is so sweet trying to decorate his poor “Charlie Brown” Christmas tree here! LOL!!  This is another adorable Crissy Armstrong image called Polar Bear’s Christmas Tree.

I’ve cut out the image the whole length of the card front panel and layered it over a piece of black cardstock and then some red cardstock.  I was placed over a piece of digital paper that I printed out from the Whimsy Stamps Rustic Wood and Brick Digital Paper Collection.  I ran the edge of some scissors along the edges of it and then added some of the plaid ribbon along the left side.  I then mounted this over a 5.25″ square top folding black card base.

I die cut some pine boughs from green cardstock and arranged and glued it down over the strip of plaid ribbon.  I then added a plaid ribbon bow over top and then attached a black button with a twine bow in the center of that.

Vicki-WSPolarBearXmasTree-close

I’ve put a lot of detail into this image which is why I wanted this to be the main focus of the card.  I actually didn’t use too many different colors of Copic markers, but it took a while to get the “fur” looking the way I wanted.  (See list below.)

I started the scene by ink blending around the top edges and a bit around the sides with Weathered Wood distress ink.  After the ink blending, I took the sentiment from the Whimsy Stamps Holiday Mini Sentiments clear stamp set and white heat embossed it over the top right edge of the image panel.

For finishing details, I took some yellow chalk for around the star at the top of the tree for a glow look and then covered the star with some gold Stickles.  I brushed the red ornament with a glitter brush pen and then the “hook” was colored with a gel pen.

I covered the entire bottom of the image panel with a glue pen and then sprinkled on some clear glitter for the snow.  Lastly I’ve added some red “berries” to the garland that the polar bear is holding with some Red Nuvo Drops.

Here’s the list of Copic markers that I’ve used to color in the image with:

  •  Polar Bear – W9, W7, W5, W3, W1, W0, blender 0, R00 and white gel pen
  • Tree and Garland – E25, E23, YG67, YG63, YG61, R39, R37, R35
  • Snow Ground and Shadows – BG000

Vicki-WSPolarBearXmasTree-flat

I love the “woodsy” look to this image and I was trying to capture it in my design too.  I hope that you’ve enjoyed my Christmas card today and were inspired or helped bring you a smile!

Thank you so much for stopping in with me today and I’ll be seeing you soon!

Challenges:

  1.  Merry Little Christmas – Anything Christmas Goes
  2. Crafty Animals – Anything Goes + animal
  3. Christmas at Sweet Stampin’ – Anything Goes with optional: stars
  4. Crafty Creations – Anything Goes
  5. Simon Says Stamp Wednesday – Christmas
  6. CRAFT – Christmas
  7. Crafty Catz – Anything Goes

It’s Halloween at Cute Card Thurday!

Hello friends!  Has the weather been cooling down for you yet?  We are supposed to get much cooler than normal over my way this weekend!  Night time low around 36 degrees is a bit too chilly this time of year!  I need Fall to last! 🙂

Today starts up a new challenge this week for Cute Card Thursday!  The theme for this one is “Halloween“!!  So if you still have some more Halloween cards or treat projects, etc that you need to make, please share it with us!  We look forward to seeing what you make!

For my card, I thought it would be fun to use another Whimsy Stamps October digital stamp with a Halloween theme:

Vicki-CCT603-Witch Cinnamon-Oct10

This cute little witch is called Witch Cinnamon and I’ve used her in a little different way from the original version for my card.

First thing I did was take some black cardstock and used an embossing folder for the trees in the background.  I took a white ink pad over it so the embossing stands out a bit better over it.  I layered this onto a piece of purple cardstock and then added it over an A2 sized top folding black card base.

I took a circle die and cut it out with some yellow glitter cardstock which I then popped up with some black craft foam that I also cut out with a circle die.  I took the bat die and also die cut some bats from black glitter card stock and attached them over the design along with the witch image that is “flying” in front of the moon.  I black heat embossed (sparkly black EP) the sentiment from a Simon Says Stamp Frightful Fun set over purple card stock that I cut into a banner over the design.  I then added a thin strip of green glitter card stock at the bottom of the card.

Vicki-CCT603-Witch Cinnamon-Oct10-dark

For this photo, I tried shutting the lights off so that you can see the “green dots” in the sky that glow in the dark!  These are Nuvo Glow Drops Neon – Apple Sour that I added for the dots in the sky area.  I’ve also taken a Stampin’ Up! punch from my stash and added some purple colored stars around the area too.  If you compare this photo to the one above, you can see that with the light on, the drops are a bit more translucent.  When the lights are dimmed, you can see the glow-in-the-dark effect!

Vicki-CCT603-Witch Cinnamon-Oct10-close

I’ve zoomed in on how I’ve colored up this cutie for my card.  She’s colored with Copic markers and colored pencils.  If you take a look at the original image, you can see that I have decided to fussy cut out just the witch as I wanted her flying in front of a full bright glittery moon!  She still looks pretty cool if you were to cut her out entirely with a circle die too! 🙂

I’ve used a colored pencil to create a nice little “moon glow” on one side of her and in some areas along the top of her where I thought the moon would be glowing some light on her.

I’ve also used a white gel pen for her checks and for highlighting on her stockings.  I also used a silver gel pen to color in the buckle on her hat.  Hard to see in the photo, but behind her broom, I took a glitter pen to add a bit of shimmer where she was flying.

Vicki-CCT603-Witch Cinnamon-Oct10-flat

I hope you’ve enjoyed my card today and been inspired to create some Halloween projects soon!

Challenges this card was entered for:

  1.  Aud Sentiments – Halloween/Fall + sentiment
  2. Brown Sugar – October Anything Goes
  3. QKR Stampede – #366 Anything Goes
  4. Daisy Chain – Pink or Halloween
  5. Simply create Too – Anything Goes with optional:  Spooky/Scary
  6. Fab ‘n’ Funky – Halloween
  7. Little Red Wagon – Cut it Out!

Cheerful Sketches Guest Designer

Hello friends!  Hope you’ve had a wonderful weekend!  I just got back from a lovely weekend trip with hubby and we had such a great time visiting over in Hannibal, MO.  This was something we both really needed to just get away for a bit and it was wonderful to be able to go and do something fun!

Today I’m sharing my creation I made as a guest designer for the Cheerful Sketches challenge blog.  (I had won a spot with one of my creations I had entered.)  I was also shared the sketch and an image to work with:

Vicki-GDTCheerfulSketches-MyBesties

The was a company that I have heard of before, but this is the first time that I have actually colored one up.  This is from the My Bestie Shop in their Harvest Collection called Harvest Besties Doll 25.

I took the image and colored it up and cut it out the size I needed for my card and layered it with some dark brown cardstock.  I took some sunflower style papers from my stash and placed a piece over a 5.5″ square dark brown top folding card base.

I cut out a couple of squares for each corner of the card and layered a scallop die cut square to each one with some orange colored cardstock.  I also took a strip of this same orange cardstock and attached it diagonally across it.

Lastly, I took the image panel and wrapped some seam binding ribbon around it with a bow, twine and button.  For the seam binding ribbon, I spritzed it with water and crinkled it up a bit and let it dry before adding to my card.  I then added some Fall Prima flowers around the design.

Vicki-GDTCheerfulSketches-MyBesties-close

Here’s a closer view of the image and how I’ve colored her up with Copic markers.  For the gold glittery details in the Fall sentiment and around her (including the buttons on her shoes), I’ve taken a Quickie Glue Pen to color it in with and then added some pretty Fall gold glitter over it.

The edges of this image panel were sponged with some Tea Dye Distress Ink and then sprayed with water for the water droplet marks.

Vicki-GDTCheerfulSketches-MyBesties-flat

She has put me in the mood to go to the pumpkin patch and bring one home!

Thanks so much for stopping in today!  Hope you’ve been inspired in some way and I’ll be seeing you soon!

Challenges:

  1.  Love to Craft – LTCCB39 Oct Anything Goes
  2. Little Red Wagon – Pumpkin Party
  3. Fab ‘N’ Funky – Autumn Colors
  4. Watercooler Wednesday – WWC241 Anything Goes Feminine
  5. Crafting with an Attitude – Anything Goes
  6. Crafty Catz – Anything Goes with option of Ribbon, Bow or Flower
  7. Creative Knockouts – Lots of Layers

World Card Making Day with Whimsy Stamps-Halloween Style!

Hello friends!  Happy World Card Making Day!  Woo hoo!!  What a perfect day to celebrate for us card makers, right?!  I’m so excited to celebrate a part of this special day with you using Whimsy Stamps products… especially in a Halloween style fashion!

World Cardmaking Day is a day dedicated to celebrating the art of handmade cards – whether made with construction paper and crayons or with more sophisticated supplies. As we crafters can all agree, a store-bought card, while nice, just can’t replace the personal and thoughtful nature of one made by hand.

Vicki-WSPenguinTOT-CCT596

Here’s a fun little treat in case you forgot about my Halloween creation post back in August with this fun Whimsy Stamps Penguin Trick or Treaters digital image!  (Please click on the “Halloween creation post” for further details!)

Thanks so much for dropping in today!

Anything Goes for Cute Card Thursday!

Hello friends!  And here we are almost the first week in October coming to a close!  Wow, time goes so quickly I can’t keep up with it! LOL!

It’s Thursday and time for a brand new challenge over at the Cute Card Thursday Challenge blog!  The challenge for this week is our monthly “Anything Goes” theme with our sponsor Whimsy Stamps!

Vicki-CCT602-Oct3

Now how cute is this little Frankenstein girl?!  She could be a trick-or-treater coming around the tree with her arms out trying to walk like a Frankenstein to scare you, but I’m giggling! 🙂    This digital cutie is called, of course, Frankie by CC Designs for Whimsy Stamps.

I wanted to create a spooky scene for her (you know, to help with her trying to be scary and all!)  So I took a piece of Bristol Smooth cardstock and made a circle mask for the glowing moon and placed it where I wanted it go and began ink blending around it with some Carved Pumpkin distress ink.  I then went over that a bit with some Twisted Citron and then worked my way with Wilted Violet, Dusty Concord and Black Soot for the bottom portion.  I removed the mask and went over circle with some Squeezed Lemonade.  I wanted lots of stars in the sky, so I first sprayed the background with water and picked up the colors, then I added some “dots” with a white gel pen.  I know it won’t show up in the photos, but I sprayed the background with some shimmer spray which really makes the background so sparkly.

To finish the scene I took the Whimsy Stamps No-See All Seasons Tree die set and cut the tree out from the Whimsy stamps Rustic Wood and Brick digital papers and then sponged around the edges of it with some Black Soot distress ink.  I also took the grass die from that set and cut out 3 pieces of it with black cardstock for the ground.  I took the sentiment and spider image from the Simon Says Stamp Spook Up Some Fun stamp set and added it to the scene.  I had an older Whimsy Stamps Halloween die cut set that I cut the bat from black cardstock and added to the scene too.

Vicki-CCT602-Oct3-close

Here’s a closer look at the image and how I’ve colored it in.  I tried to capture the sparkle in the background, but it just doesn’t show up like it does in person.  You can see for the “streaks” in her hair that I’ve used a purple gel pen so it’s glittery.  I’ve also used that same gel pen for the trim on her outfit.  I used a silver gel pen for the “bolts” from her neck/face area.  She was fussy cut out and attached to the scene.  I took a glitter pen and went over her skirt too.

I’ve used Copic markers to color her in with and they’re listed below:

  • Frankie’s Hair and Shoes – C8, C7, C5, C3, C1
  • Frankie’s Skin – YG67, YG63, YG61
  • Frankie’s Outfit – V20, V17, V15, V12, YG11, C3, C1

Vicki-CCT602-Oct3-flat

Of course, I needed to make it even more spooky by adding some plastic spiders to the scene!  And yeah…. if I see a real spider…you’d be hearing a very high-pitched scream coming from me!! LOL!!  Not a fan…but pretend is just fine!  Let’s just hope I don’t drop one on the floor and see it later and scream! LOL!

I hope you’ve enjoyed my spooky Halloween card today!

Challenges I’d like to enter for this card:

  1.  Creatilicious – Anything Goes with optional: use a punch
  2. Pearly Sparkles – Spooky and/or Cute
  3. A Bit More Time to Craft – Anything Goes
  4. Addicted to Stamps and More! – Anything Goes #361
  5. Crafting by Designs – Anything Goes

Fall is Here with Digi Doodle Studios!

Hello friends!  Now that we have started October, the temperatures will start to drop and the leaves will begin to change color and drop from the trees.  That’s when we know that Fall is truly here and I look forward to being out in it! 🙂

I wanted to capture that feeling on my card for you today using an image from Digi Doodle Studios:

Vicki-DDSJoieAutumn-Oct2

This cutie is called Joie Autumn and I just love her sweet little pup companion there playing around in the fall leaves with her!  She looks so happy and this is probably something I would do instead of actually raking them up!! LOL!!

Have you ever “googled” a card sketch?  I never really thought to do this, but I have some really cool Autumn type papers and I wanted to create some layers with them on my card, but I didn’t want it to look like a hot mess, so I picked out a card sketch and used that to create this card using some more papers from my stash!  I also got to use my Autumn embossing folder for the strip in the center along with my favorite glitter ribbon across it.

I’ve layered some gold foil cardstock with a few of the layers in there and added some Prima leaves and a button over the gold ribbon bow to finish it off.  I white heat embossed the sentiment from Lawn Fawn and cut it out with a My Favorite Things banner die.

Vicki-DDSJoieAutumn-Oct2-close

Here’s this sweet image upon a closer look at the coloring I’ve done!  I’ve also added a highlight with a white gel pen to her cheeks, the pup’s cheeks and the rim on her hat.  I took a gold gel pen and colored the pup’s collar with it as well as using it for additional “dots” around the sunflowers in her hair.

The light blue shading around her was used with Copic markers as well as the blending of the colorful pile of leaves on the ground.  I took colors from the leaves as well as other colors to blend and mute them together to make it appear like a leafy colored ground.

I cut this image out with a stitched rectangle die and layered it onto some green cardstock which is the same I’ve used for the 5.5″ square card base and the embossed strip in the middle.

Vicki-DDSJoieAuumn-Oct2-flat

I hope you’ve enjoyed my Fall creation today and you’ve been inspired in some way!  I appreciate each and every one of your kind thoughts more that you’ll ever know!

Thanks for dropping by and I’ll see you soon!

Challenges I’d like to enter this card for:

  1.  As You Like It – CAS or FAF Why? – I actually like both and I think my style runs a bit into both sometimes.  I feel like I have SO much crafty stash that I just want to keep adding more onto my cards…so lately it’s been this way! 🙂
  2. Cardz 4 Galz – Pretty Bows (not really sure if it’s pretty, but it’s glittery!)
  3. Stamps & Fun = Creativity – The Magic of Fall
  4. Make My Monday – Autumn
  5. Through the Craft Room Door – Anything Goes
  6. Sheepski Designs – Autumn

Whimsy Stamps New Release with 2 Christmas Tails

Hello friends!  It’s October 1st which also means it’s time for a brand-new release for Whimsy Stamps…I’m back to share a card I’ve made for the brand-new digital release at Whimsy Stamps.

Today I’m sharing a Christmas card I’ve made using an adorable image:

Vicki-WS2XmasTails-Oct1

These adorable critters are having some festive fun!  This image is by Crissy Armstrong called “2 Christmas Tails“.

This is an unusual size and card opening for me on this card, but I wanted to be sure that the image fit completely on the design I was creating.

So I started with a 4.5″ x 5.75” side folding white card base.  I took a piece of red foil paper and clear heat embossed the snowflakes over it from the Whimsy Stamps Basic Christmas Backgrounds clear stamp set.  I mounted this over a piece of gold foil paper, added the striped paper in the bottom corner, the oval cut image panel and tied a glitter ribbon around the layers and mounted it to the white card base.

I took the Whimsy Stamps Christmas Large Word die and cut it from some of the gold foil paper and layered it over top of the gold foil banner I created by black heat embossing the sentiment.  I finished it off with some snowflake rhinestones above the critters.

Vicki-WS2XmasTails-Oct1-close

Here’s a closer look at how I’ve colored in these adorable critters.  The photos never show everything about the details of the card, but it’s so cool in person! 🙂

I’ve used Copic markers to color this in.  Here are the colors that I’ve used:

  • Santa Hats & Candy Cane – R39, R37, R35, R32, BG000
  • Bunny – E35, E33, E31, E30, R20, R00, C3, C1, C0
  • Mouse – W7, W5, W3, W1, R20, R00
  • Bell – Y28, Y26, Y21, YG13, YG11
  • Ground/Shadows – E84, E81, C1, E0000

I used a white gel pen for highlights on the candy cane and parts of the bunny’s tail.  I also covered the bell with a glitter brush pen.  I took a glue pen and added some clear glitter over the hat trimmings.  To get the blue faded color around the image, I used the oval die I cut it out with as a “mask” to blend some blue distress ink softly over it.

Vicki-WS2XmasTails-Oct1-flat

I hope you’ve enjoyed my Christmas card today and have been inspired in some way!

Thanks so much for joining me today and I’ll be seeing you soon!

Challenges I’d like to enter this card for:

  1.  Crafty Creations – Anything Goes
  2. The House That Stamps Built – S2519 Anything Goes
  3. Creative Knockouts – Anything Goes
  4. Crafty Catz – #476 Anything Goes
  5. QKR Stampede – #365 Anything Goes
  6. Simon Says Stamp Monday – Let’s Get Ready for Christmas
  7. Crafty Cardmakers – Add a Critter
  8. Sketch Saturday – (I turned sketch)

Meow-lloween Party for 2 Crafty Critter Crazies

Meow friends! 🙂   It’s October and I’m always excited about this month because there are so many fun Fall activities that happen and I also really enjoy the Halloween atmosphere around this time.  I hope you’ll enjoy the fun right along with me!

Today, I’m excited to bring you my creation for a brand new challenge for this month over at 2 Crafty Critter Crazies!  Remember that it’s always an “anything goes” challenge PLUS you need to use a critter on your creation!

This month we’re being sponsored by Beccy’s Place and was generous to supply the team with an image to play with:

Vicki-2CCC31-Beccy's Place

I just fell in love with this adorable kitty from the Scaredy Cats digital set.  I think he’s all dressed up and seriously ready to “get this meow-lloween party started“!!

So fun to pull out some Halloween papers and colors for this card.  I usually like to add in some purple somewhere if I can, so I found some ribbon and thought it matched up with kitty’s hat.

I couldn’t help but to add a few more elements to this kitty by taking a spider image from a Tim Holtz stamp set and adding it to kitty’s hat.  I also stamped the stars at the top along with the sentiment from a Simon Says Stamp Halloween stamp set from last year…I think.  The web up in the corner is an older die from my stash that I usually pull out for Halloween creations.

Vicki-2CCC31-Beccy's Place-close

Here you can see how I’ve colored up this fun kitty with Copic markers.  I’ve also colored the belt buckle on the hat with a gold gel pen.

I used some Wilted Violet to sponge around the edges of the kitty panel after I stamped the stars at the top.

While I was filling the sequins with gold Stickles, I added a few dots to the starry sky for just a bit more sparkle.

Vicki-2CCC31-Beccy's Place-flat

Hope you’ve enjoyed my fun “meow-lloween” card today!

Thanks so much for stopping in today my friends and be sure to check right back again here today as I have another post coming soon!

Challenges:

  1. Tuesday Throwdown – Anything Goes
  2. Creative Moments – Anything Goes + optional twist: masculine
  3. CRAFT -Animals
  4. The Paper Players – PP461 Tic Tac Toe