Seally Me!

Hello friends!  I hope that you’ve had a great weekend!  The temps actually got up high enough that I was able to take a nice walk Sunday!  Then of course since it’s February, Mother Nature says we will be getting several inches of snow today!  For some reason this month seems really long, so I’m ready to move along to March! LOL!

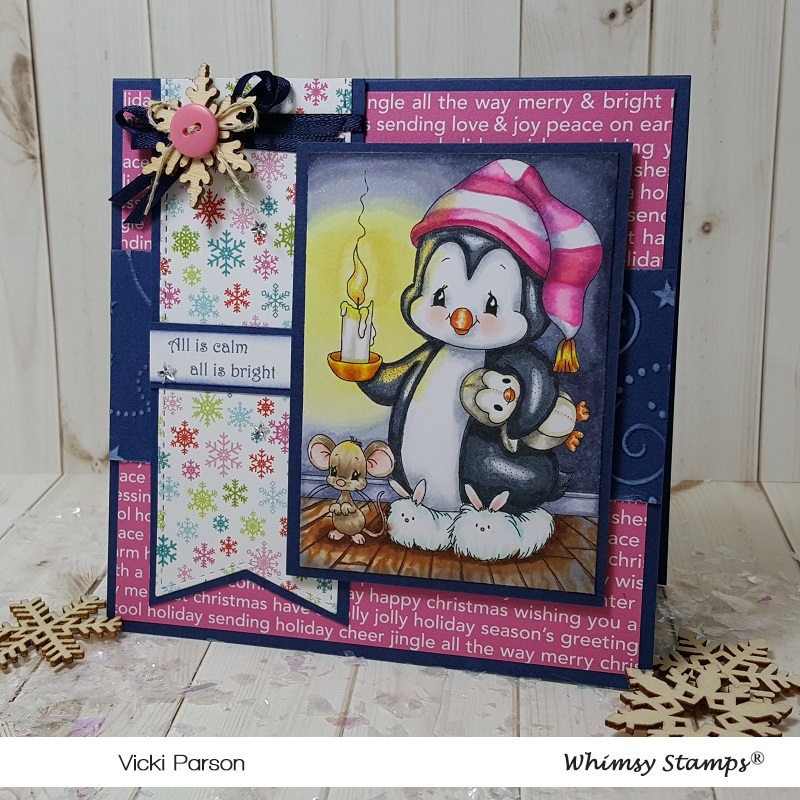
Since we are still getting snow, I thought it would be a great time to pull out this adorable “Seally for You” Pairables digi set from Digi Doodle Studios and make some cards:

Vicki-DDSSeallyforYou (2)

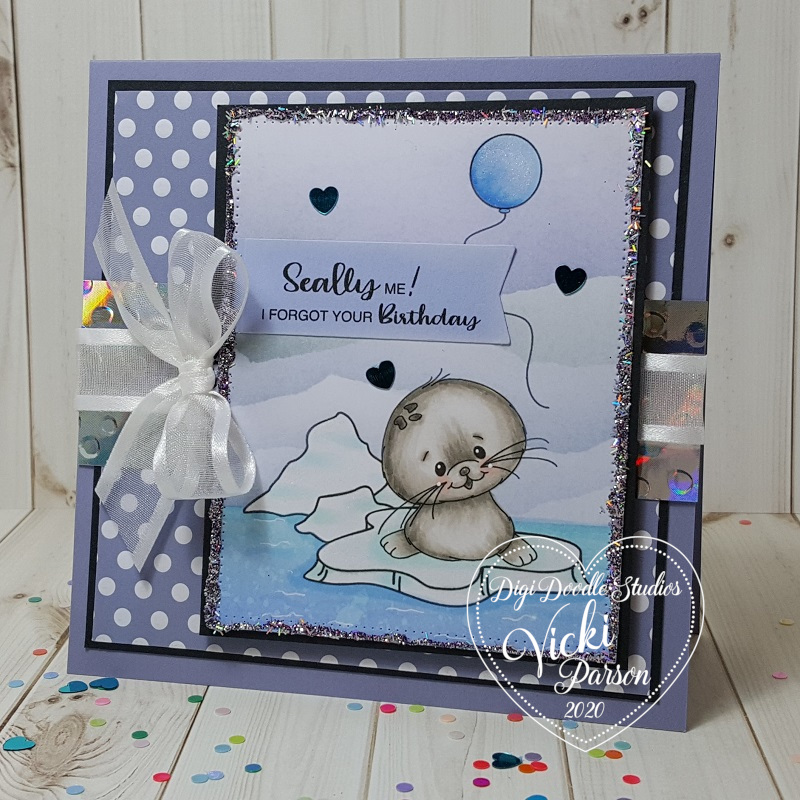
For my first card, I’ve arranged the images from the set and printed it out.  You may recognize the balloon floating in the air which is another digital image that came from the DDS Little Ones Pairables set.  (So don’t forget that you can always mix sets together to come up with some really fun scenes!)

To finish out the scene, I’ve used some masking paper and ripped up pieces of scrap paper to create the “hills” in the background along with the “water” that the seal is taking a ride on over a piece of ice.  I used some blender brushes to blend the colors for the background.

I’ve used some liquid glue around the edges of this panel and covered it with some glitter.  I printed out the sentiment from the set separately over a piece of colored cardstock and cut it out for the banner.

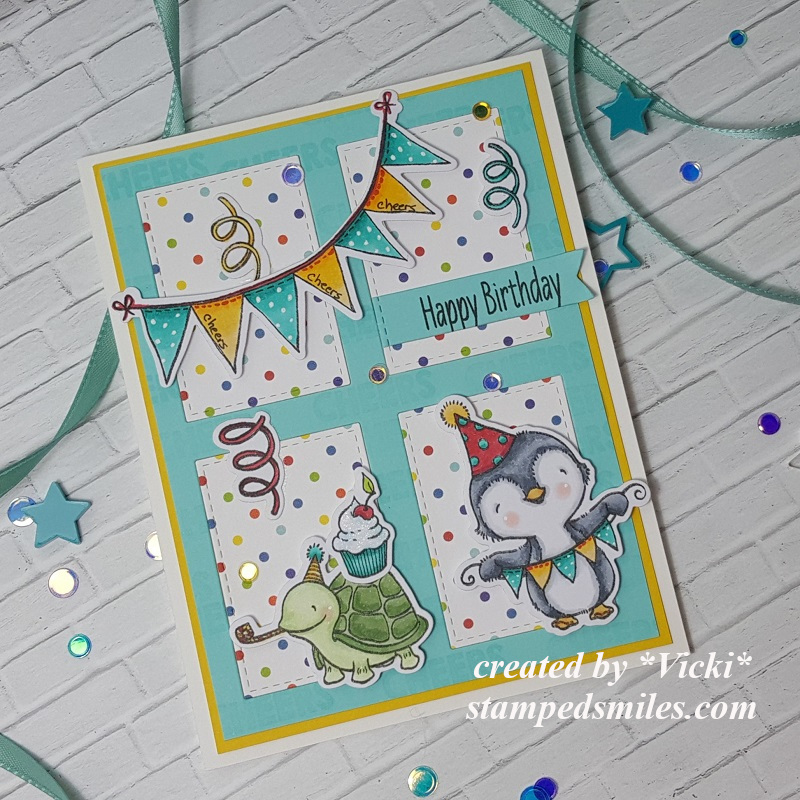
Since I was trying to keep this a “wintry” style card, I kept the colors more blue and purple.  I found some fun papers in my stash that worked for a fun birthday theme and then I used an embossing folder and embossed that strip of Prism paper in the center that I’ve placed the ribbon over and added the bow.  Lastly, I’ve added the heart sequins and covered the balloon and ice images with a glitter brush pen.

Vicki-DDSSeallyforYou-close (2)

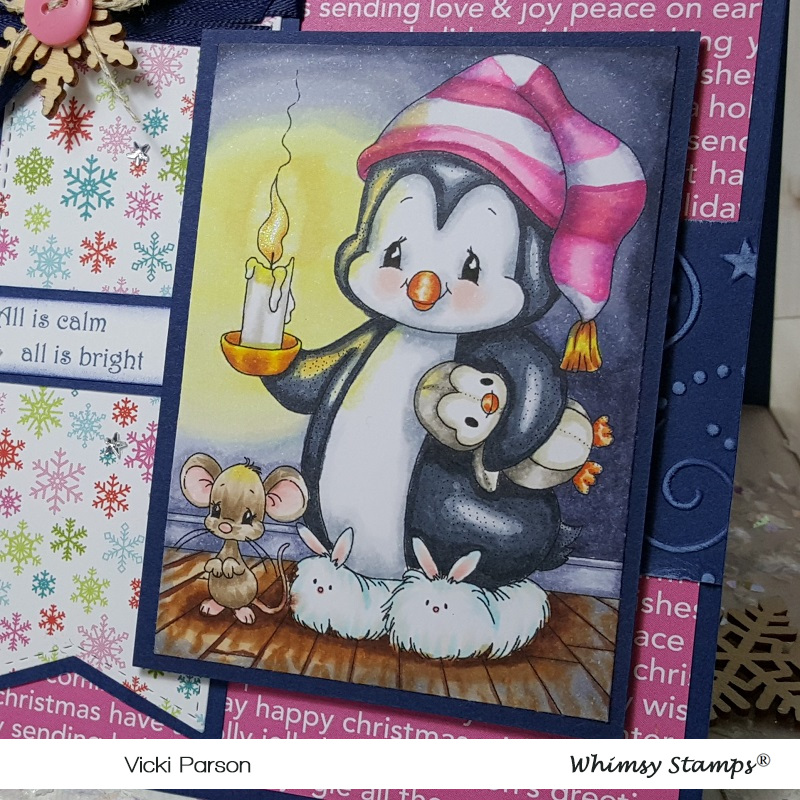
Here’s a closer look at the coloring on this cute little seal as well as all of the shimmer and sparkle everywhere!  I’ve used a white gel pen for his cheeks, eyes and for lines on the water.

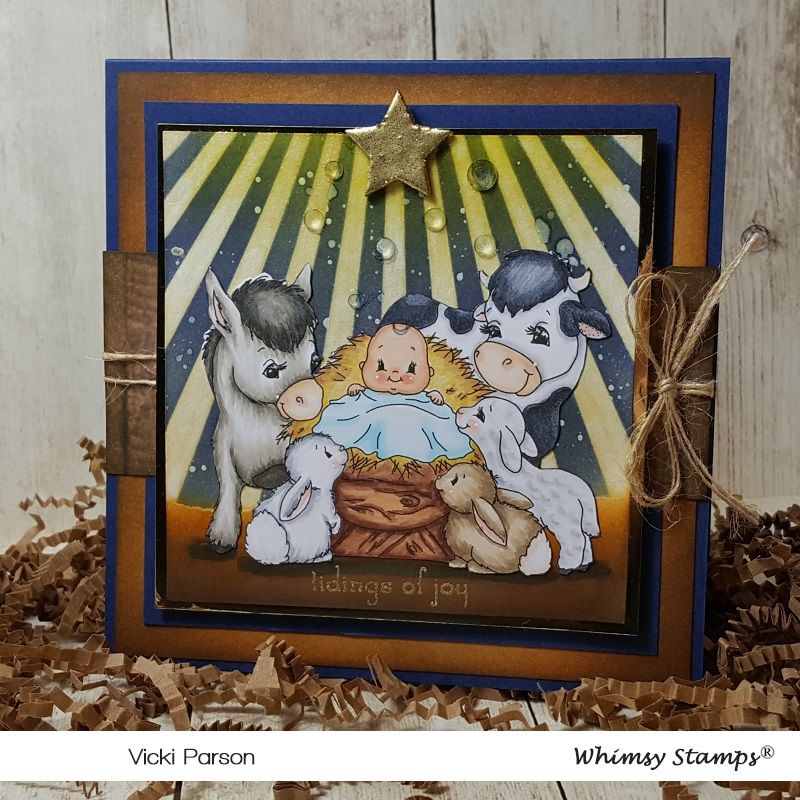
“Seally Me”….I’m always forgetting a birthday here and there!  LOL!  Which I guess is why I’ve decided to create another card:

Vicki-DDSSeallyBday

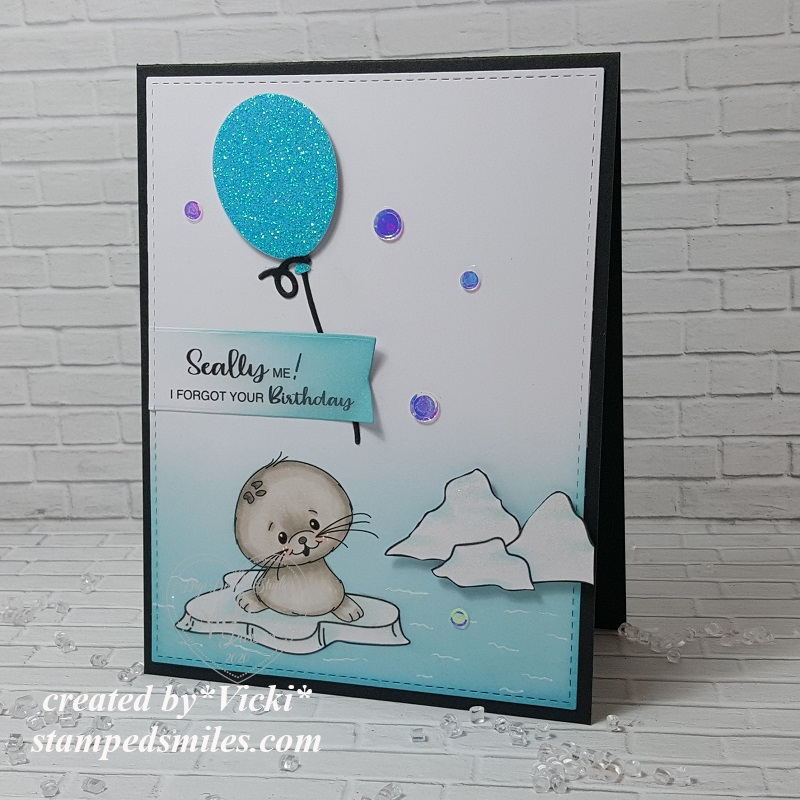
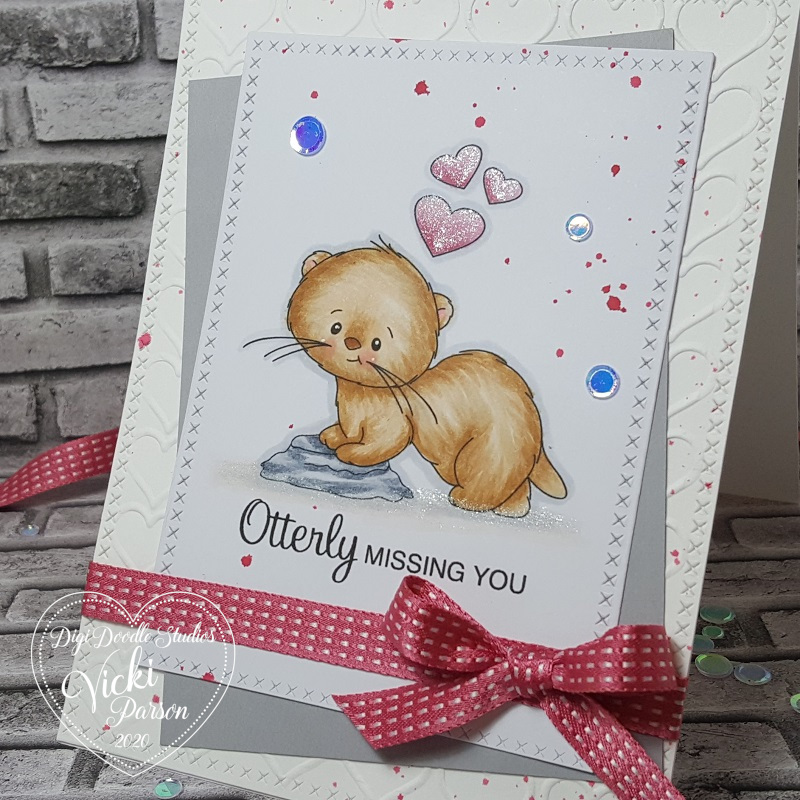
For this card, I’ve kept it pretty much the same in a more simplified way with less layers and details.

As you can see, I’ve printed out the scene panel with just the seal on the ice platform and then I’ve used blender brushes here again to just give the “water” a bit of color that fades out towards the center of the panel.  I printed out the “icebergs” and sentiment separately and then cut them out to place over the design.

I’ve also used a MFT balloon die to cut out with black and turquoise glitter paper and popped that up along with the “icebergs” over the panel.  Lastly I’ve added some sequins.

Vicki-DDSSeallyBday-close

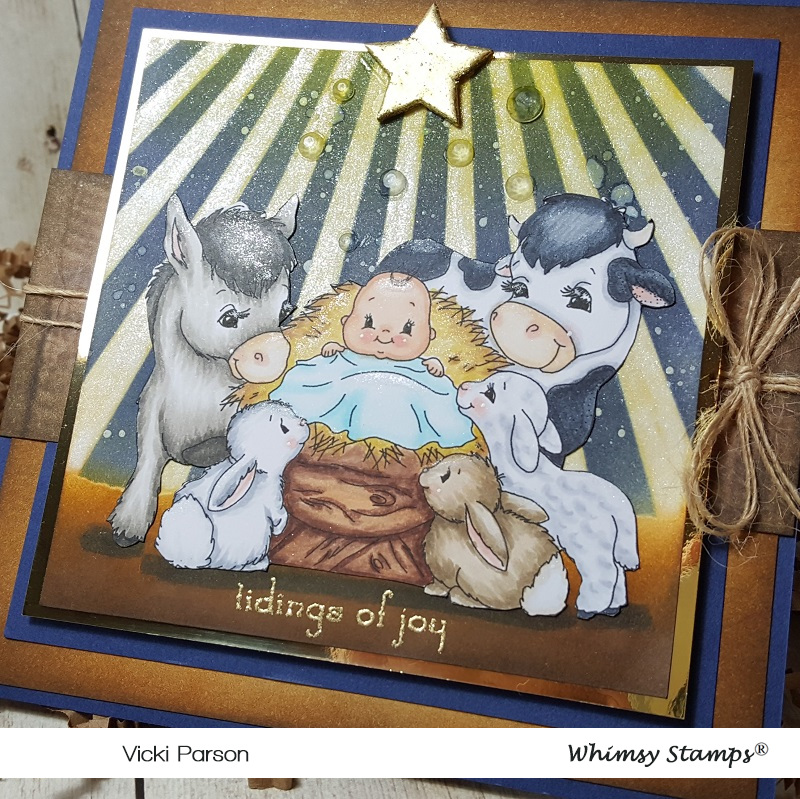
Here’s a closer view of the coloring on this seal.  I’ve kept him the same colors, but for this one, it’s a bit softer in tones.  Again, I’ve used a white gel pen for this cheeks, eyes and water as well as a glitter brush pen over the icebergs and ice platform.

I honestly am not sure which one I like better than the other, but that seal is cute regardless and that face might help me “get away” with being late for a birthday when I send it along! LOL!

Really hope that you’ve enjoyed my cards or have been inspired in some way!  Still struggling with no MOJO, but trying to work through it and hopefully it’ll miss me and want to come back soon!  Until then, I will keep trying to create through it.

Thanks so much for stopping in and I’ll see you soon!

Challenges I’d like to enter:

  1.  Di’s Digi Challenge – Use a Digi Image
  2. Papercraft– #55 Winter Fun
  3. Createful Heart Design – #17 Anything Goes
  4. Jan’s Digi Stamps– #8 Anything Goes
  5. The House That Stamps Built – F1920 Winter Color Palette
  6. Aud Sentiments – #245 Anything Goes + Sentiment
  7. Penny’s Paper-Crafty – #465 Anything Goes

Seally For You

Hello there friends!

There’s something brand new in the Digi Doodle Studios store this month and it’s just perfect for making an adorable Valentine’s Day or love themed card!  Check out this sweet card I’ve made for you today:

Vicki-DDSSeallyForYou

Aren’t these snow seals just the sweetest?!  I’ve used the brand new Pairables digital set called Seally for You from Digi Doodle Studios for my card here.

It’s really easy to create a scene on your computer with the images and then just print them out to color!  I have this cute couple arranged in a “Titanic” situation (If you’ve seen the movie, then you know what I’m referring to! LOL!)  on my scene here, but also have printed out a couple of extra hearts along with the fish and floating ice cube to fussy cut out and add to my scene later after assembling it.  The “water waves” that I’ve added to my scene is actually from the DDS Otterly Loves Pairables.  That is what is so cool about these Pairables sets, is that you can use the different elements together with another set to create some fun & unique scenes!

I used cut out vellum for the water and added another strip that I actually clear heat embossed the sentiment as it came out of the printer.  You can heat emboss over vellum as the ink stays wet a little longer after printing it out.  (Not for too long though!)

I added the colored up fish, hearts and ice cube to the design as well as sponged some soft pastel clouds with a stencil.  I was also trying to be different by tilting the image layer over the card.  The card front panel was embossed with a falling snow embossing folder, I wrapped some ribbon around the corner and attached this piece to an A2 sized top folding white card base.

Vicki-DDSSeallyForYou-close

I’ve colored the images with Copic markers.  You can see that I’ve fussy cut out the smaller heart and then popped up the top heart with foam tape.  I tucked the ice cube and one of the fish behind the vellum and then popped up the fish over the ice cube with foam tape.  I took one fish and attached next to the heat embossed sentiment.

You can also see the hearts long with the ice cube and ice platform that I’ve taken a glitter brush pen to add some shimmer to them.

Vicki-DDSSeallyForYou-flat

I hope you’ve enjoyed my card today or have been inspired to create your own fun digital scene to play with too!  Thanks so much for dropping by today and I’ll see you soon!

Challenges I’d like to enter my card for:

  1.  Challenge Up Your Life – Winter Landscape/Scene (6 total challenges)
  2. Crafty Friends – Love/Romance
  3. Get Creative – Use Hearts
  4. Creative Inspirations – Anything Goes
  5. C.R.A.F.T. – Love/Valentine’s
  6. Creative Moments – #184 Anything Goes with twist:  love

Guest Design Spot for The Paper Girls With Birthday Fun!

Hello friends!

I’m very excited to share my post with you today for The Paper Girls Challenge as I’ve been invited to be a guest designer for their current challenge of “BIRHTDAY“!  We all need birthday themed projects, so this is a great way to join in the fun and add to your birthday card stash too!  Hope you will join us!

I wanted to pull out some stamps that I had bought a while back and never pulled out to use yet, so this was fun!  Here’s my card:

Vicki-PCGguestDT-MFTbday

Who could resist a couple of cute party animals! LOL!  I’ve pulled out this adorable “Sending Sweet Celebration Wishes” stamp set from My Favorite Things and made a fun party scene with it!

For the card front, I’ve die cut some Summer Splash cardstock with the Gift Box Cover-Up Dienamics and then used it to also cut some older MFT pattern papers to fit inside the die cut squares.  I layered these pieces over a piece of MFT Daffodil cardstock (looks to be retired) and then mounted it over an A2 sized top folding white card base.

I’ve used the same Summer Splash cardstock to stamp the sentiment from the stamp set and used a banner die to cut it out with and used the Gift Box Cover die to cut the end of it to match with the upper right box area.

For the Gift Box Cover-Up “frame”, I took a sentiment from the MFT Penguins in Paradise and stamped the “cheers” image randomly with VersaMark ink all over it, but then decided that you couldn’t see it very well, so I added the word to the yellow banners with a black pen in my own writing.

I’ve used the coordinating die set for the Sending Sweet Celebration Wishes set to cut out the colored images and attached them to the card front.  Some I’ve popped up with foam tape and the others were glued.  I also wanted to add a little sparkle, so I’ve attached a few confetti sequins to finish it up.

Vicki-PCGguestDT-MFTbday-close

Here’s a closer look at the coloring I’ve done on these cuties.  I’ve used a white gel pen for their cheeks as well as adding some polka dots to the party banner.

You can see where I’ve used a marker to write the words on the banners and I also used it to create stitches along the top of each banner too.

I’ve also added some shimmer with a glitter pen over the cupcake frosting.

Vicki-PCGguestDT-MFTbday-flat

I hope you’ve enjoyed my birthday party animals card today and have been inspired in some way!

Thanks so much for stopping in today and I’ll be seeing you soon!!

Challenges:

  1.  MFT Birthday Project– Jan “Cheers”
  2. Crafty Calendar – Use die cuts/punches
  3. Seize the Birthday– Creatures Great & Small or Anything Goes
  4. Creative Knockouts – Birthday Wishes
  5. Crafty Animals – Anything Goes + animal(s)

Otterly Missing You!

Hello friends!  I wanted to say thank you for adding your comments from my last post about the card kits! LOL!  I see that I’m not alone!  You’ve all actually really inspired me to get them pulled out and use them despite how old/new they are!  Loved the idea about making several cards and sending them along to charities too!  Always love reading your feedback! 🙂

Today I wanted to share with you another card I made with the oh so adorable Digi Doodle Studios “Otterly Love” Pairables set that you may remember my card from last week that I’ve posted HERE.  I’ve used it again for my card below:

Vicki-DDSOtterlyLove-Jan16

His sweet little face gets me every time! 🙂   As in the previous card I made with this set, I’ve arranged the digital images from the set how I wanted them to look on my design and then just printed it out.

After coloring up my image panel, I die cut it out with a cross-stitch rectangle die and set it aside.  I cut a white A2 sized top folding card base and then layered a white heart embossed (folder from Stampin’ Up!) card front panel that was also cut with the cross-stich rectangle die.  I used some watered down ink (Strawberry Slush from Stampin’ Up!) and a fan brush to splatter some color over it.  I also CAREFULLY took the image panel and splattered some more over that panel as well.

I then arranged the rectangle layers including the gray colored cardstock (Smokey Slate from Stampin’ Up!)  panel and attached them to the embossed card front panel.  I tied some of that triple stitched ribbon (from Stampin’ Up!) around all of these layers and added a bow with it before attaching it all to the card base.  Lastly, I’ve added some clear sequins.

Vicki-DDSOtterlyLove-Jan-close

Here’s a closer view of the Copic coloring I’ve done on this cute critter posing on his little rock.  (I thought he needed a bit of ‘water’ around him.)

You can see the hearts and along the bottom of his feet where I’ve added some shimmer with a clear glitter brush pen.  I’ve also used a white gel pen for his cheeks and eyes.

Vicki-DDSOtterlyLove-Jan-flat

It’s a super simple card, but oh so much fun to color him up!  I thought it was a nice card to send for a ‘miss you’ to someone you love!

Thanks so much for joining me here today friends and I’ll be seeing you soon!

Challenges I’d like to enter this card for:

  1. Creative Fingers – Anything Goes #177
  2. QKR Stampede – Anything Goes #380
  3. Not Just Cards – Jan. Anything Goes
  4. Lil’ Patch of Crafty Friends – Anything Goes (Happy 5th!)
  5. The Cutie Pie– Cute, Clean and Simple
  6. Pammie’s Inky Pinkies – Anything Goes PIP2002
  7. Crafty Cardmakers – Anything Goes #248

Let’s Celebrate at 2 Crafty Critter Crazies!

HAPPY NEW YEAR FRIENDS!!!

*I wanted to take a moment to first wish all of my friends and blog readers here an extremely Happy New Year and best wishes for the most amazing 2020 you can have!  I have REALLY appreciated each and every one of you for your friendship, support and comments throughout this last year…it really means so much to me!  I hope to continue to inspire and spread smiles with you in the comng year as well!  HUGS*

Today is obviously the first which means it’s time to start a brand new challenge over at 2 Crafty Critter Crazies!  So remember that you have the entire month to play along and It’s ALWAYS an “Anything Goes + a critter” on your crafty project!  Easy peasy!

Here’s the creation I made for this month:

Vicki-2CCC34-BugabooBday

He’s such a cutie and I think he would be a fun little guy to celebrate with especially since it looks like he’s handing out cupcakes! LOL!!

The sponsor for our challenge this month is Bugaboo Stamps and the team were given some images to play with, so I have used this adorable Birthday Hedgie 02 digital stamp on my card today!

After coloring him up with Copic markers, I used a stitched rectangle die to cut him out with and then layered him onto a blue layer of cardstock along with another yellow layer that was cut from a stitched scallop rectangle die.  I used some craft foam to pop him up over the card front design.

For the card base, I took a top folding A2 sized kraft card base and found some fun birthday papers in similar colors slightly cut down to go over top.  I also found a matching blue dotted strip of paper to place from top to bottom of the card base design.  the sentiment was stamped in black ink at the bottom of the image panel.  This is a new set I got from Simon Says Stamp called Tiny Words.

Vicki-2CCC34-BugabooBday-close

Here’s a closer look at the coloring I’ve done on this cute little guy!  His “hair” actually got a bit more “fuzzy” than what I was going for, but I didn’t want to keep going over him or he might look like he partied a bit too much! LOL!

Of course it’s very hard to see unless you see it person, but I’ve added some shimmer with my glitter brush pen over the cupcakes and little hearts.  I also used some colored gel pens to go over some of the confetti pieces around him.  I also used a white gel pen for his cheeks and I thought he needed some eyeballs and I made those too!

Vicki-2CCC34-BugabooBday-flat

I hope you’ve enjoyed my card today!

P.S.  Just for fun, please share with me if you have any crafty or non-crafty “New Year’s resolutions/goals” for this year!  My goal is to COMPLETELY finish each card I make this year with sentiment/decorated inside, with the envelope and signed on back!  I hope it holds up!  I started with this card!

Challenges:

  1.  Make My Monday – Female Birthday (Thought it could be used for anyone!)
  2. Simon Says Stamp Monday – “Party Time”
  3. Creative Knockouts – Celebrations
  4. QKR Stampede– #378 Anything goes

Winter Friends at Whimsy Stamps

Hello friends!  I hope that you all had a great Christmas!  I’m still celebrating with my family over the weekend and happy to be with all of my loved ones for sure!

I have this really sweet image along with some news to share with you today.

For the news:  This will be my final post as a design team member for Whimsy Stamps.  I STILL adore Whimsy Stamps and of course will continue to use the products and promote the products and still use my affiliate link with them when I can, but my term has ended and it was time for me to move on is all…I will truely miss being apart of this wonderful team and working with my friends over there for sure, but will always remain friends of course!

And, perfectly, this brings me to my card for today with this darling image.   This card was made and sent to a lovely teamie for our Christmas card swap and I thought it was perfect to send along to her….

Vicki-WSWinterFriends-Christmas swap

I have used this adorable Wee Stamps image from Whimsy Stamps called “Winter Friends“.  I just fell in love with the sweetness of it all for sure!

After coloring up the image, I die cut it out with a stitched circle die and layered it over another blue die cut circle.  I then took some “Fallen Snow Glitterstock” from Brutus Monroe and cut out a piece with the MFT Linked Chain Circle Frames die and attached that piece around the die cut circle image.

I wanted to pair this image to match up with the colors from the Whimsy Stamps “Christmas So Soft” Digital Papers Collection.  I used one panel for the entire background base that was mounted over a blue 5″ square top folding card base.  And then I used the pink strip from the same collection mounted over another strip of blue cardstock across the middle of the card wrapped with some silver metallic ribbon.

In the bottom corner of the card is where I stamped the greeting in black ink from the Whimsy Stamps Holiday Mini Sentiments clear stamp set.  The circle image was mounted over top of the card with some craft foam and then I die cut some snowflakes from the Whimsy Stamps No-See All Seasons Tree die set with more of that Glitterstock that was randomly added to the card along with placing one in the center of the ribbon bow.  I’ve also added a gem to the center of that snowflake as well.

Vicki-WSWinter Friends-Christmas swap-close

Here’s a closer view of the coloring that I’ve done on this sweet image.  I’ve used my usual Copic markers and also used a white gel pen for highlights in certain places.  I covered the “holly berries” in her hair with a glitter brush pen and for the snow ground, I used a glue pen and then added some glitter over top of that for sparkling snow.

Vicki-WSWinterFriends-Christmas swap-flat

A perfect image to send to one of my special DT Whimsy friends!  I hope you’ve enjoyed it as I really enjoyed creating it and sending it off to my friend too.  🙂

It’s NEVER a “good-bye”, but I’ll see you again soon my friends!  HUGS

Challenges I’d like to enter this card for:

  1.  As You Like It – Favorite Die and Why? (I am constantly using the circle, square and rectangle stitched dies because they’re nice basic shapes but also add that stitched detail along the edges to add more interest if needed.)
  2. Daring Cardmakers – Pretty Pastels Christmas
  3. Allsorts – Anything Goes
  4. Stamps & Fun = Creativity – Anything Goes
  5. Papercraft – Anything Goes
  6. Cute Card Thursday – Anything Goes

All is Calm, all is bright

Hello friends!  Are you getting ready for the big day tomorrow?  It’s Christmas Eve and not a creature was stirring except for this mouse and his penguin friend….

Vicki-WSPenguiinCandle-KC

They are up in the dark to see if they can capture a glimpse of Santa of course!  LOL!

Do you remember this image from Whimsy Stamps last year?  It was a special edition digital stamp especially made for a Kit and Clowder class.  The name of the image was called “Penguin Candlelight“.  The class isn’t available including the image with the bed scene, but this particular image is still available in the store!!

Well, I ended up getting the image which came with the entire bed scene, but there was also just this image portion as well, which I’ve used here.  I had started it last year, set it aside mainly because of my confidence and decided I needed to take the time to push through the class and finish it up no matter what it ended up like.  I’m glad that I did this and I plan to learn more about coloring next year to improve my skills and not only with marker, but hopefully with pencils too.

I came up with this layout for the card using pattern papers to match up with the pinks in the hat and layering it with some navy colored cardstock.  I’ve used an embossing folder for the strip across the middle and highlighted with some white ink.

The sentiment was computer generated by myself.  I added some ribbon, a snowflake wood veneer topped with a button and twine.  I added a few tiny rhinestone stars around the snowflake banner strip.

Vicki-WSPenguinCandle-KC-close

Here’s a closer look at the coloring I’ve done on the image.  The only added “extra” thing I did beyond the class tutorial was add some rosy cheeks and used a glitter brush pen over the candle flame.  Everything else on the panel was colored with Copics using instruction from the class.

Vicki-WSPenguinCandle-KC-flat

I hope you’ve enjoyed my calm and bright card today! 🙂

Thanks for checking in!  Wishing you a very peaceful and calm evening….

Challenges:

  1.  C.R.A.F.T. – Christmas – the last stretch
  2. QKR Stampede– #377 Anything Goes
  3. Crafty Animals – #34 Anything Goes + animal
  4. Crafty Gals – ‘Tis the Season

DDS and PND Collaboration Blog Hop is Here!

Hello friends!  Today is the “special day” of our really fun and festive Collaboration Blog Hop!  Hope you will be joining along with us for lots of inspiration and prizes!  Woohoo!

MY HOLIDAY HOP PROJECT:

I am on the Digi Doodle Studios Design team and here is my interpretation of combining each companies’ images together to come up with this fun snow scene for the Holidays:

Vicki-DDSandPND blog hop

For my card here I have taken the Digi Doodle Studios Penguin Wobbles Special Delivery digital stamp along with the Paper Nest Dolls Holiday Friends digital stamp and printed them out over a piece of Copic Blending Card.  I’ve colored them up and fussy cut them out for my scene here.

To create the scene, I’ve used some blue cardstock for the background and splattered some watered down gesso over it and then used a die cut to create the fun frame within it.  I layered it over a piece of gold cardstock so it shows through.  I also die cut some snowy hills with white glitter cardstock and some pine trees with green cardstock.

I arranged them over my blue cardstock panel  and created the scene.  I popped up the front layer of snow hill along with the penguin image with foam tape.  I covered this snow hill layer with some texture snow paste…it’s so glittery!!  I also added some more glittery details here and there on the images too.

I white heat embossed the sentiment and placed a peppermint candy embellishment next to it and attached the strip over the blue background.  I then mounted this entire scene layer over some fun and festive foiled striped papers and then onto another blue piece which was then mounted over a top folding white 5.5″ square card base.

Vicki-DDSandPND blog hop-close

Here’s a bit of a closer look at the images and how I’ve colored them up with Copic markers.  You can see that I’ve used my white gel pen for details on the bow in the present along with the shinny look on the candy cane and the cheeks of all the images.  I’ve added a few dots on the deer’s back tail too.

I’ve used a gold gel pen to color in the sleigh runner, the band around the gift sack, the “lettering and dots” on the penguin’s sign as well as the bells the little girl is holding.  I used a red gel pen to color in the little deer’s nose.  I’ve used a green gel pen to create “dots” on the penguin’s present and the deer’s bow.

I’ve also added some glitter to the heart candies and the girl’s outfit trim.

You can also see just how puffy and dimensional that snow is too! It’s really glittery and was so fun to add to the scene!  It looks like they’re gearing up to deliver some presents and the cute little Mr. Penguin Wobbles is all loaded and ready to go! LOL!

Vicki-DDSandPND blog hop-flat

I really hope that you’ve enjoyed my card today and have been inspired with it in some way to get you into the festive Holiday spirit!

Thanks so much for stopping in today my friends!

Challenges:

  1.  Stamping Sensations– Dec Anything Goes
  2. Love to Craft – LTCCB41 – Dec Anything Goes
  3. Lil Patch of Crafty Friends – Anything Goes
  4. Shopping Our Stash– Happy Holidays!
  5. Crafting By Designs – Dec Anything goes
  6. The Paper Funday – Dec Anything Goes with optional twist:  Christmas Holiday
  7. Winter Wonderland – Anything Christmas Goes

Tidings of Joy with Whimsy Stamps

Hello friends!  It’s December and that means Whimsy Stamps has fun things coming out!

I have this really sweet card just perfect for this time of the year….

Vicki-WSChristmasManger-Dec3

Today I’m sharing this really sweet image called “Christmas Manger” by Crissy Armstrong.  Isn’t this just as precious as can be!  You may remember a card I did last year IN THIS POST with a penguin style manger.  Really love Crissy’s sweet images and I’m thinking I may have to start collecting her mangers she comes out with each year now! LOL!

After coloring up this image, I’ve fussy cut it out while I worked on the background design.  I started by ripping a piece of masking paper and covered the bottom portion of a square 4″ piece of cardstock.  I took a “Light Ray” stencil and ink blended some Chipped Sapphire distress ink over it.  While the stencil was still on it, I took some white watered down paint and splattered over the background.  After removing the stencil, I let that dry while cleaning up my stencil and work area.  After it was dry, I took some Scattered Straw and Mustard Seed distress inks and blended over top.  I then took a glitter brush pen and went over each of the yellow strips in the background.  (I also covered the tops portions of the images too.  You can see this all better in the photos below.)  Lastly, I’ve used the other side of the masking paper that I ripped to cover up the sponged rays and ink blended with Rusty Hinge, Walnut Stain and Ground Espresso.  I used a marker to add some shading around the image and glued it down.

For the card, I’ve used a navy 5.25″ square card base and I’ve also used it as part of a layer behind the image panel along with a piece of gold mirror cardstock.  It’s hard to completely see this, but I’ve printed out some digital papers from the Whimsy Stamps Christmas Red, Gold and Green collection as well as the Whimsy Stamps Rustic Wood and Brick Collection.  The background was sponged with the same colors that I’ve used for the bottom of the image panel.  I’ve used some twine for the center strip area and tied a bow along the side with it.  The image panel layered with the Gold Mirror cardstock was popped up with some craft foam over that.

I’ve used a wooden star that I’ve heat embossed several times with some Gold Sparkle EP which is what I’ve used to heat emboss the sentiment at the bottom of the image panel from the Whimsy Stamps Holiday Mini Sentiments.  To finish it off I’ve decided to add some Studio Katia Sparkling Crystals.

Vicki-WSChristmasManger-Dec3-close

Here you can better see the sparkle and shimmer on the yellow “light rays” as well as the tops of the images where the light might be shining on them.  I’ve got the image colored up with my go-to Copic markers.

You can also see the sparkle and shine on the wooden star and sentiment from the gold sparkle embossing powder.  Plus of course the shine from the gold mirror cardstock.

Vicki-WSChristmasManger-Dec3-flat

I hope you’ve enjoyed my card today!  I sure had fun putting it together and I know someone special that this needs to get sent to as soon as I can!  Time is running out for it to make it on time!  Oh yes…that dreaded time running out is near isn’t it?! LOL

Thanks so much for stopping by today!  I appreciate you being here!  I will be seeing you again soon my friends!

Challenges I’d like to enter this card for:

  1.  Creative Knockouts – Winter/Holidays
  2. Daring Cardmakers – Anything Crafty with theme Shining Lights
  3. Crafty Friends– Anything Goes
  4. Merry Little Christmas – December Anything Christmas Goes
  5. Country Views– Stars
  6. Crafty Animals – #33 Anything Goes

Teddybear Tags for 2 Crafty Critter Crazies

Hello friends!  Welcome to December!  We have already arrived at the final month of the year!  Can you believe how quickly this year went by?!  The first of the month means it’s time for a new challenge to start over at 2 Crafty Critter Crazies!  Remember that it is an always “ANYTHING GOES + A CRITTER“.   I love adding critters to my crafty projects so it’s easy for me!  🙂

Since I’ve been on a tag making binge, I’ve got some more to share today:

Vicki-2CCC33-tags2

Isn’t this the cutest little bear?!  We’re sponsored this month by Beccy’s Place and I have opted to try out this cute freebie that she has offered on her blog called Stanley’s Bauble.

I thought he was too cute and I wanted to try coloring him up in a couple of different ways and even a couple of different sizes too!

I just took my Sunny Studios scallop circle tag dies and die cut a couple of them in my selected color choices of course to match up with his bauble and then I’ve die cut some coordinating circles and pattern papers to match.  He was fussy cut out and placed over top of the tag.  I’ve added some silk ribbon for both and added a twine bow around them.

Vicki-2CCC33-tags-red

Here’s  closer view of the Stanley’s Bauble red and black tag.

For this tag, he’s a bit larger than the other an he was popped up over the tag with some foam tape.  I’ve colored the bauble hanger with a gold gel pen and then went over the red bauble with a glitter brush pen.

Vicki-2CCC33-tags-blue

Here’s a closer view of the smaller tag.  The light has caught this one just right to where you can really see the glitter brush over the blue bauble.  I’ve also colored his bauble hanger with a silver gel pen.

The circle layer behind the snowflake paper was cut from some silver glitter paper.  I’ve taken a Simon Says Stamp sentiment strip and cut it out, sponged it with blue ink and glued it above the bear.  Since he was smaller than the other bear, I had room for a sentiment.   He was just attached with glue this time.

I hope you’ve enjoyed these teddy bear tags today!

Challenges:

  1.  Fab ‘n’ Funky – Anything Christmas Goes
  2. Penny’s Paper Crafty – Anything Goes
  3. Polkadoodles – Anything Goes
  4. QKR Stampede – #374 Anything Goes