*This is a scheduled post as I’m away for my son’s wedding and don’t have access to Internet at this time*
Hello friends! Here we are towards the end of June already and in full Summer mode now! Time has went by so fast! I do hope you’re all doing well, staying safe and enjoying your time however you’re spending it.
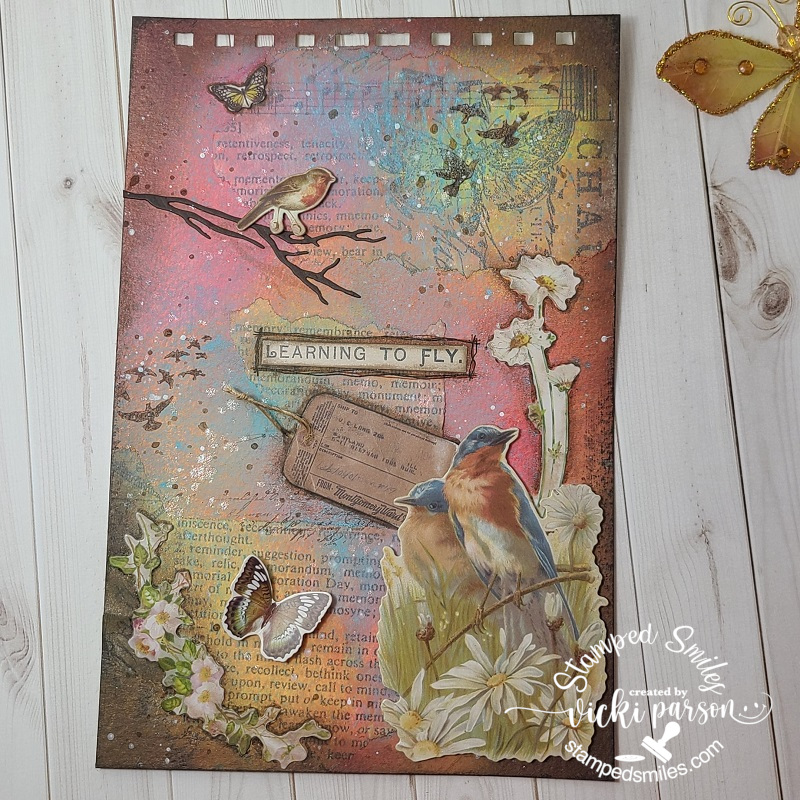
The end of the month also brings the monthly AJ page collaboration with my crafty friend, Carol (from Crafty-Stamper), so please check out her blog for more inspiration too! We’re trying to get creative by using up our never-ending stash piles! So here’s my Art Journal inspiration with the “SMASH OUR STASH” June prompt of: “buttons/sequins/gems.“
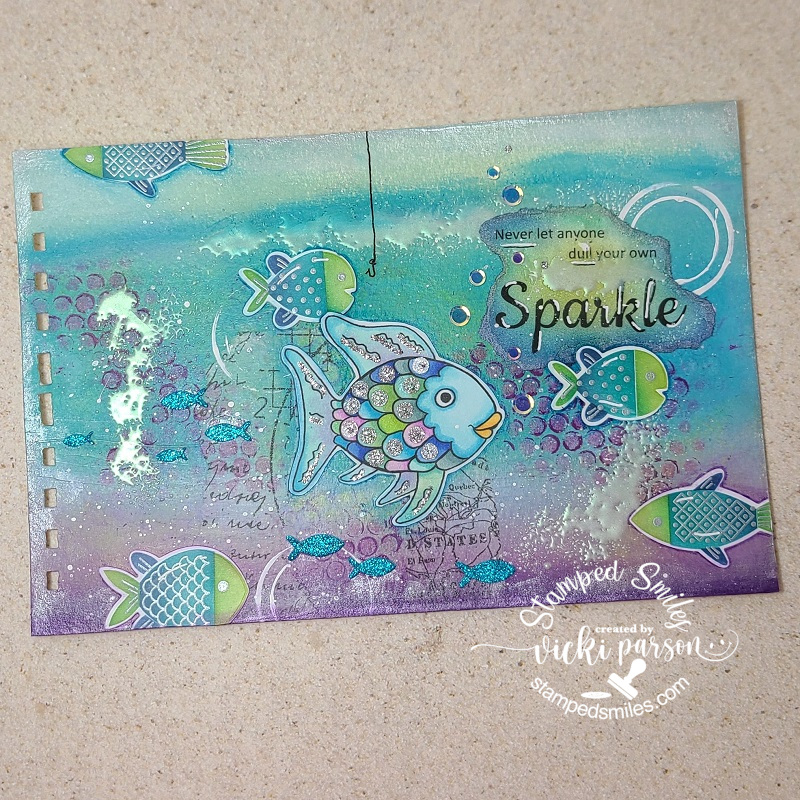
So who doesn’t have oodles of sequins in their stash? (I probably had enough to cover the entire page, but left it strictly for the fish scales and “bubbles”.😄) I was inspired by the Art Journal Journey challenge prompt this month of “FISH” and with the stash prompt in mind, it had me thinking of a book I had gotten for the kids years ago, perhaps you’re familiar with “The Rainbow Fish” by Marcus Pfister?
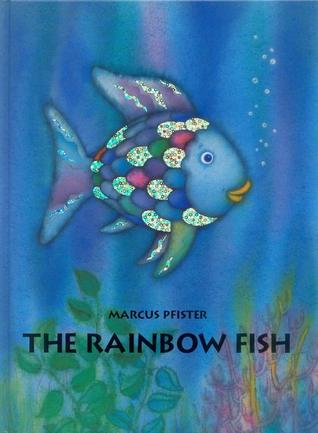
In the book, the fish’s scales were very shimmery, and it made me think to add the sequins to a fish, so I actually found a fun and free “coloring page” fish image to print out and color for my page! I used Copic markers to color that fish and the sequins are a glittery silver sequin that were topped with some silver Stickles as well as the “lines” on his fins. I also added some clear iridescent sequins for the “bubbles” above him.
For my background – Since the goal is to use my stash, I pulled out my set of gelatos that I’ve had for a few years to create my background. I found it fun to blend them and smudge them with my finger. I also used a piece of punchella trim for stenciling with them too. Of course, since they’re water soluble, I needed to cover it with some matte medium using a spatula rather than a brush. Once the matte medium dried, I added some printed vellum pieces ripped up over it and then used some white and silver paint for splatters and stamping an empty roll circle. I also went around the edges a bit with the silver paint for shimmer. For a little bit more texture, I took some Ultra Thick Embossing Enamel (UTEE) and heated up a few “piles” of the crystals and melted them…I haven’t used that in a long time either! I needed to be VERY careful with my heat gun because of the matte medium…it started to smoke a bit! 😮
For the background fish – I had a few extra cut out fish pieces from a previous project I made using the Taylored Expressions Hook, Line & Sinker Stamp & Stencil Combo with dies and adding them to the scene. I also added some sparkly fish that was die cut from the TE Little Bits-Fish dies. (I haven’t posted this project yet, but I will later on!) I took a micron pen to add a fishing line coming down from the top with a hook.

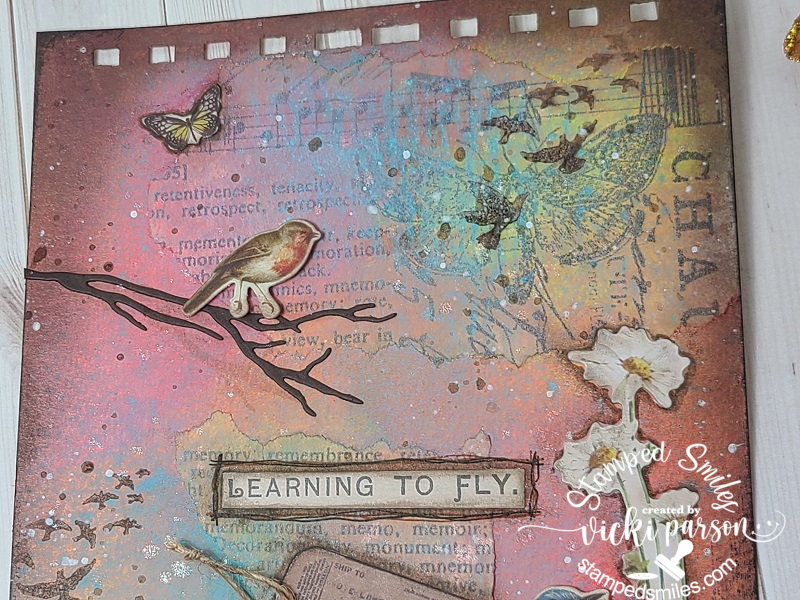
Here’s a closer view of the fish as well as some of the details in the background.
For the sentiment – it was printed out along with the fish and then I just ripped around it and then using the same ink colors as the background fish, I blended over this piece. I also used the same UTEE on it as the background. I took a white Big Brush marker to highlight the letters and underline. I also used it for highlights on the fish. I used different colors of the Big Brush markers to add some shading details around the fish.
All of the sequins and silver Stickles were added very last to the page.
Challenges:
- Art Journal Journey – Fish (will have to link later when I get back!)