Hello friends! I hope you had a wonderful Christmas in whatever way you chose to spend it! It was wonderful to celebrate the season with loved ones for sure! So many memories were made this year and lots to celebrate!
- Speaking of “Memories”, this will be my last Art Journal Page and my collaboration with the monthly “SMASH OUR STASH” Art Journaling. I’ve collaborated with my crafty friend Carol (from Crafty-Stamper) to join in. (Check out her page HERE!) Here’s my final AJ page with the DECEMBER prompt of “MEMORIES”:
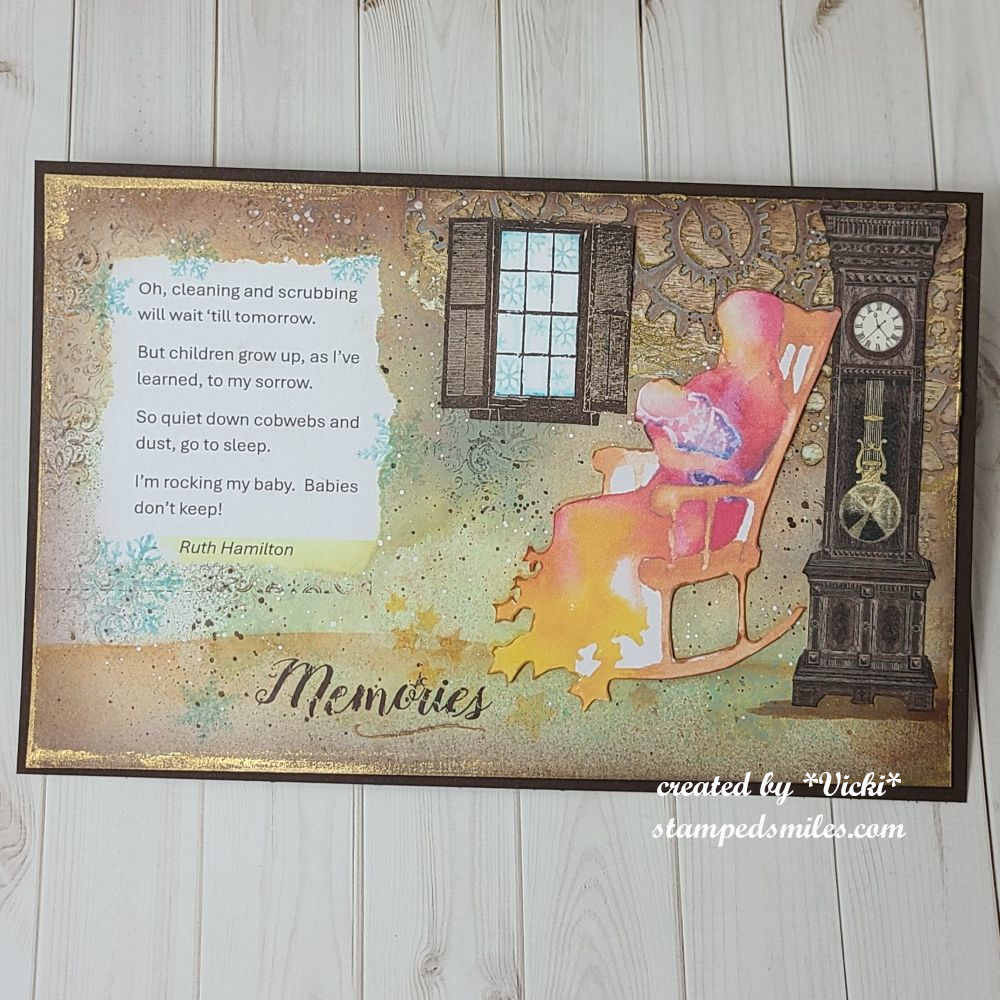
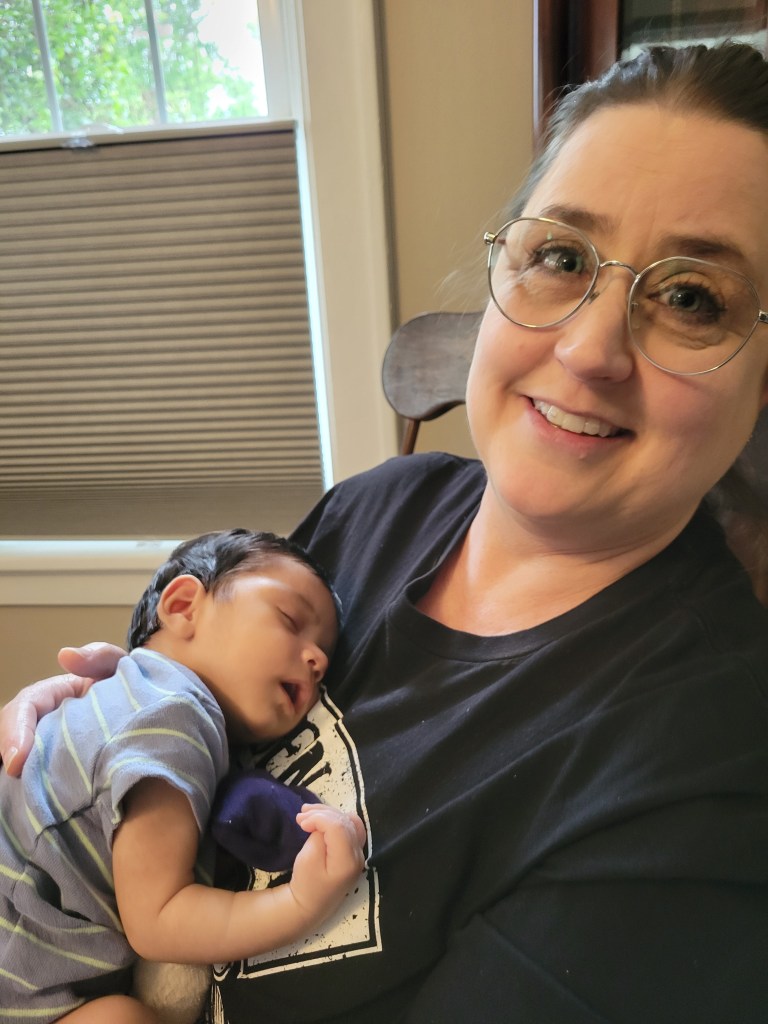
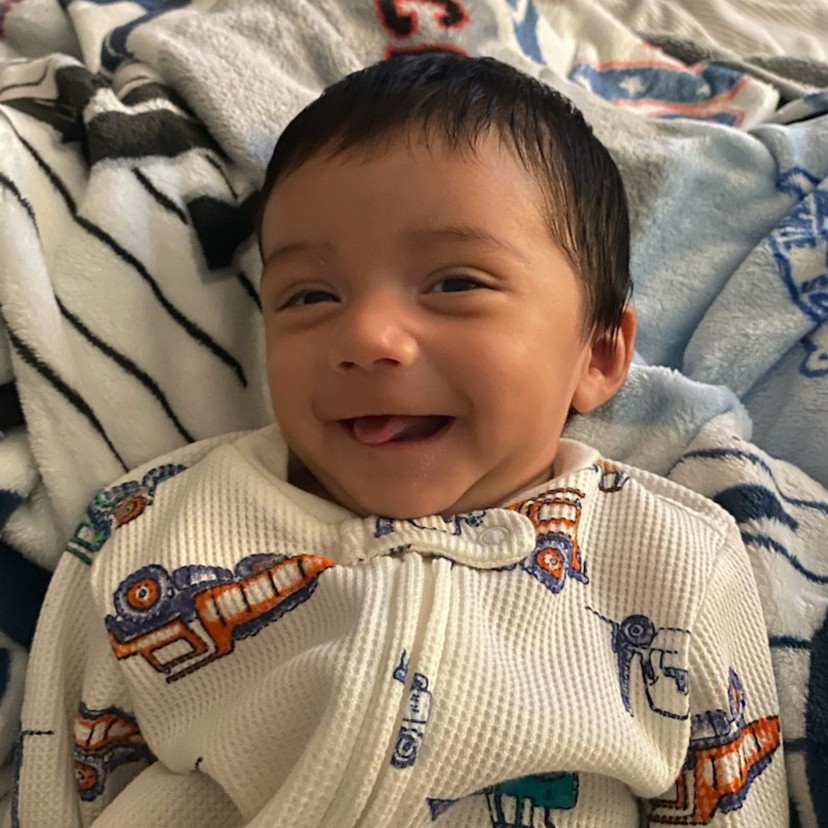
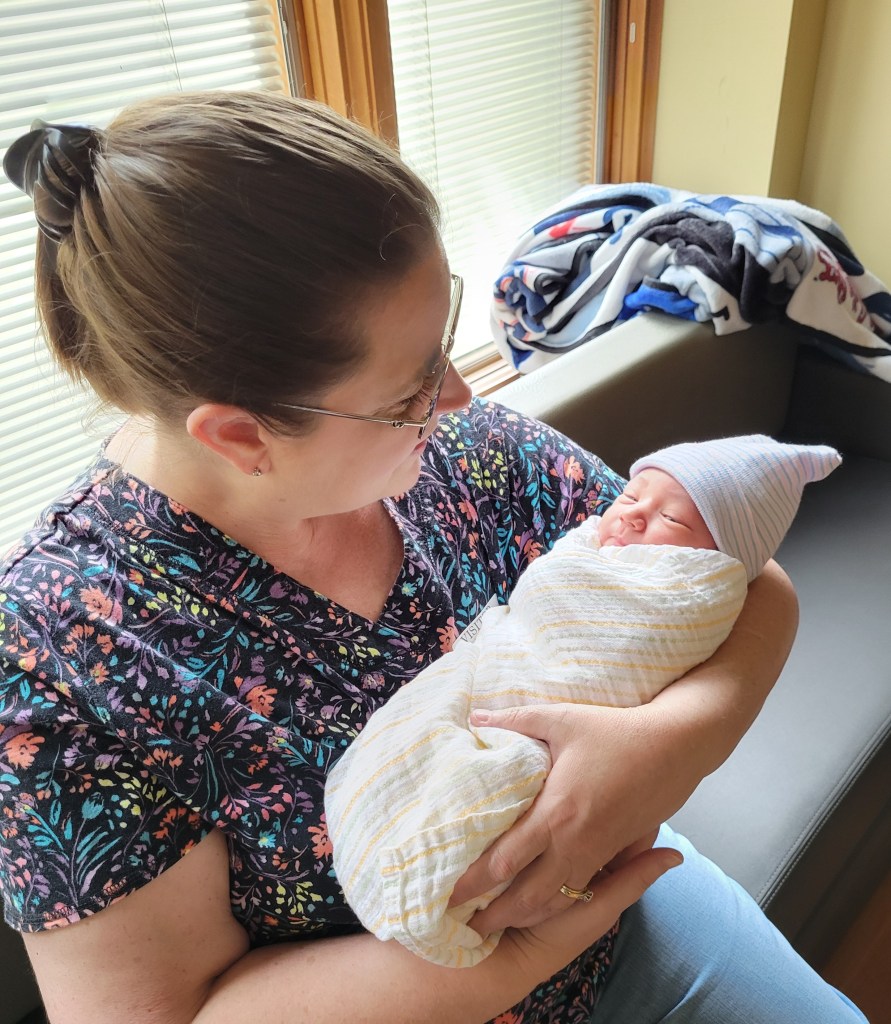
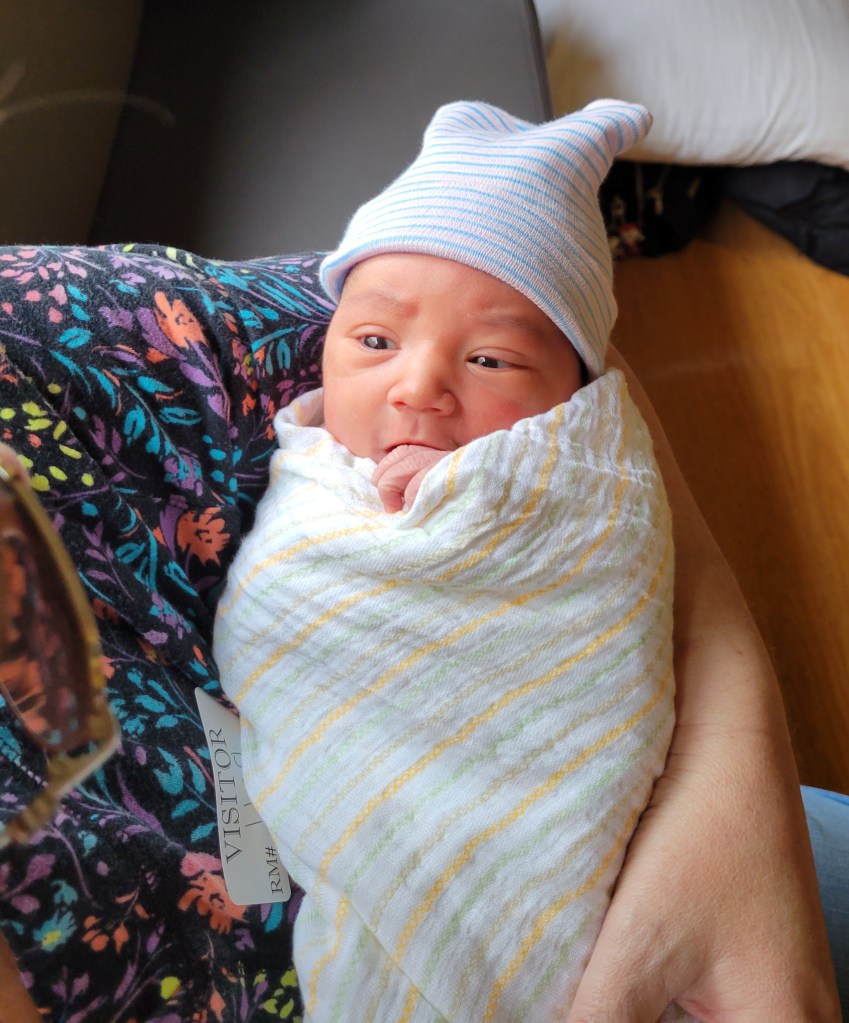
I thought that the “memories” prompt would be a good one to use for the end of the year. It’s a way for me to reflect back at all of the memories that were made throughout the year. Plus, with the winter weather outside, it’s a good time to stay indoors where it’s warm and rock a baby perhaps!😉 When my new grandson came over, it was a pleasure to rock him in the very same rocking chair that I had rocked my children in as well! This brought up special memories of my grown children now with their own baby! So I made a scene with winter outside, rocking my baby and the grandfather clock I have next to it. (Which is a similar scene from my home.)
BACKGROUND: I started by printing out the poem on a piece of cardstock in brown and then cut it down to the side 8.5″ x 5.5″ with the poem being in horizontal to the left.
I took some masking paper and ripped a piece that would fit over and cover the poem so that I could do some watercolor. Before the watercolor began, I took a “gears” stencil and covered up the top right corner with dimensional paste and let it dry. Once it dried and the poem still covered with masking paper, I used my Zig Kuretake watercolor to go over the background by creating a floor and going over the paste. I also did some splattering brown watercolor and white opaque Copic ink. while the mask was still on, I also took a background stamp and randomly stamped in brown ink over some of the areas. Then I used the same brown ink and sponged around the edges. Lastly, I took some gold metallic paste to go around the edges as well as the texture on the stenciled paste.
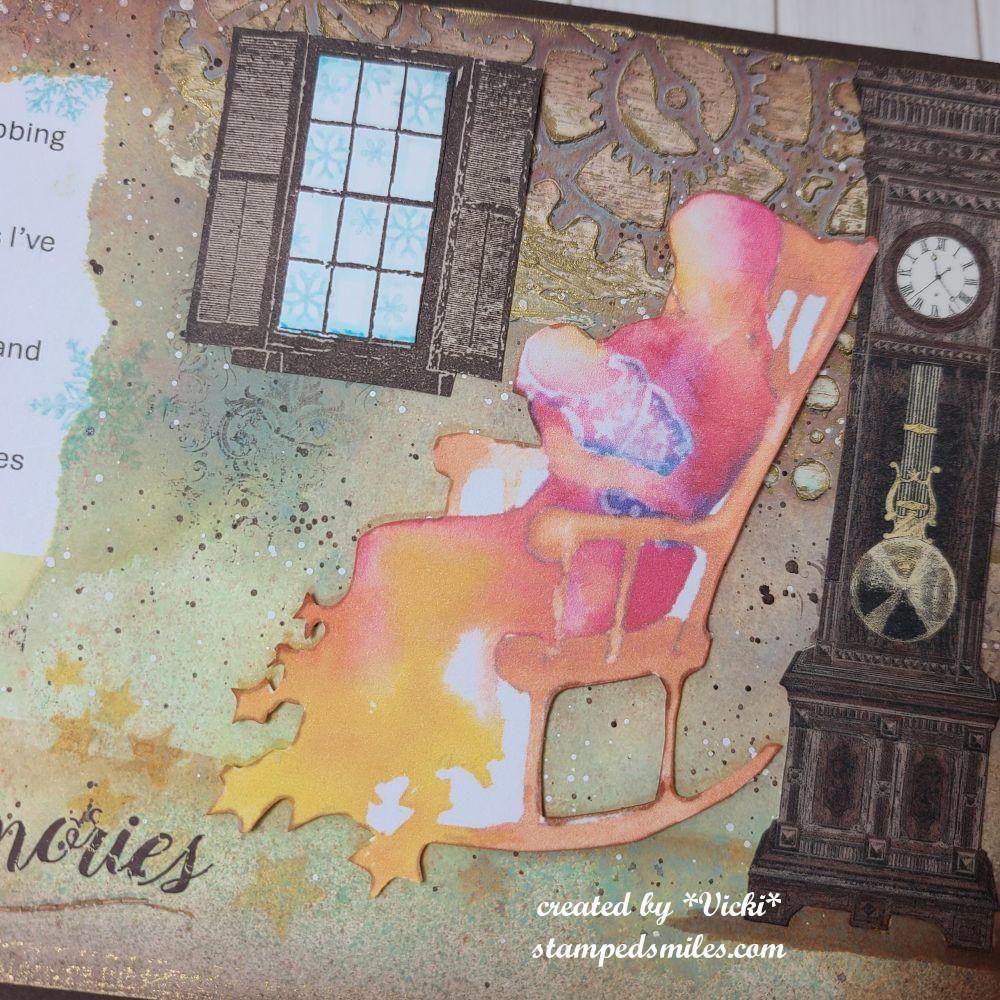
For the images, I found a watercolor image of someone rocking a baby and printed it out and fussy cut it out to pop up with foam tape on the page. I used Copic markers to create more of the stars underneath the image as well as “grounding” for the grandfather clock. (This way I knew where my “flooring” would be.)
The grandfather clock was a sticker from my stash and then for the window, I stamped it with brown ink over kraft cardstock and then again in white cardstock. I did this so that I could cut out the center of the window to make it show what’s going on outside which is winter! I stamped snowflakes and used my Copic to create a cold looking window with snow shadows! I also used some blue ink to randomly stamp some snowflakes around the page next to the poem.
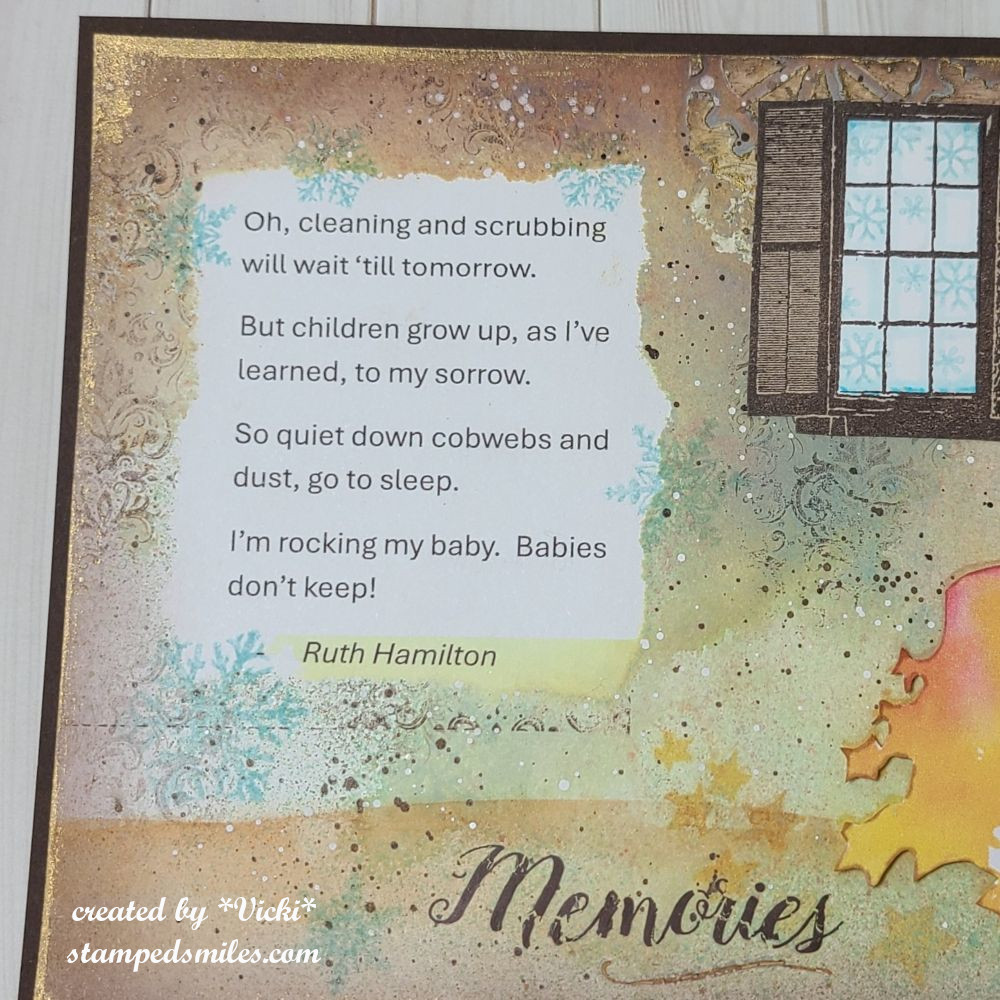
Here’s a closer view of the poem. I’ve seen this poem when my children were babies themselves and I’ve always loved it. The “memories” sentiment came from a rub-on transfer in my stash.
- I hope you’ve enjoyed my page today and I hope you enjoyed seeing all of the pages that both Carol and I have shared throughout the last THREE years! Wow, can’t believe that was how long I did these! I really enjoyed the process!
Thanks so much for stopping by as I really appreciate your thoughts! I’ll be seeing you soon!
Challenges:
- Art Journal Journey – Winter (hope my snowflakes are enough to convey this!)
- Creative Artiste – #122 Anything Goes with Mixed Media