Rainbow Shaker Birthday!

Hello friends!  Yay!  It’s Friday and I thought I’d share this happy shaker card that I made for my mom’s recent birthday she had.  (Yes, I kept this one a secret until I gave it to her!)

Vicki-MFT Birthday Bear Rainbow

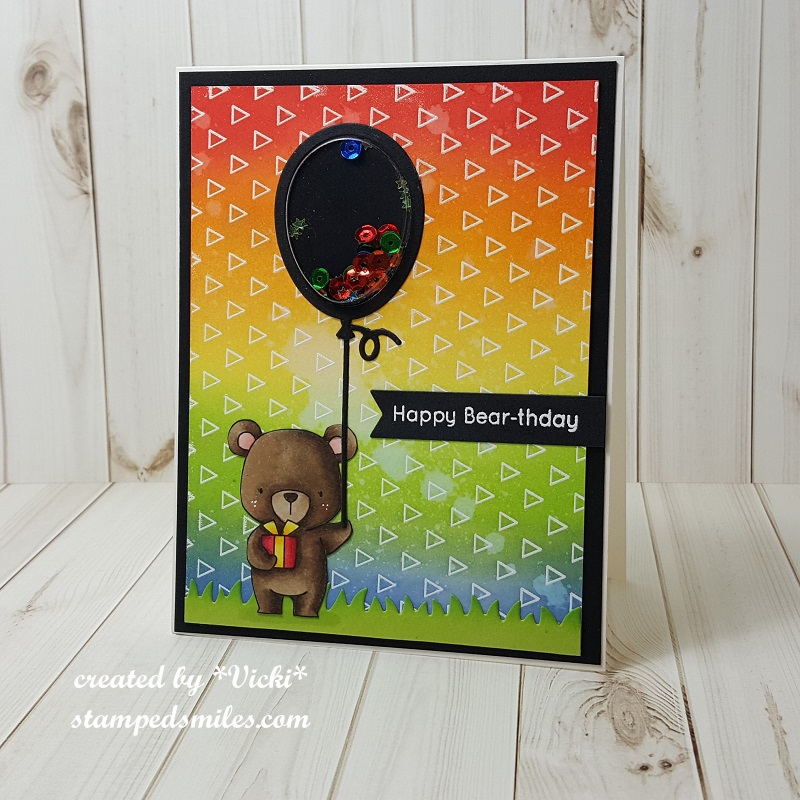
I saw over at My Favorite Things “Birthday Project” Challenge was a “rainbow” theme and I thought this would make for a happy and fun birthday card design!  So I pulled out the MFT Transparent Triangles Background stamp (now retired) and heat embossed it with white EP over some Bristol Smooth Watercolor paper.  I went to work with my rainbow background and sponged several colors of Distress Oxide ink in rainbow form over the heat embossed background for a “resist technique”.  I spritzed some water over it and my sprayer went a tad bit “dropy” and I ended up with a weird large droplet pattern, but I decided I wanted to keep it anyway, I liked it.

So to make sure that my shaker balloon was going to line up with my bear, I needed to stamp, color and fussy cut out this bear from the Beary Special Birthday stamp set.  I needed to fussy cut it out because the coordinating die cut would also cut out the balloon from the image, and I didn’t want to include it as I was making my own!  I’ve also white heat embossed a senitment from the same stamp set and cut it out with the Essential Fishtail Sentiment Strips.  I also took the Mini Balloon Shaker Window & Frame Die-namics to cut out all of the pieces that I needed for the balloon.  (I used the fussy cut out bear for placement to see where I needed to die cut a hole in the background for the shaker area.)  Before attaching the bear down, I also took some green cardstock and cut out a border with the Grassy Fields Die-namics.  I sponged the edges with green ink and took a Copic marker to give a shadow around the bear.  So after I placed my “balloon hole” where I needed it on the background, I took the rainbow sequins to place inside the Mini Balloon Shaker Pouches and added a piece of black cardstock for the background, which was placed over an A2 sized white top folding card base.

Vicki-MFT Birthday Bear Rainbow-close

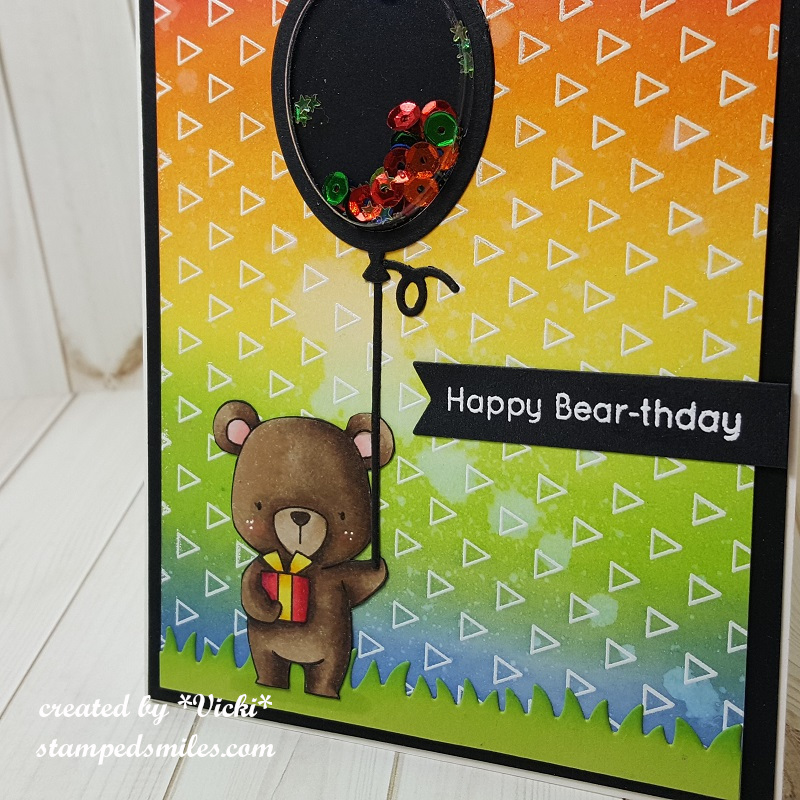
Here’s a closer look at the bear and how I’ve got him colored in.  I forgot that in addition to the rainbow sequins I had, I put some tiny star sequins in there as well.  At first I thought I had went a bit too dark for coloring the bear, but I like how he blended out and I think he really stands out on the rainbow background and doesn’t get lost with the black accents on the card.  I took a white gel pen to his cheeks and added some shimmer to his present with a glitter brush pen.
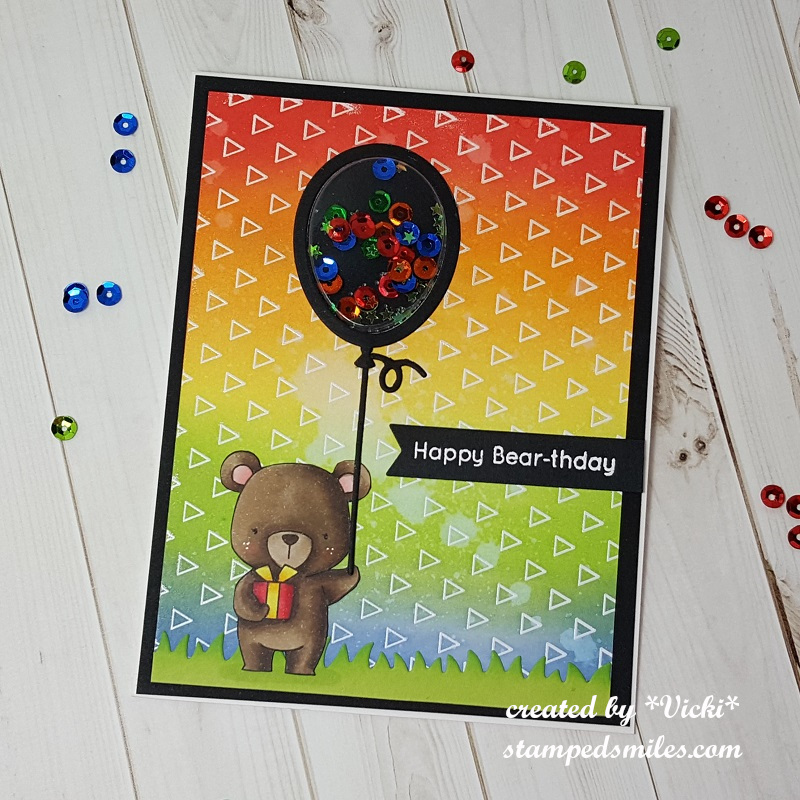
  (My mom likes the color red, so I purposely made the present red).

Vicki-MFT Birthday Bear Rainbow-flat

Here with the card laying flat, you can better see the shaker bits on the inside of the balloon and how they really stand out against the black balloon background.

I think I got a smile and it was passed around for the shaking.

Hope you’ve enjoyed my card today and I thank you so much for stopping in!  Wishing you a very happy and rainbow filled weekend too!  🙂

challenges:

  1.  MFT Birthday Project – Rainbow
  2. Creative with Stamps – BirthdayCWS#37Birthday
  3. Crafting By Designs – Anything Goes
  4. Little Red Wagon – “Shake It!”
  5. Always Fun – Birthday

April New Release for Whimsy Stamps with Interactive Card!

Hello friends! (If you are looking for my “Purple Day” Epilepsy Awareness Blog Hop winner’s post, CLICK HERE)

It’s the first of the month for April and this also means a new release for Whimsy Stamps!  You can check out all of the new digital release by CLICKING HERE!

I’m excited to be sharing this really fun and unique interactive design that I’ve made with one of the cute images called Stretchy  Giraffe digtial stamp from the new release!

Vicki-Giraffe Flies extended neck-April 2nd

This giraffe is so sweet and was fun to color up with Copic markers!  (See below for the full list of the markers I’ve used.)

I took the extended neck version of the giraffe and made some fold marks in his neck so that when folded, it looks like the “regular neck” version of the image, but when you pull up on the purple balloon at the top, the neck extends up with it! LOL!

Check out this 18 second video below to see how it works:

I’ve used the Whimsy Stamps No-See Kinetic Basics die set along with the Kinetic Straight Basics die set to make the straight track behind the large cloud that is under the flying giraffe.  This way there’s no track behind the giraffe to move the neck which I think is pretty cool with these special WS Kinetic No-See dies!

Because this was a giraffe with a long neck, I wanted to make a tall skinny type of card for this design.  (It measures 3″ x 6″ when closed.)  I’ve used a cloud die cut to hide the interactive track behind the giraffe and then I used a cloud stencil to sponge on some Wilted Violet and Tumbled Glass Distress Oxide inks on the cloud die cut as well as the background white panel and the interactive pull behind the balloon so it all matches.  I thought it would be fun to add some stars, so I took the star from the Snappy Birthday clear stamp set and stamped them with the Wilted Violet Distress Oxide ink.  I also took the sentiment from the Dachshund Balloon rubber stamp set and stamped it on the bottom of the white card front panel.  (I thought it was the perfect sentiment to go along with this image!  LOL!)  I’ve rounded the corners of the white panel and cloud panel with a corner chomper.

The giraffe was popped up with the black string wrapped around his left “antler” and then secured on the back.  The other end of the black string was tied around the balloon which is attached to the pull tab underneath the cloud area.  I covered the stars with a clear glitter brush and added some sequins filled with some Nuvo White Blizzard Glitter Drops.  I’ve used foam dots to pop up the giraffe over the design.

Vicki-Giraffe flies extended neck-April 2nd-close

Here’s a closer view of the extended neck and the coloring I’ve done.  Here is the Copic list that I’ve used to color with and you can purchase them at Whimsy Stamps by CLICKING HERE:

  • giraffe body – YR24, YR21
  • spots, muzzle, mail & tail end – E15, E13, E11
  • Hooves & horns – E49, E47, E44
  • ears & belly – R20, R11, R00, R000
  • balloon – V17, V15, V12

I fussy cut the giraffe and the balloon separately from the image so that I could add my own string and make this an interactive card design.

Vicki-GiraffeFliesExtendedNeck-April 2nd-pulled tab

Really enjoyed creating this fun interactive card in a unique way with this adorable new stamp!  I hope you’ve been inspired with it too!  Would love to see what you come up with if you purchase this image!!

Thanks so much for popping in today!!  I’ll see you soon!

Here’s the list of Whimsy Stamps Products (with affiliate links) that I’ve used on my card for today:

stretchy_giraffe_display_resized_1024x1024

dashchund_20balloon_20color_20display_1024x1024

Snappy_Birthday_color_display_1024x1024

No-See_Kinetics_Basics_Die_Set_1024x1024

Kinetic_Straight_Basics_Die_Set_1024x1024

kuretakewosclear_800x_0fab0d61-5a3e-4885-b433-a6a8b8fc7bee_large

nuvo white blizzard

WS-Copic display

Challenges I’d like to enter this card for:

  1.  TGIF Challenge – Balloons (TGIFC205)205
  2. Alphabet Challenge – ‘A’ is for Animals
  3. Crazy 4 Challenges – C4C477 “Trick Card”
  4. Pammies Inky Pinkies – ATG (PIP1913)
  5. Crafty Animals – Anything Goes + animal
  6. 613 Avenue Create – Anything Goes with optional:  create a kinetic card


Celebrating at 2 Crafty Critter Crazies With a New Challenge For 2019!

**I have 2 posts coming up today!  This is post 1 of 2**

Hello friends!!  Happy New Year to you!!  I hope you’ve enjoyed the celebrating with your famly and friends!  Are you excited about a brand new 2019?!  I sure am!  I’ve got lots in store to share with you this year!  Hope you’re looking forward to it as much as I am!!

Let’s start this year off with a brand new challenge over at 2 Crafty Critter Crazies, shall we?  Every first of the month there’s a brand new “Anything Goes” challenge…BUT you must use a critter somewhere on your project is all!

Vicki-2CCC22-Bugaboo

Isn’t this guy adorable?!  I have used one of our sponsor’s image for my card today from Bugaboo.  This is the Critter Balloons – elephant digital stamp.  I have actually cut him out twice and colored him in, but I cut just his head and the balloon to pop them up with some foam tape for a little dimension.

I’ve made a Center Step Card for my design today.  I kept the dimensions at an A2 standard size when it lays flat so that it will still fit inside an A2 envelope for mailing.

I’ve used some fun birthday style papers from my old stash and then I’ve used a sentiment from My Favorite Things More Essential Sentiments and white heat embossed it over a piece of black cardstock that I cut out with the Die-namics Essential Fishtail Sentiment Strips.  Lastly I added some silver ribbon above that.

Vicki-2CCC22-Bugaboo-close

Here’s a bit of a close-up to see the dimension over the image.  I’ve also taken a glue pen over the balloon image and added some clear sparkly glitter over it.

Hope that you’ve enjoyed my card today and please be sure to stop in over at the 2 Crafty Critter Crazies challenge blog to see more inspiration from the rest of the design team!  We look forward to seeing what you come up with this month!

I’ll be back very quickly with a second post today!

Challenges:

  1.  QKR Stampede – Anything Goes #328
  2. A Perfect Time to Craft – Anything Goes