Hello friends! As of Thursday, Fall has begun! It actually really does feel like Fall with the cooler temps settling in on exactly that same day too! I’m looking forward to all of the wonderful changes it brings with it! I enjoy going out in nature and seeing the trees change into their colors.
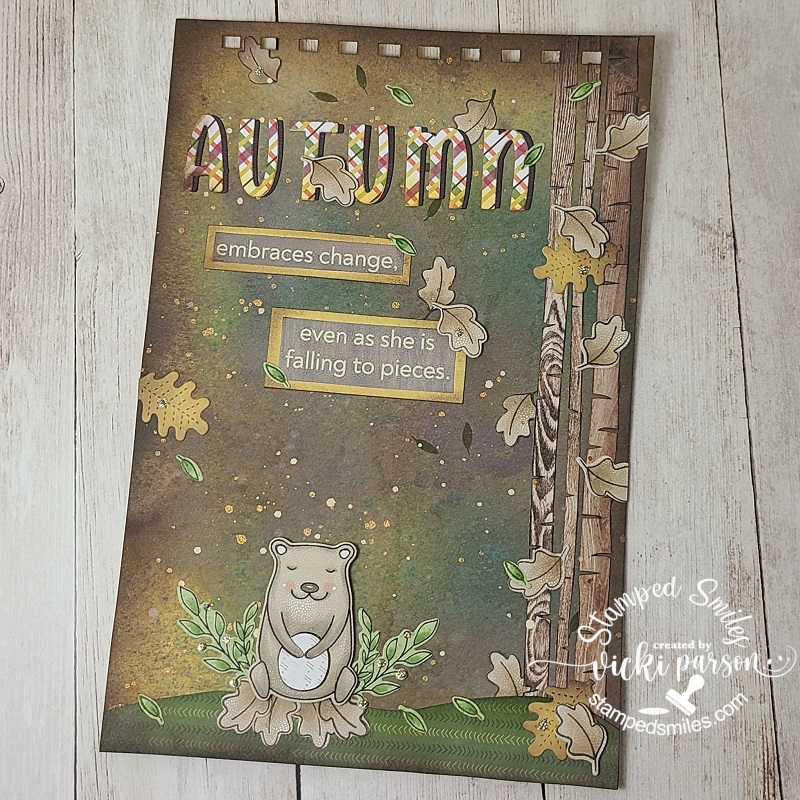
It’s also that time for a monthly Art Journal page and collaboration with my crafty friend, Carol (from Crafty-Stamper), so please check out her blog for more inspiration too! We’re trying to get creative by using up our never-ending stash piles! So here’s my Art Journal inspiration with the “SMASH OUR STASH” September prompt of “ANY kind(s) of scrap papers!” :
Like many crafters out there, I’m sure we all have those never-ending piles of papers! I especially have a very extensive collection of pattern papers and MANY within those piles of little left-over pieces that never seem to get used and just thrown back into the package! I not only have packages, but I also have several card kits that ALSO have packages of papers in them too…so I pulled out a past kit and was happy that I’ve used pretty much all of the left-over scraps from it! One down and a trillion to go!!😅
For the Background: The page is a 6″ x 9″ Canson 140# cold-pressed paper with the holes prepared at the top for later book binding. I’ve used Distress Oxide Sprays and used the left-over spray on my glass mat with water until I soaked up all the ink. I’ve also splattered some Gold and Ivory acrylic paints over top once dry. I stamped a couple of the tiny leaves with green ink for a bit of depth in the background.
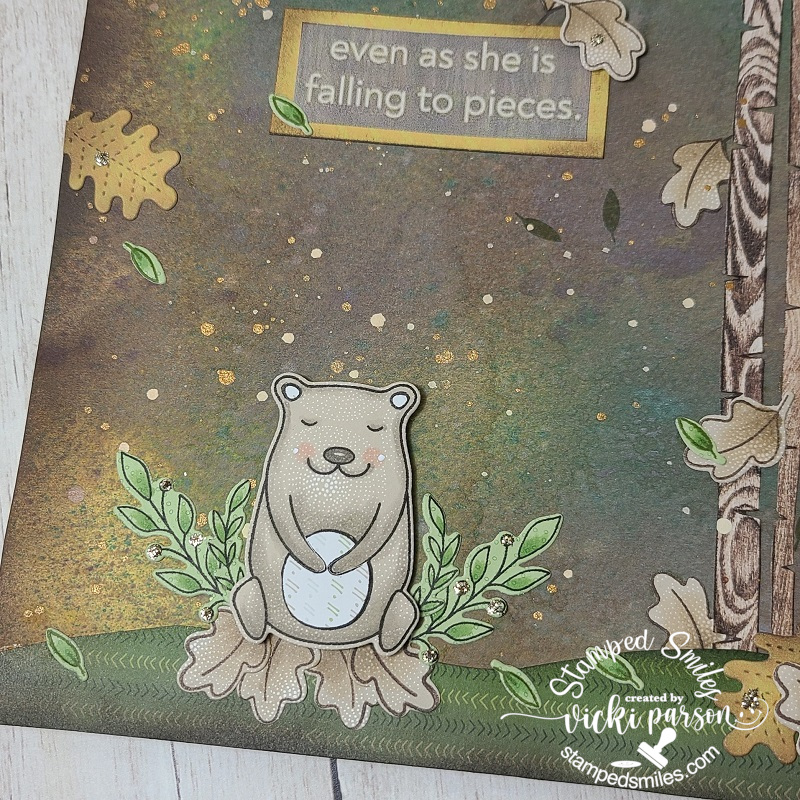
For the Image Elements: I used the Simon Says Stamp “Woodland Whimsy” stamp set to paper piece all of the image elements with the tall trees on the right, the leaves, the bear, the bear’s belly and ears, also with the berry and leaf branches next to him. The trees were fussy cut with scissors and the other images were cut with coordinating dies. I’ve used Copic markers to add a bit of depth and dimension to some of it. Some were glued down while some were popped up with foam squares. I’ve also taken the Lawn Fawn Small Stitched Leaves dies to cut out a few extra and sponged around them to add to the scene. I’ve also used the same papers I’ve used to cut those leaves out and added it as a layer behind the two sentiment quote squares. The quote was printed out from my computer and the “Autumn” sentiment was cut out from pattern papers using the Lawn Fawn henry’s ABCs dies along with more papers to make an “off-set” shadow behind them.
The “ground” was just fussy cut with scissors and ink sponged around the edges. Lastly, I’ve taken some gold Stickles to create “berries” on the leaf branches and randomly over the page.
I really enjoyed creating this page as it has inspired me to go out in nature for a walk! I sure hope you’ve enjoyed it as well! Thanks for stopping in today!
Hello friends! I’m so excited to be sharing a special collaboration blog hop with my fellow crafty friends collab FB group as we share our own personal progression on how practice over time can help to increase your confidence and skills within your crafting journey.
So please grab your favorite beverage and join us in this fun and informative blog hop that shows how “the power of practice” can be utilized in your own crafting! (highlights are done in red.)
I would like to start off by stating each person’s experience is their own journey and will run on it’s own pace which is something that we all need to be aware of and patient with. Some particular skills will take much longer to grasp than others and you need to take it easy on yourself without harsh judgement. Just enjoy the process and have fun with it! (That was and still is the hardest thing for me to learn.)
Although I’ve been paper crafting for the last 20 years or so, I’ve been involved in several different crafts throughout my entire childhood or since I could hold a crayon in my hand! My grandmother as well as my mother has passed down their experience with crafts which I learned from and picked up many others along the way including what I love today. So some things I do may already come naturally for me without recognizing where it came from because it was taught to me long ago. There are some things, however, that I’ve had to spend the time learning.
Now taking classes aren’t the ONLY way to learn something for sure! Good ole “Trial and Error” are great for learning and gaining personal experience from…which I tend to learn the most from actually!😁 Another thing that helps is new tools/products to help make the process easier or look more “finished” or “professional” in nature. When I first started with my stamps, there was not a common heat tool for instance. I had to heat emboss over a stove! So times have changed as well as techniques and inspiration. Inspiration is EVERYWHERE over the Internet too! Many people have so many clever ideas…I wish I could keep up with them all! Some things may not be of interest to you and others may intrigue or intimidate you. Find what interests you the MOST..at the time…and work on it because you will love learning about it which means you will gain more knowledge from it. You don’t have to share with others what you do as long as YOU enjoy what you’re doing. Do what feels right to you and your journey. It’s never about others, it’s about YOU!
I feel like I could write an entire book on just this matter, but since this is a visual craft, it’s better to “see” with your eyes sometimes or show how things can come together…or not!🤨
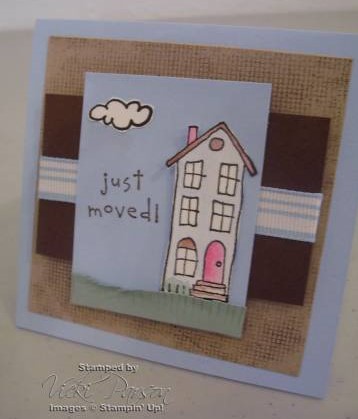
I’m starting with a photo of a card I had made back in 2007 when I had already been a year into having a blog and was still a Stampin’ Up! demonstrator at the time. Even the technology of simply taking a photograph has improved tremendously over the years…
I no longer have most of the products used here and I had to lift the photo from my Splitcoaststampers gallery as they have stored my oldest photos I have anywhere. This was the first place that I shared anything I made online. (There are 124 pages of my gallery and if you look through, you will see the progression over time.)
Now I could really criticize myself and pick this all apart, but it was part of my process at the time. And at that time, I was happy with it. It looks like I’ve colored with ink pads and a blender pen, cut out the images with scissors as well as cut fringes of the grass border. (tools have improved since and many purchases have been made as well!😊) As we move forward, I can share how I updated that design today:
What I have decided to do was to take the photo of the older card above and make an updated version of the same design, but with the mindset and techniques that I’ve learned since. You can see that my coloring has improved as well as the different tools and items that have been updated to help with my design execution. I still used similar colors, similar layout design as well as coloring an image, but just maybe updated the look from the practicing of not just the coloring over time, but the practice of just cutting the layers and putting things together as compared to years past. Just meerily putting together card after card has helped me with the practice and made me better aware. So you can see how just putting together a card in general, with practice, can help improve skills!
Another tip I find helpful is to join your fellow crafty friends in groups and collaborations like this blog hop as well as other groups which is what I’ve also made this card for, called “The Crafty Chefs“, where we take turns coming up with a new “recipe” to follow each month. There’s no pressure, just a group of friends coming together, learning from each other through challenges, and inspiring one another as we enjoy our love of crafting! For me, this is a huge deal. Check out the link above if you’re interested in joining with us! It’s still fun to craft, but it’s even better when it’s shared with someone. So here’s the September Crafty Chef’s recipe that our head chef Linda has come up with for us to use.
(I have used ALL of the “must do” items and then added a couple of pearls from the “can do” items.)
I have found that within the last several years, many people enjoy watching video tutorials on You Tube..which makes sense because seeing someone actually doing something or putting something together is a better way to learn rather than just seeing a finished photo of a project. So to see how I’ve made my latest card for my son’s birthday, check it out below or CLICK HERE to view on my You Tube channel:
Hopefully through the video you were able to learn a few things that you can incorporate into your own card making. Sometimes we can improve upon ourselves by even trying to recreate something we’ve done in the past and add some new things you’ve learned along the way. It’s a great way to see how far you’ve come along and not be so critical of yourself to remind you that you are always learning, as I still am right now as well.
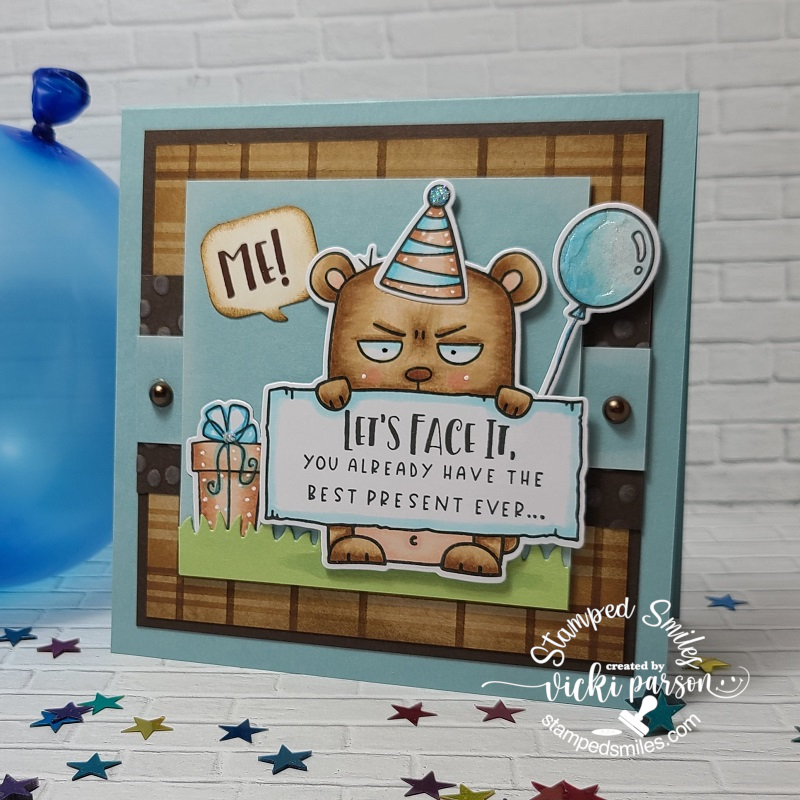
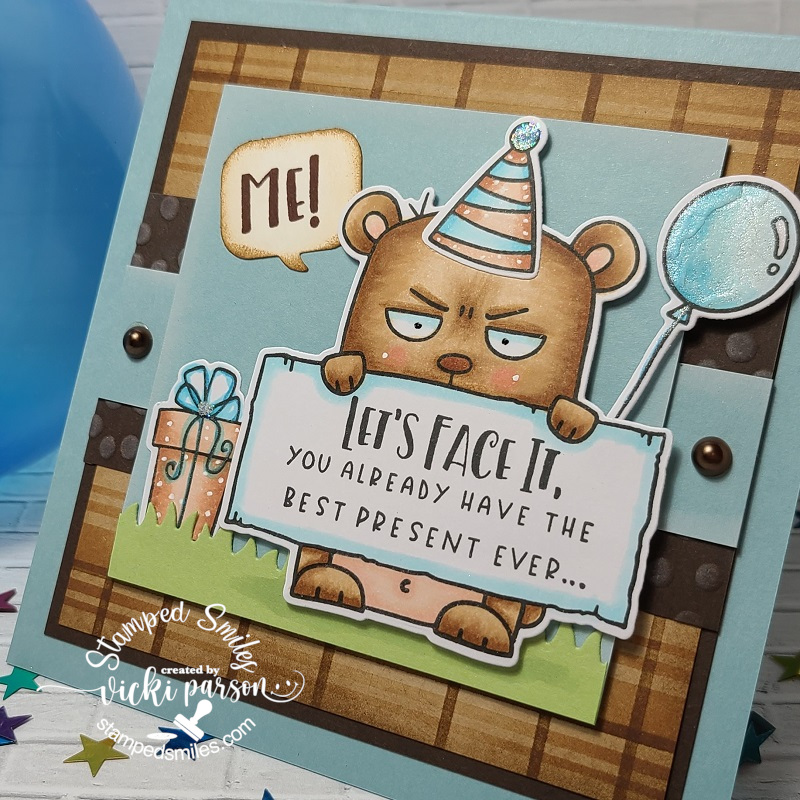
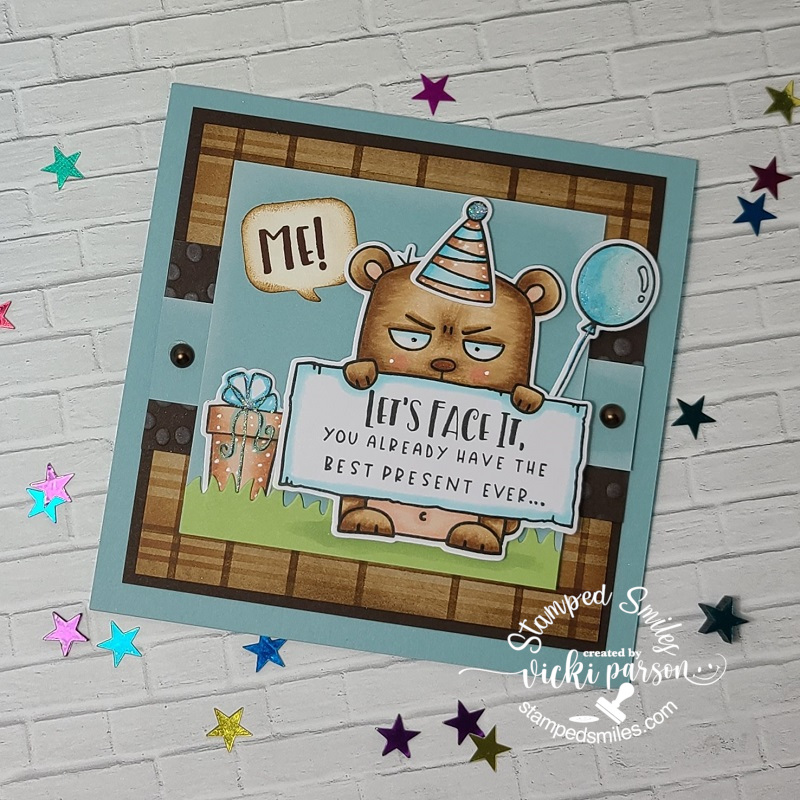
I have to chuckle at this card for my son’s birthday as he is a fun-loving jokester that will appreciate this along with the fact that it’s a bear image. He was nicknamed “Bear” in his school years, so I thought these Big Grumpy products from Taylored Expressions would work perfectly for this! I’ve also used the Big Grumpy Birthday stamps to go with him along with the other products used in my video above.
For the sparkle, I’ve taken some Stickles Star Dust glitter and added to the birthday hat as well as the center of the bow in the present. I used a glitter brush pen over the balloon and bow. I added dots to his cheeks, hat and the present with a white gel pen. I forgot to mention in the video that I’ve added a couple of brown pearls to the blue strip so that I added something from the “can do” list for the Crafty Chefs recipe!😉
I really hope that this post was helpful as well as enjoyable for you and that you received some benefit for taking the time to read over it. I know that I will be looking forward to seeing what my other crafty friends have to share and inspire me with! I think there is something to learn from everyone no matter how long you’ve been doing it.
The power of practice simply means, to me, being able to refine your skills into something that you want to be better at, take in more information or take it to the limits of your ability. This is done by repeating often and over time to increase or add to your knowledge of what you’re trying to improve upon. If we are not trying new things, then we are not learning or growing as individuals.
Thanks so much for stopping by my friends and I’ll be seeing you again soon!
Hello friends! Welcome to December! We have already arrived at the final month of the year! Can you believe how quickly this year went by?! The first of the month means it’s time for a new challenge to start over at 2 Crafty Critter Crazies! Remember that it is an always “ANYTHING GOES + A CRITTER“. I love adding critters to my crafty projects so it’s easy for me! 🙂
Since I’ve been on a tag making binge, I’ve got some more to share today:
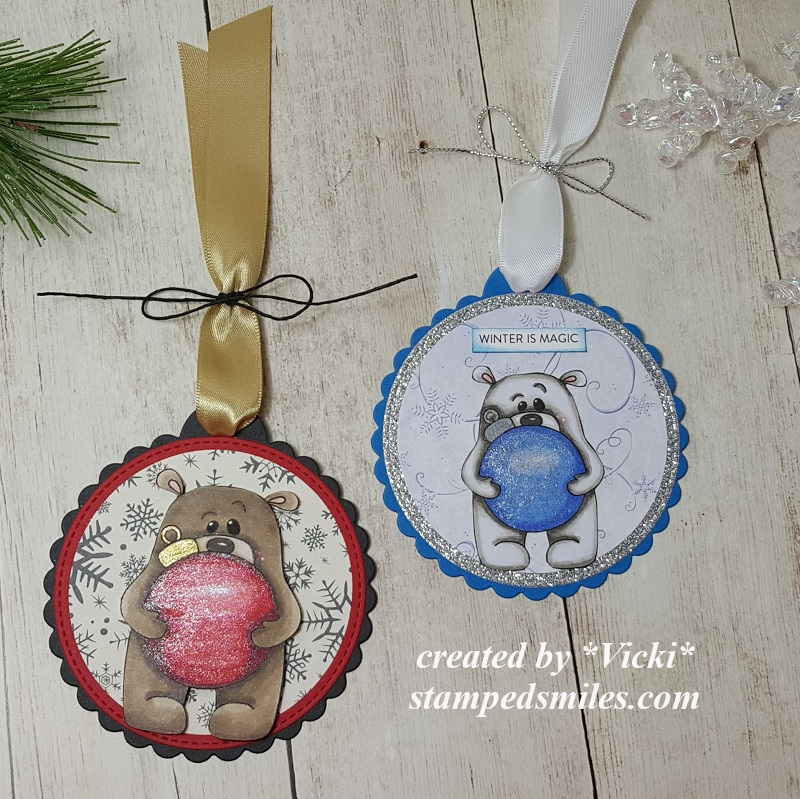
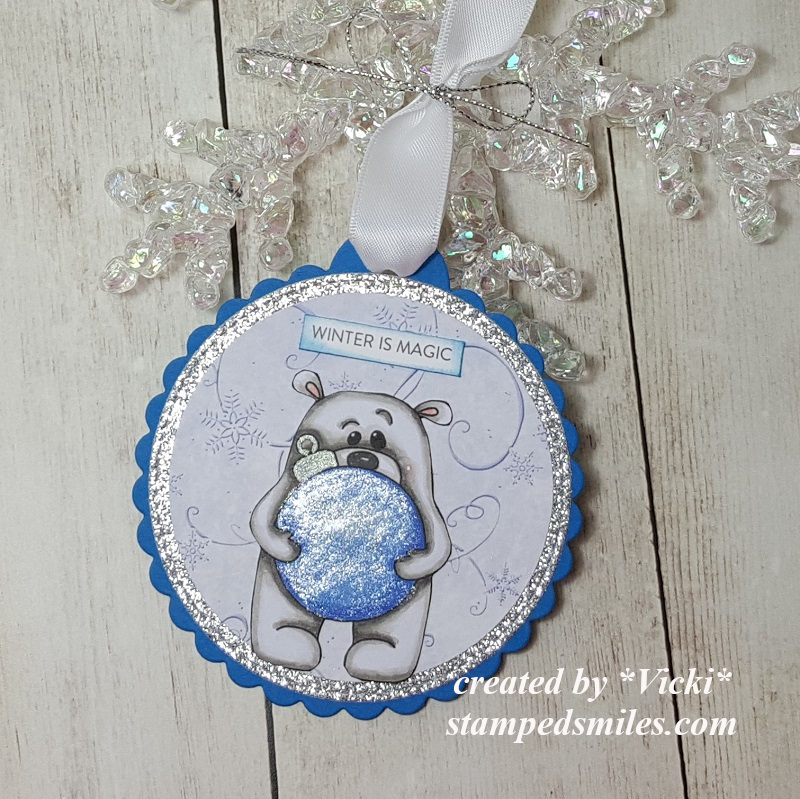
Isn’t this the cutest little bear?! We’re sponsored this month by Beccy’s Place and I have opted to try out this cute freebie that she has offered on her blog called Stanley’s Bauble.
I thought he was too cute and I wanted to try coloring him up in a couple of different ways and even a couple of different sizes too!
I just took my Sunny Studios scallop circle tag dies and die cut a couple of them in my selected color choices of course to match up with his bauble and then I’ve die cut some coordinating circles and pattern papers to match. He was fussy cut out and placed over top of the tag. I’ve added some silk ribbon for both and added a twine bow around them.
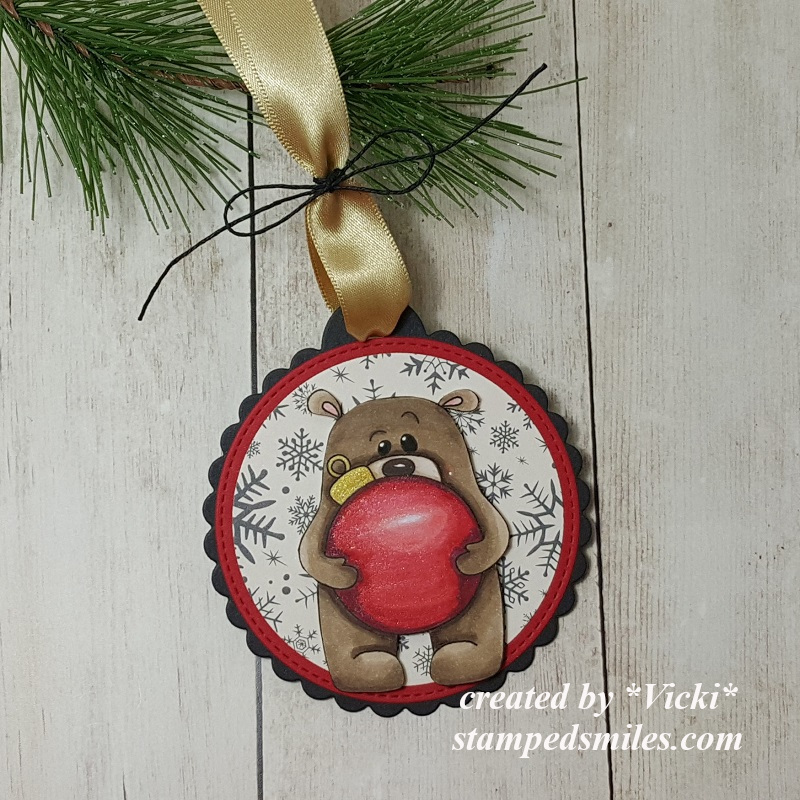
Here’s closer view of the Stanley’s Bauble red and black tag.
For this tag, he’s a bit larger than the other an he was popped up over the tag with some foam tape. I’ve colored the bauble hanger with a gold gel pen and then went over the red bauble with a glitter brush pen.
Here’s a closer view of the smaller tag. The light has caught this one just right to where you can really see the glitter brush over the blue bauble. I’ve also colored his bauble hanger with a silver gel pen.
The circle layer behind the snowflake paper was cut from some silver glitter paper. I’ve taken a Simon Says Stamp sentiment strip and cut it out, sponged it with blue ink and glued it above the bear. Since he was smaller than the other bear, I had room for a sentiment. He was just attached with glue this time.
I hope you’ve enjoyed these teddy bear tags today!
Hello friends! Welcome to September! Can you believe that it is here already?! I’m looking forward to all things Fall and seeing all the wonderful crafty inspiration from everywhere for sure!
It’s been a while since I’ve shared a post for the 2 Crafty Critter Crazies Challenge, but I’m so happy to be back with my design team friends for this month’s challenge! The theme each month is always “Anything Goes + a critter“. So if you make something with a critter on it, we want to see it! We look forward to seeing your crafty critter creations this month!
Our sponsor for this month’s challenge is QKR Stampede and they’ve provided some fun images for the team to use in their creations. Here’s my project:
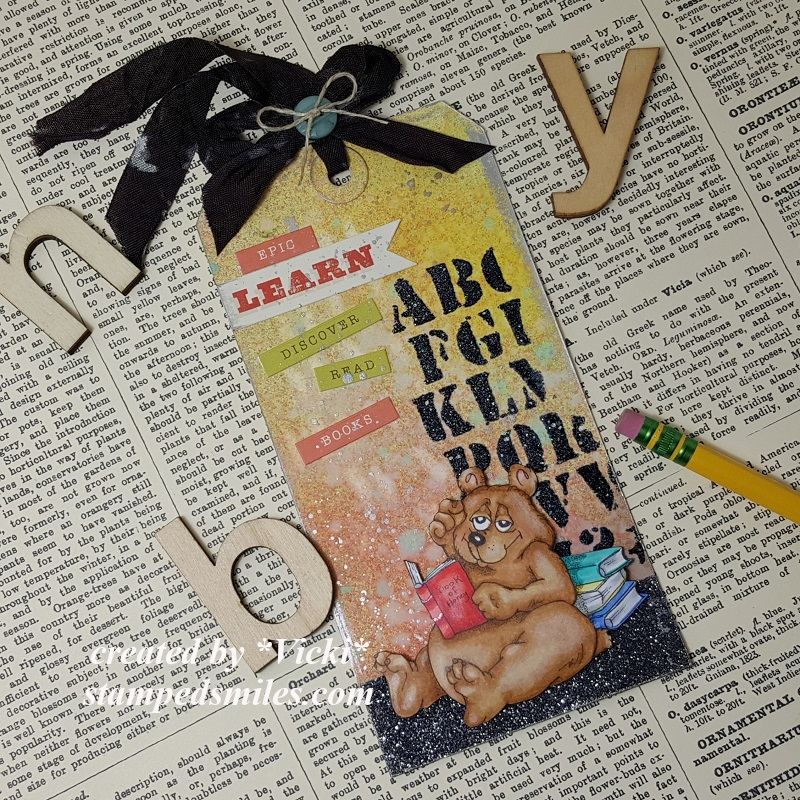
September is the time we know that the kids are back at school. I remember telling my boys that it was time for them to start “hittin’ the books!” They never seemed to care for that too much though! LOL! Thinking back at those old school days, I thought it would be nice to create a school themed bookmark with this adorable image from QKR Steampede called Reading Books.
Speaking of learning, I pulled out some Distress Oxide Sprays and played around with them on my tag to see what results I got. I was surprised at how nicely the colors blended together. I then took a Tim Holtz stencil and inked it up with embossing ink and heat embossed the letters with a Brutus Monroe Raven Sparkle EP.
Not quite finished with my background, I knew I wanted to use some black seam binding ribbon for the top of my tag, so I grabbed some silver alcohol ink and dabbled the ribbon with it. What was left on my glass surface, I took a fan brush and splattered some of it over the tag background. I also rubbed it along the edges of the tag.
To give the bear image a bit of a “ground” to sit on, I took a strip of Brutus Monroe Black Glitterstock and attached it at the bottom of the tag. Then for the word strips at the top, they’re from a cardstock sticker panel I had from an old card kit. (They got splattered along with the background.) Lastly, I just added a button with some twine in the middle of my seam binding bow.
And here’s a better look at this adorable bear image who’s studying really hard on his book! I thought it would be funny to title the book for him. So I took out my Copic liner pen and wrote in “Book of Honey” on the cover! LOL!
I’ve colored up this image with Copics and fussy cut him out to attach to the bottom of the tag/bookmark. I turned him over and rubbed a stylist over him to add some dimension to the image. I popped him up with some foam dots over the black glitterstock strip.
I hope you’ve enjoyed my bookmark/tag project today! I had fun playing around with some media that I hadn’t had a chance to play with which was really fun!
Thanks for hanging out with me this weekend! Hope you had fun or were inspired in some way! I’ll be seeing you soon!
Hello friends!! Yay! Welcome to June! I am hoping that this month will be a bit more dry than what it has been lately. I’m growing tired of flash floods! Rain vibes sent to those that need it too!
Today starts a brand new monthly challenge over at 2 Crafty Critter Crazies as well! So please hop on over there and play along with us! It’s an easy challenge! All you have to do is add a critter somewhere on your project! That’s it!
So here’s what I’ve made for the challenge:
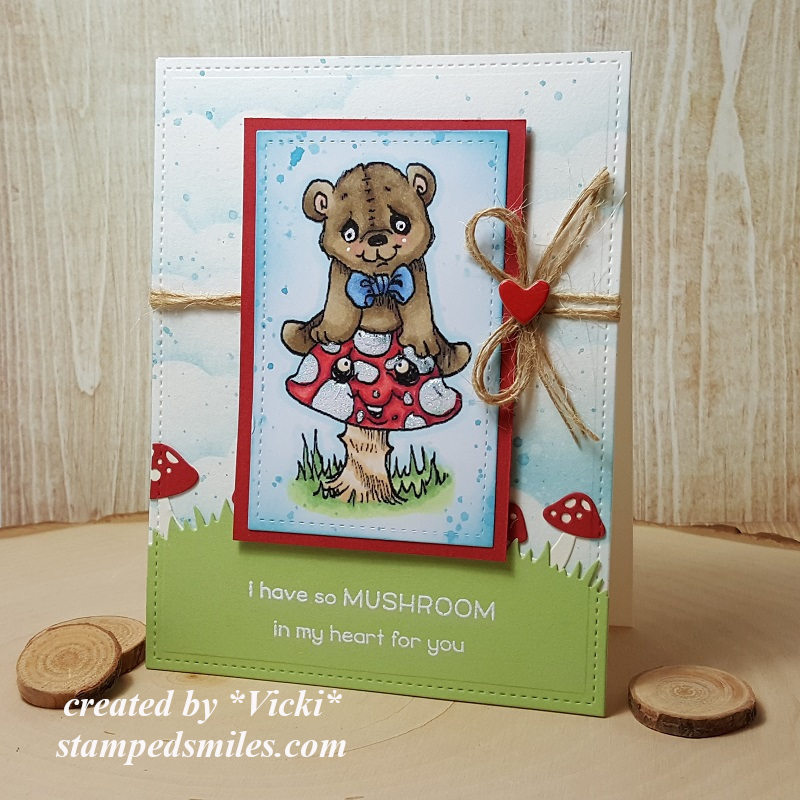
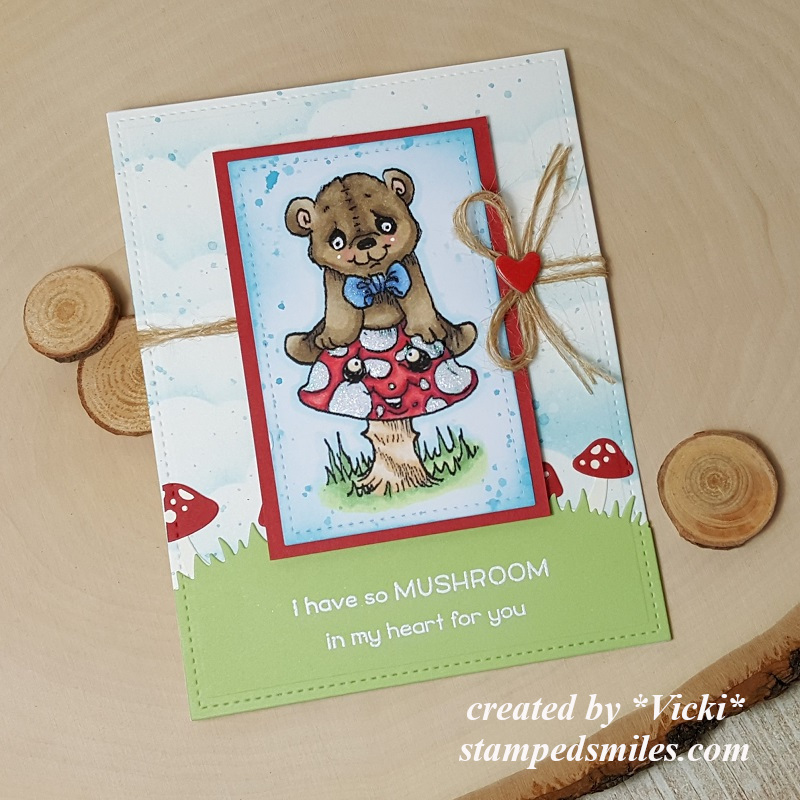
Isn’t he a cutie? Now, I’ve never seen a teddy bear on a mushroom before, but they look so happy together, so I think it works! 🙂 Our sponsor for this challenge is Rick ST Dennis and we were provided some images to use. I’ve used one of the images from the 2 Bearii Kawaii digital stamp set.
After coloring him up, I’ve used the Lawn Fawn Stitched Rectangle dies to cut him out with and then I’ve used some Tumbled Glass Distress Ink and an ink blending tool to go around the edges with it. I also used this ink and tool to sponged some clouds in the background on a white piece that was cut with another Stitched Rectangle die. I thought it would be fun to add some splatters, so I carefully covered up the image and added some splatters with the same distress ink that was watered down and splattered both the cloud background and image panel.
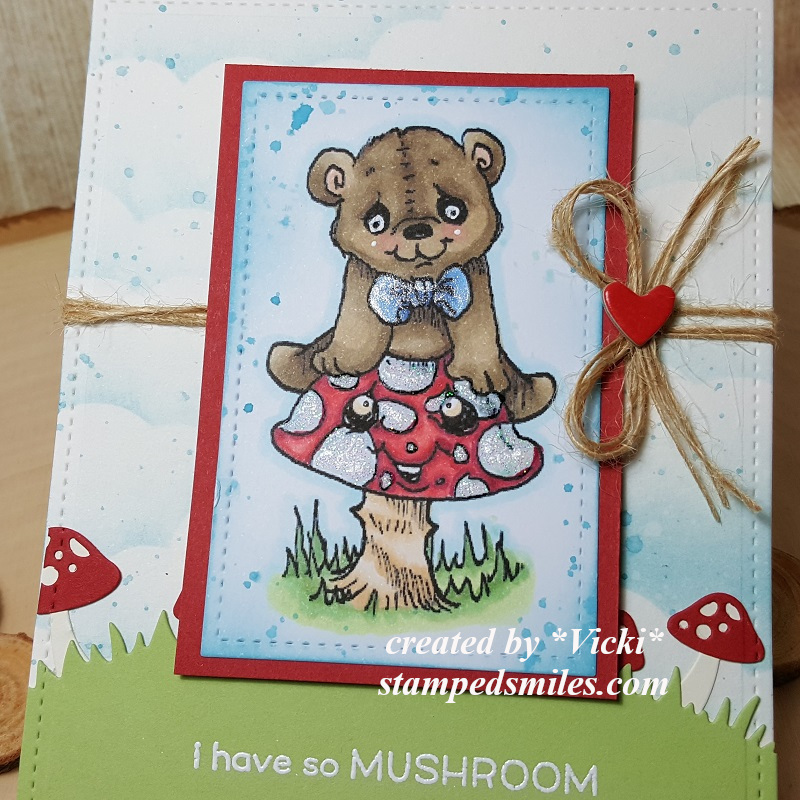
For the bottom of the card, I cut a piece of green card stock with the LF Mushroom Border die. I also used this die set to cut out the mushrooms with some vanilla and red cardstock. I white heat embossed the punny sentiment at the bottom of the grass border from the LF Oh Gnome stamp set. I’ve attached these borders to the bottom of my cloud panel and lined it up to cut it out again with the stitched rectangle die so that it matched with the background of the card.
I then added some twine around the cloud panel and then attached this piece over top of a white top folding A2 sized card base. Lastly, I took some foam tape and added it to the image panel and then attached the twine bow with the chipboard heart in the center of the bow.
Here’s a closer view of the image details. I’ve colored the image with Copic markers and then went over the bear’s bow with a glitter brush pen. The white dots on the mushroom was covered with some Nuvo Glitter Drops. For a bit more personality, I have decided to take a black marker and make dots in the center of the eyes on both the mushroom and the teddy bear. I’ve also added some white dots on the teddy bear’s cheeks.
I have to say that this card was so fun to put together! I hope you have enjoyed it too! Thanks so much for stopping in today!
I will have another post coming up shortly to share a new release with you!
Challenges I’d like to enter:
Double Trouble – (Doesn’t begin until June 3rd!) – Use a Critter and used cloud stencil in the background.
Happy Friday friends! Just stopping by to share a few creations that I’ve been working on! I can’t believe how crazy busy this week has been, but I’m still pressing on and having as much fun as I can stand in my craft room! 🙂
I feel like it’s been a while since I’ve pulled out some of the huge stash of My Favorite Things stamps, so I played around with some challenges! Check it out:
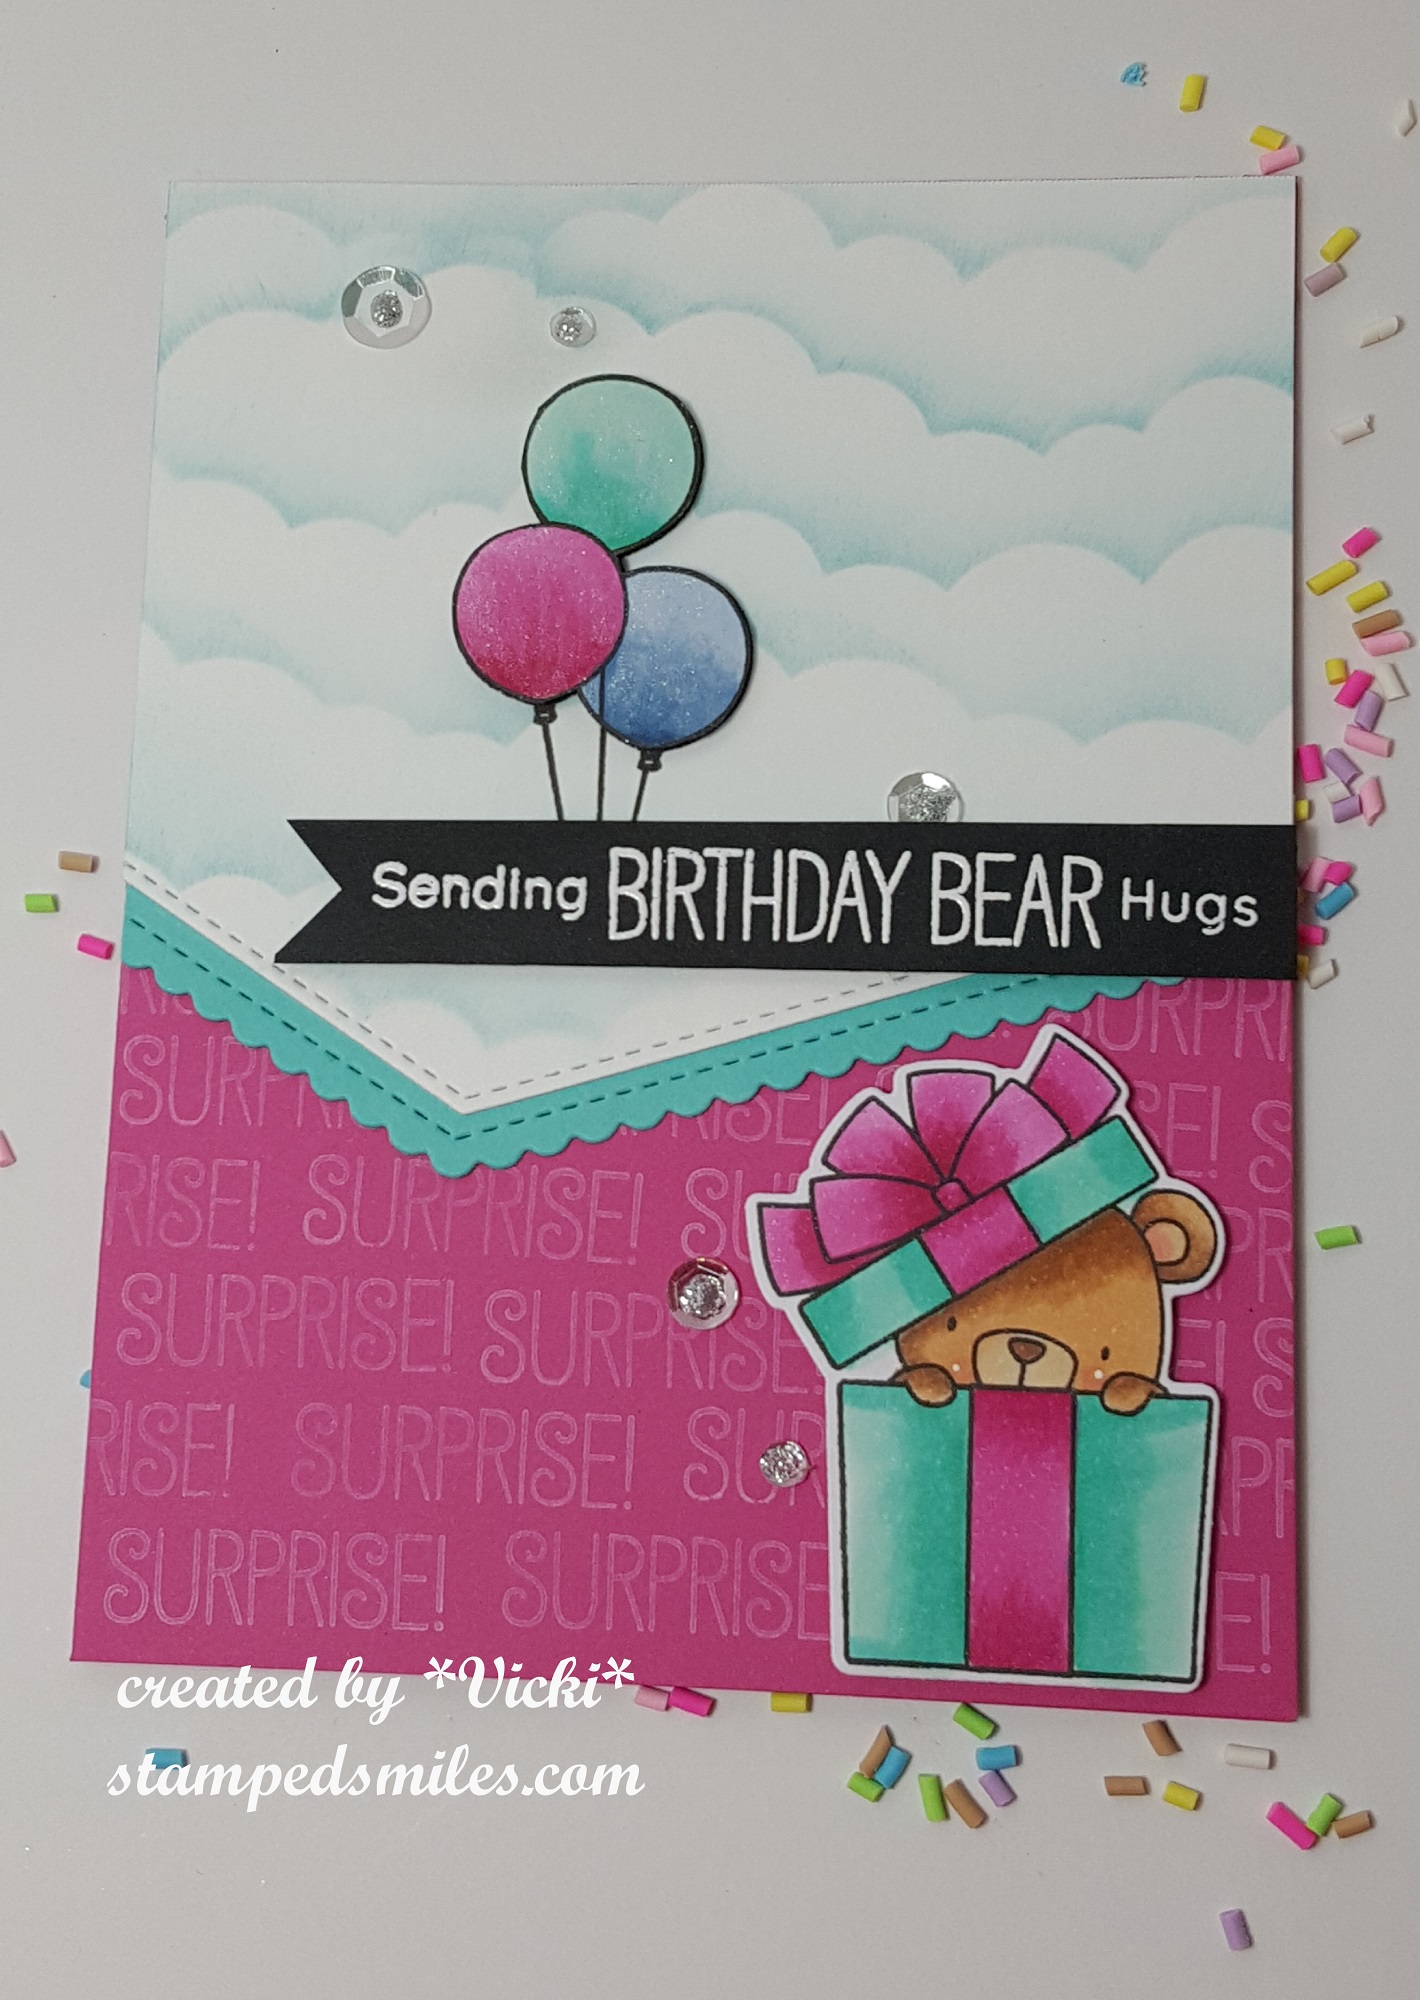
How cute is that bear peeking out from the gift box?! So, keeping with the challenges, I’ve used the MFT sketch and color challenges to base this card on. I also wanted to play along with the birthday project challenge as well…so killing several ‘birds’ at once here. (See all challenge details below.)
I pulled out the MFT Ripe Raspberry card stock for the base of my card and used the MFT Beary Special Birthday stamp set with the sentiment in white ink to stamp all over the background of the base. I colored the sweet bear and cut him out with the coordinating die and popped him up with foam tape at the bottom of the card. For the top panel, I took the MFT Mini Clouds Edges stencil and created a cloudy sky on white card stock. (I didn’t have any but was trying to match up the colors with the MFT Blue Yonder for the color challenge.) I then cut this panel with the MFT Stitched Basic Edges and then cut out a MFT Blu Raspberry piece of cardstock with the MFT Stitched Scallop Basic Edges die and layered it underneath the cloudy sky background. I attached this to the Ripe Raspberry card base.
I took the bunch of balloons from the same stamp set and colored them with coordinating colors, I fussy cut just the balloons because I took the image and stamped it on the cloudy sky background so I could pop up the balloons with foam tape. I also covered the balloons with some Spectrum Noir clear sparkle glitter pen. I then took a sentiment from the same stamp set and heat embossed it in white embossing powder over some MFT Black Licorice card stock and cut the strip with fish tails and then popped it up over the balloon strings with foam tape. Lastly, I added some Pretty Pink Posh sparkling clear sequins and added some silver Nuvo glitter drops in the center of each one.
I can’t believe that I have fully completed week 5 of the ICAD challenge so far! Although things have been a bit hectic, I am determined to continue on with these index cards each day…I am surprised by how they turn out sometimes too! Here are the weird and random tiny pieces of art I’ve created each day this last week:
I truly am hoping that this will help me to become a better artist. I am proud of myself for pushing on when I want to just give up sometimes, but that’s exactly why I need to challenge myself to continue when it gets hard. I’m also happy to pull out media that I’m either not familiar with or pushed to create beyond what I am comfortable with…like drawing! LOL! I can’t wait to look back at these all at one time when I’m done!
Have YOU challenged yourself lately?
Thanks for stopping by today! Hope you’ve enjoyed my creations!
Challenges I’d like to enter my ‘Happy Bear-day” card for:
 We’re trying to get creative by using up our never-ending stash piles! So here’s my Art Journal inspiration with the “SMASH OUR STASH” September prompt of “ANY kind(s) of scrap papers!” :