{Cupcake Inspirations} Birthday Celebration Day 3

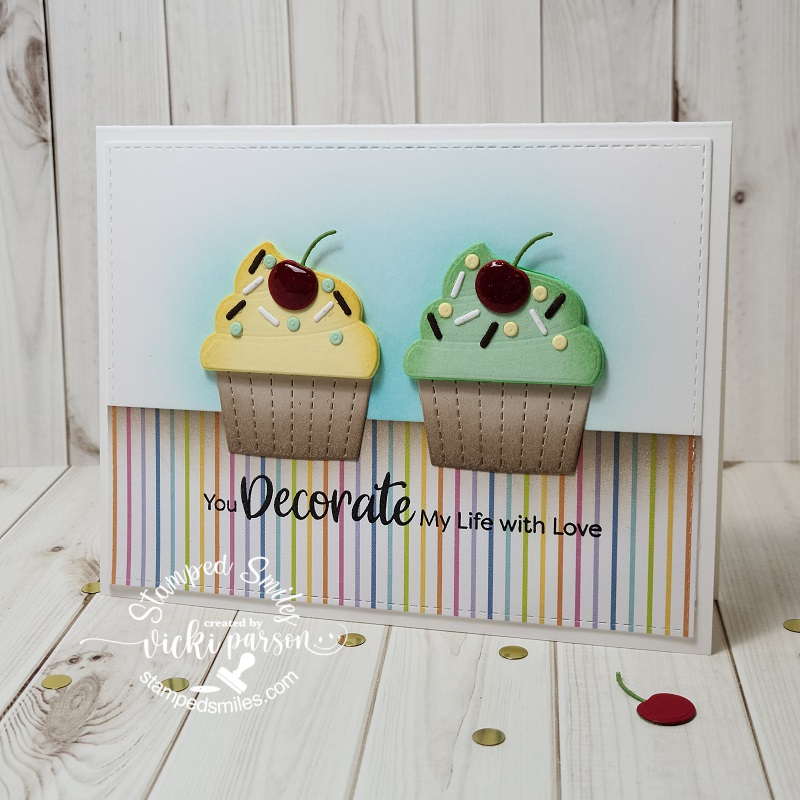
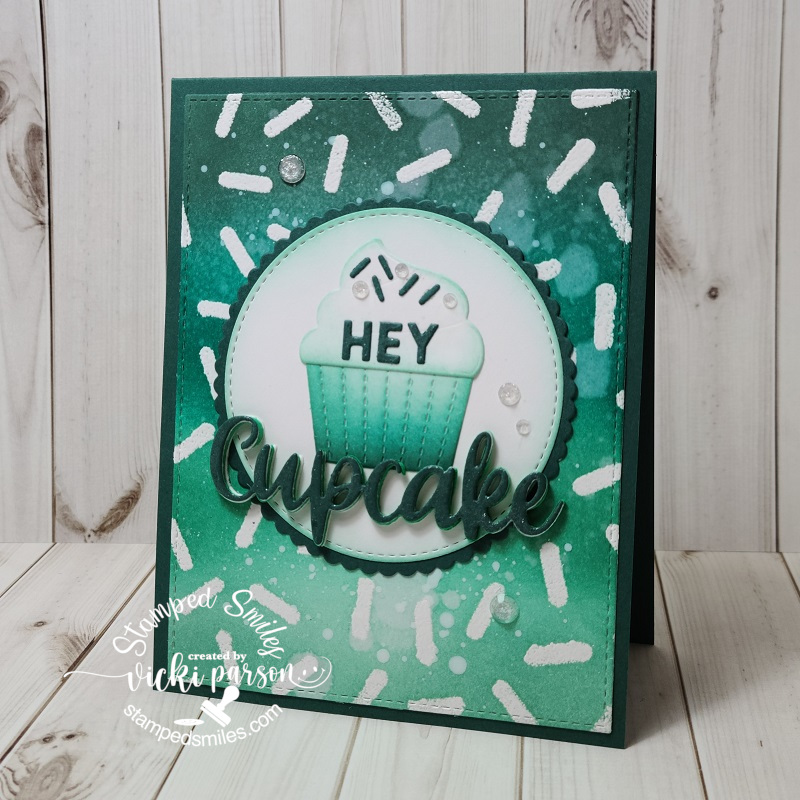
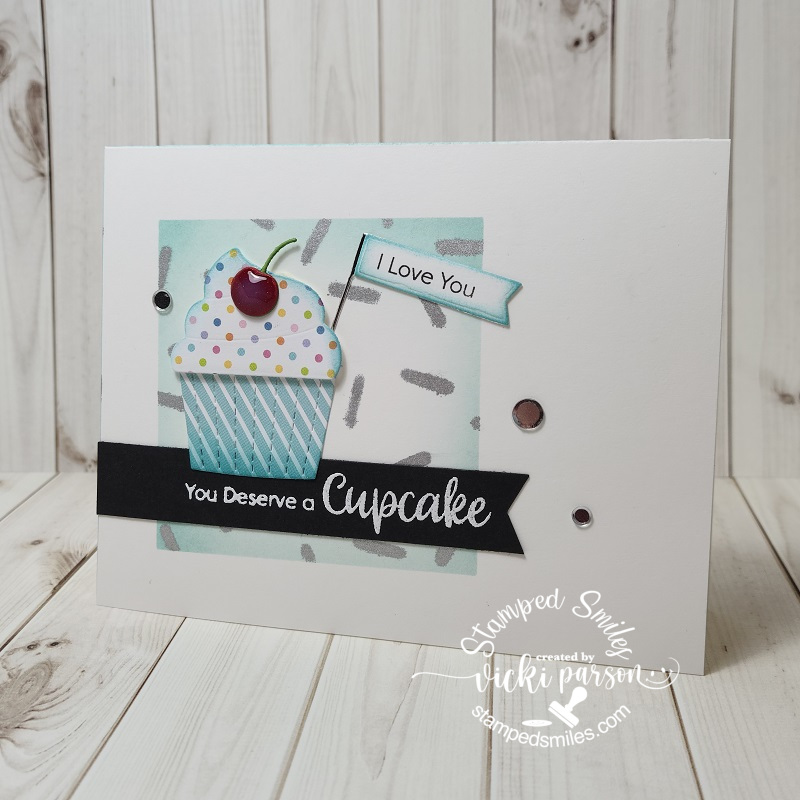
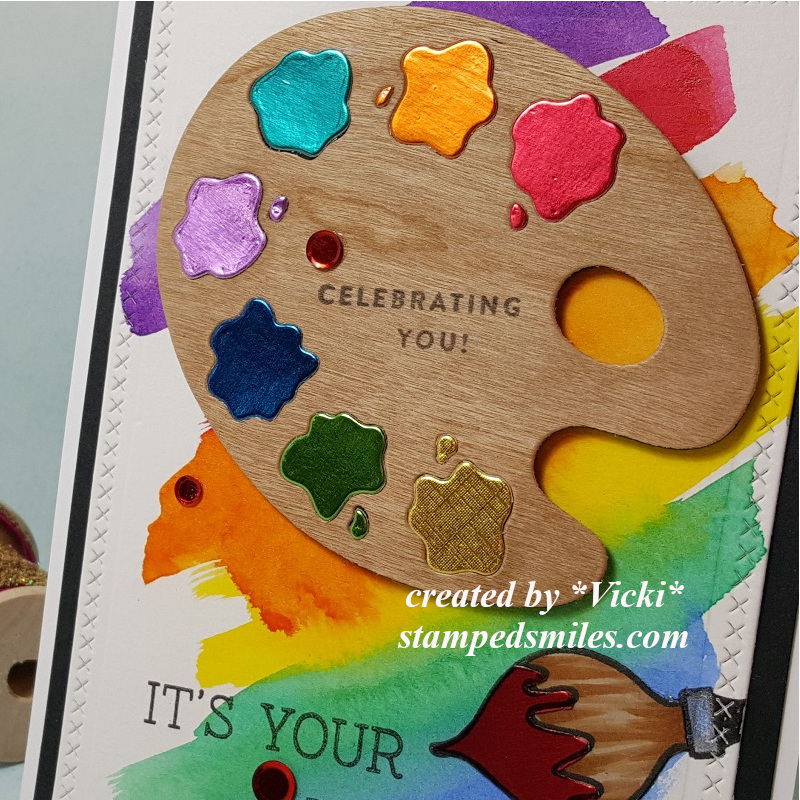
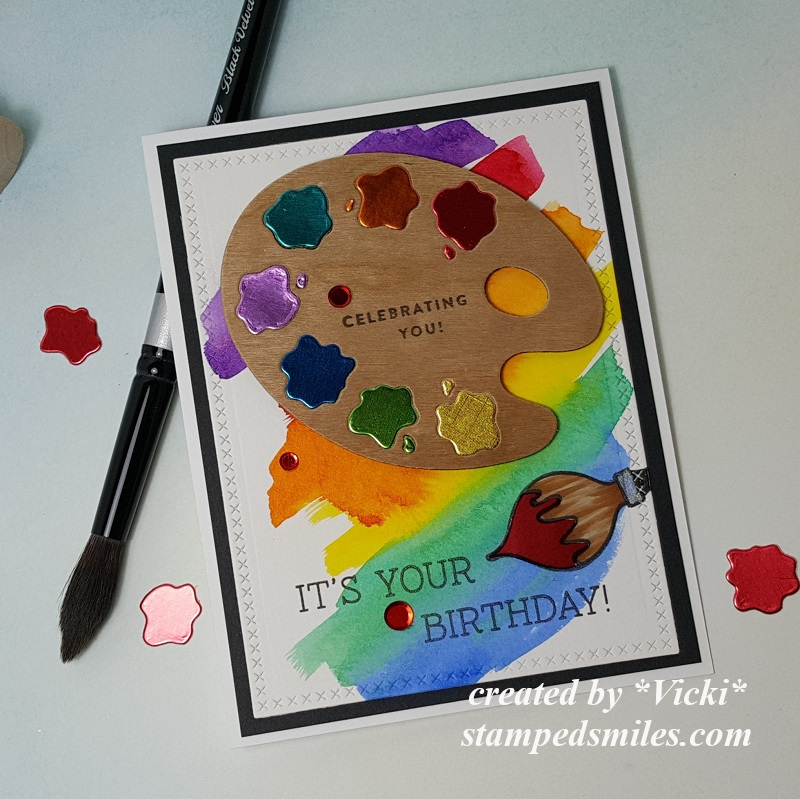
Hello again friends!  We are on day 3 of celebrating over at {Cupcake Inspirations} with another feature of sponsors for our 500th “birthday celebration” challenge!!  Yay!

Today, we are highlighting Crafty Scrappers & Gerda Steiner Designs – check out the challenge blog for more details about these sponsors.

The DT was given images from Crafty Scrappers to use for our creations:

Vicki-CIC500-Day3-CraftyScrappers

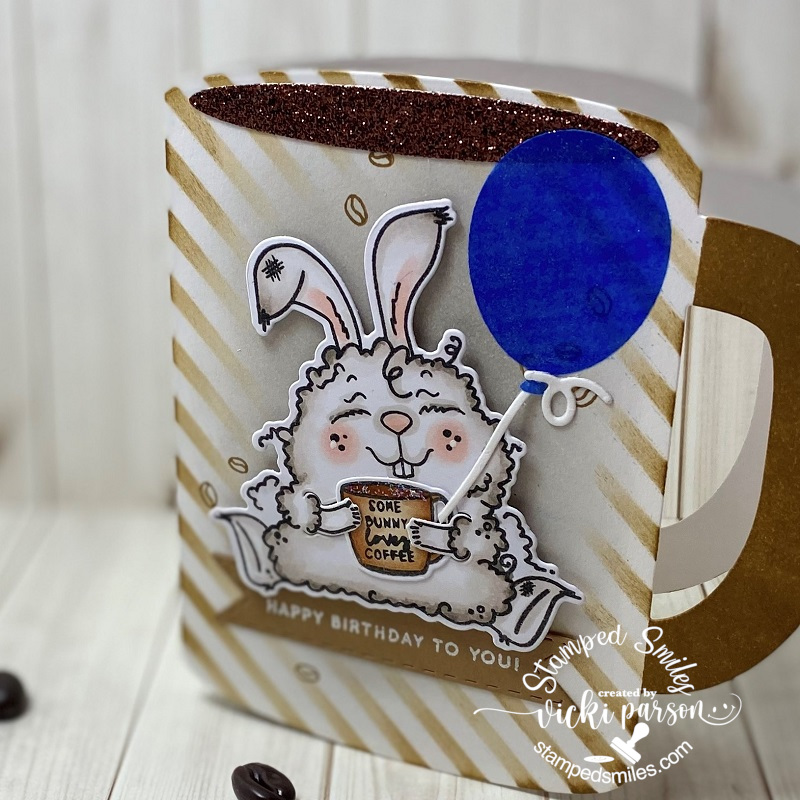
Isn’t she the cutest with her oversized cupcake and glasses?!  I’ve used images including the sentiment from the Ms. Cupcake stamp set provided by our sponsor.

I had so much fun coloring her up with Copic markers and then adding lots of details to it like the gold glitter shimmer over the ribbon on the cupcake, the shimmer over the frosting and then some glossy accents for the chocolate syrup, cherry on top and over her glasses too!  I’ve also used a white gel pen for highlights on areas.  I actually fussy cut her out and popped her up over the circle die cut panel with foam tape.

I thought she fit the circle nicely and would work for a circle easel card design.  I matted her over a purple fancy circle die cut layer and then made the circle easel base a pink color.  I cut a strip for the sentiment and layered that over purple cardstock for the inside which is helping to keep the front layer propped up.  I’ve also added some gold sparkle crystals over the design to match her ribboned cupcake.

Thanks for dropping in today friends and I’ll see you tomorrow!

Challenges:

  1.  Dream Valley– Add Gems/Pearls or both
  2. As You Like It– Favorite Color to Pair With Pink and Why? (Purple is my favorite color, but I think it’s amazing with pink because it gives a wonderful feminine look…and it’s great for princesses and unicorns too!)
  3. Creative Knockouts – #363 Finish the Inside (my inside is propping up the front of card!)
  4. Alphabet – ‘J’ is for Jewels or Jewlery
  5. Creatalicious– #193 Anything Goes with optional: Anything but square or rectangle

{Cupcake Inspirations} celebrates it’s 500th Challenge! WOW!🥳

Hello friends!!  Happy Monday!  I have something very special to share with you today!

The {Cupcake Inspirations} Challenge Blog has hit a wonderful milestone and is celebrating their 500th challenge! How cool is that?!

I’m so thrilled to be apart of the celebration with them and share in the excitement!  I hope that you will be celebrating right along with us and join the challenge too!  We also have an AMAZING list of sponsors to share in the celebration with us!  Please be sure to check out the challenge blog for the complete list…AND…we will be sharing inspiration EVERY SINGLE DAY throughout the 2 week challenge using products from our sponsors, so you won’t want to miss any of the posts so you can see the inspiration!

  • I WILL BE POSTING INSPIRATION FROM MOST OF THE SPONSORS RIGHT HERE ON MY BLOG EACH DAY AS WELL!  SO STAY TUNED IN!

The theme for this challenge is “Birthday Celebration!  We can always use birthday cards!  So we look forward to seeing your creations!!🥳🧁

Vicki-CIC500-Day1-LawnFawn

Remember those fun birthday parties as a child and all of those fun photos you took with your friends?  Everyone is having a great time together!  I miss those days for sure!

I have used the Wild for You stamp set along with the coordinating dies for the animals friends and colored them up with Copic markers.  I have also taken the Party Animal stamp set and coordinating dies for the sentiment over the black banner that was white heat embossed as well as the balloon that is tied around the gator’s tail with black twine.  I popped up the balloon and covered it with glossy accents.  The cupcake on the gator’s back came from the “Party Panda” stamp set and dies that I received as a gift for my birthday month.  (P.S. You may notice a cupcake in almost every one of my creations for these two weeks…see if you can spot them!)

I’ve used the Selfie Frames die set to cut out the polaroid frames, plus I die cut some grass in them with the Grassy Border die.  I pulled out a piece of paper from the Watercolor Wishes paper pad and cut it out using the Small Dotted Rectangle die.

I finished my card with some bright blue and purple sequins.  (Although it almost looks black on the photo! LOL!)    I’ve added details with metallic gel pens and glitter too.

Really fun card to make with some really adorable products…love Lawn Fawn!

Thanks for stopping in today friends!  Be sure to check and see what I’m making for tomorrow’s post with another sponsor!

Challenges:

  1.  Not Just Cards – August Anything Goes
  2. Retro Rubber – rrcb141 Anything Goes (have had all at least 1 year or more!)
  3. Arty Divas– #28 Anything Goes
  4. Watercooler Wednesday – WWC284 Occasions
  5. Colour Crazy– Anything Goes + coloring

Finishing Up Summer School With Cupcake Creations!🧁

Hello friends!  Hope you’ve had a great week!  Wow…it’s Finally Friday!  I’ve been SO busy “behind the scenes” and I will be getting to all of that later on, but I needed to squeak in with the final creations for the MFT Summer School!

I finished up Day 2 with my “smile rainbow” and now for Day 3, they’re asking for a “symmetry” style of creation.  I was told that basically it’s something that if you were to split it in half, it would be exactly the same on the other half…so this is what I thought of:

Vicki-MFTSummerSchool-Day3Symmetry

I was so excited about getting the My Favorite Things Cupcakes card kit, so I was determined that I was going to pull it out and use it for the rest of my Summer School cards! LOL!  It’s such a cute set with the dies and sentiment stamps!  I really had fun!

I used some papers from the kit and sponged ink around the edges of everything pretty much.  I just used the two cupcakes side by side for the symmetry class.  I just have opposite colors of sprinkles.  I added the red cherry on top, covered with the glitter brush pen and then some glossy accents.  (The glossy accents really got a work out!😮)

Vicki-MFTSummerSchool-Day4Ombre

So Day 4 class was “ombre” and that pretty much called to me to use the stencil from the card kit (sprinkles in background) and then I just heat embossed white over white and then used inks for the emboss resist technique moving the colors from lightest to darkest to get that classical “ombre effect”.  I also added a die cut cupcake that I used the same ink effect over it.  I die cut the words from the kit with the dark papers I used for the base of the card.  I finished with some sparkly crystal accents to finish it off!

Vicki-MFTSummerSchool-Day5WhiteSpace

And last but certainly not least was Day 5 “White Space” class.  I don’t often make cards like this, but I honestly love those CAS style cards, but I always want to “teeter” on the fine line between CAS and not…so I always think I’m not doing CAS.  I’m just not comfortable with the “CAS” definition or “rules” of what is or isn’t CAS.  I just feel happiest doing whatever happens to work out in my plan for a design…that’s pretty much it!    Be happy and you’re good!

I used this class to also follow along with the MFT sketch challenge going on as it looked like it was a good sketch for making a “white space” design.

I started by masking off the square and sponging lightly around it, I white heat embossed the sentiment over a black strip and added some silver ink over the stencil again and then attached the cupcake over top with the papers…and added the cherry on top with glossy accents too!

I finished it off with another little flag die from the kit and some silver sequins!  I like how it turned out!  I think I deserve a cupcake after all the creations I made!!😋

I hope you’ve enjoyed my creations today and I really appreciate you stopping in to see what’s going today!  Have a fabulous weekend!

Challenges:

  1.  MFT Summer School– Day 3 Symmetry
  2. MFT Summer School – Day 4 Ombre
  3. MFT Summer School – Day 5 White Space
  4. My Favorite Things – Wednesday Sketch Challenge MFTWSC502 (my last card and I flipped the sketch on the side)
  5.  Crafty Creations – #412 August Anything Goes
  6. Craft Rocket – #73 Birthday
  7. Creative Fingers – #191 Anything Goes
  8. Arty Divas – Bonus Birthday Challenge
  9. Crafty Friends Anything Goes

Dir-Tea Birthday Bunny Coffee Card🐰

Hello friends!  I’m back again today with another fun card that I wanted to enter before the time runs out!  So check it out:

Vicki-TSDir-teaBunnyCup

This adorable smiling bunny is so fun and I really loved creating this coffee themed cup shaped card using some products from Trinity Stamps.  I’ve used the Dir-Tea Bunny stamp set along with the coordinating dies that also cut out his hands so you can stick stuff between them like I did with the coffee cup and balloon!  The coffee cup came with the stamp set and I added that sentiment to it!  The balloon is a die set from MFT.  I cut out the balloon with vellum and used my Copic marker to color it in.

I used the Trinity Stamps Coffee Mug Card die set in white cardstock and then took the Slimline Stripes stencil to sponge over it.  I completely sponged over the handle of the cup and then I sponged the center of the cup in grey colored ink for the bunny to be on top.  I also stamped a few coffee beans from the stamp set with the same sponged ink.  I took some Glitterstock to cut the die cut piece for the top of the coffee cup and for the inside of the card is where I added my gift card holder which comes with this die…which is pretty cool!  It’s already to go for my coffee loving birthday person now!!

I did not have a Trinity Stamps birthday sentiment, so I pulled out one from my stash and white heat embossed it over a strip of cardstock that is the same color of ink from my cup.  The banner was actually cut out with the Trinity Stamps Slimline Scalloped Card Panels and Banners die set.  (I just shortened it as needed.)  I used foam squares to pop up the die cut bunny to sit on top of the banner.

Vicki-TSDir-teaBunnyCup-close

Here’s a close up view of the details on the card.  I’ve used Copic markers to color in the bunny and added dots to his cheeks with a white gel pen.  I’ve also took some glitter and added it to the inside of his coffee cup to make it look as glittery as the larger cup!

Hard to tell in the photos, but the blue vellum balloon was also covered with a Spectrum Noir glitter brush pen for a bit of shimmer.  To attach the vellum balloon, I ran it through my Xyron Machine so you couldn’t “see” any glue marks.

(I love how he can hold different items!) 😀🎈

Vicki-TSDir-teaBunnyCup-flat

Wished I remembered to take a photo of the inside of the card, but it just has a coffee gift card holder on the inside along with a greeting and more stamped coffee beans.

Hope you’ve enjoyed my funny bunny shaped coffee cup card today!  I sure appreciate you stopping in and I’ll be seeing you again soon!!

Challenges:

  1.  Trinity Stamps Crafty Troop Birthdays + Trinity Stamps products
  2. Pammies Inky Pinkies – PIP2025 – Anything Goes
  3. Dream Valley – #228 All Occasions
  4. Always Fun – #168 Anything Goes
  5. The Male Room Use Die Cuts
  6. The House That Stamps Built – J2420 Anything Goes
  7. Watercooler Wednesday– WWC277 All About Occasions

Whimsy Retreat Crafty Fun Results

Hello friends! Hope you’re having a great week! I’m so glad you’ve joined me today as I have lots of fun creations to share with you!😀

This past weekend Whimsy Stamps held a “virtual craft retreat“, so I thought I’d tag along and join in on the fun! I’m glad I did because I made several cards:

The first challenge given was a tic-tac-toe challenge. I did 3 down: birthday, heat embossing and circles for mine. Almost had 2 bingos…but didn’t quite work out! Aren’t those penguin eyeballs the best?! LOL! I needed to send out a birthday card to someone so this was great timing!

The background papers, cover die, sentiment die and the penguin stamps are all from Whimsy Stamps. I even put little ice cube confetti for my shaker card!

This card was made for the second challenge given during the event which was to use a sketch and a color palette using at least 2 of the colors given. This was my take on the sketch along with using blue, green and brown from the palette.

Most all of the items used on this design came from an older card kit from Whimsy Stamps. The stamp set is still available in the store called Enjoy the Journey. For the sentiment panel, I heat embossed a sentiment from this stamp set and then used the Slimline Postage die to cut along the edges of it.

Tihs is the card that I created for the third challenge issued which was to follow a photo prompt with words: “When it rains, look for rainbows. When it’s dark, look for stars.” The first thing that came to my mind was these cool Rainbow Papers from Whimsy Stamps and so I’ve cut a panel out with an older Whimsy Stamps die along with the image panel.

This image is called Rainy Day Smiles by Sassy Cheryl’s which is what I had actually won as a prize from the event over the weekend for one of the games..so that was cool! I wanted to be sure to use it for one of my cards! I added some raindrop crystals on a few areas of the image too.

This card was made for the fourth challenge given which was simply to create a project with one of the digital freebie images that was given during the event.

Facebook actually kicked me out of the event a few times for leaving too many comments! LOL! I was trying to participate in games and it told me that I was leaving too many comments! This was one of the cute freebie images that they gave at the event called Sloth. After all that happened…I felt that this little guy was laughing at me!🤣🤣🤣 So I wanted to laugh right along with him, and I printed him out, colored him with Copics and used the Whimsy Stamps Notched Square dies and layered him over some papers from my stash and attached to a 5″ square card base that I stenciled some clouds on along with the background of the image. I die cut some leaves from the Whimsy Stamps No-See All Seasons Tree die set to add to the top corners of the image panel.

Needless to say, I did “hang in there” right along with him!!😄

And last but not least, the fifth challenge was to make a project based on one of the video tutorials that was shown at the event. Of course, I’m always inspired by Crissy Armstrong and her coloring! This sweet little penguin called Penguin Momma was a freebie given during the event and I watched Crissy color this up and I tried my hand at her tips and tricks.

I printed out another piece of the feather background and cut it out with the Whimsy Stamps Zig Zag Stitched Rectangle dies and added my own white feather to the design. I sponged some grey ink around the edges of the printed papers and added some yellow crystals.

  • I had such fun creating these projects and pulling out my Whimsy Stamps stash for the challenges. And now I have a few cards for sending out to people that I already have in mind! Hope you’ve enjoyed my makes today and I’ll be seeing you again soon!! (The links in this post contain affiliate links if you want to purchase anything! Thank you!!)

Challenges:

  1. Creatialicious – Anything Goes optional birthdays
  2. A Bit More Time to Craft – Anything Goes
  3. Love to Craft – Anything Goes
  4. Crafty Creations – Anything Goes
  5. Colour Crazy Craft – Anything Goes + colouring
  6. Crafty Friends – Anything Goes
  7. Creative Craft Cottage – Anything Goes
  8. Creative Moments – Anything Goes
  9. Lil’ Patch of Crafty Friends – Anything Goes

I’m Still Crafting!!🎨

Hello there friends!! 😀

I’m doing well and healthy as is my family!  I sure hope that all of my fellow blog friends and readers are staying healthy as well!  Thank you from the bottom of my heart for reaching out to me and asking about my well being!  I really miss you guys!

I haven’t posted since I’ve not been on any design teams and I sort of just “took a personal break” from posting anything on my blog or social media.  The first reason being was that I had lost some “MOJO” and was really struggling with getting inspired and wasn’t really “happy” about what I was creating.  As I had mentioned before, it really does happen to us and sometimes it’s harder to “get over it” at times.  With all that is going on in the world right now, I also had other concerns on my mind as I’m sure many of us have.  So my blog break became even more extended.  Now that I’ve “been away”, I’m stuggling with what exactly I want to do.  I miss my blog friends very much and really enjoyed having this way of communitcating with you all…after all…we love crafting together and we have that in common and it’s something to be happy about to come together for!  So I’m sharing my heart to heart update with you!

WHAT HAVE I BEEN DOING??????🤔

Yes!  I’ve been crafting, but I just haven’t really taken the time to create a post about it.  As you know with blogging, you know that you not only need to take a photo of it, but you have to edit it, watermark it, create/type up the blog post, link all the things and then share it to all of these other social media platforms..so, with that, I just didn’t take the time! LOL!  And….I’m still trying to decide if blogging is something I should continue.  PLEASE, share with me your thoughts.

While I’ve not been posting, I sure have been crafting!  I signed up to take several different classes!   I had planned on going to a couple of retreats that were obviously canceled, so I decided that the online type classes were a way to go and to try to boost up some of that lost MOJO!  While not posting about it, I actually think that may have helped!  I was able to freely create with no time restraints and I didn’t have to worry about typing up a post for social media and “judgment”.  It just turned out to be whatever it was!  So MAYBE posting about whatever comes up for my crafting is a little more “freeing” and it can be whatever it turns out to be?  I don’t know, I guess I will find out!

____________________________________________________________________________________________

I will try and start with about where I left off from the beginning of April and just go forward from there!  Lots of things have been going on “behind the scenes”!  LOL!

Vicki-BMicecreamBday

This is a card I had actually made back in March for a birthday card for someone and just never posted it.  I had pulled out an older birthday card kit and used the stamp set along with the papers from the kit.

I also used the circle shaker pouch as well as some dies from My Favorite Things to create the shaker panel.  the confetti and sequins all came from the card kit I used.

Vicki-BMicecreamBday-close

I used Copic markers to color in the ice cream cone and then I also die cut a heart from the Glitterstock that was included with the birthday card kit and glued it on top.  I took some white twine as I felt a bow on the cone would help tie everything together nicely.  I white heat embossed the sentiment over a strip and swiped some white ink along the edges of it.  It was glued over top of the polka dotted paper and die cut out with a stitched rectangle die.

Vicki-BMicecreamBday-flat

As you can see, I even took an additional image from the stamp set and stamped the envelope to match. (something I’ve been trying to work on when making cards)

I didn’t photograph it, but I also used a gift card pocket die on the inside of the card to tuck a gift card in.  Those little pocket dies come in handy for when you want to mail a gift card!

So please let me know that you’re here and what you think!

Thank you for your continued support during my crafty journey!!  I have more things to post that I’ve been working on, so I’ll be seeing you soon!!

Challenges:

  1.  Crafty Cardmakers Celebrations
  2. A Bit More Time to Craft Anything Goes
  3. Creative Fingers – #185 Anything Goes
  4. Stamp & Fun = Creativity – #367 Eat & Drink
  5. Pammie’s Inky Pinkies – PIP2018 Anything Goes

Celebrate For 2 Crafty Critter Crazies + Other News

Hello friends!  Happy April 1st which means it’s time for a new monthly challenge for the 2 Crafty Critter Crazies Challenge!  Remember that it’s always an “ANYTHING GOES + CRITTER” challenge to enter your creation.  We’re looking forward to seeing your projects!

This month we’re being sponsored by Digi Doodle Studios!  They were kind enough to provide images for the design team to create their projects with, so here’s what I’ve made for my challenge project:

Vicki-2CCCwithDDS

I think I could probably celebrate with these cute little hedgies, couldn’t you?!🦔🦔

This image is called Hedgie Party from Digi Doodle Studios and it was super fun to color up for my card!  We can always use birthday cards in our stash, so I pulled out some papers from my stash…including some left over pieces to assemble the design.

I used a Simon Says Stamp stamp set to heat emboss the stars over the green decorative paper with gold EP.  I stamped the sentiment at the bottom of the paper from the same stamp set with black ink.  I cut out this panel with a square stitched die, layered over white cardstock and then attached it to a piece of orange top folding 5″ square card base.

I pulled out some gold mirror cardstock cut with a scallop square die and layered it over the design, wrapped some gold ribbon around it, placed the layered image panel over top of that with craft foam and added the bow.

Vicki-2CCCwithDDS-close

Here’s a closer view of the image I’ve colored with Copic markers.  I’ve also used a white and gold gel pen to create some polka dots over parts of the image.

Hard to see in the photo, but I covered the big present bow with a glitter brush pen too.

Vicki-2CCCwithDDS-flat

I hope you’ve enjoyed my card today using this sweet DDS image! Thanks for stopping in!

Other news:

Just FYI that this post will be my final creation as a design team member for not only 2 Crafty Critter Crazies, but also for Digi Doodle Studios as well.  Although I adore everyone on these design teams very much, it’s just time for me to let DTs go for a while.

Challenges:

  1.  Krafty Chicks – All Occasions
  2. Di’s Digi Challenge – Birthdays
  3. QKR Stampede – #391 Anything Goes
  4. Creative Knockouts – #343 Anything Goes
  5. Pammie’s Inky Pinkies – PIP2013 Ribbon
  6. Country View– Animal Magic

Birthday Card For a Painter!

Hello friends!  Hoping amid this strange time you’re finding peace and sanity among your crafty time and online community of friendly crafters as well to help uplift your spirits and keep you thinking happy thoughts!  If you’re looking for smiles, please know that this is the main purpose of why I do what I do here!  Helping to spread smiles is something that is near to my heart along with crafting.  If you’re enjoying a smile with me, that’s all I care about!  Thanks for hanging out!

Today, I have a special birthday card that I’ve made for my mom who’s a crafty tole painter and I wanted it to be a bright and cheerful design since I couldn’t celebrate with her face to face due to the current circumstances:

Vicki-SSSbirthday

So I’ve been having fun pulling out my past card kits as they’ve not been used as often as I would like to use them.  For my card here, I’ve used the Simon Says Stamp painter’s palette die that came from a past SSS card kit along with the stamp set called Sweet Birthday.  I have been hoarding some special paper made from real wood to die cut the main palette die from and then I’ve cut it out several times using some different colored specialty mirror colored cardstock from the kit for the different colors of paint.

I popped up the entire paint palette with some foam tape over a piece of watercolor paper that I took a brush and some watercolor to make the strokes for a fun and colorful background.  I then cut it out using my Lawn Fawn Cross-Stitch rectangle die which I mounted over a piece of black cardstock and mounted over a white A2 sized top folding card base.

Also for the background, I decided I wanted to include some sort of paint brush, so I dug out an old stamp I had and paper pieced some of that red mirror cardstock for the paint on the end of the brush.  (Red is my mom’s favorite color.)  I used Copics to finish coloring the brush and a glitter gel pen for an accent on the brush.  I then stamped the sentiment in black ink over the background and added some red sequins from the kit.

Vicki-SSSbirthday-close

Here’s a closer view of the palette and the real wood texture of the paper I had die cut it with.  You can see the shimmery colors of the cardstock I’ve used from the kit.  The only color that wasn’t included in the kit was the yellow, so I dug through my stash and found a piece of gold that I used for the yellow color…you can see it has a bit of texture on it, but I was fine with it.

I thought that the background was so fun and simple to create.

Vicki-SSSbirthday-flat

I hope you’ve enjoyed my colorful birthday card today!  Do you know someone that would love to receive a happy and colorful card?  I encourage you to get out some pretty colors and make a background and send it out to someone!  Not only will they enjoy receiving a handmade smile from you, but you will be smiling while having fun too!

Hope you’ve enjoyed my card today and maybe we’ll be seeing some rainbows in our future very soon friends! 🙂   I’ll be seeing you soon!

Challenges:

  1.  Shopping Our Stash – Happy Birthday
  2. Creative Knockouts – #342 Bingo (second line across, I’ve used paper piecing, image and die-cuts/punches)
  3. Penny’s Paper-Crafty – #467 Anything Goes
  4. Creative Fingers – #182 Anything Goes
  5. QKR Stampede – #390 Anything Goes
  6. Creative Moments – #187 Anything Goes

Hot Dog! It’s Birthday Time!

Hello friends!  As you know, I’ve been TRYING to get my MOJO flowing and I REALLY appreciate the feedback that I’ve gotten from you and others about things I can try including non-craft related things!  (Honestly, right now in this world with what is going on, it is hard to concentrate along with worrying about my own family in different ways…so that doesn’t help either!)  But I’ve been trying to find things to keep my mind focused and try new things that are interesting to me…so I will just keep going along and see what happens!!  I would like to continue with as many “stamped smiles” as I possibly can right now….we all need that at this time!

Today’s card was made for my son’s birthday that was this past Saturday:

Vicki-SSSSoPunFriends

I pulled out an older Simon Says Stamp card kit and used the So Pun Friends and the I Chews You stamp sets along with the coordinating dies.  I’ve used the cardstock and cute Doodlebug So Much Pun Papers that came with the card kit as well.  The tag was cut using the My Favorite Things Stitched Tag dies.  I created the hole at the top of the tag with circle punches and the twine is from left over packaging.

I cut the tag shape out again with more of the papers from the kit and then popped up the image tag with foam tape and added some white enamel dots.

On the inside I stamped a birthday greeting and made a pocket to hold a gift card for him.  We usually take him out to dinner for his birthday, but since he’s moved away I had to send him a gift card instead.  Bummer…

Vicki-SSSSoPunFriends-close

Here’s a closer look at the cute smile face images that I colored up with my Copic markers.  I cut out the food images with the So Pun Friends coordinating dies.  For the sentiment, I stamped the speech bubble from the I Chews You stamp set over a piece of the Doodlebug papers and then added the sentiment from the So Pun Friends stamp set in the center of the speech bubble.  I then die cut it out with the I Chews You coordinating dies.  

I used some blue distress ink to blend some color over the center of the white area on the tag and then popped up the speech bubble with some foam tape over that area.  The hotdog at the bottom was also popped up with foam tape as well.

Vicki-SSSSoPunFriends-flat

I actually had some fun pulling out this older card kit to play with and who could resist a hotdog smiling at you?!  LOL!

Thanks so much for stopping in and for your continued support!  It’s very much appreciated and I hope that I helped bring a smile or inspiration to you today! 

I actually have a couple more birthdays coming up that I need to make cards for, so I’m sure you’ll be seeing more of those in the near future too!

Challenges:

  1.  Not Just Cards – March Anything Goes
  2. Little Red Wagon – Etc, etc, etc (3 enamel dots and 3 food images with smiles)
  3. Cute Card Thursday – Celebrate!
  4. TIME OUT – Birthday with optional twist:  die cutting or fussy cutting
  5. Seize the Birthday – #185 Touch of Green or Anything Goes

Seally Me!

Hello friends!  I hope that you’ve had a great weekend!  The temps actually got up high enough that I was able to take a nice walk Sunday!  Then of course since it’s February, Mother Nature says we will be getting several inches of snow today!  For some reason this month seems really long, so I’m ready to move along to March! LOL!

Since we are still getting snow, I thought it would be a great time to pull out this adorable “Seally for You” Pairables digi set from Digi Doodle Studios and make some cards:

Vicki-DDSSeallyforYou (2)

For my first card, I’ve arranged the images from the set and printed it out.  You may recognize the balloon floating in the air which is another digital image that came from the DDS Little Ones Pairables set.  (So don’t forget that you can always mix sets together to come up with some really fun scenes!)

To finish out the scene, I’ve used some masking paper and ripped up pieces of scrap paper to create the “hills” in the background along with the “water” that the seal is taking a ride on over a piece of ice.  I used some blender brushes to blend the colors for the background.

I’ve used some liquid glue around the edges of this panel and covered it with some glitter.  I printed out the sentiment from the set separately over a piece of colored cardstock and cut it out for the banner.

Since I was trying to keep this a “wintry” style card, I kept the colors more blue and purple.  I found some fun papers in my stash that worked for a fun birthday theme and then I used an embossing folder and embossed that strip of Prism paper in the center that I’ve placed the ribbon over and added the bow.  Lastly, I’ve added the heart sequins and covered the balloon and ice images with a glitter brush pen.

Vicki-DDSSeallyforYou-close (2)

Here’s a closer look at the coloring on this cute little seal as well as all of the shimmer and sparkle everywhere!  I’ve used a white gel pen for his cheeks, eyes and for lines on the water.

“Seally Me”….I’m always forgetting a birthday here and there!  LOL!  Which I guess is why I’ve decided to create another card:

Vicki-DDSSeallyBday

For this card, I’ve kept it pretty much the same in a more simplified way with less layers and details.

As you can see, I’ve printed out the scene panel with just the seal on the ice platform and then I’ve used blender brushes here again to just give the “water” a bit of color that fades out towards the center of the panel.  I printed out the “icebergs” and sentiment separately and then cut them out to place over the design.

I’ve also used a MFT balloon die to cut out with black and turquoise glitter paper and popped that up along with the “icebergs” over the panel.  Lastly I’ve added some sequins.

Vicki-DDSSeallyBday-close

Here’s a closer view of the coloring on this seal.  I’ve kept him the same colors, but for this one, it’s a bit softer in tones.  Again, I’ve used a white gel pen for this cheeks, eyes and water as well as a glitter brush pen over the icebergs and ice platform.

I honestly am not sure which one I like better than the other, but that seal is cute regardless and that face might help me “get away” with being late for a birthday when I send it along! LOL!

Really hope that you’ve enjoyed my cards or have been inspired in some way!  Still struggling with no MOJO, but trying to work through it and hopefully it’ll miss me and want to come back soon!  Until then, I will keep trying to create through it.

Thanks so much for stopping in and I’ll see you soon!

Challenges I’d like to enter:

  1.  Di’s Digi Challenge – Use a Digi Image
  2. Papercraft– #55 Winter Fun
  3. Createful Heart Design – #17 Anything Goes
  4. Jan’s Digi Stamps– #8 Anything Goes
  5. The House That Stamps Built – F1920 Winter Color Palette
  6. Aud Sentiments – #245 Anything Goes + Sentiment
  7. Penny’s Paper-Crafty – #465 Anything Goes