The “Power of Practice” Blog Hop

Hello friends! I’m so excited to be sharing a special collaboration blog hop with my fellow crafty friends collab FB group as we share our own personal progression on how practice over time can help to increase your confidence and skills within your crafting journey.

So please grab your favorite beverage and join us in this fun and informative blog hop that shows how “the power of practice” can be utilized in your own crafting! (highlights are done in red.)

  • I would like to start off by stating each person’s experience is their own journey and will run on it’s own pace which is something that we all need to be aware of and patient with.  Some particular skills will take much longer to grasp than others and you need to take it easy on yourself without harsh judgement.  Just enjoy the process and have fun with it!  (That was and still is the hardest thing for me to learn.)

Although I’ve been paper crafting for the last 20 years or so, I’ve been involved in several different crafts throughout my entire childhood or since I could hold a crayon in my hand!  My grandmother as well as my mother has passed down their experience with crafts which I learned from and picked up many others along the way including what I love today.  So some things I do may already come naturally for me without recognizing where it came from because it was taught to me long ago.  There are some things, however, that I’ve had to spend the time learning.

Now taking classes aren’t the ONLY way to learn something for sure!  Good ole “Trial and Error” are great for learning and gaining personal experience from…which I tend to learn the most from actually!😁  Another thing that helps is new tools/products to help make the process easier or look more “finished” or “professional” in nature.  When I first started with my stamps, there was not a common heat tool for instance.  I had to heat emboss over a stove!  So times have changed as well as techniques and inspiration. Inspiration is EVERYWHERE over the Internet too!  Many people have so many clever ideas…I wish I could keep up with them all!  Some things may not be of interest to you and others may intrigue or intimidate you.  Find what interests you the MOST..at the time…and work on it because you will love learning about it which means you will gain more knowledge from it.  You don’t have to share with others what you do as long as YOU enjoy what you’re doing.  Do what feels right to you and your journey.  It’s never about others, it’s about YOU!

I feel like I could write an entire book on just this matter, but since this is a visual craft, it’s better to “see” with your eyes sometimes or show how things can come together…or not!🤨

I’m starting with a photo of a card I had made back in 2007 when I had already been a year into having a blog and was still a Stampin’ Up! demonstrator at the time.  Even the technology of simply taking a photograph has improved tremendously over the years…

Neighborhood_by_basement_stamper

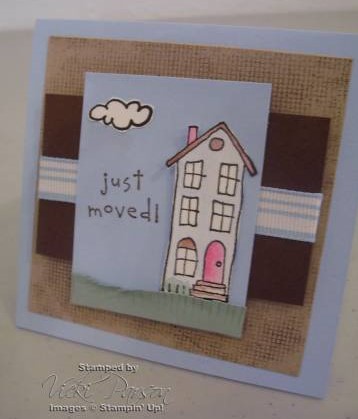
I no longer have most of the products used here and I had to lift the photo from my Splitcoaststampers gallery as they have stored my oldest photos I have anywhere.  This was the first place that I shared anything I made online. (There are 124 pages of my gallery and if you look through, you will see the progression over time.)


Now I could really criticize myself and pick this all apart, but it was part of my process at the time.  And at that time, I was happy with it.  It looks like I’ve colored with ink pads and a blender pen, cut out the images with scissors as well as cut fringes of the grass border. (tools have improved since and many purchases have been made as well!😊)    As we move forward, I can share how I updated that design today:

Vicki-CraftyChefs and POPhop

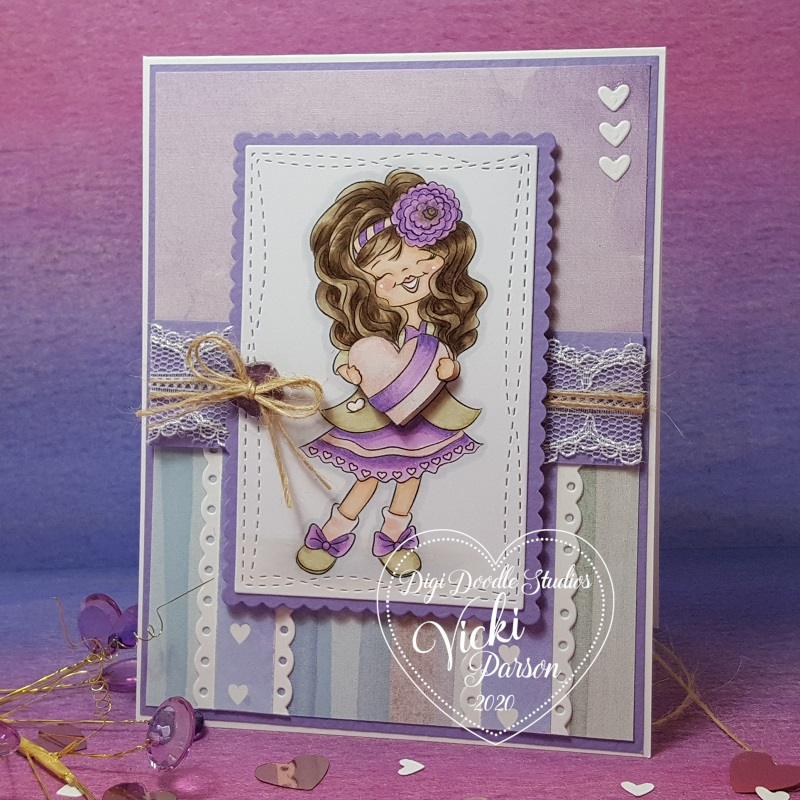
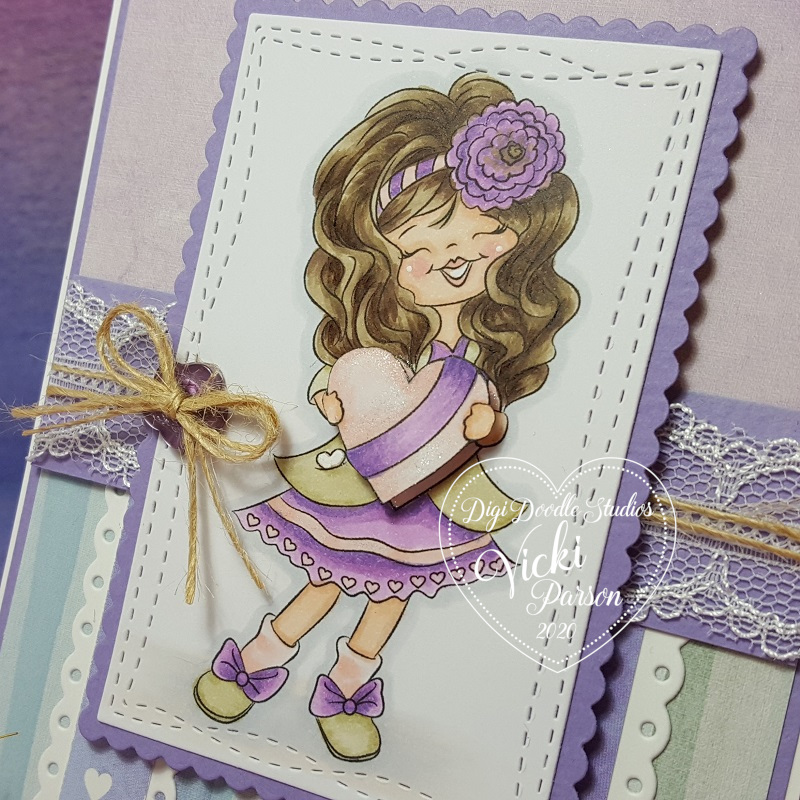
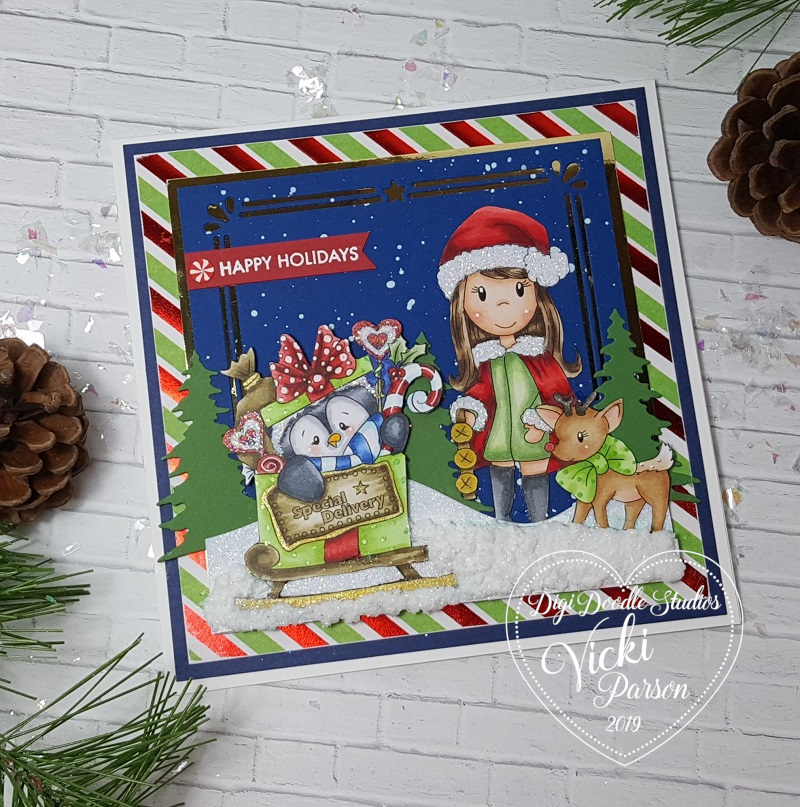
What I have decided to do was to take the photo of the older card above and make an updated version of the same design, but with the mindset and techniques that I’ve learned since.  You can see that my coloring has improved as well as the different tools and items that have been updated to help with my design execution.  I still used similar colors, similar layout design as well as coloring an image, but just maybe updated the look from the practicing of not just the coloring over time, but the practice of just cutting the layers and putting things together as compared to years past.  Just meerily putting together card after card has helped me with the practice and made me better aware.  So you can see how just putting together a card in general, with practice, can help improve skills!

  • Another tip I find helpful is to join your fellow crafty friends in groups and collaborations like this blog hop as well as other groups which is what I’ve also made this card for, called “The Crafty Chefs“, where we take turns coming up with a new “recipe” to follow each month.  There’s no pressure, just a group of friends coming together, learning from each other through challenges, and inspiring one another as we enjoy our love of crafting!  For me, this is a huge deal.  Check out the link above if you’re interested in joining with us!  It’s still fun to craft, but it’s even better when it’s shared with someone.  So here’s the September Crafty Chef’s recipe that our head chef Linda has come up with for us to use.


(I have used ALL of the “must do” items and then added a couple of pearls from the “can do” items.)

I have found that within the last several years, many people enjoy watching video tutorials on You Tube..which makes sense because seeing someone actually doing something or putting something together is a better way to learn rather than just seeing a finished photo of a project.  So to see how I’ve made my latest card for my son’s birthday, check it out below or CLICK HERE to view on my You Tube channel:

Hopefully through the video you were able to learn a few things that you can incorporate into your own card making.  Sometimes we can improve upon ourselves by even trying to recreate something we’ve done in the past and add some new things you’ve learned along the way.  It’s a great way to see how far you’ve come along and not be so critical of yourself to remind you that you are always learning, as I still am right now as well.

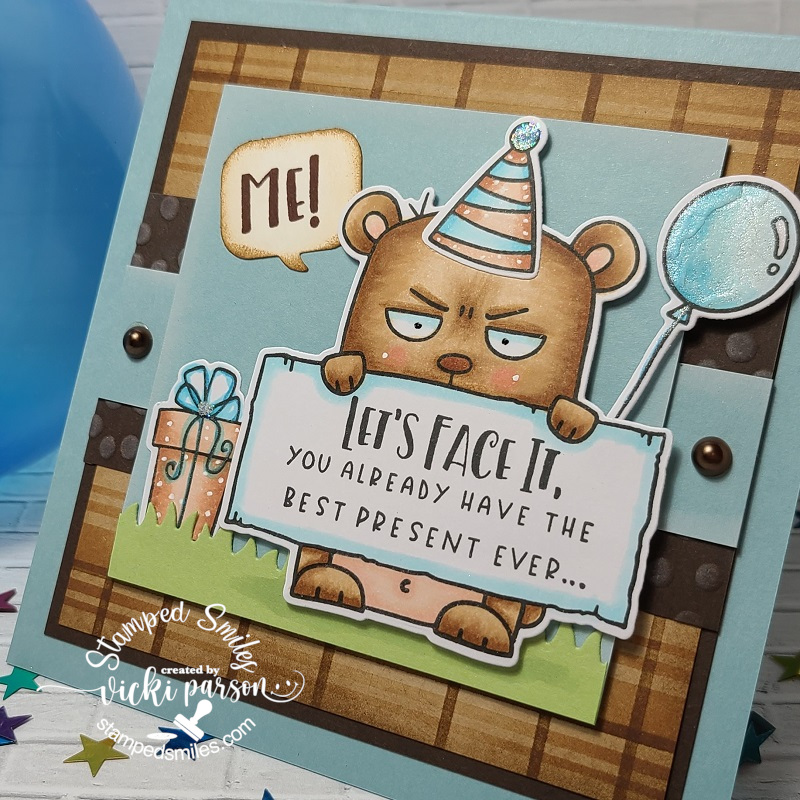
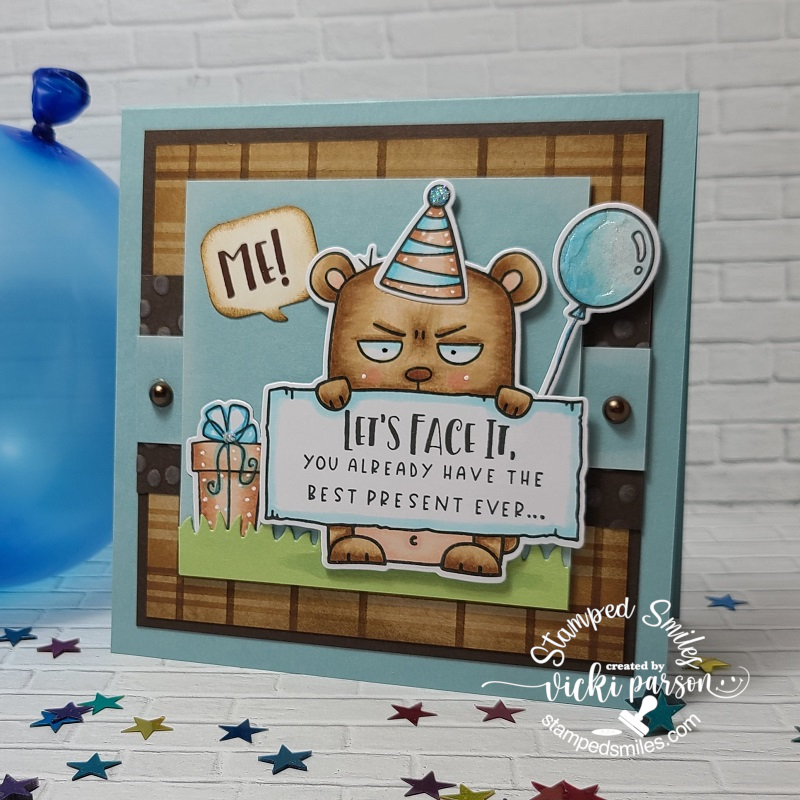
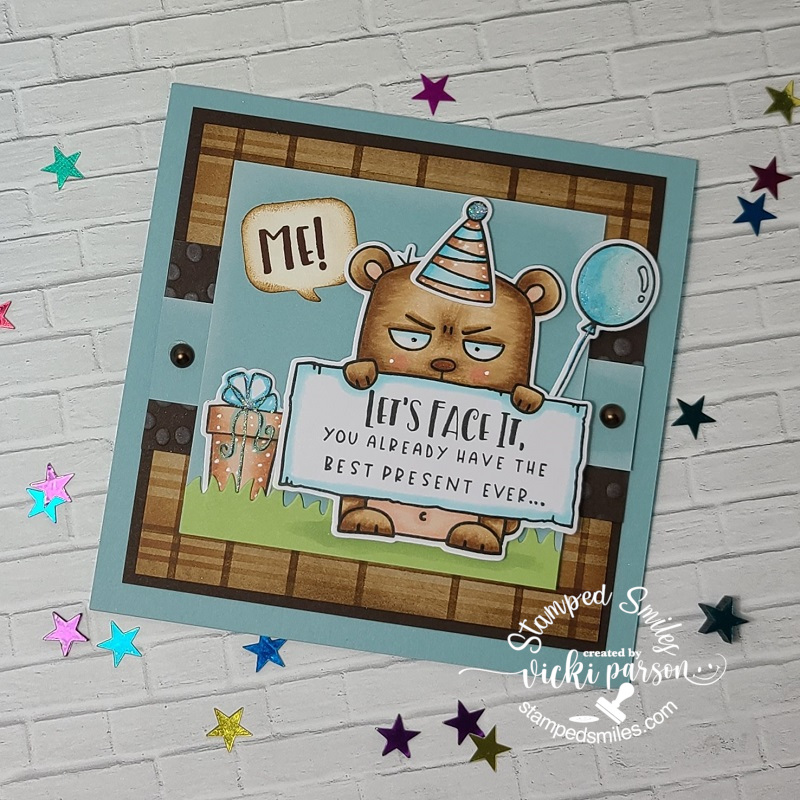
I have to chuckle at this card for my son’s birthday as he is a fun-loving jokester that will appreciate this along with the fact that it’s a bear image.  He was nicknamed “Bear” in his school years, so I thought these Big Grumpy products from Taylored Expressions would work perfectly for this!  I’ve also used the Big Grumpy Birthday stamps to go with him along with the other products used in my video above.

For the sparkle, I’ve taken some Stickles Star Dust glitter and added to the birthday hat as well as the center of the bow in the present.  I used a glitter brush pen over the balloon and bow.  I added dots to his cheeks, hat and the present with a white gel pen.  I forgot to mention in the video that I’ve added a couple of brown pearls to the blue strip so that I added something from the “can do” list for the Crafty Chefs recipe!😉

I really hope that this post was helpful as well as enjoyable for you and that you received some benefit for taking the time to read over it.  I know that I will be looking forward to seeing what my other crafty friends have to share and inspire me with!  I think there is something to learn from everyone no matter how long you’ve been doing it.  

  • The power of practice simply means, to me, being able to refine your skills into something that you want to be better at, take in more information or take it to the limits of your ability.  This is done by repeating often and over time to increase or add to your knowledge of what you’re trying to improve upon. If we are not trying new things, then we are not learning or growing as individuals.

Thanks so much for stopping by my friends and I’ll be seeing you again soon!

Challenges:

  1. Inkspirational – Birthday Photo
  2. Crafty Friends – Anything Goes
  3. Crafty Calendar – Anything Goes
  4. Lil Patch of Crafty Friends – Anything Goes
  5. Dragonfly Dreams – Happy Birthday Traci!
  6. The Corrosive Challenge – #9 Sept Anything Goes
  7. Creative Moments – #198 Anything Goes optional:  Make it Funny
  8. AAA Birthday – #17 Animals & Critters
  9. Creative Craft Cottage Include and Animal
  10. Simon Says Stamp Wednesday Challenge – Humorous/Fun Card

Purple Day Blog Hop For Epilepsy Awareness

Hello my friends!  Today starts the annual “Purple Day” blog hop and I have joined with my friend Fiki to help bring awareness about epilepsy.

Please take a moment and read important information about this special day:

Purple Day is a global grassroots event formed with the intention to increase worldwide awareness of epilepsy, and to dispel common myths and fears of this neurological disorder. Further intentions of this movement are to reduce the social stigmas commonly endured by many individuals afflicted with the condition; to provide assurance and advocacy to those living with epilepsy that they are not alone in their ongoing endurance; and to initiate individuals living with the condition to take action in their communities to achieve these aims.

The day occurs annually on March 26.  To read more about epilepsy or how you can help in the U.S., check out the Epilepsy Foundation’s website.

My card inspiration:

Vicki-DDS-purplebloghop

Isn’t she just the sweetest little girl with her big heart?!  So delighted, of course, to have been provided this darling image from Digi Doodle Studios which is one of the sponsors for our blog hop today!  This image is called Sweet Carlina and I’ve got her colored up in purples and pinks.  She has a little white heart tucked in her jacket pocket to go with the white hearts on my design.

I found some pretty purplish decorative papers from a recent card kit I had and then I just followed along with a sketch to complete my design. (See challenges below.)  After coloring her out, I’ve cut her out with a MFT Wonky Stitch rectangle die and then layered with a purple cardstock layer cut out with a MFT Scallop Stitch rectangle die.  I popped it up with craft foam over strips of lace, twine and accents I’ve created with the papers.  I’ve used a LF scallop border die to cut accents to go with my heart paper strips.  Extra hearts left over were used in the top corner.  I also added a purple flower button with twine to finish it off.

Vicki-DDSpurplebloghop-close

Here’s a closer view of the coloring I’ve done on her with my Copic markers.  I’ve used white gel pen to dot her checks and color the heart in her pocket.  You can barely see the shimmer that I’ve done over the heart she’s holding with a glitter brush pen.

You’ll also notice that I’ve printed out this image twice, fussy cut out just the portion of the heart she’s holding along with her hands and popped it out over the colored image to give it some depth.

Vicki-DDSpurplebloghop-flat

I hope you’ve enjoyed my inspiration for the blog hop!  I sure enjoyed creating it and helping to give support to my friend along with creating awareness for epilepsy!

Challenges:

  1. Time OutPurple (helping to support epilepsy awareness with us!)
  2.  Sketch Saturday – sketch #602
  3. Pammie’s Inky Pinkies – PIP2012 Anything Goes
  4. Arty Divas – #18 Anything Goes
  5. Through the Craft Room Door – Anything Goes
  6. Simon Says Stamp Wednesday – Anything Goes
  7. The House That Stamps Built – M2520

Turner Syndrome Awareness Blog Hop

Hello friends!

February is TSA month and If you’re not familiar with this, please read about it below:

Turner Syndrome is a genetic disorder where a female is born with only one X chromosome, instead of two, leaving her with life-long medical issues and learning disabilities. This condition occurs one in 2,500 female births worldwide, but is more common among pregnancies that do not survive to full term. That is why Turner Syndrome Females are considered MIRACLES!

My TS related project is inspired by the TSA official color board:

For my project, I have combined two different digital sets that were kindly made especially for this blog hop and the TSA cause:

Vicki-JansDigi-TSAbloghop

I was really inspired by the wonderful colors along with the images from the inspirational board above, but it was fairly easy since the images were already pre-colored in the set to create with!

I’ve used the TSF Key digital set from Jan’s Digi Stamps for the images on my card.  Also what’s cool about this set is that all of the proceeds from this set go directly to the Turner Syndrome Foundation!  It’s a stunning set to have plus a great way to help with a terrific cause too!

I have printed out the images over a piece of white cardstock and cut them out.  I also added one of the images in a repeat pattern to print out over a piece of green cardstock for a decorative strip on the background of my card design.

I took an embossing folder and embossed only the top portion of my card base, added the green printed strip with ribbon wrapped around it and sponged the edges.  I layered some pink cardstock and cut a scallop square piece of lavender colored cardstock for behind my vanilla panel and popped it up over the card base with foam tape.

Lastly, I’ve attached the bow, button and twine to the side of the image panel and attached the cut-out butterfly to the top corner of the image panel.  I glued only the center portion of the butterfly so that I could pop out the wings.

Vicki-JansDigi-TSAbloghop-close

Here’s a closer view of the images.  I’ve used a Copic marker on the vanilla-colored panel to create a “shadow” around the key image and then I attached the cut-out key over top of that.  I’ve used the same Copic marker for a few more shadows around the key.  For that butterfly, I’ve used a glitter gel pen to color portions of the butterfly and then a clear glitter brush pen to go over the wings.

You can see that TSA symbol on the key which is the same image used for the green background panel I created on the computer.

Vicki-JansDigi-TSAbloghop-flat

I hope you’ve enjoyed my card today!

Thank you so much for stopping by!

Challenges I’d like to enter my card for:

  1.  Jan’s Digi Stamps Challenge Anything Goes
  2. Pammie’s Inky Pinkies – PIP2004 Anything Goes
  3. Arty Divas – #14 Anything Goes
  4. Through the Craft Room Door – Anything Goes
  5. Allsorts – A Touch Vintage

DDS and PND Collaboration Blog Hop is Here!

Hello friends!  Today is the “special day” of our really fun and festive Collaboration Blog Hop!  Hope you will be joining along with us for lots of inspiration and prizes!  Woohoo!

MY HOLIDAY HOP PROJECT:

I am on the Digi Doodle Studios Design team and here is my interpretation of combining each companies’ images together to come up with this fun snow scene for the Holidays:

Vicki-DDSandPND blog hop

For my card here I have taken the Digi Doodle Studios Penguin Wobbles Special Delivery digital stamp along with the Paper Nest Dolls Holiday Friends digital stamp and printed them out over a piece of Copic Blending Card.  I’ve colored them up and fussy cut them out for my scene here.

To create the scene, I’ve used some blue cardstock for the background and splattered some watered down gesso over it and then used a die cut to create the fun frame within it.  I layered it over a piece of gold cardstock so it shows through.  I also die cut some snowy hills with white glitter cardstock and some pine trees with green cardstock.

I arranged them over my blue cardstock panel  and created the scene.  I popped up the front layer of snow hill along with the penguin image with foam tape.  I covered this snow hill layer with some texture snow paste…it’s so glittery!!  I also added some more glittery details here and there on the images too.

I white heat embossed the sentiment and placed a peppermint candy embellishment next to it and attached the strip over the blue background.  I then mounted this entire scene layer over some fun and festive foiled striped papers and then onto another blue piece which was then mounted over a top folding white 5.5″ square card base.

Vicki-DDSandPND blog hop-close

Here’s a bit of a closer look at the images and how I’ve colored them up with Copic markers.  You can see that I’ve used my white gel pen for details on the bow in the present along with the shinny look on the candy cane and the cheeks of all the images.  I’ve added a few dots on the deer’s back tail too.

I’ve used a gold gel pen to color in the sleigh runner, the band around the gift sack, the “lettering and dots” on the penguin’s sign as well as the bells the little girl is holding.  I used a red gel pen to color in the little deer’s nose.  I’ve used a green gel pen to create “dots” on the penguin’s present and the deer’s bow.

I’ve also added some glitter to the heart candies and the girl’s outfit trim.

You can also see just how puffy and dimensional that snow is too! It’s really glittery and was so fun to add to the scene!  It looks like they’re gearing up to deliver some presents and the cute little Mr. Penguin Wobbles is all loaded and ready to go! LOL!

Vicki-DDSandPND blog hop-flat

I really hope that you’ve enjoyed my card today and have been inspired with it in some way to get you into the festive Holiday spirit!

Thanks so much for stopping in today my friends!

Challenges:

  1.  Stamping Sensations– Dec Anything Goes
  2. Love to Craft – LTCCB41 – Dec Anything Goes
  3. Lil Patch of Crafty Friends – Anything Goes
  4. Shopping Our Stash– Happy Holidays!
  5. Crafting By Designs – Dec Anything goes
  6. The Paper Funday – Dec Anything Goes with optional twist:  Christmas Holiday
  7. Winter Wonderland – Anything Christmas Goes