Sparkles Monthly Challenge-Things with Wings

Hello friends!  I hope you’ve had a lovely Mother’s Day weekend and are enjoying the month of May so far!  I look forward to seeing those beautiful blooms and digging in the garden! 

Today starts a brand new challenge over at the Sparkles Monthly Challenge and the theme is “Things with Wings“!  This is a good one as there’s several ways to interpret it!  Be sure to check out the blog to see what the design team has come up with for inspiration!  Speaking of design team, Caz is looking to add to the team, so be sure to check out the details if you would be interested in joining.  Here’s what I’ve made for the challenge this month:

I thought the butterfly from this Taylored Expressions stamp set called Endless Joy would be so fun to color and use for this challenge.  They were stamped with Copic markers and cut out with the coordinating dies.

For the background, I’ve taken the rectangle masking stencil and blended some blue ink over the center and then I’ve added an additional stencil over top of it and blended bluer to get the pattern.  I then added some raw umber paint and opaque white Copic to splatter over top of it.  I cut out a stitched frame and added it over the blended area.

I added the flowers and butterfly to the card by gluing and popping out the smaller flower as well as the wings on the butterfly.  The sentiment was gold foiled and cut out with a coordinating die that was glued at the top.  I added some highlights on the butterfly with a white gel pen and added some Stickles glitter to the center of the flowers.  The white panel was attached to a top folding A2 white card base.

I hope that you have enjoyed my card today!  I hope that you will stop into the challenge and play along with us this month!  Looking forward to seeing the gallery of wings!!

Have an amazing day and see you again soon!

Challenges I’d like to enter this card for:

  1. Four Seasons – Spring Season
  2. Triple B (Birds, Blooms &/or Butterflies) – Spring 
  3. Love to Scrap – Anything Goes
  4. Unicorn – Flowers
  5. Crafty Animals – Anything Goes + animal
  6. Critter Crazy – Anything Goes + featured critter
  7. Fab ‘n’ Funky – Things with Wings
  8. The Crafty Addicts – Anything Goes

Pray Until Something Happens With Inky Stamper

Hello friends!  How is your Summer going?  It seems like it is really flying by for me!  After getting back from the wedding, I have a PILE of things to get finished up, literally!  I signed up for classes knowing that I couldn’t participate during the class time, but figured I would finish them up on my own, so along with doing that I’ve decided to also throw in a current challenge project as well and share that today:

So, this cute little fella came from Inky Stamper called Praying Mantis, of course.  The challenge for the month of July in the Inky Stamper Inkspiration FB Group calls for “watercolor” of any kind and so I pulled out my Zig CC Real Brush markers to color him with, cut him out with the coordinating die and even added a bit of the Liquid Pixie Dust on his wing.

For the watercolor on the background, I’ve used an Inky Stamper Watercolor Panel and ran a few different colored Distress Oxide ink pads over it without touching the colors.  I then spritzed it with water to saturate and let the colors run together over it.  I picked up any extras on my glass mat to completely cover the panel and then I took the Picket Fence Geo Squares Stencil and laid it over top while it was wet, pressed it in and let it just sit until it was dry. I picked up the stencil that had dried ink on it, spritzed it with water and turned the stencil the other way with the ink on it and pressed it onto the panel again and let it dry.  This is how the darker ink color showed up on the lighter end.  I took some green and black watercolor to spritz over top.  Really fun background to play with!

I then white heat embossed a sentiment over a black strip and attached it to the bottom portion of the background and then die cut the panel with a double-stitched rectangle die.  I used foam squares to pop up the bug and wrapped some Doodlebug Limeade Twine under the sentiment.  This panel was layered over a black piece which was attached to a top folding A2 white card base.  I finished it with some Doodlebug rhinestones.

And continuing on with my “Inky Stamper projects”, There was an OOAK event a few days before I left.  I didn’t have time to do my projects during the time but finished them up when I returned.  We made this fun and unique fold design with a gorgeous butterfly and then of course the mini card to go along with it. 

For mine, I colored the butterfly with Copics, popped up the wings with foam tape and added some of that Liquid Pixie Dust which is hard to see in the photo.  Then for the mini card, I used some watercolor to color the hydrangea with.  The sentiment was white heat embossed.

Super fun projects as always! (I usually make my “mini card” into TWO ATCs, I just did the one so far here.)

And for my last set of “Inky Stamper projects”, this was for a special class Chelsea held during the time that I was gone.  Even though I wasn’t able to attend the fun and games with them live, I went ahead and purchased the kit anyway so I could watch the video at a later date to make all of these fun projects centered around this ADORABLE Sloth!

I pretty much followed along with the way the class projects were made.  I added some gold thread on the card in the back with the clocks so that it could hang from the sloth’s claw.  I added a glittery heart for the treat container for the sloth to hold as well.  The candy inside the container are slow pokes!! 😂   Super cute and fun projects to make!  I sort of treated myself to the candy while I was creating!

I also think that there were a few days where I could relate to the sloth too, but glad to get things done!

Really hope you’ve enjoyed my projects that I’ve shared today and are inspired in some way too!  Thanks so much for stopping in today…I’ll be sharing more soon! 😉

Challenges: (For top card only)

  1. Happy Little Stamper Watercolour – Anything Goes + watercolor
  2. Happy Little Stamper Stencil – Anything Goes + stencil
  3. Aud Sentiments – Anything Goes + sentiment
  4. As You Like It – Favorite warm/cool colors and why? (Always been attracted to the cool tones even as a child!)
  5. Krafty Chicks – Week 1: Stamp Act
  6. Crafty Catz Anything Goes
  7. Creative Fingers – #235 Anything Goes
  8. Colour Crazy Craft – Week 27: Anything Goes + coloring
  9. Pammie’s Inky Pinkies – PIP2228 Anything Goes

Triangle Corner Pop Up Card + video tutorial!

Today I’m sharing the Triangle Corner Pop Up Card.  I have actually received several messages and comments that people wanted to see a video tutorial on how to make one.  So I thought I would come up with a version that I could share to show the many different variations that you can come up with and the fun you can have with it!

Vcki-BMBeHappy-TriCornerPop-opened

This style is a much more elegant approach which is much different than a past creation I put together.  I love that you can change the look and have fun playing with different stamps and elements to fit inside the design!

For this one, I have taken the Rose and Butterfly stamp sets to stamp and Copic color.  I fussy cut out the images on my design.  I’ve used Jurassic 100# and White 100# cardstock.  The decorative paper is from the Rustic Florals paper pad.  I stenciled the bottom of the Jurassic panel with a stencil using some Unicorn Horn Glitter Glaze.  Both of the rose images along with the small heart circle on the easel card were popped up with some foam tape.

For the circle easel design, I’ve cut out a scallop circle with the white cardstock in the size that I thought would fit within the design.  Then cut the body of the card with other circle dies in the Jurassic cardstock and then the front with some more of that Rustic Florals paper that I’ve used in the background.  The sentiment below the butterfly and the hearts on the small circle were stamped from same stamp set.  All of the white panels (with the exception of the scallop circle) was ink foam blending with some grey distress ink.  To keep the card “locked” in this position, I’ve used the Mini Disc Magnets.

If you are interested in learning how to create one of these cards for yourself, then please be sure to check out my video below.  CLICK HERE to view on You Tube.

These cards can look really intimidating, but once you see the measurements of how to put one together, they’re really easy and fun to make!

Vicki-BMBeHappy-TriCornerPop-unfolded

Here’s what the card looks like completely opened up.  You can see on the left bottom panel that I’ve taken that rose from the stamp set again and stamped it in the corner with some grey ink after ink foam blending around the edges of it.  This will be the area that I’m leaving for a personal message.

To fold it down to a 4″ square card that’s close you will start by folding down on the top and then fold it over from the right side to the left.  This will completely close it up.

Vicki-BMBeHappy-TriCornerPop-front

Here you can see that the card is completely closed to a 4″ square size minus the rose leaves sticking out which I don’t mind.

I took another panel of the Jurassic cardstock for the front of the card and sponged around the edges of it with the white Ink and then also stamped the rose again in the corner of it.  Because I had several dimensional and extra layers on this card, I had to use a ribbon to tie it together to help it stay closed up.  You might need an envelope that is slightly larger than an A2 envelope, but if you use less layers and dimension, it should fit in an A2 size envelope.

Hope you’ve enjoyed my interactive card and tutorial today!  Thanks so much for dropping in with me! 

Challenges I’d like to enter this card for:

  1.  Cardz 4 Galz Wings
  2. Crafty Cardmakers – It’s a Bug’s Life
  3. Through the Craftroom Door – Anything Goes
  4. Try it On Tuesday – In my Garden there is….

Coming Up Flowers at Cute Card Thursday

Hello friends!  Welcome to Thursday!  We are already near Easter this weekend and it’s a great time to be thinking about flowers!  This is the new challenge this week over at Cute Card Thursday, so I hope you can join in the floral fun with us!

I decided to pull out some stamps that I received a few months ago by Repeat Impressions from a challenge win because they are ALL floral themed and I thought it would be perfect to work with for the challenge:

Vicki-CCT578-Flowers

To help with my design, I’ve used the tic-tac-toe board from the Repeat Impressions challenge.  I have used the Flower Power Background stamp and stamped it with white ink over a piece of vellum and then mounted it over a light purple piece of cardstock so that it was a bit more subtle looking, but yet still had the floral pattern.

I’ve also taken one of the stamps from the Beautiful Days Collection called “Daisies & Butterfly” and stamped it with waterproof ink over a piece of Bristol smooth watercolor cardstock.  After coloring it, I fussy cut the image and then die cut a scallop square layer to place behind it and then cut another layer of black cardstock to layer behind that.  I thought it really brought out the details of the image.  The butterfly was popped up with some foam squares.

Lastly, I’ve stamped a sentiment, did some paper piercing with a tool pick around the corners of the vellum layer and around the image layer.  All of these layers were mounted over an A2 sized top folding white card base.  I then took some clear “dew drops” and attached them over the front of the card.

Vicki-CCT578-flowers-close

Here’s a closer view of the watercolor I’ve done on the image.  I’ve used my Zig Clean Color Real Brush Markers and occasional help with a water brush to blend or soften up the colors as needed.  Hard to see, of course, but I’ve taken a glitter brush pen and went over the wings on the butterfly.  You can also see the details of the paper piercing that I’ve done on the vellum.

Vicki-CCT578-flowers-flat

I noticed that after I had stamped the sentiment with black ink, the white ink from the vellum showed through a bit.  I was going to layer something over it, but decided that I actually liked it that way, so left it.

I’m always out of sympathy cards when I need one, so this will be a nice one to have on hand for that.  Thanks so much for stopping in and I’ll see you again tomorrow!! 🙂

Challenges for this card:

  1.  Repeat Impressions – A1019 Tic-Tac-Toe
  2. Just Us Girls – Off the Edge
  3. Allsorts – Blossoms, Butterflies and/or Bugs
  4. The Creative Crafters – Anything Goes
  5. Simon Says Stamp Monday – Beautiful Blooms

2 Crafty Critter Crazies – You are my Happy

Hello friends!!  Happy April Fool’s Day! 🙂

Well, there’s “no fooling” here today as I bring you a post to share the creation, I’ve made for a new challenge over at the 2 Crafty Critter Crazies Challenge Blog!  Since it’s the first of April, we have a new challenge starting with the “Anything Goes + critter” theme in mind!  Hope you will join us with your critter creations!

We are being sponsored by Digi Doodle Studios and this is the card I made for the challenge this month:

Vicki-2CCC-DigiDoodle-Mia

Our sponsor was kind enough to share this very sweet image called Mia which I’ve used for my card today.  This is my first experience with these images, and I must say they have some really cute ones in their store, so hop on over and check them out!

I’ve colored her up with Copic markers including drawing extended lines for the grass and coloring it up all the way across and down.  I cut it out with a cross stitched rectangle die and then used a sun ray stencil to ink some yellow behind her by taping off the grass edge, so I didn’t get any on that part.  I then stamped the sentiment in black ink over top of that.

To continue on with the yellow color theme I’ve got going on, I cut out a piece of yellow glitter cardstock that was cut out with a scallop rectangle die (retired from Lawn Fawn) and attached it to the back of the image panel.  I took some plaid papers for the bottom portion of the A2 white top folding card base and then attached some yellow grosgrain ribbon across the top and then attached the image panel and then added a yellow ribbon bow along the edge.  Lastly, I finished it out with some yellow rhinestone crystals.

Vicki-2CCC-DigiDoodle-Mia-close

Here’s a closer look at the coloring I’ve done on the image.  I took a black gel pen to color in the eyeball’s circles.  I wasn’t sure how to go about coloring the eyes, but this is the way that made the most sense to me.  I also went around the edges of the butterfly with the black gel pen.  I took a glitter brush pen and went over the liquid in her cup.

Vicki-2CCC-DigiDoodle-Mia-flat

I have to add that this image really got me thinking about past memories with my sweet little Mocca and how we would go out on nice Spring days like this.  She certainly was always “my happy” for sure and I still miss her like crazy.  I’m sure any of you that have lost pets understand what I’m saying.   It’s great to have the memories we’ve shared after all this time!

Thanks so much for stopping by!  I appreciate it so much!

challenges:

  1.  Crafty Friends – Spring
  2. Crafty Gals Corner – Spring is Here!
  3. Krafty Chicks – Coffee, tea or hot cocoa
  4. As You Like It – Favorite Coloring medium – Copic Why?  It’s my favorite “go to” coloring method and I love the way the markers blend together for shading and highlight effects.
  5. Creative Knockouts – Outside Fun
  6. Allsorts – Use Yellow
  7. Digi Doodle Studios Challenge – #15 Anything Goes

“It’s a Girl Thing” TSA Inaugural Blog Hop!

Hello friends!  So happy you are here!
Welcome to the “It’s A Girl Thing” Turner Syndrome Awareness Inaugural Blog Hop!   Before I share my project with you, here is some important information regarding what this special blog hop is all about:
Turner Syndrome is a genetic disorder where a female is born with only one X chromosome, instead of two, leaving her with life-long medical issues and learning disabilities. This condition occurs one in 2,500 female births worldwide but is more common among pregnancies that do not survive to full term. That is why Turner Syndrome Females are considered MIRACLES!

Turner Syndrome and the Butterfly

The butterfly has become the symbol for “Turner Girls”. Just like a butterfly, they are considered fragile and beautiful miracles. Turner Syndrome may also cause a myriad of health complications, such as heart defects, learning disabilities and infertility, according to the Mayo Clinic. Sept 14, 2013.

Because it represents femininity, strength, and uniqueness, the butterfly was designated by TSSUS to become the Turner Syndrome symbol. “Butterflies fly on their own which is our hope for our girls.”

Vicki-TSAbloghop-ribbonsoflove

I have used this digital stamp set called “Ribbons of Love” I think it’s awesome that you can choose to use the pre-colored versions from the set which I have for my card here.  It’s a perfect set to have on hand in multiple-colored ribbons that can be used for any cause you like to support!  It also has some fantastic sentiments to go with it too!  The butterfly was perfect to use for this particular cause!

vicki-tsabloghop-ribbonsoflove-close

I have used some papers from my stash for the background and the colors all chosen from the TS color palette!  I printed out the image and sentiment together and die cut it with a stitched circle die.  For the circle glitter layer behind it, I cut out another cardstock circle layer with some Super Adhesive Sheets over it, peeled off the backing and sprinkled some Gecko MF glitter and burnished it in.  Added some blue ribbon with a bow over the papers, attached the circle layers, flowers and pearls.  I then took a clear glitter pen and went over the butterfly with it for more shimmer.  This was all mounted over a SU! Pacific Point 5×5″ top folding card base.

I hope you’ve enjoyed my card and it has inspired you in some way!  Thanks so much for dropping by and taking part in this blog hop with us!

I am happy to be donating this card along with a few others to Lori so that she can use them to help raise funds for this cause as well.

Challenges I’d like to support with this card:

  1.  Creative Fingers – #156 Anything Goes
  2. Pammies Inky Pinkies – PIP1904 – Anything Goes
  3. Tuesday Throwdown – Anything Goes

Stamp Convention Photos!

Hello friends!  Hope you had as great of a weekend as I did!  I came back Sunday evening from a wonderful stamp convention in Collinsville, IL and created, purchased, spent time with some amazing people too…it was so fun!  It was fun to talk to other stampers and just enjoy our time there!  I thought I’d share some of the fun I had with you!

First, I would like to say that I was honored to finally meet up with a wonderful blog friend who inspires me with her creative art, Patti from Cherish Each Precious Day.  I was so happy to actually see her in person and meeting her lovely friends as well!  I really wish I had remembered to take a snapshot with you though!

This was my first time in many years that I had actually even been to a stamp convention, and I really hope to go to another one again next year as we had such a great time!  I always love going and seeing demonstrations and make-n-takes from the vendors…so of course I had to take part in the fun and here are some of the cards that I made there:

OLYMPUS DIGITAL CAMERA

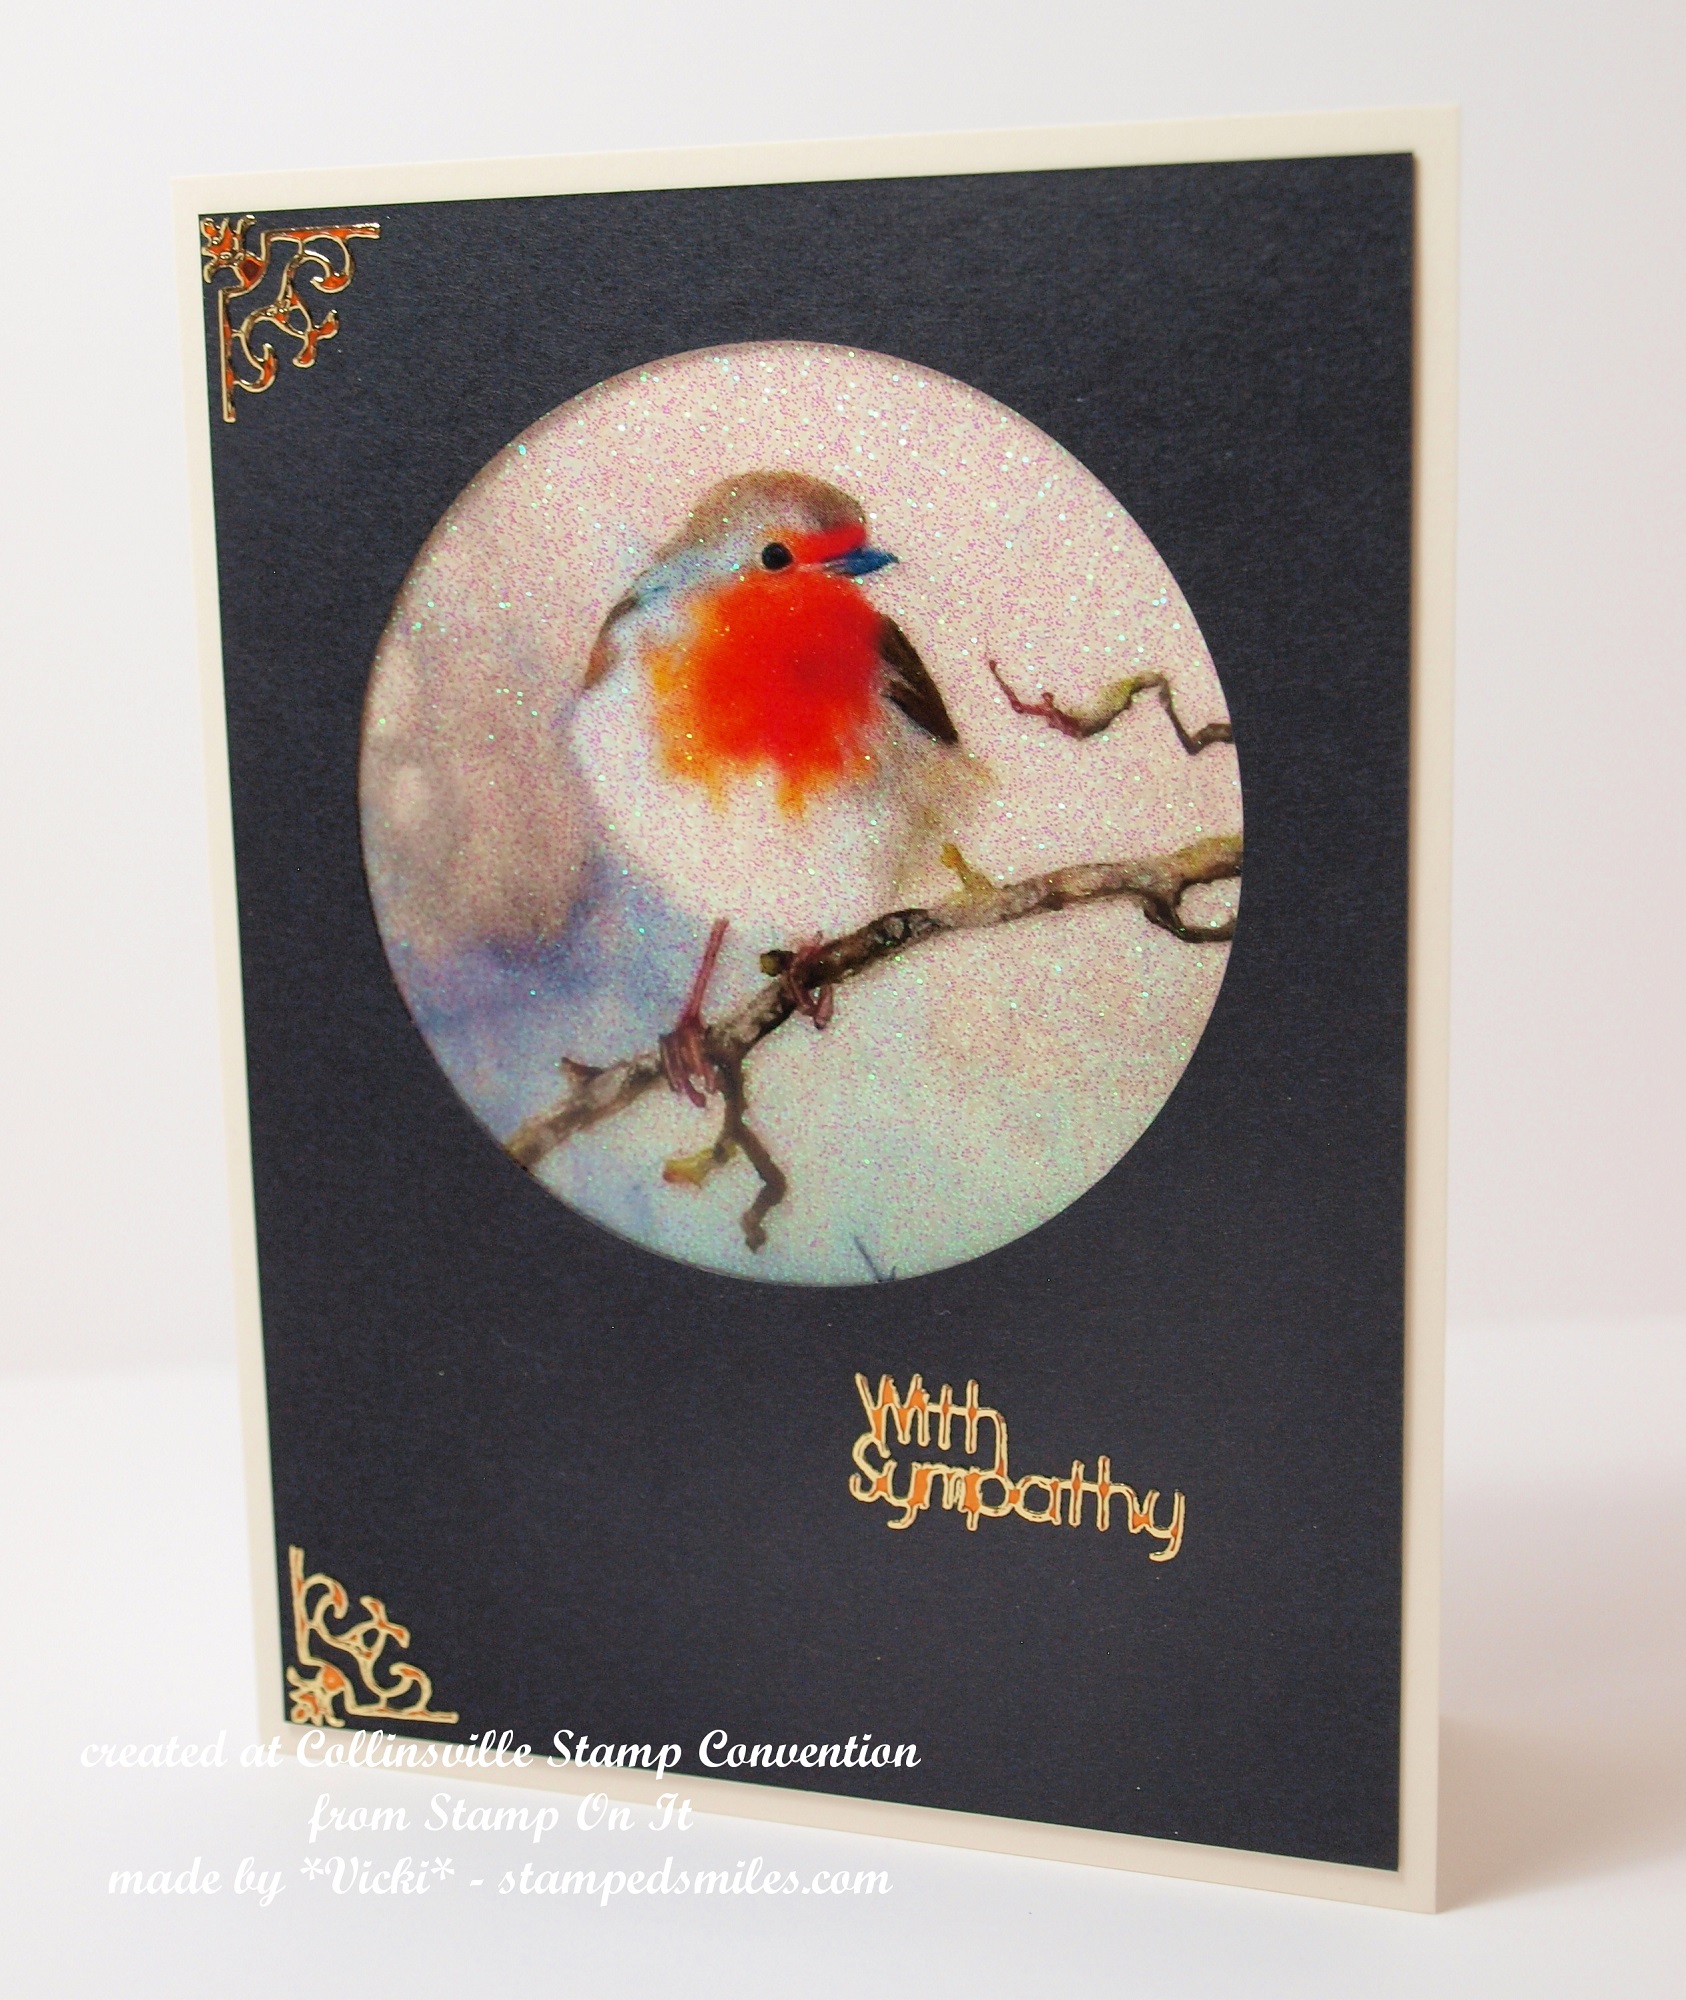
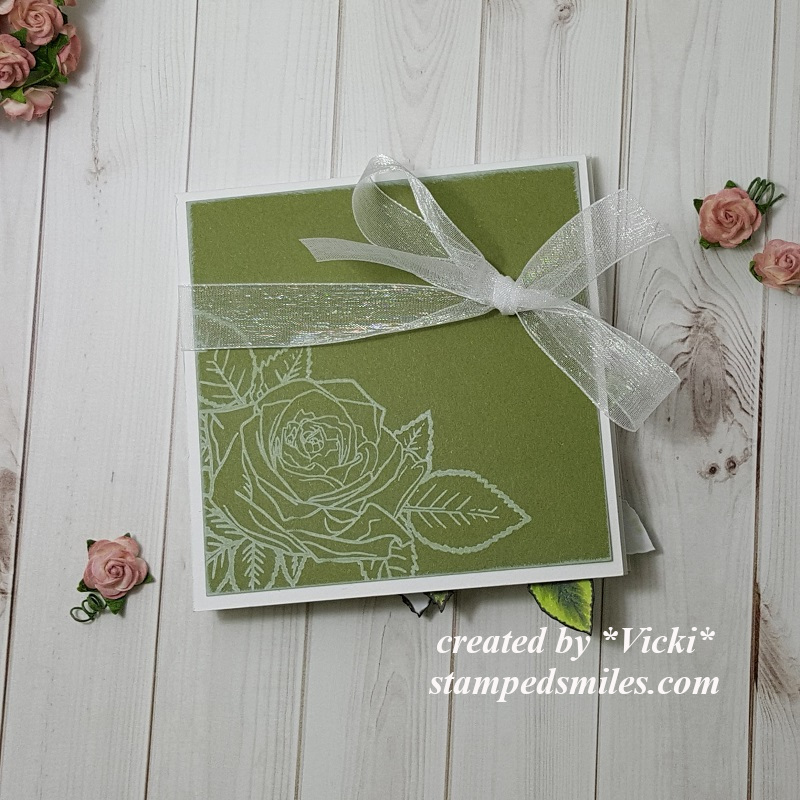
This was made from the Stamp On It vendor (Kim was the lady who taught the make-n-take) which sold these amazing kits with a variety of stunning images printed on acetate sheets.  You would use this sticky glitter adhesive to go over it and create this amazing look.  Of course, it’s much more stunning in person!

OLYMPUS DIGITAL CAMERA

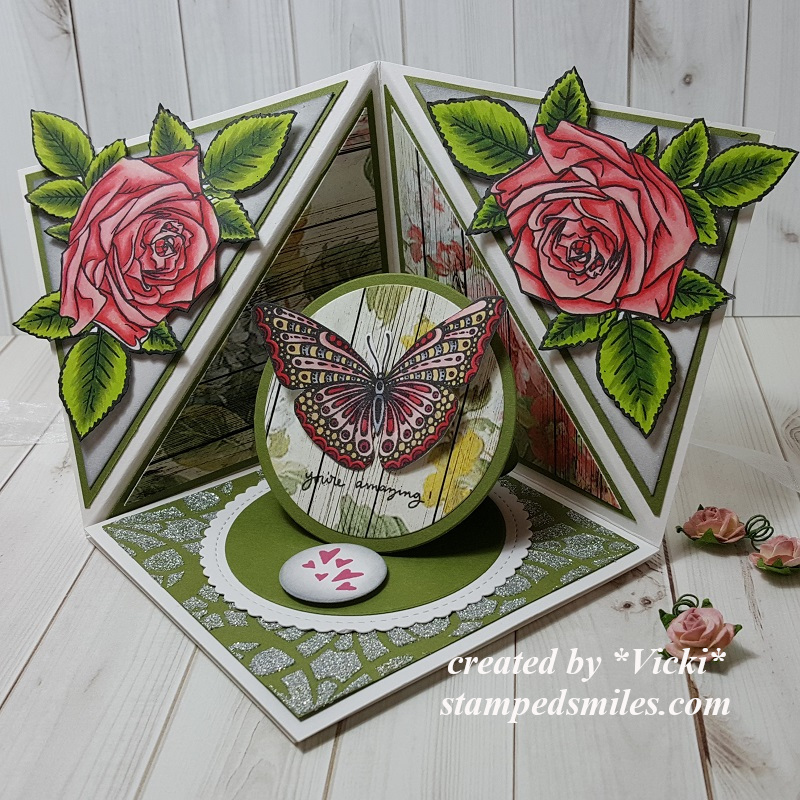
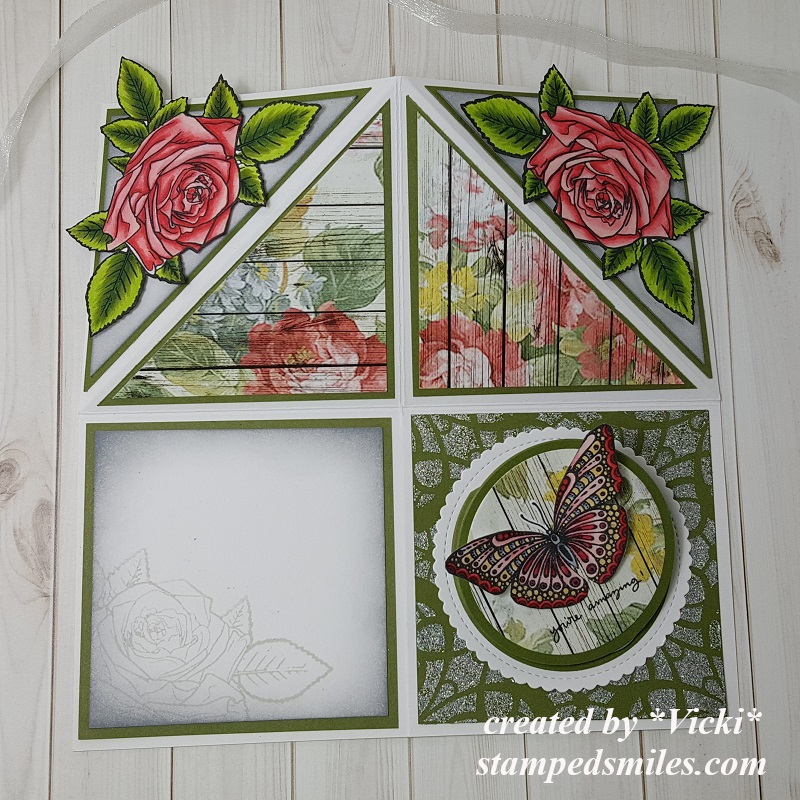
This make-n-take was made from the Rubber Cottage vendor.  I just fell in love with that gorgeous floral background image and bought it! 🙂  The lady that taught the make-n-take showed us a clever way of keeping the card protected while the stickles glitter dried.  Again, it’s so pretty and sparkly in person!

OLYMPUS DIGITAL CAMERA

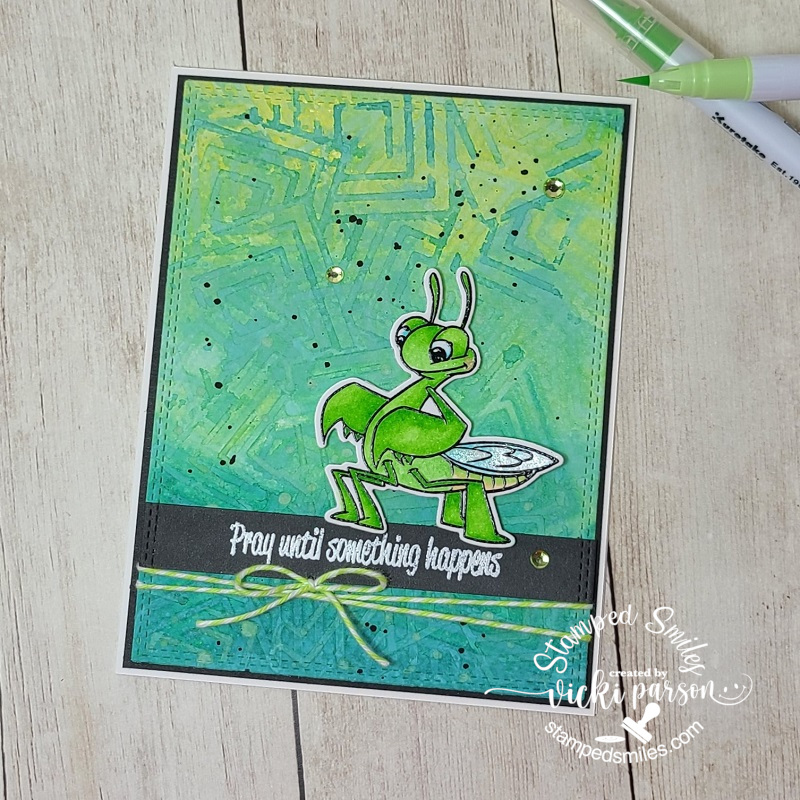
These fun designs were from the Marco’s Paper vendor.  The “Woohoo” card was created with Nuvo paste at the bottom corner and a strip of Nuvo glitter with score tape.

The other piece you see was something that was made using a gel press and oxide ink pads.  We just had fun playing around with it and got some great tips from the lady sharing it.  I have a gel plate but have yet to use it!  Hopefully I can pull it out soon and just play now that I’ve actually seen it in action! 🙂

OLYMPUS DIGITAL CAMERA

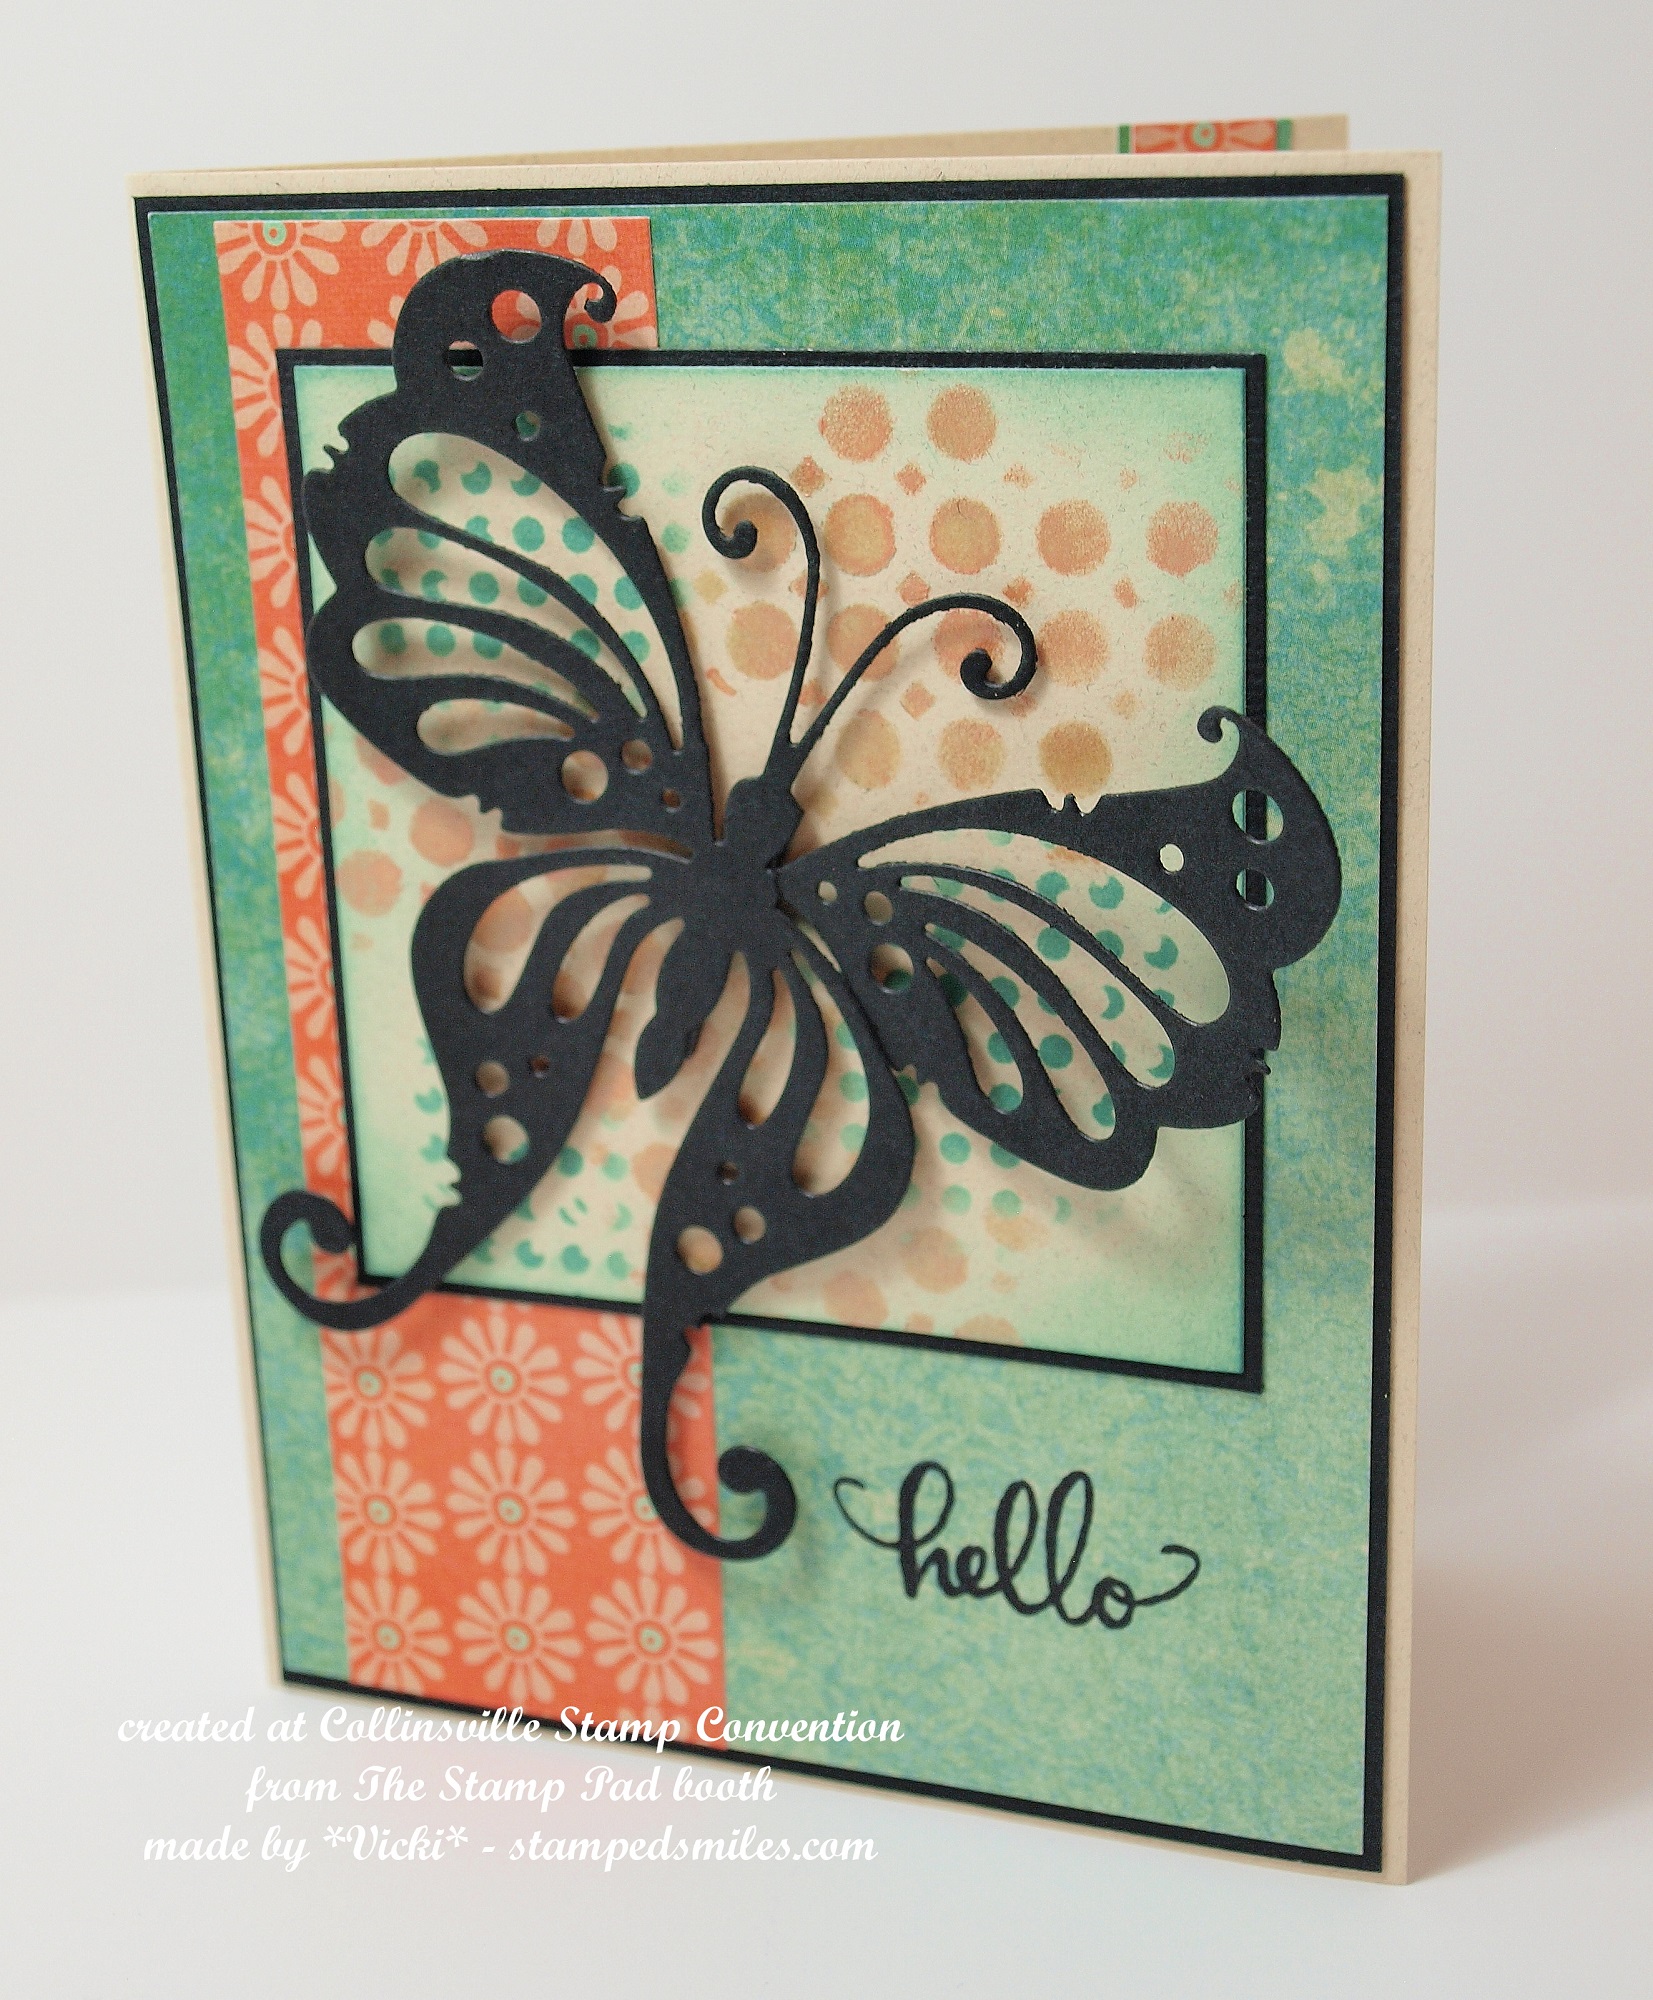
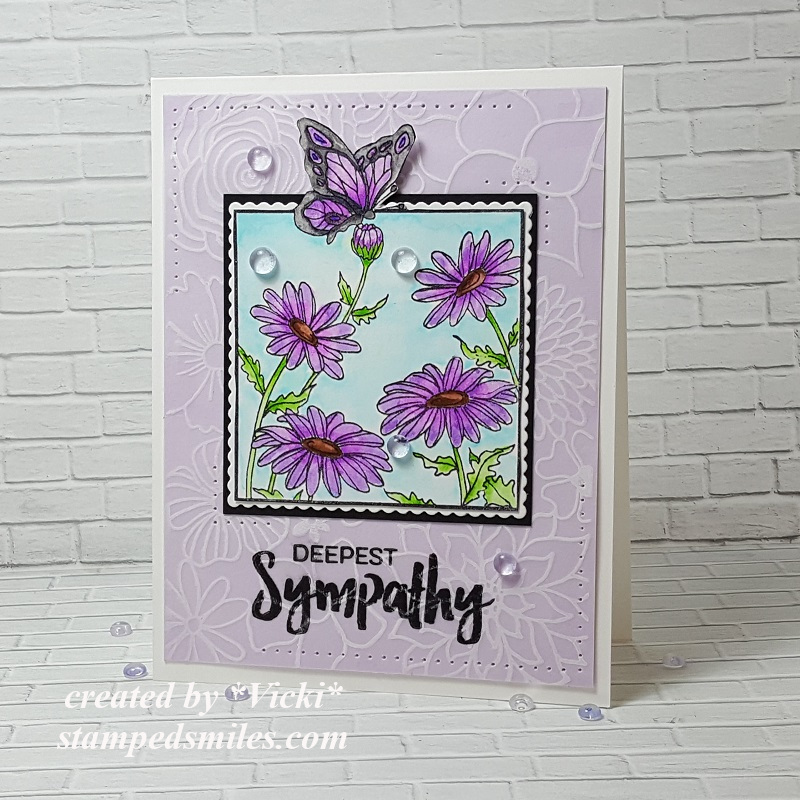
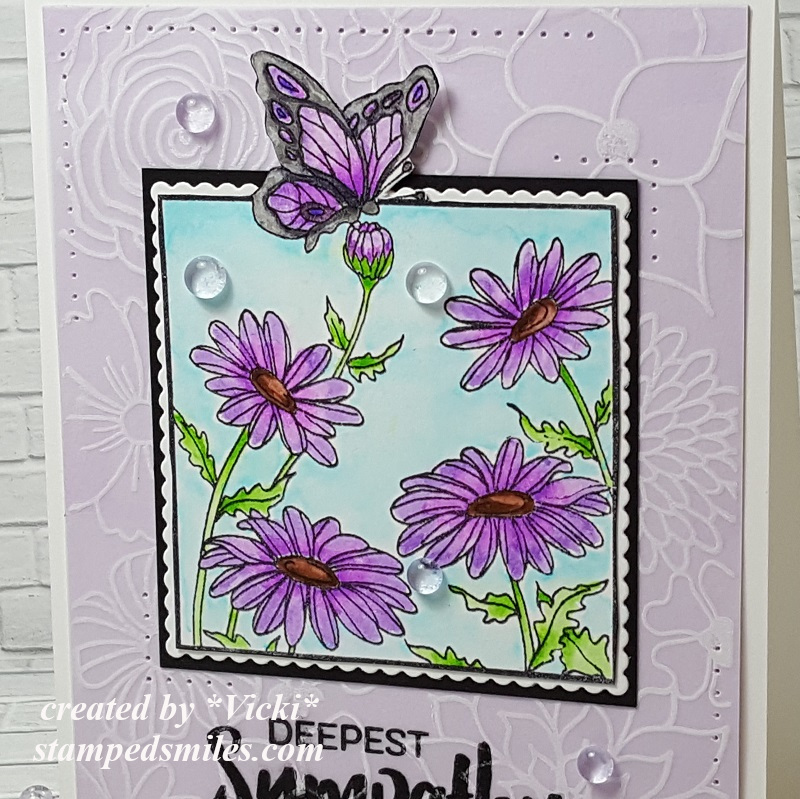
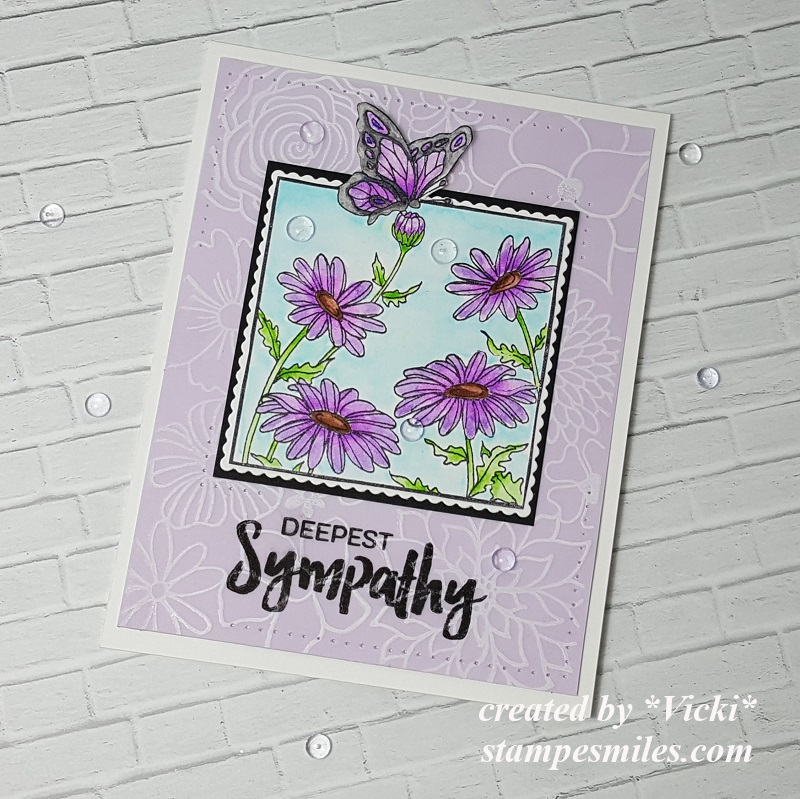
This card was made from The Stamp Pad vendor.  She does not have a website as of yet, but she is a store located in the small town of Kimmswick, MO.  I was talking with the owner, and she was explaining what a nice little town it was.

We used stencils with distress ink and Nuvo paste.  I thought the butterfly and papers were so pretty.  The sentiment was already previously stamped when given the kit.

OLYMPUS DIGITAL CAMERA

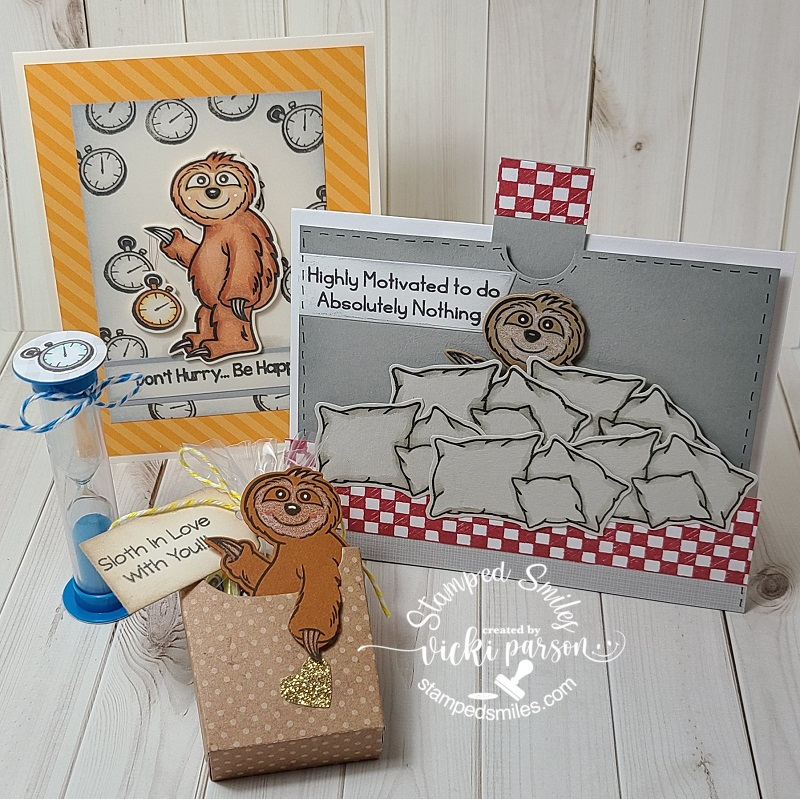
This card was made from the Taylored Expressions vendor (You can actually see another version of this card on the front of her website!).  From what I heard from others at the event, she was new to this stamp convention, and she seemed to be a very busy vendor there!  She had many different things going on with demos and several different make-n-takes.  I just loved her products, and you will see something below that I got there! 🙂

This card was just a matter of adding the decorative paper in the background and then placing the colored card stock popsicles over the already cut out border.  We stamped the sentiment using the MISTI, colored the popsicle sticks with a Copic marker and added the twine.  She even provided an envelope.  Taylor helped me with my bow! LOL!  When I got home, the only thing I did was add some sparkle with my Spectrum Noir glitter brush.

OLYMPUS DIGITAL CAMERA

Lastly, we created this alcohol inked background card from The Paper Cut vendor.  The lady there showed the different looks you get from dabbing verses twisting the applicator.  I twisted my background.  The frame was already die cut, but I ended up saving those tiny dots from the die and added them back onto it.  (We were provided with enough rhinestones for each dot in the sentiment as well as the corners.)  We used the alcohol inks to color the rhinestones in the corners and then we popped it up with foam tape.  An envelope was provided for this make-n-take too.

The stamp convention also held a card contest where you could make up two cards based on the theme provided for each day.  The themes for this year were Saturday:  “Ahoy Matey!” and Sunday:  “Time for a Nap”.  I decided to send in the limit which was two cards per theme.  Of course, silly me didn’t remember to take a photo of the cards BEFORE I mailed them off…so sorry about the quality, but I took photos on my phone of the cards that I made that were displayed:

Ahoy Matey contest pirate

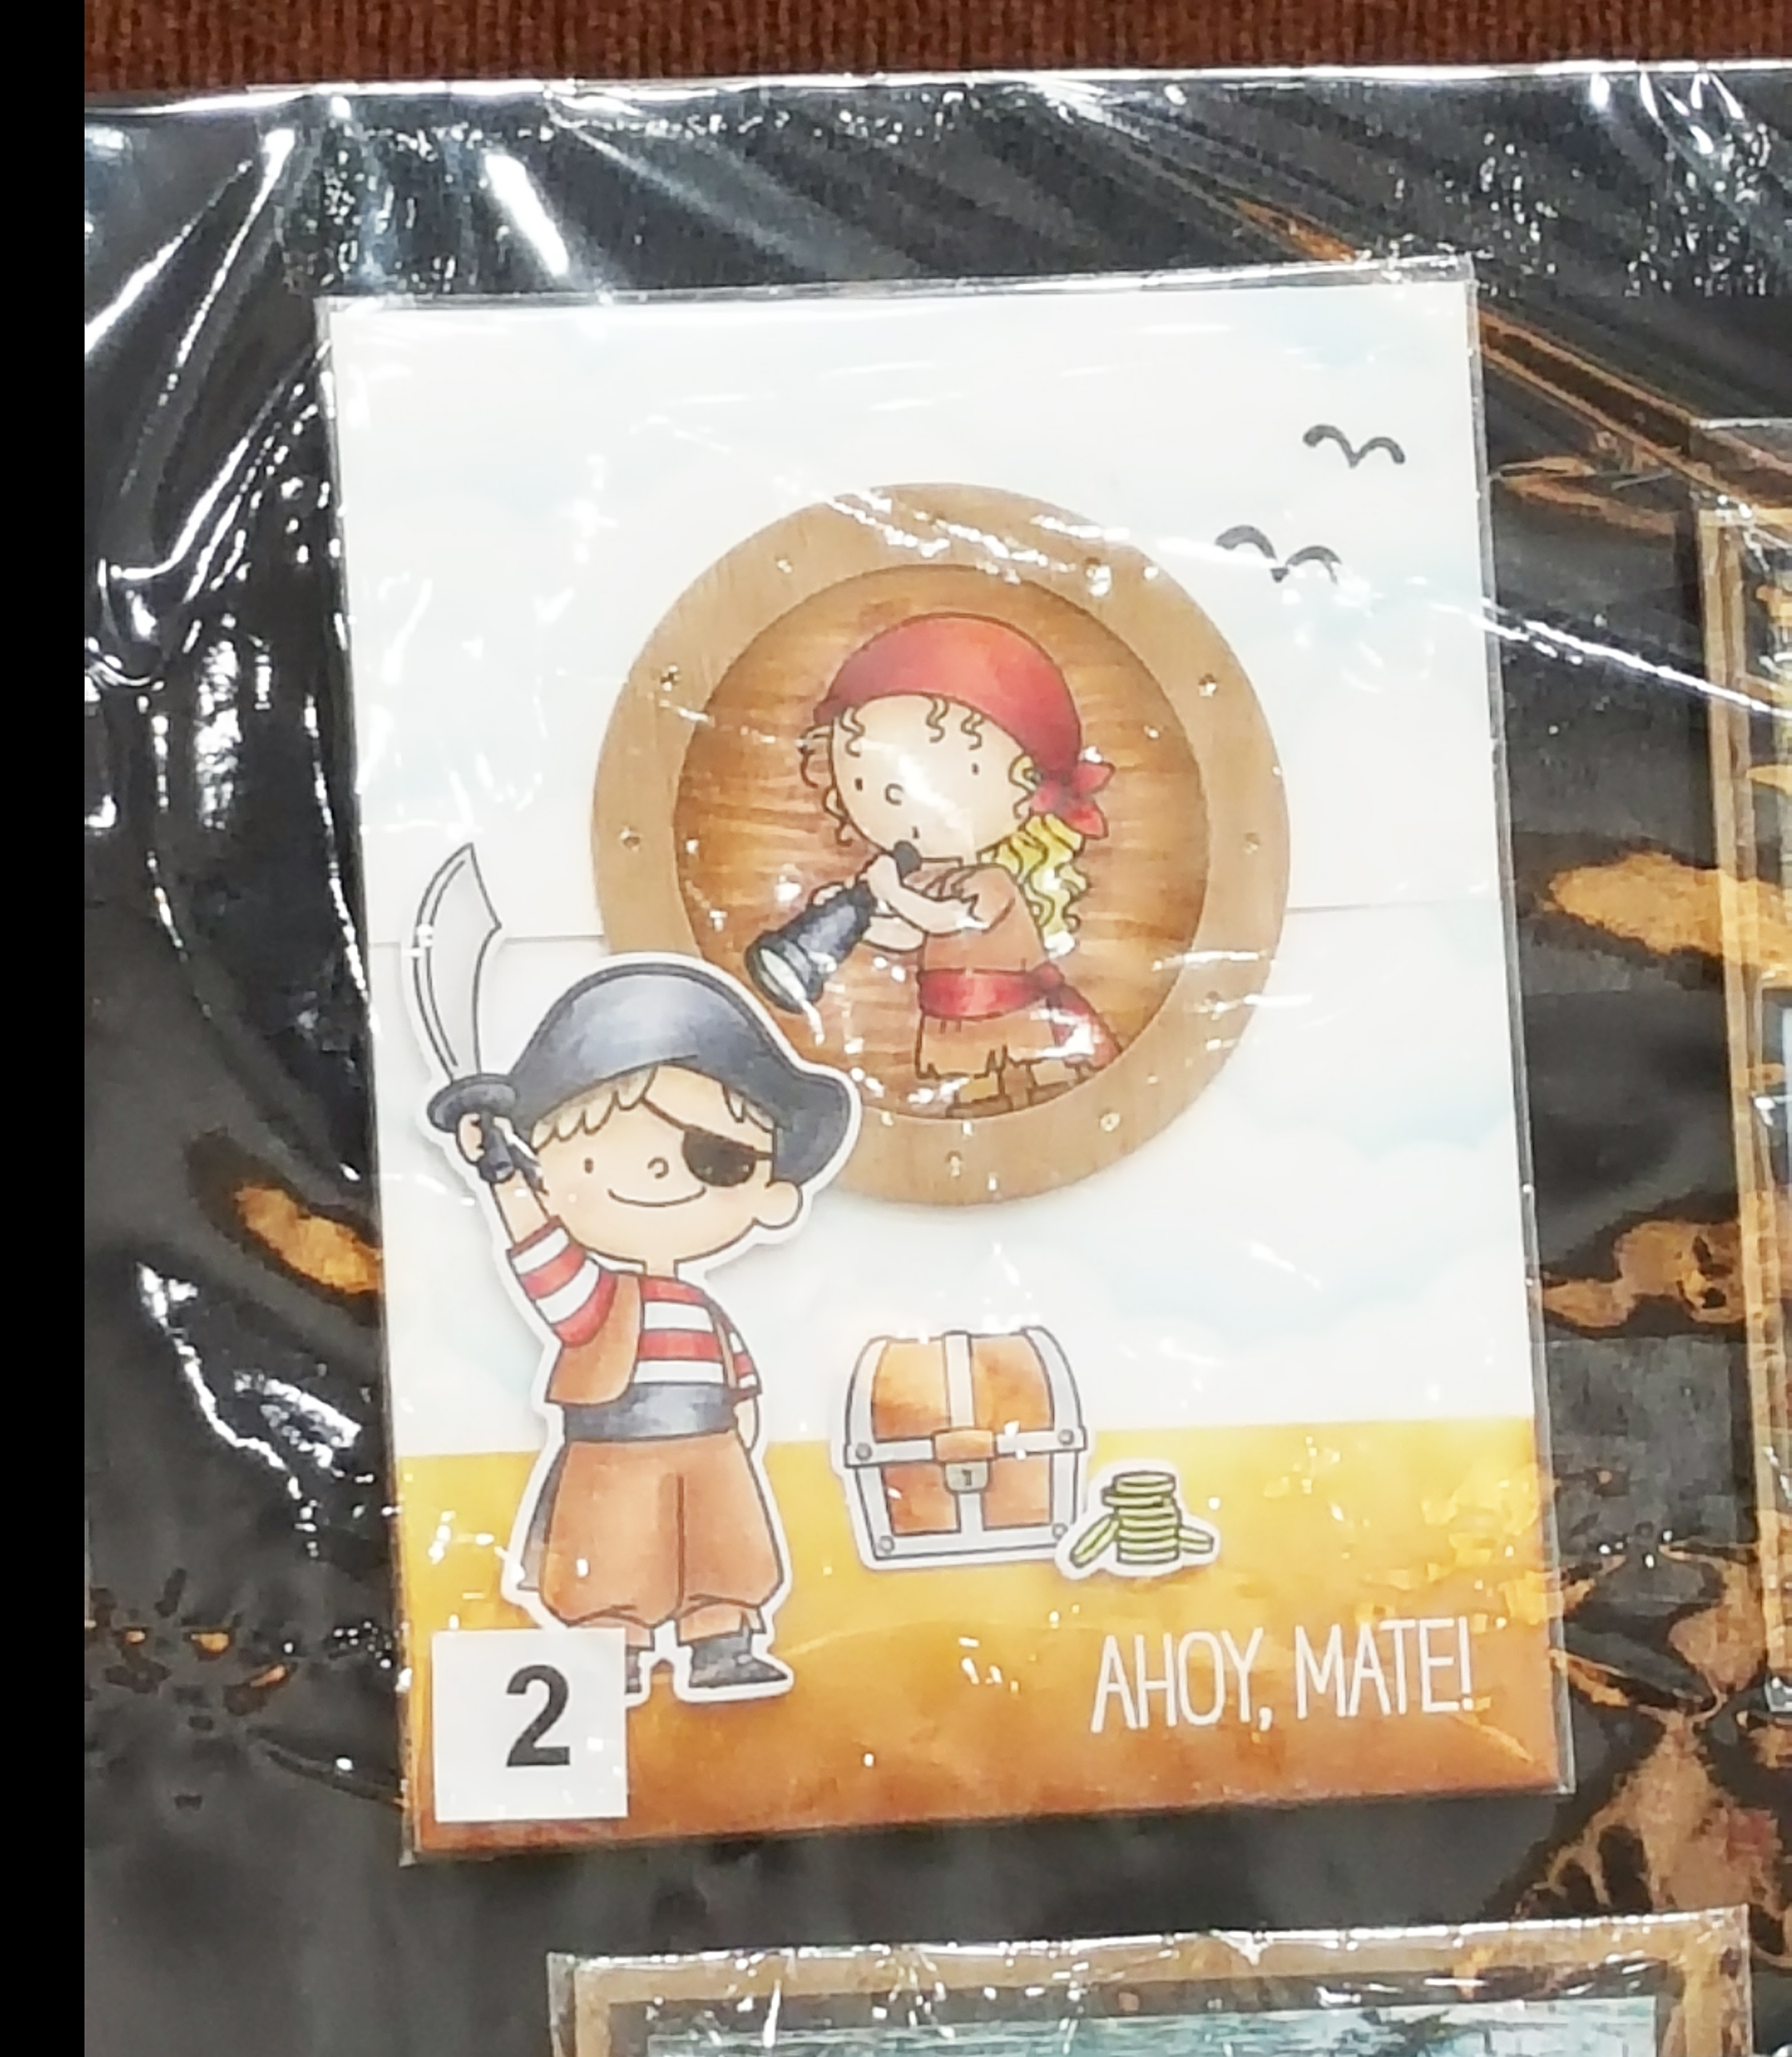
I made this card using of course a My Favorite Things stamp set called Party Like a Pirate.  Where you see the girl pirate inside the port hole looking out, this is actually cut out with real wood veneer paper, and it acts as a flap to open the card from the center so you can see the line where it opens.  I had so much fun with this one!

Ahoy Matety contest map

this is the second card I made in the same category.  I used stamps and a marker to make a map background and distressed the edges.  The skull and treasure chest come from an older set in my stash from a company no longer in business.  The parrot is from the same stamp set listed in the above card.

Nap time context snoopy

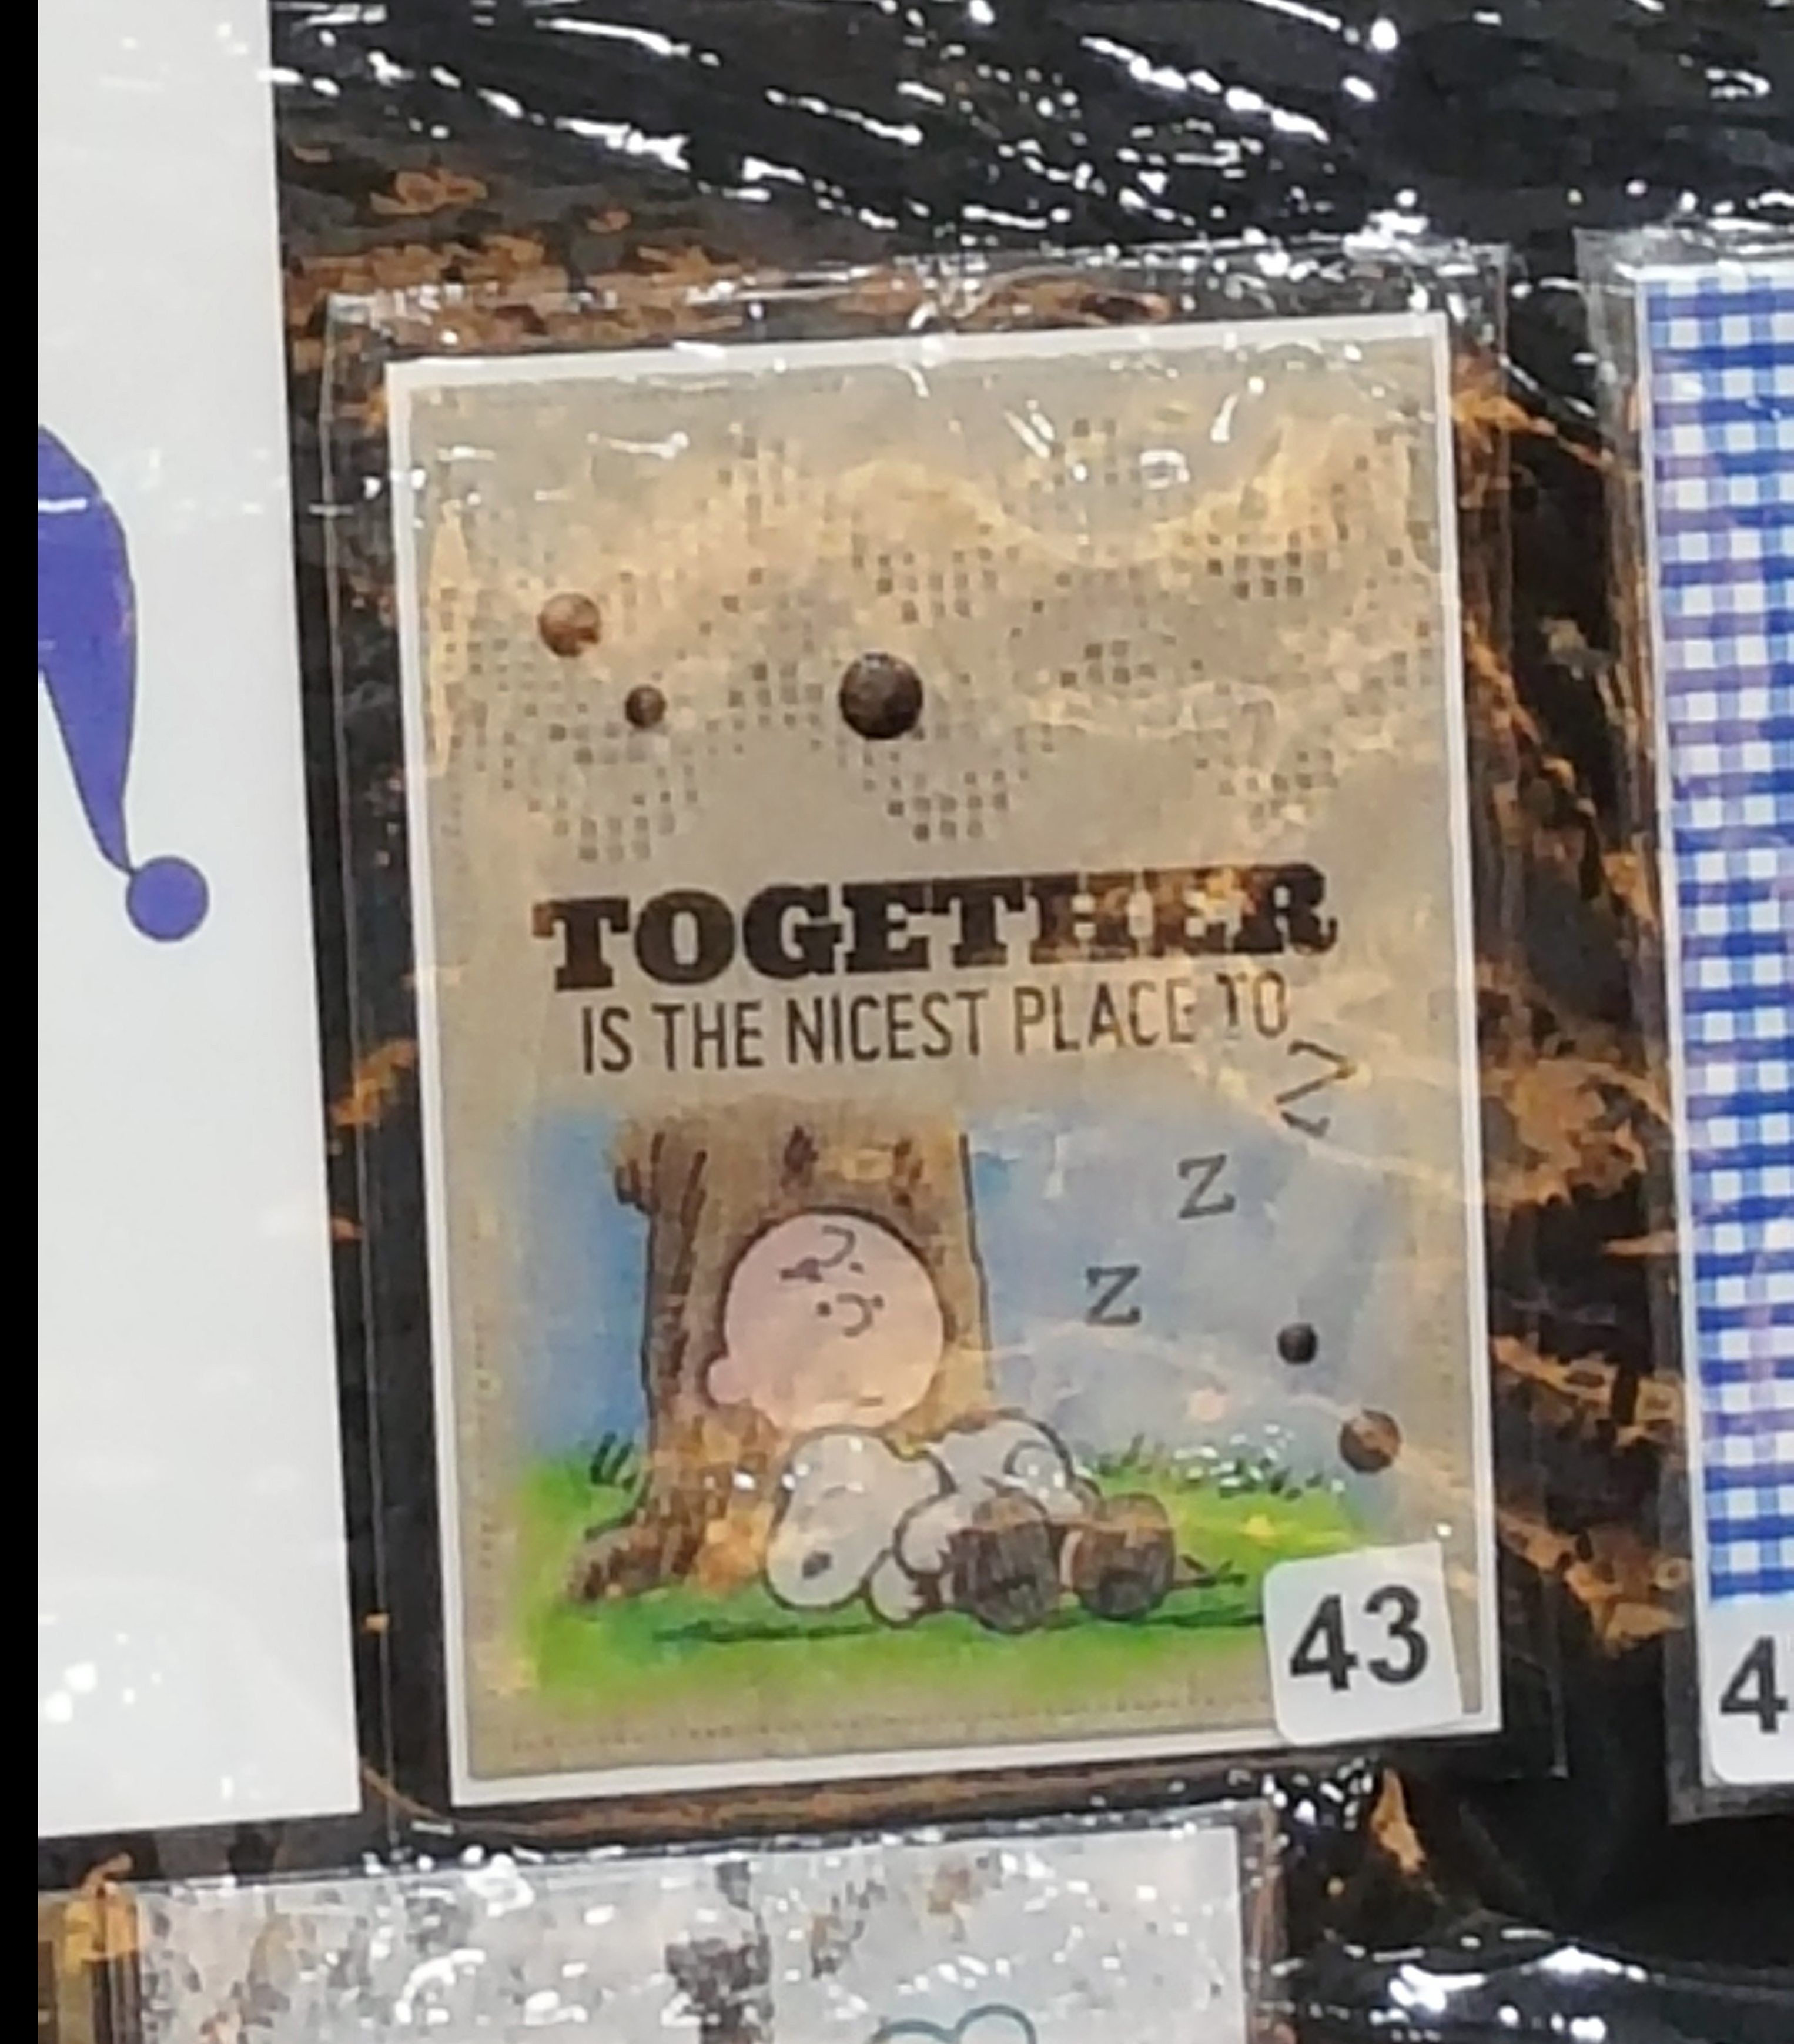
For the second day Sunday’s contest of “Time for a Nap”, this is one of the cards that I made.  It’s so hard to see the details in this photo, but obviously I’ve used a Snoopy stamp and colored it with colored pencils on kraft card stock.  I took a play on the sentiment and added the “Z”s in place of “be” that would be there.

Nap time contest penguin

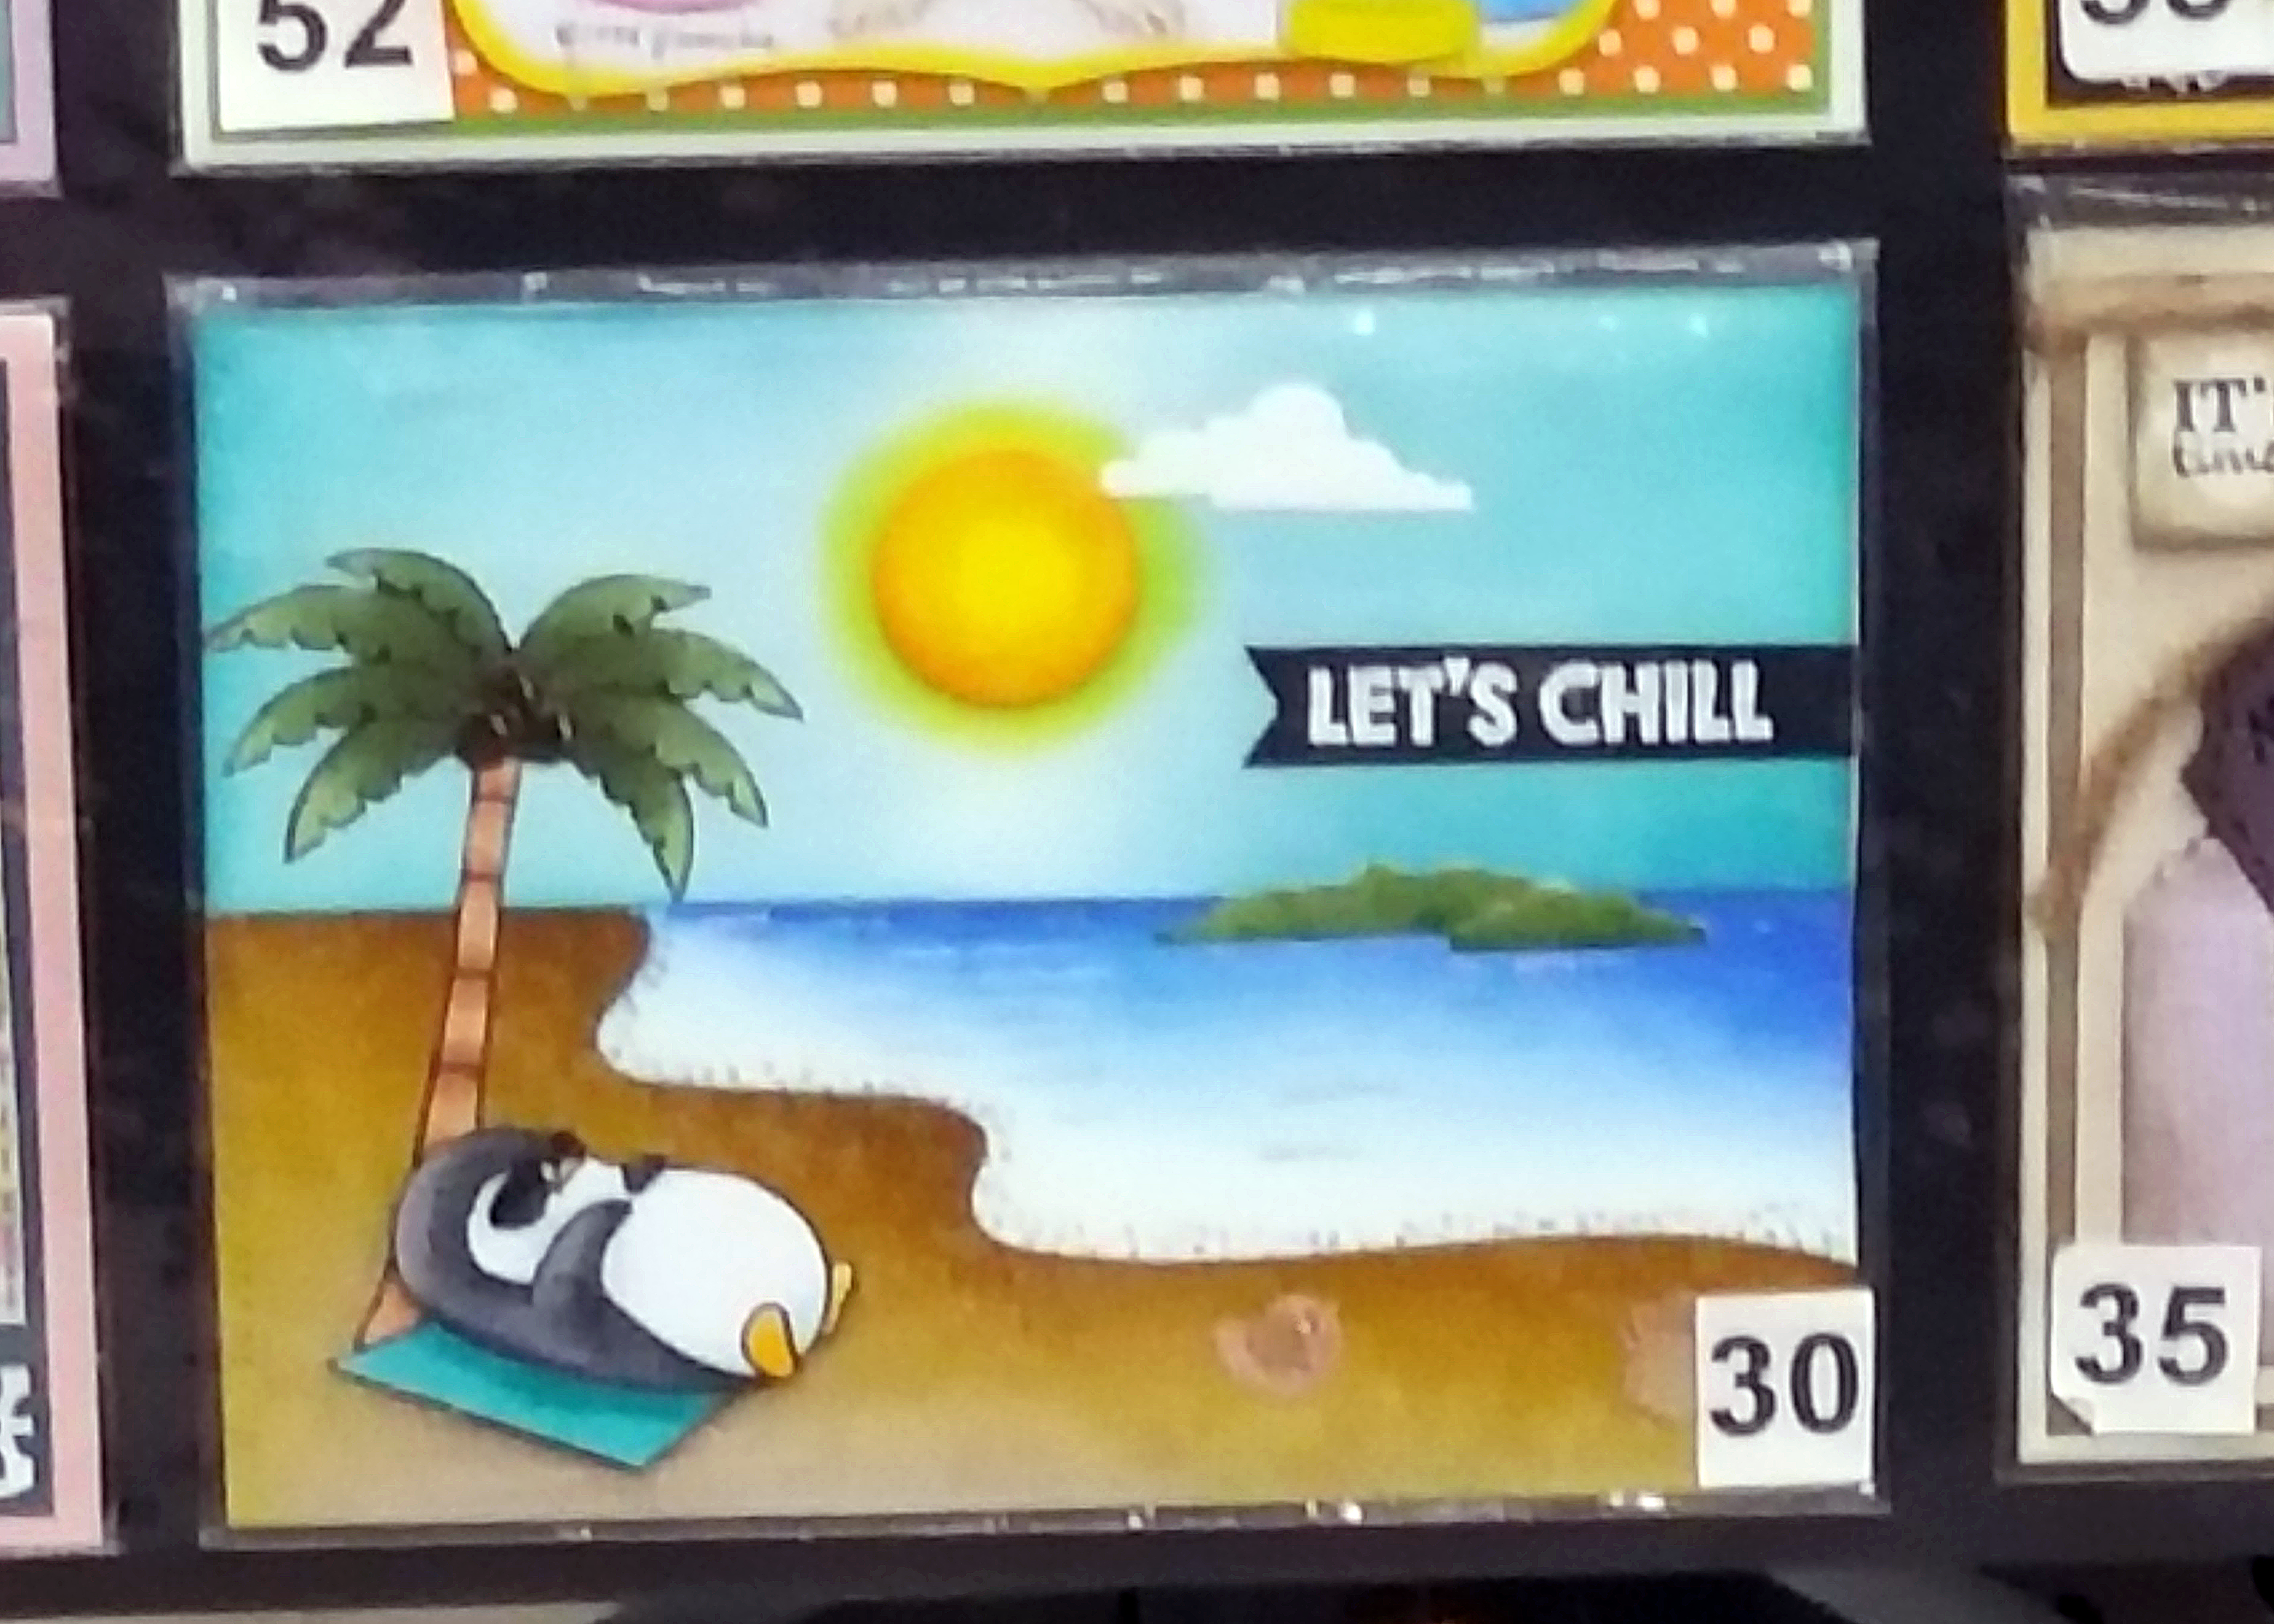
And for my second card in this category, I’ve made this fun penguin beach theme using the My Favorite Things set called Penguins in Paradise.  I thought it would be fun to add a summer beach scene with a penguin taking a nap!  LOL!  The sky and the water were masked to create the different looks.

I have to say that it paid off in sending in my cards!  On Saturday, I had no luck at all with any prizes.  On Sunday, when they announced 3rd place, 2nd place and then the first-place winner…. I was so excited to find out that my penguin card won 1st place at the stamp convention!!  My prize award was $100 to spend with ANY vendor there at the show!  Believe me, it didn’t take long at all to spend it!!  LOL!

stamp convention winner

So I thought I’d just share a quick photo of some of the items that I got while I was there!  Notice the bag I’m holding above…so it gets MUCH bigger after that! 🙂

I had no problem spending the prize winnings there!

So after the exciting weekend, long drive home…I ate a late great supper that hubby made for me and pretty much collapsed that night.  Yesterday, I had been sorting, photographing and trying to “catch up” with normal life now. 🙂

Hope you’ve enjoyed my share and thanks for stopping in!  Hope you can share a smile with someone today!