Hello friends again! I have two posts going up for today, so please see my post for the Mix It Up Challenge details in the above post when it goes live or click HERE.
I’m so excited to have been asked to be a guest for this month’s Pearly Sparkles Challenge! I always love playing along in challenges and supporting them when I can as I always find inspiration in using my supplies when I play!
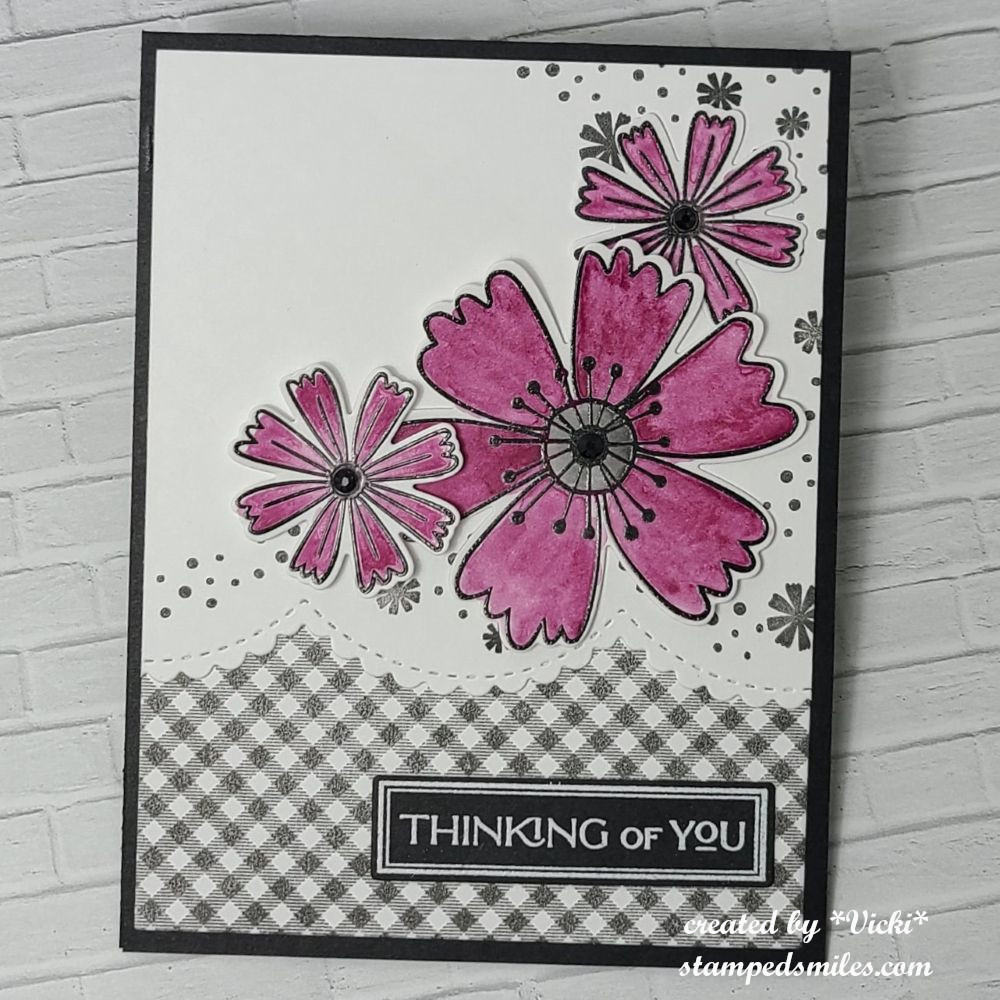
So for May’s Challenge, they would like to see: BLACK, WHITE PLUS ONE OTHER COLOR in your project(s). Here’s the card I made for this theme to inspire you:
I wasn’t sure what I wanted to do for this, but I thought you couldn’t go wrong with some flowers. I pulled out a long forgotten stamp set from Taylored Expressions called “Picked Posies” (no longer available) and black heat embossed the images over watercolor paper and used one pink watercolor brushed over the petals. I die cut each flower with the coordinating die.
I made the rest of the card layout with all black and white elements. I stamped the TE Checking In Background stamp in black ink over a white panel, placed this over an A2 sized top folding black card base. I also used the TE More Easy Edgers die to cut an additional piece of white cardstock and placed it over the stamped checkered background. I also used some more of the elements from the flower stamp set and stamped some more black images on that background before I attached the watercolor flowers on it. I centered each flower with a black rhinestone.
Thanks so much for stopping in today and I hope you’ll check out this challenge to see what the rest of the team has to inspire you with so you can play along too!
Hello friends! Just popping in with a quick post to share a card I’ve made for a few challenges.
This year, I’m going to try and “shop my stash” instead of buying and buying and buying all the things. YES…I know it’s easier said than done, but I’ve joined a fellow crafter that I’ve known for a long time to join in her monthly challenge prompts in her group on FB (This & That With Danni’s Dreams) to help keep me motivated in spending less. I’m sure she’d love you to join her, so check it out. Her monthly prompts are from her “Use Your Stash” challenges that she just started this year.
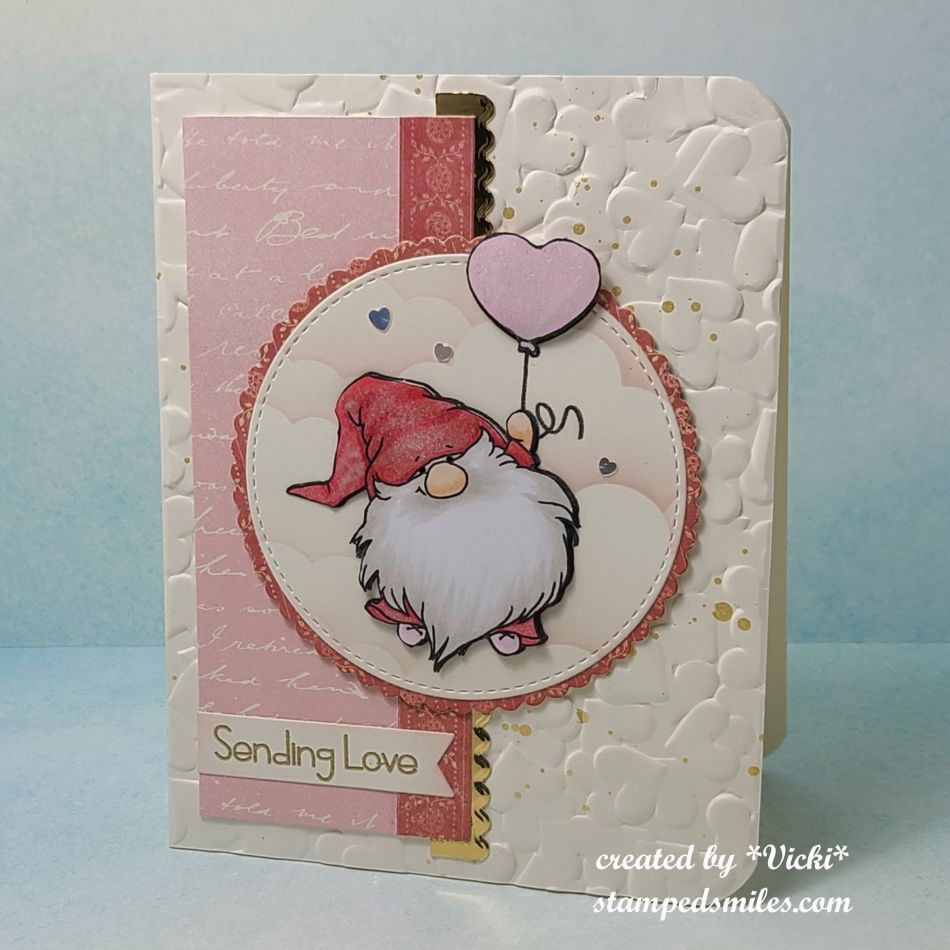
Her themes/prompts for January 2025: gnome(s), embossing folder, border die/punch, heart(s) and 12×12 paper. (You can choose one, several or all.) Here’s the card that I’ve made “Using My Stash” with ALL of the prompts:
I think gnomes are cute and I happen to have several stamps, so it was no problem finding one of those! I’ve used an older gnome set from Whimsy Stamps Gnome One Like You. I colored him up with Copics, but I fussy cut out the gnome and the heart balloon to pop up over the image on the circle that I’ve stenciled some pink clouds on.
The background has an older Sizzix embossing folder not sure of the name, but it’s a 3D embossing folder with hearts piled up. The embossing folder and hearts was another two of her prompts. I splattered some gold watercolor over the background before placing it over an A2 sized top folding cream card base. I also used a corner chomper to round the edges of the right two corners.
I’ve used some very old 12×12 papers from Stampin’ Up! called “Fan Fare”. I hoarded it for a long time and even wrote the coordinating colors on the back of the package! It’s high time to use some of it up…even if it’s a small strip! I’ve also taken the Whimsy Stamps Basic Border dies (not available any more) to cut a mirror gold strip along the edge of the papers. (The remaining of her other prompts used.)
I gold heat embossed the sentiment from the stamp set over a piece of the cream cardstock. I cut it out with a banner die and sponged some light pink ink around the edges. Lastly, I covered the heart balloon with a glitter pen and added a couple of tiny sequin hearts around the gnome.
I had a great time pulling out items from my stash and it felt good to be using them! I certainly plan on doing more of these every month! So stay tuned for more posts to help “Use Your Stash”! Thanks so much for dropping in! See you again soon!
Hey friends! Just poppin’ in with another card I made and wanted to get it in before the deadline ends…which I normally don’t always do!😁
I have been playing along (with the exception of the last few years) with the Coffee Loving Papercrafters “Coffee Lovers Blog Hop” which has been going on since 2014! It’s hard to believe it’s been around that long, but looking back at the posts that were shared recently for “a look back”, I had a different blog platform and there I was playing along 10 years ago! Really appreciate all of the fun that Amy has provided to us through the years as well as the many sponsors that have been apart of it.
I’ve pulled out some stamp sets from one of the sponsors (Newton’s Nook) new and older from my stash in honor of this occasion:
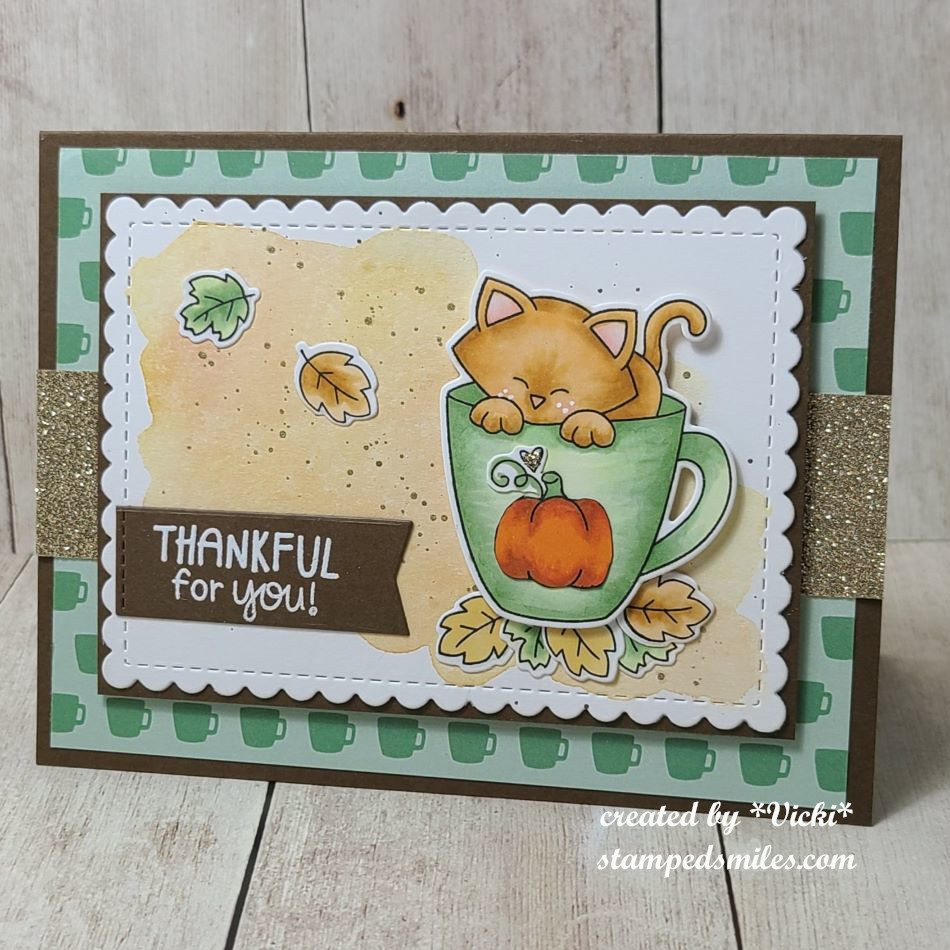
That is the cutest cup of Pumpkin Spice Latte that I’ve ever seen! I’ve used the NN Newton’s Mug stamp set with coordinating die to stamp, color and cut him out. He was popped up with foam tape over the background. For the pumpkin image on top of the mug, I’ve used an older NN stamp set called “Love a La Carte” (No longer available). I just stamped, colored and fussy cut the image to place over the mug. I also added some gold glitter on the heart above it.
For the background: I cut a piece of paper with the NN Frameworks die set and pulled out some watercolors for the background and then splattered some gold after the background was dry. I layered this over the brown cardstock. I also used a piece of that brown cardstock to white heat emboss the sentiment which came from an older STAMPtember collaboration set with NN called “Talk Turkey“. I cut it out with a banner die and attached it to the side of the scallop panel. The leaves under the mug and over the watercolor panel were from the NN Autumn Mice stamp set and coordinating dies.
I was trying to also follow along with a fun sketch from the Inky Paws Challenge (see below) and so I’ve pulled out some more papers from the NN Coffee House Stories paper pad that I thought went with the coloring on my cup and attached it to an A2 top folding brown card base. I also added a strip of gold glitter paper to bring out the touch of glitter on the tiny heart above the pumpkin.
That’s it for today! I hope you’ve enjoyed my coffee card or have been inspired to create something fun too! I’m off to check out all the other entries for more inspiration! Have a wonderful weekend ahead!
Challenges:
Coffee Loving Papercrafters – #fallwinter2024clh 2024 Fall/Winter Coffee Lovers Hop using coffee, tea, cocoa, and/or apple cider
Hello friends! Sending a happy Mother’s Day to all of the celebrating moms this weekend! It’s a beautiful day out today and tomorrow will be too, so I’m going out to plant some flowers that I’ve been wanting to do! I hope that you’re having a nice weekend in whatever you’re doing.
I just wanted to share a card that I had made just for Mother’s Day:
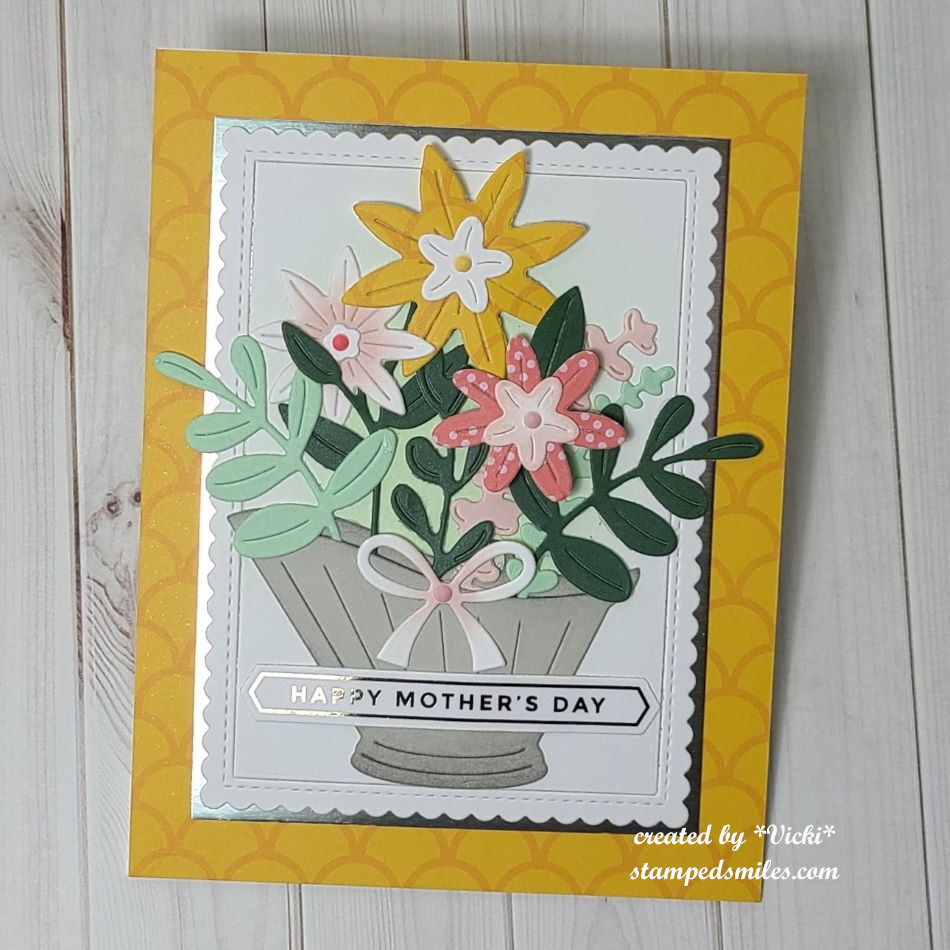
I love how this turned out with all of those blooms bursting out from the antique pail! I’m in the middle of going back over some classes that I’m doing, and this was one of them that I’ve switched up to fit this occasion. The original card had carrots as a base and I didn’t have the flower dies they used, so I made my own version with what I had.
The antique pail, flowers, leaves, bow and foiled sentiment dies all came from Taylored Expressions. The scallop rectangle frame came from My Favorite Things and some of the design papers I’ve used came from Scrapbook.com.
The background papers and large flower came from the same pattern papers as a couple of other flowers and dark green leaves. I used some light pink ink to sponge some of the other flowers and center of bow. The center of the scallop frame has some light green blending, so that it wasn’t so stark white behind the flowers. I also sponged around the antique pail.
I arranged the flowers inside the pail and turned it over to attach with glue over the center of the scallop panel. I popped up the front flower and added some colored gem dots to the center of the flowers and bow. I attached some mirror cardstock to the back of the scallop frame panel to match the foiled sentiment. The sentiment was attached over the pail at the bottom.
It took a little bit of time to cut and arrange all of it, but it was fun to fiddle with.
Thanks for taking some time to stop by and I hope you’ve enjoyed this pail of flowers for Mother’s Day! Have a fabulous weekend whatever you do! 🌼🏵️
Good evening friends! Tomorrow is about “LOVE” for Valentine’s Day! I hope that whatever you’re doing that you spend it with those that you love or at least tell someone how much they mean to you! I have a special post this evening that is dedicated or inspired by love. ❤️
First up is my art journal page with the prompt/theme of “LIGHT/KEEPING IT LIGHT” that I’m guest hosting this month for the Art Journal Journey Challenge. It’s been so fun to see all of the wonderful art created so far!
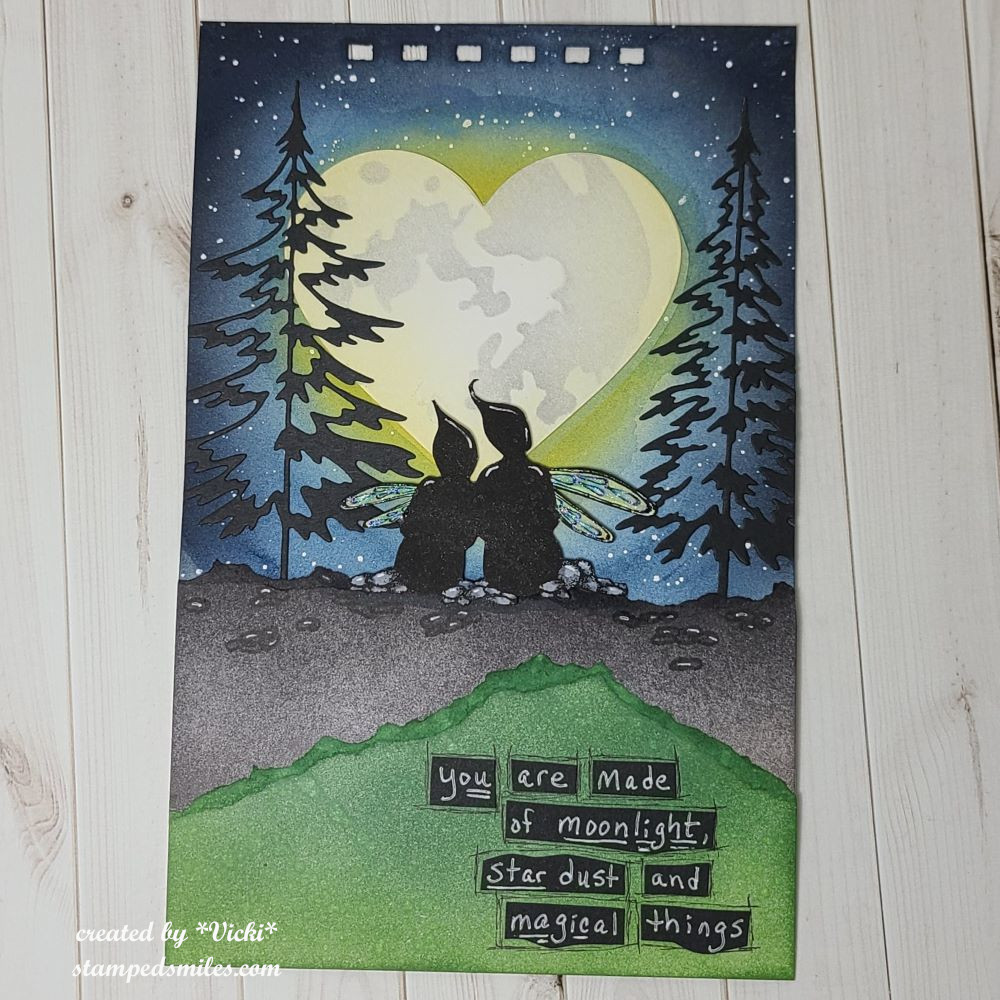
This page was inspired by not just the “light” prompt for the challenge, but it was also inspired by the love of my life. We have spent many moons together and have enjoyed our time in the moonlight as we both love nature and have spent some time traveling and seeing some beautiful things. I’m so thankful to have had these special memories with him.
For the background: I started with a 5.5″x8.5″ watercolor with pre-punched holes at the top with my Zutter machine. I used my watercolor to create the blue sky background with an idea of where I was going to place the moon. I left that area to watercolor in the yellow rather than the blue. I then used some white opaque copic watered down and splattered over top for stars. The “moon” was die cut in white with a heart shaped die and I added a moon stencil over top to make it look like a heart shaped moon and glued it in the center of the watercolor background.
The bottom portion was made with just ripping some cardstock and ink blending one with the greens and one with greys and black. I die cut the trees in black and glued them in place and then added the ripped layers over top.
I stamped the Lavinia Stamps “Star Gazers” stamp in black in and fussy cut it out. I colored the rocks they were sitting on as well as their wings and popped them up on the grey ripped border. I also hand drew more rocks around them and used a white gel pen to highlight. I added some glitter to the wings. Lastly, I wrote over black cardstock with a white gel pen, cut them out and attached to the ripped green border. I then used a black pen to doodle around the words.
Next up are a few Valentine cards that I’ve made. I’m actually really bummed because I would’ve shared another two cards that I made, but I forgot to take photos of them before I sent them out! I used a pizza theme and they were so fun!
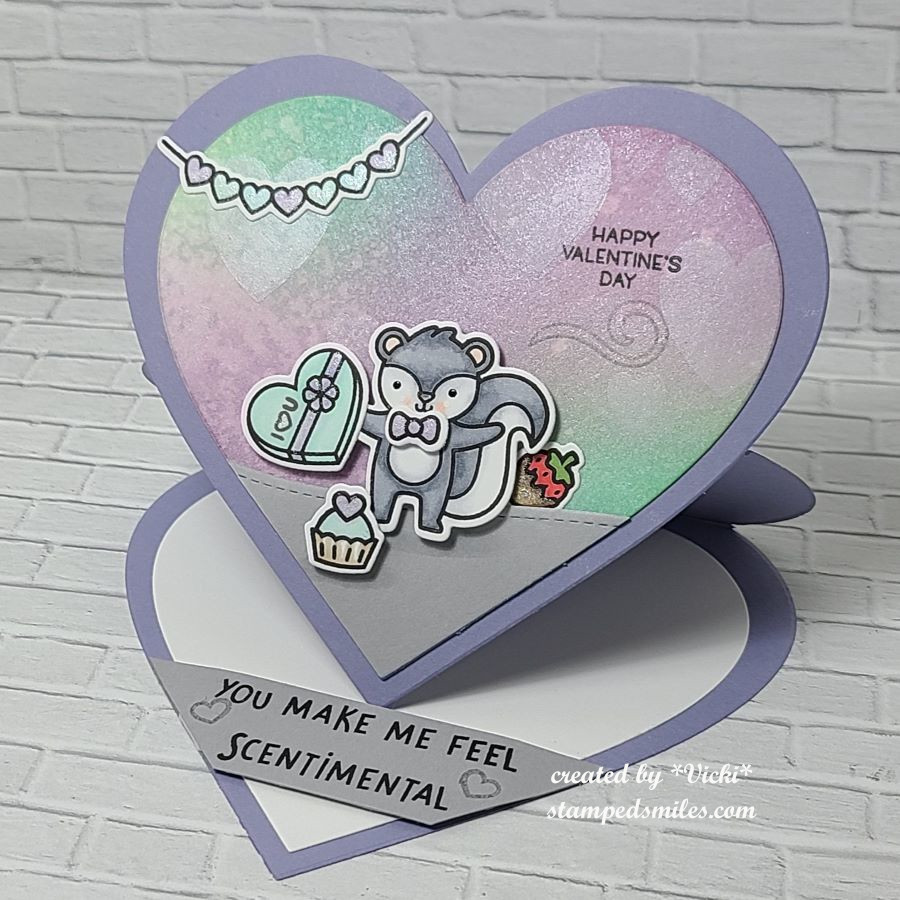
This first one is for my husband and I’ve used the Craft Roulette #201 parameters to create it:
We had to make an easel card, so I decided to make a heart shaped one. I’ve used the cute skunk from Lawn Fawn with all of the “sweets”. (which was also one of the parameters) My husband loves his sweets! I also had to use “quiet” colors and some sort of bokeh, so I’ve made a bokeh background and used a solid heart stamp in white over the blended colors. It reminds me of those conversation hearts. This skunk makes me smile!
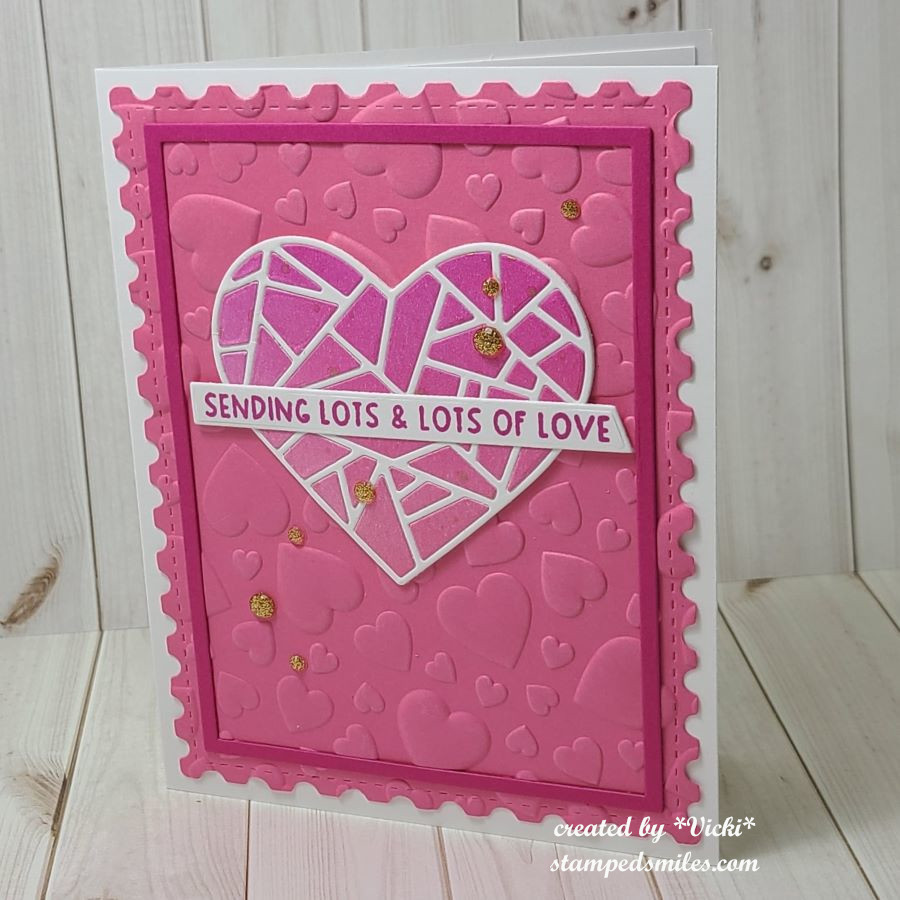
This is another fun card that I’ve made for a friend! I couldn’t wait to use this fun mosaic heart from Taylored Expressions. It came as a freebie for a limited time with a Valentine release. I like that it comes with the solid heart backer which makes putting it together easier. I ink blended a panel in two shades of pink and then die cut the heart with the pieces. I used the frame cut in white and then popped in the ink blended pieces inside the frame.
The embossed heart background was made after cutting out a piece of Bubblegum cardstock with the postage rectangle die. I stamped and die cut the sentiment over top of the heart and added some gold rhinestones.
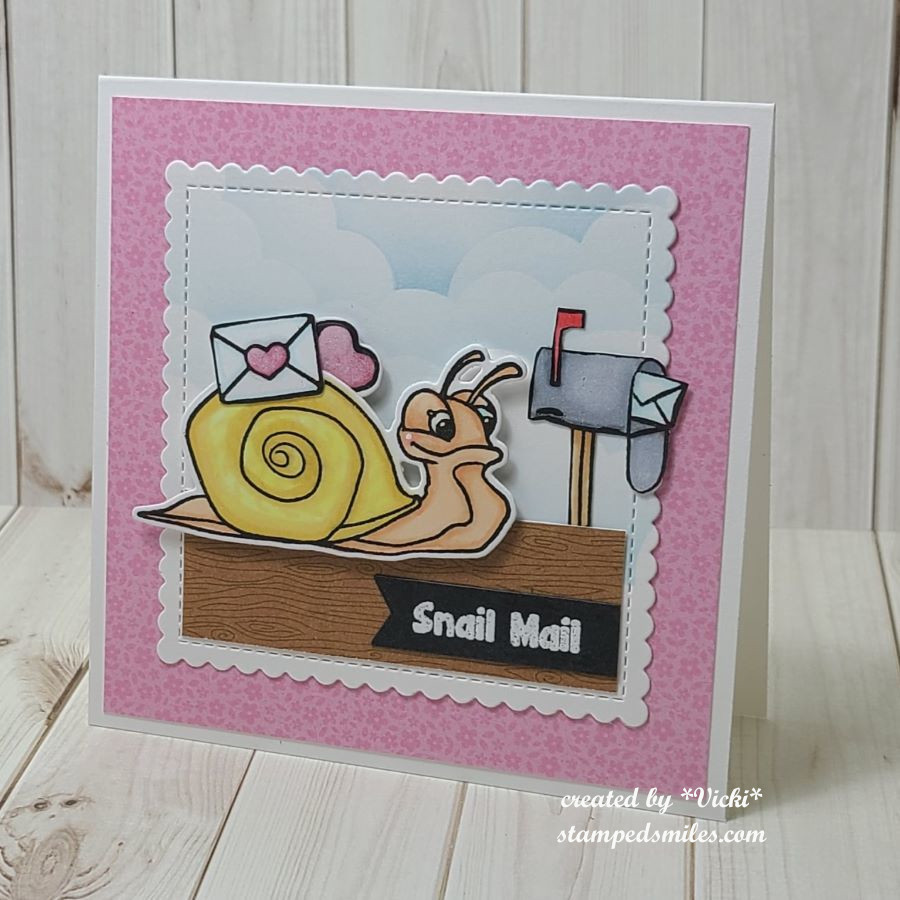
And this card was done for the Inky Stamper FB challenge which was to create a square card. I have made this one 4.25″ square and used the cute Snail stamp set along with some Doodlebug papers which you can also find in their store.
I just stamped, colored and cut out the images, added a border at the bottom and cut out a scallop square in white and stenciled some clouds at the top. More pink papers onto a white square card base and called it done! There’s nothing better than getting snail mail!
I hope you’ve enjoyed my heart-filled post today and you’ve been inspired in some way! Thanks so much for stopping in and I’ll see you again on Thursday for a new challenge to try! Happy Valentine’s Day!