Bugging Out With Sketches

Hello friends!  I hope you’re having a good week so far and staying safe wherever you are in the world.  Sending hugs to all experiencing a troubled time.  I hope that my post can bring a smile to you today.

I needed to create some get well type of cards and so I thought I’d try to incorporate some challenges while working on them which helps me to concentrate more in what I’m doing and maybe think outside the box a bit.

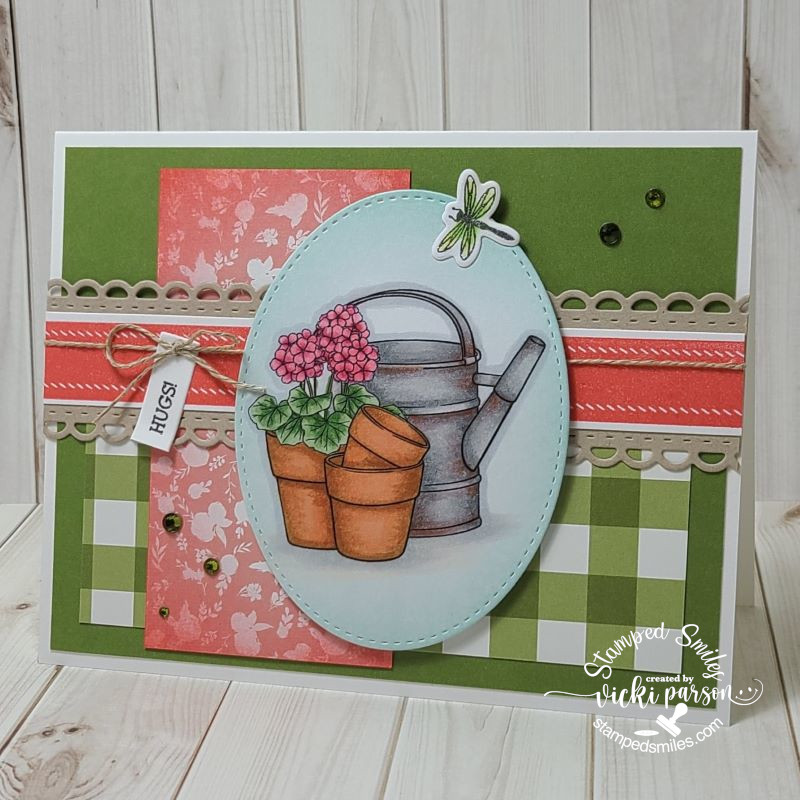
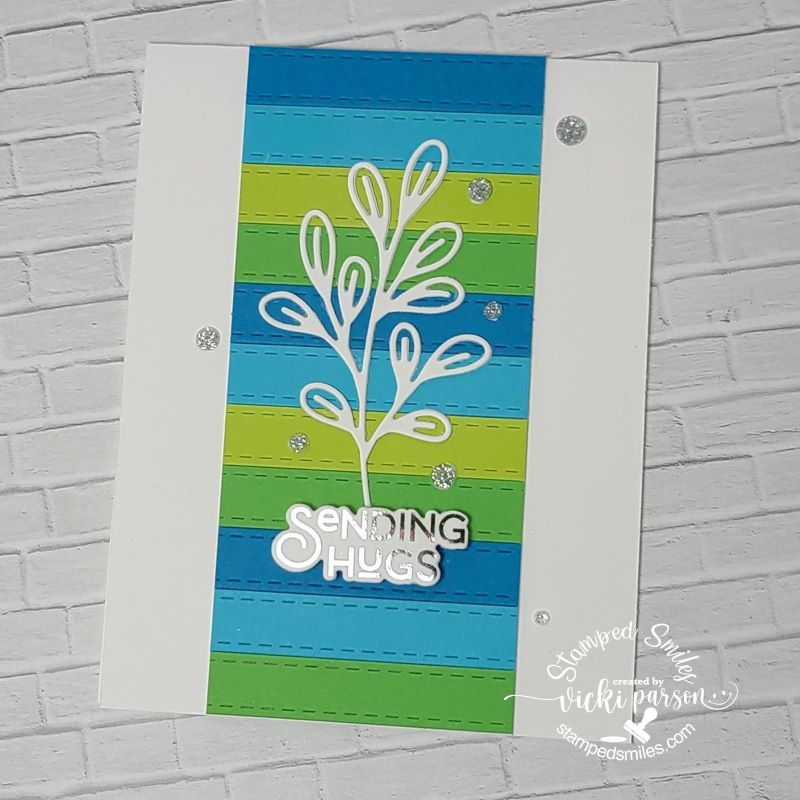
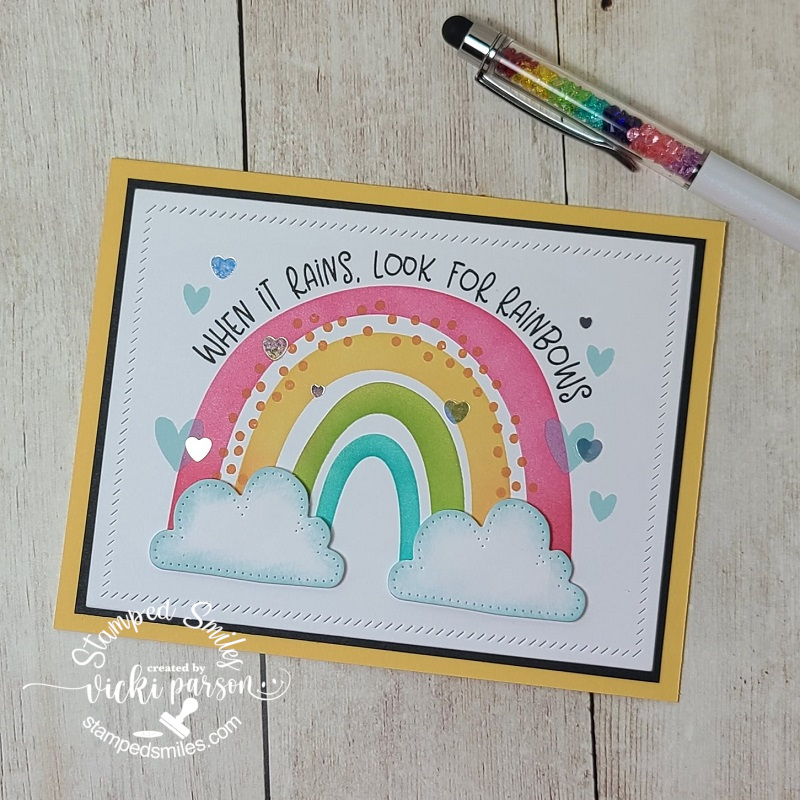
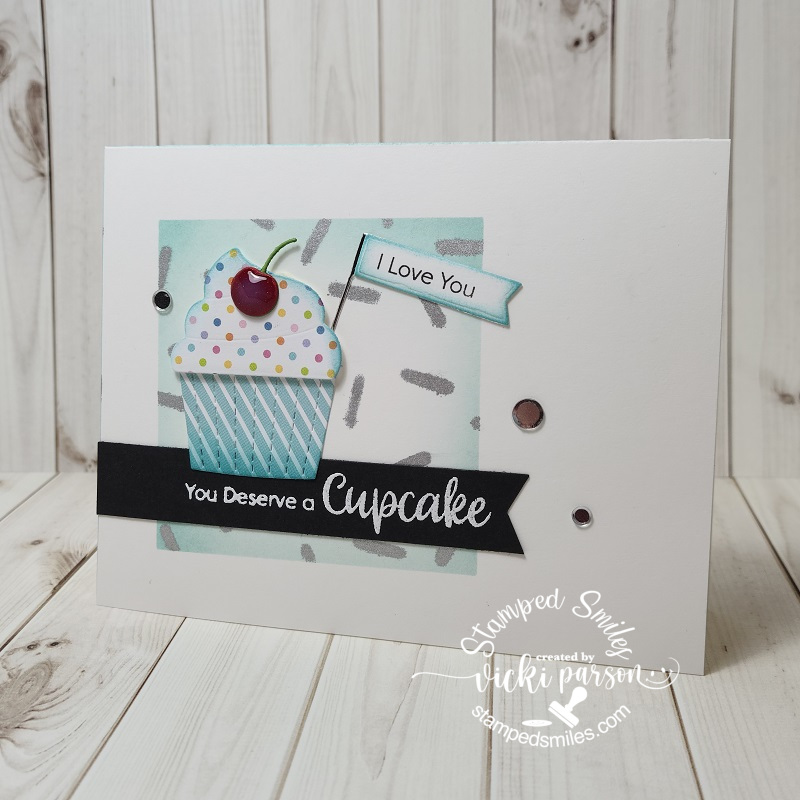
My first card is made with the Beccy’s Place Challenge freebie this month and she also challenged us with a sketch which I’ve decided to use for my card. (see sketch below)  I was really happy to use up some more pattern papers with it and I also decided to add a tiny dragonfly at the top to enter another challenge and to adhere to my “bug” theme today!

I printed the image in black and white and colored with Copics.  The dragonfly and the center pink strip were stamps that I cut out and added to the design.  The rest is pattern paper from my stash except the scalloped kraft border in the center that I cut out with a die.  I stamped the sentiment and cut it out to go with my twine around it. *You will notice in ALL of these cards that I’ve used some sparkly gems.  I wasn’t aware until posting them!  I must be on a kick of wanting to use them!*

Challenges for 1st card:

  1. Beccy’s Place – August challenge + sketch
  2. Paper Dragonfly Creative – Anything Flies (Goes) or Party
  3. Kreativ-Tanten – Anything Goes
  4. The Crafty Addicts – Anything Goes
  5. Crafty Calendar – Anything Goes
  6. Dragonfly Dreams – Dragonflies

And for this next card, I’ve played with a large bug:

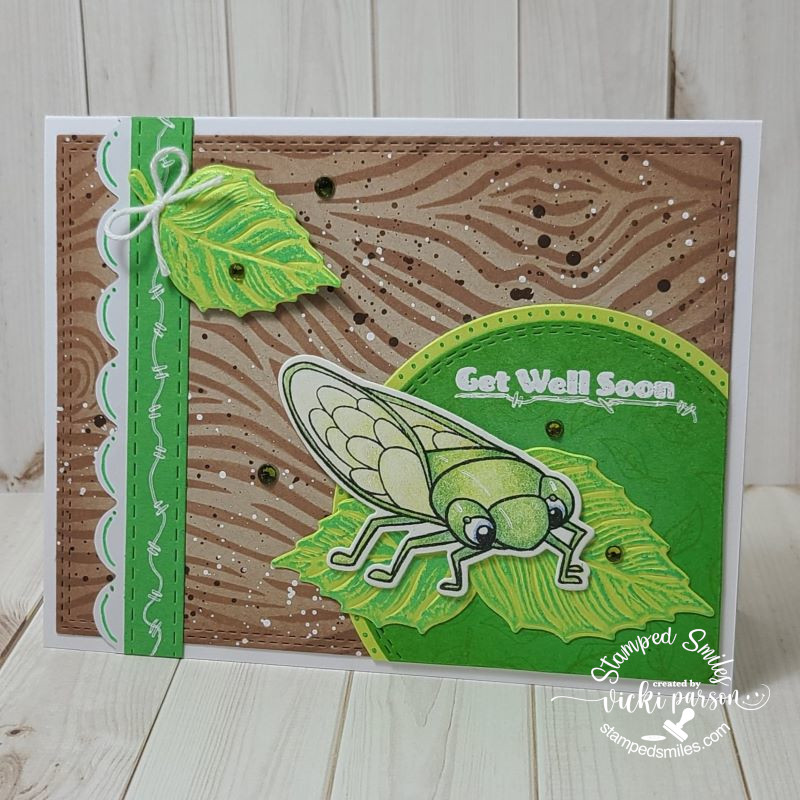
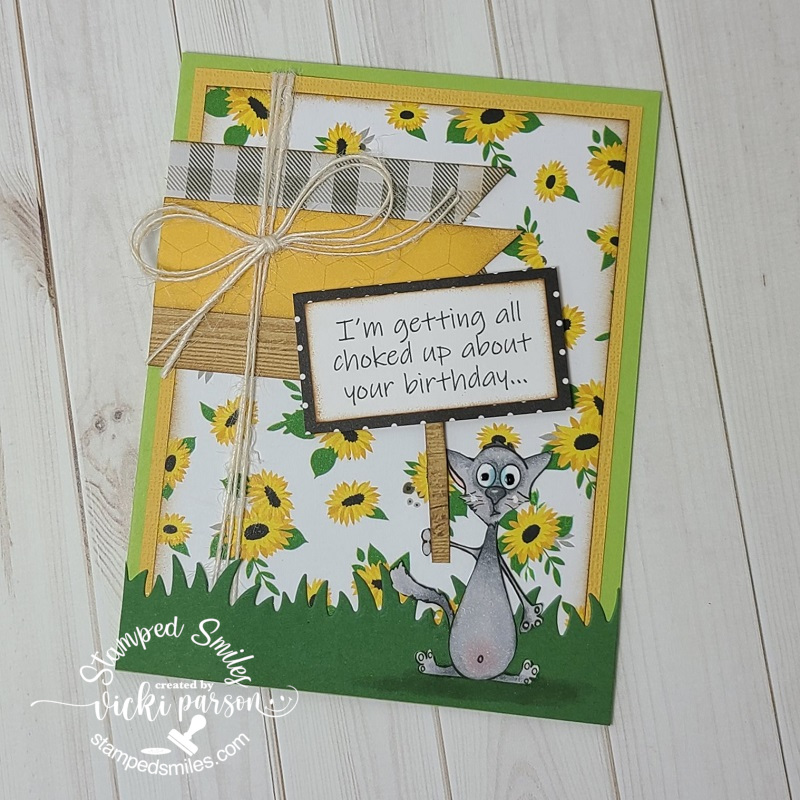
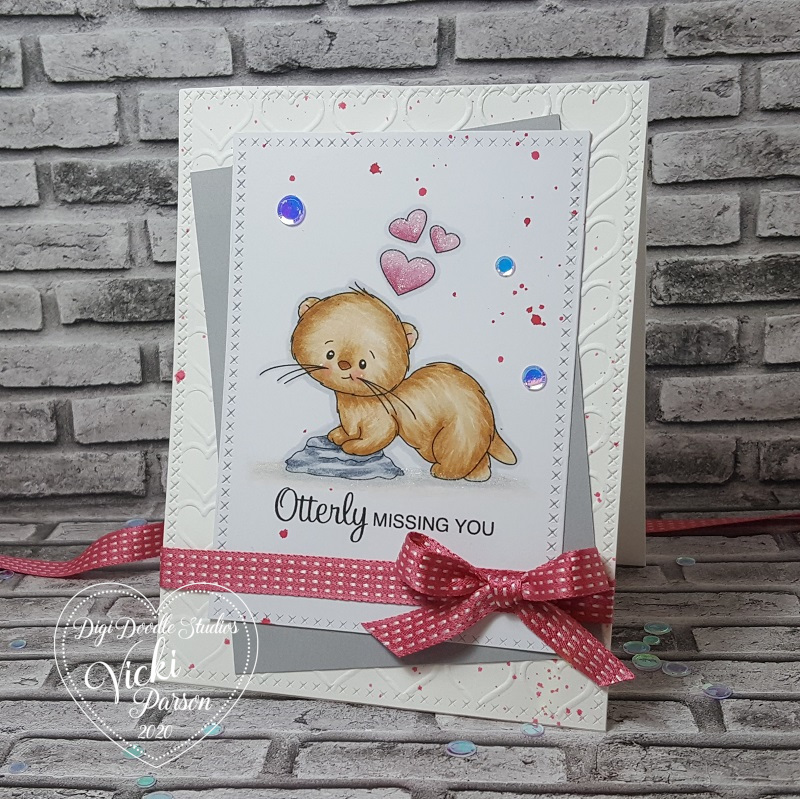
Around my area this time of year, you can hear the sound of these cicada bugs with their distinct noise throughout the trees.  My husband likes the sound when a bird catches one! EEW!  This bug is a cute one from Inky Stamper called Cicada and I’ve colored it up with pencils this time.  Hard to see, but I’ve also added some shimmer with a glitter pen on his wings.

I’ve used the Picket Fence Tree Bark stencil over kraft on the background and then splattered it with brown and white paint. The leaves under the bug and the accent came from the Lisa Horton Variegated Leaf EF+die that I cut over light green cardstock.  I used some metallic green wax to go over the details in them.  I also used some gel pens to make some doodles around the strip, the circle and under the sentiment along with following a sketch. (details below) You will also notice more sparkly gems!  I’m also entering this in the Inky Stamper FB challenge this month which is using an IS bug image.

Challenges for card

  1. Sketch Saturday – #732 sketch + twist: add a doodle
  2. Creative Knockouts – #501 Anything Goes
  3. We Love Stamping – Masculine
  4. Lil’ Patch of Crafty Friends – Anything Goes
  5. Pammie’s Inky Pinkies – Anything Goes
  6. A Place to Start – Anything Goes optional: leaves/trees
  7. The Corrosive – Anything Goes

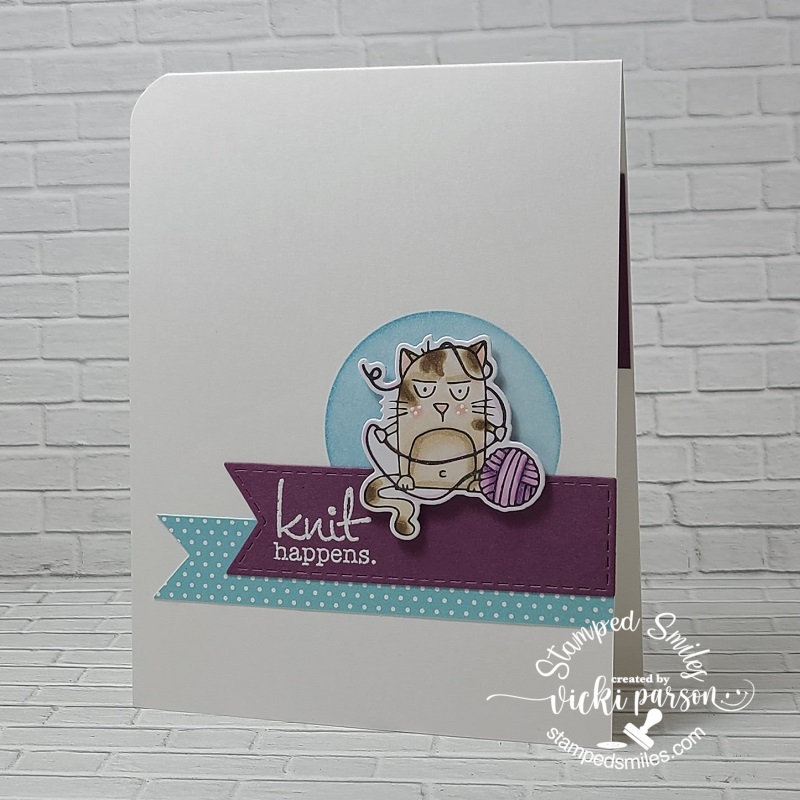
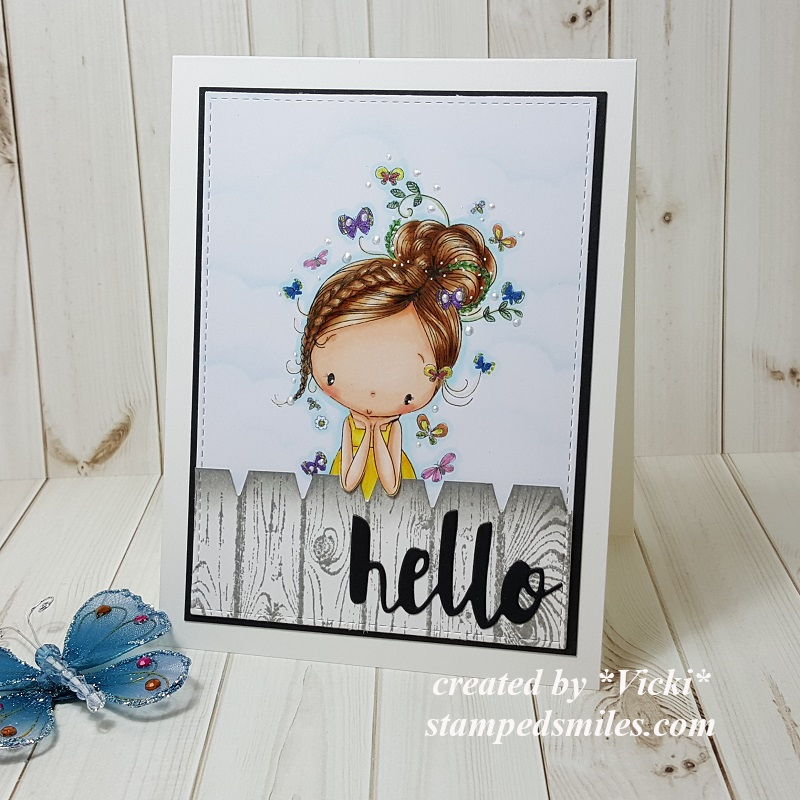
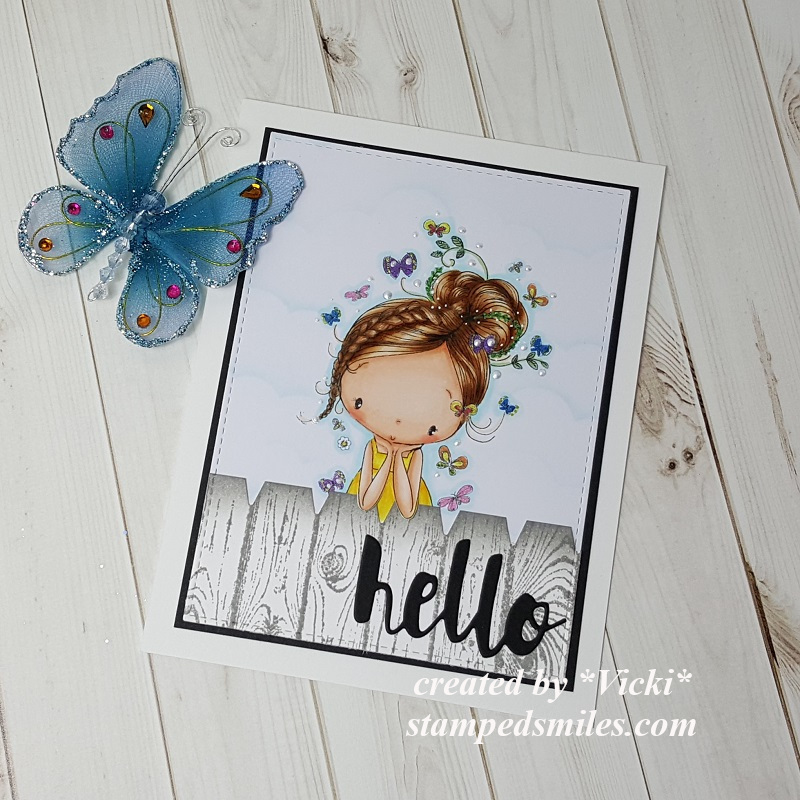
For my last card I decided to keep this one simple’ish’:

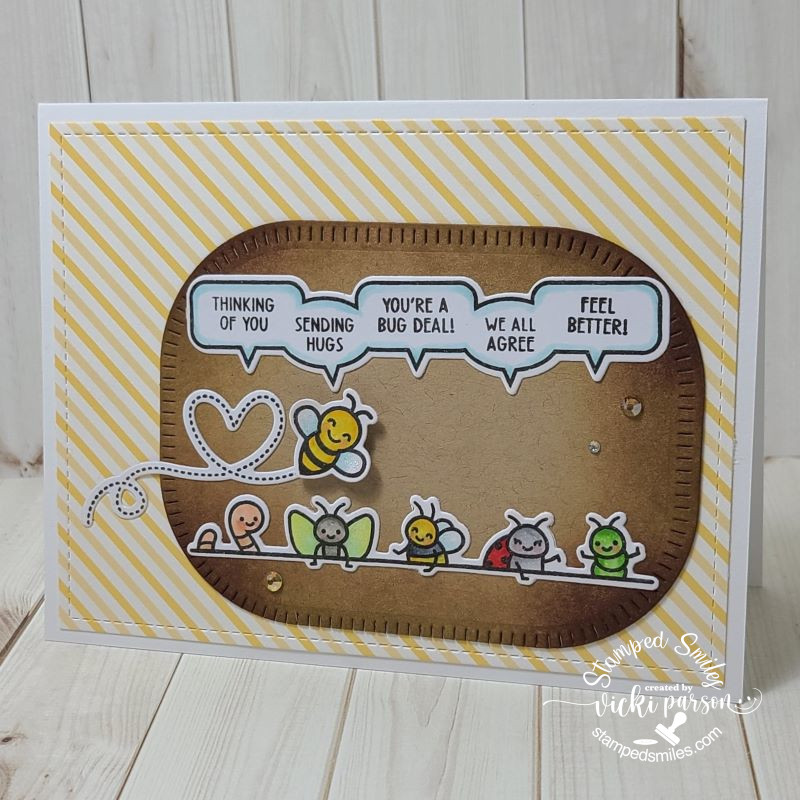
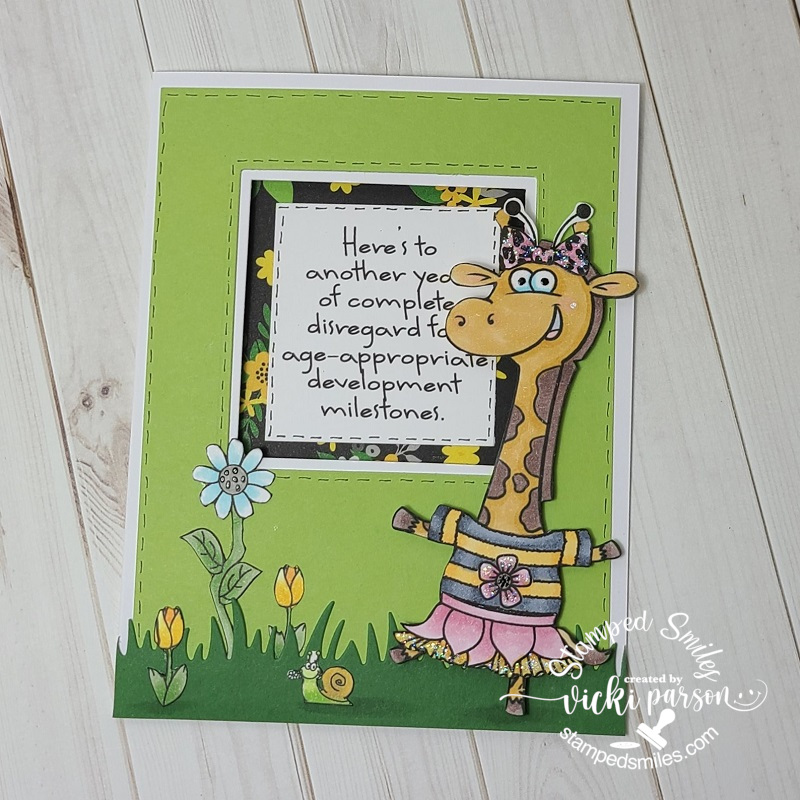
So, I know these aren’t real bugs because I’m not squealing, but these guys are too cute! They’re popping up out of the dirt for a special greeting!  I mixed in both a new and older stamp set from Lawn Fawn on this one. I’ve used another sketch for this one and decided to keep it very simple.  The hardest part of this was the coloring which honestly wasn’t all that difficult either because they’re small images.  I’ve also added some shimmer with a glitter pen on the wings and of course, there’s those sparkly gems again!

Challenges for card

  1. Sunday Stamps – SSC316 in the corner sketch
  2. The Paper Players – CAS using any Bug
  3. Simon Says Stamp Wednesday – Clean and Simple
  4. Krafty Chicks – CAS (Clean and Simple)

Thanks so much for stopping by today!  I appreciate your time and thoughts!  I’ll be seeing you again on Saturday with another AJ page!

NO STAMPING ALLOWED at Sparkles Monthly

Hello friends!  It’s been a bit since my last posting!  I’m still crafting, but I’m also enjoying the outdoors lately too!  I’m just not making the time I need to post on my blog here!  However, being on a design team helps to keep me focused on posting and hopefully it’s something that will bring motivation because I need it!  So I will try and get some more posts in!

Today starts a new challenge over at the Sparkles Monthly Challenge and the theme is “No Stamping Allowed!This may seem a bit challenging, but I look forward to seeing what people come up with for it!  Be sure to check out the blog to see what the design team has come up with for inspiration!  Here’s what I’ve made for the challenge this month:

I was trying to channel something that would work and realized that I had these fun strip dies from Taylored Expressions and I wanted to play with some new colors, so I ran with that on the middle of my card front by alternating the strip colors.

I also die cut a frond three times and glued them together for thickness and sturdiness.  I attached it over the colored strip panel and then added a sentiment that was already toner printed so that I could foil over it with silver Deco Foil.  I also had a die that cut it out which was popped up with foam strips and added to the bottom of the die cut frond.  Lastly, I’ve just added some silver glitter drops randomly over the card front.

Hope you’ve enjoyed my non-stamped card today and will think about joining in the challenge with us this month!  Thanks so much for stopping in! Have a great week!

Challenges:

  1. Craft Rocket – Use Dies
  2. NBUS – #51 June – new colors and dies
  3. Creative Fingers – Anything Goes
  4. A Place to Start – Anything Goes and/or twist: flower + one other thing
  5. Penny’s Paper-Crafty – Anything Goes using paper
  6. The Crafty Addicts – Anything Goes
  7. CAS on Friday – Leaves


Going CAS at Sparkles Monthly

Hello friends and happy Wednesday!  Today starts a new challenge over at the Sparkles Monthly Challenge Blog and this time we would like to see your CAS (or “clean and simple”) creations!  I hope you will hop on over to see the inspiration from the team and consider joining in the fun with us!

Here’s the DT creation that I’ve made for it:

Sometimes I feel that CAS can actually be even more difficult than regular cards and I struggle with thinking I’ve added too much, or it doesn’t look right.  I think it’s more of me over-thinking something, though!

It was my son’s birthday yesterday and I thought this would be a great opportunity to make a card for him.  He’s a postal carrier, so I thought this cute owl from the Lawn Fawn Special Delivery would work great for this.  I started with the LF Stitched Cloud Backdrop and the LF Stitched Rectangle Frames dies to create the main focal panel.  I lightly blended some blue ink in a circle before adding the Copic colored postal owl popped up with foam.

Over some red cardstock, I white heat embossed the sentiment.  (I don’t remember which LF stamp set it came from) I die cut it with a banner die and popped it up over the cloud panel.  I also had an extra die cut heart lying on my table, so I thought it would be great to add with the owl.

Thanks so much for stopping in today!  Hope you’ve enjoyed my CAS card and have been inspired to join us this month with your take on the challenge too!

Challenges:

  1. Country View – Birthday card for a man
  2. Love to Scrap – Anything Goes
  3. 613 Avenue Create – Anything Goes optional: CAS
  4. Lawn Fawnatics – All things birthday
  5. Sunday Stamps – SSC304 sketchSSC304

Time to Get Your Grumpy On!

Hey there friends!  Hope you’re having a wonderful week so far!  We’re getting closer and closer to Halloween already!🎃  I haven’t made as many Halloween makes as I usually do, but as the day gets closer I’ve been more in the mood to pull out some things to have fun with my stash and my thoughts turned to “Grumpy”.

If you’re not familiar with “Grumpy”, this is the Big Grumpy Cat from Taylored Expressions.  I absolutely love the “Grumpy” and “Grumplings” line and I don’t pull them out as much as I’d like to.  Since it’s closer to Halloween, I’ve also pulled out the Big Grumpy-Halloween accessory set to go along with him too! (The only thing I used from this set was the witch hat and the sentiment.)  I’ve stamped, colored and cut out each of these items for my card.

The #TEMakerChallenge has the theme this month of using Oreo & Sugar Cube with the option of adding any other pop of color.  I’ve decided to pop in an orange color for mine.  The theme was also “Sparkle & Shine” through foiling, heat-embossing, glitter paste or sparkly cardstock.  

So, for the “Sparkle & Shine” I’ve taken a Foil-It Spiderweb panel and foiled some orange Deco Foil over it.  I then took one of the Frame in Frame 3 dies to cut out the middle of this panel, added some acetate over the opening and made it into a shaker panel.  I die cut the same frame as well as the Little Bits-Spiders die from some black Glitter Cardstock.  I attached these pieces onto the web panel along with adding the Grumpy Cat with his hat string and extra spider attached to him over the acetate.  I attached double-sided foam around the opening and added some “shaker stars” in the colors orange, black and silver.  And lastly, I thought it would be fun to pop up a left-over ghost I had from a previous project at the top!  (I think the ghost is in fear of the “witch switch”!) 😂

  • I also have another “grumpy” card to share…

So this card was made to send a smile to a friend.  I’ve used a cat for this one as well from the Taylored Expressions “Grouchy Grumplings” set which I don’t believe is available in the store any longer.

I kept it a simple card by stamping, coloring and cutting out the grumpy.  I ink blended a circle that fit him with blue ink, white heat embossed the sentiment and cut it out from the TE Stitched Banner Stacklets. I popped grumpy with foam tape over the sentiment banner and circle.  I also used some TE decorative papers from my stash and cut out a banner with it using my scissors.  A corner chomper was used to round the top left corner of the card to finish it off.

I hope you’ve enjoyed my “Grumpy” projects today and have been inspired in some way!  Really appreciate you stopping in!

Challenges: (Top card only)

  1. Country View – Halloween or Harvest
  2. Craft Rocket – Autumn/Halloween
  3. Crafting Happiness – Halloween
  4. Aud Sentiments – Halloween/Fall + Sentiment
  5. Crafty Gals Corner – Halloween Colors
  6. Colour Crazy Craft – Anything Goes + coloring
  7. Allsorts – Add a Sentiment
  8. Pammie’s Inky Pinkies – Anything Goes
  9. Double D – Orange & Black

Challenge Up Your Life with a RAINBOW!🌈

Hello friends!  I don’t know about you, but I’m so happy to see the month of May starting!  That means the flowers will be coming out along with the warmer weather!  It’s also a great time of the year to see a rainbow perhaps?!

#147_regenbogen_CUYL

Today I’m super excited to be joining the “Challenge Up Your Life” challenge blog as a guest designer!  I had previously won a Top 3 and a future guest design spot from a past challenge I had entered, so I’ll be joining them as a guest for April, May and June challenges!  Today their new monthly challenge for May is “RAINBOW“.  Hope you can share your lovely creations with us this month!  (Check out the challenge blog for details and inspiration!)

Here’s my guest design creation for this month’s challenge:

Nothing better than to look up into the sky and see a rainbow!  What’s also fun is to be able to create your own and especially on a card to send to someone to brighten their day!  I’ve used a previous card kit from Taylored Expressions that contained these products:  Make a Rainbow Stencils, Over the Rainbow clear stamp set, Rainbow Cloud Duo dies, and Over the Rainbow Sentiments clear stamp set to create this card.  I ink blended the different colors through the rainbow stencil and stamped the orange dots over the rainbow as well as a few hearts in light blue ink. The sentiment was also stamped with black ink over top of the rainbow.  I then die cut the one cloud twice from white cardstock and ink blended some light blue around the edges of it and popped it up with foam tape at the ends of the rainbow.

Then the card front panel was run through the die machine using the Taylored Expressions Diagonal Stitch Rectangle dies (Which actually doesn’t cut anything out but creates the lines.)  I layered it onto a piece of black to make the rainbow pop a bit more and then attached it to an A2 sized top folding TE Pineapple card base.  I also topped it off with a couple of TE Bits & Pieces-Full of Heart sequins. 

I knew the minute I went to create for this challenge that my zippered pouch from Taylored Expressions that has the “A Rainbow of Possibilities” sticker over it was what I was going to grab!  All of my rainbow things are in it!  Makes it easy to grab when you know everything is in there!

I hope you’ll stop over at the challenge blog and join with us to share your rainbow too!

I hope you’ve enjoyed my card or been inspired!  Thanks for stopping by and I’ll see you soon!

Challenges:

  1. Sweet Stampin’ – Rainbows & Rainy Days
  2. Arty Divas – Anything Goes
  3. Penny’s Paper-Crafty – Anything Goes
  4. Krafty Chicks – All Occasions (encouragement)
  5. Creative Fingers – Anything Goes

One Layer Challenge and More Riley Fun!

Hello friends!  Hope you’re having a great week so far!  I have a few cards to share with you today that I’ve made over the weekend having some fun.

Vicki-InkyStamper-FebCAS

I love the cute little grin this goat has! This goat along with all of the images used are from the same stamp set by Inky Stamper. This month, the Inky Stamper FB group challenged us to create a ONE-LAYER only card…not even ribbon/twine, etc. could be used! I haven’t made one of these CAS or one-layer cards for quite some time, but I enjoyed the play with it.

So I’ve used masking paper to create this by stamping the goat over masking paper, stamping the goat over the front of the card and then placing the cut out masked goat to cover him up.  I then die cut a circle over another piece of masking paper and placed the left over piece on top of my card where I masked my goat image.  All that was left was the circle opening and this is where I ink blended the opening with distress inks.  I also stamped the small line of grass with green ink.

I took off the circle mask along with the goat mask.  I colored up the goat with Copic markers and then I stamped the triangle image from the same stamp set along with the sentiment.  I then added 3 black gems and colored the inside triangles with a glitter brush pen.  I also used my corner chomper to round the two bottom corners.

This last weekend there was another OOAK event and there was another fun card kit from Riley and Co.  I didn’t attend the entire event, but joined in to see what the new release was about while I was making my cards from the kit.  I’m pretty sure that there are no more of these kits left as they sold out of the first batch and had to make more.

The critters are so fun to color, and I really loved these papers from the kit as they have me anxiously awaiting Spring to get here!  I’m bundled up, drinking hot liquids and trying to stay warm, but nothing beats a warm Spring Day! 😁

To get a better look at each one of these cards up close along with what’s going on for the insides, check out the gallery below.  If you’re directly on my blog website, you can click on each photo below to enlarge it:

Just wanted to share my recent makes as I’m still trying to work at finishing up some Valentine cards along with getting going on the wedding invites.  Sure enjoy seeing the wonderful inspiration from everyone and hope that you’re all staying safe and warm friends!  Thanks for stopping in and I’ll see you soon!

Challenges (Top Goat card ONLY):

  1. Challenge Up Your Life – Triangles
  2. Happy Little Stampers CAS – “Inky”
  3. CAS on Friday – Male
  4. Krafty Chicks – Stamp Act
  5. Just Add Ink – Minimalist 

Finishing Up Summer School With Cupcake Creations!🧁

Hello friends!  Hope you’ve had a great week!  Wow…it’s Finally Friday!  I’ve been SO busy “behind the scenes” and I will be getting to all of that later on, but I needed to squeak in with the final creations for the MFT Summer School!

I finished up Day 2 with my “smile rainbow” and now for Day 3, they’re asking for a “symmetry” style of creation.  I was told that basically it’s something that if you were to split it in half, it would be exactly the same on the other half…so this is what I thought of:

Vicki-MFTSummerSchool-Day3Symmetry

I was so excited about getting the My Favorite Things Cupcakes card kit, so I was determined that I was going to pull it out and use it for the rest of my Summer School cards! LOL!  It’s such a cute set with the dies and sentiment stamps!  I really had fun!

I used some papers from the kit and sponged ink around the edges of everything pretty much.  I just used the two cupcakes side by side for the symmetry class.  I just have opposite colors of sprinkles.  I added the red cherry on top, covered with the glitter brush pen and then some glossy accents.  (The glossy accents really got a work out!😮)

Vicki-MFTSummerSchool-Day4Ombre

So Day 4 class was “ombre” and that pretty much called to me to use the stencil from the card kit (sprinkles in background) and then I just heat embossed white over white and then used inks for the emboss resist technique moving the colors from lightest to darkest to get that classical “ombre effect”.  I also added a die cut cupcake that I used the same ink effect over it.  I die cut the words from the kit with the dark papers I used for the base of the card.  I finished with some sparkly crystal accents to finish it off!

Vicki-MFTSummerSchool-Day5WhiteSpace

And last but certainly not least was Day 5 “White Space” class.  I don’t often make cards like this, but I honestly love those CAS style cards, but I always want to “teeter” on the fine line between CAS and not…so I always think I’m not doing CAS.  I’m just not comfortable with the “CAS” definition or “rules” of what is or isn’t CAS.  I just feel happiest doing whatever happens to work out in my plan for a design…that’s pretty much it!    Be happy and you’re good!

I used this class to also follow along with the MFT sketch challenge going on as it looked like it was a good sketch for making a “white space” design.

I started by masking off the square and sponging lightly around it, I white heat embossed the sentiment over a black strip and added some silver ink over the stencil again and then attached the cupcake over top with the papers…and added the cherry on top with glossy accents too!

I finished it off with another little flag die from the kit and some silver sequins!  I like how it turned out!  I think I deserve a cupcake after all the creations I made!!😋

I hope you’ve enjoyed my creations today and I really appreciate you stopping in to see what’s going today!  Have a fabulous weekend!

Challenges:

  1.  MFT Summer School– Day 3 Symmetry
  2. MFT Summer School – Day 4 Ombre
  3. MFT Summer School – Day 5 White Space
  4. My Favorite Things – Wednesday Sketch Challenge MFTWSC502 (my last card and I flipped the sketch on the side)
  5.  Crafty Creations – #412 August Anything Goes
  6. Craft Rocket – #73 Birthday
  7. Creative Fingers – #191 Anything Goes
  8. Arty Divas – Bonus Birthday Challenge
  9. Crafty Friends Anything Goes

Otterly Missing You!

Hello friends!  I wanted to say thank you for adding your comments from my last post about the card kits! LOL!  I see that I’m not alone!  You’ve all actually really inspired me to get them pulled out and use them despite how old/new they are!  Loved the idea about making several cards and sending them along to charities too!  Always love reading your feedback! 🙂

Today I wanted to share with you another card I made with the oh so adorable Digi Doodle Studios “Otterly Love” Pairables set that you may remember my card from last week that I’ve posted HERE.  I’ve used it again for my card below:

Vicki-DDSOtterlyLove-Jan16

His sweet little face gets me every time! 🙂   As in the previous card I made with this set, I’ve arranged the digital images from the set how I wanted them to look on my design and then just printed it out.

After coloring up my image panel, I die cut it out with a cross-stitch rectangle die and set it aside.  I cut a white A2 sized top folding card base and then layered a white heart embossed (folder from Stampin’ Up!) card front panel that was also cut with the cross-stich rectangle die.  I used some watered down ink (Strawberry Slush from Stampin’ Up!) and a fan brush to splatter some color over it.  I also CAREFULLY took the image panel and splattered some more over that panel as well.

I then arranged the rectangle layers including the gray colored cardstock (Smokey Slate from Stampin’ Up!)  panel and attached them to the embossed card front panel.  I tied some of that triple stitched ribbon (from Stampin’ Up!) around all of these layers and added a bow with it before attaching it all to the card base.  Lastly, I’ve added some clear sequins.

Vicki-DDSOtterlyLove-Jan-close

Here’s a closer view of the Copic coloring I’ve done on this cute critter posing on his little rock.  (I thought he needed a bit of ‘water’ around him.)

You can see the hearts and along the bottom of his feet where I’ve added some shimmer with a clear glitter brush pen.  I’ve also used a white gel pen for his cheeks and eyes.

Vicki-DDSOtterlyLove-Jan-flat

It’s a super simple card, but oh so much fun to color him up!  I thought it was a nice card to send for a ‘miss you’ to someone you love!

Thanks so much for joining me here today friends and I’ll be seeing you soon!

Challenges I’d like to enter this card for:

  1. Creative Fingers – Anything Goes #177
  2. QKR Stampede – Anything Goes #380
  3. Not Just Cards – Jan. Anything Goes
  4. Lil’ Patch of Crafty Friends – Anything Goes (Happy 5th!)
  5. The Cutie Pie– Cute, Clean and Simple
  6. Pammie’s Inky Pinkies – Anything Goes PIP2002
  7. Crafty Cardmakers – Anything Goes #248

Floral Watercolor Foiled Hello

Hello friends!

Here’s what I made for today:

Vicki-BMhop-Aug28ATG

I’ve been wanting to do some coloring… so I got out several of my Aqua Pigments and Watercolor Brushes and went to town with one of these floral panels!  What I love about these card panels is not only are they all gorgeous, but I love that the lines on the images are a bit raised as if embossed which helps with the watercolor process.

Vicki-BMhop-Aug28-panels

As you can see, I’ve only used half of my card panel cut diagonally on my card.  So after coloring up the panel, I thought it was a nice way to cut the panel in half and then still have another panel left over to create another card with later!    So there’s a tip for extended more life out of your card panels!

Vicki-BMhop-Aug28-ATG-close

Here’s a closer view of my watercolor and the pretty shimmer from the Aqua Pigments!  So as you can see, I also did some foiling!  I wasn’t sure if these panels would foil correctly or not, but as you can see only a portion of the image foiled.  I was fine with that as it still adds a pretty sparkle to my card.

I did take the “hello” die and cut that from cardstock and then added some glue over it with the Deco Foil adhesive pen and then foiled over it in my laminator with some Deco Foil Rose Gold Transfer Sheets.  Love the look of the foiling and how it turned out!

Vicki-BMhop-Aug28ATG-flat

For my card, I attached the watercolor cut panel over a piece of black cardstock that I also cut diagonally with the panel and then attached it over a piece of very heavyweight white cardstock.  Then I attached my foil die cut sentiment across the card and added some Acrylic Bubbles randomly over the card. I finished it with some Nuvo Dew Drop accents as well.

I hope you’ve enjoyed my card today!  I appreciate you stopping by!

Challenges for my card:

  1.  Simon Says Stamp Wednesday – Clean and Simple
  2. Allsorts – Feminine
  3. Pammie’s Inky Pinkies – PIP1934 Anything Goes

It’s CAS at Cute Card Thursday!

Hello friends!  I hope you’re having a great week so far!!  I had forgotten to give updates on the “bird nest” situation, but actually the last time we had checked, the baby bird hopped onto the roof next door and the mother bird was chirping at us and then the baby took off and flew away!  We never were able to get any more photos.  I think there was just that one baby bird that survived.  Now we have the empty nest in the tree.  We think another bird may be trying to build on it, but we don’t see anything.

Today is Thursday which means it’s time for a brand new Cute Card Thursday Challenge!!  The theme for this week is CAS (clean & simple)  Our sponsor is All Dressed Up, so be sure to play along for your chance to win!

Here’s my take on the challenge:

Vicki-CCT586-ADU

I have used this really cute image kindly donated by our sponsor called Dreaming of Summer.  I love the “dreamy” pose she has!  I thought she would look so cute propped up over a fence, so I made one for her!

**Sometimes, CAS puzzles me as to the “definition” of what it TRULY is.  To me, it is a bit different to some than others.  I feel it to be more like an “art term” where everything is subjective in it’s form and if I have to think about it TOO much, I’m not being “me” and having my fun with it…so I just create weather it is considered simple or not.  🙂  For me, this seemed like a CAS design.**

First, I colored up the image and then stenciled on some clouds behind her.  I took a craft knife and cut out just the bottoms of her elbows.  I stamped another panel with a woodgrain stamp in gray colored ink and then used a punch with a sharp point to create the “planks” for the fence.  I sponged around the edges with more gray ink and then I tucked the fence panel underneath her elbows and attached it to the image panel.  I cut out these pieces with a stitched rectangle die and layered that onto a piece of black cardstock that was layered over an A2 top folding white card base.  Lastly, I added the die cut “hello” with black cardstock in the corner.

Vicki-CCT586-ADU-close

Here’s a closer look at the coloring I’ve done on this image.  I’ve colored her in with Copic markers and then for the tiny butterflies, bees and flowers around her, I’ve used some metallic gel pens to color them with.  You can see the shimmer on them.

I’ve also taken some liquid pearls to place some dots around her as well.  I thought it made her look a bit more whimsical.

You can also see where her elbows are lifted up over the fence panel too.

Vicki-CCT586-ADU-flat

Thanks so much for stopping by!!  See you soon!!

Challenges for this card:

  1.  All Dressed Up Challenge – Anything Goes + ADU image
  2. Craft Rocket – Summer is Coming
  3. Happy Little Stampers – Anything Goes with Dies
  4. Crafting From the Heart – Anything Goes
  5. Crafty Creations – #392 Anything Goes