Interactive Fun for Crafty Chefs + Video

Hello friends!  We are nearing the end of July and I wanted to be sure to try and get at least ONE “Christmas in July” project in before the month is gone, so I thought I’d keep things fun and simple as well as “kill 2 birds with one stone” so-to-speak!

Now we’re given one “must do” item from the previous chef to use on our recipe.  My item from Nana Connie was *”die cut” and so here is the project that I’ve made for this month’s “Crafty Chefs” group:

Vicki-DDSElves-squarefold

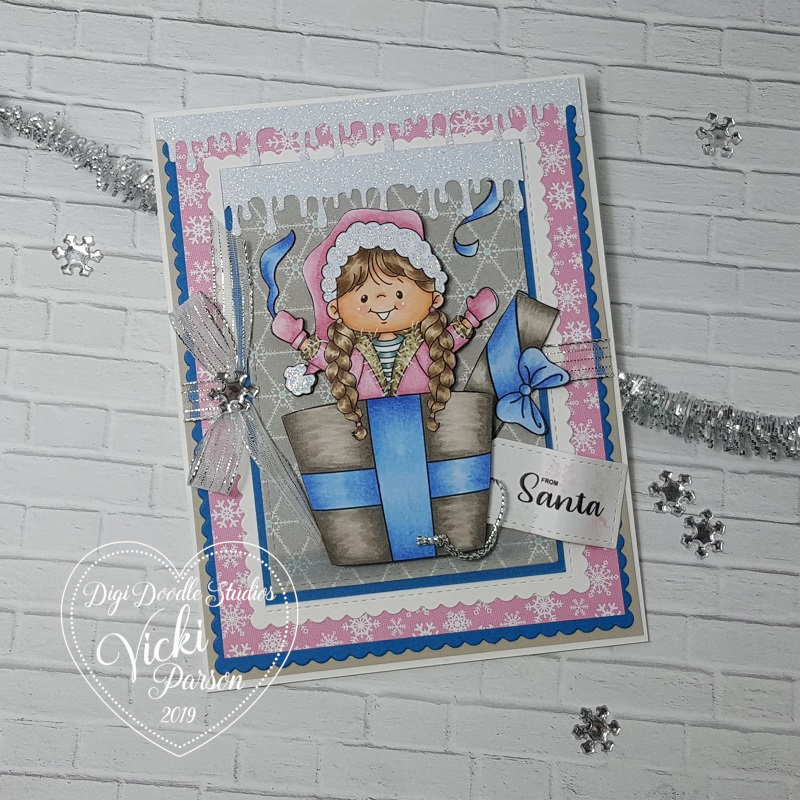
I have used a scallop square (cut from gold metallic mirror cardstock) and stitched square die cuts for layers on my project here.  I’ve taken this really cute elf image from the Christmas Elves Pairables digital set from Digi Doodle Studios on the front of my design.

I’ve printed out and colored the present from the same digital set along with another elf image (for his arm only) so that I could cut them out to make it look like he’s holding the gift.  His cut out arm was popped up with foam tape.  I’ve colored with Copic markers, added details with gel pens, liquid applique and Stickles glitter under his feet for snow affects.  I also stamped extra snowflakes for the background as well as add three snowflake rhinestones for accents.

Here’s the Crafty Chef’s August Recipe:

MUST DO:

  1.  *Die Cut (can also use electronic machine like Cricut, etc)
  2. Interactive (More than 1 fold eg: easel card, gatefold, etc.)
  3. Specialty Paper (foil, vellum, glitter, etc.)
  4. ribbon/twine/raffia

CAN DO:

  1.  Color an image
  2.  Add THREE of something
  3. **add glitter/sparkle – (this one I’m passing along to the next chef)

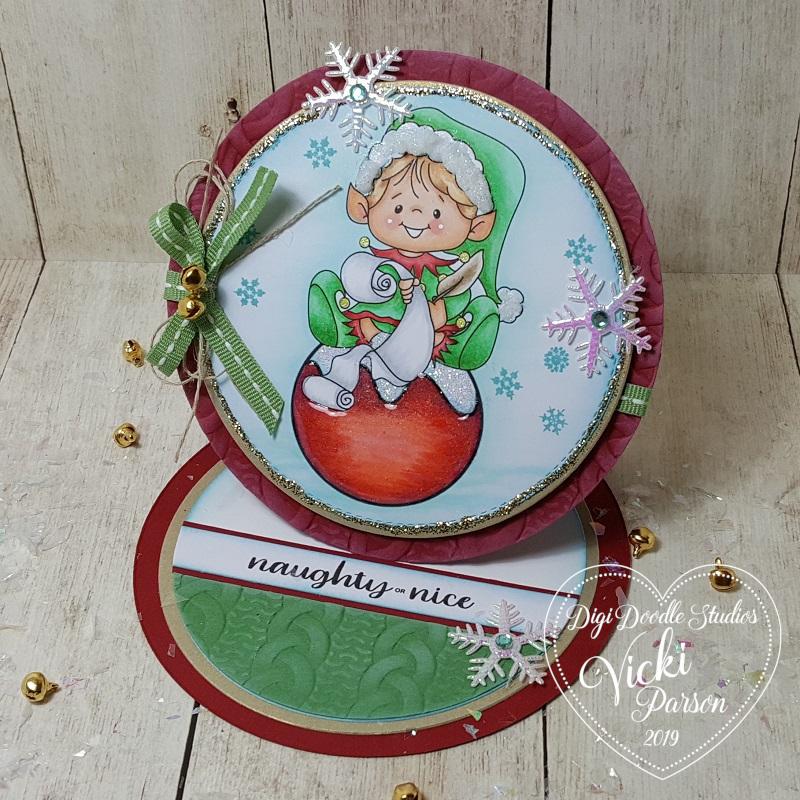
It doesn’t appear to be very interactive by looking at it, but when you untie the ribbon along the side, this is what it looks like when you open it up:

Vicki-DDSElves-squarefold-open

I have decorated two of the opposite panels with a greeting and then I’ve added a pocket to the top left panel so that I could include a gift card or cash to the recipient for Christmas!  I thought it was a super quick and fun interactive design to do!

If you are interested in learning how this project comes together, I’ve made a video sharing the measurements on how it’s done:  (CLICK HERE to see the video on You Tube.)

During this time of the year when it’s pretty warm over my way, it’s sort of a nice thought to think about some snow!  Plus, it always nice to get a start on some Christmas too!  (It’s not necessary for the “Crafty Chefs” to use a Christmas theme…it can be anything.)

I hope you’ve been inspired by my project today and have learned something fun in my video with it too!  (I have even more interactive tutorials on my You Tube video channel if you’d like to see other ideas!)

Thanks so much for stopping in today friends and I’ll be seeing you again soon!

Challenges:

  1.  Colour Crazy Craft – Anything Goes + coloring
  2. Daring Cardmakers – Three Musketeers (3 snowflake rhinestones)
  3. Sweet Stampin’ – Chrismas in July
  4. Lil Patch of Crafty Friends – Anything Goes (Christmas in July)
  5. Crafting Happiness– #59 Anything Goes
  6. Pammie’s Inky Pinkies – PIP2030 Anything Goes
  7. Dream Valley – Christmas in July
  8. Fab ‘N’ Funky – #492 Christmas
  9. Christmas in July 2020 Hop – Anything Christmas

A Special Present from Santa for Digi Doodle Studios

Hello friends!  Happy weekend!  It has warmed up slightly for us this weekend and the sun is out…for now!  It’s supposed to get below freezing again soon though and I’ll have my warm slippers ready for it!

Today I have another fun card to share with you using a Pairables set from Digi Doodle Studios:

Vicki-DDSChristmasElves-Nov16

Surprise!  This cute little girl is popping out of the gift marked:  “From Santa” and she threw open the box lid and is tossing blue ribbon around everywhere!  She seems to be so happy about celebrating in the cold!  LOL!

All of the images I’ve used for this card came from the Christmas Elves Pairables set from Digi Doodle Studios. (There are so many elements to play with in this set!)  I have actually enlarged a couple of the images from the set and sized them the way I needed them to fit with my scene and make it appear as if she was popping out of a large box.  I printed out the girl a couple of times so that I could place her behind the box with the lid and then another image to cut her out without the lid of the box and make it more dimensional.

I’ve used several layers of cardstock and more decorative papers behind her with both stitched and scallop rectangle dies.  I used my Martha Stewart “goo” border punch to add the “snow” look at the top of the layers with white Glitterstock.

I’ve added some silver metallic ribbon behind the smaller layers and placed a snowflake rhinestone in the middle of the bow.  I die cut the sentiment with a stitched tag die and added some silver twine to tuck alongside the present.  I stamped some pink snowflakes over the tag and crinkled it up a bit for dimension and movement.

Vicki-DDSChristmasElves-Nov16-close

Here’s a closer look of the coloring I did on her with Copic markers.  I’ve used a white gel pen for her cheeks as well as to help create the texture on her coat.

I’ve used some Nuvo White Blizzard Glitter Drops for the sparkle on her hat trimmings and she was popped out from the background paper with foam tape.

Vicki-DDSChristmasElves-Nov16-flat

I hope my card gave you a smile today and were inspired in some way!

Thanks so much for popping in here today my friends!  So happy you’re here!  I’ll see you again soon!

Challenges:

  1.  Addicted to Stamps – Anything Goes
  2. Pammie’s Inky Pinkies – PIP1945 Anything Goes
  3. Through the Craft Room Door – Anything Goes
  4. Fab ‘N’ Funky – Add Some Sparkle
  5. Creative Knockouts – Anything Goes
  6. Jingle Belles – Baby, It’s Cold Outside!
  7. Send a Smile 4 Kids – Happy Holidays or Anything Goes for kids

Naughty or Nice for Digi Doodle Studios

Hello friends!  Hoping you all had a wonderful weekend!

Today I’m sharing a fun circle shaped design using a cute new Pairables set from Digi Doodle Studios:

Vicki-DDSChristmasElves-Nov4

This cute little elf is sitting atop of an ornament, getting out the list for Santa and marking down who’s naughty or nice! LOL!  This image and sentiment are apart of the Christmas Elves Pairables Digi stamp set.   On my computer I actually expanded the ornament image to make it larger and then added the cute little elf from the set right on top of the ornament.  I printed it out as one image and colored it up with Copics.  I’ve also stamped some snowflakes around the image and cut him out with a circle die.  I used some Broken China distress ink to sponge around the edges.

I layered him onto a brushed gold die cut circle and added some gold stickles around the edges.  I then layered these onto a red die cut circle that was embossed with an embossing folder, which is also the same one that I used for the green piece on the inside of the card.

I made a circle easel card and then cut out the sentiment from the digi set in a strip  (also sponged with Broken China ink) and mounted it over another piece of red cardstock and attached it on the inside right above the green embossed layer.  (This strip is what helps keep the front layer propped up.)

Vicki-DDSChristmasElves-Nov4-side

Here you can see the side view of the card design.  These are very simple to make with die cut shapes and I love how they nicely display for the recipient.

I’ve add some green saddle stitch ribbon to the center of the red circle before attaching it to the easel card backing and then added a bow that I’ve tied 2 gold bells on with a piece of twine.  I then used the twine to make a double bow to go behind the green one and glued them on my card.

I added some snowflake accents and placed a blue rhinestone in the center of each.

Vicki-DDSChristmasElves-Nov4-close

Here’s a closer view of the details on this cutie.  I actually have lots of thing going on with this image.  First, I covered the bottom of his ornament with glossy accents.  It’s a fairly thick layer and you can see the details of it in the photo below, but I had to let it dry over night!

I have taken a gold gel pen and colored the “bells” on the elf’s outfit.  I then took a white gel pen for his cheeks.  On top of the ornament, I used a glue pen and covered it with some clear loose glitter.

For the trim on his hat, I took some Brutus Monroe Snow Paste and a small brush to apply it.  It’s REALLY thick stuff, so for a small area like that, I had to be a bit careful.  Love the sparkle in it and you can see, in the photo above this one, the side view of how thick it actually is!  I heat set it with my heat gun because it “puffs” up a bit when you heat it.

Vicki-DDSChristmasElves-Nov4-flat

Here’s what the card looks like when it is closed up.  I think this would also make for a really cute ornament too!  You can really see the shine on the glossy accents from this photo and why it took all night to dry! LOL!

I hope you’ve enjoyed my easel card today and gotten some inspiration and/or a smile!  Thanks so much for stopping in today!  I’ll be seeing you again soon!

Challenges:

  1.  Merry Little Christmas – November Anything Christmas Goes
  2. Pearly Sparkles – Christmas
  3. My Time to Craft – No Rectangle or Square Cards Allowed
  4. Stamping Sensations – Traditional Christmas Colors (Red, Green, Gold)
  5. A Bit More Time to Craft – Anything Goes
  6. Crafts Galore Encore – Anything Goes