Aliens Made Me Do It for Craft Roulette & More Catching Up!

Hello friends!  For those that celebrate the July 4th holiday, I hope you had/ having a great weekend!  We usually do a cookout and later watch fireworks.  It was a bit hot and humid so we didn’t stay outdoors very long and watched a movie instead.

WARNING:  PHOTO HEAVY POST!!!!

0CraftRoulette

I think I may have posted about this before, but last year I was introduced to Craft Roulette (a papercraft game show on You Tube) by Chelsea from Inky Stamper when she was a guest on there last year.  I quickly became addicted to it and have been playing quite regularly.  In fact, this is Chelsea’s third time as a guest on there and I wanted to share what I’ve made for episode #222 that aired on You Tube Friday July 5th, 2024.

The parameters this week are…

  • PROJECT – Dutch Door (create a card/project with dutch door)
  • COLORS – Gnomes (whatever inspires those colors to you)
  • ELEMENT – Movie 
  • RANDOM – Building Blocks

If you’re interested in playing along, check out the Craft Roulette website on how to enter and watch the episode!  You can watch/play along on You Tube with them every Friday evening. (Check what time zone you’re in compared to the Central US time zone used for Craft Roulette live shows.)  You have until Sunday evening to play.  If you enter the Craft Roulette #222 episode by then, you can also enter your card over at Inky Stamper Inkspiration Group on FB for a chance to win a prize from her as well.  So check it out!

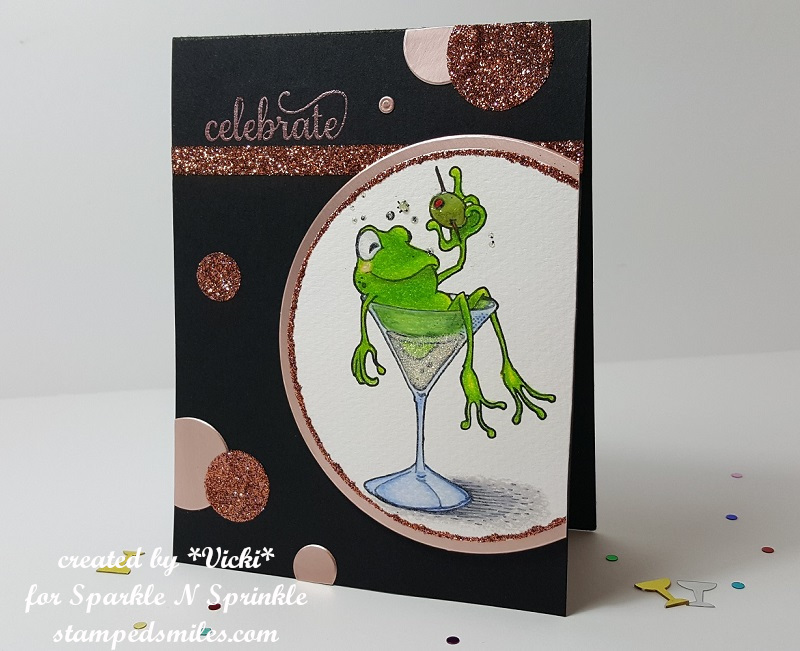
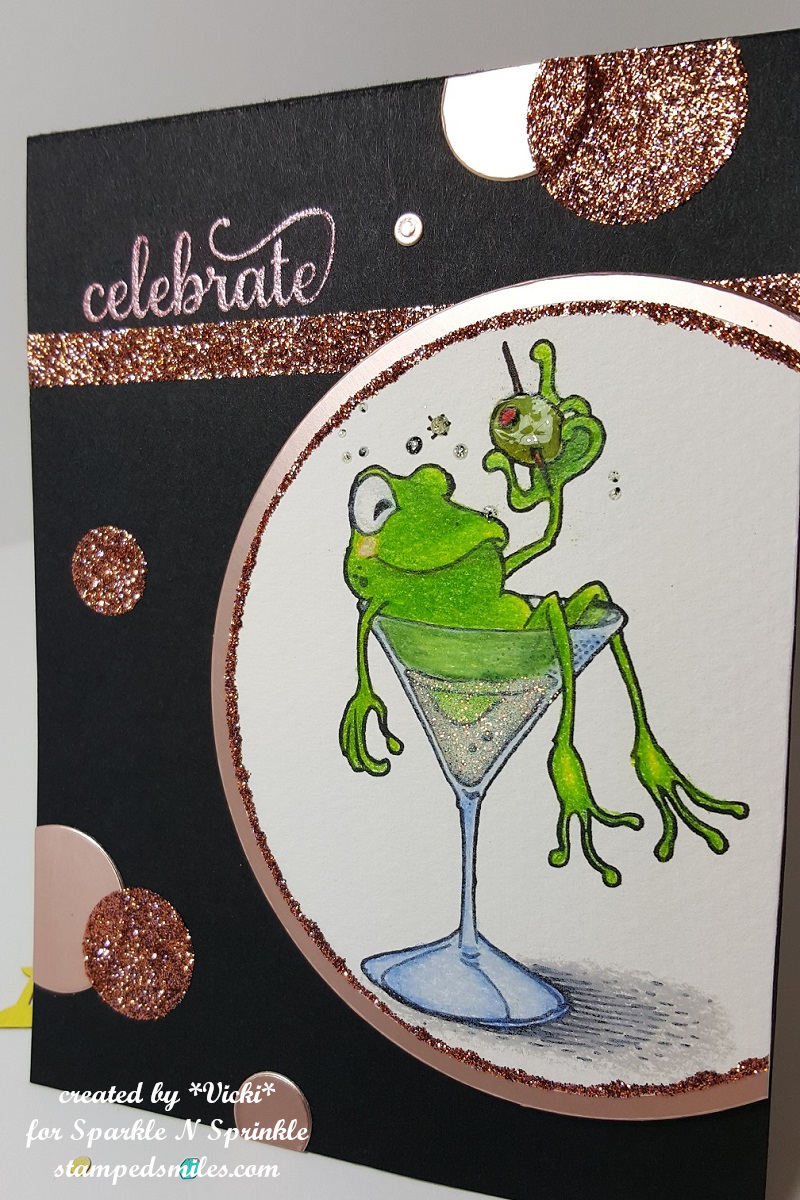
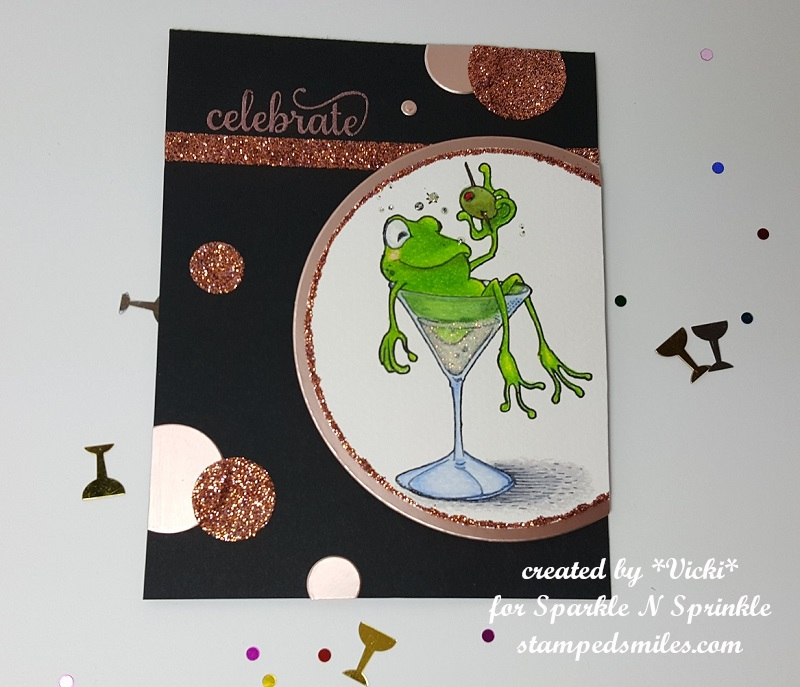
I think this one turned out cool using the Inky Stamper Alien stamp set! I have my alien (which is my “movie” element parameter) colored up with pencils and cut out with the die. I stamped the molecule (which is my “building blocks” random parameter in red ink over a piece of Doodlebug graph paper. I sponged the edges of this piece with some grey ink before attaching it to the bottom portion of the card. The sentiment also came from the same stamp set that was white heat embossed over black and cut out with a banner die and popped up with foam squares.

To create the “Dutch Door” card for the project parameter, I just used a black A2 card base and cut the front in half so that only the bottom portion of the card opens up. For the torn hole behind the alien, I used the Lisa Horton Torn Aperture 3D embossing folder and die. I used some silver mirror for the outer edges and black for the back along with a piece of white for the background details. I finished it off with some Pinkfresh Studio Ice clear drops.

Here’s the inside of my Dutch door card.  I took a white piece of cardstock for the inside of the card along with the white piece from behind the torn aperture on the front and ink blended a galaxy background with reds, blues, greens, yellows and black which works with the “gnomes colors” for the colors parameter.  I sprayed the background with water, let it dry and then I white heat embossed the sentiment from the alien stamp set and then I used silver watercolor to splatter over top of both pieces. 

I attached the insert for the aperture back in with the silver frame and attached it to the front bottom portion with half of it sticking up above it.  (As you can see in the photo above.)  The alien was attached over the aperture with foam squares.

Had a lot of fun making this one and playing along using the parameters!


Obviously, I don’t post the cards I make every week for Craft Roulette on my blog, but I thought I’d share all the creations that I made last year since my very first contribution that I’ve done.  I thought I’d save the cards for posting at the end of each year to look back on them.  I started in January of last year and only skipped a couple of them.  This card today will be my 72nd contribution!

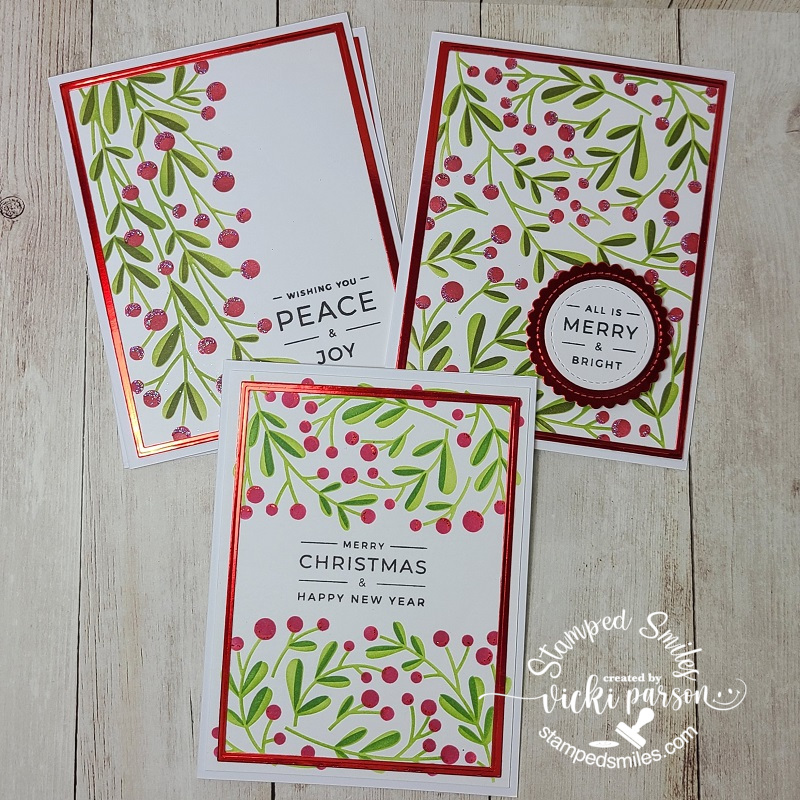
So here’s a gallery of cards that I’ve contributed since I first discovered Craft Roulette in January of 2023 up to December 2023:  (I will post the cards for this year in December!)

  • If you’re on my website, click on the photos to see enlarged

Wow!  That was ALOT of cards!  I placed the episode #s on each one for reference on what the parameters would’ve been.  So this is what happens when I don’t post!

I have fun trying out the parameters each week and entering.  I did win a prize one week from The Paper Insider which was a box of gorgeous papers.  They’re all so gorgeous that I seem to be hoarding them and not used any of it!🙄  That will be a goal for one of these weeks for sure!

Hope you’ve been inspired with my post today and maybe I’ll see you over at Craft Roulette sometime!  Thanks so much for stopping in today! 

Challenges:  (For Alien card only!)

  1. A Place to Start – Anything Goes
  2. Creative Crafting Uncles – #54 embossing heat/dry (I did both!)
  3. Crafts Galore Encore – #125 Anything Goes
  4. Love to Craft – #81 Anything Goes
  5. Love to Scrap – #168 Anything Goes

Bugging Out With Sketches

Hello friends!  I hope you’re having a good week so far and staying safe wherever you are in the world.  Sending hugs to all experiencing a troubled time.  I hope that my post can bring a smile to you today.

I needed to create some get well type of cards and so I thought I’d try to incorporate some challenges while working on them which helps me to concentrate more in what I’m doing and maybe think outside the box a bit.

My first card is made with the Beccy’s Place Challenge freebie this month and she also challenged us with a sketch which I’ve decided to use for my card. (see sketch below)  I was really happy to use up some more pattern papers with it and I also decided to add a tiny dragonfly at the top to enter another challenge and to adhere to my “bug” theme today!

I printed the image in black and white and colored with Copics.  The dragonfly and the center pink strip were stamps that I cut out and added to the design.  The rest is pattern paper from my stash except the scalloped kraft border in the center that I cut out with a die.  I stamped the sentiment and cut it out to go with my twine around it. *You will notice in ALL of these cards that I’ve used some sparkly gems.  I wasn’t aware until posting them!  I must be on a kick of wanting to use them!*

Challenges for 1st card:

  1. Beccy’s Place – August challenge + sketch
  2. Paper Dragonfly Creative – Anything Flies (Goes) or Party
  3. Kreativ-Tanten – Anything Goes
  4. The Crafty Addicts – Anything Goes
  5. Crafty Calendar – Anything Goes
  6. Dragonfly Dreams – Dragonflies

And for this next card, I’ve played with a large bug:

Around my area this time of year, you can hear the sound of these cicada bugs with their distinct noise throughout the trees.  My husband likes the sound when a bird catches one! EEW!  This bug is a cute one from Inky Stamper called Cicada and I’ve colored it up with pencils this time.  Hard to see, but I’ve also added some shimmer with a glitter pen on his wings.

I’ve used the Picket Fence Tree Bark stencil over kraft on the background and then splattered it with brown and white paint. The leaves under the bug and the accent came from the Lisa Horton Variegated Leaf EF+die that I cut over light green cardstock.  I used some metallic green wax to go over the details in them.  I also used some gel pens to make some doodles around the strip, the circle and under the sentiment along with following a sketch. (details below) You will also notice more sparkly gems!  I’m also entering this in the Inky Stamper FB challenge this month which is using an IS bug image.

Challenges for card #2

  1. Sketch Saturday – #732 sketch + twist: add a doodle
  2. Creative Knockouts – #501 Anything Goes
  3. We Love Stamping – Masculine
  4. Lil’ Patch of Crafty Friends – Anything Goes
  5. Pammie’s Inky Pinkies – Anything Goes
  6. A Place to Start – Anything Goes optional: leaves/trees
  7. The Corrosive – Anything Goes

For my last card I decided to keep this one simple’ish’:

So, I know these aren’t real bugs because I’m not squealing, but these guys are too cute! They’re popping up out of the dirt for a special greeting!  I mixed in both a new and older stamp set from Lawn Fawn on this one. I’ve used another sketch for this one and decided to keep it very simple.  The hardest part of this was the coloring which honestly wasn’t all that difficult either because they’re small images.  I’ve also added some shimmer with a glitter pen on the wings and of course, there’s those sparkly gems again!

Challenges for card #3

  1. Sunday Stamps – SSC316 in the corner sketch
  2. The Paper Players – CAS using any Bug
  3. Simon Says Stamp Wednesday – Clean and Simple
  4. Krafty Chicks – CAS (Clean and Simple)

Thanks so much for stopping by today!  I appreciate your time and thoughts!  I’ll be seeing you again on Saturday with another AJ page!

What? It’s Christmas Already?!

Hey there friends!  Wow, so my last post was Thanksgiving and I pretty much missed the entire month of December it seems like, right?!  It has been a very crazy month with lots of different things (including personal) going on so pardon me for going MIA!

I HAVE been working on some projects here and there and I would be happy to share those, but for right now, let’s focus on the Christmas projects that I’ve been working on getting ready for the up-coming Holiday next week! 

I have already sent out my Christmas cards, thank goodness, as I wasn’t even sure that was going to happen either!  I was very impressed with the new Taylored Expressions Create-in-Quads Mistletoe Layering Stencil and how quickly I was able to knock out 4 card panels at a time, which was a huge time saver to get my Christmas cards finished up!  There is actually a set of 4 designs here (like shown below), but I was in the middle of addressing the cards and forgot to photograph some before shoving into envelopes! LOL This set was using the white cardstock with the green and red colors which turned out very pretty.  I also used the red glitter paste for the highlights on the berries.

And here is the other set of four cards that I made using the Toffee colored cardstock with green and white inks for the stenciling.  I’ve also splattered these with brown and white paint.  The sentiments were white heat embossed over some TE Chocolate Truffle cardstock and cut out with some MFT dies.  Before attaching to the pre-made white A2 card bases, I also wrapped some twine around some of the panels or added a bow with it. (I love the homespun look of the white mistletoe!)

These all turned out great because they were pretty much flat and fairly easy to mail off.  I think I was short just a few which is where I’m glad that I still have a few extra cards that I had made throughout this year and I have previously given out some “extra special” Christmas cards earlier in the year as well.  I think you may have already seen them from a previous post…I will have to take a look and see under my “Christmas” section!

If you’re looking for a last-minute Christmas gift/tag, these wood slice things are so quick easy and fun to create!  I’ve had a huge box of these wood slices for a long time, so I pulled one out to make a project for the Inky Stamper December challenge on FB.  I had hubby drill out a hole for me at the top before decorating so as I knew where to put everything.

I’ve used the Inky Stamper Christmas Bauble stamp set for the stamping on the wood and colored in with pencils and gamsol.  I’ve added details with a glitter brush pen on the ornament and added some snowflakes with Nuvo White Crystal Drops.  I had to mask the frog to stamp the Santa hat on him.  I’ve used some silver twine for the hanging portion and then I glued a silver bow with some silver ribbon from my stash under the hole.

And lastly, I’ve also been working on some commissioned cards as well!  Last year, I had a request from someone to create a special Christmas card for his cleaning lady.  I had him pick out an image and asked about the colors…you may remember it as I had posted it last year.

a few months back, someone had asked me to re-create the same design for them with pretty much the exact design with the exception of the sentiment which I changed out for this person.  This one went to another country and I was concerned about the shipping costs, but it was not a problem.  The package had taken an unexpected journey because of the crazy mailing system going on at this time, but it arrived eventually and was in “perfect condition” as reported to me, so I was so thrilled with that and they seemed very pleased with it.

With the square size of the design (5″ x 5″), I’ve handmade the envelope for this one as well.  I found the exact papers used in the designs for these cards, but I don’t think I have any more left after completing this one.

Here’s how I’ve decorated the inside of the card and left blank as requested for their own personal use.

So now, I just want to take this time to say THANKS SO MUCH for hanging in there and stopping in today!  I don’t have too much time on my hands right now as I’m getting ready to make some Christmas treats and the Holidays will soon be over.  I hope you are all doing well and I wish each and every one of you a very safe, happy and healthy Holiday Season!

See you again in the New Year 2022 friends!!

{Cupcake Inspirations} New DT!🧁

Hello friends!  I’m so excited to announce that I’ve been asked to join the {Cupcake Inspirations} Challenge design team!!

What could be better than crafting AND cupcakes, right?!  So be sure to join me here every Monday for new challenge and reminder inspiration!  I do hope you’ll check out the challenges and join us over there to play along!  (And maybe enjoy yourself a cupcake treat while you’re at it!😁)…if you’ve followed along with me for a while, you may have remembered about 5 years back that I used to be on this team before!  So I’m excited to be joining with them once again!

So here we go with the brand new challenge and a really fun theme to play with:

The theme for this challenge is “Flowers with Pearls/Sequins

**The challenges will last for 2 weeks, so you will have that long to play for each challenge!  There is a theme challenge and then a color challenge for every other one.  There will be a reminder week in between each one as well…so be sure to subscribe and follow the blog so you can see the inspiration and play along with us!**

**We are also partnering with the Double Trouble Paper Crafting Challenge Blog with their challenge of a tic-tac-toe board!  So be sure to check out all of the up-coming details and play along with them too!**

Here’s my take on the challenge:

Vicki-CIC497

I was really inspired with the flowers and pearl theme and I’ve been wanting to play around with a past card kit I had to color with pencils, which I hardly ever do!

The flower images come from the Simon Says Stamp Stronger Together stamp set and kit.  The kit had some colored pencils with it that I used to color the image and then I just used some dies from my stash to add the layers.  I took an additional floral image from the set and white ink to stamp the background and swiped the ink pad around the edges.

To fit with the challenge theme, I thought it would be fun to add several sizes of pearls along the edges of the oval panel.

Vicki-CIC497-close

Here’s a closer view of the coloring on the flowers.  I’ve also taken a sentiment from the stamp set and inked it up with some eggplant ink using my MISTI tool.  I inked it up again with some embossing ink and then added some clear sparkle EP over top of it to heat set.  The sparkle shows up so much better in person, of course!  I cut it out with my scissors and popped it up over the image with foam tape.

Vicki-CIC497-flat

Really hope that you’ve been inspired with my creation today!

I will be back next week with more inspiration for this challenge!  Thanks so much for dropping by!

Other Challenges I’d like to enter this card for:

  1.  Crafty Creations – #411 Anything Goes
  2. A Bit More Time to Craft – #119 Anything Goes
  3. Crafts Galore Encore – #77 Anything Goes
  4. QKR Stampede – #401 Anything Goes
  5. Love to Craft – LTCCB48 Anything Goes
  6. Love to Scrap – LTSCB135 Anything Goes
  7. Watercooler Wednesday – WWC278 Anything Goes Feminine

Celebrate for a Hoppy New Year!

Happy New Year friends!!  Here’s wishing for a very HAPPY, HEALTHY and CRAFTY 2019 to you all!!

So… to be festive and join in on the celebration everywhere, I’ve decided to make a special card just for the occasion! 🙂

Vicki-SNS-challengeblog

I’ve used this really fun digital stamp called Max and I have used my Prisma Color pencils to color him in with over some Canson Mi-Teintes Pastel paper.  I cut him out with a circle die and then ran some glue around the edges with a Nuvo Medium Tip Glue Pen and sprinkled some Copper Jewel Glitter over it.  I mounted another circle behind it that I’ve cut out with some Tonic Burnished Rose Mirror Cardstock.

For the background of my card, I’ve used some Adhesive Sheets that I’ve cut out in different sized circles and then added some of the same glitter that I’ve used for around the frog image panel.  I cut a few more circles out with the same mirror cardstock as well.

Before attaching the circles, I’ve heat embossed the sentiment over the A2 sized top folding black card base with some bronze Rose embossing powder, which I think matches up beautifully with that mirror cardstock!  Right underneath the embossed sentiment, I added some 1/4″ Tear Tape and sprinkled on some more of that pretty glitter that I’ve used all over this card.  Then I added all the circles in the background including the frog image panel and cut off the circle part sticking over the edge on the right side.

Vicki-SNS-challengeblog-close

Taking a closer look at the “party Max frog”, you can see better how he’s colored in and a few other details that I’ve added to him.  For the olive shine, I’ve used some Nuvo Morning Dew Crystals Drops and for the “liquid” glass he’s sitting in, I’ve taken the Nuvo Medium Tip Glue Pen and sprinkled some Waterscape glitter over it.  I’ve also used the Nuvo Gold Coast Glitter Drops to add a bit of sparkle around Max’s head.  (I’m assuming that it’s a bit of “champagne pops” from the glass!  Tee Hee!)

Vicki-SNS-challengeblog-flat

Just like Max here, I’m just as happy to dive right into the New Year in 2019!

Thanks so much for dropping in!!  Enjoy your first day in 2019!

A Beary Sweet Christmas Tag for 2 Crafty Critter Crazies

Hello friends!  I’m back with another new challenge for you today!

It’s the first of the month, so that means it’s time for a new monthly challenge over at 2 Crafty Critter Crazies!  As always, the challenge will last for 1 whole month and all you need to remember is to add a critter to your creation!  We look forward to seeing your critter makes this month!

Vicki-2CCC-SnS-tag

I have used this darling digital stamp set called A Peppermint Christmas. I used a Word doc. to design it before printing it out.  Once printed out, I cut it down to size for my black tag and rounded the corners with a corner chomper.

I’ve been trying to develop my skills a bit with colored pencils and invested in a large set of them recently.  So, this is what I have used to color in the images of my tag.  After coloring it all in, I took out my Quicky Glue Pen and then sprinkled some Glitter (Semi-Transparent) over the snowflakes and dark gold star bursts.  For the stars, I’ve sprinkled the Lemonade Ultrafine Glitter (Semi-Transparent) over it for a bit brighter sparkle!  I’ve also covered the peppermint candies with the Nuvo Aqua Shimmer Glitter Gloss Pen for some shimmer.  AND… if that wasn’t enough, I took the Quickly Glue Pen again and went along the edges of the white image panel and added the Waterscape Glitter to the edges.

For the assembly of my tag, I’ve used a pre-made tag from Graphic 45 and sponged around the edges of it with white ink.  I took some green colored glitter paper from my stash and added a strip of it across the center of the black tag.  I then added some pink silk ribbon strips on each side of the glitter paper.  I then used some craft foam to pop up the image panel and placed it on the tag.

I finished it off with a pink silk ribbon bow and added some more of it to the tag hole for a hanging element and tied that together with a piece of white twine.  Decided for a finishing touch to add a sparkly snowflake gem in the center of the bow.

I hope that you have enjoyed my critter project!  Thanks for hanging in there with me!

Challenges:

  1. QKR Stampede – Anything Goes (319)
  2. Sunny Day Crafting – Animal
  3. The Holly and Ivy Christmas Challenge – Anything Christmas Goes
  4. The Merry Christmas Challenge – Anything Christmas Goes