**DON’T FORGET TO ENTER THE GIVEAWAY I’M OFFERING IN THIS POST – OR SCROLL BELOW THIS POST TO SEE!**
Hello crafty friends! I hope that you all had a happy Christmas time with your loved ones and friends! 2025 is quickly approaching us and I know there will be lots of changes coming to look forward to! Although I’m not feeling 100%, so I think I’m going to rest for the remainder of what’s left of the year🤒.
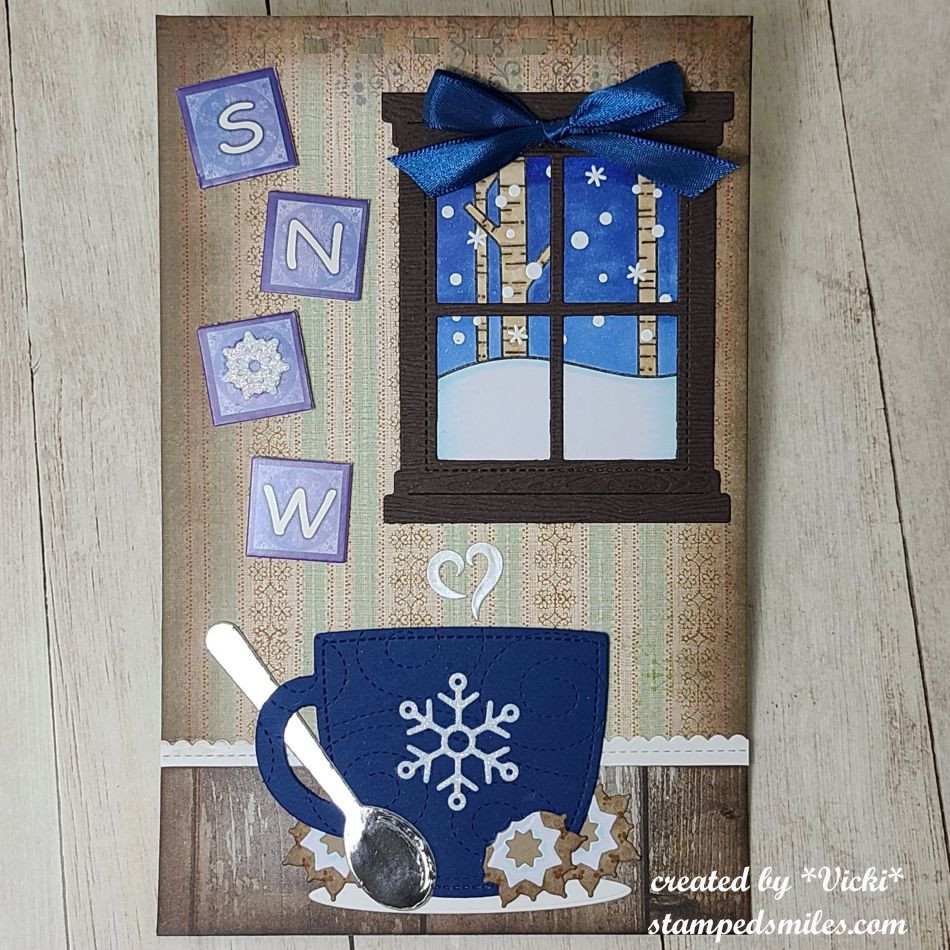
Today is the monthly Art Journal Page collaboration with my crafty friend, Carol (from Crafty-Stamper)! We get creative trying to use up our never-ending stash piles along with a prompt for each month. I know she always has great inspiration to share, so please check out her blog too! Here’s my AJ page with the “SMASH OUR STASH” December prompt of “FOUND OBJECT(S)” (something you found or discovered): (I’ve also combined 2 other past prompts with this one that I’ve missed out on earlier in the year!)
SNOW SNOW SNOW! I know people that hate it and people that love it! Whatever YOUR favorite place to be with it…or not…mine is being inside the warmth and watching it from the window! I don’t mind shoveling if I need to help my husband, but I enjoy watching it peacefully from the window.
The prompt for THIS month (December) is “Found object(s)” and I found some VERY pretty blue ribbon on a present this year and decided to keep it…and I have plenty left for another project! I used it above the die cut window. (This page is my normal 5.5″ x 8.5″ with pre-punched holes at the top…I would have a book finished, but I wasn’t feeling well enough to get one done, so I’ll have to do it later.)
And for the other prompts I’ve missed this year: August I was away and didn’t get to complete that one and the prompt for that month was “Vintage/Old“. The background wallpaper area looks vintage to me and it came from a VERY old pack of paper that I’ve had along with the letters on the side of the window. I also missed November and the prompt for that month was “Food“. I love me a good cup of cocoa in the winter and I thought I would make myself some Linzer cookies to add with it in the shape of snowflakes with frosting on them! I even took a bite out of the one in front of the cup!
Since I’m not feeling well, I’m going to stop typing and get some sleep now. Please let me know if you have any questions about the page as I’d be happy to answer!
Thanks so much for taking the time to stop in! I really appreciate it and will try to reciprocate when I feel better. Happy New Year friends and I’ll see you in 2025!
Hello friends! We’re here! We made it to Christmas Eve!😀 My cards have been sent out, my cookies are done and delivered as well as my other little gifts. This is quite a long post, so grab your hot cocoa or whatever your favorite beverage is and a Christmas cookie or treat and let’s see what I’ve been doing this past week:
So, starting with my Christmas cards, I usually make around 40ish cards each year give-or-take and I only like to make a handful of them at a time for not only boredom of the same design, but for product depletion as well.
So back in July, I purchased this really adorable card kit from Taylored Expressions (included was the Frosty Background Cling and Clear Combo set + more.) that came with coordinated colored envelopes as well as the seals. So, I made a set of four different colored designs in two of each one. The snowmen were popped up with foam squares over the backgrounds and I added some fun Snowflake bits that were included with the kit as well.
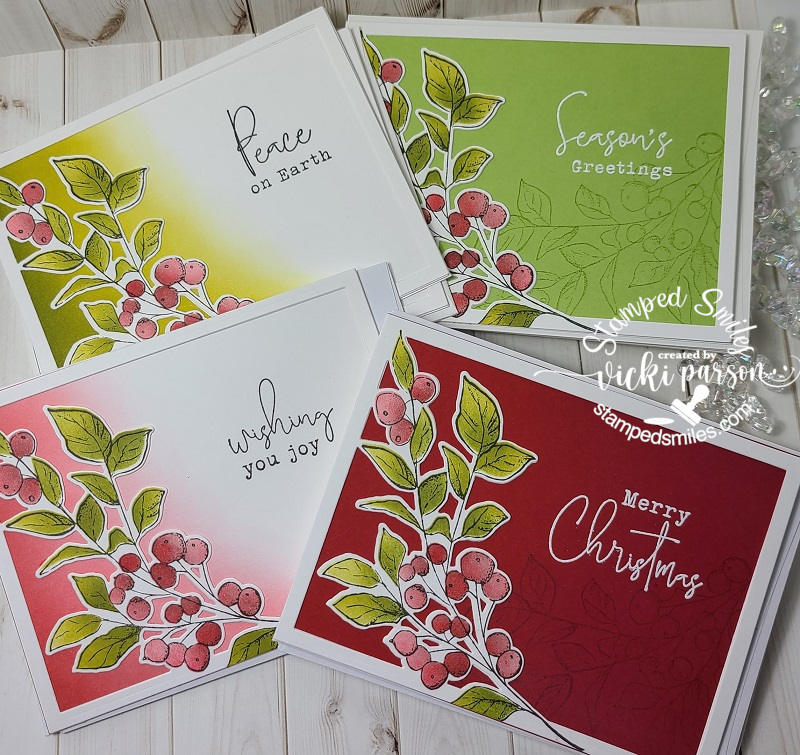
Next up is another set of cards I made using some more gorgeous products from Taylored Expressions. I’ve used the Seasonal Sprig stamp and die combo along with the stencil to color them in with. Some of these I ink blended the backgrounds, so I just used cardstock with a watermark effect and a white heat embossed sentiment. I used the die to cut an extra frame behind the stamped one for added stability. I made 4 of each design shown here for a total of 16.
I then made another set of four using the same products, but for these I gold heat embossed the image and sentiment and then used some watercolor for coloring it in with. I also got some of these coordinating envelope seals to use on about 10 of the 16 cards. (No longer available in store.) I’ve also partially ink blended the background behind the frame on these as well.
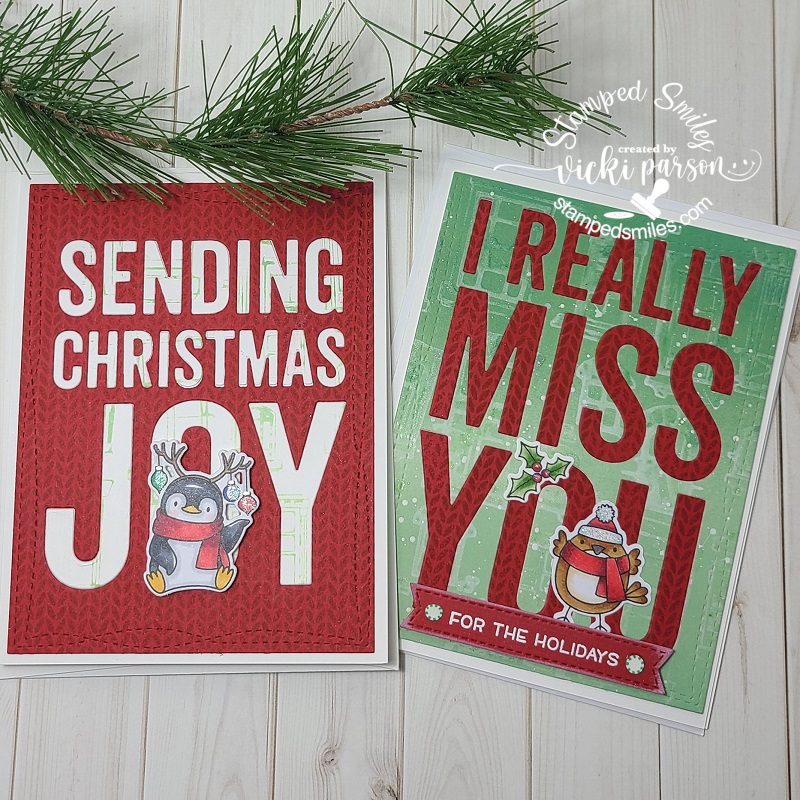
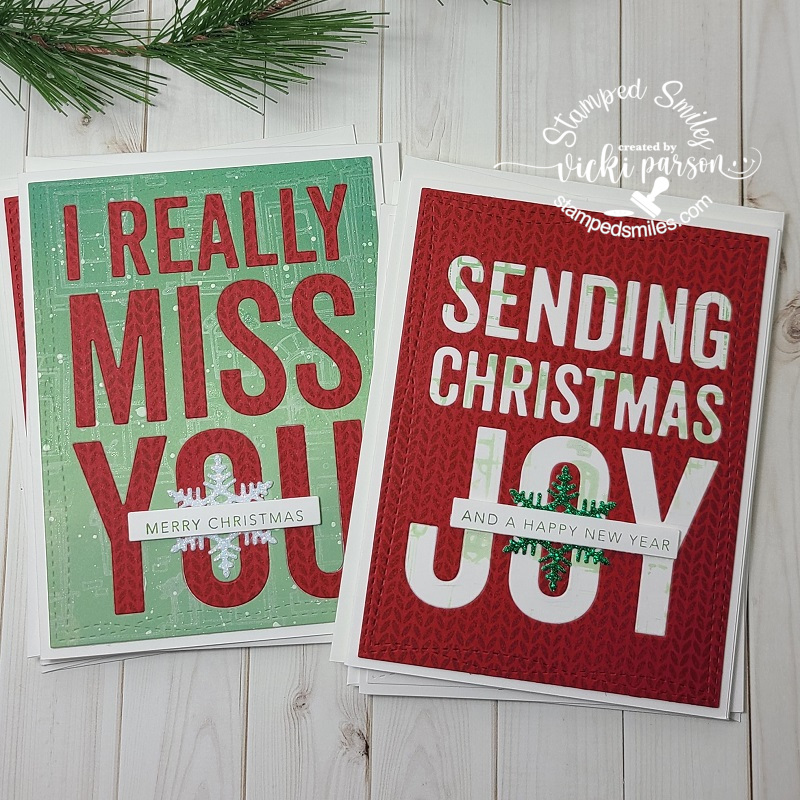
Here are some cards that I’ve actually made a total of 8 similar designs using the large wording background dies from My Favorite Things. I’ve used the “Sending Christmas Joy” and “I Really Miss You” dies for all eight of these, but only after I stamped the backgrounds. I used the MFT Knitted Sweater BG stamp and the Alley Cat BG stamp for a couple of backgrounds before I die cut them. Then I used the die cut letters to place into the other backgrounds on the cards to get that look. So it was like creating 2 cards with one cut and filling it all in. (For the Alley Cat background stamp, I ink blended the background and stamped it as a watermark effect over it and then took the “left over” ink from that to stamp it again to create an additional BG.) I then cut out each of the panels with the MFT Wonky Stitched Rectangle die and placed over a white A2 sized side folding card base. The penguin image is from the MFT Holiday Penguins set and the bird on the other one is from the MFT “Tweet Holidays” (Not found in store.)
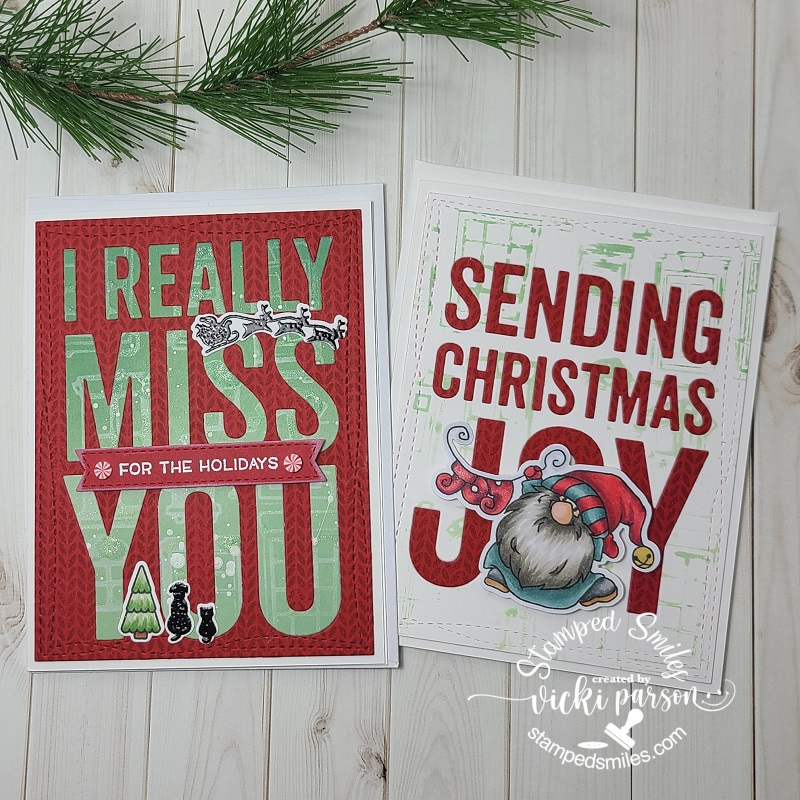
And then of course you don’t want to waste any backgrounds you’ve made, so you make more cards! I’ve used a couple more images to personalize the design for people too. I combined the sets Newton’s Nook Whispering Pines and the Lawn Fawn Winter Skies. I think I took a set from them to create a sentiment to fit my cards as well. (not sure from which set.)
For the other card, I took this cute image from the Whimsy Stamps Gnome for Christmas stamp set, colored him up with my copics and cut him out with the coordinating die to pop him up over my card.
And then for these set of 4 cards, I’ve just die cut a snowflake from some glitter paper and glued in the center of the “O” on each design and popped up a sentiment over that with foam tape stamped and die cut from the Taylored Expressions Mini Strips – Holiday and Mini Strips die.
And as you remember in a previous post those “recycled Crystal Light containers” that I make, I made another set of three of them here. This time, I’ve used this snowman stamp. I just used my scissors to fussy cut those cute snowmen out as they were pretty simple to do and then I popped them up over an ink blended tag using the stencil over them. I used coordinating cardstock and silver heat embossed the sentiment strip at the bottom and of course added my “snowman soup” poem on the back of the containers. I’ve also added a layer of silver mirror cardstock behind the tags.
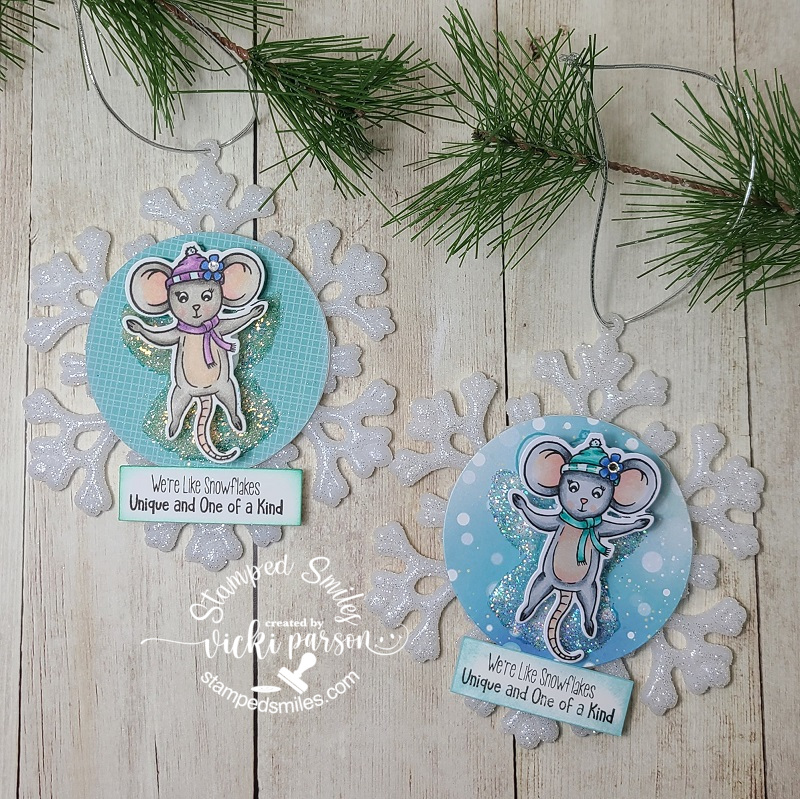
And I made a couple of these darling ornaments from a fairly “new to me” company that I was actually introduced to with product during my time as a {Cupcake Inspirations} sweetie DT when they sponsored a challenge a while back. P.S. There are a few more days left to enter their current challenge of “SNOWFLAKES” if you want to pop on over to join us too!!
But I was so taken with this darling image and kit from Inky Stampers from this Snow Much Fun Kit. You get the snowflake ornament (with string), the stamp set and die, papers, wobbler, along with glitter to complete it too! Well, I wanted to make more than one, so I grabbed another set of Snowflake Ornaments from the store and just added my own papers and glitter from my stash to make it.
Whew! I’m ready for that “Looong winter’s nap” now!!🥱 I hope you’ve enjoyed my post today and it has brought you some inspiration and/or a smile somehow! I have received some beautiful Christmas cards and I so appreciate them and have them all displayed by being pinned around my garland in our pass-through in the living room/dining area. I think after a bit of rest, I need to finish up my projects for the “Bugaboo Christmas Chaos” that I halted in the middle for to finish up Christmas projects….so I’ll be back soon with that.
In the meantime, I wish a MERRY CHRISTMAS TO ALL AND TO ALL A GOOD NIGHT!!🎅
Hello friends! Hope you had a wonderful weekend! I first would like to say a huge thank you to those that have mentioned they were going to send out a Christmas card for Danny (mentioned in previous post below). I think it will be so exciting to see how many cards he receives and from where around the world! I think this will help bring him much needed cheer!
Today I have a fun creation with more inspiration for our “Holiday Sweets” challenge over at the {Cupcake Inspirations} blog! So, I hope that you will drop on over, check out the inspirations from the rest of the sweeties and come share your delicious Holiday Sweets creations with us!
I’m still in a “cookie” mode and looking forward to making some traditional Christmas cookies in my own kitchen soon…so I’ve played around with a recent card kit I’ve received:
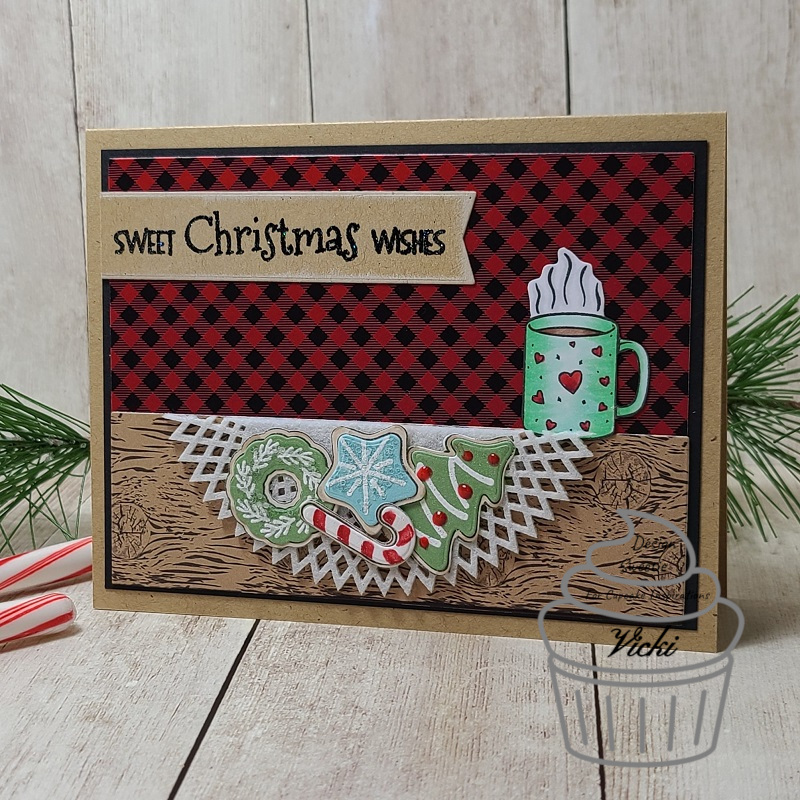
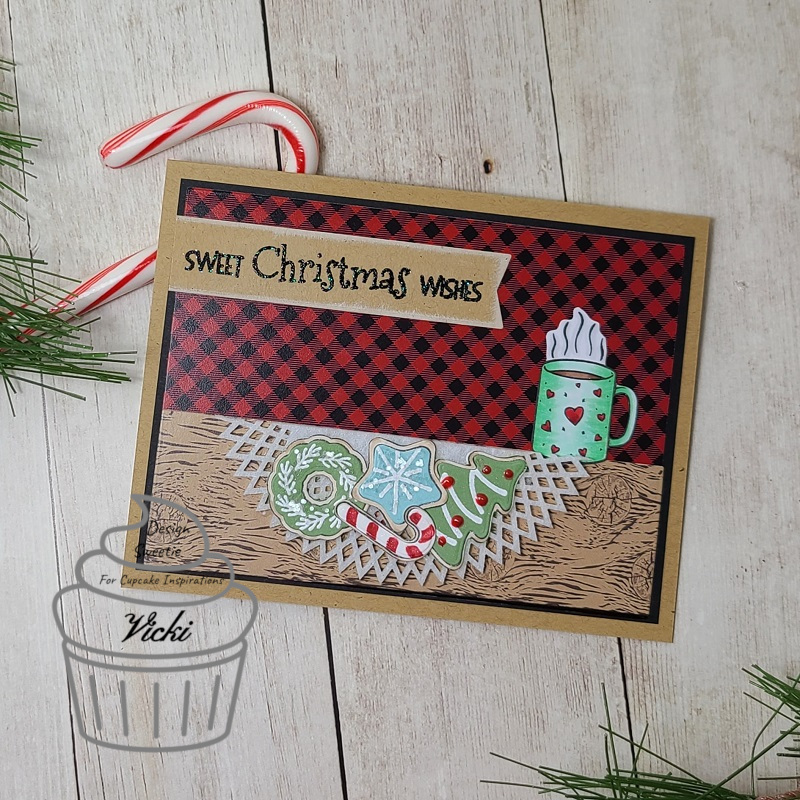
I’ve created a cozy and festive table scene full of delicious Christmas cookie treats using several products from an older Christmas card kit and a few other items. First of all, the cookies from that kit were super fun to put together! It comes with all the dies and stamps you need to decorate a (craft) cookie with!
I started my card with an A2 sized top folding kraft cardstock piece and used some of the Winter Cabin Papers to create my scene for the “table” and background. The cookies were all created with the stamps, dies and some paper from the kit, but I added some White EP for the frosting and some red Nuvo Crystal Drops for decoration. There was a felt circle cut in the kit that I cut off to attach over my “table” to place the cookies on. I also heat embossed the sentiment from the stamp set in the kit with Raven Sparkle EP and die cut with a banner from my stash. I went around the edges of it with some white Ink.
The hot cocoa mug came from a previous card kit that I stamped, colored and cut out to place on my table scene. I took the whole scene and layered it over a black piece of cardstock included in the kit and added it to my card base.
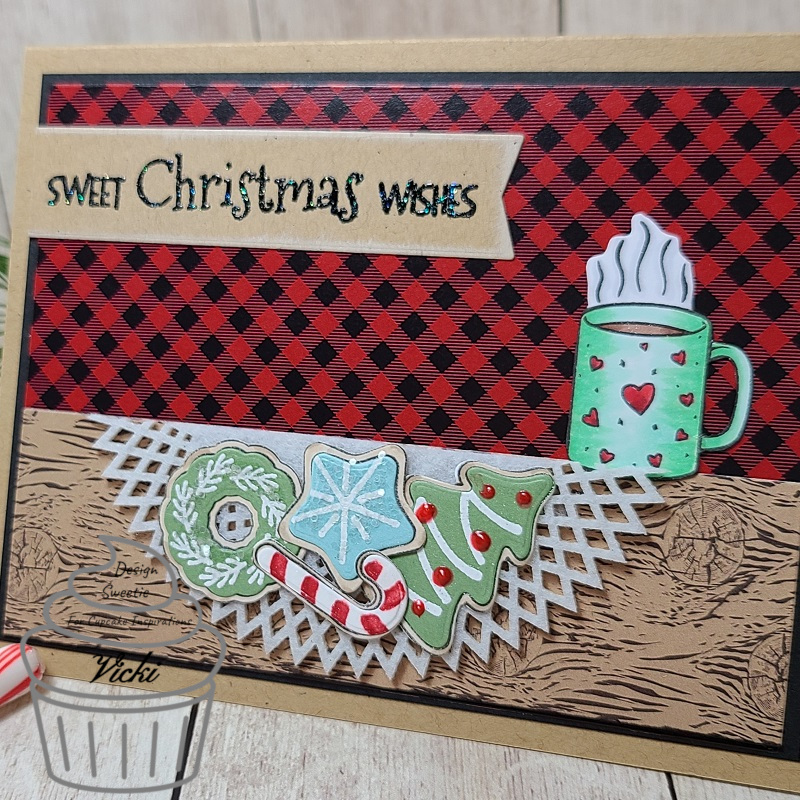
Here’s a closer look at those cookies! You can see that the die cuts have cut the images out right up next to the image line. I also took a glue pen and added some chunky style glitter from my stash to make some of the cookies look like they’re sugar coated. You can also see the sparkle from the EP in my sentiment.
Probably hard to see the bit of shimmer inside the cocoa mug and on the candy cane that I covered with my glitter brush pen, but it’s all shimmery and sparkly in person. I colored up the mug with my Copic markers and fussy cut out the image.
I hope that you’ve enjoyed my cozy Christmas cookie scene here and are inspired to pull out your favorite Holiday sweets to play along with us too! Please be sure to stop by the {Cupcake Inspirations} Challenge Blog to see more inspiration from the DT Sweeties! Looking forward to seeing your creations there!
Thanks for popping in today friends! I’ll be back very soon with a special post!