{Cupcake Inspirations} Birthday Celebration Day 4

Ready for more celebrating!?  We are on day 4 of celebrating over at {Cupcake Inspirations} with another feature of sponsors for our 500th “birthday celebration” challenge!!  Yipee!🥳

CIC500

Today, we are highlighting Varada Sharma – check out the challenge blog for more details about this sponsor.

1

Our DT has been generously provided with an entire new release collection from this sponsor!  There were so many fun things to play with, so I did some combining:

Vicki-CIC500-Day4-VardaSharma

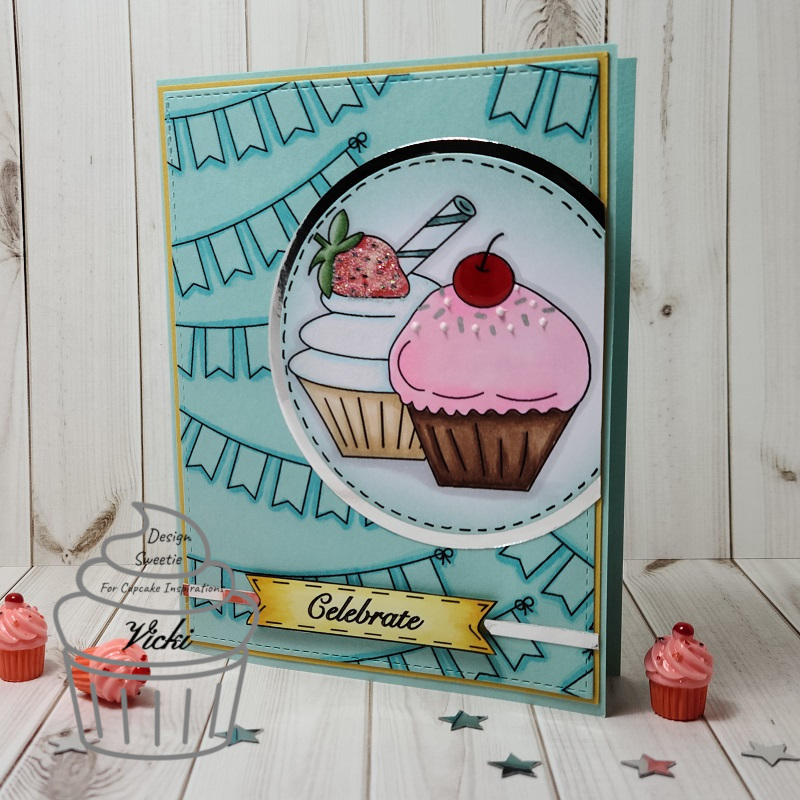
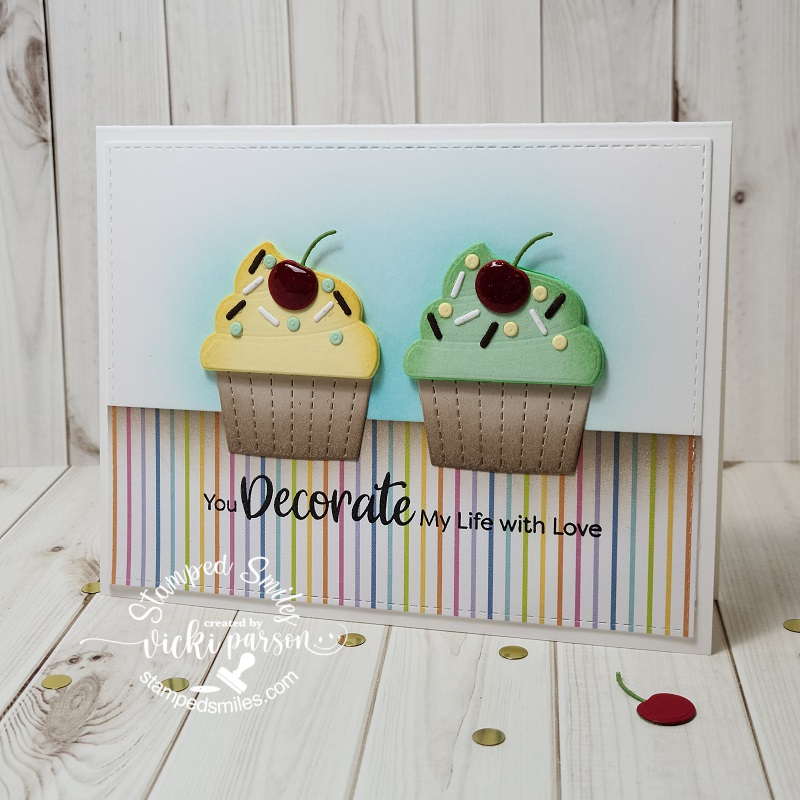
How fun and yummy is this?!  There’s just something about cupcakes that are so fun to decorate with frosting, sugar crystals, sprinkles, fruit, etc etc and so why not do that with crafting too?!

I started with the background and decided to take the Hanging Banners Background image and print it out over some teal cardstock and then I used a Copic marker to add some shadowing around the images.  I cut it out with a stitched rectangle die and layered it over a piece of yellow cardstock to match the sentiment banner…which actually looks green in the photo, but it’s yellow IRL! LOL!  Then I mounted it over another A2 sized side folding teal cardstock base.

I sized and placed together the two different cupcakes from the Cupcakes, Cake Slices and Toppers set, printed it out and then colored them in with Copics.  I’ve cut them out with a circle die, layered it over another circle layer cut from some silver mirror cardstock.  I sponged some teal ink around the edges of the cupcake circle, added some stitch lines with a marker and then cut off the excess from the edge.

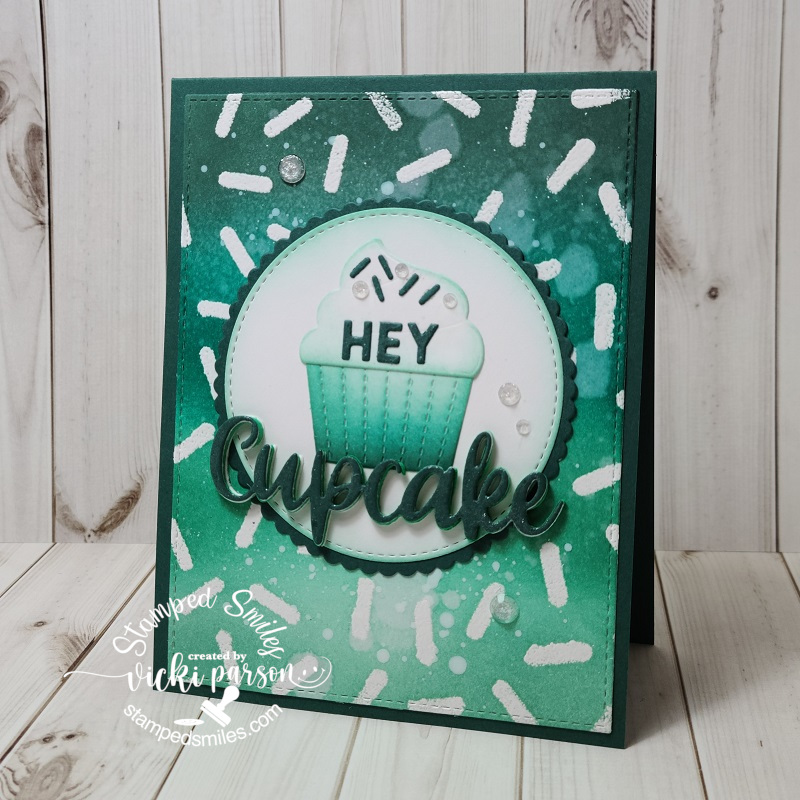
I used some glitter, glimmer and shine to add details to the cupcakes! (The photo is not showing all of the fun details at all!) Bummer…

I added a thin strip of that silver mirror cardstock across the bottom of the card front and then took the sentiment that I put together from the Celebration set, printed it out over white cardstock and then used my yellow ink to sponge over it.  I fussy cut it out and then popped it up with foam tape over the silver strip.

This is going to make a fabulous card for someone’s birthday.  If you need to add to your birthday card stash, come play along with us and you might win!

Challenges:

  1.  A Bit More Time to Craft – Anything Goes
  2. Lil’ Patch of Crafty Friends– #140 Anything Goes
  3. Crafting Happiness – #62 Anything Goes

Finishing Up Summer School With Cupcake Creations!🧁

Hello friends!  Hope you’ve had a great week!  Wow…it’s Finally Friday!  I’ve been SO busy “behind the scenes” and I will be getting to all of that later on, but I needed to squeak in with the final creations for the MFT Summer School!  I have earned my badge now…woohoo!

MFT_SummerSchool2020_GraduationBadge

I finished up Day 2 with my “smile rainbow” and now for Day 3, they’re asking for a “symmetry” style of creation.  I was told that basically it’s something that if you were to split it in half, it would be exactly the same on the other half…so this is what I thought of:

Vicki-MFTSummerSchool-Day3Symmetry

I was so excited about getting the My Favorite Things Cupcakes card kit, so I was determined that I was going to pull it out and use it for the rest of my Summer School cards! LOL!  It’s such a cute set with the dies and sentiment stamps!  I really had fun!

I used some papers from the kit and sponged ink around the edges of everything pretty much.  I just used the two cupcakes side by side for the symmetry class.  I just have opposite colors of sprinkles.  I added the red cherry on top, covered with the glitter brush pen and then some glossy accents.  (The glossy accents really got a work out!😮)

Vicki-MFTSummerSchool-Day4Ombre

So Day 4 class was “ombre” and that pretty much called to me to use the stencil from the card kit (sprinkles in background) and then I just heat embossed white over white and then used inks for the emboss resist technique moving the colors from lightest to darkest to get that classical “ombre effect”.  I also added a die cut cupcake that I used the same ink effect over it.  I die cut the words from the kit with the dark papers I used for the base of the card.  I finished with some sparkly crystal accents to finish it off!

Vicki-MFTSummerSchool-Day5WhiteSpace

And last but certainly not least was Day 5 “White Space” class.  I don’t often make cards like this, but I honestly love those CAS style cards, but I always want to “teeter” on the fine line between CAS and not…so I always think I’m not doing CAS.  I’m just not comfortable with the “CAS” definition or “rules” of what is or isn’t CAS.  I just feel happiest doing whatever happens to work out in my plan for a design…that’s pretty much it!    Be happy and you’re good!

I used this class to also follow along with the MFT sketch challenge going on as it looked like it was a good sketch for making a “white space” design.

I started by masking off the square and sponging lightly around it, I white heat embossed the sentiment over a black strip and added some silver ink over the stencil again and then attached the cupcake over top with the papers…and added the cherry on top with glossy accents too!

I finished it off with another little flag die from the kit and some silver sequins!  I like how it turned out!  I think I deserve a cupcake after all the creations I made!!😋

I hope you’ve enjoyed my creations today and I really appreciate you stopping in to see what’s going today!  Please be sure to stop by again on Monday for a very special post that you won’t want to miss!  Have a fabulous weekend!

Challenges:

  1.  MFT Summer School– Day 3 SymmetryMFT_SummerSchool2020_Symmetry
  2. MFT Summer School – Day 4 OmbreMFT_SummerSchool2020_Ombre
  3. MFT Summer School – Day 5 White SpaceMFT_SummerSchool2020_WhiteSpace
  4. My Favorite Things – Wednesday Sketch Challenge MFTWSC502 (my last card and I flipped the sketch on the side)MFT_WSC_502
  5.  Crafty Creations – #412 August Anything Goes
  6. Craft Rocket – #73 Birthday
  7. Creative Fingers – #191 Anything Goes
  8. Arty Divas – Bonus Birthday Challenge
  9. Crafty Friends – #142 Anything Goes

Let’s Celebrate at 2 Crafty Critter Crazies!

HAPPY NEW YEAR FRIENDS!!!

*I wanted to take a moment to first wish all of my friends and blog readers here an extremely Happy New Year and best wishes for the most amazing 2020 you can have!  I have REALLY appreciated each and every one of you for your friendship, support and comments throughout this last year…it really means so much to me!  I hope to continue to inspire and spread smiles with you in the comng year as well!  HUGS*

Today is obviously the first which means it’s time to start a brand new challenge over at 2 Crafty Critter Crazies!  So remember that you have the entire month to play along and It’s ALWAYS an “Anything Goes + a critter” on your crafty project!  Easy peasy!

Here’s the creation I made for this month:

Vicki-2CCC34-BugabooBday

He’s such a cutie and I think he would be a fun little guy to celebrate with especially since it looks like he’s handing out cupcakes! LOL!!

The sponsor for our challenge this month is Bugaboo Stamps and the team were given some images to play with, so I have used this adorble Birthday Hedgie 02 digital stamp on my card today!

After coloring him up with Copic markers, I used a stitched rectangle die to cut him out with and then layered him onto a blue layer of cardstock along with another yellow layer that was cut from a stitched scallop rectangle die.  I used some craft foam to pop him up over the card front design.

For the card base, I took a top folding A2 sized kraft card base and found some fun birthday papers in similar colors slightly cut down to go over top.  I also found a matching blue dotted strip of paper to place from top to bottom of the card base design.  the sentiment was stamped in black ink at the bottom of the image panel.  This is a new set I got from Simon Says Stamp called Tiny Words.

Vicki-2CCC34-BugabooBday-close

Here’s a closer look at the coloring I’ve done on this cute little guy!  His “hair” actually got a bit more “fuzzy” than what I was going for, but I didn’t want to keep going over him or he might look like he partied a bit too much! LOL!

Of course it’s very hard to see unless you see it person, but I’ve added some shimmer with my glitter brush pen over the cupcakes and little hearts.  I also used some colored gel pens to go over some of the confetti pieces around him.  I also used a white gel pen for his cheeks and I thought he needed some eyeballs and I made those too!

Vicki-2CCC34-BugabooBday-flat

I hope you’ve enjoyed my card today and that you’ll swing on over to the 2 Crafty Critter Crazies challenge blog to catch the inspiration from the rest of the team and play along with us this month too!  We can’t wait to see your critter creations!

P.S.  Just for fun, please share with me if you have any crafty or non-crafty “New Year’s resolutions/goals” for this year!  My goal is to COMPLETELY finish each card I make this year with sentiment/decorated inside, with the envelope and signed on back!  I hope it holds up!  I started with this card!! 🙂

Challenges:

  1.  Make My Monday – Female Birthday (Thought it could be used for anyone!)
  2. Simon Says Stamp Monday – “Party Time”
  3. Creative Knockouts – Celebrations
  4. QKR Stampede– #378 Anything goes