Happy weekend! It’s very hot here today as we are under a heat advisory! So thought it was best to stay indoors and keep working on my “catch-up” posts! This one is a bit different than my usual papercrafting posts, but it’s my finished projects from the crafting retreat I had with friends right before the wedding and why I was so busy! But first, I’d like to share a fun “thank you” card I made for my friend that hosted it all:
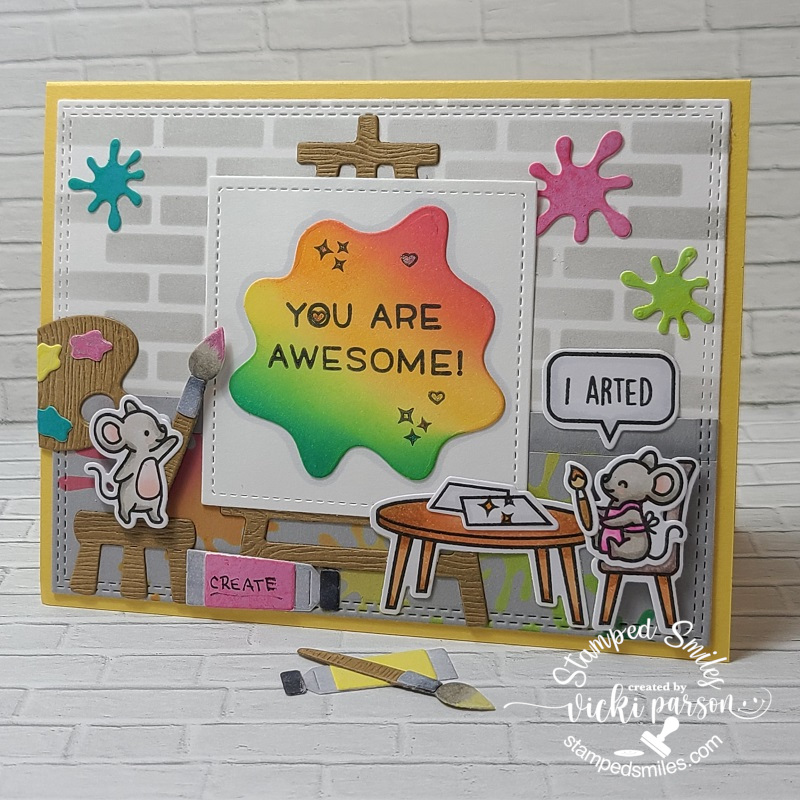
And as you know from my last post, I was on a Lawn Fawn fever mode, so this was also made for my friend that hosted the fun “Painting Divas” retreat for us! This ADORABLE set called Just Add Glitter was a perfect set to use to create a card for the theme as well as those products to accompany it with the Art Supplies dies, Canvas and Easel as well as the Paint Splatter Background Stencil too!
For the background, I created a scene with a brick stencil from my stash that I’ve had for years which was blended on with some grey ink. The bottom solid grey portion of the scene I used that paint splatter stencil and some Distress Oxide colors and blended in over it. By using the oxide inks, the colors showed up better over the grey.
I used these same colors of Oxide inks to sponge over the die cut pieces from the Art Supplies dies as well as the “masterpiece” splatter on the “canvas” and the brick wall splatters. I’ve used some LF Woodgrain paper to cut out portions of the “wooden” pieces and the rest of the pieces were cut from white cardstock and then just colored with Copic markers. I arranged the scene to make it fit the way I wanted and then attached it down with some of the pieces being popped up with foam tape. (The sentiment on the rainbow canvas blob was from a freebie stamp the company is famous for adding to your order.) I had fun making this one and I chuckle at the “I arted” sentiment! 😅
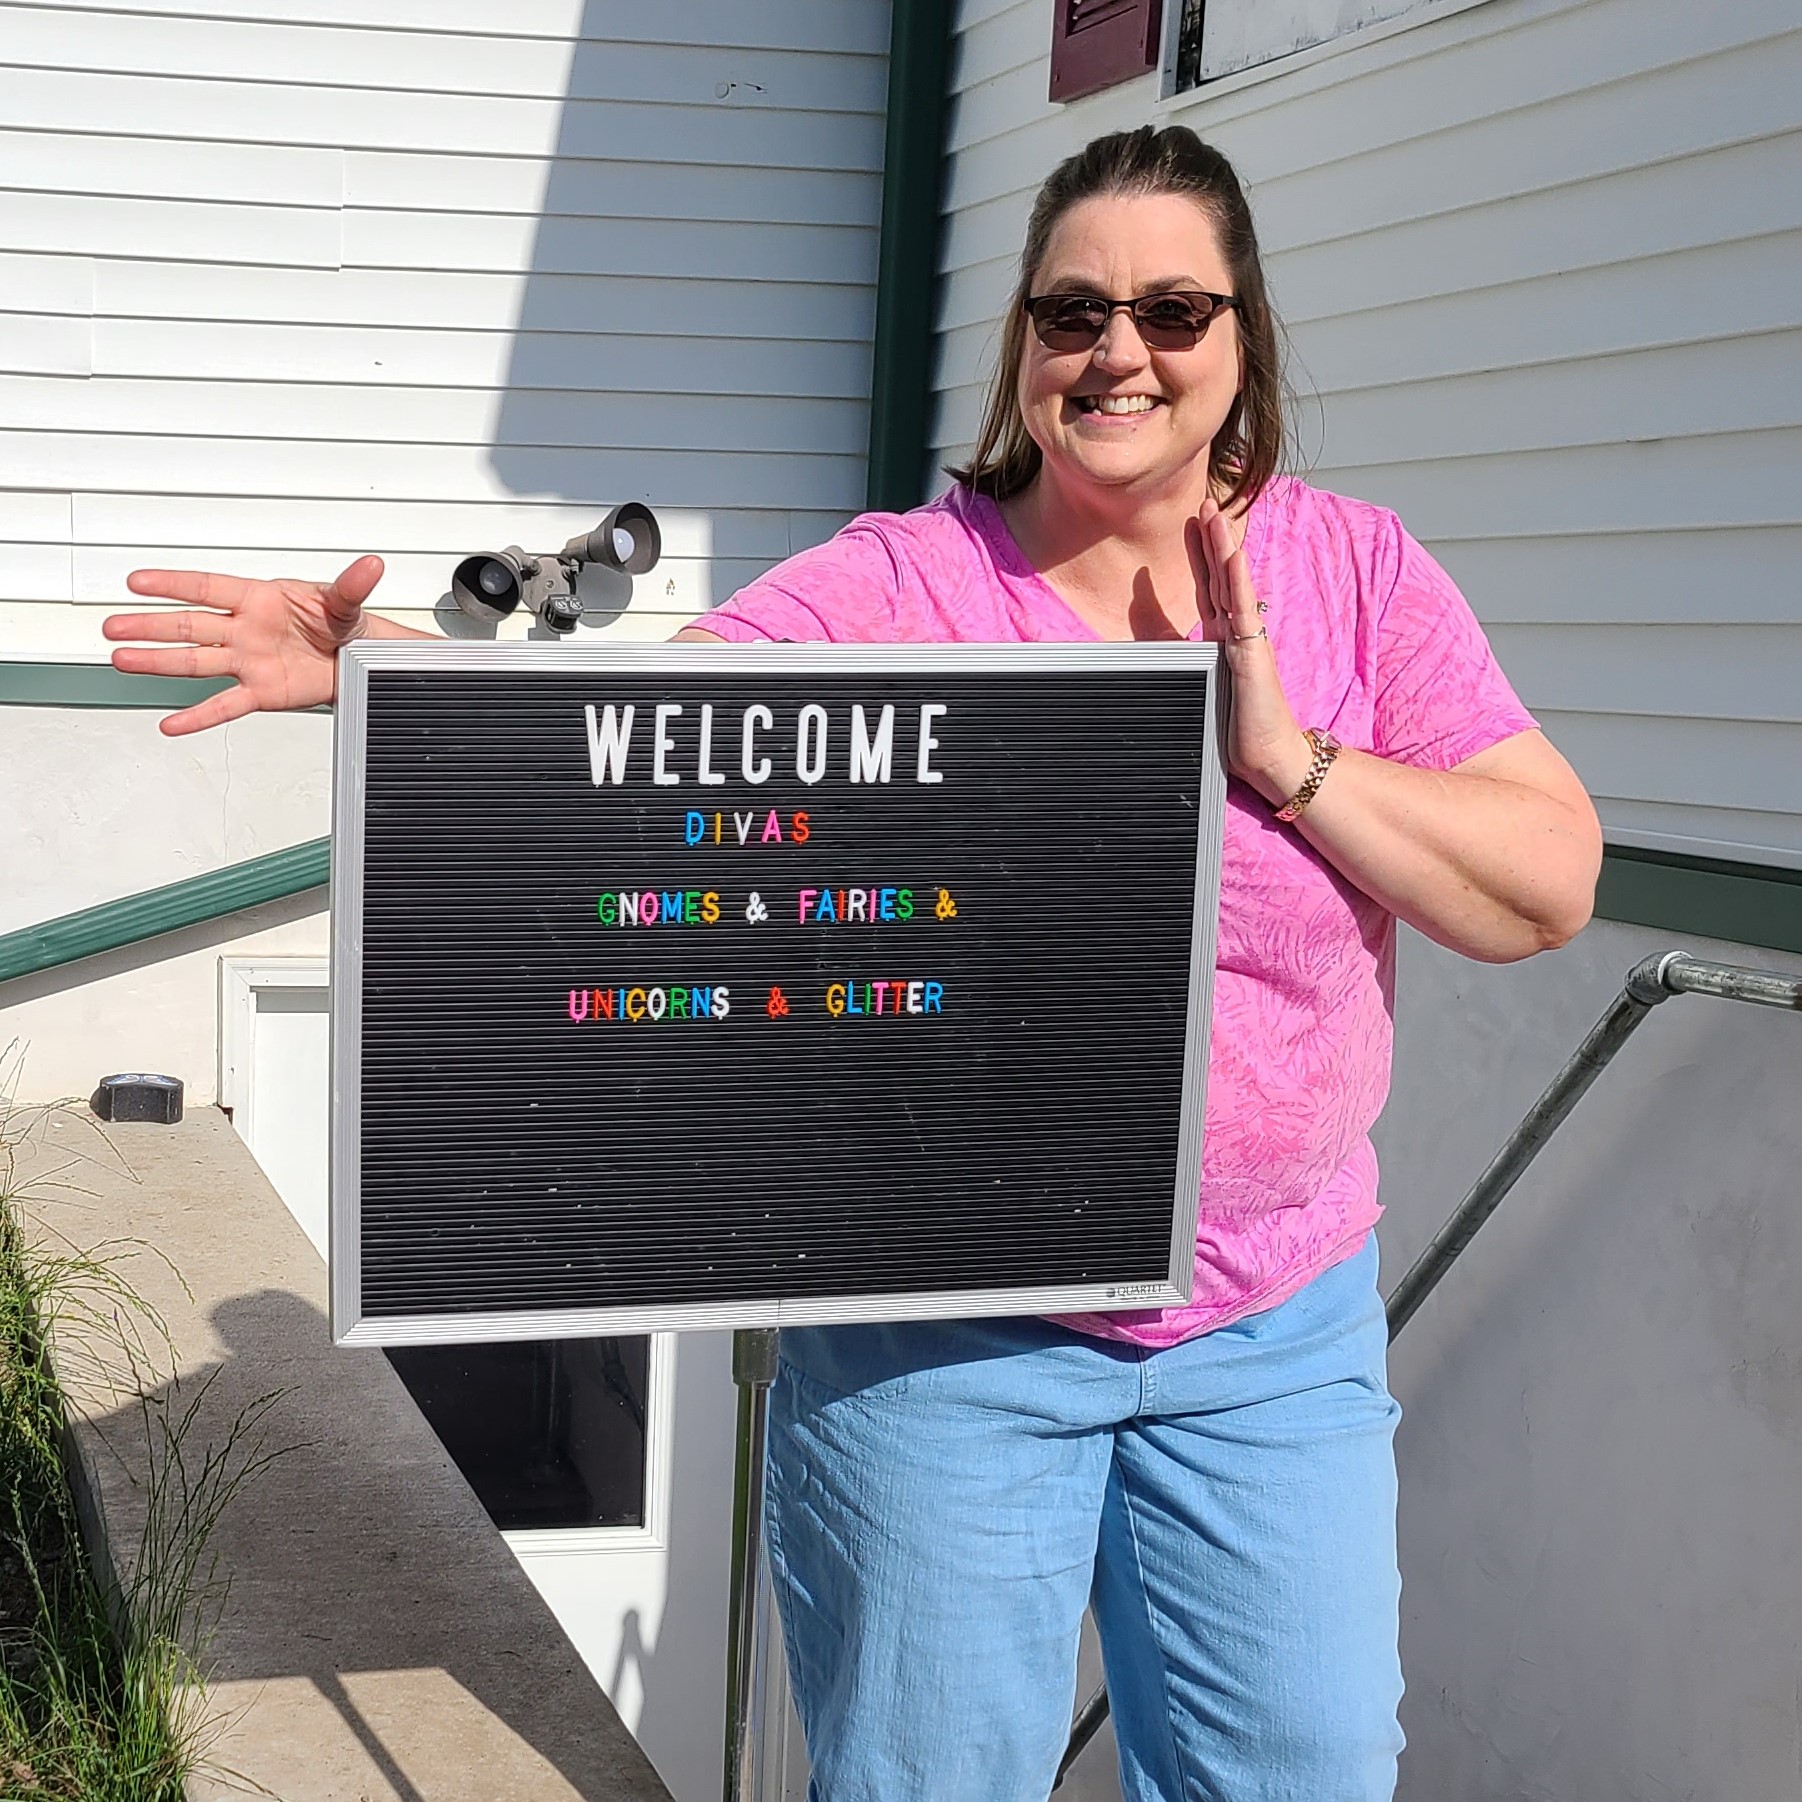
For the “Painting Divas” Retreat, we had projects with different teachers and of course you probably recall the Mixed Media birdhouse I did from my past blog post. CLICK HERE TO VIEW POST The theme was on that cute little sign as we arrived…”Gnomes & Fairies & Unicorns & Glitter”…how fun is that?!! We were to create a decorated gift bag to bring with us using the theme and enter for a contest…but totally forgot to bring mine back home for a photo to show! LOL (I am hoping that we get together to share some photos as I wish I had taken more than what I did!)
I took a quick photo with birdhouses everyone finished for my class, and it was so fun to see everyone’s interpretation of how they made their own. I enjoyed seeing what everyone did! (I think two of these are missing in this photo.)

Now, I am not an avid decorative painter and don’t spend a whole lot of time doing it, but a couple of girls at this retreat are, and have been doing it for many years! (even longer than I have been a paper crafter…which is a LONG time! LOL) So I have had the privilege of learning a bit about it. I’m glad to have this time to share something together and doing when we can. I appreciate it and the memories that are made. 🥰
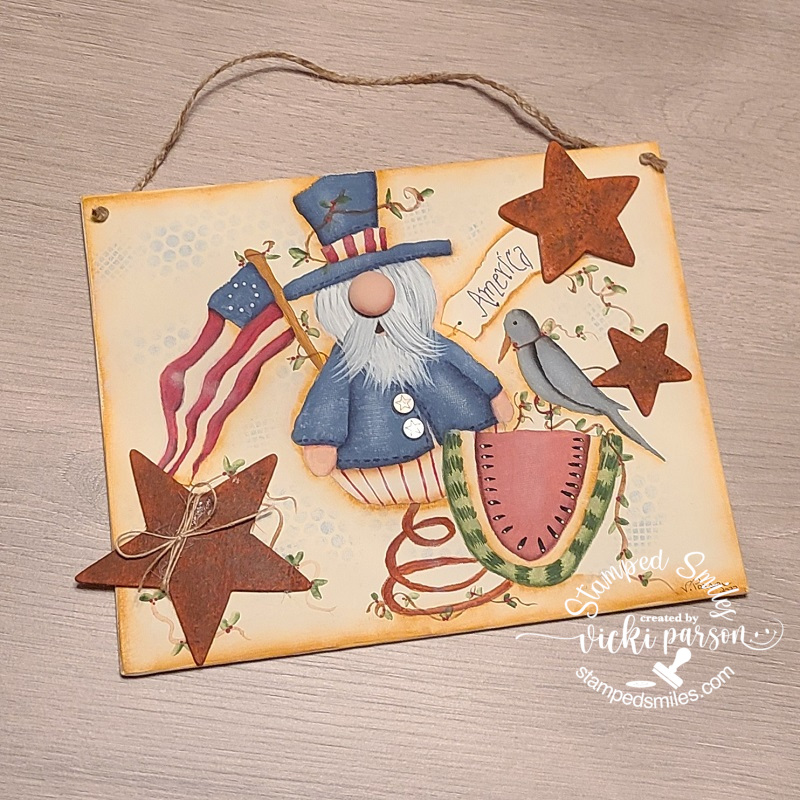
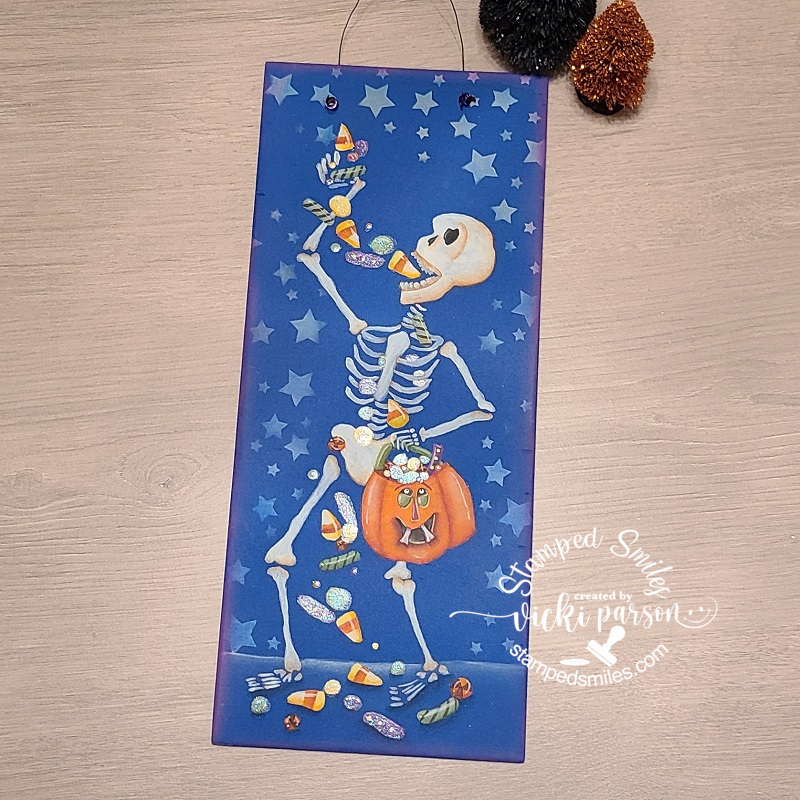
Below is my gallery of projects that I did for each class. I did this in order of when each class was taught. If you’re directly on my website, just click on each photo to enlarge it and also see the description of what the dimensions and types of surfaces that were used. All were hand painted by me using acrylic paints.


I have one last project to share which is something I recently finished up before this painting retreat, but it had been sitting around the last few years as an un-finished box not being used.

A few years back, I had gone to a paint convention and purchased this brush box that was hand-made by an older gentleman and vendor at this place. I started it quite a while back and finished up the top portion of the box doing some ombre painting. I added the wooden lettering on the front and some glitter paint to the lettering after it was sealed.
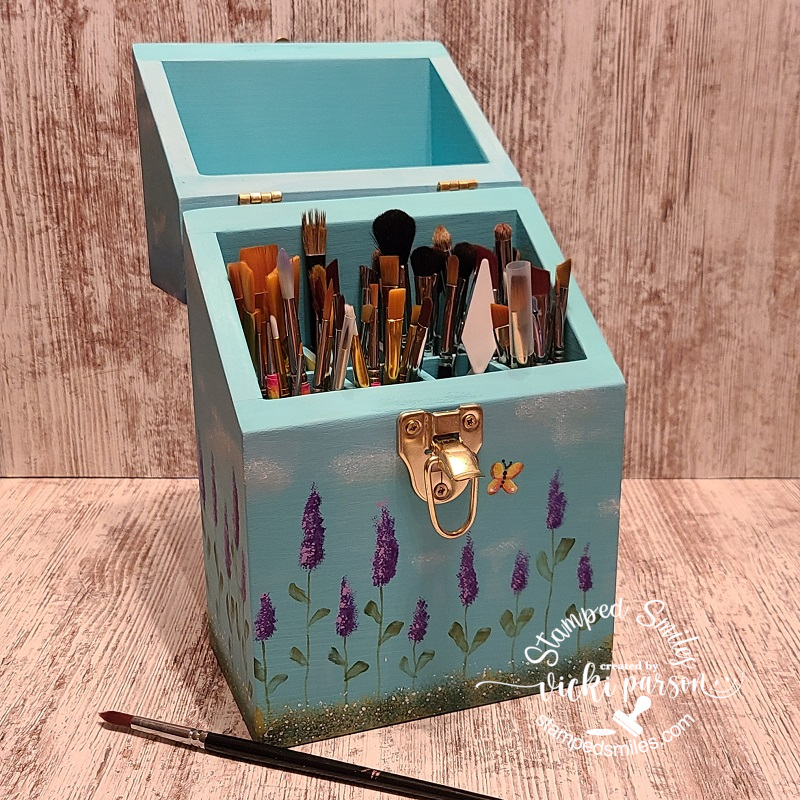
And here’s what the inside of the box looks like with all of my brushes stored in it. (Well most of them anyway! LOL) What I like is that there are separate compartments so that I can organize the different types/styles of brushes in each. The brushes are protected and dust-free. The dimensions of this brush box are 11″ x 7″ x 4″ deep all made with wood. The hardware was removed and then replaced after painting and sealing.
Like I mentioned, I don’t always do decorative painting like this, but since it’s already part of my life and I have accumulated things related to it, I will probably do some things here and there. It’s like a mixed media thing for me as I don’t always do that, but sometimes I enjoy getting things out for something different. I like many different crafts which makes this all so fun for me. It’s nice to have a variety of interests to keep enthusiasm going!
How about you? Do you have interests in other things besides paper crafts?
Stay COOL and safe out there today friends…how do you like to keep cool?
Thanks so much for joining me today and I hope you were inspired in some way on your visit!
Challenges:
- Crafty Animals – Anything with an animal (card)
- Dragonfly Dreams – Indoor Hobbies (card)
- Happy Little Stampers – Anything Goes with Dies (card)
- Happy Little Stampers – Anything Goes with Stencils (card)
- Addicted to Stamps & More – Any Occasion (card)
- Cardz 4 Galz – Get Inky (card)
- Creative Moments – Anything Goes optional: CUTE (card)
- Lil’ Patch of Crafty Friends – Anything Goes (card)
