More Christmas Smells

Hello friends!  Since it’s still so very warm outside, I thought it would be fun to do a bit of coloring which I haven’t really done much of lately and create another Christmas card in July!  Hope you are staying cool…or warm depending on where you live! LOL

Vicki-InkNSplatterdigi-gingerbread

A cup of cocoa with marshmallows, a candy cane and a chocolate cupcake with a gingerbread friend to share it with sounds wonderful to me!  You may recognize the image from Digi Doodle Studios, which is where this retired image is from called “Jacks Ginger Cocoa Mug“.   It was just nice to be able to spend time coloring up a cute image and enjoy more from my long-forgotten stash!  I’ve used Copics to color the image and cut it out with my square dies to layer for my card design.

I thought the brown gingham papers went well with the cardstock that I’ve used from Stampin’ Up! called Baked Brown Sugar. I wanted to also bring in some red to the design because of the candy canes/peppermints in the image.  I layered a piece of lace ribbon over it and then popped up the layered colored image on top.  I used a photo corner punch for redder in the right top corner of the image.

The sentiment was white heat embossed over the Baked Brown Sugar cardstock and cut out with a stitched banner die.  The sentiment is also from a retired Pink & Main stamp set I had in my stash.  Lastly, I added some round peppermint clay accents to finish it off.

Hope you’ve enjoyed my Christmas card today or have been inspired for Christmas..or food!  Thanks for stopping by!

Challenges I’d like to enter:

  1. Christmas Kickstart – Gingerbread Treats
  2. Rudolph Days Challenge – Anything Goes Christmas (June)
  3. Merry Little Christmas – Anything Goes Christmas
  4. Crafter’s Cafe – Christmas in July
  5. Double D – Christmas in July
  6. Creative Knockouts – Christmas in July
  7. Crafty Catz – Anything Goes with optional Christmas in July

Pink Halloween for Digi Doodle Studios GDT

Hello friends!  I hope that you’re all having a wonderful week so far!  The weather has really been changing this week as we get into Fall now.  Speaking of that, it’s time for sharing some fun Halloween themed projects!

I’m VERY honored to have won a guest spot for this month over at the Digi Doodle Studios Challenge Blog!  So, for the October challenge, the theme is “Pink and/or Halloween” You can choose to use either or both…I’ve decided to use BOTH on my creation:

As a winner, I was given this darling image to play with called Gwendoline DDS Good Halloween Witch and I thought she would be so much fun to color up in the pink and black colors!  I think she turned out adorable in her pinkness!

I have also decided to print out a sentiment from the DDS Halloween Happiness Digital Sentiments Collection that I’ve used as a strip on the right side of my panel placed directly under the image panel.  Both of these panels have been sponged with some pink ink around the edges.  The witch image panel was popped up with some craft foam.

For the  papers, I have printed out the fun pink and black dotted patterns from the DDS Wonky Halloween Digi Paper Pack and then used a sander around the edges of them for a bit of distressed look.  Before attaching the black with pink dots strip in the center, I wrapped some pink metallic ribbon around it with a bow.  This strip was placed behind the image panel, but in front of the layers behind the image panel. Those layers are pink metallic mirror cardstock and a scallop die cut black cardstock which was also layered behind the sentiment strip.  All of the panels were placed over a black top folding 5″ card base.

I’ve added a couple of die cut spider webs from some white glitter paper and attached them in the corners of the design and then found some pink sequins with stars that I filled the centers with some pink glitter drops scattered around as well as placing an extra die cut star and sequins in the center of the bow.

And here’s a closer look at the coloring I’ve done over her using Copic markers.  I’ve used a white gel pen for the dots on her cheeks as well as highlights on her legs.

It’s always hard to really show all of the wonderful shimmer and sparkle, but I’ve used a glitter brush pen over the pink stars in her dress as well as the stars surrounding her. (Her pink earrings were covered with it too.)  I took a pink metallic gel pen to color in the dots on her dress and the ones surrounding her.  I then took the pink glitter drops that I’ve used in the center of the sequins and add a couple more around her trailing stars and the center of the star in her wand too.

I also very lightly sponged in some pink chalk for the stars and dots area around her after it was all dry.

I hope you’ve enjoyed my card for today and have been inspired in some way!

Thanks for dropping in today my friends and I’ll be seeing you again very soon!😉

Challenges:

  1.  Daring Cardmakers – 3 Things Starting with ‘S”:  Stars, Spider Webs, Sequins
  2.  Pammie’s Inky Pinkies – PIP 2039 Anything Goes
  3. Always Fun – Die-cutting (my fave is stitched scallop!)
  4. A Perfect Time to Craft – Anything Goes Oct
  5. Creatalicious – Anything Goes
  6. Simon Says Stamp Wednesday – Anything Goes

Foxy Skater Spinner Card in Action With Video Tutorial!

Hello friends!  Really feeling the cold air around here, so I’m still thinking in winter mode and have another interactive winter card to share with you again today!  (Please be sure to check out THIS POST to see another interactive winter card and video tutorial if you’ve missed my last posting!)

What’s a better way to embrace the cold than to create interactive cards in your nice warm crafty space, right?!  So sit back, have a warm sip and get creative with me today!

Vicki-DDS-Spinner Fox Card video

This cute little guy is so fun to watch him spin around doing his cool ice skating trick!  I’ve used the Foxy Skater image from Digi Doodle Studios for my card here along with the Winter Plaids N’ Patterns Digi Paper Pack and Snow Days Sentiments set as well!

I’ve used several dies from My Favorite Things for the front of the card!  I’ve cut out the plaid papers with the A2 Stiched Rectangle die and mounted it over an A2 sized side folding white card base.  The spinner “window” was cut out with a Circle die that was also used to cut the center for the Scallop Stitched Circle frame around the opening.  The sentiment was printed out and cut with the MFT Slanted Banners die (not finding link in store).  I’ve also used MFT dies for the snowflakes (also not shown in store), that was cut from some Brutus Monroe Fallen Snow Glitterstock.  I’ve added some silver Stickles to the centers of the snowflakes and dotted around the front of the card.

I’ve also used some snowflake papers for the inside area of the card from the Candy Land Paper Pack from MFT as well!

Check him out below as he spins around:

What’s different about this particular spinner card is how I’ve used a single digital image to create the front AND back of this Foxy Skater guy!

To see how I’ve put together this card for the spinner action, check it out in my video below or you can watch it on You Tube HERE:

I still have this card along with the other interactive card from my last post sitting here on my desk playing around with them! Not sure I can give them up quite yet as I’m having fun!! LOL!

Vicki-DDS-Spinner Fox Card video-close

Here’s a closer look at the cute “Foxy Skater” guy that twirls around on the card.  I was going for a bit of a textured look on his fur, so I also used a white gel pen to mix in some white fur on his cheeks, chest and tail areas. I’ve also used a gel pen for the cheeks and a metallic gel pen for his skate blades.   It was a little more time consuming to color in two fox images, but as you can see, it’s totally worth having both sides for this spinner action design! 🙂

To flip the image in the opposite direction, I used Word doc. on my computer, copied the original image so that it was the exact size, pasted him again and then used the “rotate” setting to flip him in the opposite direction.

Check out the video to see how I was able to fussy cut him down for my card design.

Vicki-DDS-Spinner Fox Card video-flat

I hope you’ve enjoyed my spinner card today and that the video is helpful for you to create your own fun version during the wintry cold months ahead of us!

Thanks so much for stopping in today my friend and I’ll be seeing you soon!

Challenges I’d like to enter this card for:

  1.  Shopping Our Stash – Winter blues
  2. Through the Craft Room Door – Anything Goes
  3. The Male Room – It’s Snowing!
  4. Creative Moments – Anything Goes
  5. Penny’s Paper-Crafty – Anything Goes #463
  6. CCEE Stampers– CCEE2004 “Ice, Ice Baby!
  7. Aud Sentiments – Anything Goes + sentiment

The Skiing Bandit Raccoon in Action with Video!

Hello friends!  I hope you’re having a great week!

As I mentioned in my last post, it’s really cold and snowy over my way so I thought I’d join in with the winter season and have a little interactive fun in my craft room!  (Where it’s much warmer inside! LOL!)

I have used some Digi Doodle Studios products to create this really fun interactive card design:

Vicki-DDS-Pull Tab Slider Racoon

This cute little critter is just having a blast! 🙂  This card was so fun to play with and I couldn’t put it down!  This cute critter is the Skiing Bandit Raccoon digital stamp from Digi Doodle Studios.

I’ve colored him up with my Copic markers and used a glitter silver gel pen to color up his skiing poles.  He was fussy cut out with scissors. You will notice that his scarf and mittens resemble the background papers too, which were paper pieced from the Digi Doodle Studios Winter Plaids N’ Patterns Digi Paper Pack.

To create the scene, I’ve die cut some ‘hill slopes’ with a die cut, but you could use just scissors to cut one yourself.  I die cut a set of trees for the background  and ended up inking up the edges of the snow hills along with the banner sentiment at the top.

What’s fun about this card is that when you grab that little arrow at the bottom left of the card, this little skiing bandit starts flying down the glittery snow hills!

If you’d like to see how this card moves along and how to create one for yourself, be sure to check out the video below or watch on You Tube HERE!

I thought that the invisible way he flies over the hills along with the idea of how to create your own slider mechanics with scraps is something fun that anyone can put together with items they have on hand!

Vicki-DDS-Pull Tab Slider Racoon-close

And of course here’s the view of him flying down the hill as the arrow slider tab gets pulled from the card!  The pull tab slider sentiment comes from the Digi Doodle Studios Snow Days Sentiments set, which is what I’ve also used at the top front of the card.

For the sentiment on the pull-tab slider, I’ve taken a marker and underlined part of the sentiment and added an explanation mark on the end.

I also decided to stamp a black arrow at the end of this slider so that when it’s tucked inside, you can see that arrow so the recipient knows what to do!  You could of course just use a pen to draw your own arrow as well.

Vicki-DDS-Pull Tab Slider Racoon-flat

I hope you’ve enjoyed my interactive slider card today!  I’m still having fun pulling that skiing raccoon over the snowy hills! LOL!  I think this would be a really fun card to send along to a friend for a smile during these cold months, don’t you?

Thanks so much for stopping in!  I’ll be seeing you again very soon!

Challenges I’d like to enter for this card:

  1.  Sparkles Monthly – Winter Blues
  2. QKR Stampede – #381 Anything Goes
  3. Allsorts – More Than a Single Word
  4. Crafty Friends – Anything Goes
  5. Lil’ Patch of Crafty Friends – Anything Goes
  6. Pammie’s Inky Pinkies – Anything Goes #2003
  7. The Paper Girls – Winter Color Palette

Oh BABY! It’s Shaping Up!

Hello friends!  Hope that you’ve enjoyed a fantastic weekend whatever it was you were doing!  It’s been SO freezing over my way and I’ve been covering up with electric blankets!  Brr!

Today I’d like to share with you a couple of shaped baby cards made with a newly released and adorable Pairables set from Digi Doodle Studios along with a few other fun products from their store…

Vicki-DDSPeciousBabies-Jan21

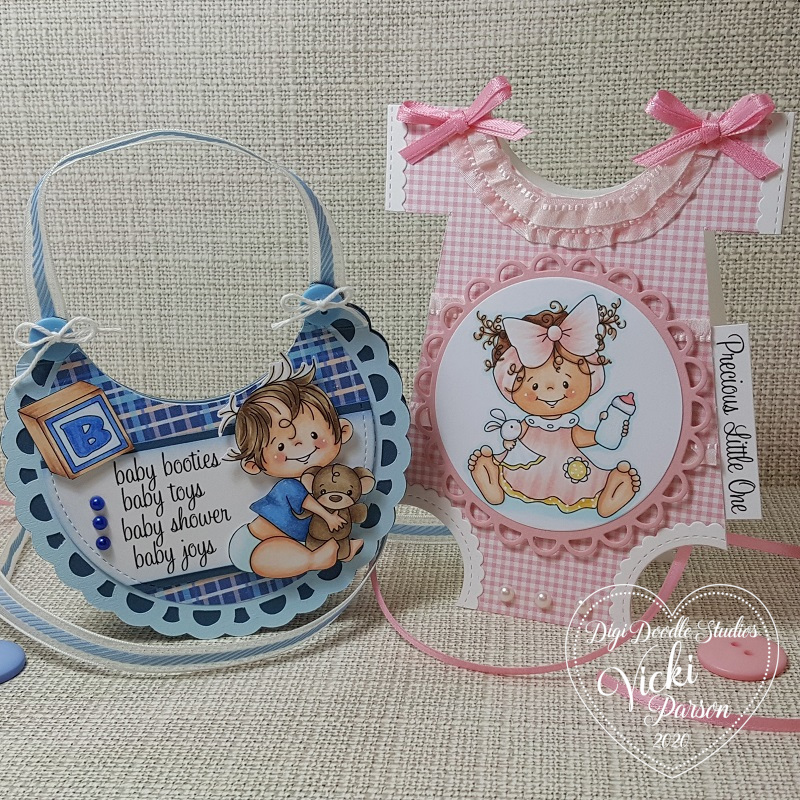
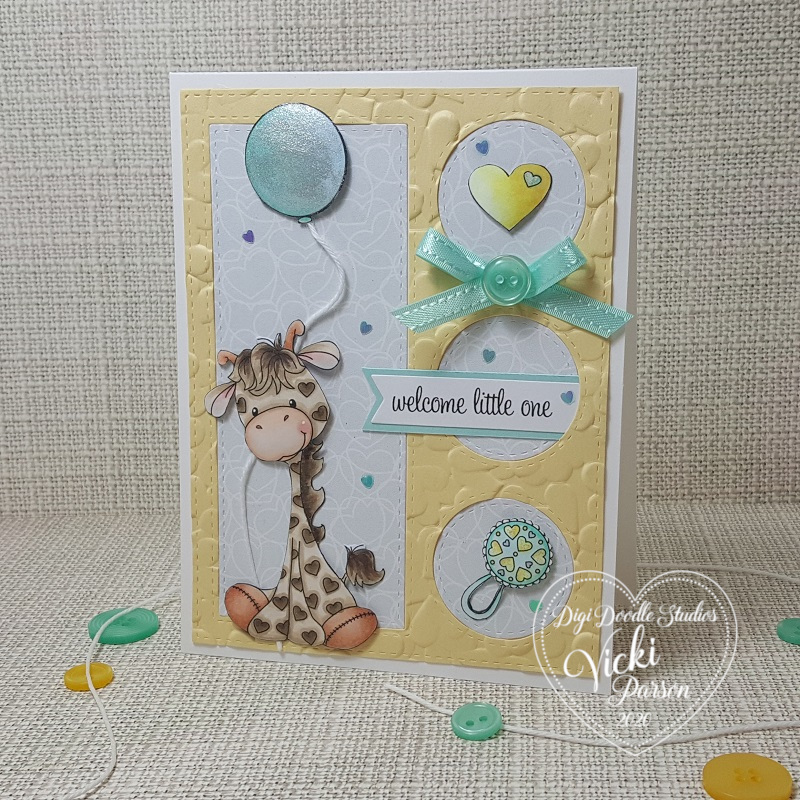
Check out these shaped baby style cards I made with these ADORABLE little baby images from the Precious Babies Pairables set!  You may remember not too long ago the other baby card I made on THIS POST with the other new set called Little Ones Pairables.

Vicki-DDSPreciousBabies-Jan21-close

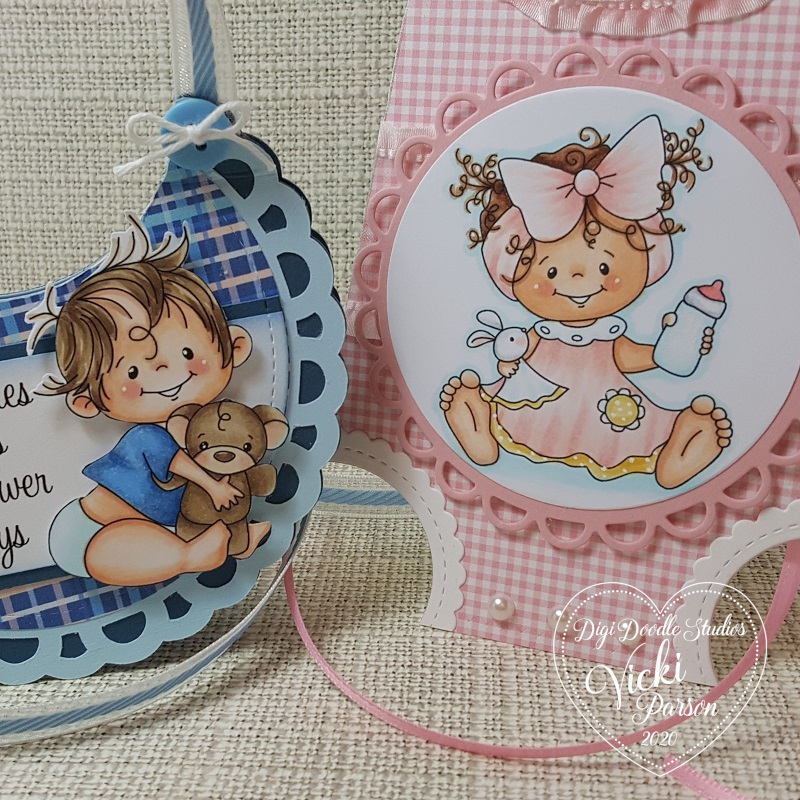
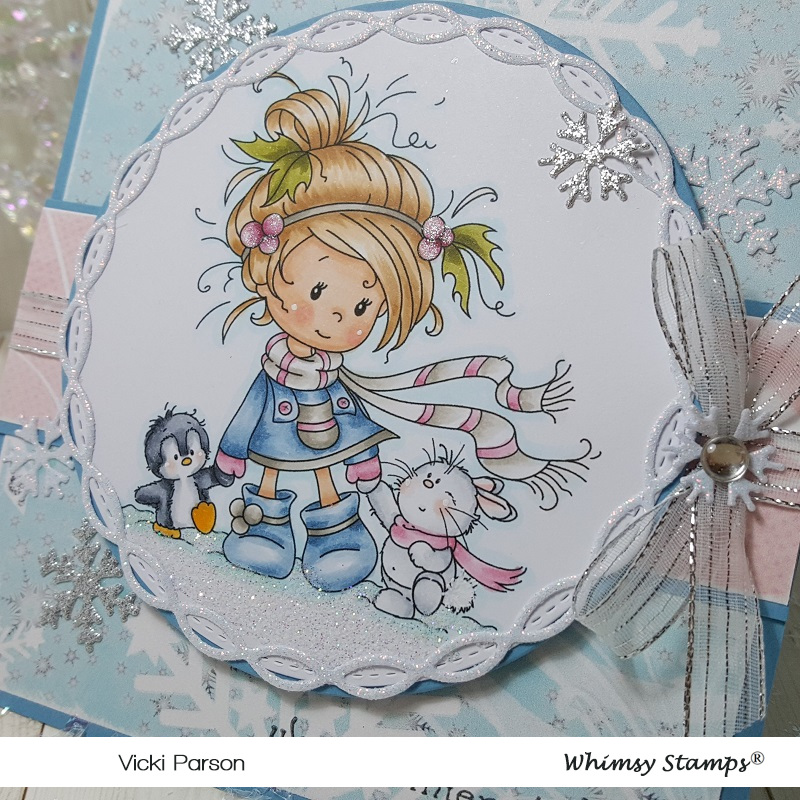
I wanted to share a close-up look at the coloring I’ve done with these two sweet little baby images.  I’ve used Copic markers to color them with and then just used a white gel pen for highlights on the cheeks as well as creating polka-dots for the baby girl’s dress on the yellow portions.

It’s hard to tell in the photos, but I covered the baby bottle with a glitter brush pen.

The baby girl was cut out with a circle die and layered over another die cut scallop circle from pink cardstock.  I’ve used my scissors to fussy cut out the baby boy and pop him over the design with foam dots.

Vicki-DDSPreciousBabies-Jan21-girl

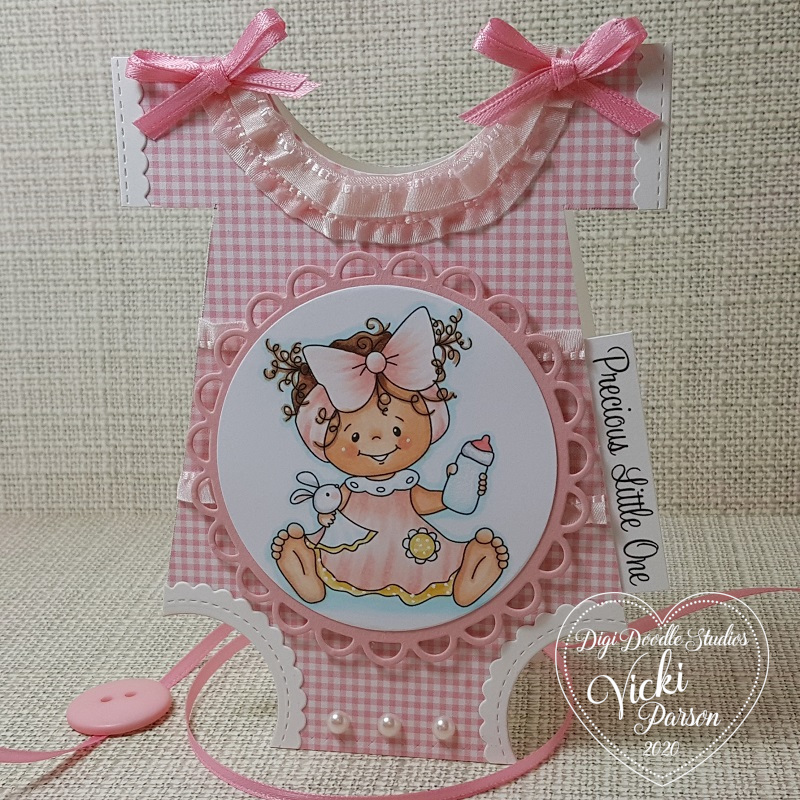
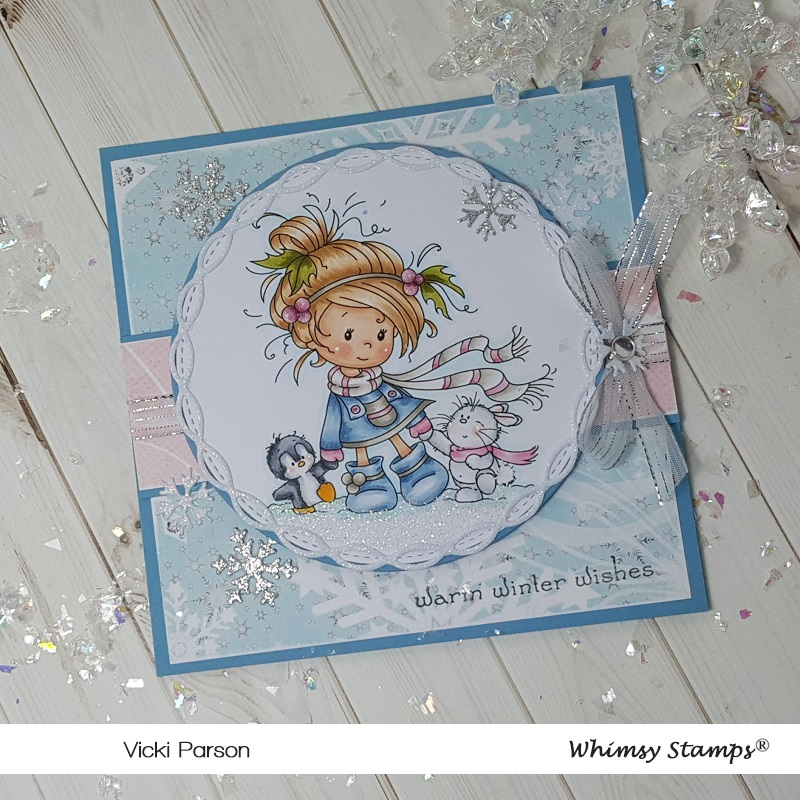
For this baby onesie shaped design, it’s actually REALLY simple to do!  It’s just a matter of measuring in, cutting and then circle die-cutting where you need to put the neck hole and leg holes is all!  It is a standard sized A2 top folding card and will easily fit inside a standard A2 sized envelope for mailing which I love!

The pink gingham paper that covers the entire front panel of this card comes from the Digi Doodle Studios Bundles of Joy Digi Paper Pack.

I’ve used the same ribbon for behind the circle panel as well as for the “ruffles” around the neck area.  I just folded up the ribbon to give it that look and attached it along the neck hole line.  I’ve attached a couple of pink ribbon bows on each side as well.

For the arm and leg hole areas, I’ve just used scallop style die cuts and sized them over the ‘openings’ and trimmed them down to fit.

I’ve taken the printed out sentiment from this same Pairables set and trimmed it down to attach along the side of the onesie, used some foam tape to pop up the baby girl image panel and added some pearls to the bottom of the onesie card.

Vicki-DDSPreciousBabies-Jan21-lilboy

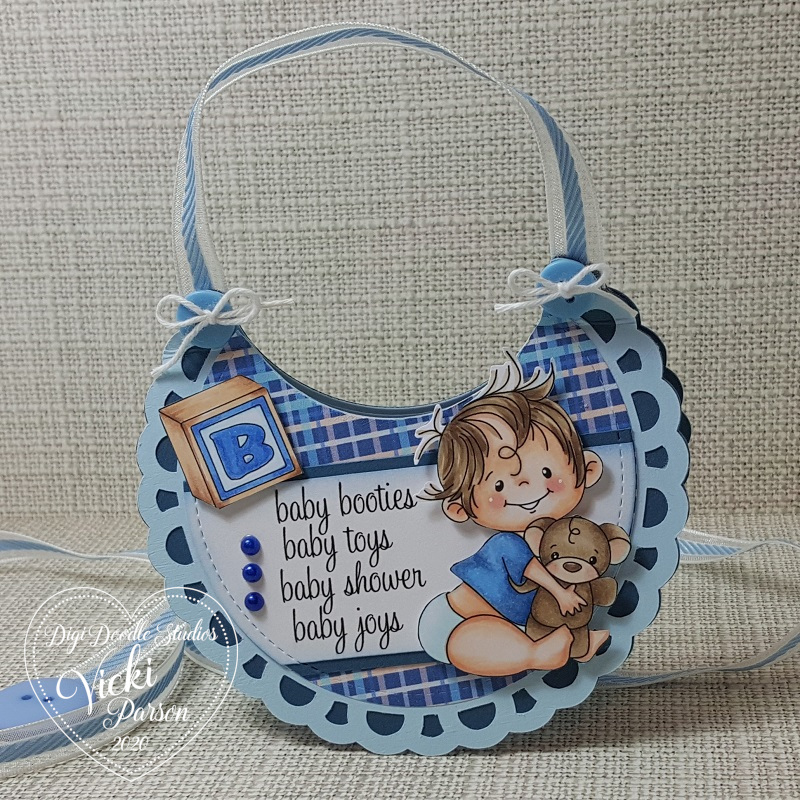
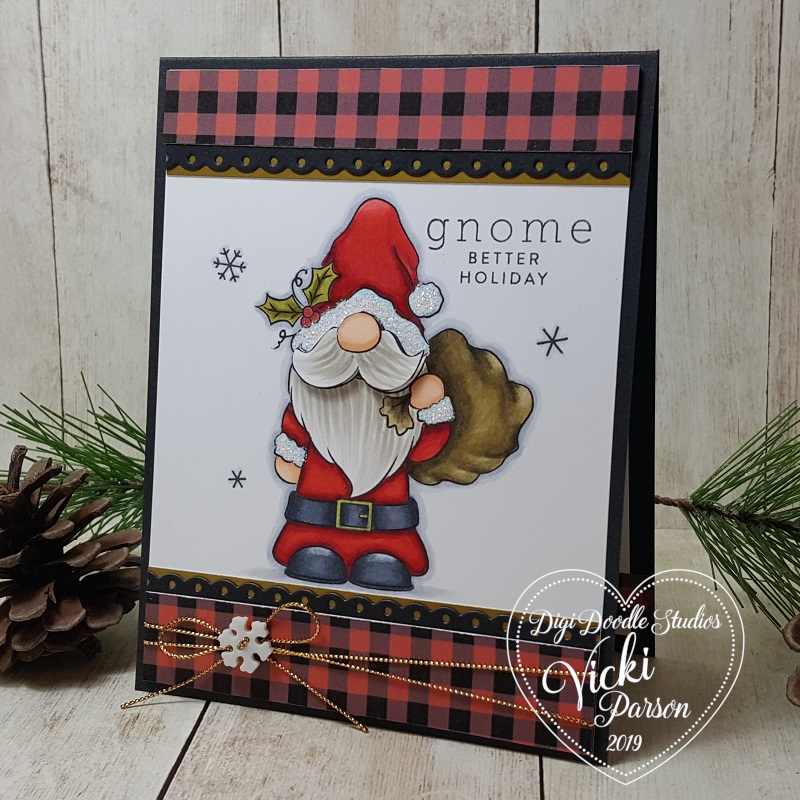
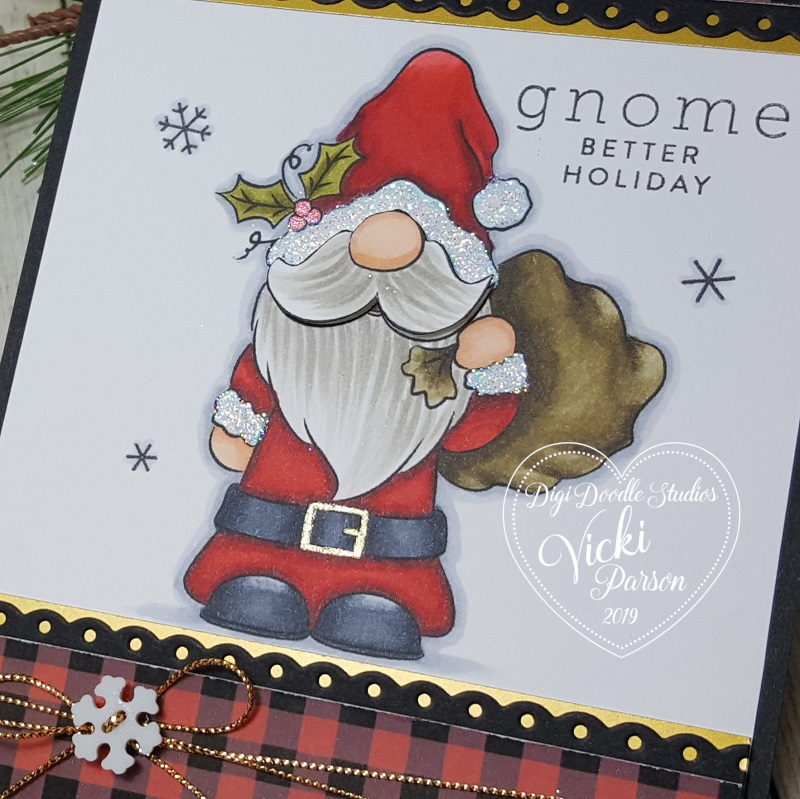
For this baby boy bib card, it’s just as simple!  You could use ANY circle die cut you have, but I didn’t happen to have a size that I was looking for, so this scallop circle design was cut from my Cricut machine.  It cut out the light blue and the dark blue layer behind it.  I ended up cutting out an additional dark blue panel to create my full shaped card design.  (This card measures exact size as above for regular A2 sized envelopes!)

The next step was using a circle die to die cut through all of these scallop circle layers for the neck opening on the bib.  I’ve used a score board to score a line on the top layer only (as the bottom was the back/inside of the card and didn’t need score lines.) and added the ribbon before securing the top two ends (behind the buttons) to the back of the card panel so that it opens like a regular top folding card.  (I also added an additional light blue circle panel to the inside for a message.)  The ribbon is secure and doesn’t interfere with the opening of the card.

I’ve used another circle die to cut a piece of paper from the Digi Doodle Studios Baby boy Digi Paper pack.  Obviously this was also cut out for the bib neck line as well.  I tied a bow with white twine on the buttons before gluing them down on the top ends of the bib.  I printed out the sentiment from the DDS Little Ones set and cut it out with the same circle die that I’ve used for the papers and trimmed it down into a strip and added another dark blue layer behind that to attach to the front of the bib.  I popped up the baby boy and the wood block with foam dots over the card and added some blue pearls along the side.

Thanks so much for joining me here today and I’ll see you again soon!

Challenges I’d like to enter:

  1.  Daring Cardmakers – Something ‘NEW’
  2. Arty Divas – Anything Goes #13
  3. Through the Craft Room Door – Anything Goes
  4. A Bit More Time to Craft – Anything Goes
  5. The Creative Crafters – Anything Goes
  6. Cute Card Thursday – What’s New?
  7. As You Like It – Anything Goes

Welcome Little One From Digi Doodle Studios!

Hello friends!  So now that we have celebrated the Holidays and have started the year, it’s time to look at all things “new”, right?!  I have some new things to share with you today using Digi Doodle Studios products!

To me, there’s nothing better to celebrate “new” than new crafty items to play with as well as a new baby theme:

Vicki-DDSBOJ-Jan7

I hope you just said “Awe!” right along with me here!  Absolutely fell in love with this precious digital Pairables set that’s BRAND NEW at Digi Doodle Studios called “Little Ones“!

I started by printing out the images and coloring them up.  I colored the giraffe, balloon, heart and baby rattle and then fussy cut them out for my card design.  There is a very soft interlocking heart grey background papers from the Digi Doodle Studios Baby Boy digital paper pack that I’ve used for the background with the frame layout.

The frame was cut out using the Whimsy Stamps Peekaboo Window 3 die from some yellow cardstock.  I then took a brand new textured embossing folder from Sizzix that I got over the Holidays and embossed it.  Love the texture of the hearts!

I used some pop dots to lift the images up a bit and added some white twine to the balloon and giraffe.  The sentiment was printed out (also from the same Pairables set) and cut out with a banner die.  Lastly, I’ve added the ribbon bow, button and some tiny heart sequins in random areas.

Vicki-DDSBOJ-Jan7-close

Here’s a closer look at the coloring I’ve done on this sweet little giraffe.  I’ve used Copics to color all the images.  You can see how pretty that texture from the embossing is!  Lots of little hearts going on here! (Including on the giraffe in case you didn’t see that!)  🙂

You can see where I’ve added some shimmer to the balloon, tiny hearts on rattle and the tiny heart inside the yellow heart with a glitter brush pen.

Vicki-DDSBOJ-Jan7-flat

I hope you’ve enjoyed my “NEW” creation for you today!  Please be sure to stop in the store and check it out along with all of the other new items available!

Challenges I’d like to enter this card for:

  1.  Crafty Creations – Anything Goes #405
  2. Pearly Sparkles – Anything Goes
  3. Moving Along With the Times – All Things New (new digi stamps/papers/embossing folder and new baby)
  4. Simon Says Stamp Wednesday – Something New
  5. Craft Rocket – Something New
  6. QKR Stampede – Anything Goes #379
  7. Crafty Friends – Something New
  8. Crafter’s Castle – Anything Goes

Winter Friends at Whimsy Stamps

Hello friends!  I hope that you all had a great Christmas!  I’m still celebrating with my family over the weekend and happy to be with all of my loved ones for sure!

I have this really sweet image along with some news to share with you today.

For the news:  This will be my final post as a design team member for Whimsy Stamps.  I STILL adore Whimsy Stamps and of course will continue to use the products and promote the products and still use my affiliate link with them when I can, but my term has ended and it was time for me to move on is all…I will truely miss being apart of this wonderful team and working with my friends over there for sure, but will always remain friends of course!

And, perfectly, this brings me to my card for today with this darling image.   This card was made and sent to a lovely teamie for our Christmas card swap and I thought it was perfect to send along to her….

Vicki-WSWinterFriends-Christmas swap

I have used this adorable Wee Stamps image from Whimsy Stamps called “Winter Friends“.  I just fell in love with the sweetness of it all for sure!

After coloring up the image, I die cut it out with a stitched circle die and layered it over another blue die cut circle.  I then took some “Fallen Snow Glitterstock” from Brutus Monroe and cut out a piece with the MFT Linked Chain Circle Frames die and attached that piece around the die cut circle image.

I wanted to pair this image to match up with the colors from the Whimsy Stamps “Christmas So Soft” Digital Papers Collection.  I used one panel for the entire background base that was mounted over a blue 5″ square top folding card base.  And then I used the pink strip from the same collection mounted over another strip of blue cardstock across the middle of the card wrapped with some silver metallic ribbon.

In the bottom corner of the card is where I stamped the greeting in black ink from the Whimsy Stamps Holiday Mini Sentiments clear stamp set.  The circle image was mounted over top of the card with some craft foam and then I die cut some snowflakes from the Whimsy Stamps No-See All Seasons Tree die set with more of that Glitterstock that was randomly added to the card along with placing one in the center of the ribbon bow.  I’ve also added a gem to the center of that snowflake as well.

Vicki-WSWinter Friends-Christmas swap-close

Here’s a closer view of the coloring that I’ve done on this sweet image.  I’ve used my usual Copic markers and also used a white gel pen for highlights in certain places.  I covered the “holly berries” in her hair with a glitter brush pen and for the snow ground, I used a glue pen and then added some glitter over top of that for sparkling snow.

Vicki-WSWinterFriends-Christmas swap-flat

A perfect image to send to one of my special DT Whimsy friends!  I hope you’ve enjoyed it as I really enjoyed creating it and sending it off to my friend too.  🙂

It’s NEVER a “good-bye”, but I’ll see you again soon my friends!  HUGS

Challenges I’d like to enter this card for:

  1.  As You Like It – Favorite Die and Why? (I am constantly using the circle, square and rectangle stitched dies because they’re nice basic shapes but also add that stitched detail along the edges to add more interest if needed.)
  2. Daring Cardmakers – Pretty Pastels Christmas
  3. Allsorts – Anything Goes
  4. Stamps & Fun = Creativity – Anything Goes
  5. Papercraft – Anything Goes
  6. Cute Card Thursday – Anything Goes

Gnome Better Holiday!

Hello friends!  Have you noticed the craze over the gnomes this season?!  Well I guess I jumped right on board with it and got a little love crazy with them myself! LOL!  This particular one really grabbed my heart though…

Vicki-DDSGnomeSanta

Check out this guy!! LOL!  This image is called, of course, Santa Gnome from Digi Doodle Studios!

Again, with this being a Christmas card for mailing, I wanted to keep it somewhat simple and flat, so I used the entire image panel for my card and trimmed it down to layer over an A2 sized black card base.

I thought it would be fun to pair this image with a couple of strips of the digital paper from the Digi Doodle Studios Buffalo Flannels Collection, so I added a strip to the top and bottom.  I also used a scallop die cut border to cut out a piece with black cardstock along the edges as well as a strip of gold cardstock under those strips for a border.

Before attaching the bottom buffalo check strip, I wrapped some gold twine with a snowflake button and bow over it.  I took the sentiment and a couple of snowflake stamps from the SSS Gnome for the Holidays stamp set and stamped them on the image panel with black ink.

Vicki-DDSGnomeSanta-close

Here’s a closer view of the image and how I’ve got him all colored up with Copics.  I used a red gel pen to color in the “hollies” on his hat and a gold gel pen to color in his belt buckle.  I then took a glue pen and covered his outfit trim with glitter.

You will also notice a bit of dimension on his face.  I printed out this image twice and one of them I only colored up his nose and moustache, fussy cut it out and then used some foam tape to pop it up over my colored up image panel.  Just thought it would be cute!

Vicki-DDSGnomeSanta-flat

Really had so much fun making up this card and this cutie really has me feeling festive for the Holidays now!  So what do you think?

Thank you for stopping by today!  I sure enjoy hearing your thoughts as they make me smile!

Challenges:

  1.  Sunday Stamps– SSC220 Keep it Open Sketch
  2. The Sisterhood of Crafters – Anything Christmas
  3. Penny’s Paper-Crafty– Anything Goes
  4. Use Your Stuff – It’s Christmas Time!
  5. Always Fun – Santa Claus
  6. Arty Divas – Anything Goes
  7. Tuesday Throwdown – Anything Goes
  8. Crafty Gals Corner– ‘Tis the Season

I’ve Been Published!

Hey friends!  This is just a quick post to share my excitement with you about having a card I made for Whimsy Stamps published in the December 2019 “Handpicked” article on p. 38 of the Making Cards & Papercraft Magazine!

Vicki-published in Making Cards magazine

I would’ve shared this a bit sooner, but I wanted to take a photo of the issue in hand with me here.   The stamp set that I’ve used for my card is from the brand new December release at Whimsy Stamps called “Winter Wonderland“.  It’s a clear stamp set with lots of really sweet snowman images in it!  It’s one of my faves from the new release too!

Vicki-WSmagazine-WinterWonderland

Here’s a photo of it that I took myself before sending it along to the magazine back in October.  🙂

I won’t go into great detail about it, but I’ve also paired this with the Whimsy Stamps Winter’s Magic Blue Digital Papers Collection as well as the Whimsy Stamps No-See All Seasons Tree die set (snowflakes only die) for my card design.

If you get the magazine, then you can see below in the article how it was put together.

Vicki-WSmagazine-WinterWonderland-close

Here’s a closer view of the image and you can see the bits of glitter over it.

Vicki-WSmagazine-WinterWonderland-flat

This was just a really fun card to make and quite simple to put together too!  I really enjoyed it and how fun to get published with it as well!

Thanks so much for stopping in and letting me share my excitement with you!

P.S.  I have a spot along the sidebar of my blog where there will be a photo of the magazine to click on my blog post link in case you’re interested about my card.

Come Aboard the Penguin Polar Express!

Hello friends!  I hope that you are having a wonderful week so far!  I have a cute wintry card to share with you today:

Vicki-WSPenPolXpress-Nov19

Isn’t this the cutest little clan you’ve ever seen?!  It looked to me that the polar bear was sliding around and having fun on the ice, so the penguins decided they wanted in on the fun too and are trying to hitch a ride! LOL!!

As you may recognize the sweet penguins from artist Crissy Armstrong, this image has come out this month in digital format called Penguin Polar Express.  I really adore her sweet images.

For my card, I have followed a sketch to make my card and thought it would be nice in blue colors and sparkle.  So I printed out some papers from the Whimsy Stamps Winter’s Magic Blues digital papers and used them for my design.  I’ve also cut out some white Glitterstock for some of the layers as well as some blue cardstock for a finished top folding 5.25″ square card.  The scallop square panel was popped up with foam tape and the circle image panel was popped up with a die cut piece of craft foam.

I finished it off with some clear metallic ribbon and snowflake sequins that was dotted with some Nuvo White Blizzard Glitter Drops.

Vicki-WSPenPolXpress-Nov19-close

Here’s a closer view of the “gang” I’ve colored up with Copic markers.  I was concerned about the colors of all of the different hats the penguins were wearing, but thought the colors really make the image stand out from the card.  I dotted their cheeks with a white gel pen.

You can see where I’ve taken a glue pen and added some sparkle to the left penguin’s hat trimming.  I also took the glue pen and went around the circle of the image and added some glitter there too.  I colored the bottom of the image with Copics and covered it with a shimmer brush pen to make it look like ice.  (You can see it better below.)

Vicki-WSPenPolXpress-Nov19-flat

I hope you’ve enjoyed my card today and have been inspired in some way or at least been amused with this sweet image on my card!

I thank you so much for stopping by today!  I look forward to seeing you soon!

Challenges:

  1.  Cheerful Sketches – November sketch
  2. Try it On Tuesday – Cold, Cold, Cold!
  3. A Bit More Time to Craft – Anything Goes #104
  4. The Creative Crafters – Anything Goes
  5. QKR Stampede – #372 Anything Goes
  6. Creative Fingers – Anything Goes