Hello friends! I hope you’re having a great week!
As I mentioned in my last post, it’s really cold and snowy over my way so I thought I’d join in with the winter season and have a little interactive fun in my craft room! (Where it’s much warmer inside! LOL!)
I have used some Digi Doodle Studios products to create this really fun interactive card design:

This cute little critter is just having a blast! 🙂 This card was so fun to play with and I couldn’t put it down! This cute critter is the Skiing Bandit Raccoon digital stamp from Digi Doodle Studios.
I’ve colored him up with my Copic markers and used a glitter silver gel pen to color up his skiing poles. He was fussy cut out with scissors. You will notice that his scarf and mittens resemble the background papers too, which were paper pieced from the Digi Doodle Studios Winter Plaids N’ Patterns Digi Paper Pack.
To create the scene, I’ve die cut some ‘hill slopes’ with a die cut, but you could use just scissors to cut one yourself. I die cut a set of trees for the background and ended up inking up the edges of the snow hills along with the banner sentiment at the top.
What’s fun about this card is that when you grab that little arrow at the bottom left of the card, this little skiing bandit starts flying down the glittery snow hills!
If you’d like to see how this card moves along and how to create one for yourself, be sure to check out the video below or watch on You Tube HERE!
I thought that the invisible way he flies over the hills along with the idea of how to create your own slider mechanics with scraps is something fun that anyone can put together with items they have on hand!
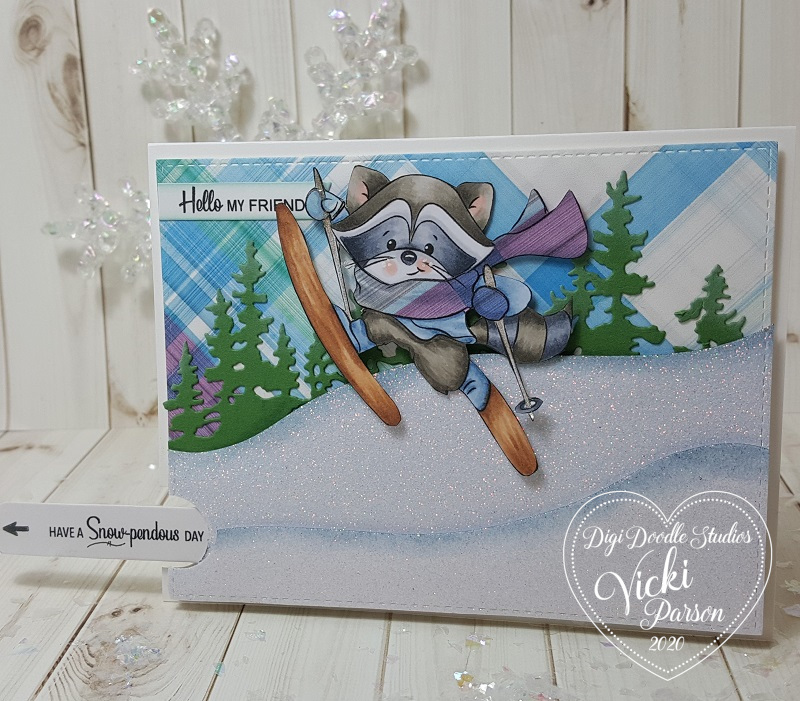
And of course here’s the view of him flying down the hill as the arrow slider tab gets pulled from the card! The pull tab slider sentiment comes from the Digi Doodle Studios Snow Days Sentiments set, which is what I’ve also used at the top front of the card.
For the sentiment on the pull-tab slider, I’ve taken a marker and underlined part of the sentiment and added an explanation mark on the end.
I also decided to stamp a black arrow at the end of this slider so that when it’s tucked inside, you can see that arrow so the recipient knows what to do! You could of course just use a pen to draw your own arrow as well.

I hope you’ve enjoyed my interactive slider card today! I’m still having fun pulling that skiing raccoon over the snowy hills! LOL! I think this would be a really fun card to send along to a friend for a smile during these cold months, don’t you?
Thanks so much for stopping in! I’ll be seeing you again very soon!
Challenges I’d like to enter for this card:
- Sparkles Monthly – Winter Blues
- QKR Stampede – #381 Anything Goes
- Allsorts – More Than a Single Word
- Crafty Friends – Anything Goes
- Lil’ Patch of Crafty Friends – Anything Goes
- Pammie’s Inky Pinkies – Anything Goes #2003
- The Paper Girls – Winter Color Palette


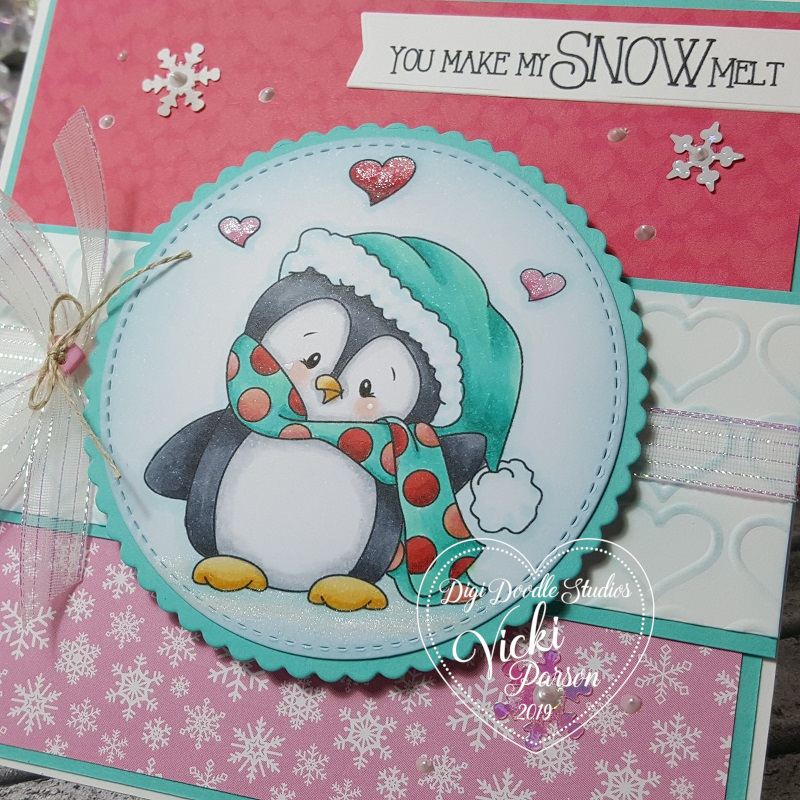


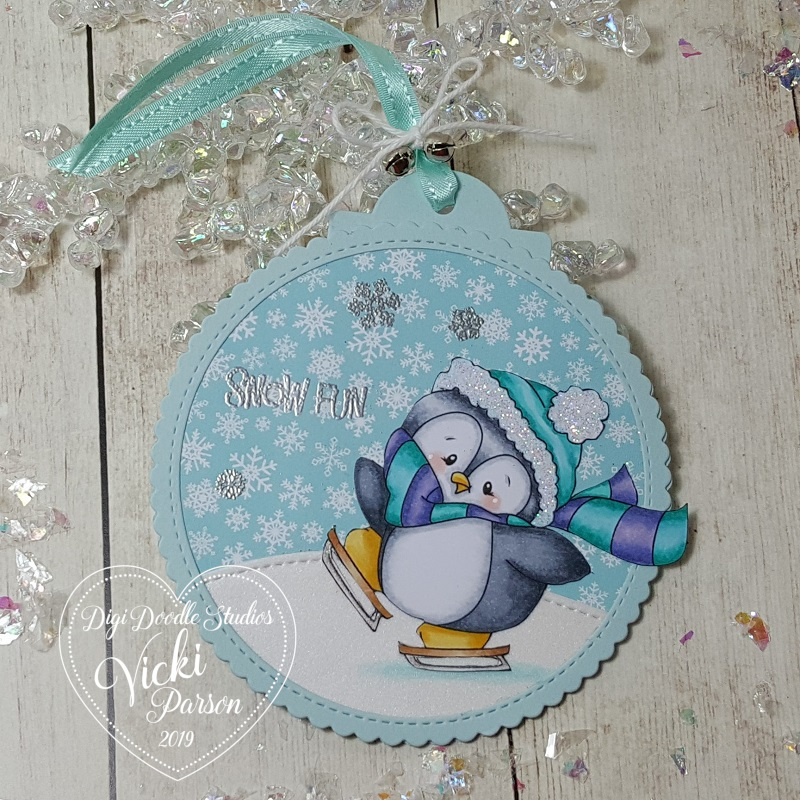
 Check out these adorable penguins having some fun doing winter activities! Penguins are probably one of the top animals that I love! I have SO many penguin stamps in my stash and seem to keep on collecting more of them…so of course I was super excited to be able to add this Wintertime Penguins Pairables set from Digi Doodle Studios to my collection as well! 🙂
 Here’s a closer view of the pink tag. For the digital image, I used Word on my computer to add the penguin and place it over one of the “ski” images from the set and enlarged it to make it look like a snow board instead of a ski! Then printed it out.