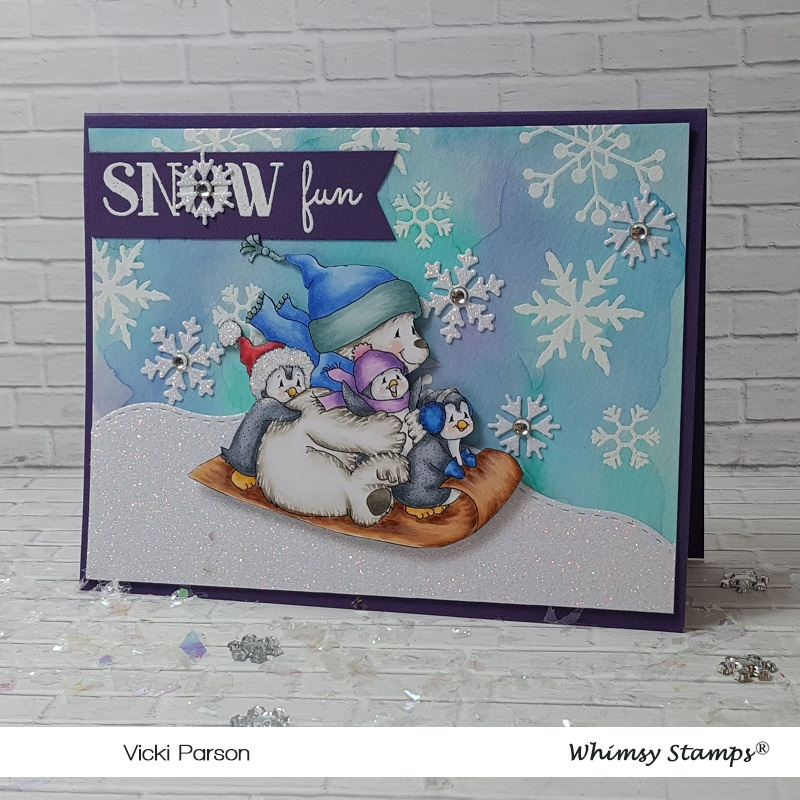
Hello friends! I hope that you are having a wonderful week so far! I have a cute wintry card to share with you today:
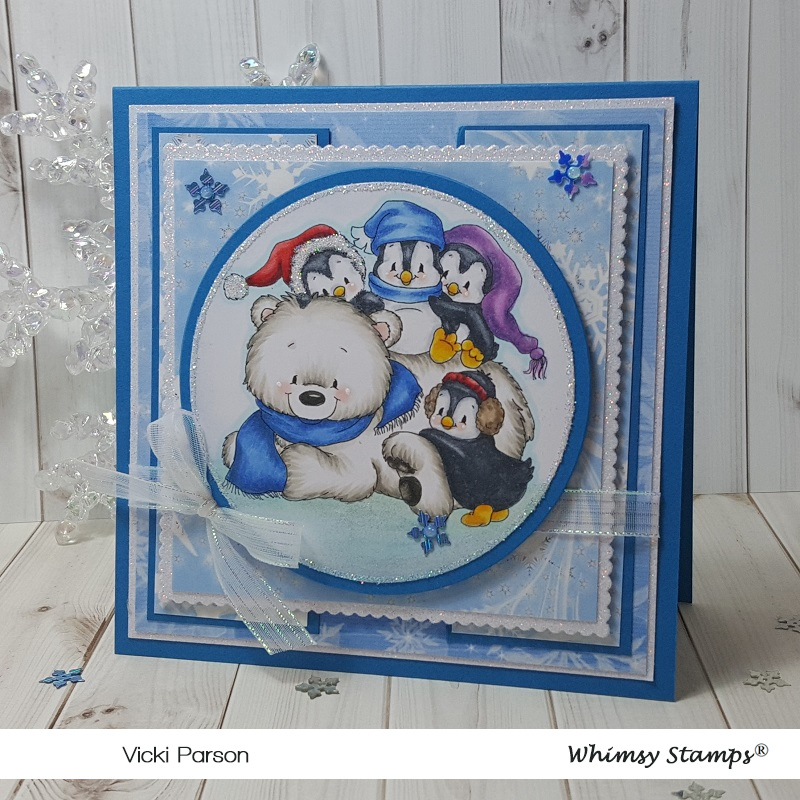
Isn’t this the cutest little clan you’ve ever seen?! It looked to me that the polar bear was sliding around and having fun on the ice, so the penguins decided they wanted in on the fun too and are trying to hitch a ride! LOL!!
As you may recognize the sweet penguins from artist Crissy Armstrong, this image has come out this month in digital format called Penguin Polar Express. I really adore her sweet images.
For my card, I have followed a sketch to make my card and thought it would be nice in blue colors and sparkle. So I printed out some papers from the Whimsy Stamps Winter’s Magic Blues digital papers and used them for my design. I’ve also cut out some white Glitterstock for some of the layers as well as some blue cardstock for a finished top folding 5.25″ square card. The scallop square panel was popped up with foam tape and the circle image panel was popped up with a die cut piece of craft foam.
I finished it off with some clear metallic ribbon and snowflake sequins that was dotted with some Nuvo White Blizzard Glitter Drops.

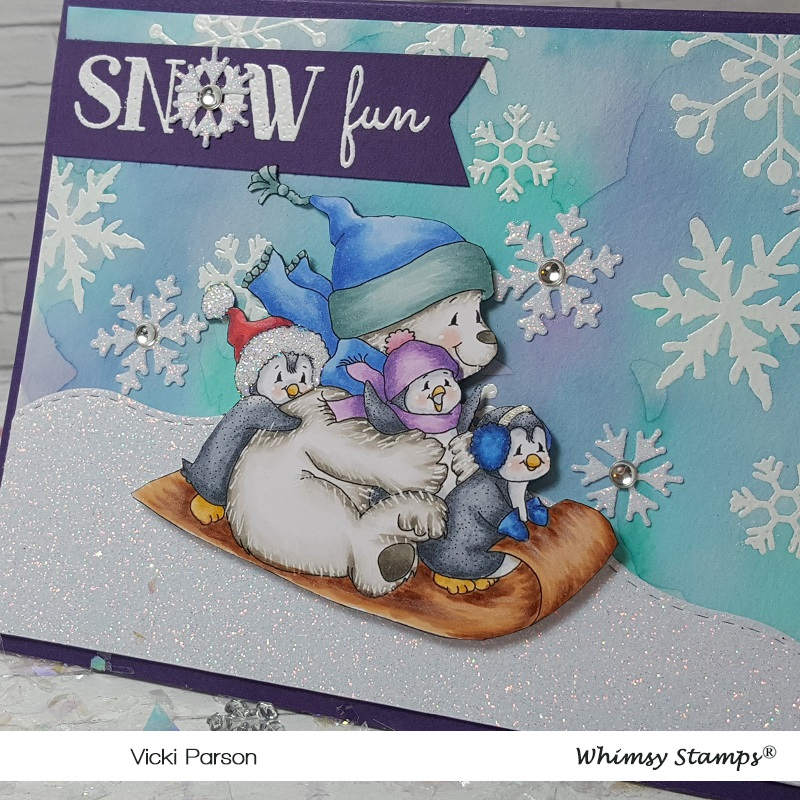
Here’s a closer view of the “gang” I’ve colored up with Copic markers. I was concerned about the colors of all of the different hats the penguins were wearing, but thought the colors really make the image stand out from the card. I dotted their cheeks with a white gel pen.
You can see where I’ve taken a glue pen and added some sparkle to the left penguin’s hat trimming. I also took the glue pen and went around the circle of the image and added some glitter there too. I colored the bottom of the image with Copics and covered it with a shimmer brush pen to make it look like ice. (You can see it better below.)

I hope you’ve enjoyed my card today and have been inspired in some way or at least been amused with this sweet image on my card!
I thank you so much for stopping by today! I look forward to seeing you soon!
Challenges:
- Cheerful Sketches – November sketch
- Try it On Tuesday – Cold, Cold, Cold!
- A Bit More Time to Craft – Anything Goes #104
- The Creative Crafters – Anything Goes
- QKR Stampede – #372 Anything Goes
- Creative Fingers – Anything Goes