Pink & Main Video Hop with Hello Autumn Slimline

Hello friends!  I hope you’ve had a fantastic week!  It seems like this month is flying by!

I’m excited to share with you a fun video hop collaboration with Pink and Main on my You Tube Channel today! (Be sure to check it out on MY VIDEO because there is a giveaway and you’ll need to leave comments on the videos to be entered to win!)  So head on over to see the wonderful inspiration with the Pink and Main products going on!

Here’s the fun Autumn themed slimline card I’ve made for the video hop today:

So Pink and Main has come out with some fabulous new products which I’ve used for my card here and I’ve added some fun techniques to use with some of those products as well!

The background was really fun to create using the Pink & Main Blending Brushes along with the new Crackling Campfire Distress Oxide Ink color that just came out!  I’ve also used the wonderful Leafy Stencil from Pink & Main over the background too.  The cups and leaves were also colored using the oxide inks and a waterbrush which you can see in my video as well as how I’ve inked and cut out the one image backwards so I have two cups with the handles in opposite directions on my design here. 

You can check out how I’ve put this design together and the techniques I’ve used in this video below, or to leave a comment and see the link to the next person in the video hop, CLICK HERE to go to the video on You Tube.

I absolutely fell in love with that Need to Venti stamp set and coordinating dies!  I loved that older Christmas Mugs stamps they had previously came out, but Autumn is awesome to add to my collection because it’s my favorite time of the year!  So be sure to check out how to stretch out the use of this set in video above!

The Blessings slimline die was so fun to use on my card too and I love that the frame cuts out separately from the center and there was room to layer behind it before attaching to your slimline card base.  The Brutus Monroe Copper Glitterstock was the perfect accent behind the scallop frame. That frame was cut out with several layers of cardstock and stacked together for thinkness.

The same Copper Glitterstock was used to cut out the sentiment dies as well.  I’ve used some vellum to layer behind the Autumn sentiment, which the backing diecut was also included in this same slimeline die set!  The final measurement of my slimline card was a piece of brown cardstock measuring 8.5″ x 7″ and scored at 3.5″ in the center.  The finished card will fit inside a #10 envelope when closed.

Here’s a closer view of the details with my colored cups using the distress oxide inks and waterbrush.  I’ve also used the same Need to Venti stamp set and oxide ink colors to stamp the leaves and die cut them out to arrange over my scene as well.

I popped up the cups with foam squares and added some drops over the whip topping in the cups with some Nuvo Honey Gold Crystal Drops.

Hopefully you can see the pretty Autumn colors and dimension in the card.  I sure had lots of fun putting all of this together with the new Pink and Main products, so I hope you’ll go check them out along with checking out the video hop for your chance to win a $25.00 gift certificate to the store! **The Video Hop will only be open for 1 week and end on September 25th!**  Wishing you lots of luck my friends!

Thanks so much for dropping in today and I’ll be seeing you soon!

Challenges:

  1. Challenge Up Your Life – Autumn Mood 
  2. The Paper Funday – #21 Anything Goes optional:  Fall/Autumn
  3. Dream Valley – Embossing wet/dry (embossed cup images)
  4. The Sisterhood of Crafters – Autumn Inspiration
  5. CCEE Stampers – CCEE2037 Slimline Cards
  6. Not Just Cards – Anything Goes
  7. Crafting Happiness – Anything Goes
  8. Pammie’s Inky Pinkies – PIP2037 Anything Goes
  9. Simon Says Stamp Monday – Frame It

Caffeinated Changito☕

Hello there friends! Really hope that you have enjoyed your long Memorial weekend! The weather finally turned warm and once it turned warm, it REALLY turned warm and humid over my way! So we were able to plant some flowers in our garden pots outside and enjoy some cookout time too!

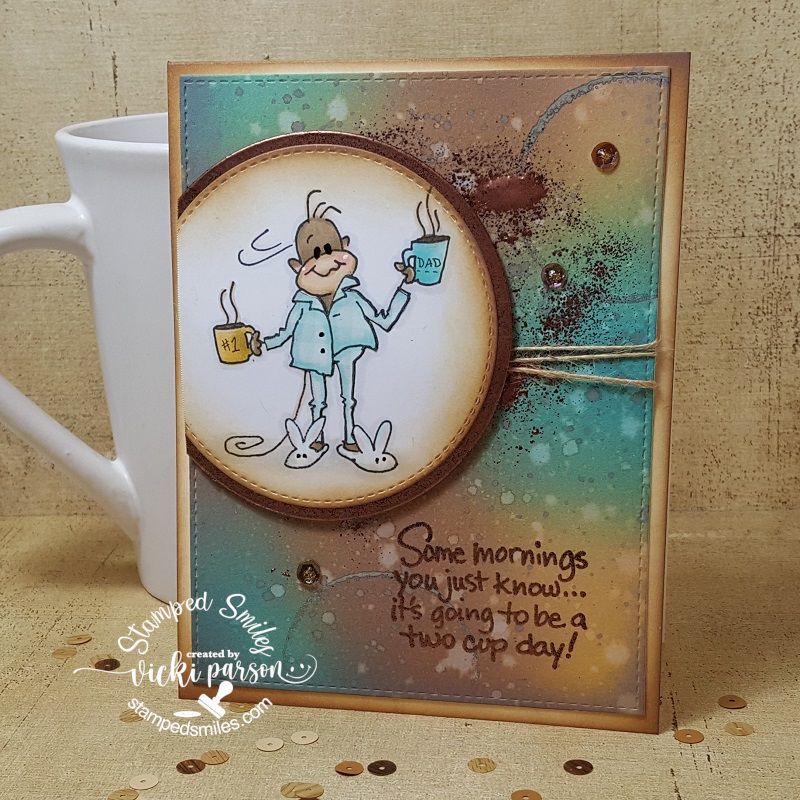
I noticed that the “Spring/Summer Coffee Lovers Blog Hop” had started up this weekend and I thought it would be a great opportunity to pull out some old stamps and have some fun with it while making a maculine card for the up-coming Father’s Day holiday too:

Does anyone remember these cute little “Changito” stamps back in the day?! I have used the Changito Coffee stamp (only found this one online) and the sentiment to go with it too! I actually bought these wood mounted rubber stamps years ago at a convention I had went to and have kept them hoarded like my other old stamps. LOL!

I stamped the image on Copic blending card and then again on some blue gingham background paper for paper piecing his PJs in! For the sentiment, I heat embossed it over my background with some appropriately named “Coffee” EP which has a metallic copper with some brown speckling in it…very cool. the store is no longer active that it came from.

For the background of this card, I had some fun playing with my Oxide Distress Inks in Vintage Photo, Broken China, Scattered Straw and touches of Espresso. I sprayed and dried layers as I went. I even took the bottom of a jar I had laying on my table to ink up some Espresso ink to make the “ring” marks over the background. I also took some more of that “Coffee” EP and sprinkled some over the background for even more distressing.

I wrapped some twine around it and attached it to an A2 sized white card base that I sponged around the edges with some Vintage Photo ink.

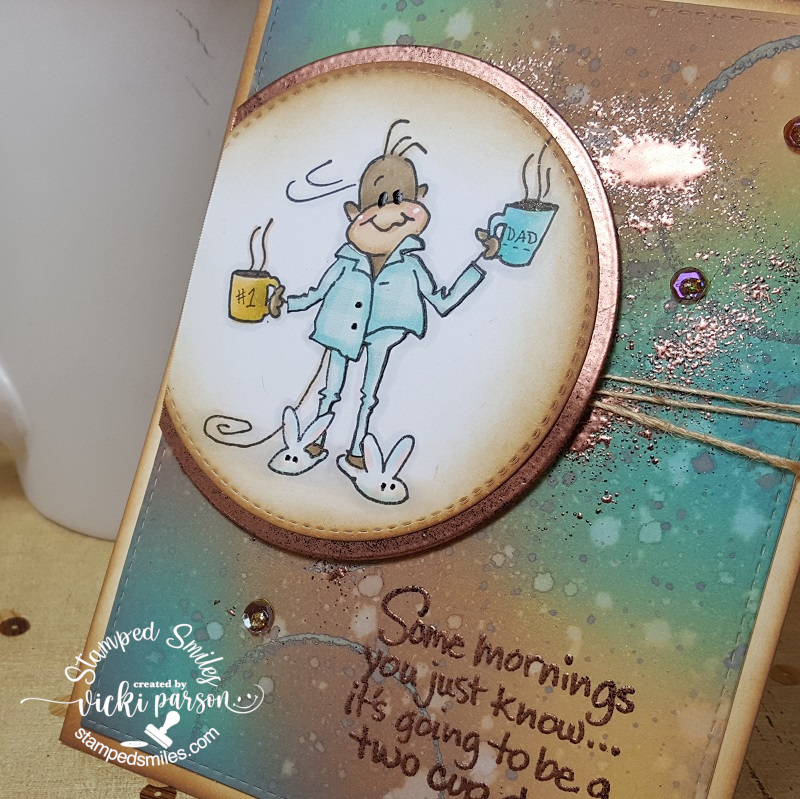
Here you can see a better look at the image and how I’ve got him colored up with Copic markers. You can barely see the gingham pattern in his paper pieced PJs, but I thought it was cute! I also took a black Copic liner and drew lettering on the coffee cups. I added just a hint of sparkle over the coffee inside the cups with a Spectrum Noir glitter brush pen. I also took a black gel pen to dot his eyeballs, the buttons on his PJs as well as dot the bunny slipper eyes. I think that little detail really makes his pop more with a bit of character.

The image was cut out with a stitched circle die and then I also cut out an additional circle to mat behind him, which I took a VersaMark ink pad and then used the “Coffee” EP to heat set along the edges of it so it has the same look and texture as the background and sentiment. This was attached over the background with twine.

Lastly, I’ve taken some brown colored sequins from my stash and attached them to the background and filled the centers with some Nuvo Honey Gold Glitter Drops.

Hope you’ve enjoyed my masculine and quirky card for today! Thanks so much for dropping in and I’ll be seeing you again soon!!😉

Challenges:

  1. Spring/Summer 2020 Coffee Lovers Blog Hop – Coffee/Tea/Cocoa Related Project

2. Addicted to Stamps and More – #391 Anything Goes

3. Cute Card Thursday – #635 Critters

4. Creative Knockouts – #351 Embossing Delight (wet or dry)

5. QKR Stampede – #399 Anything Goes

6. Simon Says Stamp Monday – “Going Around in Circles”

7. Pammie’s Inky Pinkies – PIP2021 Anything Goes

8. Die Cut Divas – Make it a Beverage + die cut/embossing folder

Snow One Like You for Whimsy Stamps

Hello friends!  I hope you’re having a wonderful week so far!

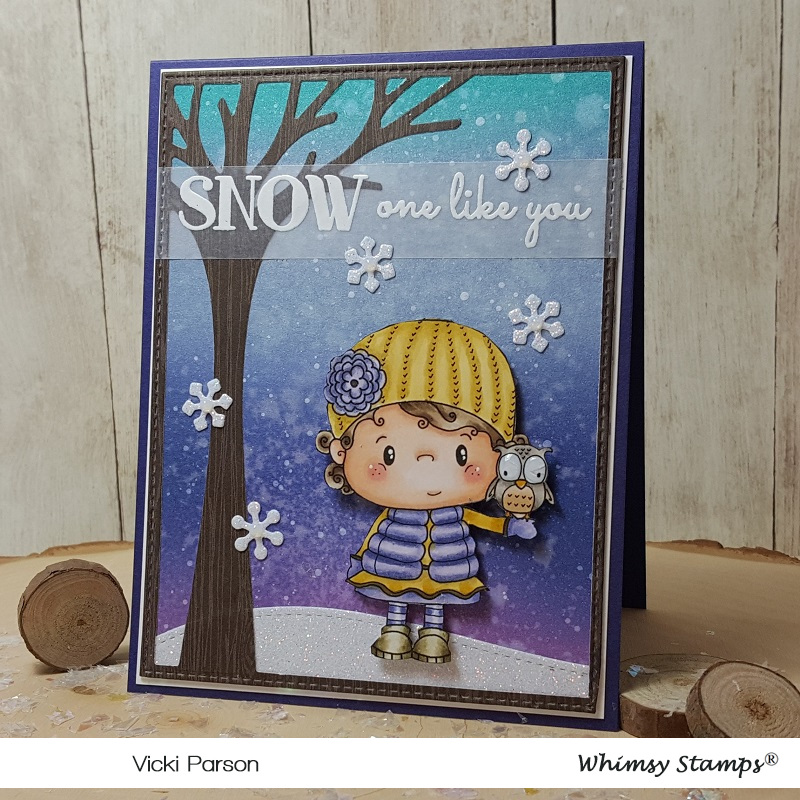
Today I have creation to share with you using this really sweet image from Whimsy Stamps:

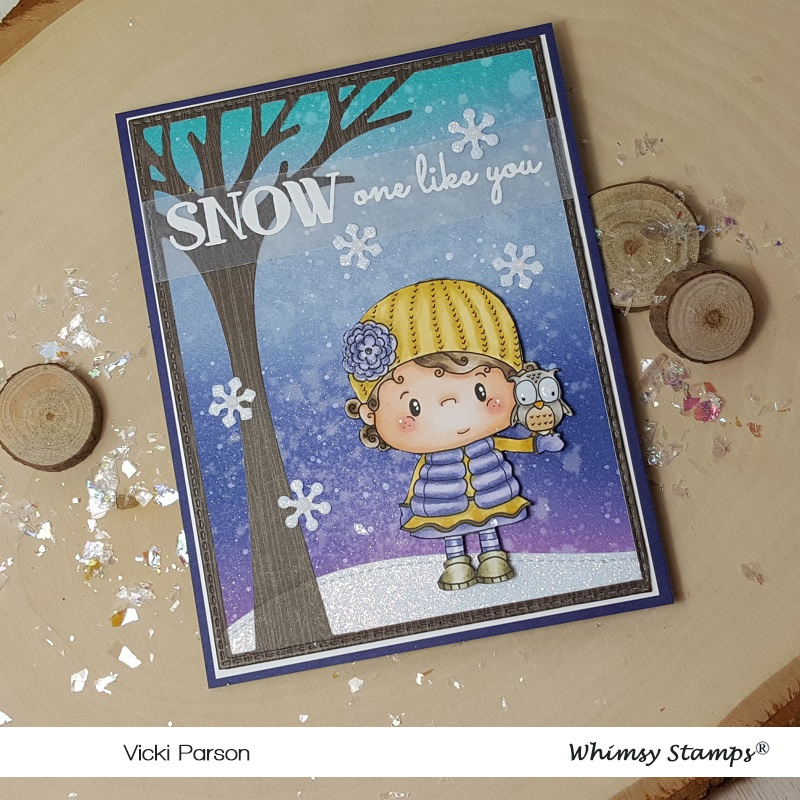
Vicki-WSTawny-Nov12

I really adore this digital stamp that came out this month for Whimsy Stamps called Tawny.  It’s one that I picked to make something with as it was a bit personal to me.  That little owl with those big eyes is so sweet and really reminds me of my grandma who passed several years ago.  She was an owl lover….so she’s like a sweet little angel with me here!  There was SNOW one like her either!  🙂  – CLICK HERE to see the full digital release for November.

To create my card, I started with some watercolor paper and Distress Oxide Inks in Seedless Preserves, Dusty Concord, Stormy Sky and Broken China (from bottom to top order.)  I spritzed it with a water bottle and soaked it up with a paper towel.  I then took some white paint watered down and splatter it with a fan brush over the panel.  I also took some shimmer spray and covered the entire panel.  You can see it better in the photo below.

I took a Lawn Fawn die to create the tree border with woodgrain paper and then die cut a snow border with glitter cardstock and glued it behind the frame.  I also took the sentiment from the Whimsy Stamps Snow Flurry clear stamp set and white heat embossed it over a strip of vellum that I’ve attached over top of these layers (with the inked backgroundalso) by using my Xyron Sticker machine.  These pieces were die cut with a stitched rectangle die, layered over a pice of white cardstock and then mounted onto a purple A2 sized top folding card base.

Lastly, I’ve added my image and some snowflakes that were cut out with some more glitter cardstock and each snowflake was dotted with some Nuvo White Blizzard Glitter drops.

Vicki-WSTawny-Nov12-close

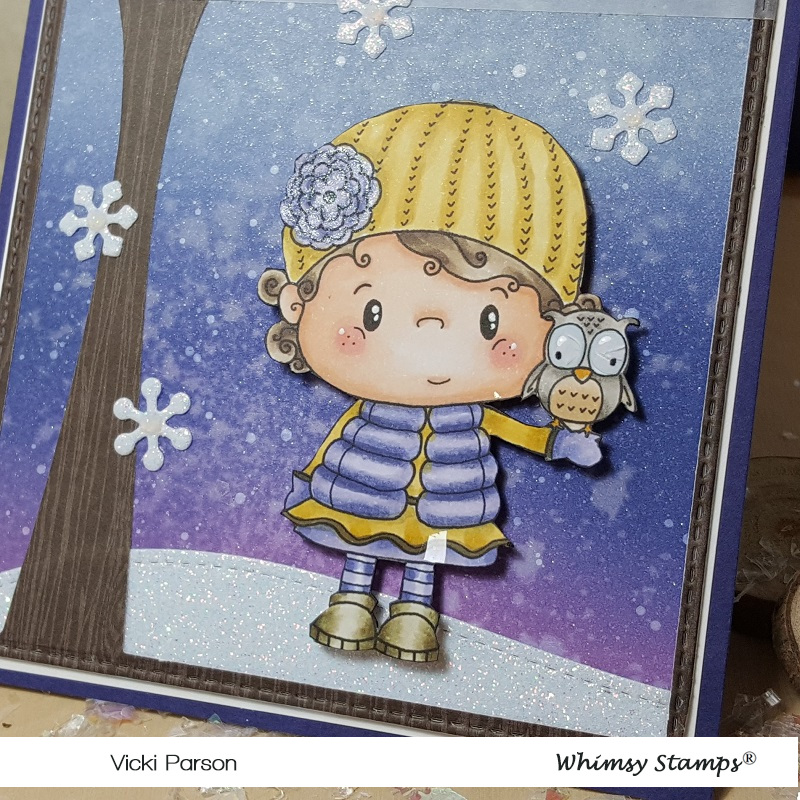
Here’s a closer view of the image and how I’ve got her colored up with Copic markers.

If you take a good look at the top portion of the background, you can sort of see the shimmer from the spray.  It’s really sparkly in the light.

I accidentally got a piece of the “faux snow” photo prop on her skirt. LOL!  I covered the flower on her hat with a glitter brush pen and I’ve used some Nuvo Morning Dew Crystal Drops over the owl’s eyes, but it cracked.  I don’t like it as much as the glossy accents as it doesn’t crack so easily like this does.

She was fussy cut out and popped up over the snow border with foam dots.

Vicki-WSTawny-Nov12-flat

I really like how this one turned out with the colors and I hope you like it too!  The inked snowy backgrounds are really fun to play with!

Thanks so much for dropping into today and I’ll see you again soon!

Here are the Whimsy Stamps products used on my creation today (Click on the photo for affiliate link to purchase/view):

tawny_digital_collection_600x600

Snow_Flurry_display_1024x1024

TDO55846_260x340_8c18eb43-3f47-40a9-b917-12b6aad784ba_600x600

Challenges:

  1.  Shopping Our Stash – Snowflakes
  2. Crafting By Designs – November Anything Goes
  3. Cardz 4 Galz – Let it Snow
  4. Moving Along With the Times – Snowflakes
  5. Creative Moments – Anything Goes with Optional:  “Baby it’s Cold Outside”
  6. Krafty Chicks – Winter
  7. QKR Stampede – #371 Anything Goes


It’s SNOW Fun for Whimsy Stamps!

Hello friends!  Welcome to the weekend and I hope you are having a great one so far!

Today I’m sharing this adorable image from the November Digital New Release for Whimsy Stamps!  Be sure to check them all out in the store!  They’re so cute!!!!

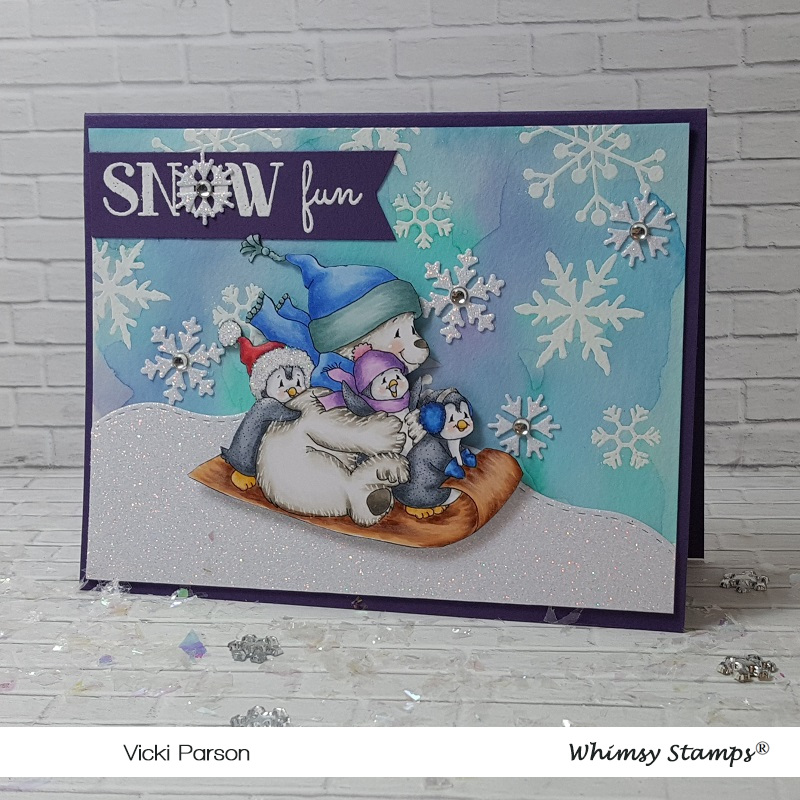
Vicki-PenguinSnowFun-Nov2

How fun and cute are these guys?!!  I’m using the Penguin Snow Fun image for my card today!  Now you already know how I love these penguins, but how cute are they especially that one in the middle with the mouth open! LOL!

For my card I started with a watercolor panel and then white heat embossed the snowflakes over it from the Whimsy Stamps Snow Flurry stamp set.  I then went over this panel with water and added some colors over it with Distress Oxide ink pads smooshed down on my glass mat and picked up with a brush and water.  I’ve used Peacock Feathers, Stormy Sky, Dusty Concord, Chipped Sapphire and Salty Ocean for the colors.  I tilted my panel to get the water to run down a bit and heat set it.

I cut a piece of glitter cardstock with the Kinetic Curved Hills die set as well as some snowflakes from the No-See All Seasons Tree die set.  I placed the hill at the bottom of the watercolor panel and randomly attached the snowflakes to the background.

For the sentiment banner, I white heat embossed it from the same WS Snow Flurry stamp set and added a snowflake in the center of the ‘O’.  I trimmed it into a banner with my scissors and added to the card.

I then took some foam tape and popped up the image over the hill and then added some gems to the center of each die cut snowflake.

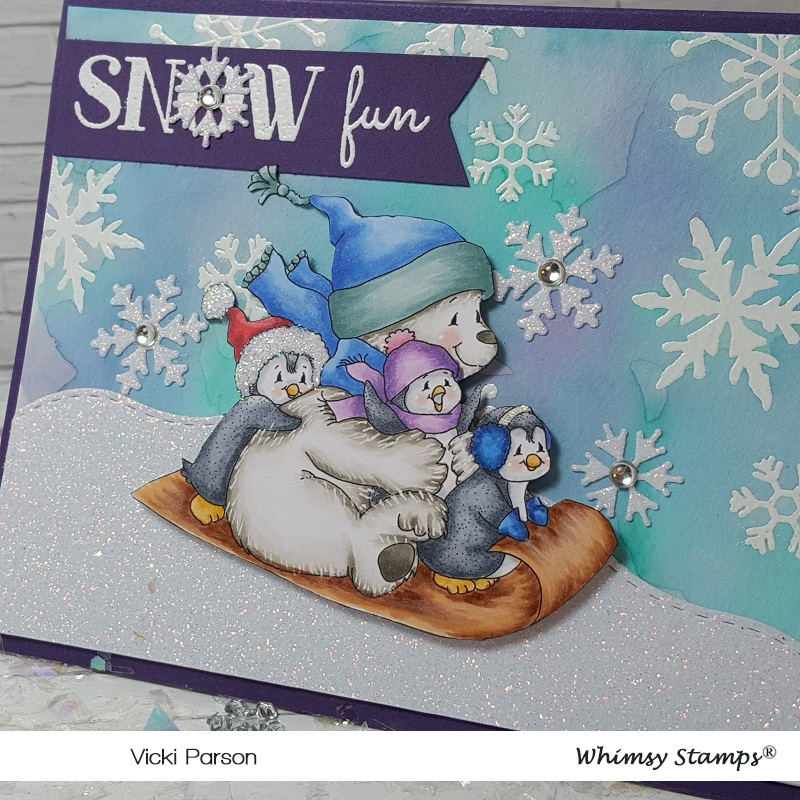
Vicki-PenguinSnowFun-Nov2-close

Here’s a closer look at this adorable image that I’ve got all colored up with Copic markers.  For the bear and everyone’s cheeks, I’ve used a white gel pen and for the band on the penguin’s ear muffs, I used a clear glitter gel pen.

For the penguin’s red hat trimmings, I used a glue pen and some loose clear glitter over top.  I fussy cut out the image and popped it over top of the glittery snow hill.

OOPS…a bit of the snowflake staging clinged to the glittery snow hill a bit! LOL!

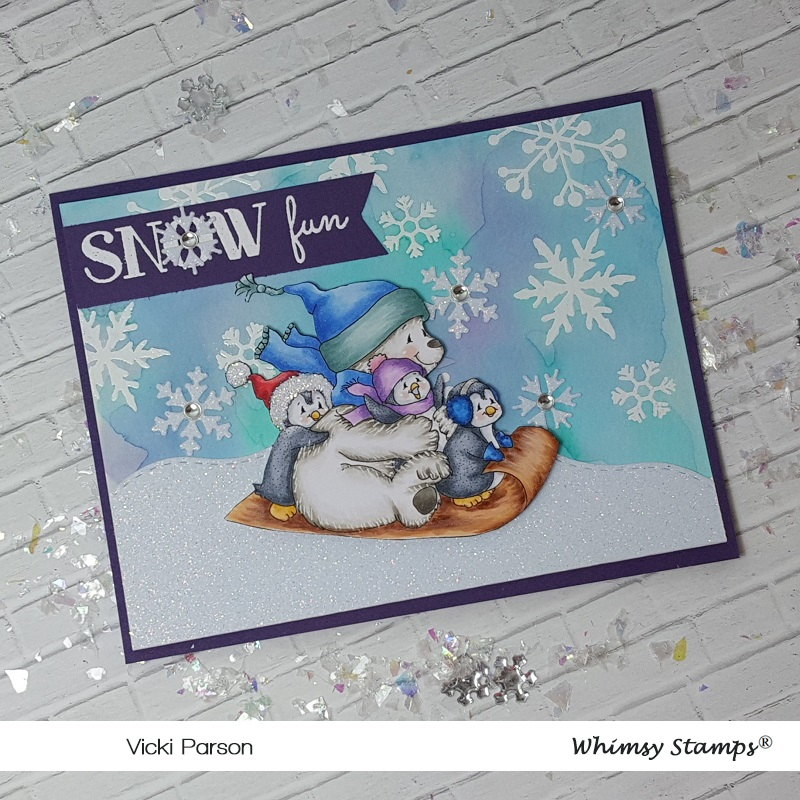
Vicki-PenguinSnowFun-Nov2-flat

Really had a great time coloring this sweet image and getting messy creating the background too!  Hope you’ve enjoyed my creation today as well!

Thanks so much for checking in with me today my friends!  I appreciate it very much and I’ll be seeing you soon!

Here’s the Whimsy Stamps products used on my creation today:

Penguin_Snow_Fun_digital_collection_600x600

Snow_Flurry_display_1024x1024

Kinetics_Curved_Hills_Die_Set_1024x1024

No-See_Tree_Climber_Die_Set_1024x1024

SBC_ri-tdo56102_0_600x600

Challenges:

  1.  Happy Little Stampers Watercolor Challenge – Anything Goes (using watercolor) + optional: animalsNovember 2019 WC
  2. Christmas Crafts All Year ‘Round – Stockings or other Winter Clothing
  3. Crafty Animals – Anything Goes + animal
  4. Crafty Catz – Anything Goes with optional: snow
  5. Brown Sugar – November Anything Goes

A Big Thanks With Floral Elegance

Hello friends!  Hope you’ve enjoyed your Thanksgiving Holiday for those that celebrate!  Stopping in to share one last guest design creation for the November release this month at Sparkle N Sprinkle.  I don’t know about you, but I can never have too many sentiment sets to use for my card making!  This “A Big Thanks” [00-928P8] rubber stamp set fit the bill perfectly with it’s gorgeous font and larger size! It’s also offered in digital [DIGI928DE] if you prefer to size it how you like though!

Vicki-SnSNov-ABigThanks

Although this looks somewhat “fussy”, it is actually really simple to create!

I started by inking up the sentiment from this set on a piece of vellum with some VersaMark Ink [VM001] and sprinkling some SnS Bronze Rose embossing powder [EP335] over it to heat set.  (GORGEOUS powder! *A tip for you on this EP is that it can get a “halo” around it because of that stunning fine mica powder in it, so be sure to use the Static Free Bag [99512] before you stamp and if there is still a halo around it after you heat set it, then I find the Swiffer cloths (that you use for cleaning) really help in picking up the fine powder that might be left behind.) – it works stunning on the vellum!

I made this vellum strip long enough so that it would wrap around the card front panel of my design and then I set this aside to work on the rest of my card.

Vicki-SnSNov-ABigThanks3

Although the flowers look complicated, they’re really not!  I took the pretty flowers from the Sparkle N Sprinkle Lovely Magnolia rubber stamp set [00-53P5] and heat embossed them with the same SnS Bronze Rose embossing powder [EP335] over some Bristol Smooth watercolor cardstock.  I then took out several shades of my Distress Oxide Inks and sponged over them with my finger sponge daubers.  I used a water spritzer to spray onto the images, let it set for a couple of seconds and dabbed it up with a paper towel.  I then used some white shimmer paint and a paint brush to splatter over top of the flowers and leaves.  I then fussy cut them out and set those aside with the vellum strip.

Vicki-SnSNov-ABigThanks2

Now to work on the background of my image panel, I took some more of the watercolor paper and some Twisted Citron Distress Oxide Ink and foam blended it very lightly in the center of the card panel.  After I was happy with the look, I spritzed it with some water, waited a few seconds and dabbed it with a paper towel.  I made sure it was completely dry before moving on.

I then took the heat embossed vellum strip, turned it over and added some tiny drops behind some of the letters with SnS dimensional glue (so that it wouldn’t show) and then wrapped the strip around the back of the panel and attached it to the card front.

I then took the flowers that I fussy cut and arranged them in the corners of my card front panel by gluing some of them and then popping up a couple with foam tape for dimension.  Anything that was hanging along the edge was cut off with scissors.

Vicki-SnSNov-ABigThanks1

I then mounted the watercolor image panel to a piece of the Tonic Studios Mirror Cardstock – Burnished Rose [9488E] (which seemed to match the embossing powder beautifully!) and then I mounted that over an A2 sized top folding white card base.

To finish it off, I thought it would look pretty to add some Nuvo Glitter Drops in Dazzling Blue [759N] by making drops with it in random areas on the design.  The blue color matched up perfectly with the flowers on my design.

Love how this one came out, hope you like it too!  Thanks so much for hanging out with me today and stopping in! – I’ll be back later with another post for you!

Don’t forget to play along in the challenges over at the Sparkle N Sprinkle Creative Challenge Blog as well as the Sparkle N Sprinkle Creative Challenge Facebook Group!  Would love to see your creations!

*Don’t forget to use my discount code below to get 10% off your order at Sparkle N Sprinkle when you do your sparkly shopping!  (Click on the badge to get started!)

SnS discount code badge

Here’s the Sparkle N Sprinkle product list I’ve used on my creation today:

  1.  A Big Thanks rubber stamp set [00-928P8] (Also offered in a digital set [DIGI928DE]) *New November Release
  2. Lovely Magnolia rubber stamp set [00-853P5]
  3. Sparkle N Sprinkle Bronze Rose embossing powder [EP335]
  4. Static Free Bag [99512]
  5. VersaMark ink pad [VM001]
  6. Tonic Studios Mirror Cardstock – Burnished Rose [9488E]
  7. Sparkle N Sprinkle dimensional glue [759N]
  8. Nuvo Glitter Drops – Dazzling Blue [759N]


Challenges I’d like to enter my card for:

  1.  Always Fun – Thank you
  2. Crafting From the Heart – Just For Fun (Anything Goes)
  3. TGIF Challenges #TGIF187 – “Sponge Worthy”TGIF Challenge Buttons 2018-039
  4. QKR Stmpede #323 – Anything Goes


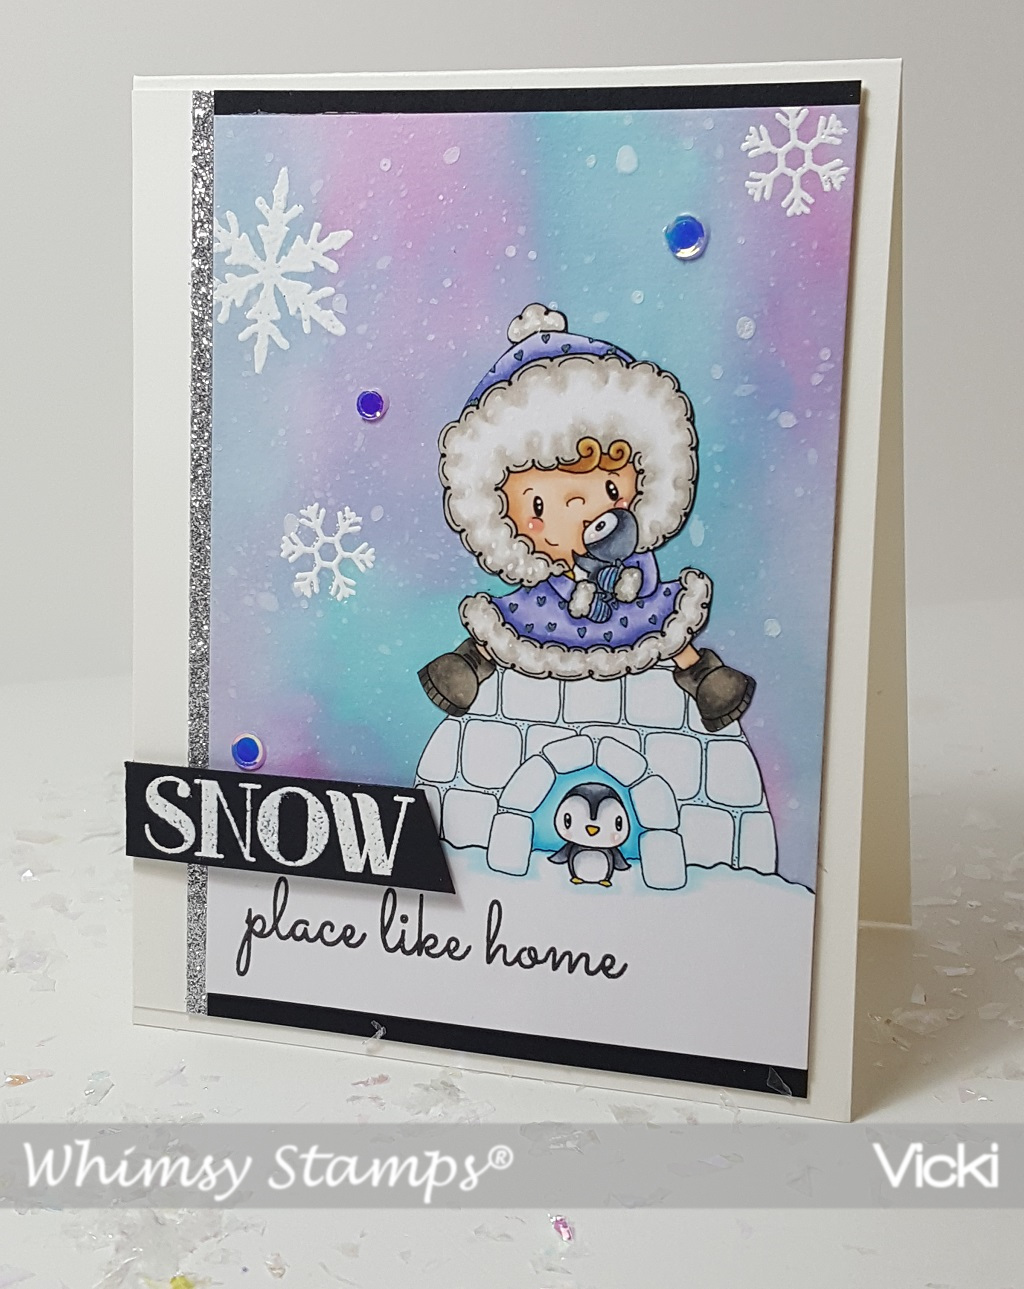
SNOW Place Like Home

Hello friends!  Hope you are having a great week so far!  Well I have to say that this card certainly does feel like home where I’m at right now as it’s pretty cold and a bit snowy over my way!  I tried to hold onto Fall for as long as possible!

Whimsy Stamps has come out with another line of really cute digital stamps from CC Designs and this is the first time that I’ve colored one from the new line and I think they’re really cute!  Check out this card I’ve made for you today:

Vicki-WS-Iggy-Nov13

This darling image is called “Iggy” and I just love these sweet little peguins with her! 🙂  Here are the Copics that I’ve used to color her with:

  1.  Coat/fur trimming – BV04, BV02, BV01/W3, W1, W0, blender, white gel pen for dots, blue gel pen to color hearts
  2. boots – W9, W7, W5
  3. Penguins – C8, C5, C3, C1, Y17, R00
  4. Skin/Hair – E23, E21, E11, E00, E000, R20, R00, white gel pen for cheeks
  5. Igloo/Snow – B04, B01, B00, B000

I fussy cut the image long with the ‘ground snow’ and left a spot at the bottom for the sentiment.  I outlined the image with a black marker and attached it to my winter snow background that I’ve made.

To make the background, I took the Stormy Sky, Peacock Feathers and Dusty Concord Oxide inks and a waterbrush to swirl a pretty winter sky pattern.  I dried it and then took a toothbrush to flick some white paint over it for the snow.  I then took a couple of the snowflake images from the Whimsy Stamps Snow Flurry clear stamp set and white heat embossed them in places on the background.  I’ve also used this same set to heat emboss the “snow” sentiment over a piece of black cardstock that was popped up with foam tape over the image panel and then the rest of the sentiment was stamped in black ink right below the image.

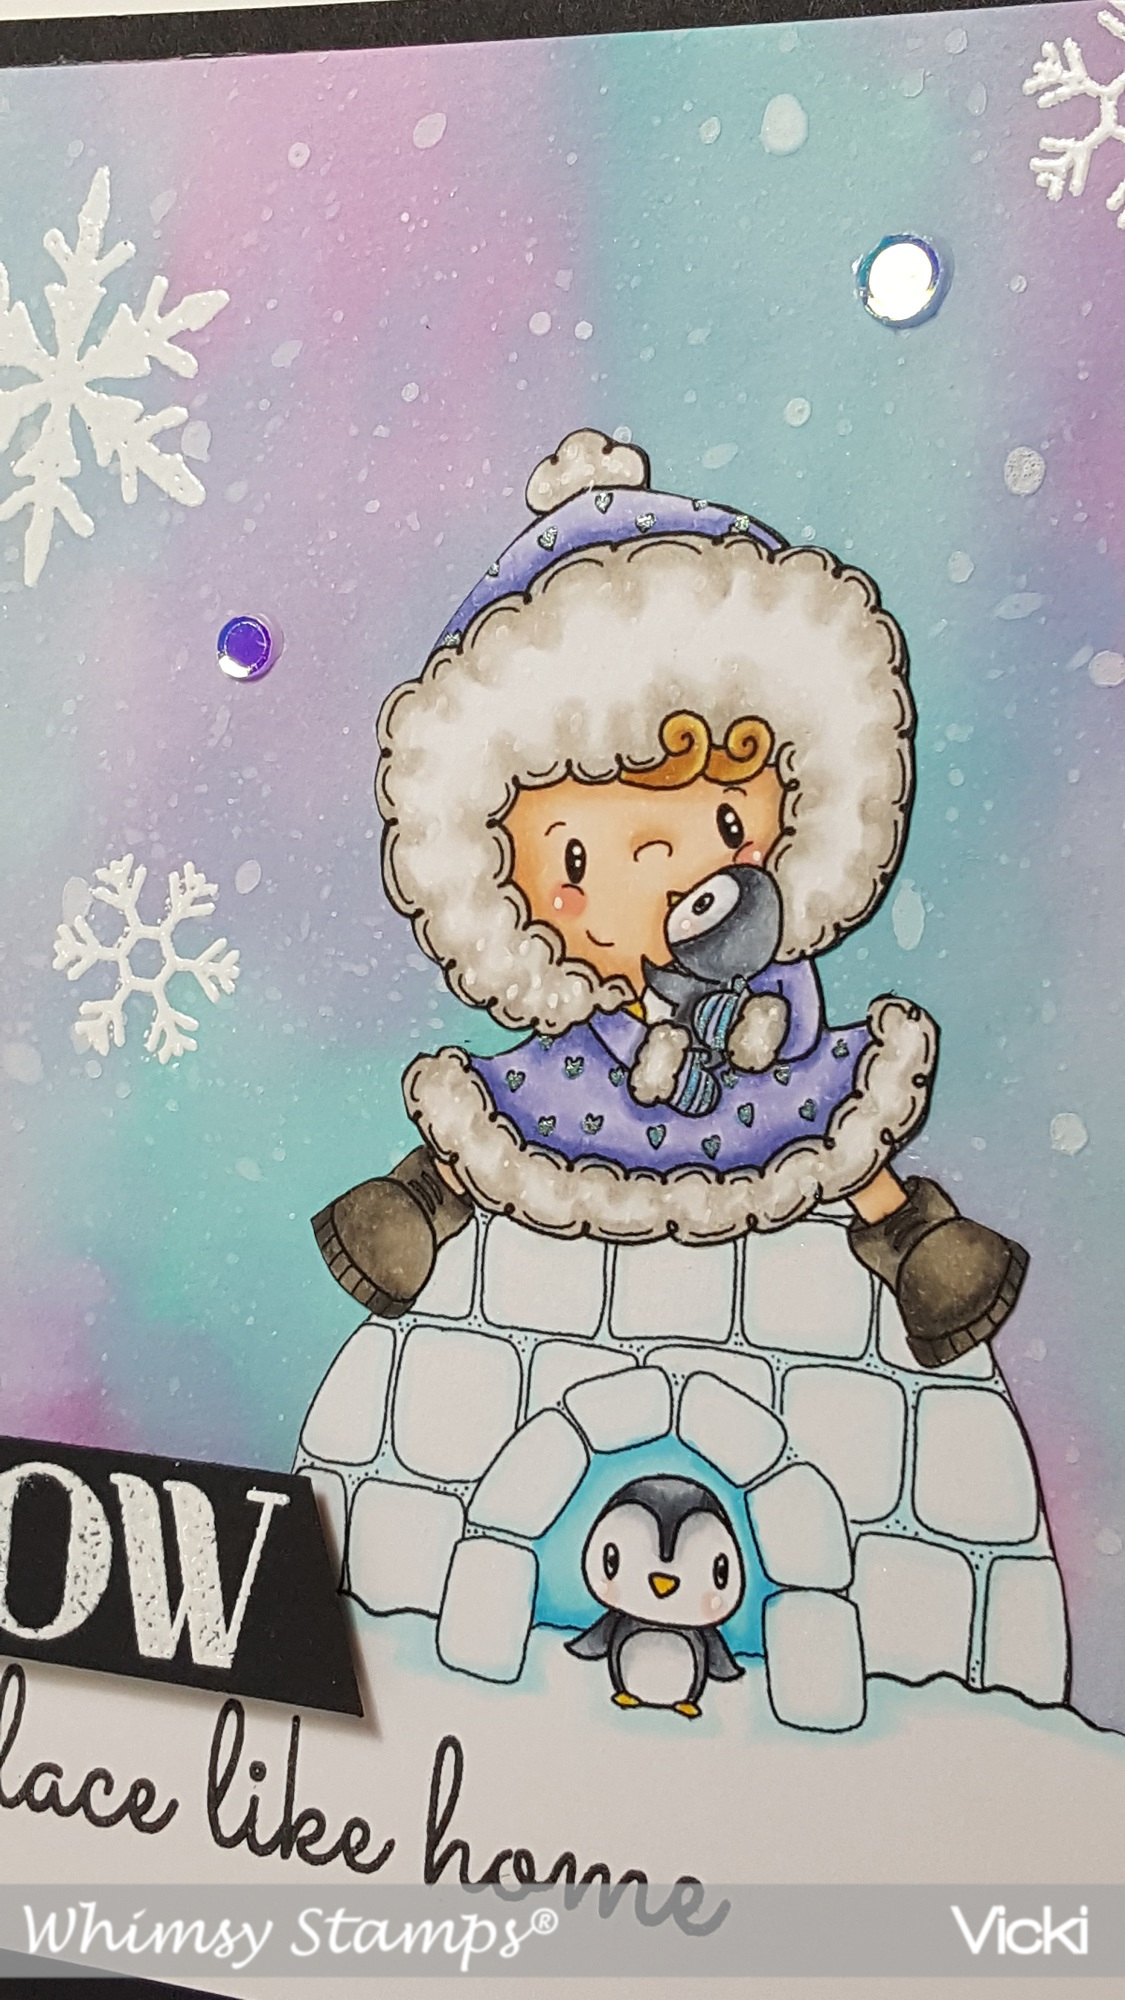
Vicki-WS-Iggy-Nov13-close

Here you can better see a closer look at the details of the coloring.  I’ve also put some shimmer over the entire igloo with a Spectrum Noir glitter brush pen.    Thought I could see it when I took the photo, but of course it’s not showing up!

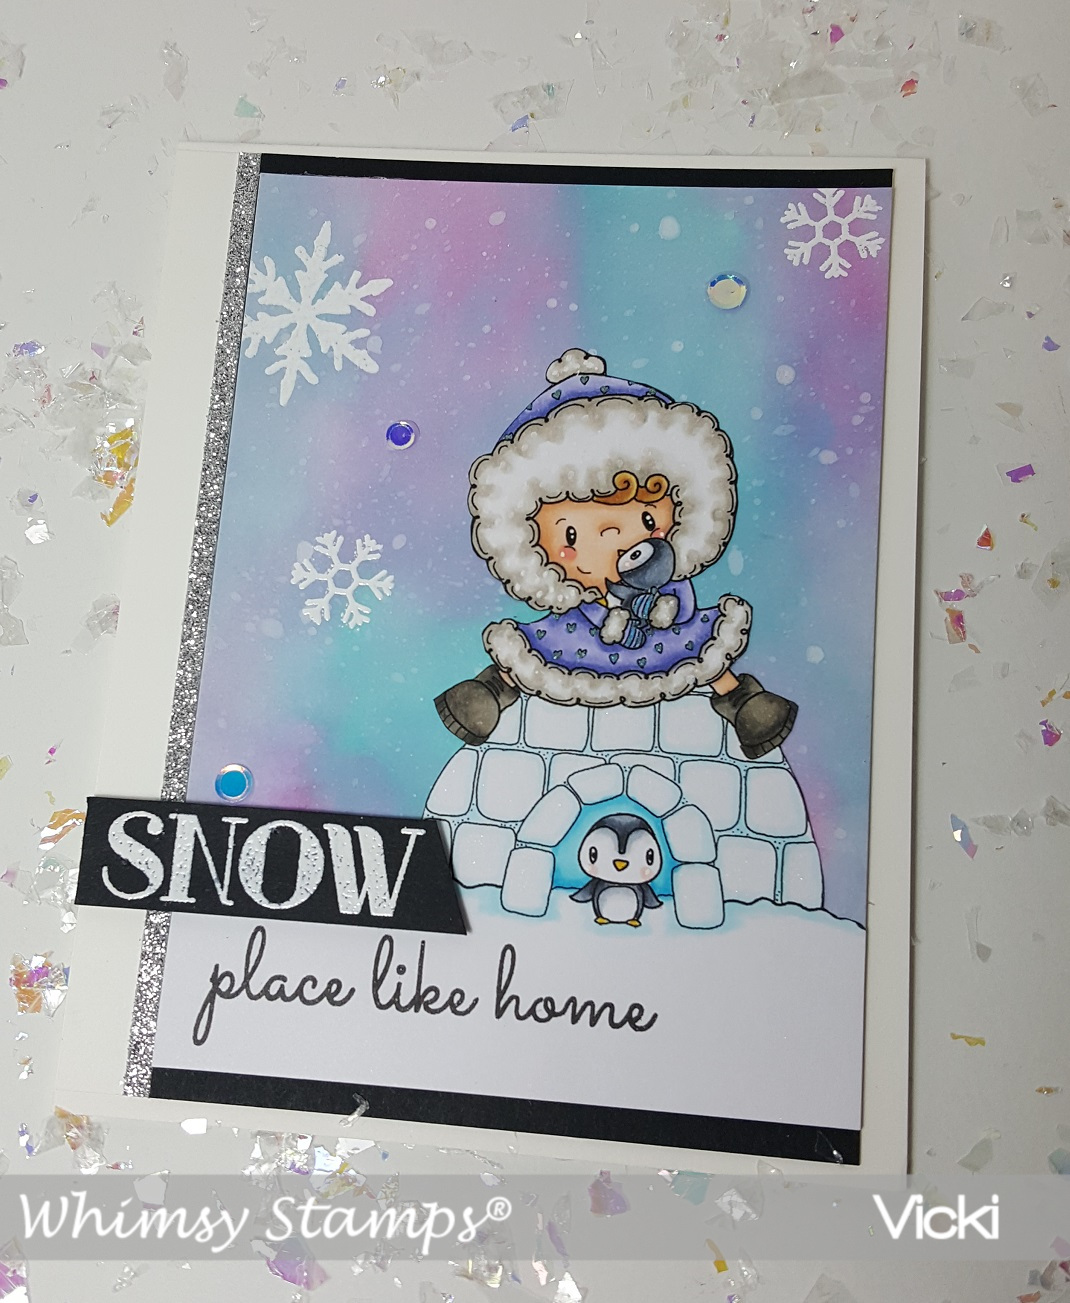
Vicki-WS-Iggy-Nov13-2

I took the snowy image panel and mounted it over a piece of black cardstock and then took a very thin strip of silver glitter cardstock to lay right next to it over a piece of white card stock.  I took this white card front base and attached it to the left side of a top folding A2 #110 card base.  Lastly, I’ve taken some sequins and attached them to the snowy background for a bit more sparkle.

I hope you’ve enjoyed my card today!  Thanks for dropping in!

Here’s the Whimsy Stamps products used on my card today:

iggy_color_display_large

Snow_Flurry_display_1024x1024

Here are the challenges I’d like to enter this card for:

  1.  Creative Inspirations – November Chill
  2. That’s Crafty – Winter Wonderland
  3. QKR Stampede – #321 Anything Goes
  4. Crafting From the Heart – Anything Goes
  5. Artistic Inspirations – Anything Goes

Witches Fly In a Glowing Moon

Hello friends!  With Fall on the way, I was really in the mood to create some spooky fun Halloween cards! (Plus I’m trying to get ready to fill my card rack for an up-coming craft booth and I ran low on Halloween cards from last year!)  I’ve also just received my winnings from playing in the Sparkle N Sprinkle challenge on Facebook, so I thought I’d use some products to enter again! 🙂

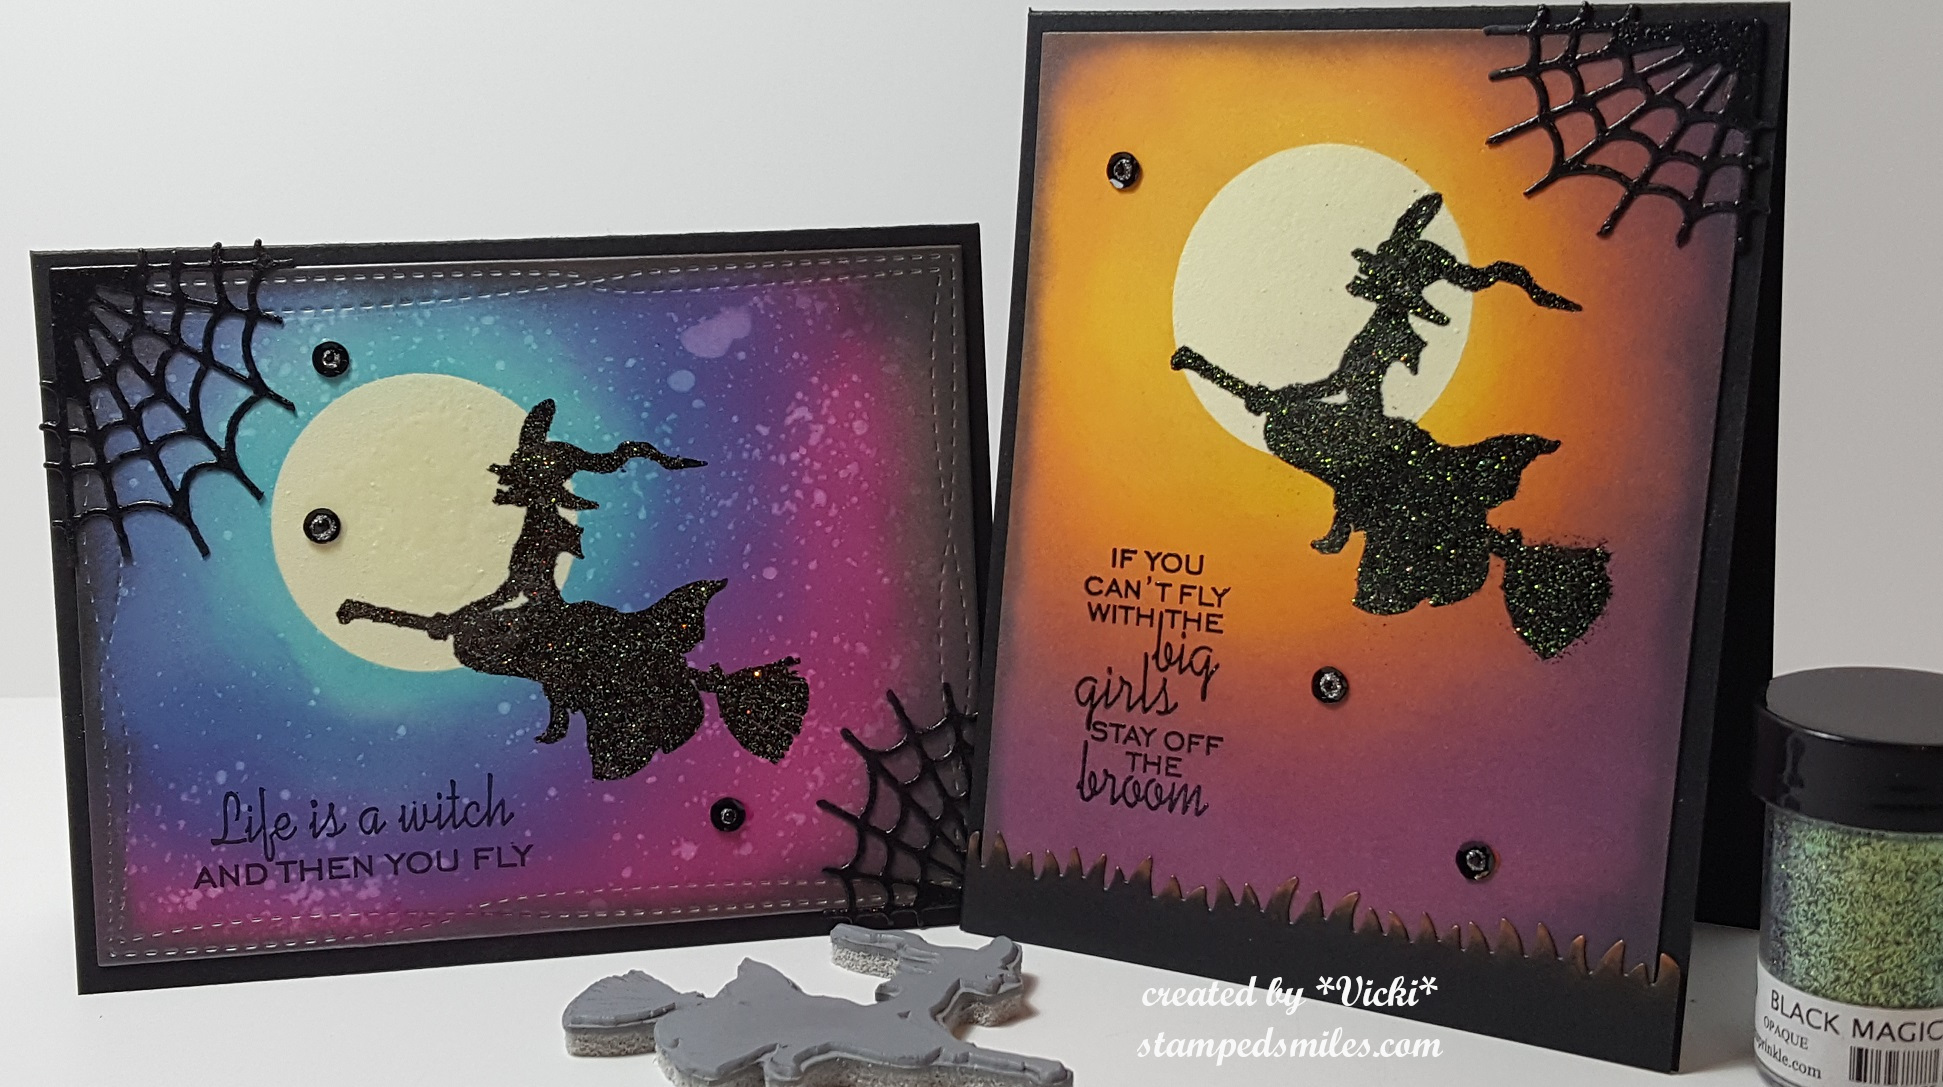
Vicki-SnS Black Magic-Glowing Moon

I thought I’d go for two cards here with the same products, but used in a slightly different way with the colored backgrounds and orientation.

I’ve picked out this cute Cackle On stamp set and the Wicked Web die cut for my winnings that I’ve used on both cards.  As you can see from the props in the photo above, I have also used the Sparkle n Sprinkle Black Magic embossing powder to heat emboss the witch image on both of them.  I just love the sparkle effect that stuff has!  I’ve also die cut the webs in black cardstock and then went over them with clear embossing powder.

Below I will share details about each one:

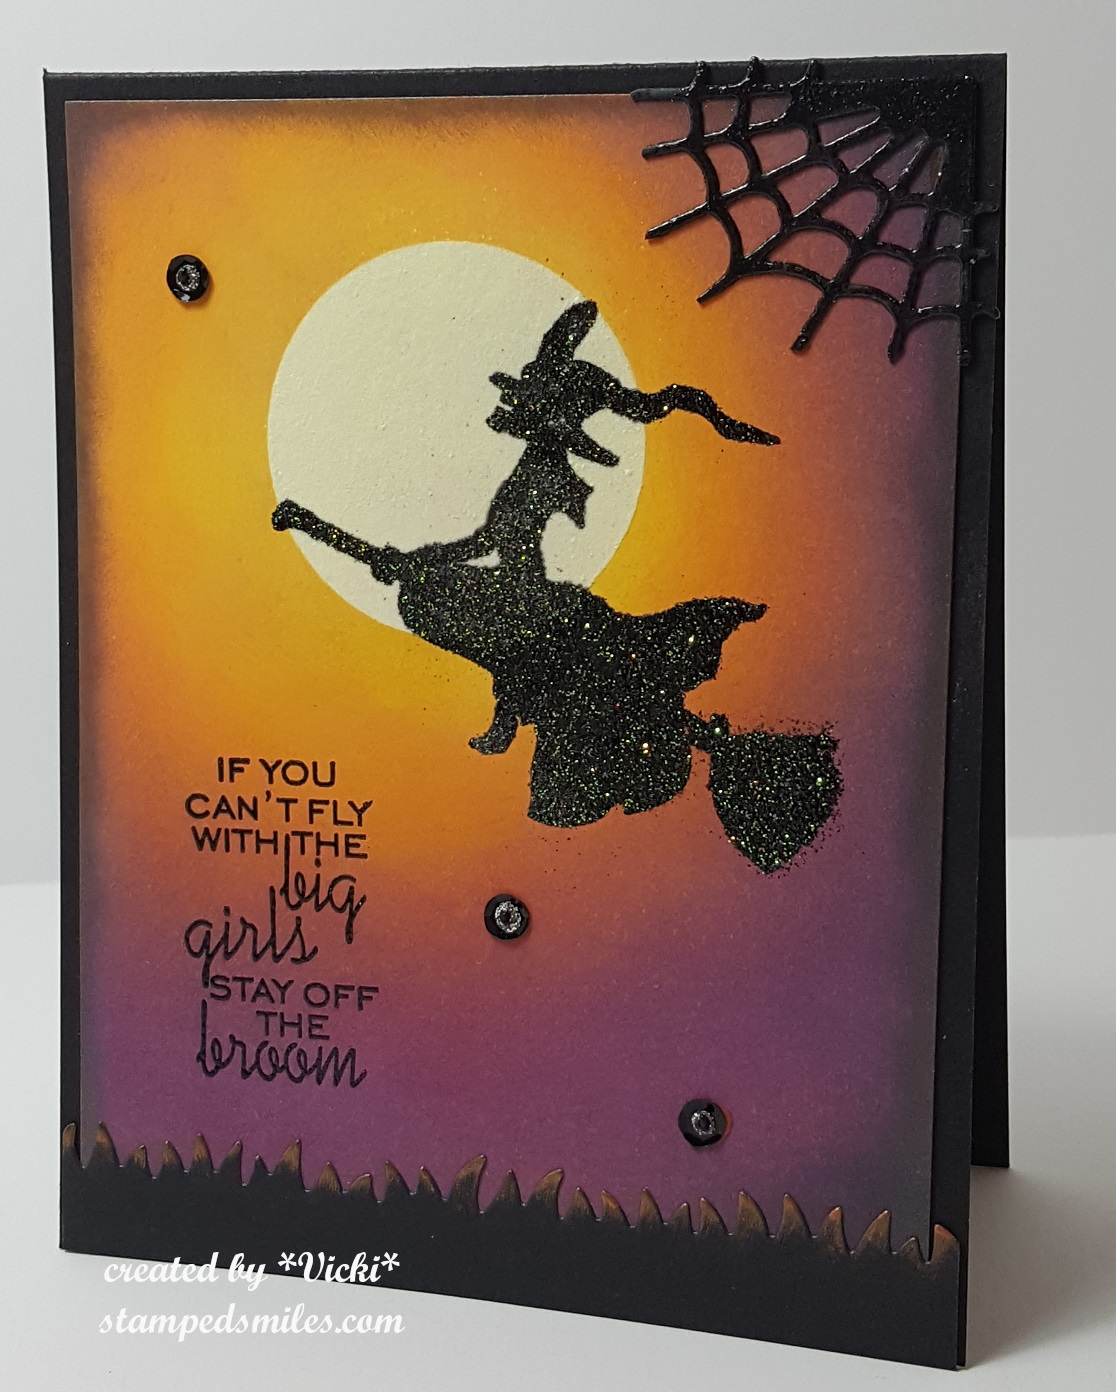
Vicki-SnS-BigGirls-sky

To get the moon, I die cut a circle from masking paper and used the negitive from the circle cut and placed it over my card front where I wanted the moon to be.  I inked the open circle area with VersaMark and then sprinkled some Glow-in-theDark embossing powder over it and heat set it.  For my background, I have used some Ranger Mixed Media card stock because of all of the embossing and inking that I’ve done.  I didn’t have to, but I put the circle cut from masking paper back over the moon.  (The embossing would resist the ink, but I did’nt want to take a chance and covered it anyway…although it didn’t stick very well! LOL!)  I then used my ink foam blending tool and added some distress oxide inks to create the background sky.  I even used purple over the orange color which is something you normally wouldn’t do, but with the oxide inks…it turns out stunning!

I then added some Nuvo Black Mousse with a sponge dauber along the edges which doesn’t show in the photo very well, but it has a cool shimmer.  Then this is where I’ve added the witch over the moon by inking it up with some pigment black ink and then heat embossed the Black Magic EP on it.  (I used my stamp positioner so that I could ink it several times as it was getting inked over the embossed moon.)  I’ve also inked up the sentiment in the same way except that I used some clear EP over it.

At the bottom, I cut a strip of ground with a grass edge border die and then used some Nuvo Copper mousse to sponge some color on top to make it look like the moon is shinning over it.  I mounted card front panel over a top folding black A2 sized card base.  Then lastly, I added some black sequins and filled the centers with Nuvo Silver Glitter Drops and then a smaller dot with some Nuvo Black enamel Drops.

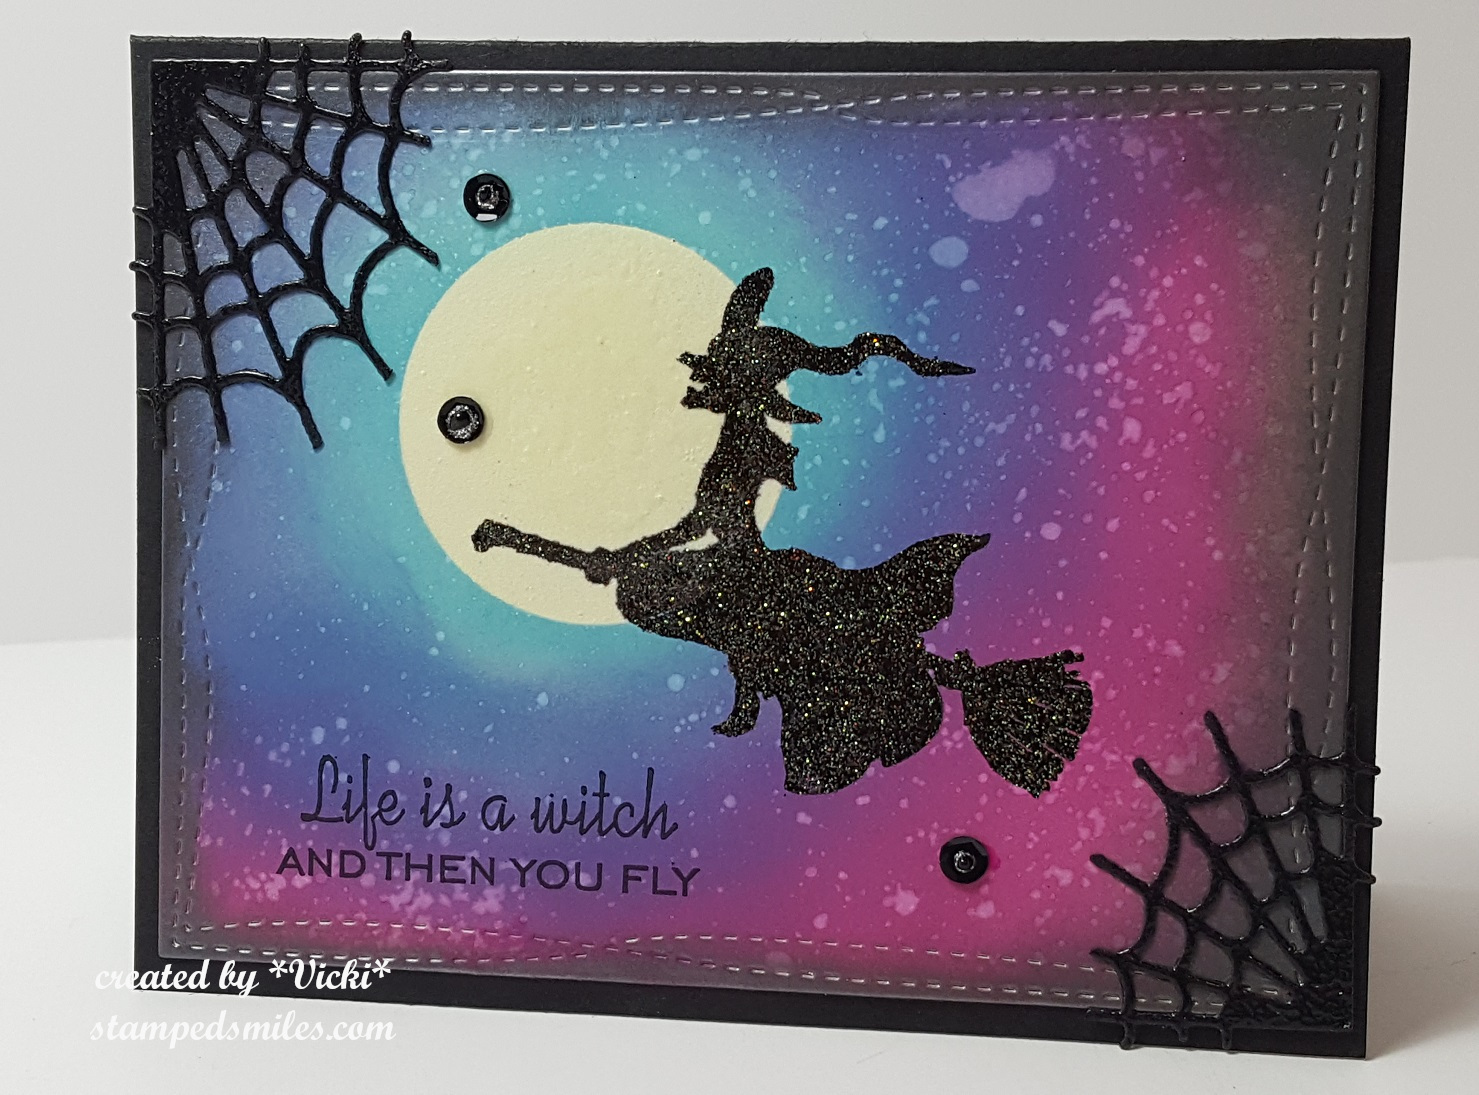
Vicki-SnS-Lifesawitch-sky

This card pretty much was made in the same manner as the above card with the exception of the Distress Oxide colors I’ve used for sponging.  I also took my spray bottle and added some water dropplets and then dabbed it off with a paper towel.

I cut out this panel with a  MFT Wonky Stitch Rectangle die before attaching it to a black card base.

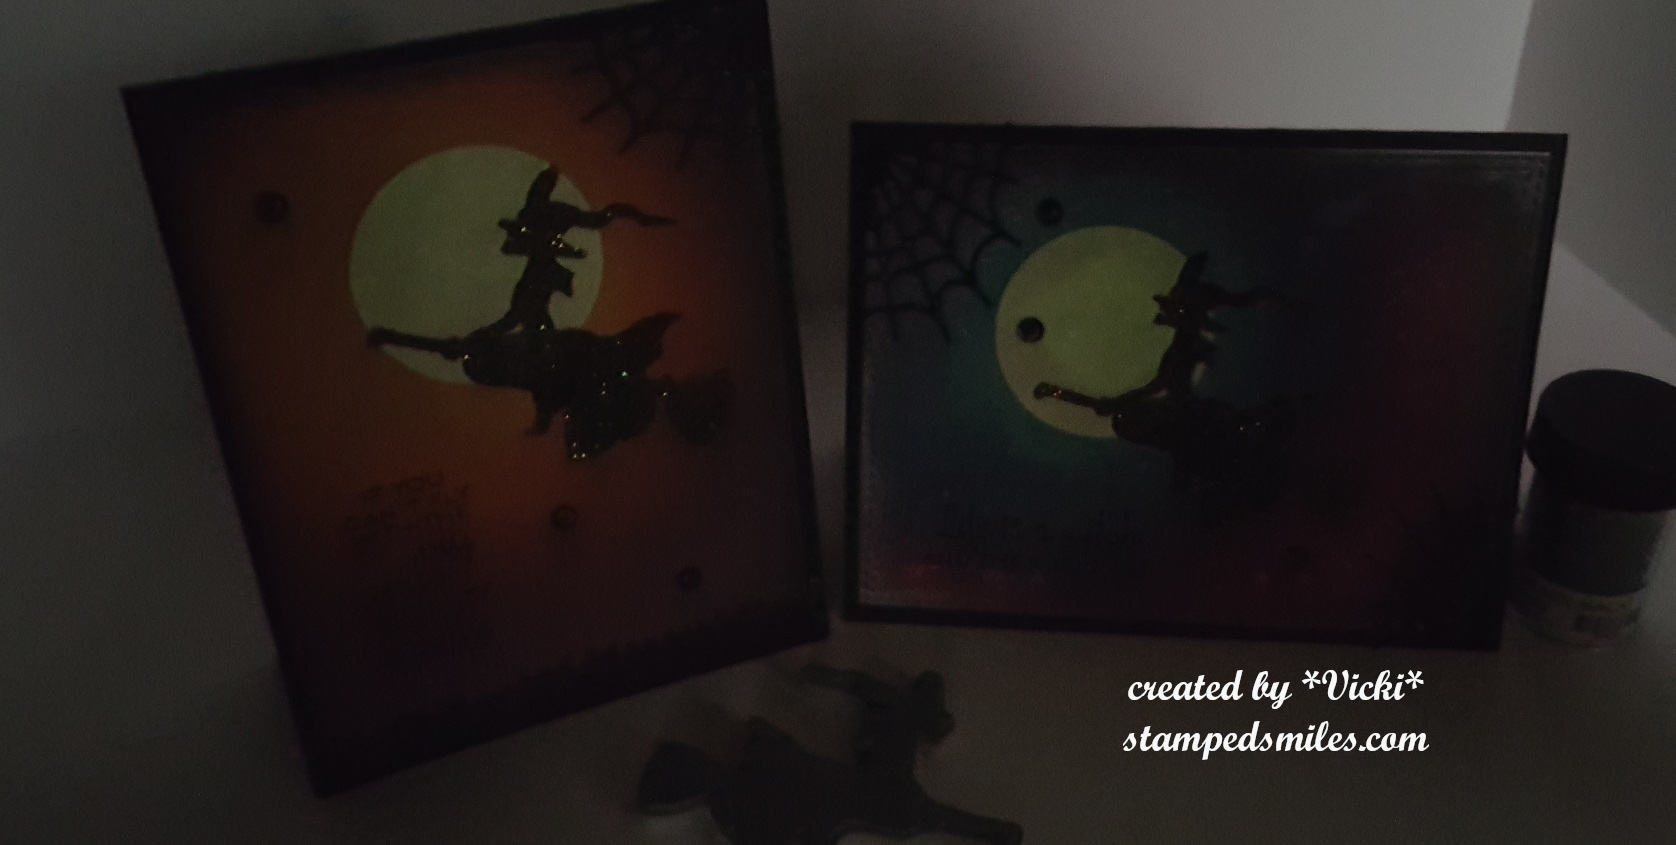
Then I wanted to show how cool this embossing powder is when the lights are off:

Vici-SnS-glowingMoon

I tried to get it as dark as I could so that you could see how that embossing powder really glows in the dark!!  To get a really fabulous glow, it’s best to do a couple of layers of embossing over it.

Hope you are having a great weekend and thanks so much for stopping by today!

Challenges:

  1.  Sparkle N Sprinkle – Anything Goes + use loose glitter/embossing powder/flocking
  2. Sparkle N Sprinkle Facebook challenge – Anything Goes + use SnS image
  3. {CupCake Inspirations} CIC453 – Spectacular BackgroundsCIC453
  4. Crafting With an Attitude – Anything Goes
  5. Crafty Friends – Embossing (wet or dry)