Holiday Sweets for {Cupcake Inspirations}!🥧

Hello friends!  Hope that you’ve enjoyed your weekend!  Thanksgiving is coming up this week and the full Holiday Season has begun and one of the things that most people are thinking about (at least my family anyway!) are those wonderful “Holiday Sweets“!  Yum!😋

This is also our new challenge for the next 2 weeks over at {Cupcake Inspirations}!  So I hope that you are able to start (if you haven’t already) thinking about creating something crafty with those “Holiday Sweets” in mind and join along in the fun with us!  Here’s what I’ve come up with for this challenge:

I remember times with my kids when we did the “milk and cookies” you leave for Santa along with your nice letter about some things you wish for him to bring you. We always wrote the letters to Santa and made sure that we put out the cookies…and usually hot cocoa on Christmas Eve.  There were always candy canes on the tree to pluck off to stir your hot cocoa with as well!

I remembered this fun little Simon Says Stamp Christmas card kit (Christmas Squad) that I hardly made a dent in to use at all, so it was really great to pull out these adorable Doodlebug items with a “milk and cookies” theme in the papers and images! I had unopened packages of cut out images which is the table with the lamp, Santa letter and mug on it.  I took the doggie image from the stamp set, stamped, colored and used the coordinating dies to cut it out with and popped it over the table image panel with foam tape. This panel was cut with a Wonky Stitch Rectangle die as well as the background papers.  I layered everything over an A2 sized top folding red card base.  The image panel was also layered over some of this red cardstock as well after sponging around the edges with some light blue ink.

Lastly, I took a sentiment from the same stamp set and white heat embossed it over another piece of red cardstock that was cut out with a banner die and popped up underneath the image panel with foam tape. (I thought it was the perfect sentiment to add especially for this year to someone you miss!)

Here’s a closer view of the images that I’ve put together onto this panel.  The pup was colored with my usual Copic markers and I’ve used a silver gel pen to color in his collar tag with.

I also had some Doodlebug stickers with the kit and added the bitten cookie with a smile face next to the other cookie on the table.  I also added a candy cane enamel sticker to the table as well as the heart enamel stickers above the table.

The strip of papers in the center of the card came from the backside left over piece that was cut out from the milk and cookies panel in the background.  The colors matched up nicely with the images.

I hope you’ve enjoyed my “Holiday Sweets” card today and it has brought you a smile, a special memory or inspiration.  If you need more inspiration for this challenge, please be sure to check out the {Cupcake Inspirations} Challenge Blog to see the rest of the DT sweeties and what they came up with!  Can’t wait to see what you come up with!

Thanks for stopping in and I’ll be seeing you soon!

**WISHING YOU ALL A VERY HAPPY, HEALTHY AND BLESSED THANKSGIVING**

Challenges:

  1. Simons Says Stamp Wednesday – Christmas
  2. CRAFT – Christmas
  3. Cardz 4 Galz – Cute Christmas
  4. Cute Card Thursday – Sentimental
  5. Crafty Catz – Anything Goes optional Christmas

Fall is Here with Digi Doodle Studios!

Hello friends!  Now that we have started October, the temperatures will start to drop and the leaves will begin to change color and drop from the trees.  That’s when we know that Fall is truly here and I look forward to being out in it! 🙂

I wanted to capture that feeling on my card for you today using an image from Digi Doodle Studios:

Vicki-DDSJoieAutumn-Oct2

This cutie is called Joie Autumn and I just love her sweet little pup companion there playing around in the fall leaves with her!  She looks so happy and this is probably something I would do instead of actually raking them up!! LOL!!

Have you ever “googled” a card sketch?  I never really thought to do this, but I have some really cool Autumn type papers and I wanted to create some layers with them on my card, but I didn’t want it to look like a hot mess, so I picked out a card sketch and used that to create this card using some more papers from my stash!  I also got to use my Autumn embossing folder for the strip in the center along with my favorite glitter ribbon across it.

I’ve layered some gold foil cardstock with a few of the layers in there and added some Prima leaves and a button over the gold ribbon bow to finish it off.  I white heat embossed the sentiment from Lawn Fawn and cut it out with a My Favorite Things banner die.

Vicki-DDSJoieAutumn-Oct2-close

Here’s this sweet image upon a closer look at the coloring I’ve done!  I’ve also added a highlight with a white gel pen to her cheeks, the pup’s cheeks and the rim on her hat.  I took a gold gel pen and colored the pup’s collar with it as well as using it for additional “dots” around the sunflowers in her hair.

The light blue shading around her was used with Copic markers as well as the blending of the colorful pile of leaves on the ground.  I took colors from the leaves as well as other colors to blend and mute them together to make it appear like a leafy colored ground.

I cut this image out with a stitched rectangle die and layered it onto some green cardstock which is the same I’ve used for the 5.5″ square card base and the embossed strip in the middle.

Vicki-DDSJoieAuumn-Oct2-flat

I hope you’ve enjoyed my Fall creation today and you’ve been inspired in some way!  I appreciate each and every one of your kind thoughts more that you’ll ever know!

Thanks for dropping by and I’ll see you soon!

Challenges I’d like to enter this card for:

  1.  As You Like It – CAS or FAF Why? – I actually like both and I think my style runs a bit into both sometimes.  I feel like I have SO much crafty stash that I just want to keep adding more onto my cards…so lately it’s been this way! 🙂
  2. Cardz 4 Galz – Pretty Bows (not really sure if it’s pretty, but it’s glittery!)
  3. Stamps & Fun = Creativity – The Magic of Fall
  4. Make My Monday – Autumn
  5. Through the Craft Room Door – Anything Goes
  6. Sheepski Designs – Autumn

I’m back! It’s Been a Rough Patch!

Hello friends! 🙂  Are you still with me out there?  (This is a bit of a long post to catch you up with what’s happened.)

Wow!  It sure has been a while since I’ve been able to even TRY to get back into things.  This was a really abrupt and rude unplanned disappearance from me and I was getting worried for a while about how I would even begin to start up again!  I actually feel pretty “rusty” and unpracticed from my absence and I have a few things to share with you too!

Firstly, I want to thank you ALL from the very bottom of my heart for your wonderful comments, personal e-mail, cards and social media contact that I’ve heard from many of you.  There were days that I just went to tears hearing from my fellow crafty friends as it came on a few days that I REALLY needed it the most!  I thank you SO MUCH for that and it really helped to get me though some difficult pain days.

So what happened was a worsening of something that I believed to be a minor back issue that I thought would resolve on it’s own, but the issue grew worse and more painful to the point that I couldn’t sit, stand, walk or even getting out of bed was painful enough that I had a procedure to try and control the nerve pain.  With this done, along with physical therapy and adjustments to my life style, I am feeling better now.  It’s not COMPLETELY pain free, but it’s tolerable enough to do normal tasks for a period of time until I need to move around again.  It’s just a life style adjustment that I can live with and hopefully fit in with what I love to do which is crafting!  It really bothered me to just “walk away”, but sometimes when your health is in trouble, you just have to do what you have to do and heal.  I have just learned that SEVERAL small breaks a day are better than none at all and I will pay for it later if I don’t!  🙂  Thanks for sticking it out with me!

———————————————————————-

And so with that, I would like to share a couple of things that actually took way longer to complete than what I would normally take the time to complete and it was actually the very last little bit that I had accomplished before I had to completely step out of my room for a while.  My husband wouldn’t let me go back in there until he was sure that I could tolerate my pain ok.  Still working through the exercises until my follow up Dr. appointment, but I think I’ll be fine from here…I sure hope so as I’m ready to ROCK N ROLL!!!  LOL

I had made a couple of masculine cards:

Vicki-Brutus Monroe-Rock ON

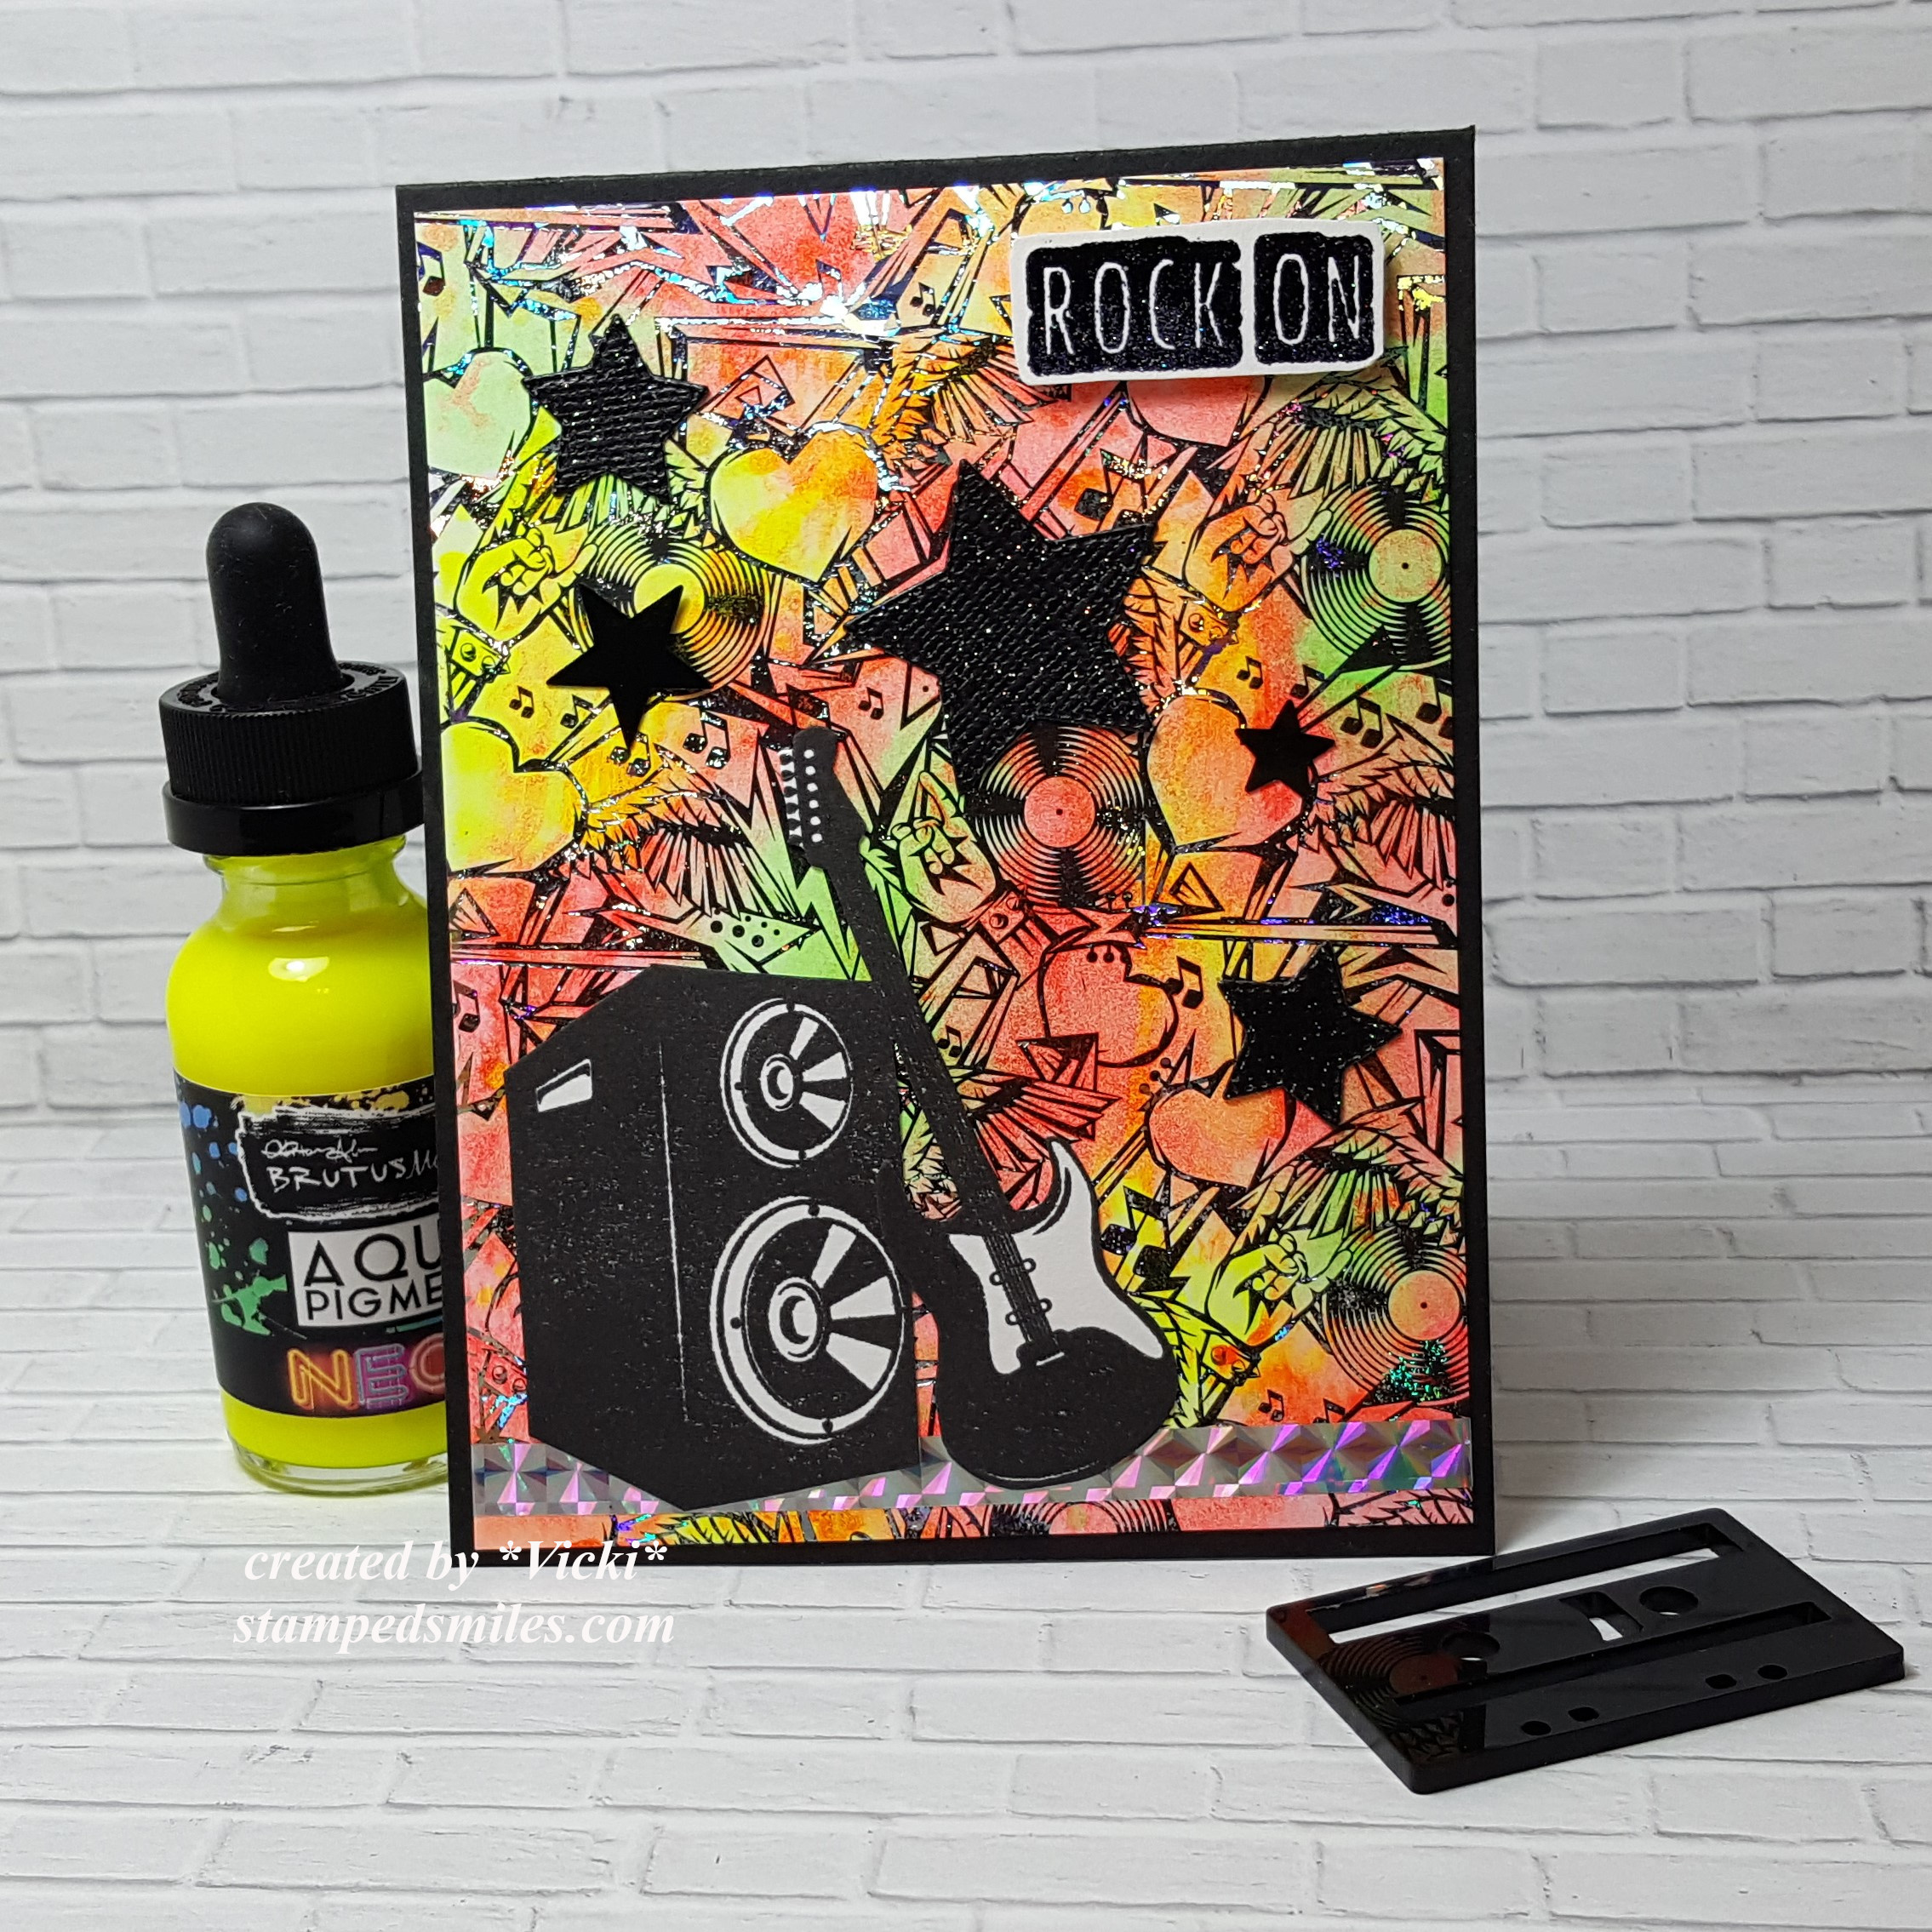
Although I don’t have a black light, if you hold up the card to a black light, the watercolor background that I made will glow!  It’s a pretty cool affect!

I took one of the foilable image panels from the kit and took several of the Neon Aqua Pigments and smooshed them over the background until I was happy.  I tried to foil over it, but it didn’t completely get all of it.  I added the strip of holographic paper at the bottom and the stamped elements along with the stars over it.  For the sentiment, I heat embossed it with the  EP that came in the kit and popped it up with foam tape.  My bro seemed to like it and I think those neon watercolors turned out pretty cool! 🙂

Vicki-NN-FathersDay

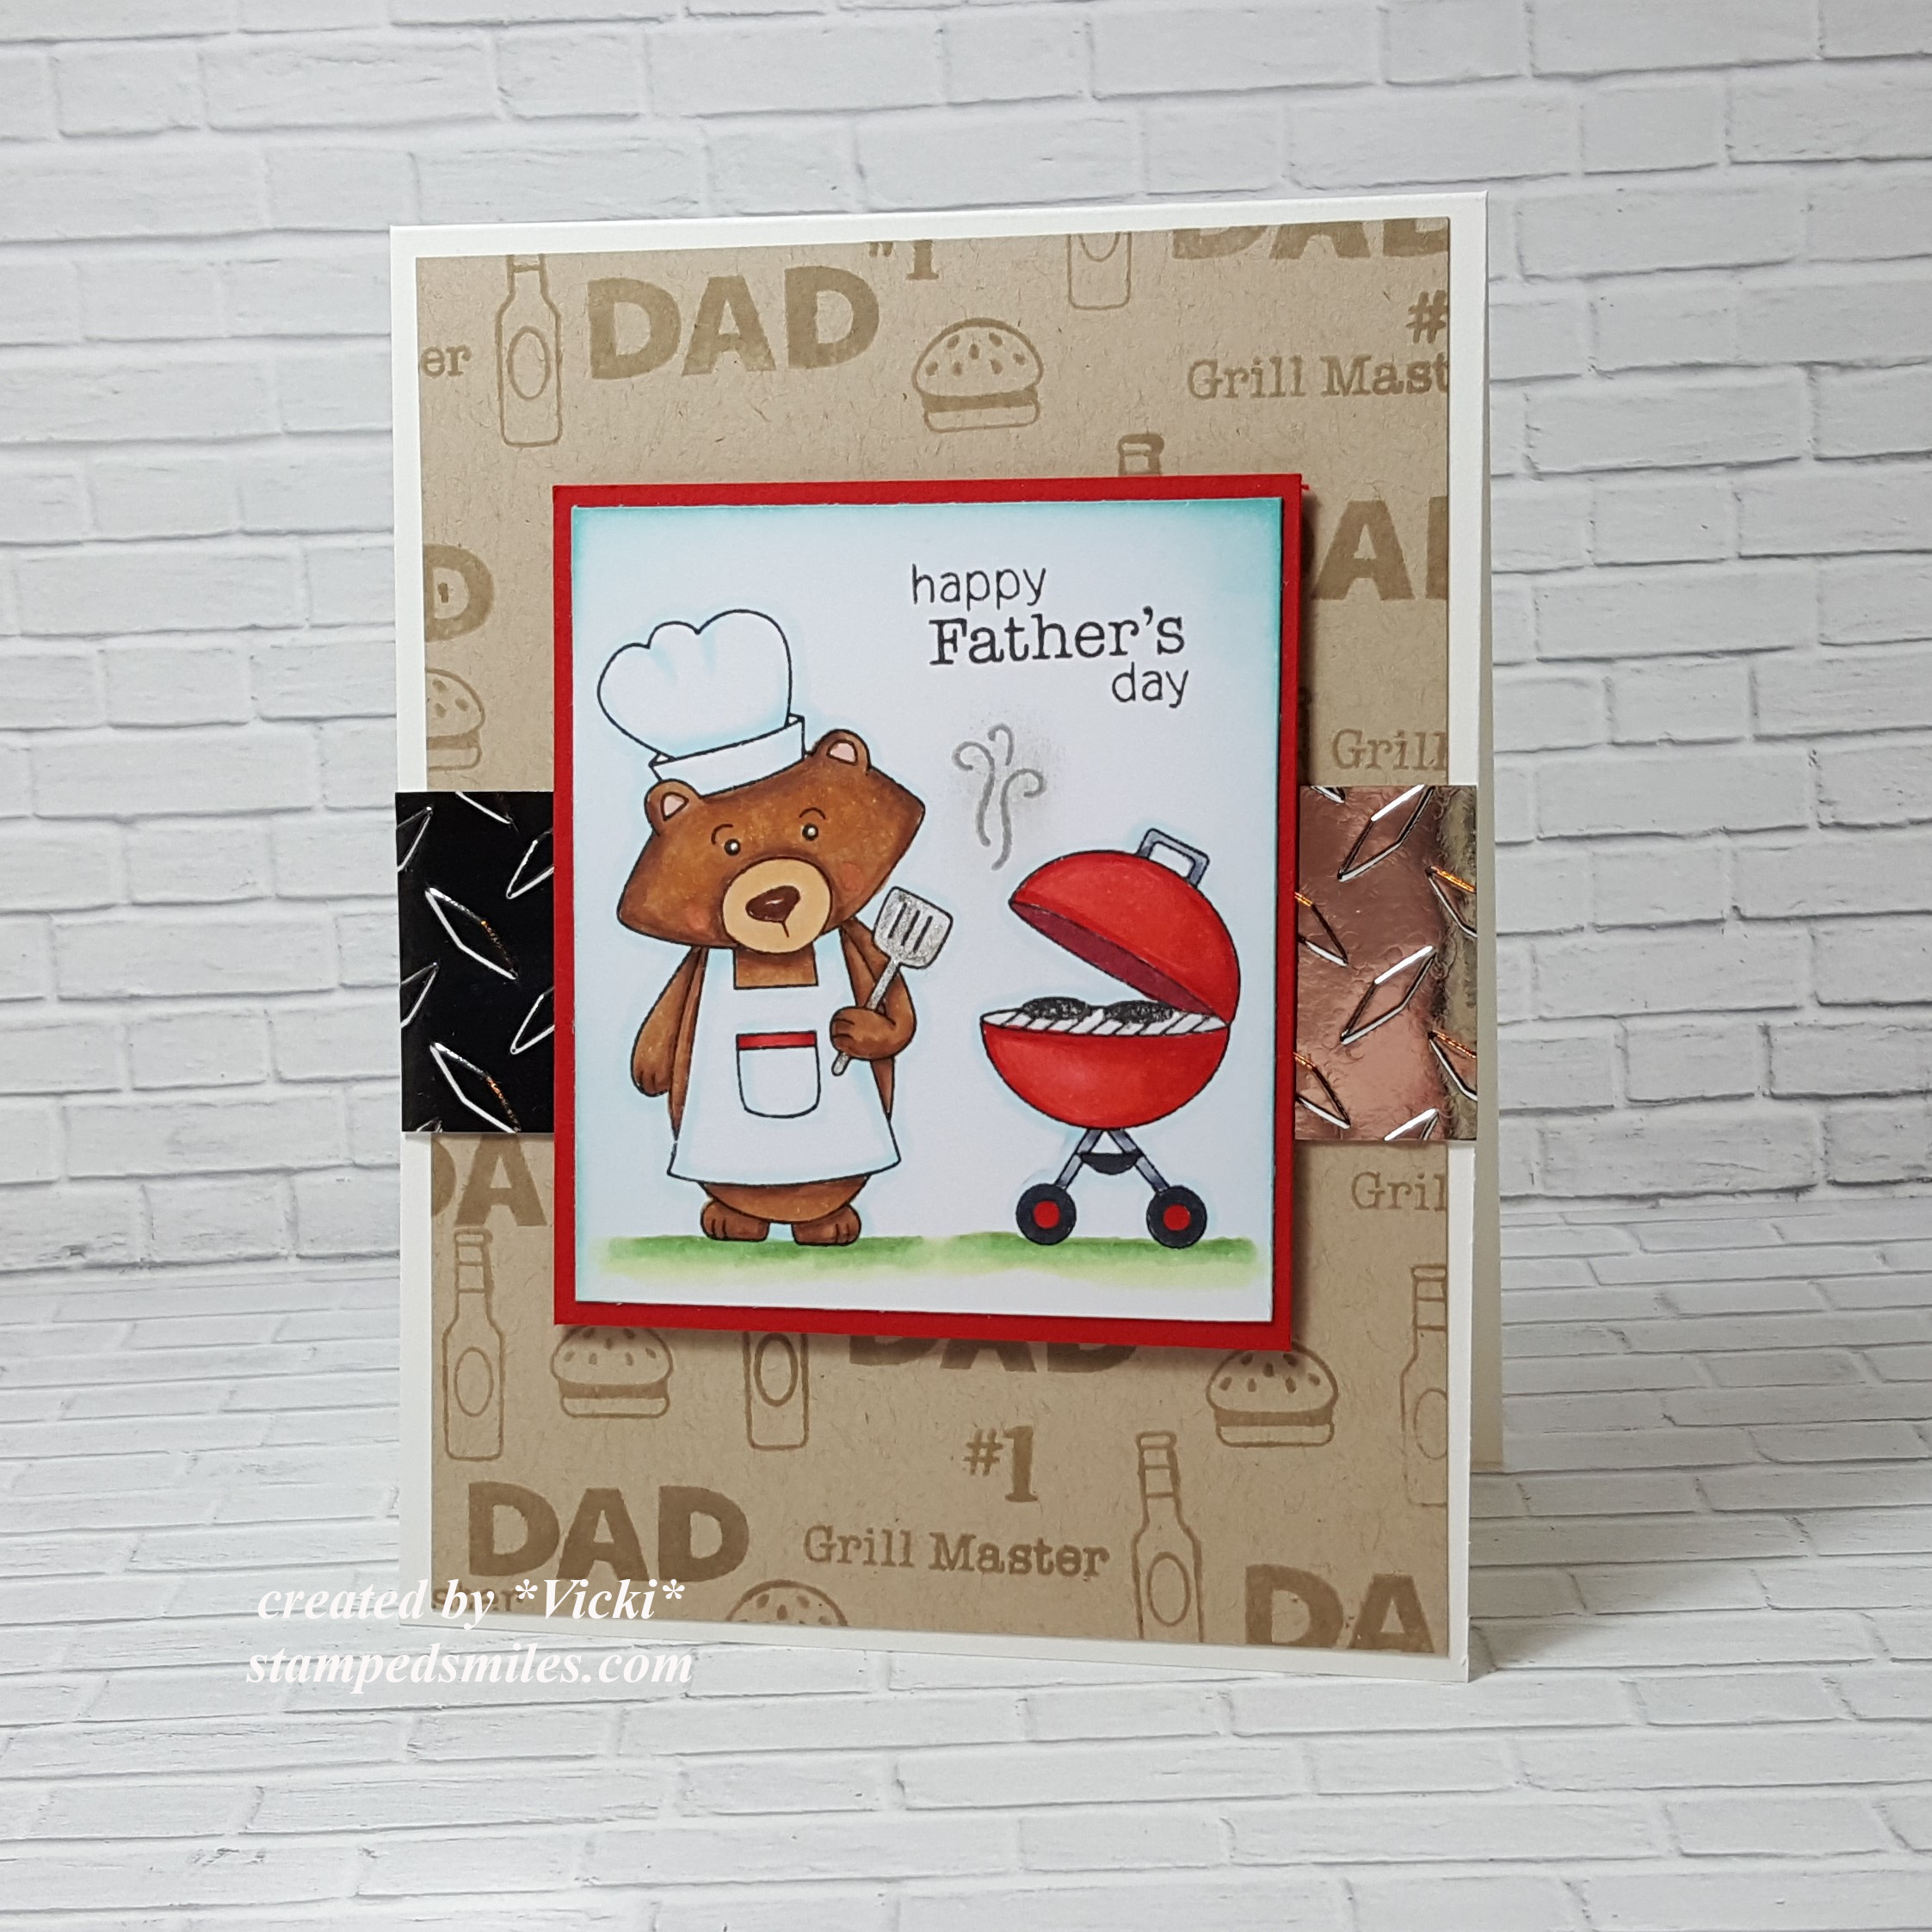
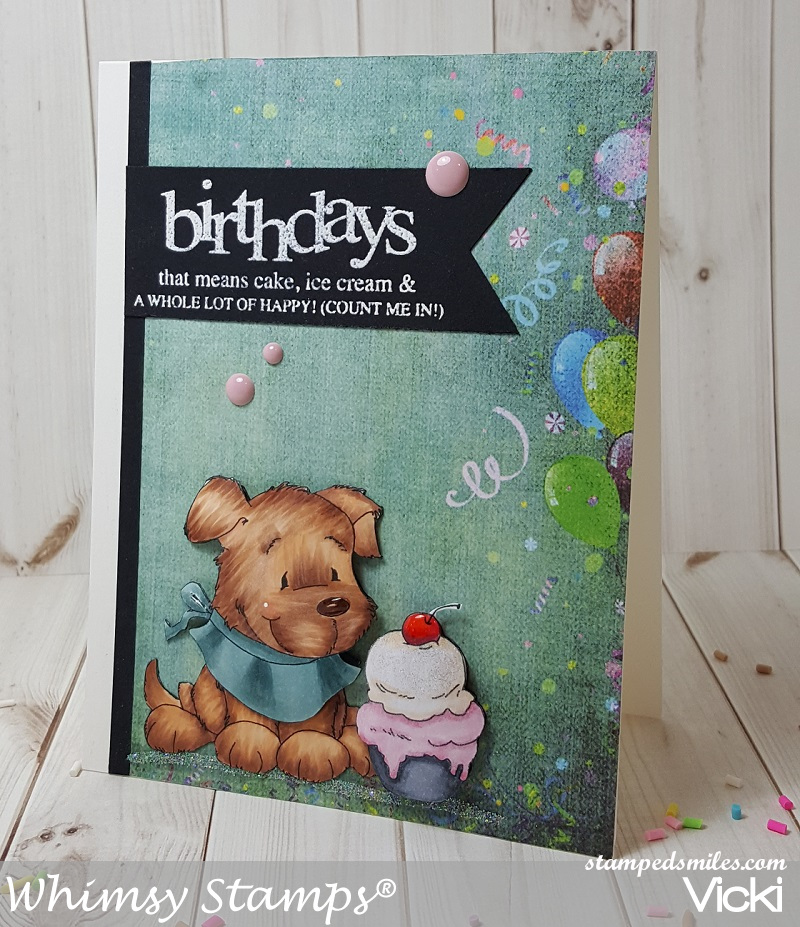
This is probably one of my all time faves from Newton’s Nook called Winston’s BBQ.  I think they have had this set for a while, but It’s a great one for masculine themed designs!

I’ve used a kraft cardstock background and stamped several of the images from the set all over the background with the same color of ink.  For the main panel, I stamped Winston, the grill and sentiment together and colored with my Copic markers.  I also sponged some blue ink around the edges of it for a “sky” looking appearance.

I’ve taken a strip of silver foil cardstock and ran an embossing folder through it to place across the center of the card.  I used some foam tape to pop up the image panel over top.  All of these layers were placed over an A2 sized white top folding card base.

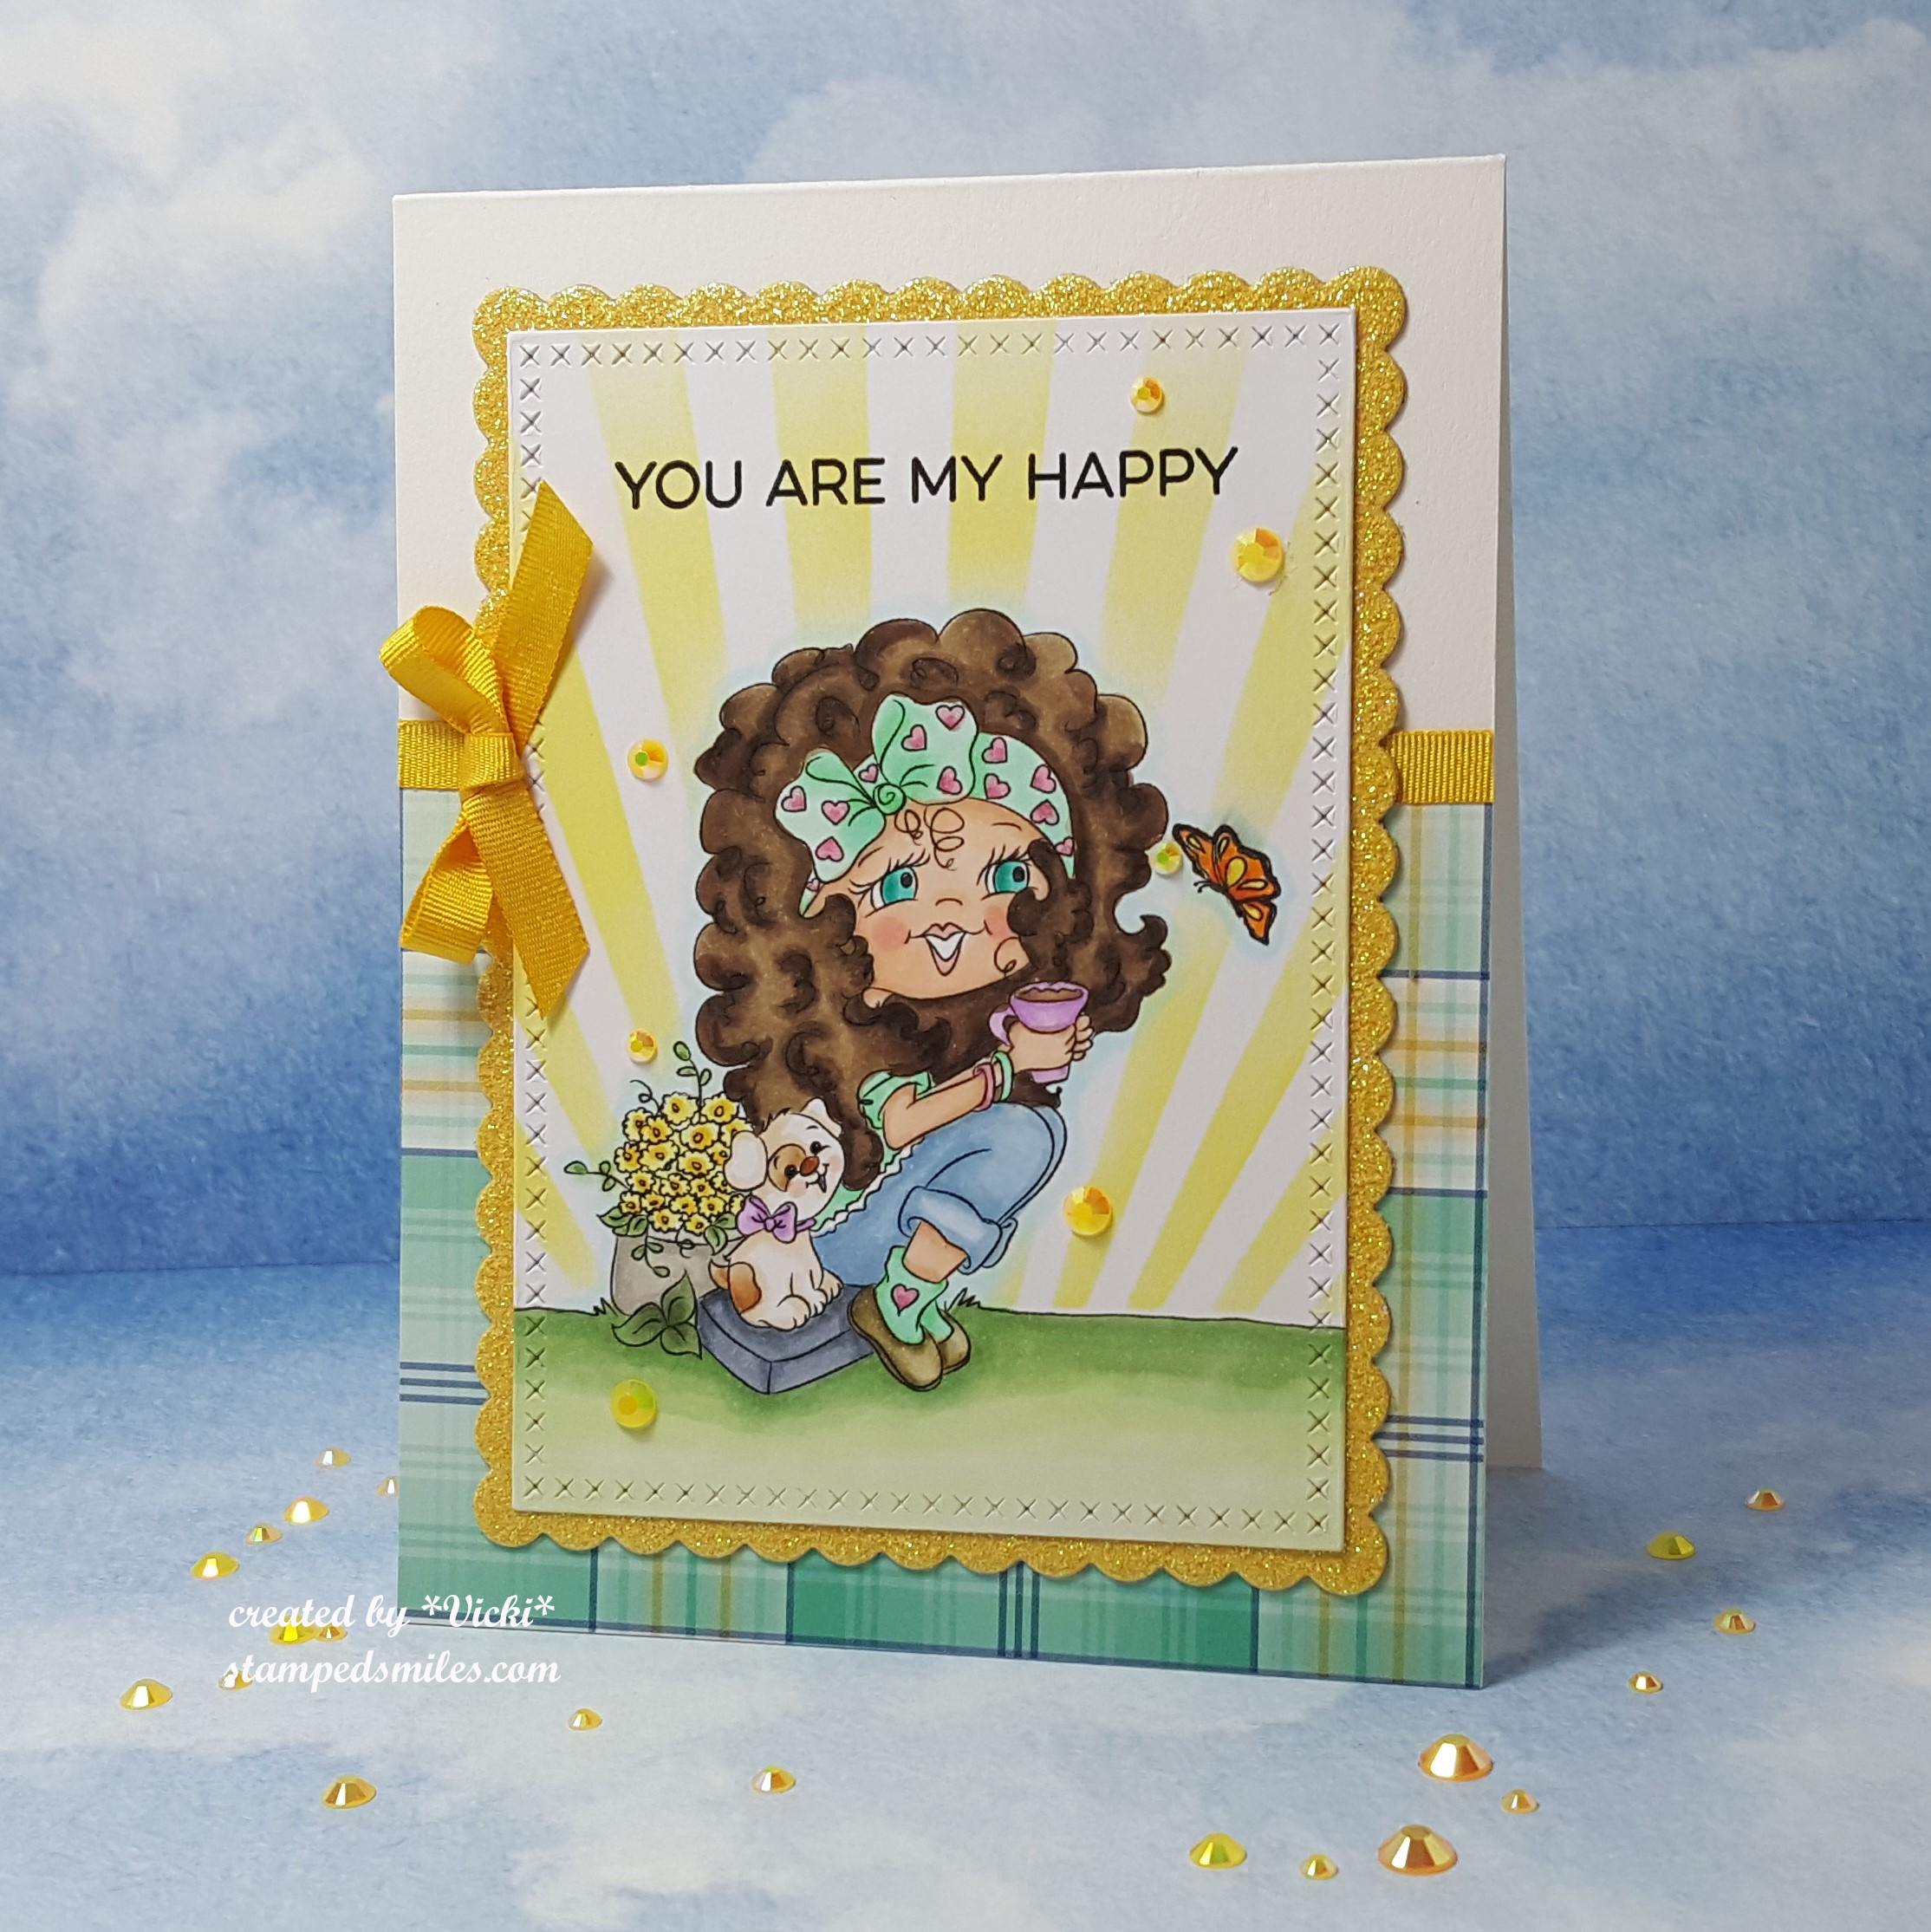
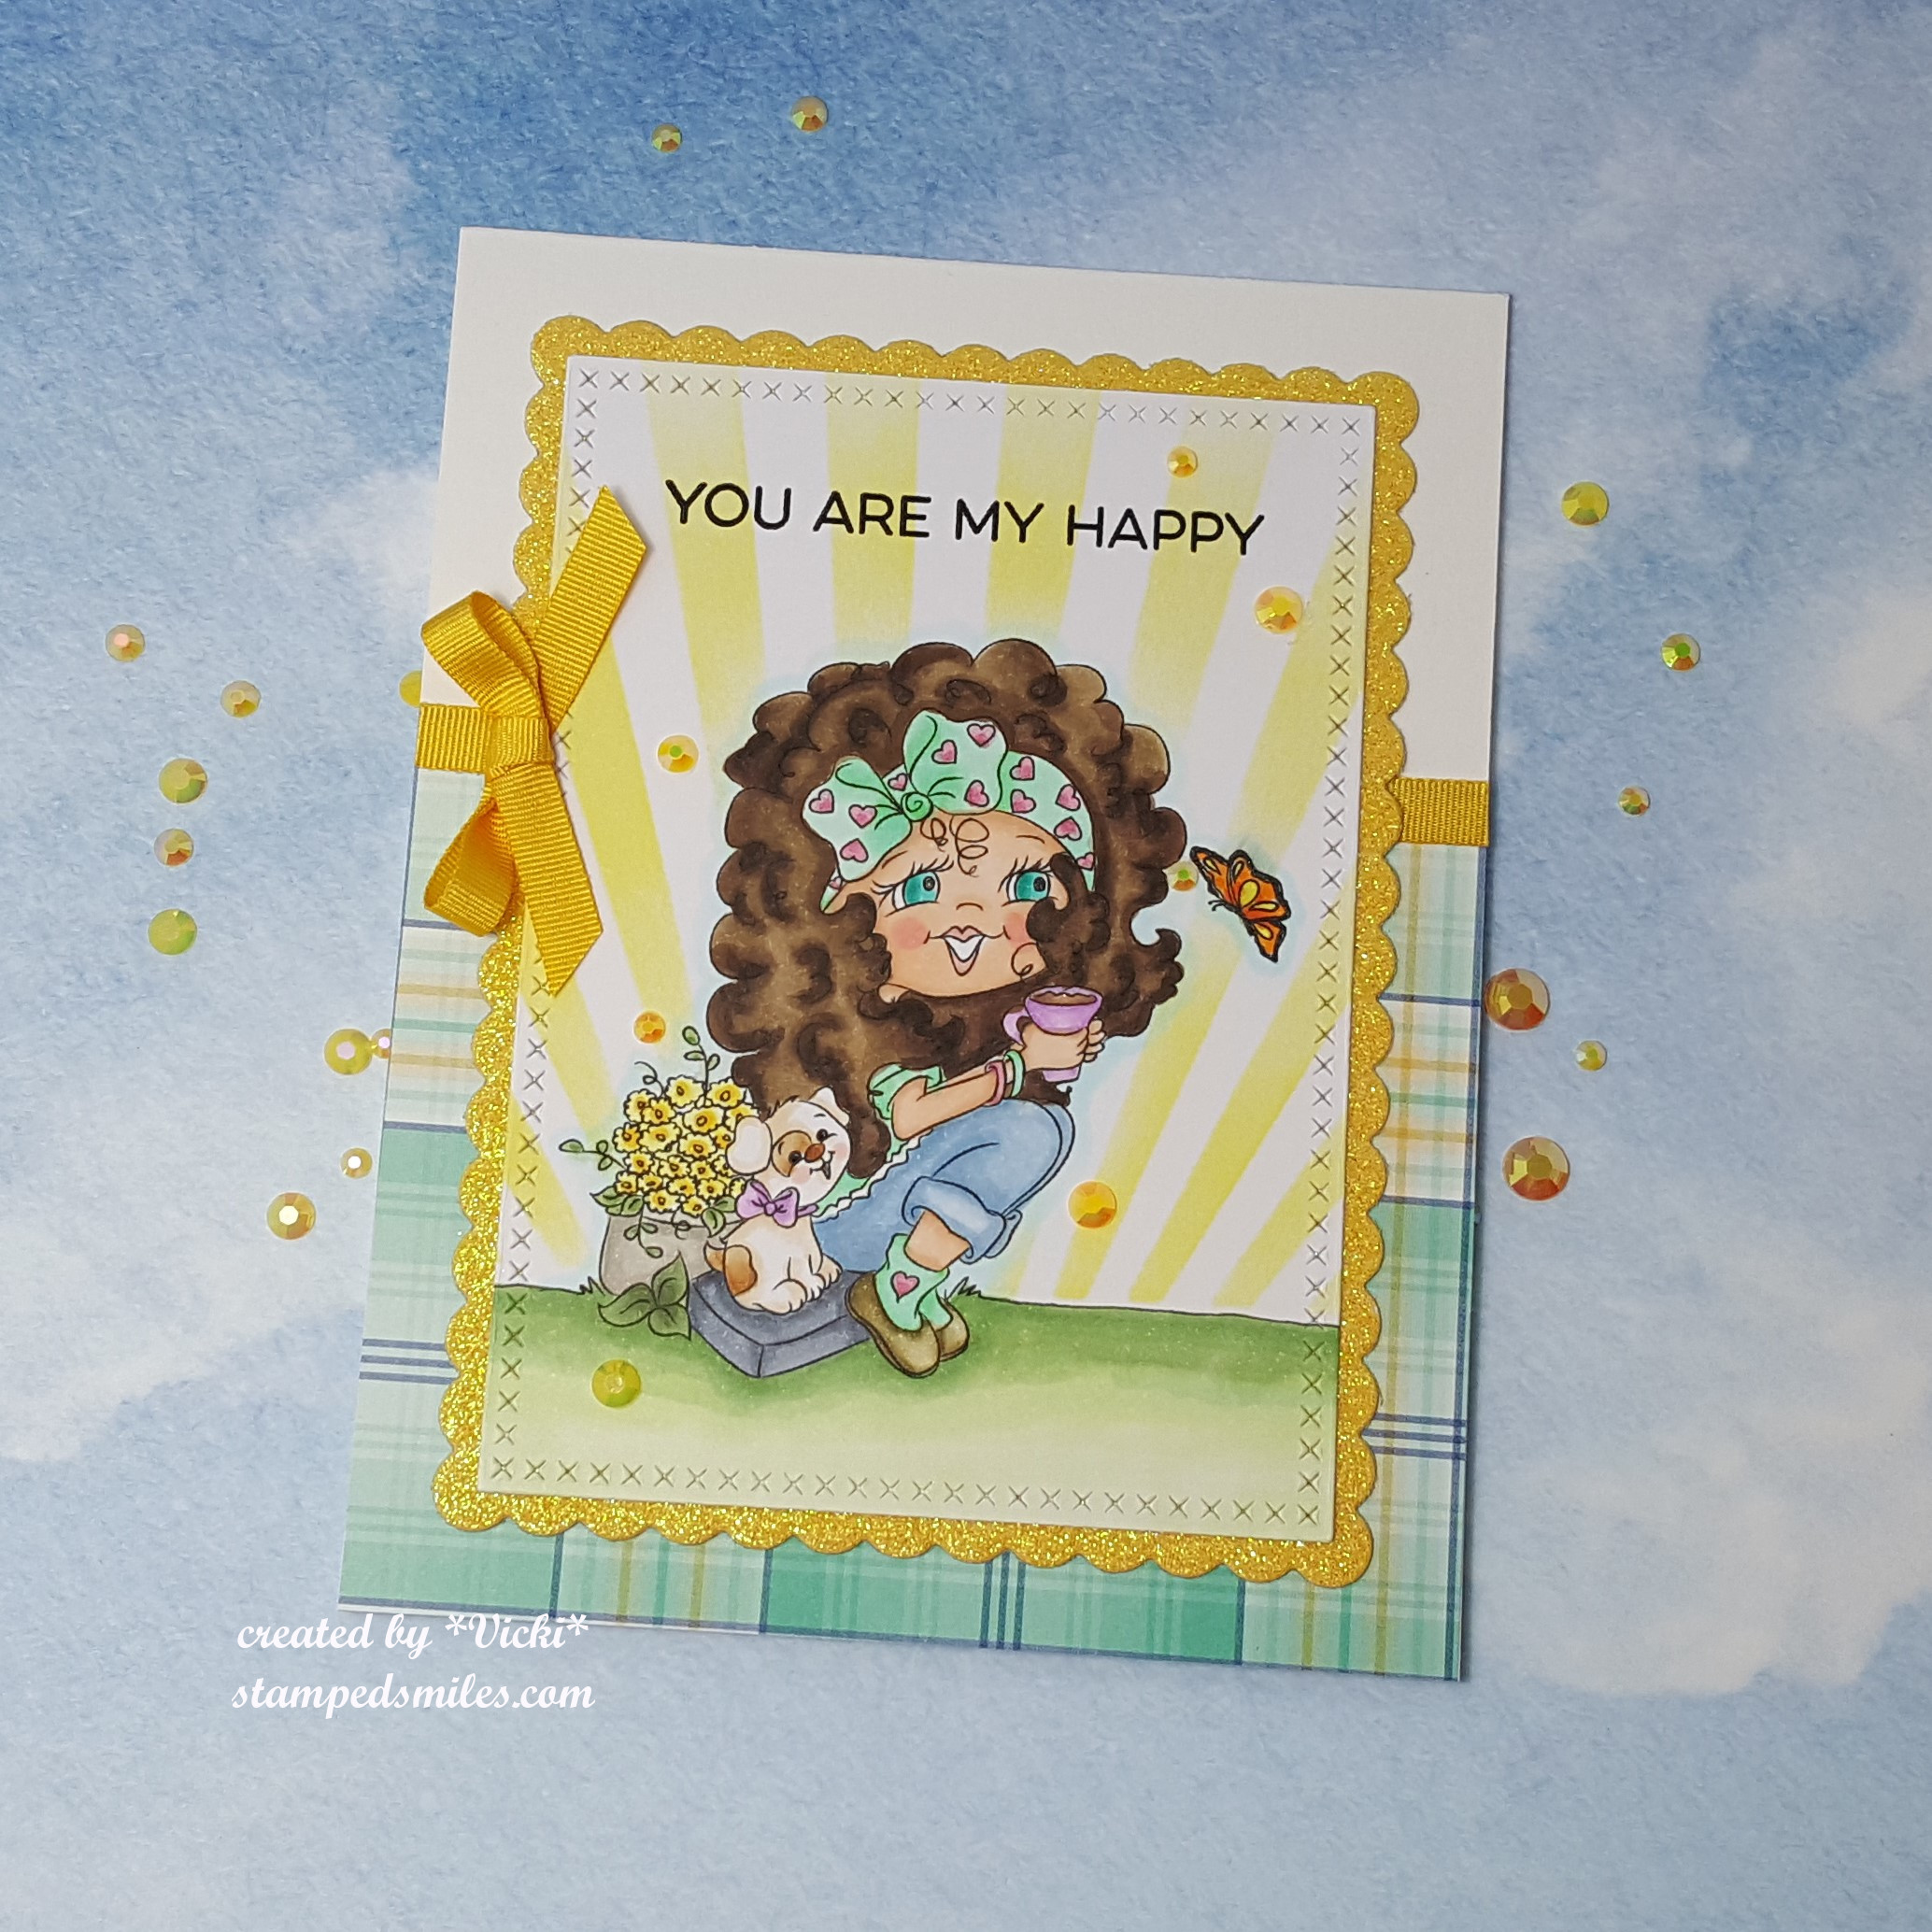
Of course, last but not least, I wanted to share a card I had completed for a guest design card meant for June and that was completed at the end of May, but I was unable to share it before I had to leave for a while.  This is the card I gave to my husband for Father’s Day and he really does feel like my super hero! 🙂

Vicki-PNDSuperBoyDog-June15

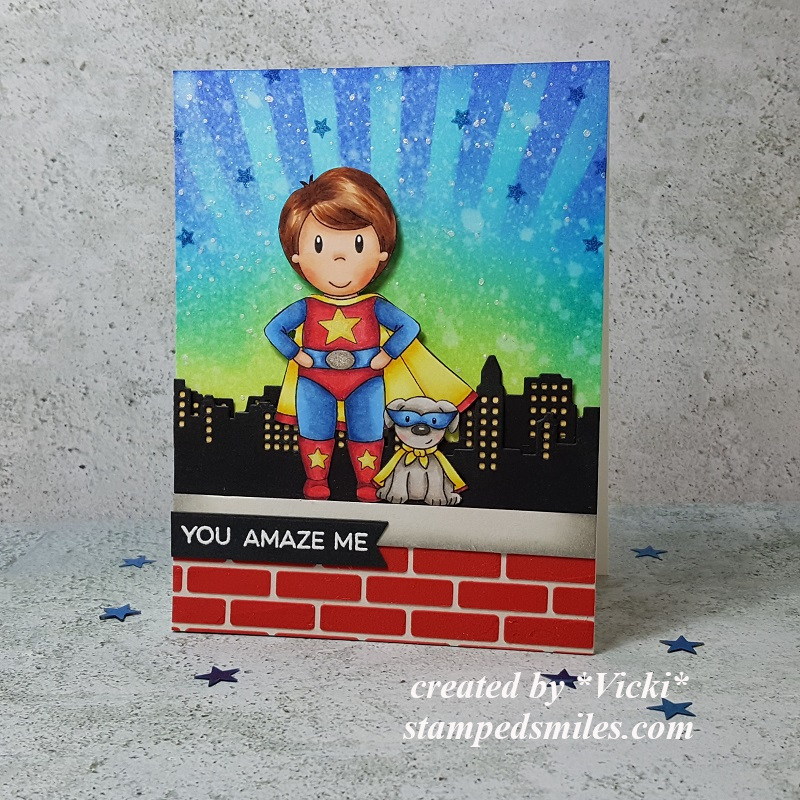
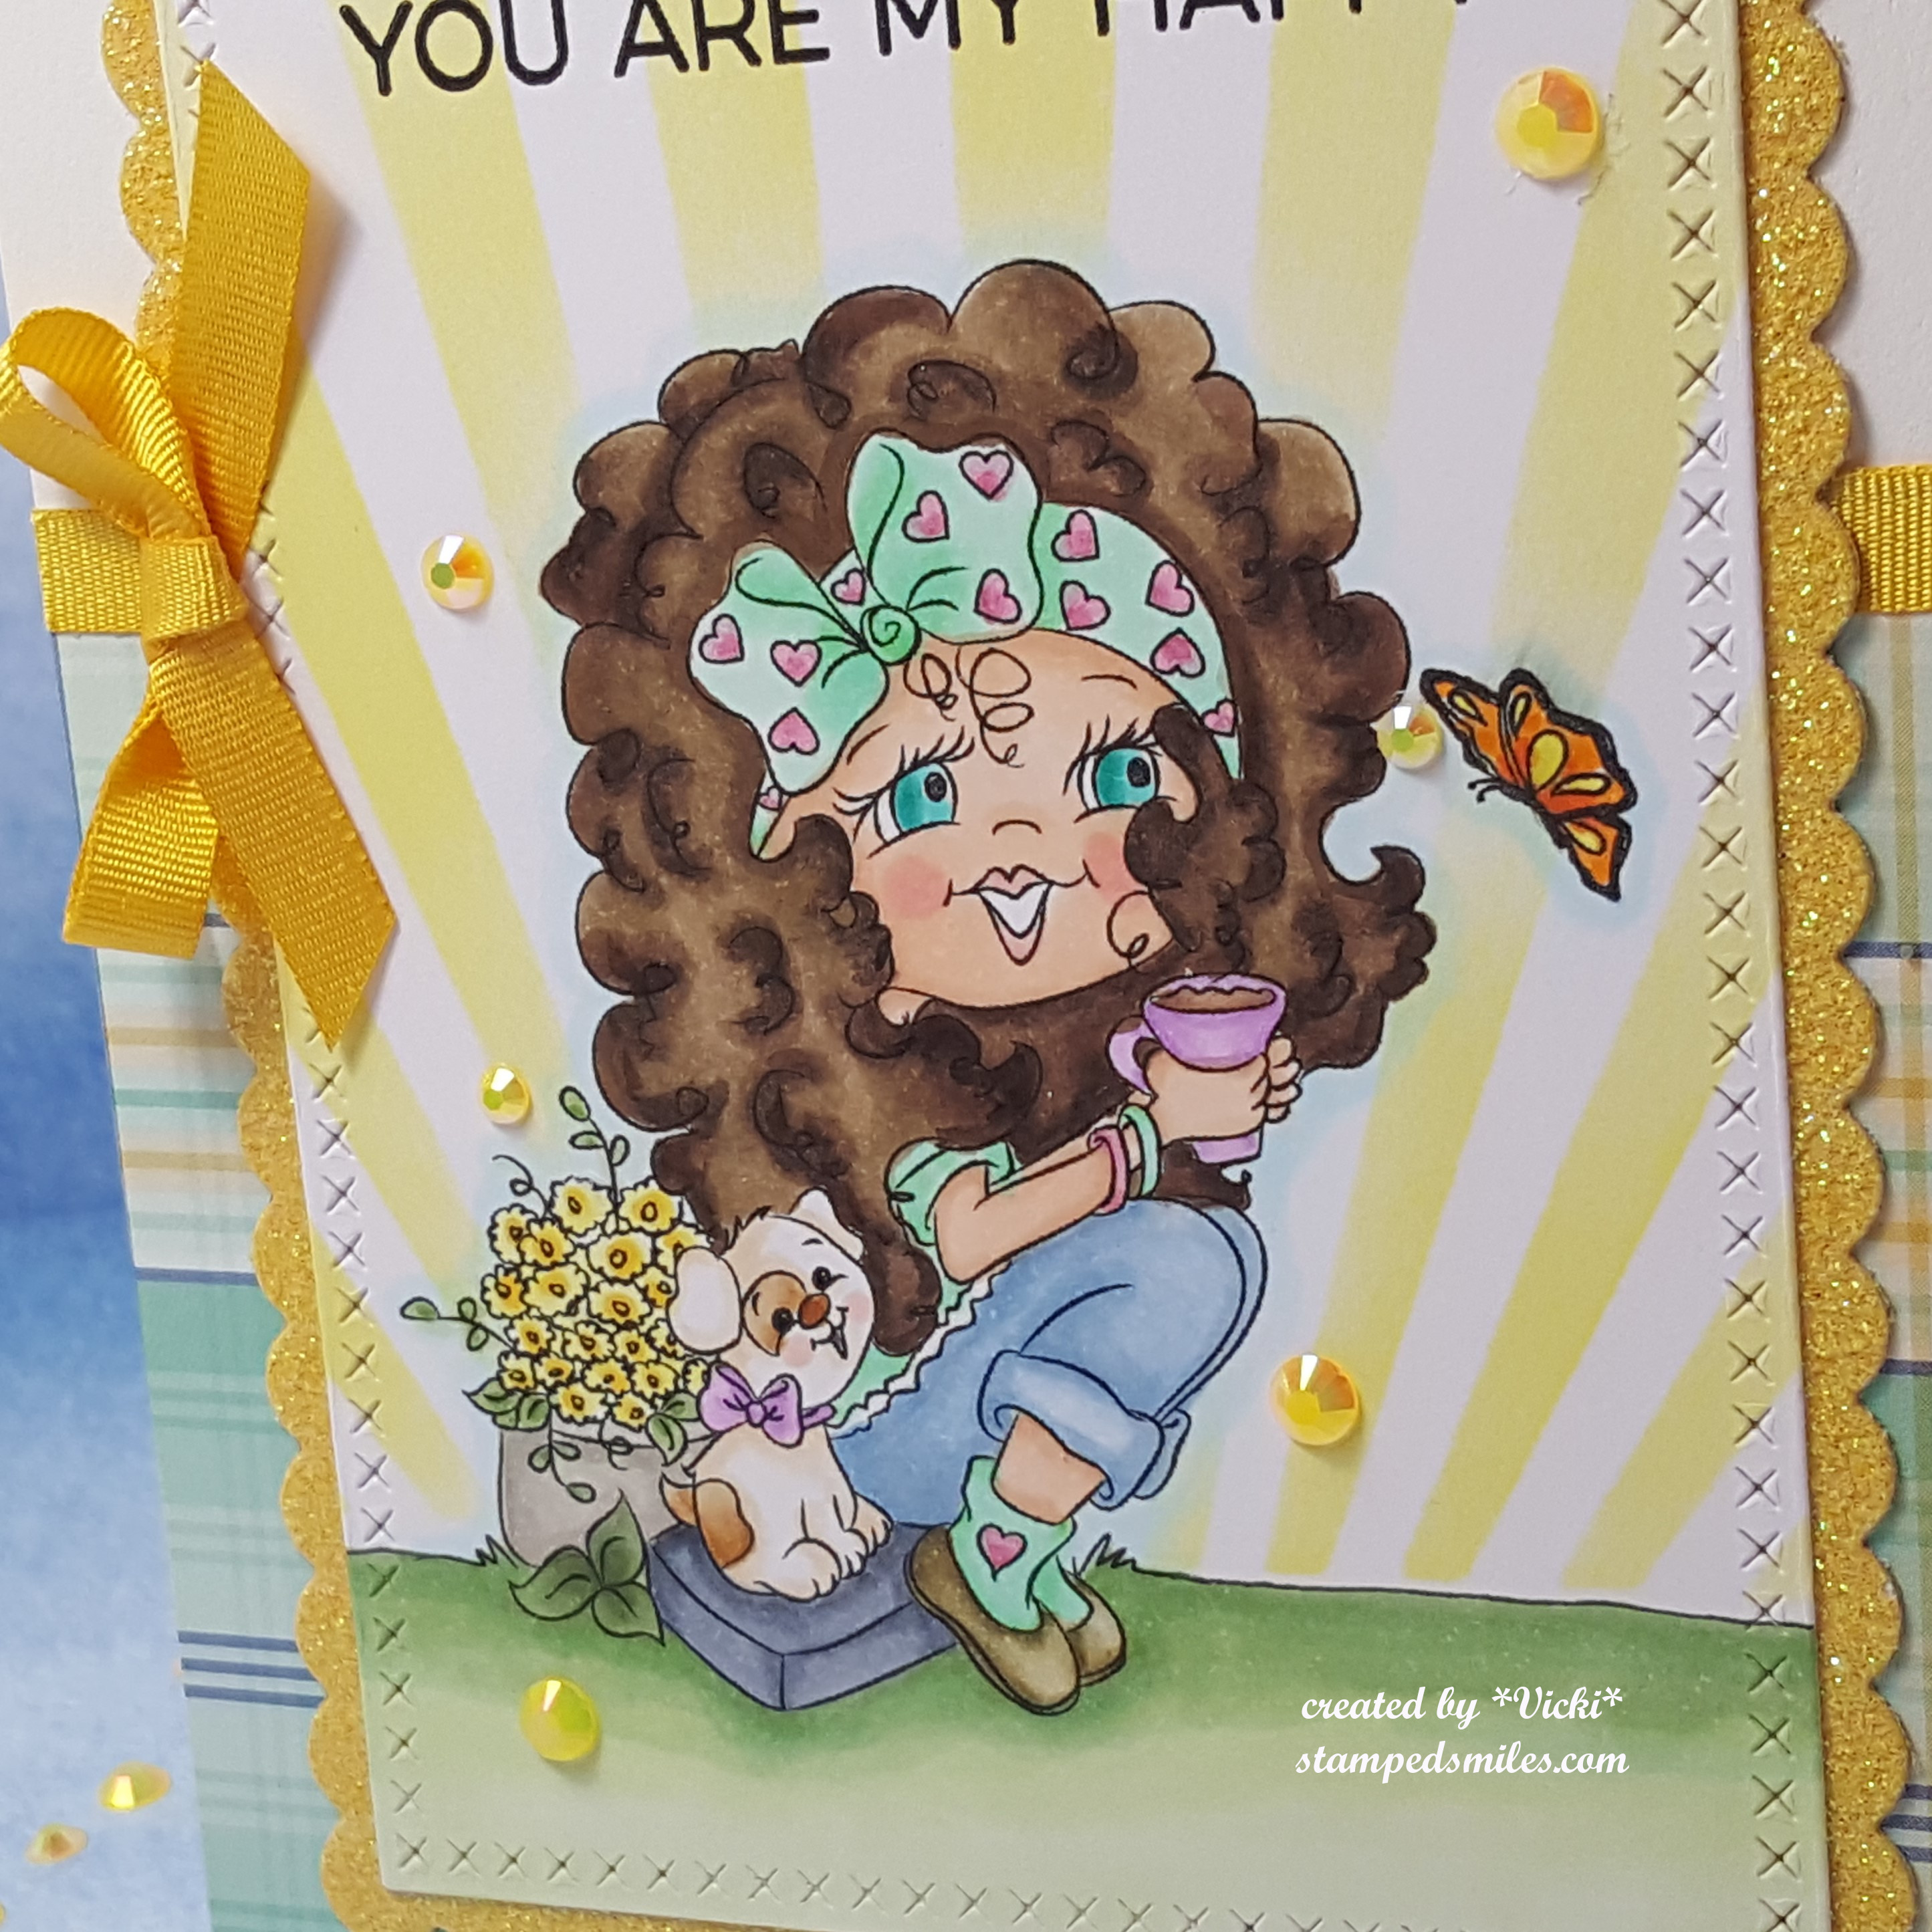
Isn’t this just the cutest?!  I made this card using the adorable Paper Nest Dolls Superboy Owen and his sweet companion Superpuppy too!  I had so much fun blending the background in the different colors!  I added some blue stars stamped in the background.  the city scape behind him was made with a city scape die cut layered a couple of times.  I used some yellow cardstock behind the building for a lighted building affect.  The wall was made using some gray colored cardstock and then a brick stencil with some red ink colored embossing paste to over it with.  Then I just added the sentiment by white heat embossing it over a black strip that I die cut out.

Vicki-PNDSuperBoyDog-June15-close

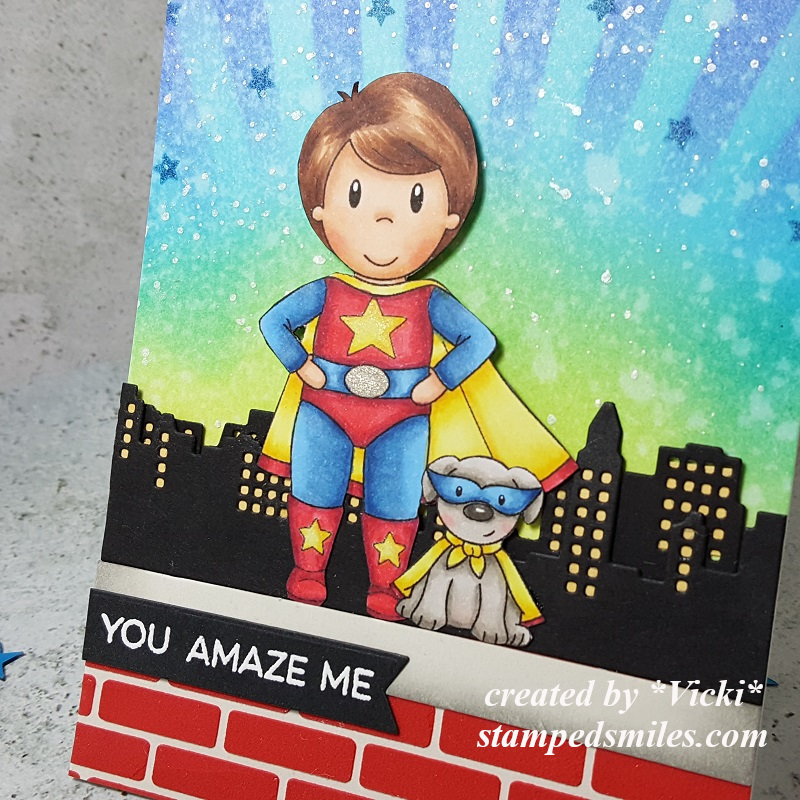
Here’s a closer view of the coloring I’ve done on the images.  I’ve used a silver gel pen to color in the buckle on his outfit.  I fussy cut the images out after coloring.

Here you can also see the splattering that I’ve done with some white shimmer paint in the background with the blue stars.


Other news

download

I actually got a bit of really cool news while I was down and thanks to a lovely craft friend, she tagged me and let me know about this, but my set of Whimsy Stamps “Bee cards” were shown in the Making Cards & Papercraft Magazine for August 2019!  Chosen as a “top spot” editor’s pick right inside the front cover!  I was very surprised and to see what was said about it along with my blog address was pretty cool!  So go get your copy of this magazine!  It’s my first time having a peek at it and they’ve got some pretty neat inspiration in there!

Although I have been in a great deal of pain and mainly dealing with what came with it, of course my husband was great at trying to “distract” me from it and trying to get me to smile as much as possible.  He knew first hand how I was feeling each day and like I mentioned above, he’s my super hero!  So there were a few fun or smiling moments here and there while I was being patient with myself as much as I could anyway.

Vicki-backyard fireworks

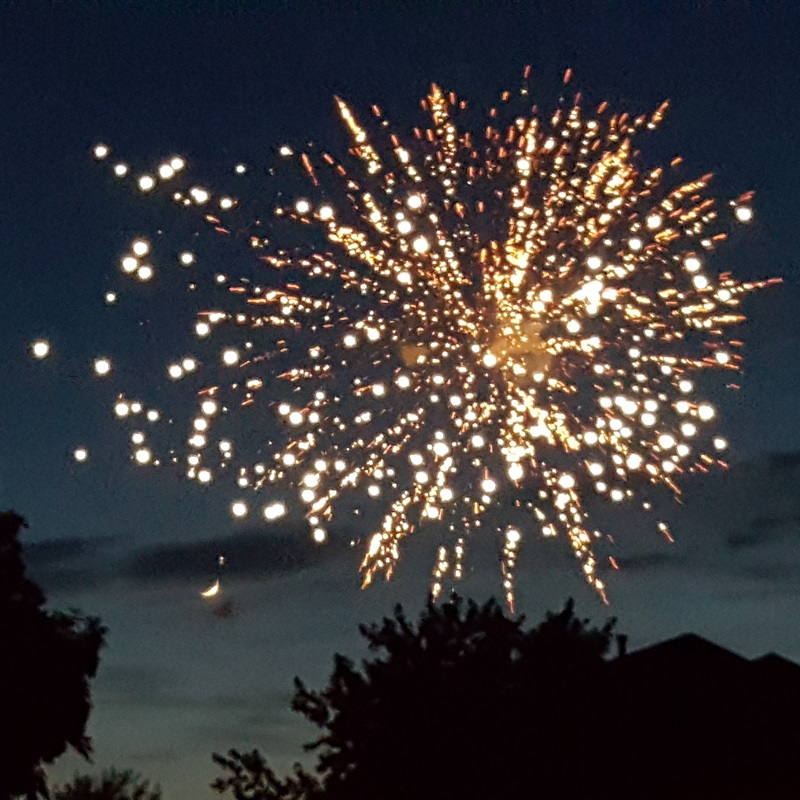
I wasn’t able to do much to celebrate 4th of July, but going out in my backyard, my neighborhood seemed to have a pretty cool display!  You can see the half moon at the bottom underneath the left side of the firework.  Needed bug spray, but it was a nice night!

Vicki-Styx Concert

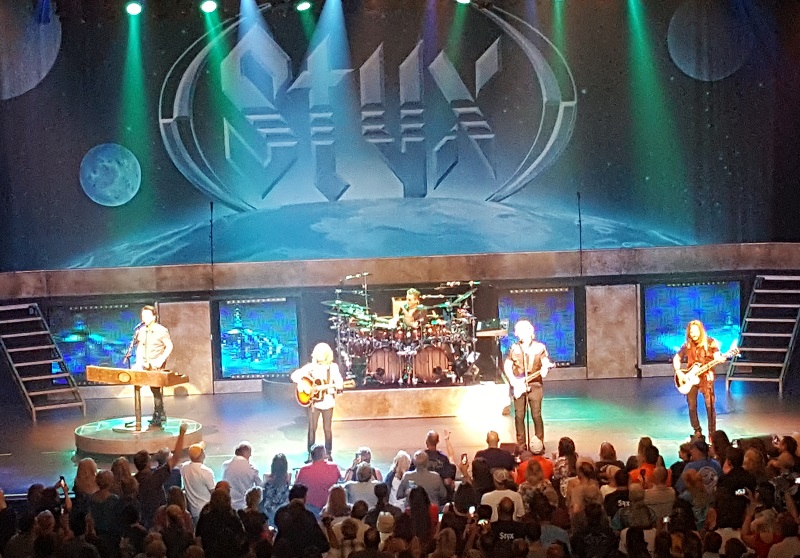
Back in April, hubby and I had gotten some Styx concert tickets and I was worried about going due to the problems I was having.  Of course hubby said not to worry about it as our seats were great with no one behind us so I could sit, stand or whatever I needed to do!  It was loud enough with the music and it took my mind off things plus I could always clap and sing the songs!  🙂  We took a good break in the middle of it so I could move around away from the seat too.  It was a great concert!

Vicki-Black Eyed Susans

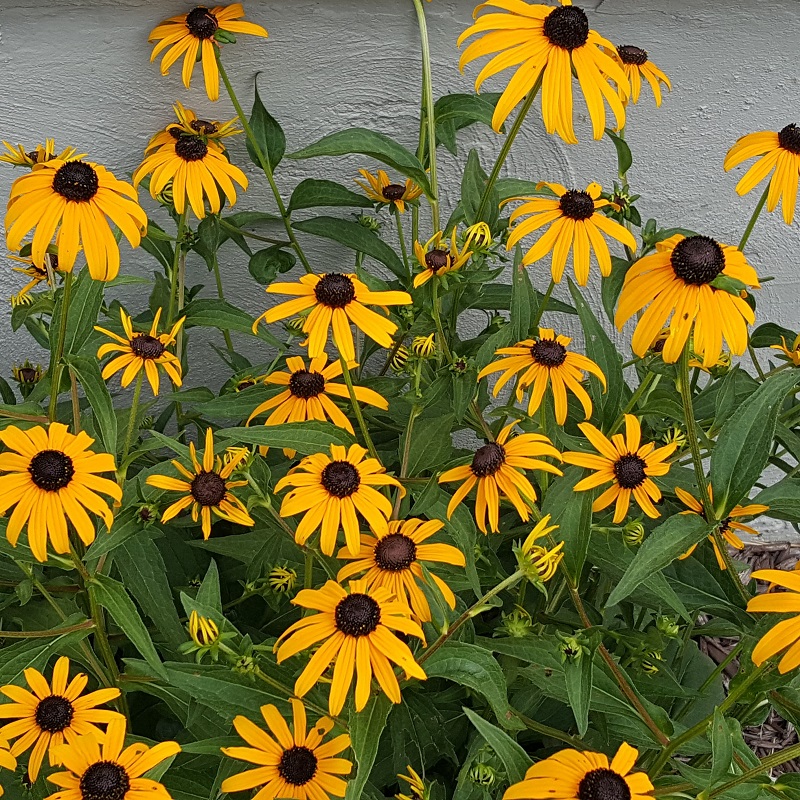
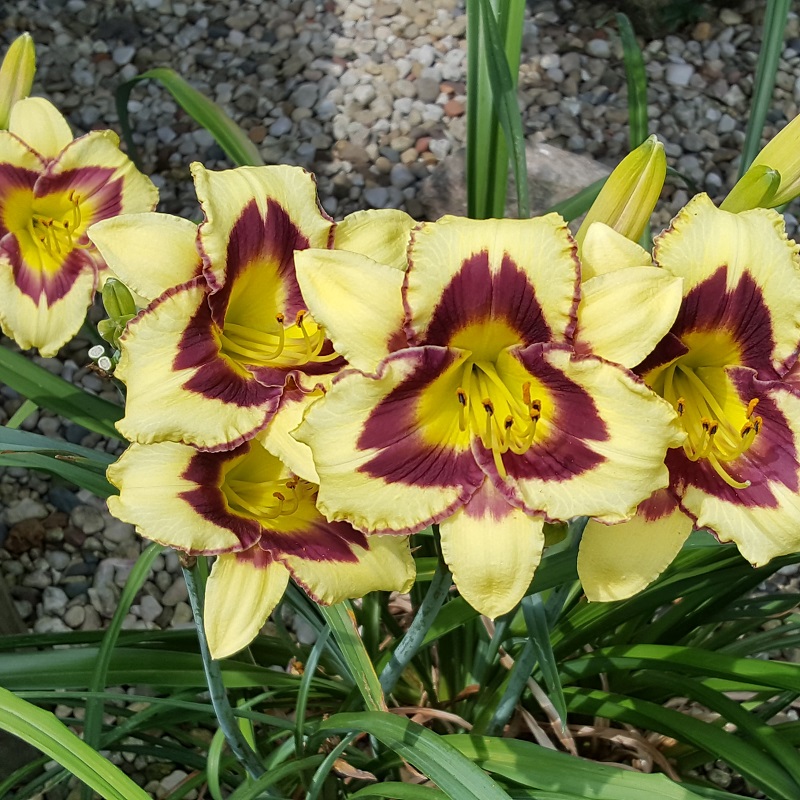
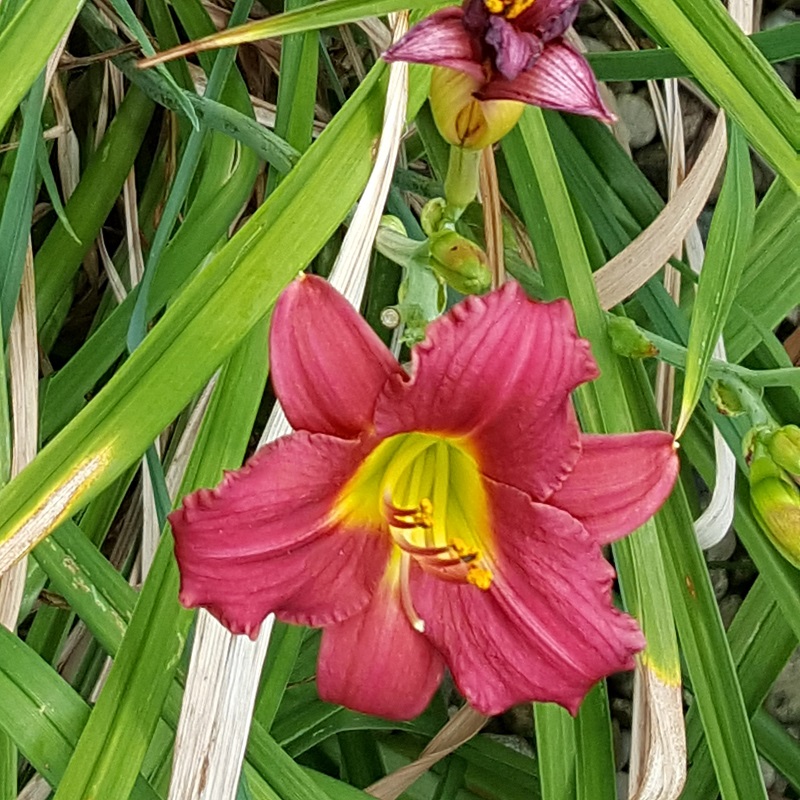
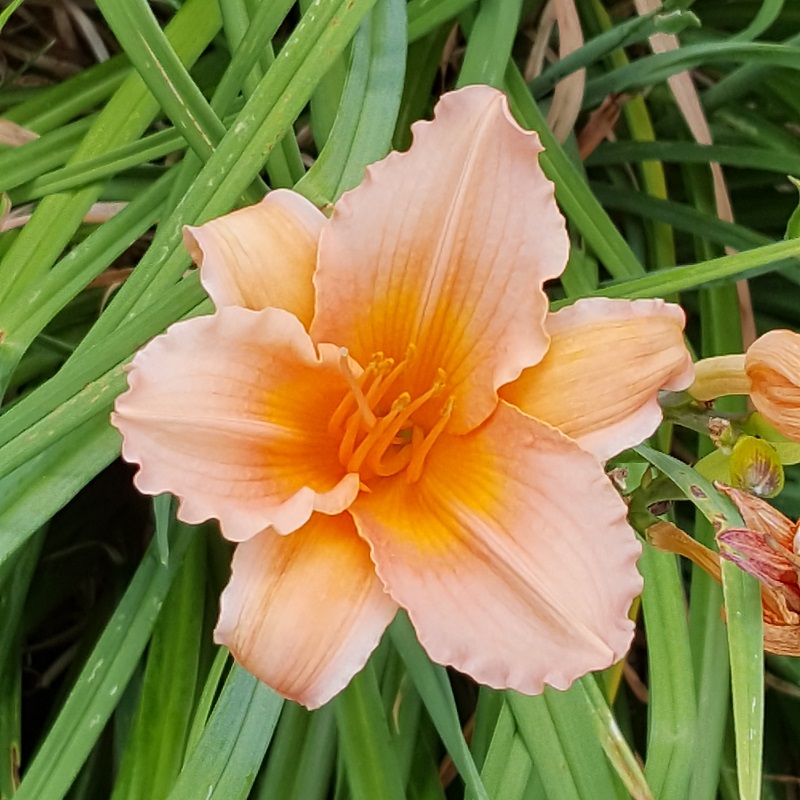
In my backyard, I have different flowers and I really enjoy going out in nature to see the flowers, birds, bees, etc.  The flowers this Summer really helped me relax, smile and just enjoy the beauty that is around.

Some days were absolutely horrible, but there are also these days too…

Vicki-Purple Cone Flowers

Vicki-Iris

Vicki-red Iris

Vicki-orange Iris

Vicki-Yellow Iris

Vicki-Hydrengas

I’m soooo happy to finally be able to write up a post and now that I’m able to start getting back into my stamp room, I’m very excited to be able to come back to my design teams (who were ALL so absolutely wonderful with letting me have the time to heal and recover!  It meant so much!) and I will be along again soon to share new creations now!  Yay!  Hope everyone is doing well and I’ve missed you!

Crafty hugs

Whimsy Critters Everywhere!

Hello friends!  Hope you are having a wonderful week so far!  I have been busy in my craft room trying to prepare for a class next week along with trying to help my son pack and move out of state…so my plate has been a bit full lately.  I do have a couple of really fun critter creations that I’ve made using some Whimsy Stamps products today:

Vicki-WS-ADSKitties-April24

If you don’t remember, Whimsy Stamps has come out with a couple of really adorable clear stamp sets to help promote their “Adopt Don’t Shop” campaign with $1 of the sale from each stamp sold going to the Gulf Coast Humane Society.  Vicki-WS-ADSKitties-close-April24

Now, normally I am a “dog fan”, but I know many of my blog friends and several others are huge cat fans as well!  I have also been requested to make up some cat friendly cards too!  So, I thought this would be such a great opportunity to make one!  I’ve used the adorable Adopt Don’t Shop CATS clear stamp set for this one.

Vicki-WS-ADSKitties-flat-April24

I have used a kraft colored A2 sized top folding card base and stamped the little paw print from the stamp set with the same color around the edges.  I also took the humorous sentiment from the set and white heat embossed it over a piece of espresso cardstock and cut a banner strip from it.  This same color of cardstock was used as a layer behind the kitty image panel that I’ve cut out with the WS Hand Stitched Nested Rectangles die.  I covered up the bottom portion of this panel with some plaid papers.  I then wrapped some twine around the middle of it and tied a bow which I have attached a wood veneer heart in the middle.


Vicki-WS-I'veGotYourBack

Here’s another card I had made to help cheer someone.

Vicki-WS-I'veGotYourBack-flat
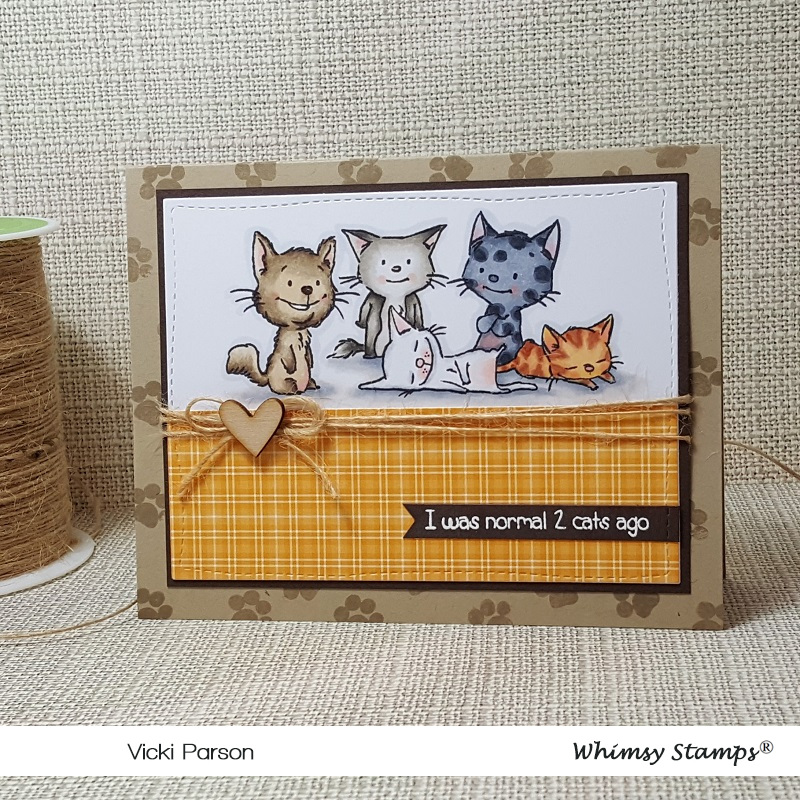
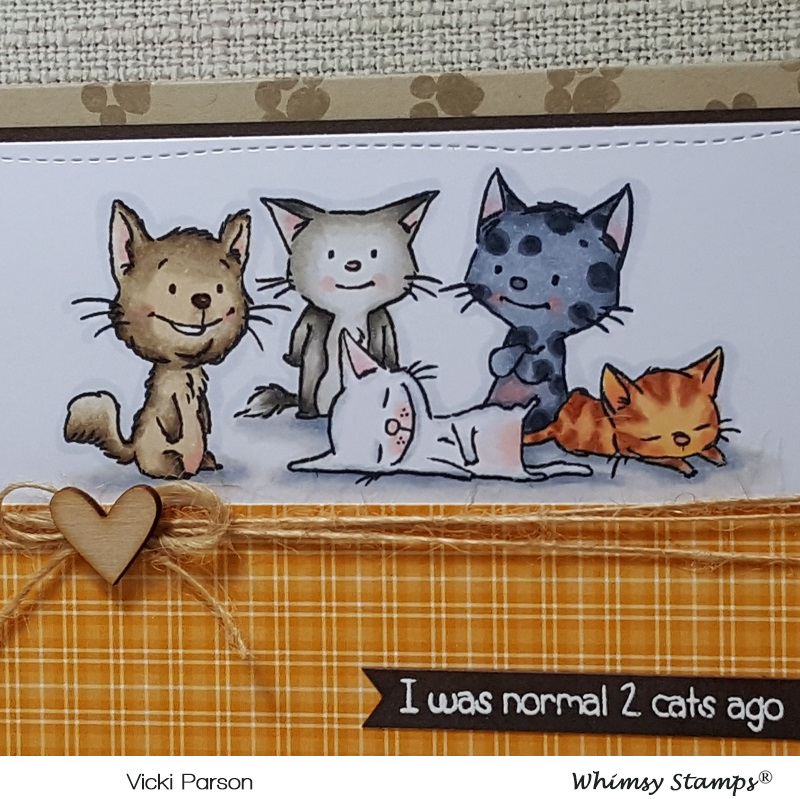
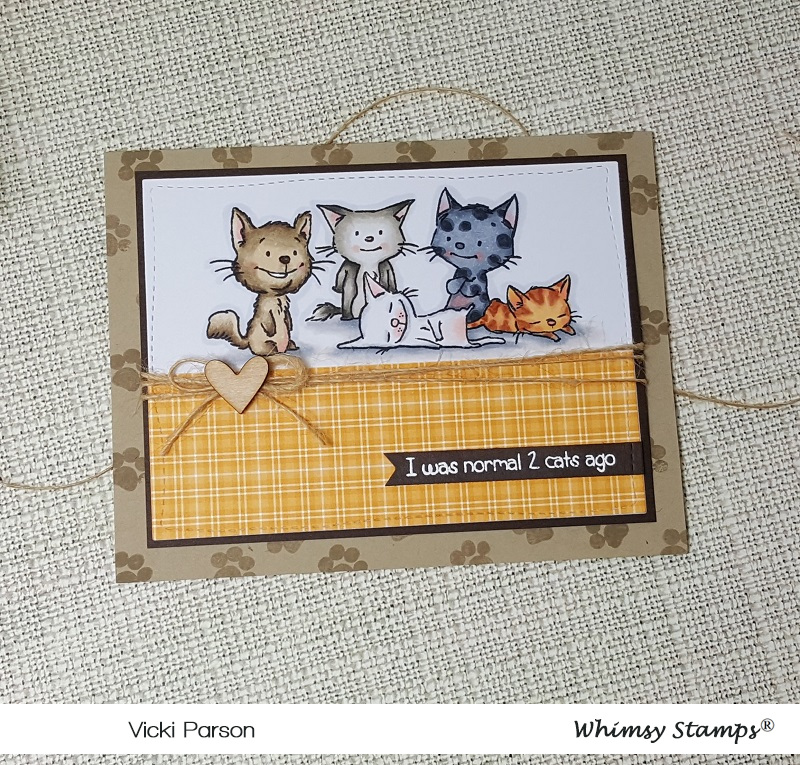
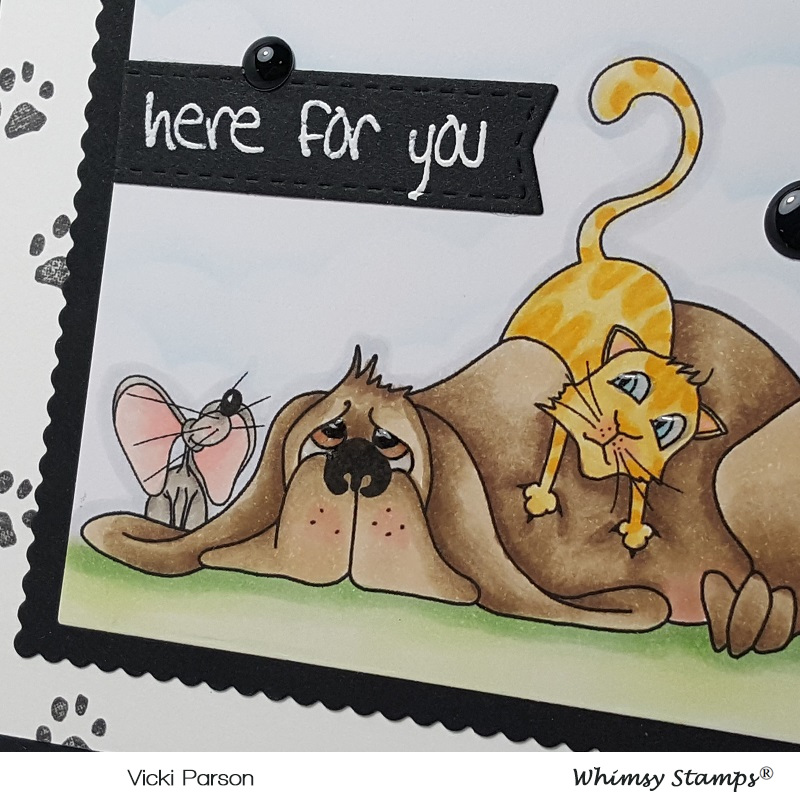
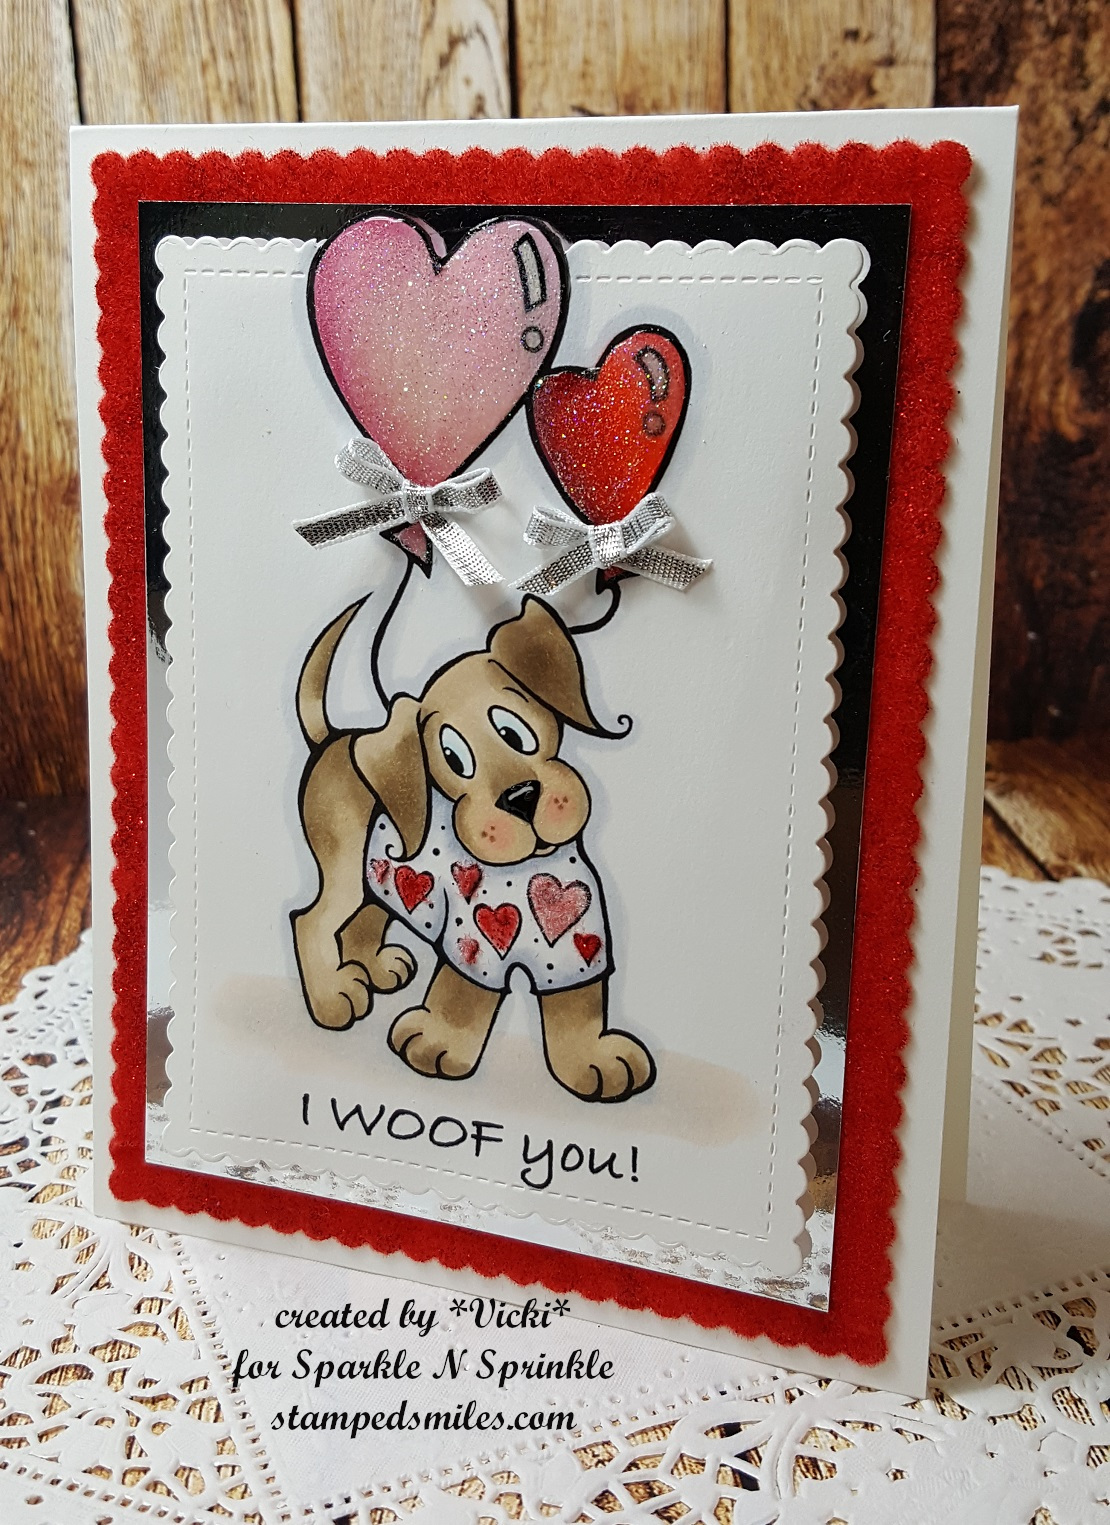
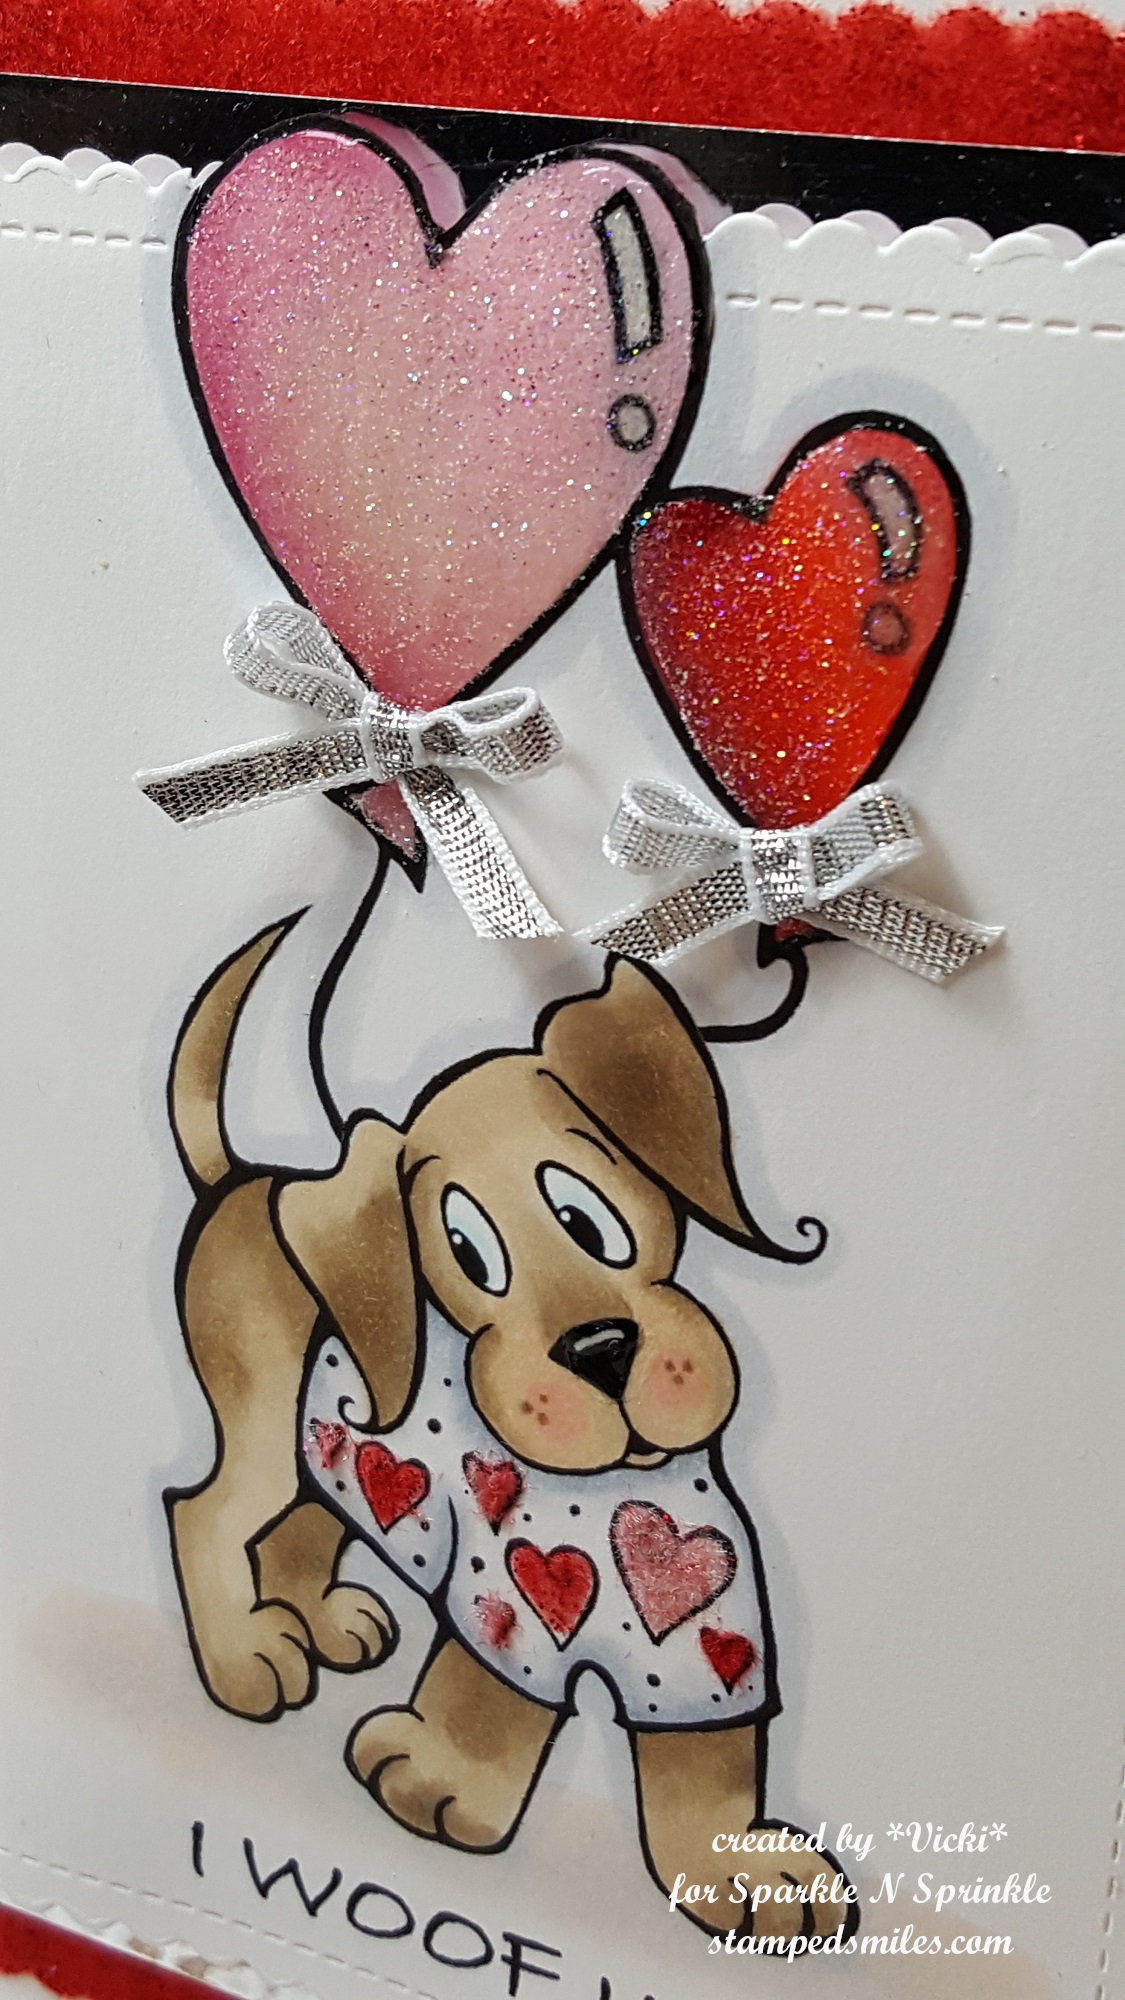
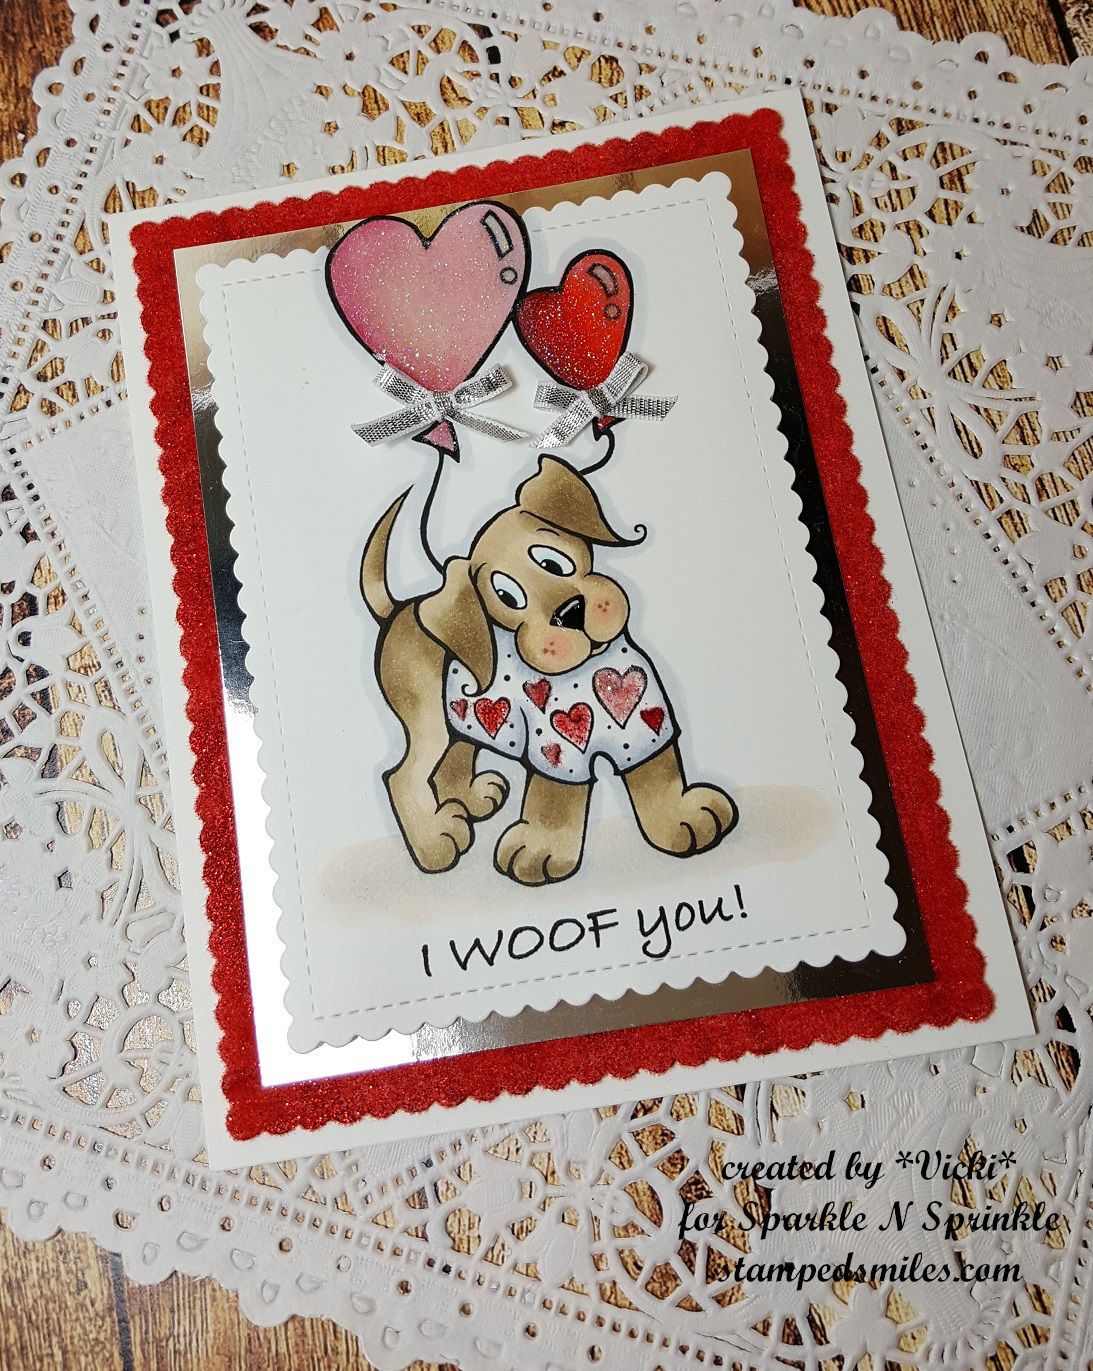
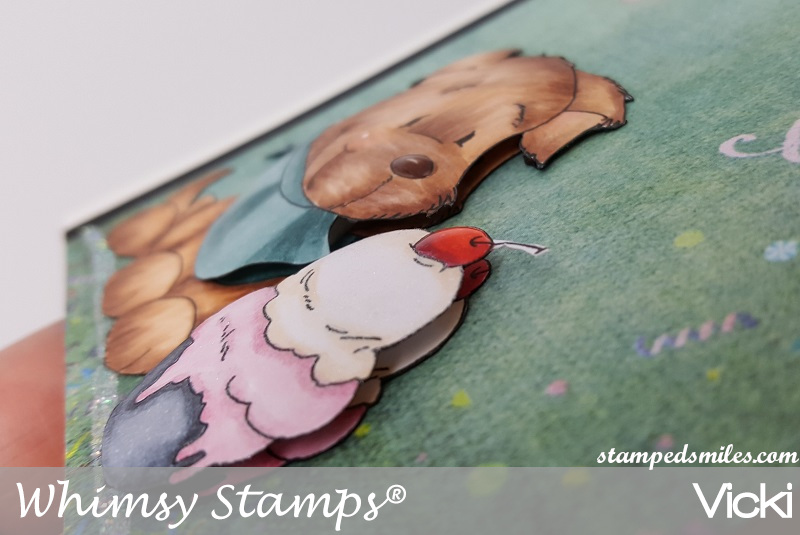
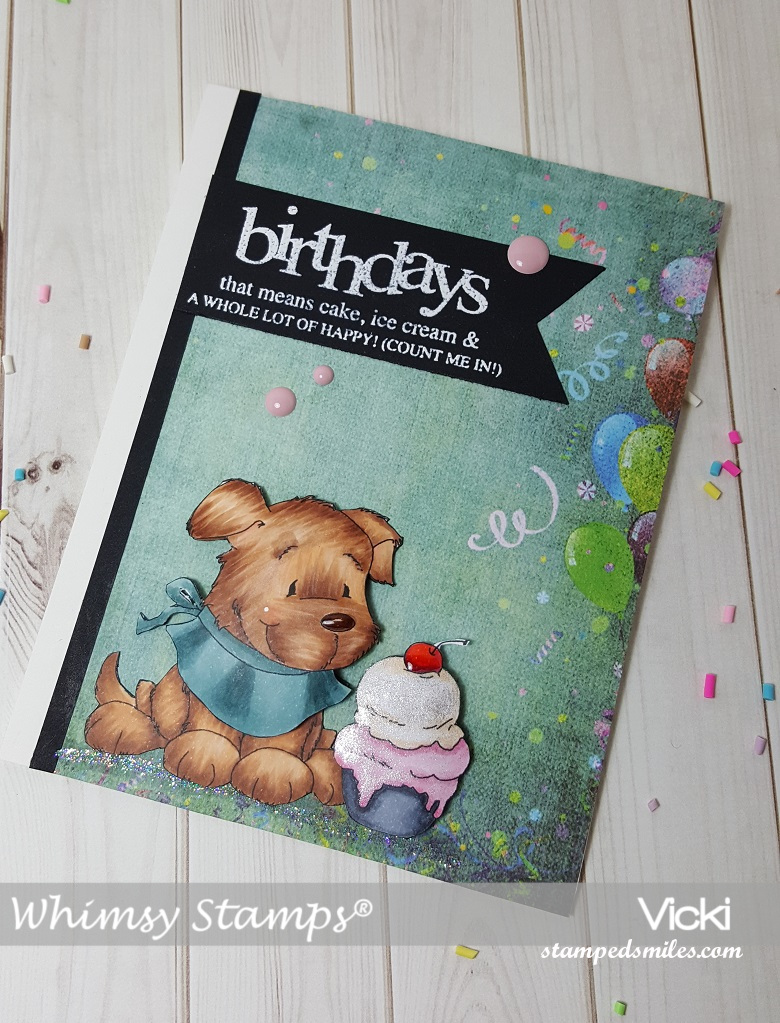
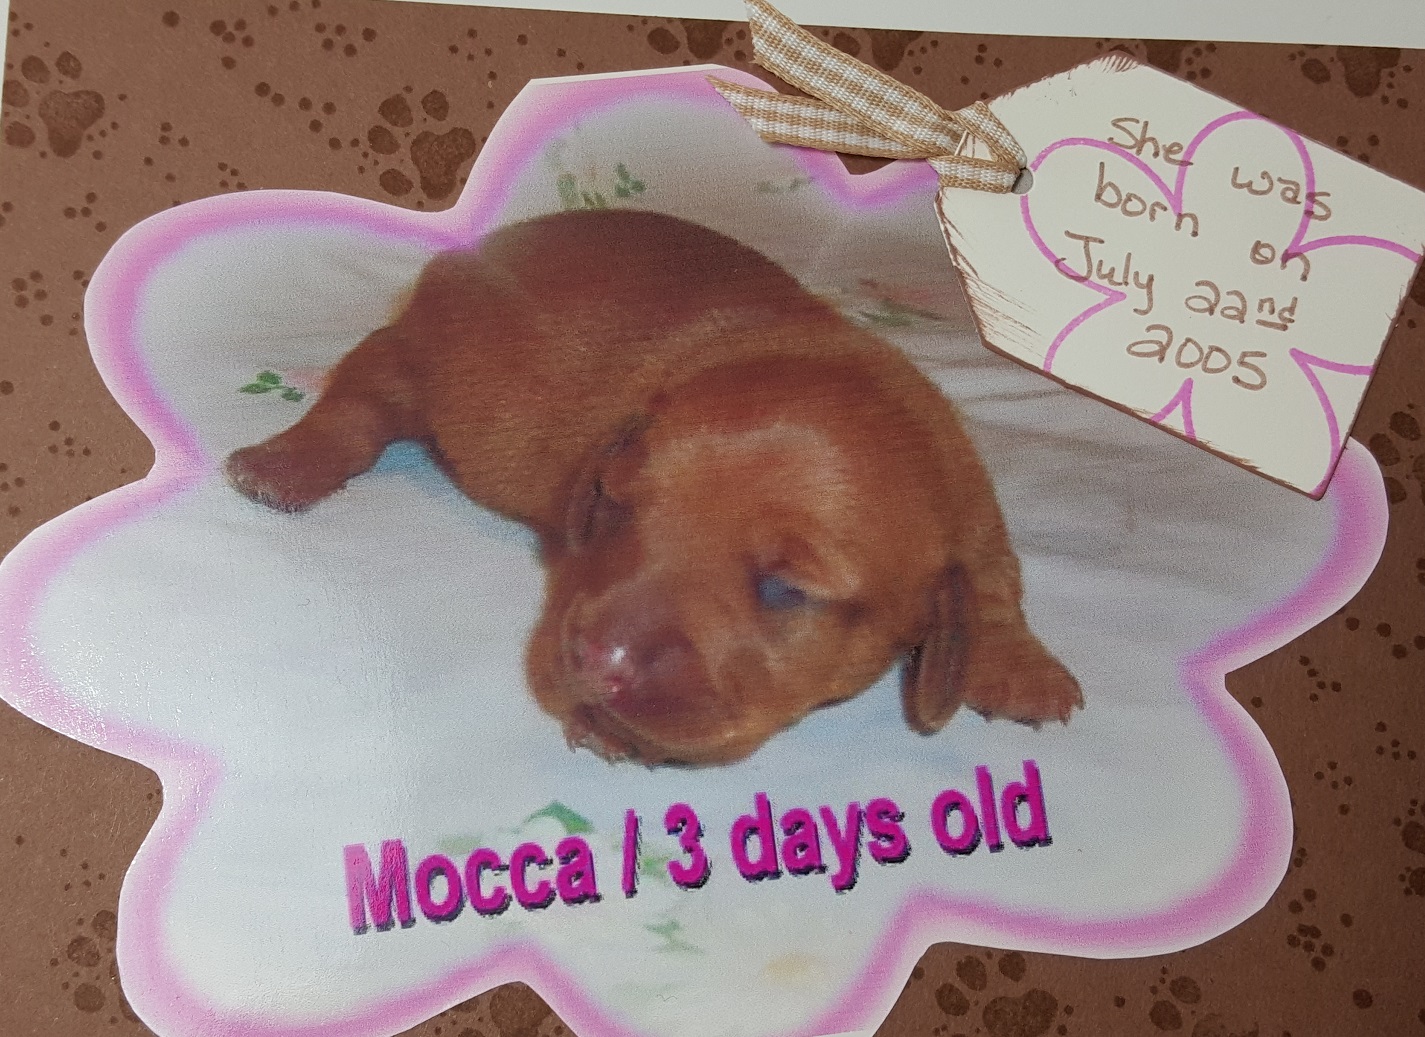
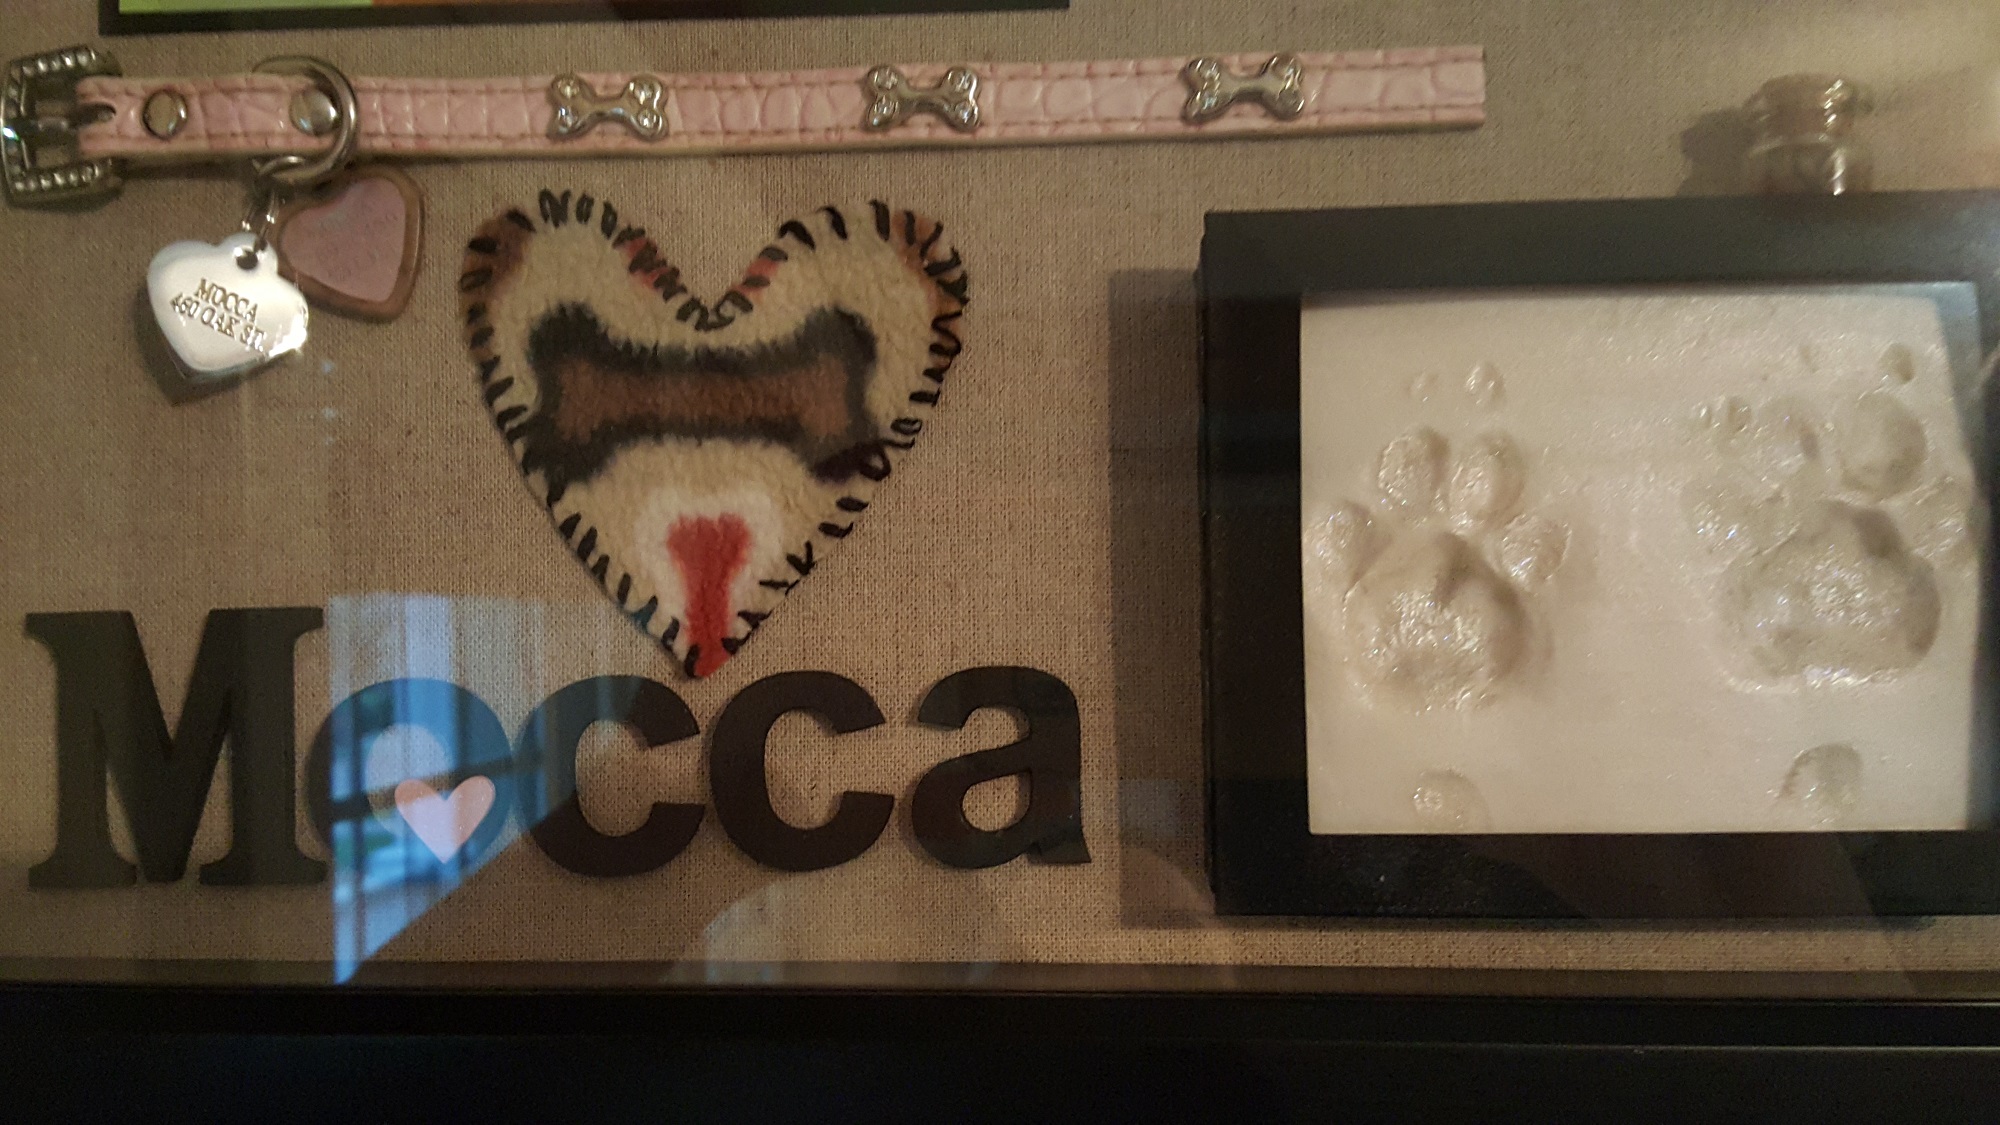
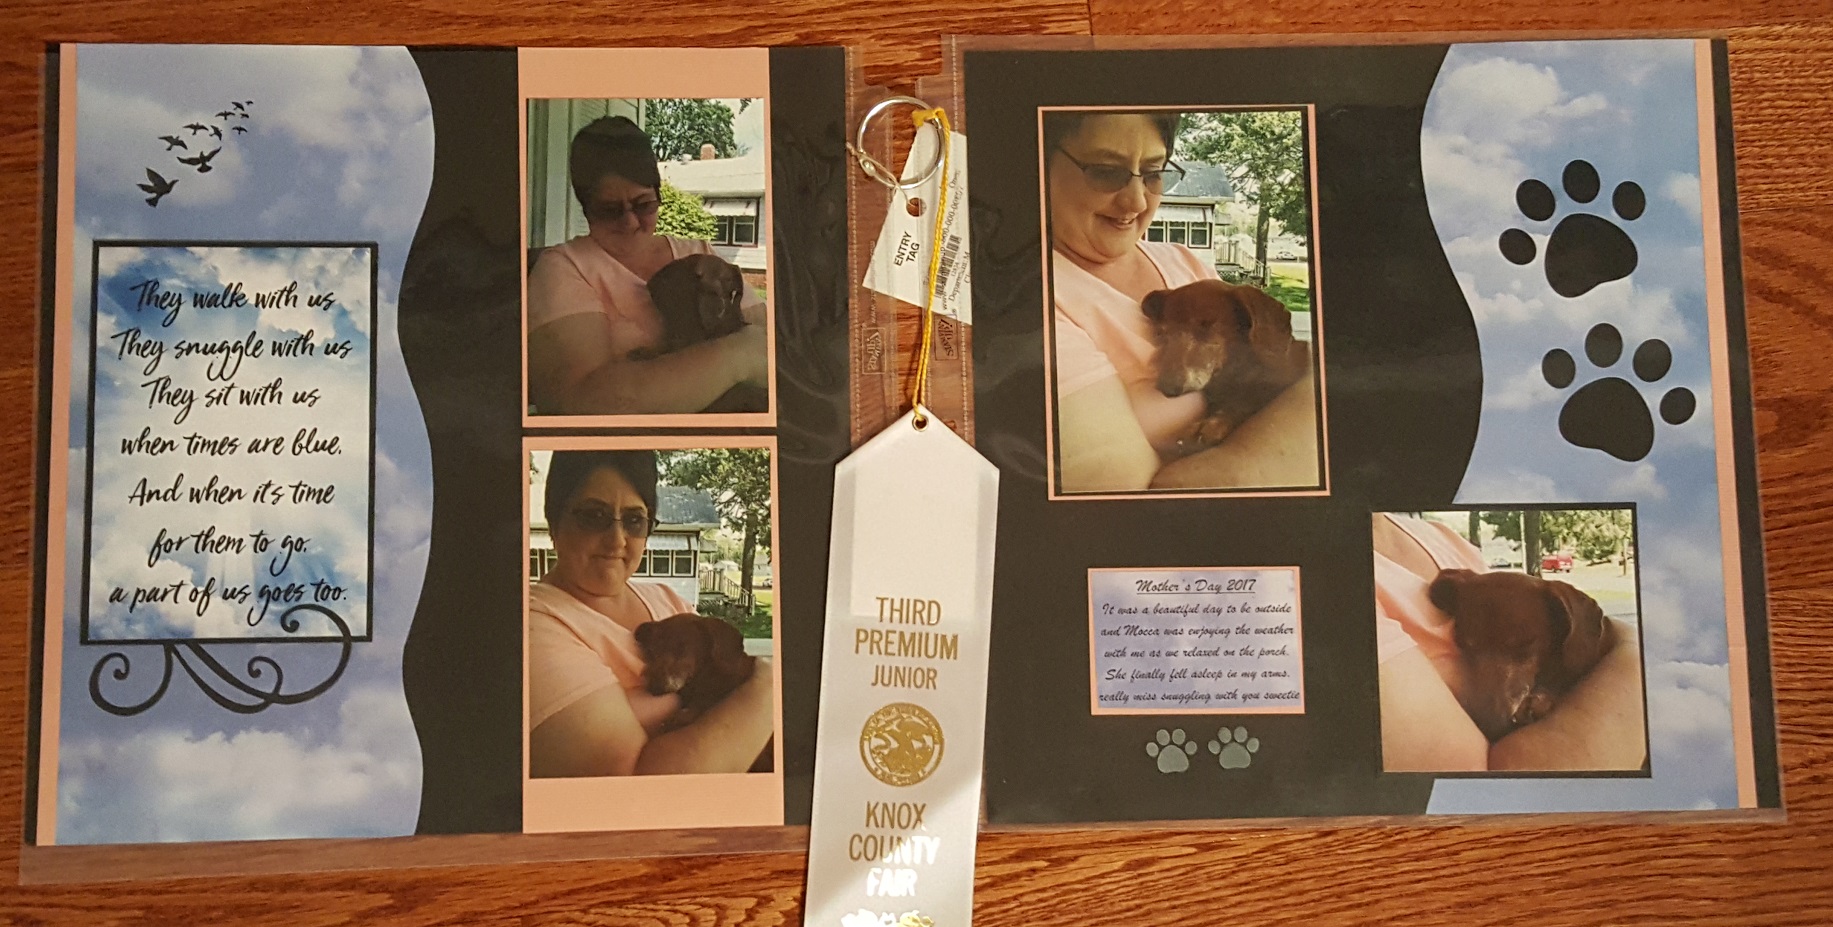
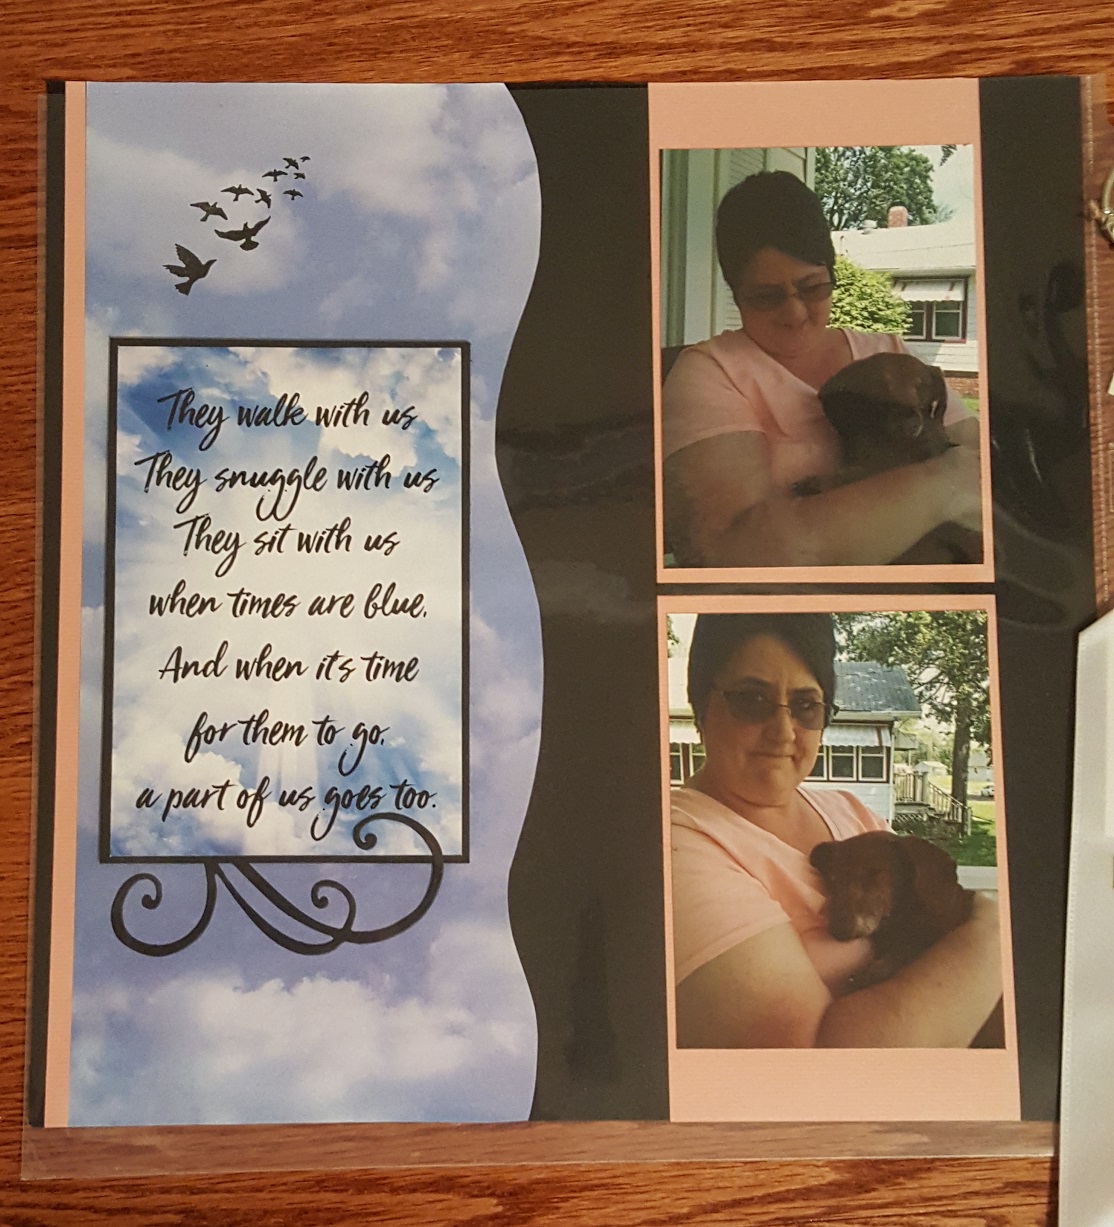
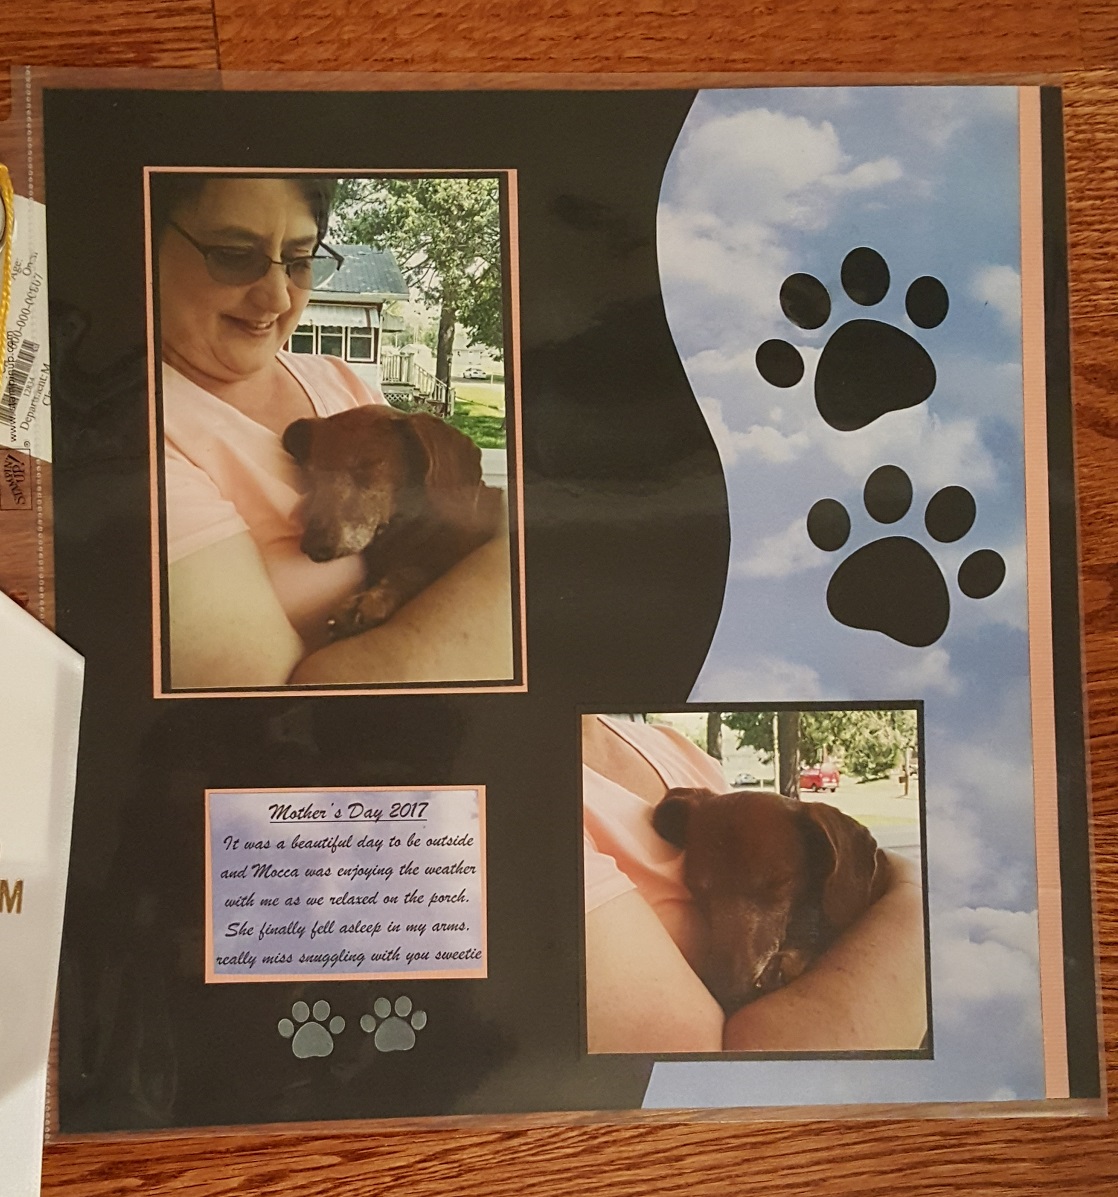
Here’s a pop quizz…. if you’ve known Whimsy Stamps for a while, does this particular image look familiar to you?  It’s a VERY old one and also one of the very first rubber stamp sets that Whimsy Stamps sold!  I believe mine is dated 2009!  I wanted to keep it as I’ve been a part of this company off and on since it started! 🙂  Really cool to still have it.  Obviously, it’s not available for purchase, but they did offer it as a freebie during their “Adopt Don’t Shop” party event last month.  The paw prints along the edges were also used from an older stamp set from Whimsy Stamps as well.  (You can see a portion of it on the right side of the photo above.)Vicki-WS-I'veGotYourBack1

Both of these images were colored with Copics.

The sentiment came from the same stamp set and was white heat embossed and cut out with the WS Quick Strips Die set.  I cut around the pup’s tail and then used a rectangle die to cut the rest of the image out and then layered onto a black piece of cardstock cut from a scallop rectangle die.  I layered the paw print piece, another piece of black cardstock and the image panel onto a white top folding A2 sized card base.  Lastly, I’ve added a few black enamel dots and even gave their eyes some shine with glossy accents.

Thanks so much for dropping in today!  Hope you’ve enjoyed my critter cards!  I’ll be back again tomorrow with a different kind of critter! 🙂

Challenges:

  1.   Crafty Catz – Anything Goes
  2. Creative Fingers – Anything Goes
  3. QKR Stampede – #344 Anything Goes
  4. Pammie’s Inky Pinkies – PIP1916 Anything Goes
  5. Creative Moments – Anything Goes

2 Crafty Critter Crazies – You are my Happy

Hello friends!!  Happy April Fool’s Day! 🙂

Well, there’s “no fooling” here today as I bring you a post to share the creation, I’ve made for a new challenge over at the 2 Crafty Critter Crazies Challenge Blog!  Since it’s the first of April, we have a new challenge starting with the “Anything Goes + critter” theme in mind!  Hope you will join us with your critter creations!

We are being sponsored by Digi Doodle Studios and this is the card I made for the challenge this month:

Vicki-2CCC-DigiDoodle-Mia

Our sponsor was kind enough to share this very sweet image called Mia which I’ve used for my card today.  This is my first experience with these images, and I must say they have some really cute ones in their store, so hop on over and check them out!

I’ve colored her up with Copic markers including drawing extended lines for the grass and coloring it up all the way across and down.  I cut it out with a cross stitched rectangle die and then used a sun ray stencil to ink some yellow behind her by taping off the grass edge, so I didn’t get any on that part.  I then stamped the sentiment in black ink over top of that.

To continue on with the yellow color theme I’ve got going on, I cut out a piece of yellow glitter cardstock that was cut out with a scallop rectangle die (retired from Lawn Fawn) and attached it to the back of the image panel.  I took some plaid papers for the bottom portion of the A2 white top folding card base and then attached some yellow grosgrain ribbon across the top and then attached the image panel and then added a yellow ribbon bow along the edge.  Lastly, I finished it out with some yellow rhinestone crystals.

Vicki-2CCC-DigiDoodle-Mia-close

Here’s a closer look at the coloring I’ve done on the image.  I took a black gel pen to color in the eyeball’s circles.  I wasn’t sure how to go about coloring the eyes, but this is the way that made the most sense to me.  I also went around the edges of the butterfly with the black gel pen.  I took a glitter brush pen and went over the liquid in her cup.

Vicki-2CCC-DigiDoodle-Mia-flat

I have to add that this image really got me thinking about past memories with my sweet little Mocca and how we would go out on nice Spring days like this.  She certainly was always “my happy” for sure and I still miss her like crazy.  I’m sure any of you that have lost pets understand what I’m saying.   It’s great to have the memories we’ve shared after all this time!

Thanks so much for stopping by!  I appreciate it so much!

challenges:

  1.  Crafty Friends – Spring
  2. Crafty Gals Corner – Spring is Here!
  3. Krafty Chicks – Coffee, tea or hot cocoa
  4. As You Like It – Favorite Coloring medium – Copic Why?  It’s my favorite “go to” coloring method and I love the way the markers blend together for shading and highlight effects.
  5. Creative Knockouts – Outside Fun
  6. Allsorts – Use Yellow
  7. Digi Doodle Studios Challenge – #15 Anything Goes

I Woof You!

Hello friends!!  Sheesh!  It’s almost Christmas!  How did it get here SO fast?!  Today I am actually preparing for my own family dinner gathering, so I will be very busy with cooking and spending time with my family today.  But I have scheduled a post to share with you using a darling Puppy Love digital stamp:

Vicki-SnS-Puppy Love-

I thought this little pup was SO CUTE!  I love the little shirt with the hearts on it!  So, if you are moving past your Christmas creations now, here’s some inspiration to share with a Valentine/Love theme! 🙂

For the image, I’ve printed it out and added the sentiment from the digital set underneath him.  I’ve used a scallop rectangle die to make an “Out of the Box” technique by cutting out the top of the heart balloon.  I colored the image with Copics.  I layered the image panel onto a piece of Chrome Silver Mirror Cardstock.

For the red layer behind that, I’ve taken a larger piece of white cardstock and added some 1/2″ Tear Tape around the edges.  I then used a larger sized scalloped rectangle die to cut it out with.  I peeled the release paper and added the Cherry Sparkle Flocking.  I’ve also added this to the tiny hearts on the shirt as well as the Pink Spirit Flocking but using the Nuvo Precision Glue Pen for the adhesive.  I’ve attached all of these layers onto a white A2 sized top folding card base.

Vicki-SnS-Puppy Love4

Upon a closer look at the image, you can see where I’ve added the flocking on the hearts in his shirt as well as the flocking at the top over the scallop rectangle panel.

For the balloons, I have covered them with some Nuvo Crystal Drops Morning Dew.  It dries clear, but while it was still wet, I’ve sprinkled on some Ultrafine Waterscape Glitter very carefully and lightly and let it dry.  I think it adds a bit more sparkle to the shiny balloons!  After it dried, I used some silver ribbon to make bows and then attached them with some glue.  I also decided to add some more of the Crystal Drops on his nose!

Vicki-SnS-Puppy Love6

I love how this turned out with the flocking and glittery shine!  Hope you’ve enjoyed my card too!!  I thank you so much for stopping in today and I wanted to take the time here to wish you all a VERY HAPPY HOLIDAY SEASON!!!   See you soon!

Challenges I’d like to enter:

  1.  Pammie’s Inky Pinkies (PIP1850) – Anything Goes
  2. Crafting From the Heart – Anything Goes
  3. Watercooler Wednesday (WWC201) – Anything Goes
  4. Crafty Gals Corner – Anything Goes
  5. As You Like It – Anything Goes – Your Style

Celebrating 10 Years of Whimsy Stamps!

Today kicks off a weekend of fun to celebrate Whimsy Stamps 10th birthday! Yay!!!  If you’ve been following along with me for a while, then you know that I have been a design team member at a few different times throughout the 10 years and I’m honored to be a part of the team again to help celebrate their 10th birthday!

I also wanted to share my birthday card inspiration:

Vicki-WS-IGhop-DoggieIcecream

So what could be more fun than this little Doggie Ice Cream digital stamp to help celebrate with!  I have printed him out twice (I’ll explain below) and colored him up in the following Copic markers:

  1.  Doggie body:  E27, E25, E23, E21, R20 (cheeks) and white gel pen
  2. Doggie bib:  BG78, BG75, BG72
  3. Ice Cream bowl:  C8, C5, C3 (Used C3 for ground shadow under image)
  4. Ice Cream/bottom scoop:  R85, R83, R81
  5. Ice Cream/top scoop:  E53, E51
  6. Cherry on top:  R39, R37, R35

I have taken some older Whimsy Stamps paper packs (this one no longer available called “It’s a Party”) to use for the background of my card design…he has to have a party scene after all, right?!

I then took a thin strip of black card stock to go along the edge of the paper to give it a nice finishing touch.  I also took another piece of black cardstock and white heat embossed the fun sentiment from the Whimsy Stamps Bold Statements clear stamp set and then cut a banner and attached it alongside the black strip.  Lastly, I’ve added some fun matching Whimsy Stamps “It’s a Party” enamel dots to finish off the design.

A closer look at my image, you can see that I’ve added some glossy accents to the cherry on top of the ice cream as well as the pup’s nose.  I’ve used a Spectrum Noir glitter brush pen to over the ice cream scoops and then I took a liquid glue pen and sprinkled some more glitter under the pup image before attaching him to the paper.

The reason I printed out this pup twice is because I wanted to add some dimension to it.  I colored and fussy cut out the entire image and attached him over the glitter ground.  I took the second image and only colored his head/bib and the ice cream images.  I fussy cut those out, then turned them over to rub a tool over which make it curl around the edges a bit.  I used some foam tape to attach them directly over the image and it gives a nice dimension to it.

Vicki-WS-IGHop-Doggieicecream-dimension

Here’s a peek of what that dimension looks like underneath.  Because the edges curl, you don’t see much sticking out, but it gives a nice dimension to your image.

Vicki-WS-IGhop-DoggieIcecream-flat

Hope you’ve enjoyed my card today and I hope you take part in the celebration with us at Whimsy Stamps in any way you can!   I also wanted to thank each of you for the kind support you’ve given me with my Whimsy Stamps creations, it means so much!

Enjoy your celebration weekend and I’ll see you soon!

Challenges I’d like to enter this card for:

  1.  Addicted to Stamps & More – Make Your Mark
  2. Crafty Creations – Anything Goes
  3. Tuesday Throwdown – Anything Goes
  4. Watercooler Wednesday (WWC200) – Occasions
  5. CRAFT – Anything Goes

Snowflakes at Cute Card Thursday

Hello friends!  It’s time already for a new challenge over at Cute Card Thursday and as I can feel it growing even cooler by the day outside, I find that this challenge is very fitting and a great way to keep going on my Christmas pile!  We would like to see some “Snowflakes” on your creations this week!  We look forward to seeing what you come up with!

Our sponsor for this challenge is All Dressed Up Stamps.  They’re kind enough to provide an image to use for this challenge, so here’s what I’ve come up with:

Vicki-CCT555-ADU-Snowflakes

This image is so sweet with the pup and kitty delivering their letters to Santa for Christmas is coming soon! 🙂  The image I’ve used is called Christmas Post from All Dressed Up Stamps and it already had some snowflakes within the image, but I always feel that snowflakes are big, small and fall everywhere, so I decided to add a few more with items from my stash.

I’ve colored my image with Copic markers and used some gel pens for the eyes, cheeks, parts of the mailbox lettering, center of snowflakes as well as adding some adding some random dots in the background for tiny snowfall flakes.  I’ve also had this Christmas Postmark stamp set in my stash and thought it was perfect to use as a sentiment for my card.  I stamped the circle, punched it out and layered it with another scallop circle that was punched from red cardstock.  I stamped the wavy lines post mark image behind that on the image panel.  The image panel was cut with a Wonky Stitched rectangle die.

Vicki-CCT555-ADU-Snowflakes1

Here’s a closer look at the image and how I’ve colored it.  For the top of the mailbox, the snowflake on the circle postmark and for the snow-covered ground, I used some glue in those areas and then sprinkled some Diamond Dust glitter over top of it for some nice sparkling snow coverage.  (I love using that stuff for snowfall!)

You can also see the silver snowflake sequins that I’ve attached and then I’ve added some silver Stickles to the centers of each one.  I’ve layered this image panel to a red cardstock layer and then added some foam tape to the back of it and mounted it over my card front.

Vicki-CCT555-ADU-Snowflakes2

So, for the card front panel, I took a white piece of cardstock measuring 4″ x 5-1/4″ and ran it through my die cut machine with a snowfall embossing folder and then I mounted this to a white top folding A2 sized card base and added the layered image panel over top.

Thanks for stopping by and have a fabulous day!

Here’s the challenges I’d like to enter this card for:

  1.  Daisy Chain – Christmas/Winter
  2. Crafting From the Heart – Anything Goes
  3. The Holly & Ivy Christmas Challenge – Anything Goes Christmas
  4. Shopping Our Stash (SOS379) – Raining Cats and Dogs
  5. Creative Craft Cottage – Christmas is Coming
  6. All Dressed Up Challenge –  Oct Anything Goes + must use ADU image

Basket of Best Friends

Hello friends!  Hope that you had a wonderful weekend!  I enjoyed spending time with hubby as he always makes me laugh…we have fun together no matter what we do!

Today I’d like to share another new creation I made from the Whimsy Stamps new August Digital release.  I fell in love with these guys and thought it would be perfect on just a simple little design:

Vicki-WS-Aug14-Pupsinbasket

This cute image is called Pups in a Basket.  I like that you can almost create any type of color or breed with this image by coloring it however you want.  So I found this adorable image online that I wanted to try and resemble the breed/coloring of:

119

Are these guys just as cute and fluffy as can be?!   I want to pet them! LOL!   Of course, the real thing has got to be the best! 🙂  And how cute would it be to add a red handkerchief to one of these pups on the image?  So many fun things to possibly do with them!

I used some plaid papers I had in my stash, and I wanted them to be somewhat neutral in color due to the accents of blue.  I’ve white heat embossed the banner at the top with the Whimsy Stamps Everyday Mini Sentiments stamp set.  Cut out all the panels with some dies and attached them to a top folding white A2 sized card base.  Lastly, I found some blue sequins to match and added some glitter accents to the centers.

Here’s a closer look at the image:

Vicki-WS-Aug14-pups up close

I’ve used my Copic markers to color it in and couldn’t help but also add some rosy cheeks with a white dot for highlights on them too!  This was so fun to color and how fun would this be to make up for someone with a new best friend!

So what type of breed or color(s) do you see in this image?  I’d love to know what you think!

Thanks so much for stopping in today!  Hope you’ve enjoyed my card and I’ll be back again soon to share more!

Challenges:

  1.  CCEE Stampers (CCEE1831) – Coloring Book Day (colored image)
  2. Crafty Creations – Anything Goes
  3. Creative Moments – Anything Goes
  4. QKR Stampede – Anything Goes
  5. Sunny Day Crafting – Anything Goes + animal on project
  6. That’s Crafty – Animal Magic

Turn! Turn! Turn! – A Remembrance of My Sweet Mocca (Bean)

I can’t tell you how very hard it is for me to type up this post, but I knew it was going to come and it is just something I must do to help with my grieving process.

If you have followed along with me on my other blog, then you may have seen a few posts or photos or mentions of my beloved miniature red-haired dachshund named Mocca.  (Pronounced like the word spelled mocha)  You may have also seen along the side of this blog a photo of her and dedication of her life.  I would like to say thank you for those of you that have asked about her and sent thoughts of sympathy my way.  It is appreciated so so much!  I thought of her as a very special family member and was with her until the very end.  She was a fantastic companion and ALWAYS there for me and by my side day in and day out.  Every single one of my family members just LOVED her so much.  It has been hard on me, but I know for a fact that she has impacted the lives of everyone around her…she was loved that much.  This post is for all of us.

Vicki-Mocca Canvas

It was very hard to go through her photos to pick out just the right ones that I wanted to do these various things with, but I’m very glad I did.  I will begin with this photo that I took while she was looking up at me in the very spot I am typing up this post.  I grabbed my phone and took it.  I took the photo to my local Walgreens and had them make an 8×10 canvas printing and it is hanging on the wall right above my computer, so I can always see her.  It’s a very awesome canvas printing and the photo wraps around the edges.

Newborn Mocca: (I received this photo after she was born)

Vicki-Mocca-newborn pup

Part of the reason for my last absence from blogging was the caretaking of her.  She had developed some problems as most older dogs do, but she had arthritis, pancreatitis and lastly, she was diagnosed with a rare disease called Mega-esophagus or “floppy esophagus”.  What that means is that her throat didn’t allow her to swallow, and she would choke or “regurgitate” anything that was caught in there.  I had to specially make her food in meatball form and make enough to feed her small meals 4 times a day.  They needed to be spread out so that there was less of a chance of anything being caught.  Dogs that develop this disease can regurgitate and then accidentally ingest some of it causing them to die from aspiration pneumonia.  Not only this, when she did eat, she had to be in an upright position so that the food went down her throat by force of gravity.  And to make sure her meatballs got down to her stomach, I had to keep her sitting upright for at least 15-20 minutes after each feeding or any time I gave her something.  After Christmas time, she had gotten worse and was slowly deteriorating to the point she couldn’t take water without choking.  I was in a special group on Facebook that had the support of others going through the same thing with their pets and some helpful advice was given many times with her.  I started giving her “Knox blocks” to help with hydration.  She was older and with her other problems, she was still dehydrated, and I think she gave up because she refused to eat at the end.  Of course, I wanted to keep going and hubby knew this…so he made me take her in where the vet had to spell out to me how sick she was.  She was 12 and half years old on Groundhog’s Day of February this year when we had to let her go.  I’m pretty sure I yelled NO! at the office.   You may remember photos from her 12th birthday in her special chair:

Mocca turns twelve

I was hoping to be able to celebrate her 13th birthday with her which would’ve been today.  Unfortunately, we did not make it, so I thought this would be a good day to remember her.  Rest in peace my little beenie weenie…. I will see you some day at the rainbow bridge.

Vicki-Mocca Shadow Box Memorial

Something else that was very important for me to get done was her Shadow Box Memorial.  Hubby and I picked out one of our favorite photos of her.  She really enjoyed being out in the sunshine and grass.  She was very healthy in that photo.  The footprints came from the vet and I had heard that sometimes they fall apart, so I wanted her footprints to stand out a bit, so I took some glitter paint to go over them and then covered the entire piece of clay with some sealer.  I put it back into the plastic case I was given and then glued them onto the shadow box background.

Vicki-Mocca shadow box1

On the other side of the paw print case that the vet gave me was this Rainbow Bridge Poem.  So I matted it with black card stock and attached it to the box.  (I apologize for the glare on the glass…hard to capture it.)  I still cannot read the entire thing without tears.

Vicki-Mocca shadow box2

For the lettering of her name, I took some wood veneer letters and painted them along with the pink heart in the center of the ‘O’ and glued them on the back of the shadow box.

The other items are sentimental from her like the collar.  I cut the end of her collar because it was so curled up and part of it was all cracked from use.  The heart is a piece of fabric from her favorite “bone blanket” she got for Christmas one year.  I cut out a heart shape and then stitched around the edge with some black thread.  The tiny jar above her footprints is her red Doxie hair.  I had some from her comb in her little “beauty box” as we called it.

This month was also our local County Fair, and I decided that I was going to enter a simple scrapbook layout that I would be able to put in her scrapbook that I’m working on.  I ended up getting third place prize with it:

Vicki-MoccaMothersDay2017-layout

The photos were taken on Mother’s Day of last year.  She was snuggling with me on our front porch and fell asleep, so my hubby took photos of the process.   This is a 2-page 12×12 layout.

Vicki-MoccaMothersDay2017-layout1

I remember now that this was about the time, I started growing my hair out…so it’s really gotten long since then! LOL!  I had some “cloud” pattern paper which I thought was perfect for this.  I added a sentiment sticker backed with black card stock along with stamping the birds and die cutting the swirl underneath the sentiment.

Vicki-MothersDay2017-layout2

I had taken the other piece of “cloud” pattern paper to place on the opposite page, but I die cut the paw prints (From My Favorite Things) so that the black would show through.  The journaling says:

Mother’s Day 2017

It was a beautiful day to be outside and Mocca was enjoying the weather with me as we relaxed on the porch.  She finally fell asleep in my arms.  really miss snuggling with you sweetie.

The paw prints underneath the journaling were stamped in white ink from the MFT Critter Condolences stamp set.

She had even shared time with me by scratching up a spot on the carpet in weird places on the floor in my craft room 🙂 What a precious crafty friend!

OLYMPUS DIGITAL CAMERA

Thank you for sharing this remembrance with me.  If any of you have ever lost a special friend like this, I know you understand.  I wish you all LOVE & PEACE

Vicki-Pooh-goodbye

Sharing this post with:

2 Crafty Critters Crazies – challenge 16 Anything Goes with a critter.