Donut You Want a Sweet Birthday!?🍩

Hello friends and happy Friday!  Wishing you a wonderful weekend ahead as we head into Valentine’s Day on Monday!  With this holiday, I’m always reminded by the sweet treats and memories of my children passing out their Valentines, making special boxes to hold them in and classroom parties with lots of goodies!  I thought it would be fun to incorporate those thoughts into a fun birthday set and a small treat with NO ‘REAL’ SUGAR ADDED!

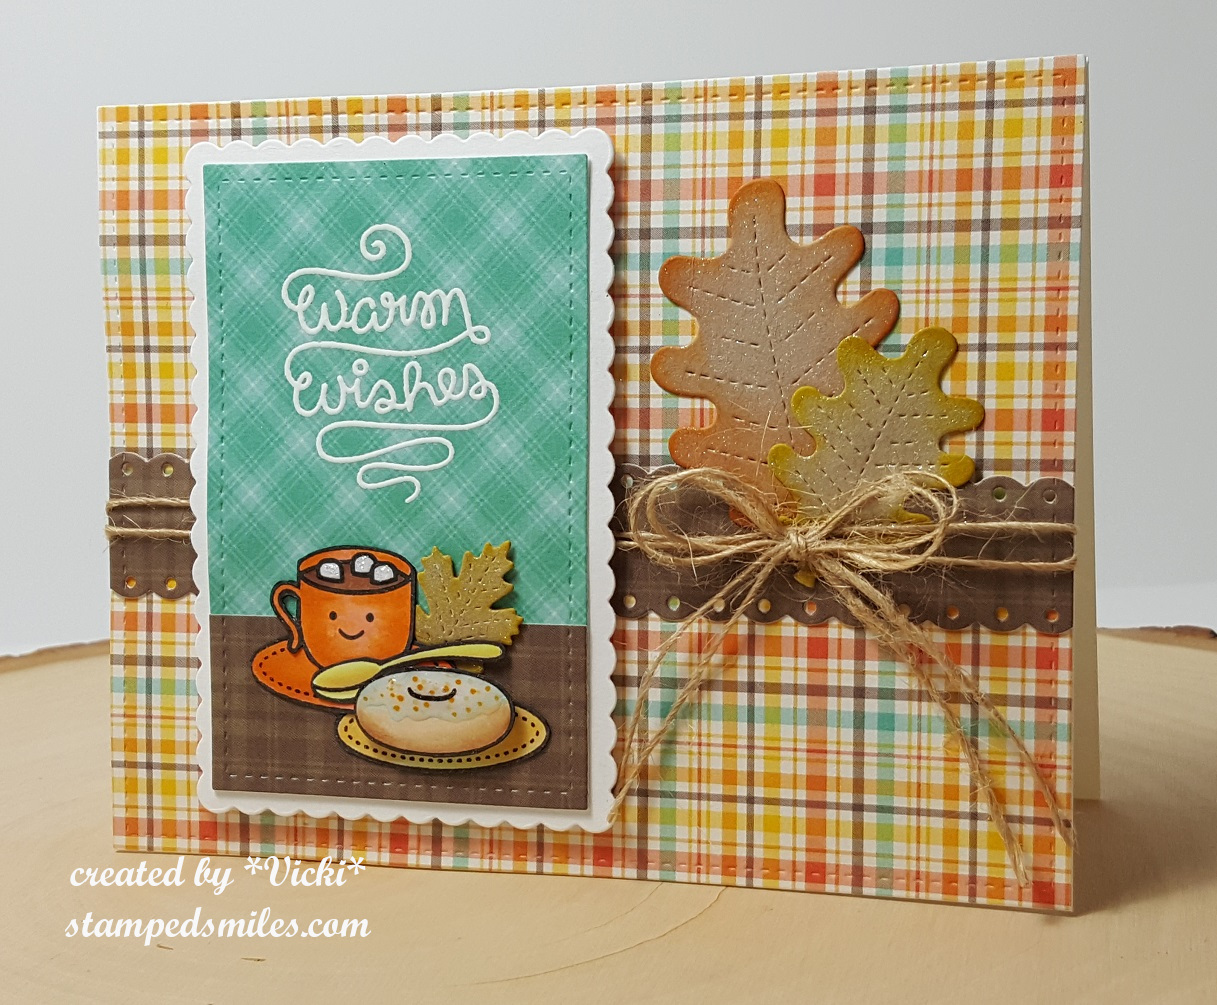
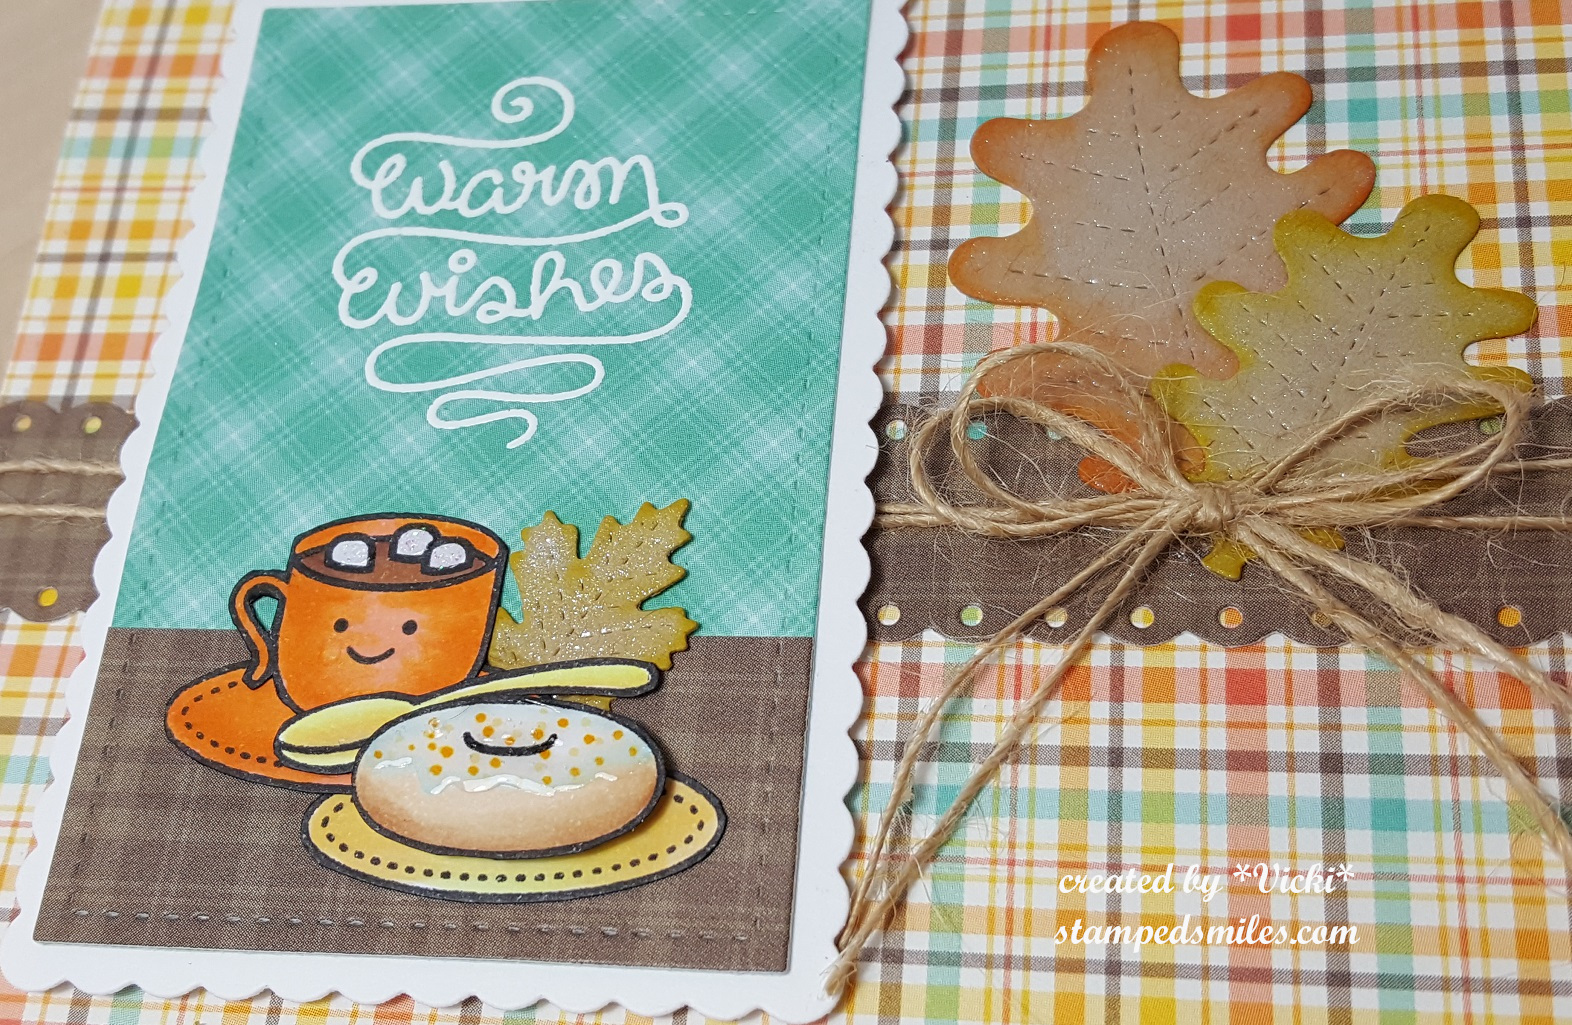
I can never turn down a good donut, how about you?  I had so much fun creating this set with the Taylored Expressions Donut Days Cling & Clear Combo and decorating them!  This was created with the February #TEMakerChallenge color combo and theme in mind when putting the set together.  I’ve used both the TE Spearmint & Peaches ‘N Cream ink and cardstock for these.  I’ve added some Chocolate Truffle, Toffee and White EP as well.

To create the “donut box” on the card, I’ve stamped the TE Argyle stamp only without using the stencils and then I’ve cut it out with the TE Box Top Stacklets die to give the frame look for the donuts to be placed in!  (Note the small treat container was decorated on the front with the left-over middle piece from the frame…so save everything!)  I then took the stamped frame and ran the TE Pierced Lattice Cutting Plate over it for an added design.  To assemble the box of donuts, I took a piece of tissue paper, crumpled it up and glued the decorated donuts together over it.  The back of the frame with foam tape was then centered over the donuts so it was popped up.  I ripped the excess tissue paper and attached the card together.  I used some of the TE Peaches ‘N Cream cardstock and white heat embossed the TE Mini Strips Donut Worry and cut them out with the TE Mini Strips die.

FOR THE TREAT HOLDER – 

I found this really fun video tutorial for a Hand Sanitizer PocketBac box container using my envelope punch board.  (CLICK NAME FOR THE TUTORIAL!)  I always love finding new ways to use a tool I have especially in a totally different way than what it was intended for!   I didn’t wrap decorative paper around mine like she did, but like I mentioned above, I saved the center of the cut-out frame and cut it down to size to decorate the front.  I took one of the sentiments and donuts left over from the card, wrapped some twine around it and tied it so the bow is centered inside the donut hole.

I do love me a good pun…so please feel free to pun away my friends!!😅 Maybe you can come up with a “hole in one”! 

I hope you’ve enjoyed my birthday sweet treats today and thanks so much for stopping in! 

Challenges:

  1. Penny’s Paper Crafty – Anything Goes using paper
  2. Watercooler Wednesday – Helen’s “All About Occasions” 
  3. Creative Fingers – Anything Goes
  4. River of Creativity – Anything Goes
  5. Crafty Calendar – Anything Goes
  6. Lil Patch of Crafty Friends – Anything Goes

Thank you to all of the wonderful challenge blogs and keeping them going!

Lawn Fawn Friday

Hello friends!  Yay, it’s Friday!  I have lots of fun Lawn Fawn “goodies” to share with you today and although it’s still a bit warm over my way, I am in the mood for Fall, how about you?  There’s nothing better in the Fall, for me, than a warm apple cider donut that we get every year from an apple orchid we like to visit each Fall!  It had me thinking of the current challenge going on…

Vicki-LF-FallTreats

It may be a bit of an oldie, but a goodie to me and I really enjoy using it!  I have pulled out my LF Love You a Latte stamp set to base my card for today.

I started with a white A2 sized top folding card base and added a piece of (now retired) “Perfectly Plaid Fall” mini paper stack that I’ve cut with the LF Stitched Rectangle die along with the pieces used on my image panel also cut with the same die set.  I layered that onto a white piece of cardstock that was cut from the LF “Scalloped Rectangle die” (Looks to be retired too!)  I have taken a strip of the plaid papers and used the LF Valentine Borders die to cut the edging on it.  I then wrapped some twine around it and added the LF Stitched Leaves that were cut from kraft cardstock and colored on the edges with distress ink and a foam blending tool.  I then tied a bow with the twine and placed it over the leaves.

I colored my images, fussy cut them out and placed them over my layered paper panels and then popped it up over the plaid card base with some craft foam.

Vicki-LF-FallTreats1

Upon a closer view of the image, you can see that I white heat embossed the sentiment from the stamp set.  I also added some glitter to the marshmallows in the cup and covered the donut with some glossy accents.  I added a LF Small Stitched Leaves that I made similar to the others to tuck inside with my treats! 🙂  All the leaves were covered with a glitter brush pen.

*Be sure to scroll down below for more Lawn Fawn goodies!!*

Here are the challenges I’d like to enter this card for:

  1.  Lawn Fawnatics – Coffee, Tea and Treats
  2. Retro Rubber (RRCB94) – Anything Goes + Older Stamp(s) Mine is circa 2015
  3. Watercooler Wednesday (WWC185) – Anything Goes
  4. Simon Says Stamp Wednesday – Anything Goes

I thought this was a good place to stick in this project I made and had entered into my local county fair last month.  This particular item did not place, but the category was “Hand Stamped Item Other Than a Card”…so I created this using a Lawn Fawn stamp:

Vicki-LFSkunk-Wood Slice

I found a bag of these really cute wood slices when I was out shopping with my mom earlier this Summer at Hobby Lobby.  They seemed like a perfect size to do this with!

I stamped this adorable skunk from the Lawn Fawn Stinkin’ Cute stamp set and then colored him in with my Prismacolor pencils.  Of course, the woodgrain gives it some slight imperfections, but I didn’t mind and thought it gave it more character!  (See the wood knot under his chin!)  I’ve added some green “Flower Soft” for the grass portion to give him something to stand on.  I also added some glitter to the hearts above his head.  Hubby drilled a hole in it for me so that I could add some twine for it to hang.

Vicki-LFSkunk-WoodSlice1

Here I’ve turned it at a bit of an angle so that you can see the thickness of the slice and the fun texture of the bark on it.  I thought this would be so cute on a gift bag or something.  I have it hanging in my room because he’s just too stinkin’ cute anyway! 🙂

Thanks for stopping in today and I wish you all a fabulous weekend!

P.S.  Sunday I will be sharing a post with a brand-new release…so be sure to check that out too!  Bye!